
Home »Equipment» Heating radiators
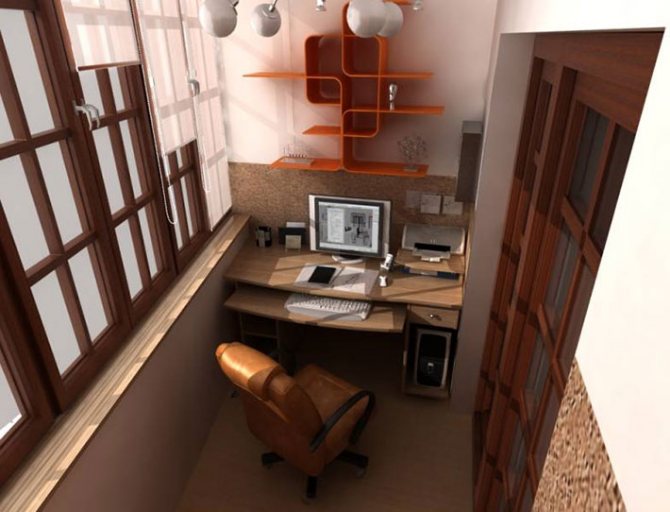
In the conditions of a small living space of an apartment building, there is no extra space. Recently, it has become fashionable to use a balcony as a full-fledged room (a study or a place to relax). The practicality of such a solution is difficult to overestimate, but it is important to think over the heating of the loggia, otherwise the whole idea will go to the bottom.
Insulation of the loggia during the construction phase
The tips in this section are suitable for "bare" balconies and loggias. The main difference between these two rooms is that the balcony protrudes from the facade of the house, and the loggia is separated from the main room by a wall. Read more in the article "loggia and balcony, what is the difference".
The first thing you should decide is whether you are ready to start insulation outside. This may require special equipment if you live above the 1st floor. Double-sided insulation is necessary for large rooms.
Seal all cracks with sealant (small) or polyurethane foam (large). Through them, heat leaves the fastest. Level all walls with putty, cement mortar. This increases the efficiency of the thermal insulation.
Pay particular attention to moisture insulation. Dampness attracts cold. Treat the internal and external walls with a moisture-repellent mortar before installing the heat-insulating panels.

Thermal insulation of the structure
Heating the balcony will be absolutely useless if the warm air that will come from the source simply dissipates. To prevent this from happening, it is important to take care of high-quality insulation of the balcony or loggia. It is worth noting that in some cases it will be quite difficult to achieve high-quality insulation of the balcony. This is due to the fact that its three walls will be in direct contact with the street. It is necessary to start the process of insulating the balcony with the dismantling of the old structure. You will have to remove almost everything, leaving the bare slab. In most cases, the insulation of the metal parapet with expanded polystyrene turns out to be insufficient for the normal functioning of heating on the balcony, since it is difficult to achieve the required layer of insulation.

After the dismantling work has been carried out, it is necessary to equip a new balcony parapet, on which the main structures will be fixed. It is better to do this using foam blocks. Their advantage is their low weight and excellent thermal insulation. They must be laid out along the perimeter of the balcony slab. In some cases, it is possible to expand the balcony over the slab. This will add extra usable space. The process is quite complicated, so it will have to be coordinated with the relevant authorities.
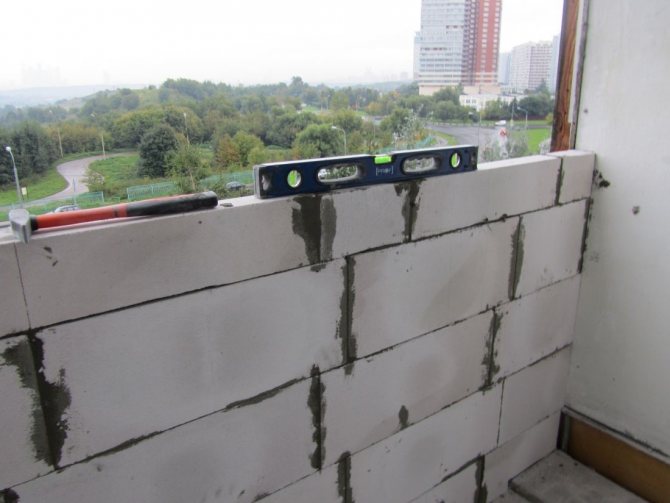
It should be understood that when laying a foam block, it is necessary to observe the minimum seam thickness. Otherwise, there will be too many cold bridges through which heat loss will occur. To increase the strength of the structure, a metal mesh is laid in the seams, which forms a monolithic structure with mortar. As a solution, special compositions with the required viscosity are used. Conventional sand / cement mix is not suitable. Before laying the foam blocks, it is necessary to provide waterproofing from the balcony slab so that moisture does not pass through it.
Advice! It is quite easy to adjust foam blocks to the required size. To do this, you can use a regular hacksaw with a fine tooth.
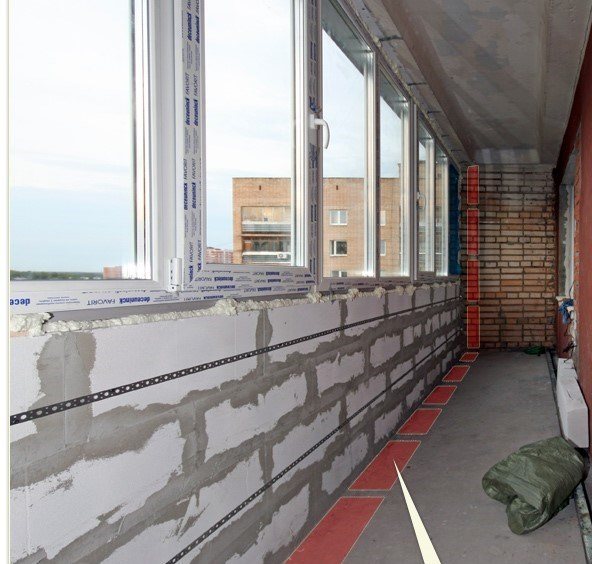
The next stage of the balcony insulation will be the installation of windows. In this case, the use of metal-plastic structures will be required.They have excellent thermal insulation due to the presence of chambers in the profile itself, as well as in double-glazed windows. The optimal solution for a balcony or loggia would be a five-chamber profile. Although it all depends on local conditions. It is necessary to compare several variants of profiles, since in some cases the number of chambers may be greater, and the total thickness of the profile is the same as in the three-chamber version. If possible, for a balcony or loggia, it is better to take an option with a double or triple glass unit.
It is not worth stopping your choice on double-glazed windows with inert gases, since they evaporate rather quickly, but an energy-saving film or spraying is a good option. In order for the window to have better support, a metal frame can be mounted on the upper end of the parapet on the balcony. It is better to entrust the measurement and installation of the structure to professionals. This will save a lot of time that can be spent on additional finishing of the balcony. After the glazing is completed, you can proceed to the next stage of insulation. It consists in the installation of insulation. Of all the abundance, you can use:
- mineral wool;
- Styrofoam;
- extruded polystyrene foam.
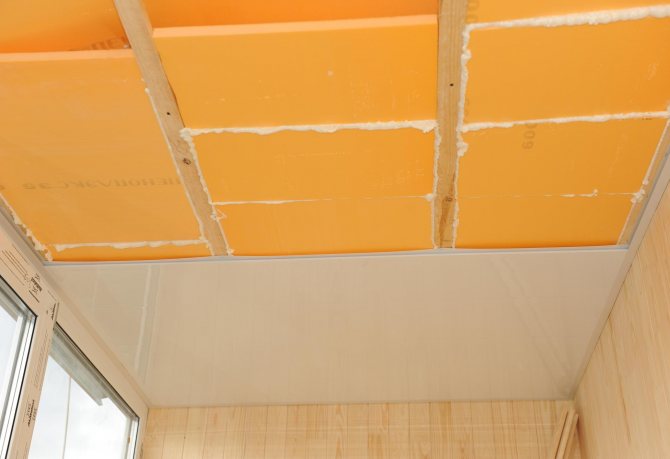
The latter option has all the necessary properties to ensure minimum heat transfer. In order not to reduce the useful area of the balcony, the insulation is installed outside. This will require additional equipment if the balcony or loggia is not on the ground floor. The insulation is fixed on all surfaces by means of glue and special plastic dowels, which press it to the blocks. The next step is the application of glue and the installation of the reinforcing mesh. After grouting, the balcony is finished. It is also advisable to insulate the ceiling or floor on the balcony from the outside, but this is not always possible, therefore, the insulation is done from the inside.
Advice! Finishing of foam blocks must be done as early as possible, since they are largely susceptible to the negative influence of environmental factors.
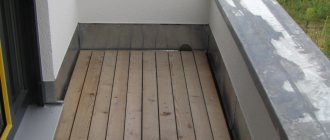
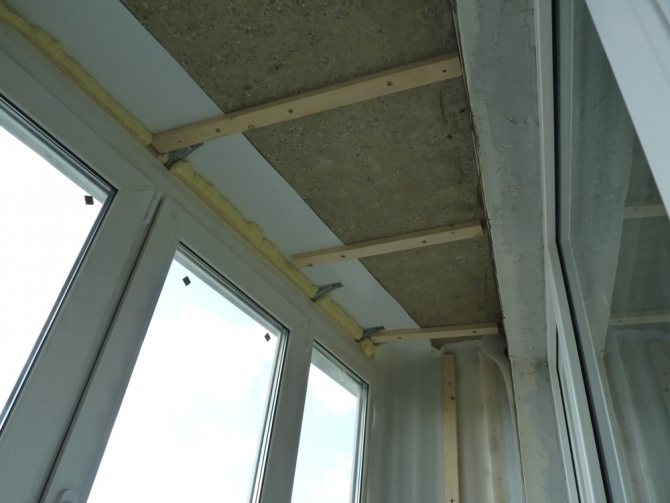
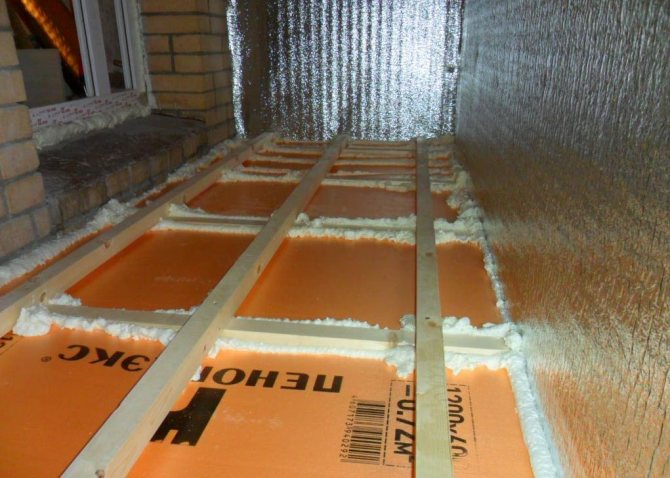
If the insulation of the balcony ceiling is made from the inside, then the installation of a wooden lathing will be mandatory. It is required in order to subsequently fix the cladding material on the balcony. The battens are mounted perpendicular to the direction of the cladding deck. If you want to visually expand the balcony room, then the cladding must be fixed across. If you want to lengthen the balcony, the fastening is done the other way around. The insulation is fixed between the battens. It should enter between them with little effort, the insulation is coated with a special glue along all the seams.
When insulating the floor, a similar scheme applies if it is planned to lay a laminate or similar flooring. If you want to have a tiled floor on the balcony, you will need to fill in the screed. Before laying any finishing flooring, the insulation is closed with waterproofing. If stone wool was chosen as a heater, then the base on which it is laid should be covered with waterproofing and a vapor barrier is laid on top, after which the finishing is performed.
The loggia is insulated according to a similar algorithm as the balcony, but if the work is carried out independently, then it will be easier to carry out the insulation from the inside. In this case, the entire surface is cleaned and the old screed and plaster are dismantled. A wooden lathing is being installed, between which insulation is laid and decorative finishing is performed. Walls and ceiling can be sheathed with clapboard, and laminate can be laid on the floor.
Insulating materials
The following types of heaters are presented on the market:
- expanded clay;
- mineral wool;
- expanded polystyrene;
- polyurethane foam;
- penofol.
Choosing the best material is easier than it sounds.
Expanded clay
This is the cheapest material. Does not hold its shape, readily absorbs moisture. Durable, resistant to fire, mold, mildew. It is used to insulate the floor on the balcony when they want to save money.
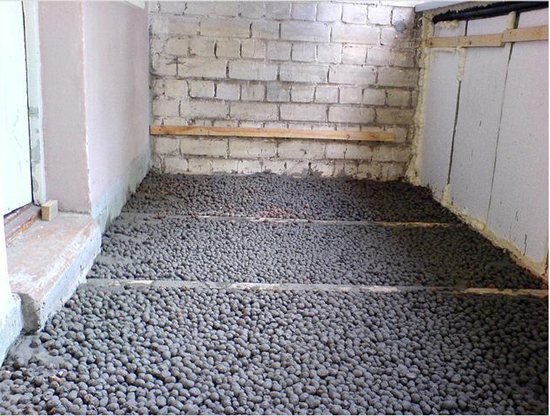
Insulation of the floor on the loggia with expanded clay
Mineral wool
Material of the middle price category. Slabs made of it are very wide, so they are not suitable for small spaces. Moisture penetration will impair the insulation properties. Mineral wool is environmentally friendly, fire-resistant, creates additional sound insulation.
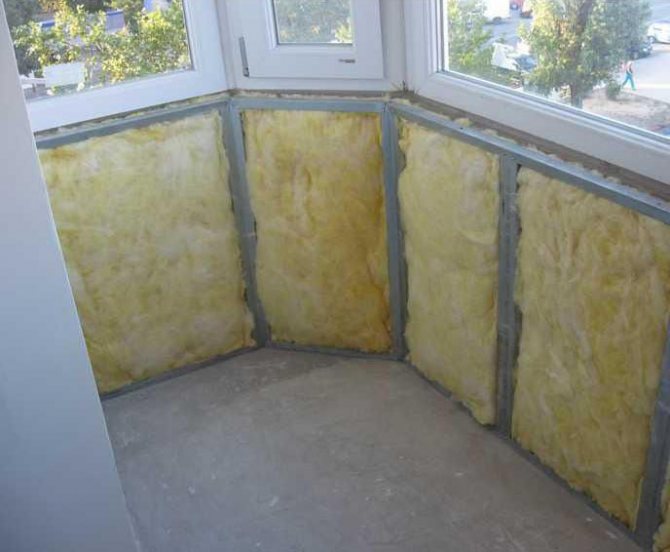
Thermal insulation of a balcony with mineral wool
Expanded polystyrene
Expensive insulation, devoid of any flaws. Plates are easily attached to any surface using self-tapping screws. The best option for any room.
Polyurethane foam
Liquid insulation. Easily fills any cracks, cavities. Installation requires special equipment. Dismantling presents some difficulties.
Penofol
Auxiliary thin heat and water insulator. It is used together with expanded polystyrene, mineral wool to create an additional air gap.
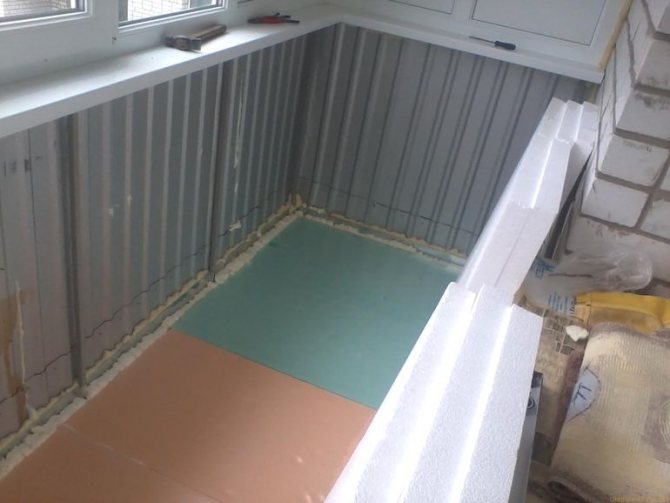
After you have chosen a heat insulator, proceed with the installation. First, all walls, floor, ceiling must be covered with a layer of waterproofing made of polyethylene or penofol, and the joints between the sheets must be glued with tape.
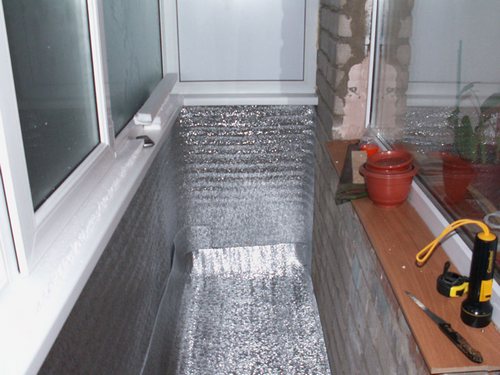
Insulation of the balcony with penofol
Then a metal or wooden frame is erected (for more details, see the article “balcony lathing”), into which the insulation will then be laid. The distance between it and the surfaces must be sealed with polyurethane foam. Next, the insulating plates are laid tightly. There should be no gap between them and the frame, otherwise all the work will go to waste.
On top of this structure, a rough covering is made of chipboard, plywood. You can install a warm floor on a loggia on it. Then finishing work is carried out.
What should be foreseen?
Before proceeding with the installation of heating a balcony or loggia, it is necessary to insulate the room itself. Insulation includes glazing and cladding with insulating material of all internal and, if possible, external walls. Glazing with the help of two-chamber windows or plastic frames will reliably keep the heat on the balcony, competently mounted foam or mineral wool insulation will provide comfortable humidity, air temperature, and thoughtful ventilation will eliminate dampness and condensation.
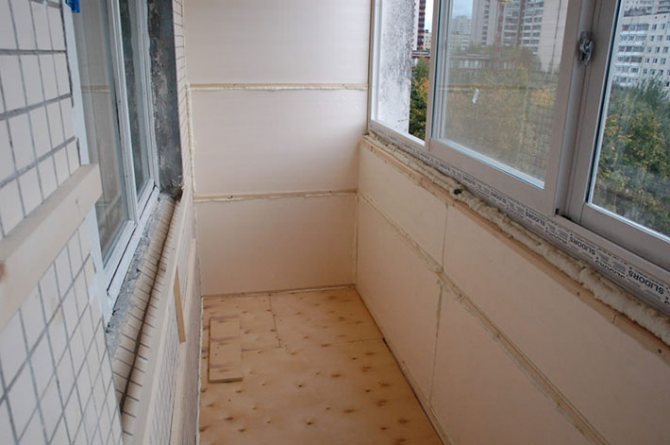
Photo 3. Thermal insulation of the balcony as the first stage
The most time-consuming stage is the work on the insulation of the walls, in particular the floor. But before you make the floor insulation, you must assume which heating option is preferable for your balcony.
Do-it-yourself balcony insulation
If you do not have time to do a full-fledged repair of the balcony with your own hands, use some folk methods of warming the loggia. The temperature can rise by several degrees. Remember this is a temporary measure. Such "tricks" will not be able to replace full-fledged thermal insulation.
Walk around the loggia with a candle or lighter. This will help determine from which joints, cracks are blowing. Cover them with putty. Draft is the worst enemy of heat.
Build insulating panels with unnecessary pieces of foam. This material does not conduct heat well.
Such impromptu warming can be done in a few hours, but even this trifle lowers the chance of catching a cold from the cold coming from the loggia.
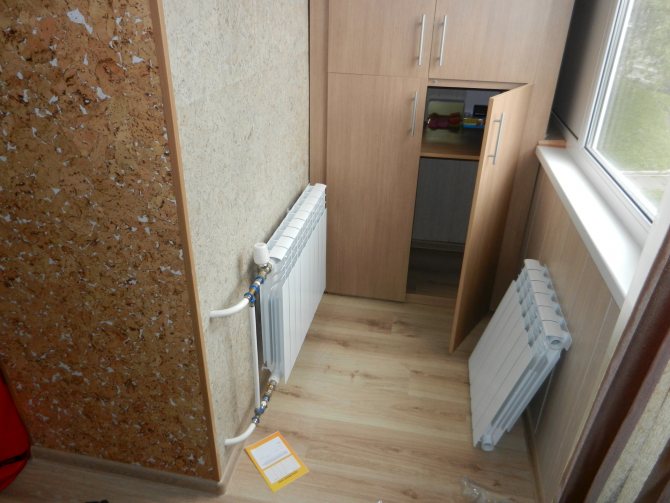
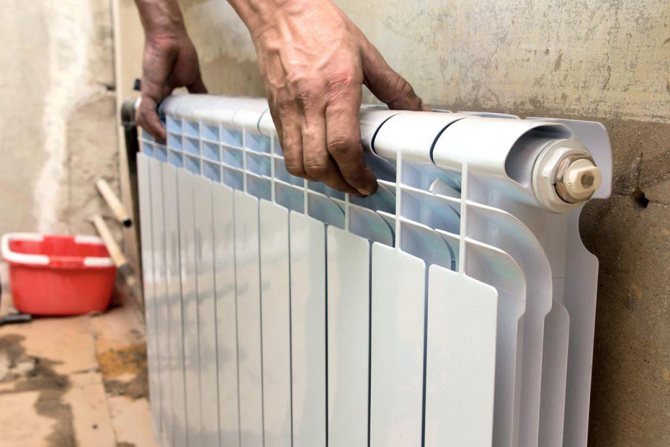
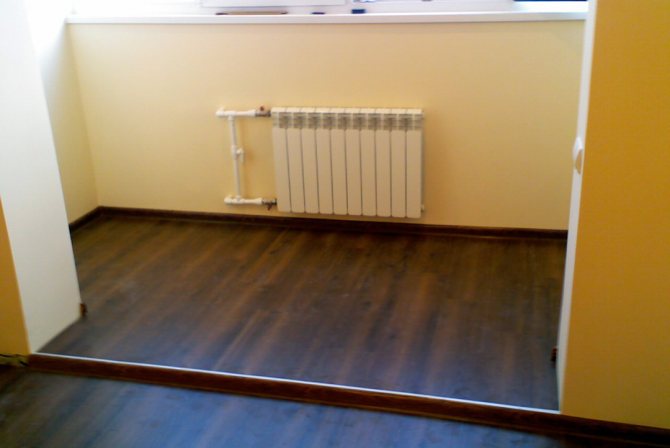
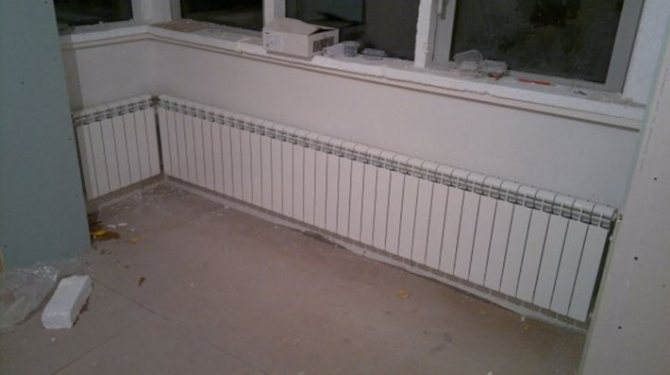
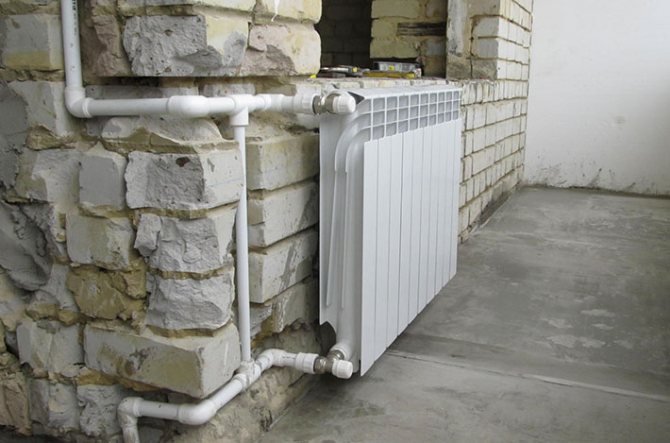
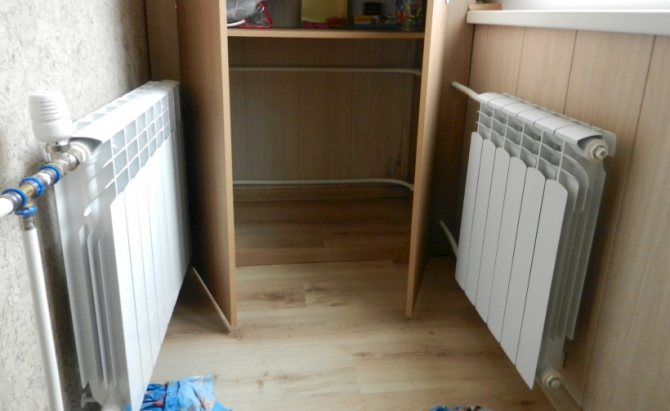
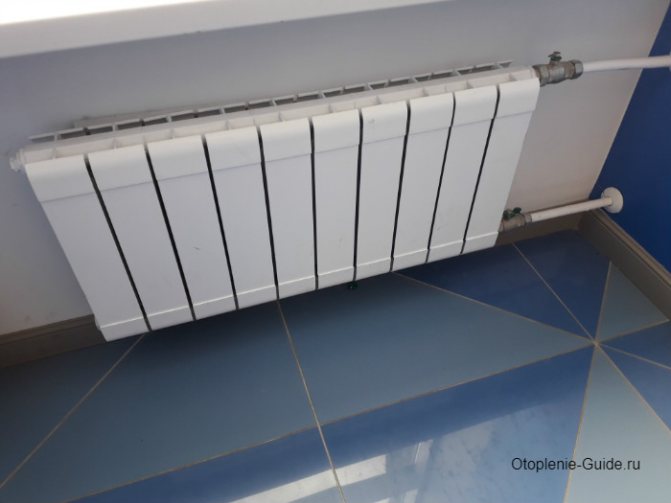
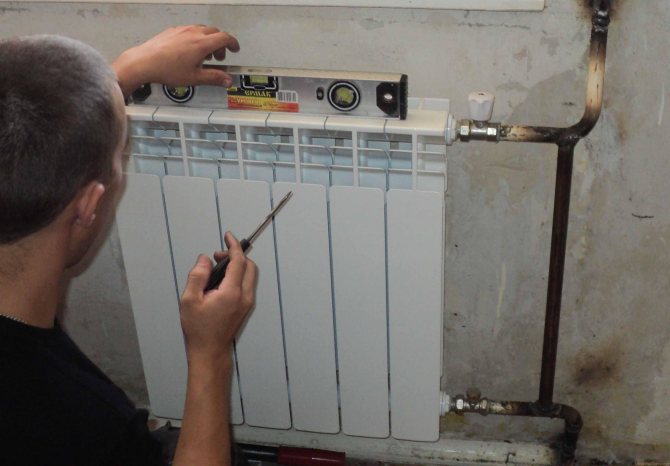
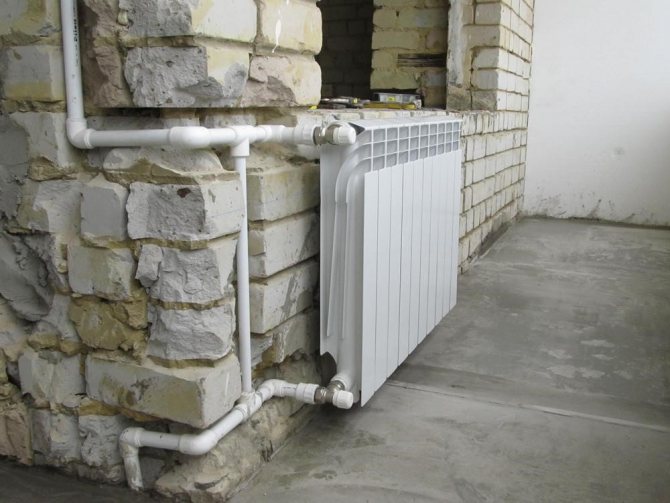
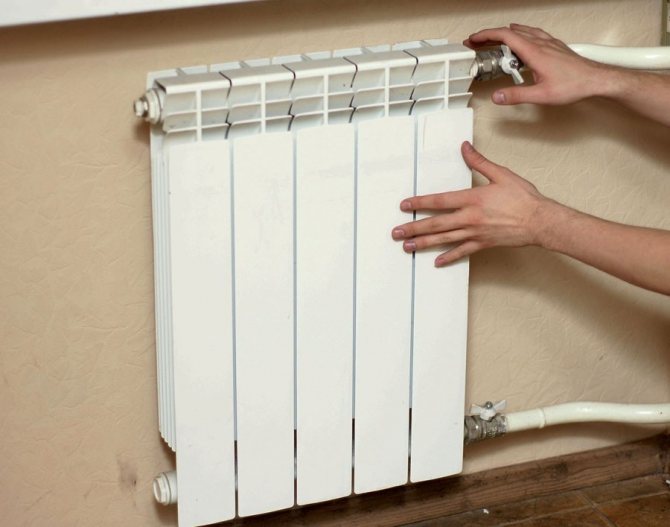
Central heating batteries
Previously, it was possible to bring the central heating battery to the balcony without any problems. It was not forbidden to do the editing yourself. But now such actions are an administrative article.
The government decided to limit the ability of residents of apartment buildings to change the layout of heating systems. This was done for security reasons. The battery on the loggia can freeze and burst.
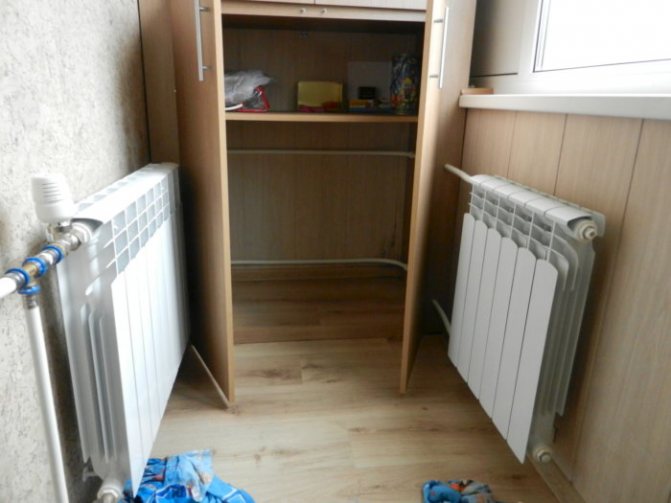
Having an experienced lawyer, observing all the standards, such a redevelopment can be legalized through the courts. It takes time and money, but as a result you get a complete heating of the loggia.
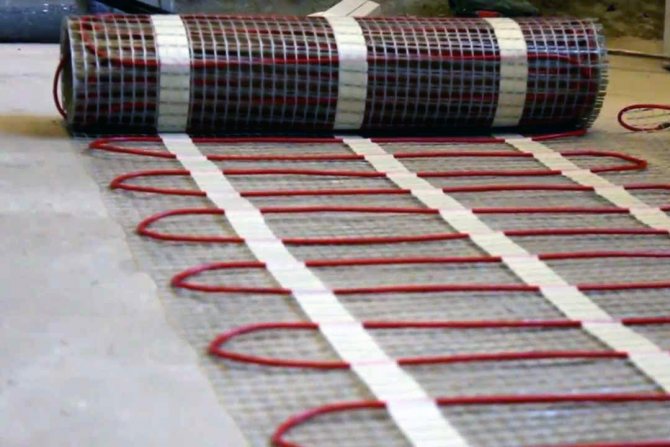

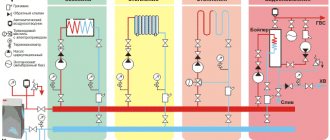
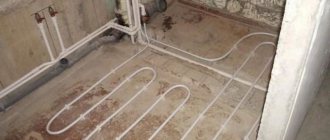
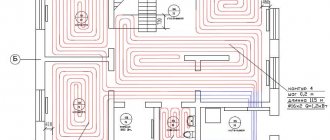
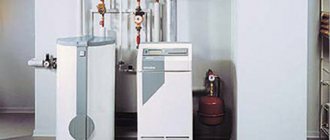
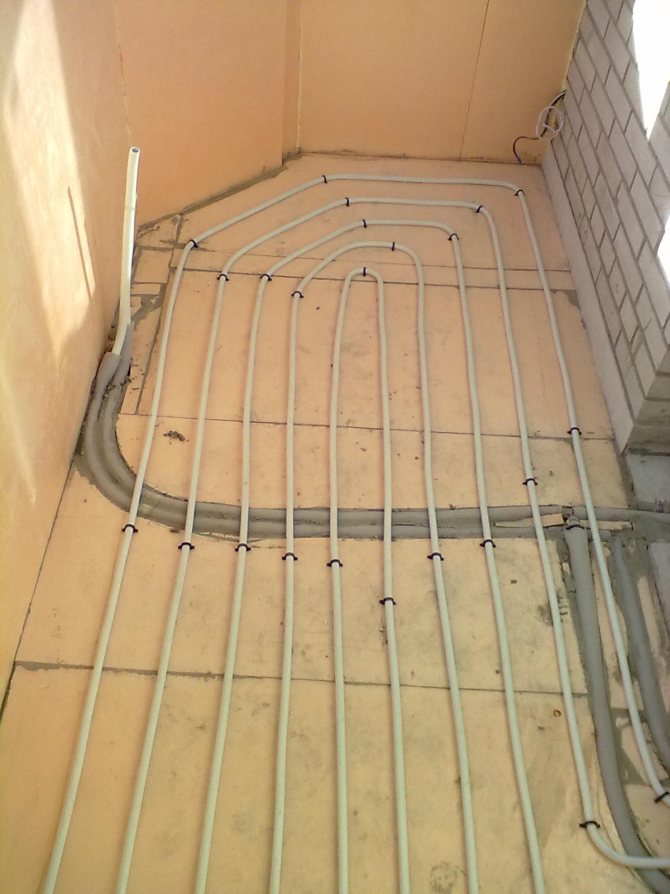
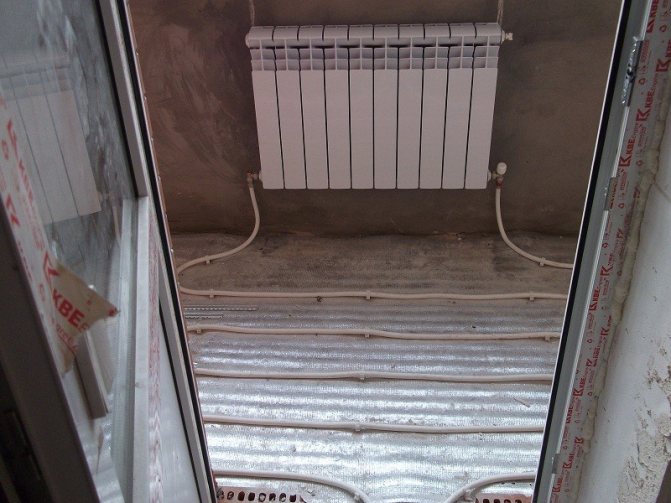
Water underfloor heating
The water heating system is a polymer tube that is installed under the screed. It can be connected to both a gas boiler and a central heating system.
Do not forget to check the water heating on the balcony before filling it with a screed. This can save you from compensating flooded neighbors.
Benefits - low cost.
Disadvantages:
- damage to the tube can lead to a flood;
- fragility;
- difficult to connect to the central heating system.
Conclusion: a budget balcony heating system, which makes sense to install in the presence of an economical gas boiler.

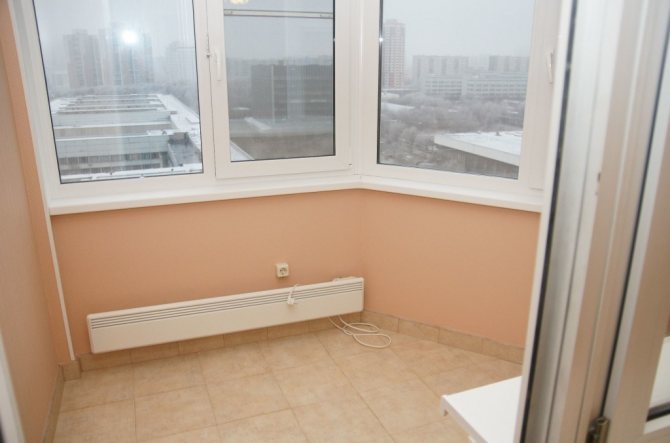
Electric floor heating
Electric heating of a balcony is more expensive and more reliable than water heating. Installation is almost indistinguishable from water systems. The only difference is that the electric floor must be connected to the power supply.
Benefits:
- durability;
- easy installation;
- precise temperature control.
Disadvantages:
- high price;
- needs a stable mains voltage;
Conclusion: a durable system for apartments, small suburban areas.
Electric underfloor heating on the balcony is of two types:
- cable;
- infrared.
The latter type is more modern, but it is not devoid of its shortcomings.
Cable electric heating
The heating element of such a system is a one- or two-core wire that has two layers of insulation. Cable heating on the balcony is not very economical.
Infrared electric heating
Thin thermal films of infrared heating systems consist of graphite strips isolated from each other and from the environment. Such heating is 20% more economical than cable analogs, completely safe, but its service life is no more than 15 years.
Using underfloor heating
The most economical, safe and reliable way to heat a loggia is to install a warm floor. The heated air, rising, effectively and gently heats the entire room, capturing every corner.
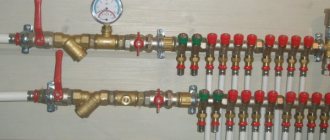
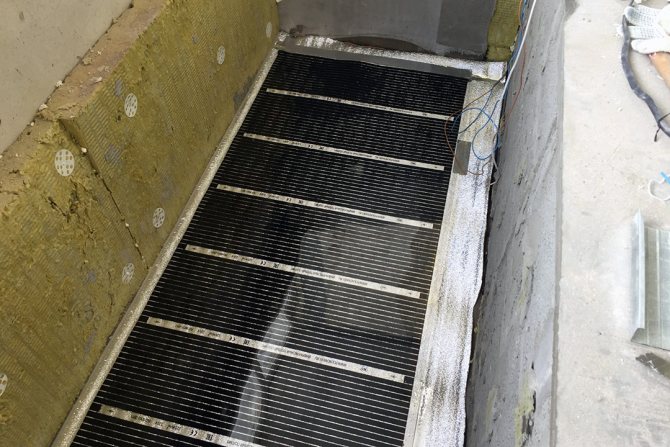
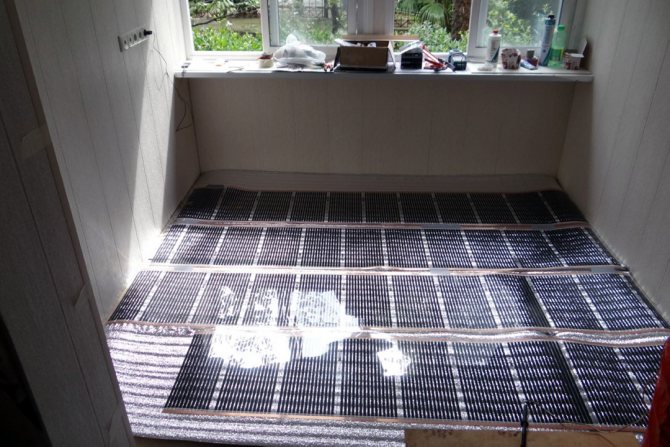
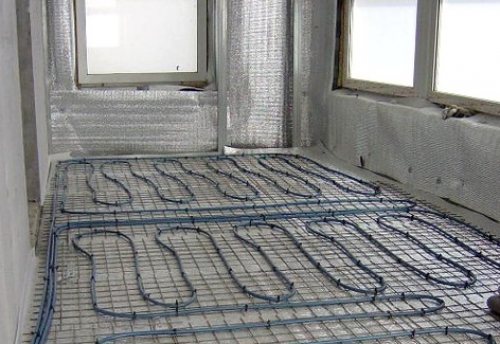
There are two types of underfloor heating system construction: electric and water. When installing the water floor, plastic pipes are used, laid inside the concrete screed. The heat carrier in them is hot water. The pipes are connected to a heating or hot water supply system through a manifold and a pump. This additional equipment is placed in a special locker.
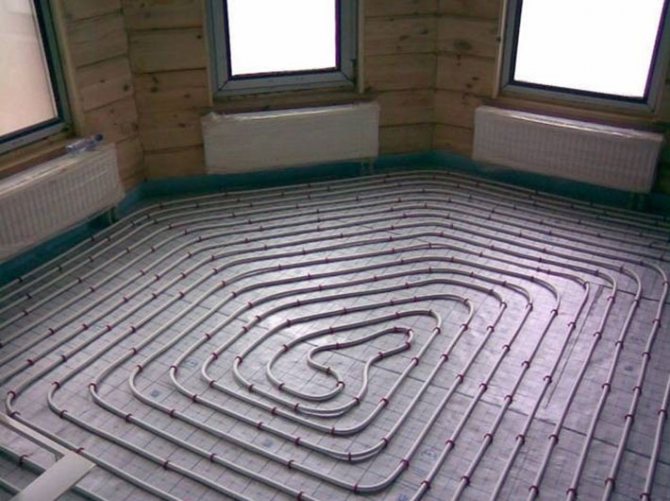
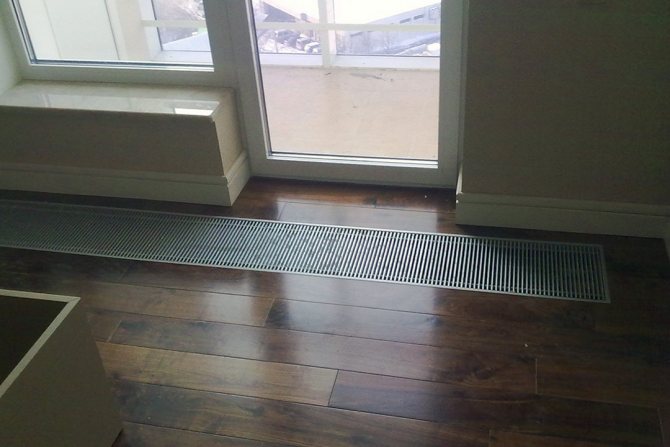
Photo 11. Water heat-insulated floor
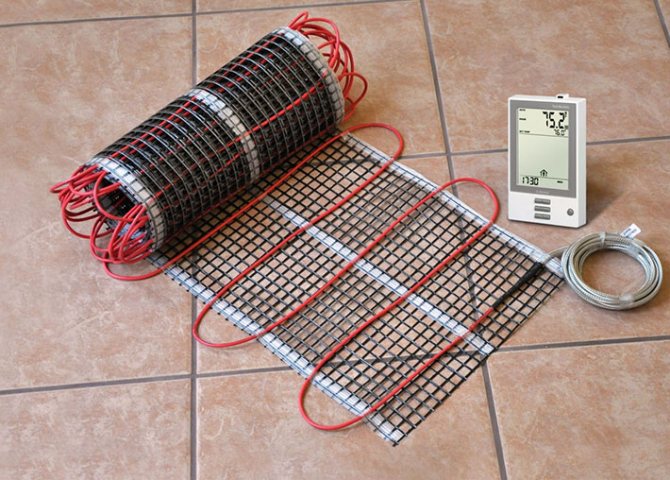
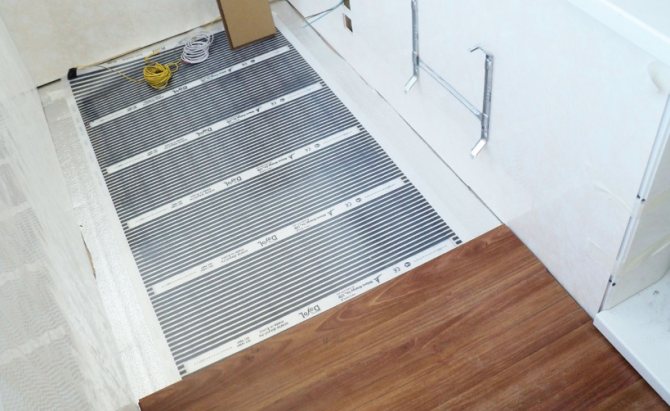
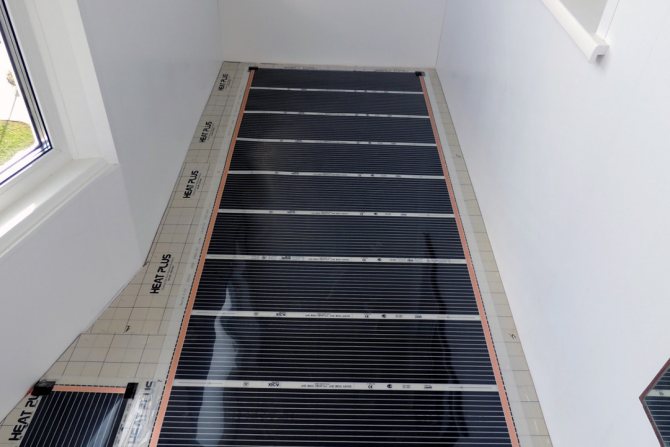
Photo 12. Electric floor heating
An electric underfloor heating can be installed from a special cable laid along it in a zigzag pattern or by laying a special thermal film. In both cases, there is a conversion of electrical energy into heat. To reduce heat loss, thermal insulation material is first laid. A heat cable is laid on top, which is fixed on the floor surface with the help of special mounting strips and is connected to a power source. Then it is poured with a cement screed and left to dry completely. The main floor covering is laid on top. Ceramics have the highest thermal conductivity, so tiled floors will warm up the loggia better and faster.
When laying the film covering, the finished strips are laid along the balcony and covered with a screed or simply covered with a carpet. The floor heating temperature is controlled by a built-in thermostat that maintains the set operating mode. Using an electric underfloor heating for heating a loggia is the most economical and effective in comparison with other methods.
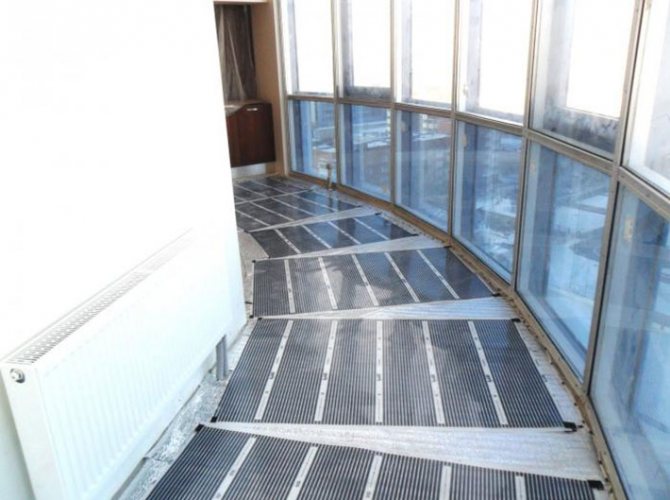
Photo 13.Thermal film on the loggia
Heating a cold balcony is an important and urgent issue, the solution of which will create a healthy indoor climate. A correctly chosen heating system of the loggia will significantly expand the living area, turning the balcony into a comfortable and warm corner of the apartment.
Heating with electrical appliances
If you were able to insulate the balcony, but there is not enough time or money to install the heating system, use heaters. Dealing with all the variety of these devices can be tricky. Let's consider each of them in more detail.
Fan heater
A fan heater is an inexpensive option for auxiliary or spot heating in a loggia.
It consists of:
- hulls;
- heating element;
- heat dissipation systems.
The body can be made of plastic or metal. After prolonged use, the plastic may burn and melt in some places. This does not affect the operation of the device, but still you shouldn't spare money to buy a high-quality heater.
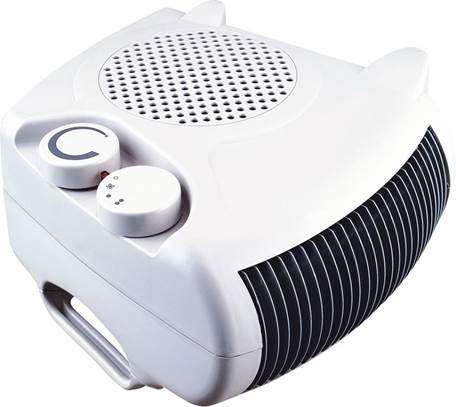
The key part of an electric fan heater is the heating element.
Main types:
- Spiral from nichrome wire. It is used in the cheapest devices. It has a high temperature and very low heat dissipation.
- Tubular heating element. A metal tube filled with a thermally conductive substance. It has average heating and heat transfer rates.
- Ceramic. Semiconductor glass-ceramic sputtered heating element. Has the highest heat transfer parameters.
For a small room, floor-standing stationary or mobile fan heaters in a metal case are suitable.
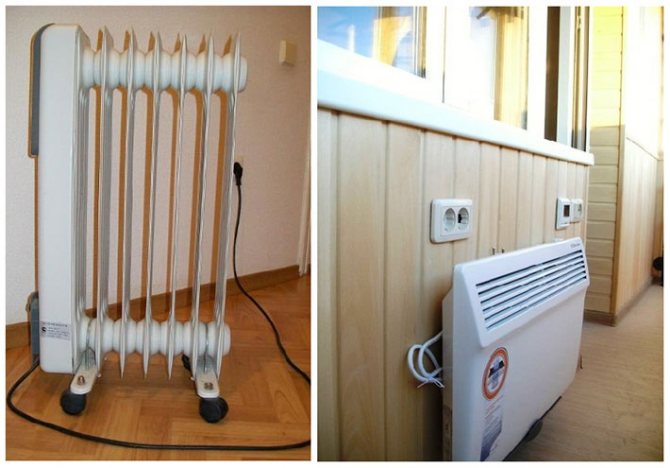
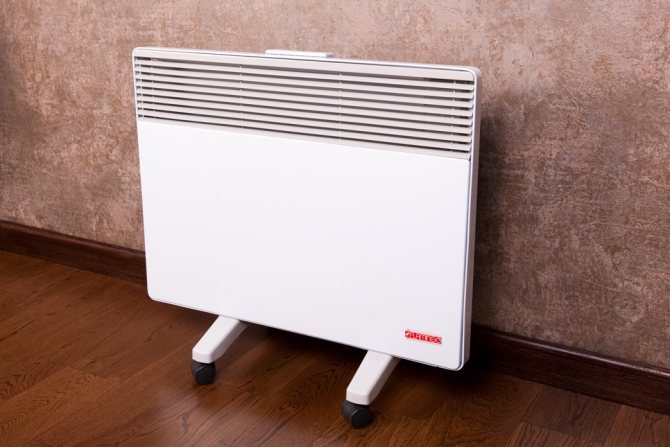
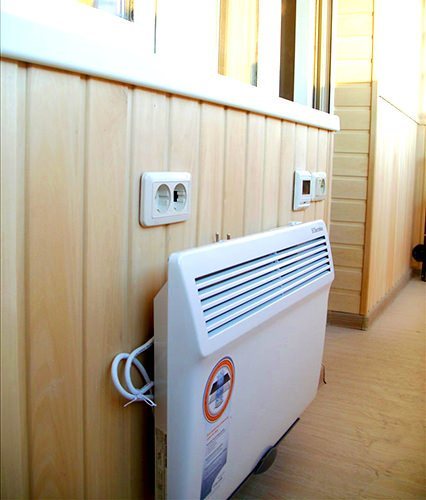
Convector to the balcony
A convector is a thermal panel, an automatic heater that gradually changes the temperature in the room. Cold air enters the housing, heats up, then blows back out. The heating element does not heat up above 100 degrees, which reduces the likelihood of ignition of surrounding objects to a minimum.
The thermal panel can have the following heaters:
- Electric. Nichrome coil, tubular electric heater, infrared element. Expensive models are distinguished by increased efficiency, reduced energy consumption.
- Gas. Economical, but requires connection to a gas cylinder, central gas pipeline.
A convector heater should be used to maintain a constant temperature on the balcony.
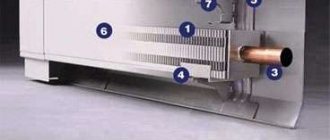
Oil radiator
An oil heater resembles a conventional water battery, but works much more efficiently.
It consists of:
- metal radiator;
- mineral oil with high thermal conductivity;
- tubular electric heater;
- temperature control systems, supplied power.
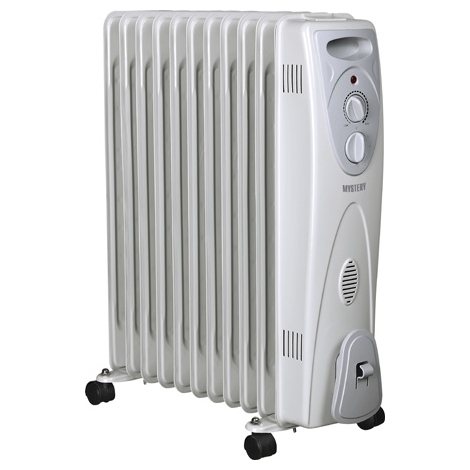
Radiators are of two types:
- panel;
- sectional.
Always choose a section oil cooler. This design has an increased area of contact with the ambient air. There are mobile, stationary models. Choose equipment depending on the size of the balcony.
Heating the balcony with heaters
The heat carrier of the oil heater is mineral oil. The device can have several operating modes. It is enough to install one of them and forget about the work of the radiator. When it heats up and reaches a certain temperature, it will automatically shut down. As soon as the device cools down, it also automatically turns on. However, with drafts, there will be no effect from the operation of the oil heater. Because warm air will escape from the room. Therefore, the use of oil radiators requires insulation of the balcony space.
Pros of using oil coolers
- Ease of movement throughout the room thanks to small castors;
- Relative efficiency due to the cyclical nature of the work;
- Setting the temperature - the presence of a regulator allows you to set the desired temperature;
- Work safety.
Cons of heating a balcony with an oil radiator
The disadvantages of using an oil radiator for heating a balcony are half.
- Are heavy
- Heating the room slowly
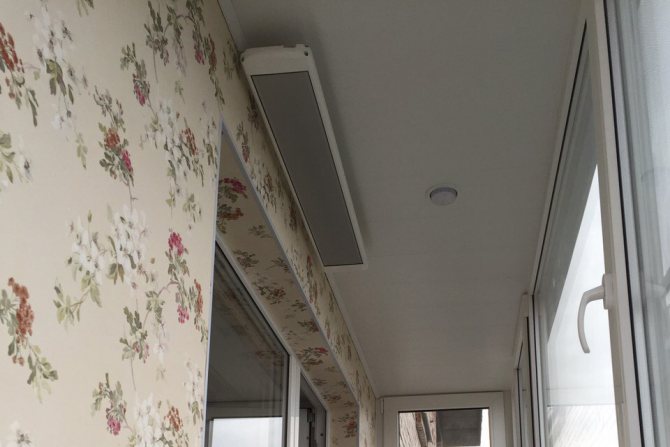
Pros of using infrared balcony heaters
An infrared heater is a lamp that heats a room and objects in it with radiation.
- The equipment consumes less electricity compared to oil and convector heaters,
- High performance
- Affordable price;
- Fast heating of the room.
Cons of infrared heaters for heating the balcony
- The fragility of the lamp is the only significant drawback of IR equipment

Pros and cons of using a fan heater for balcony heating
A fan heater is a device that draws in cold room air. He heats it up and gives it back. If the balcony is well insulated, it will quickly warm up its space. However, there are also downsides. It makes noise and, during long work, begins to warm itself. Therefore, the equipment will have to be turned off periodically.
All three heaters are powered by electricity and are not prohibited by law. Therefore, additional assembly is not required, as well as the use of special tools when transferring. The downside of all heaters is strong air drying. The plants on the balcony, if they are there, will not like it.