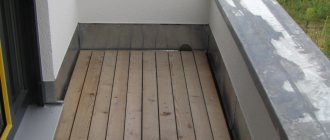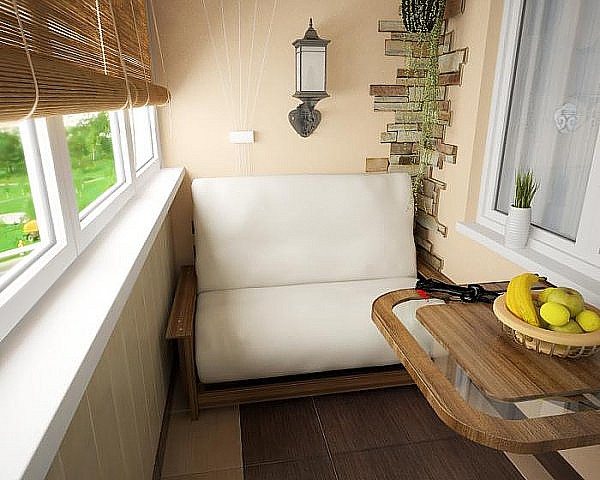
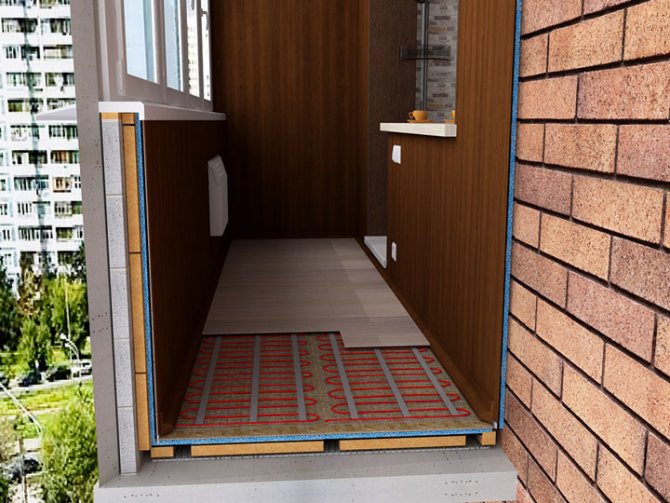
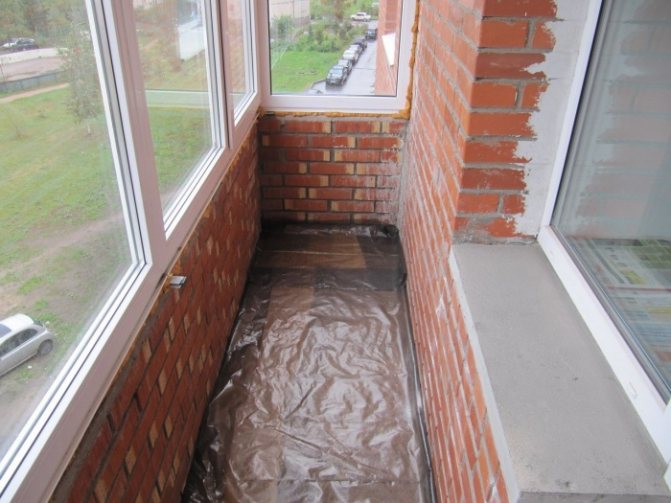
Many people, starting repairs in their apartment, do not always remember about arranging a balcony or loggia. And in vain, because this room, reliably and of high quality, can become a full-fledged additional room, ideal for rest after a hard day's work. For this reason, the warm floor on the balcony will be simply irreplaceable, especially in the winter season.
Warm balcony
How to make a balcony warm?
Balcony heating options:
- Central heating radiators can be used to heat the balcony. But when using this method, one significant nuance should be taken into account - the prohibition of legislation on the output of central heating to the balcony, because of which the entire heating system of the house may be violated.
- Another option for insulating a balcony is the use of electric heating appliances. In the modern construction market, you can find electric fireplaces, electric convectors, electric radiators, combined appliances. Oil-filled radiators are considered the safest in their operation.
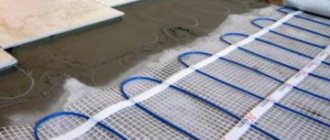
One of the most popular options is an electric underfloor heating on the balcony. Also, a water heat-insulated floor, which operates from a boiler, is quite in demand.
The structure of the warm floor on the balcony
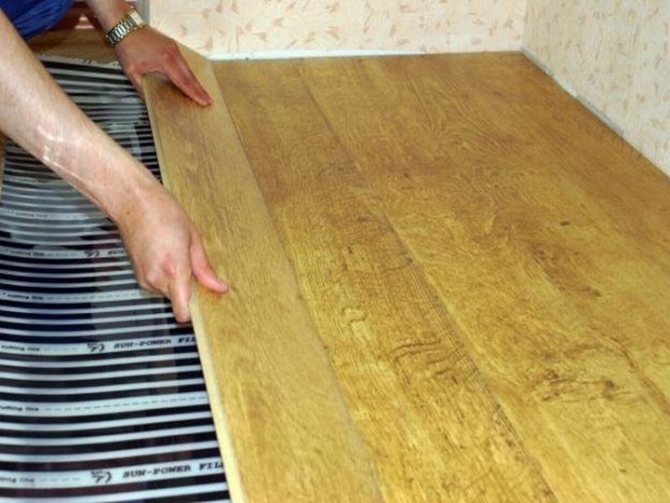
The warm floor on the balcony can be equipped with an infrared heating film. It is ideal for porcelain stoneware, laminate or timber joist floors. Thanks to the infrared film, the most optimal temperature regime for heating the floor covering is provided. In addition, such a film is perfect for heating walls and ceilings, which will be very important in winter.
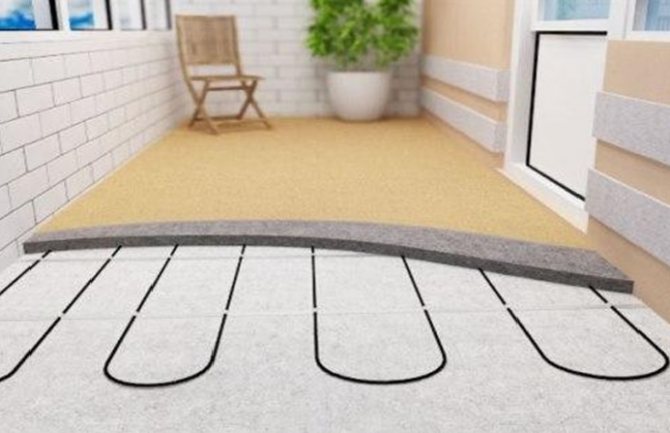
Today there are two types of warm floors on a balcony or loggia - electric and water.
To determine the best option, you should compare the advantages and disadvantages of each type of underfloor heating. The link is a general technology of how to make a warm electric floor.
Do-it-yourself floors on the balcony and loggia
Floor mounted in a screed
You will have to mount such a system in several steps:
- Divide the floor into equal sections.
- Make a layer of thermal insulation.
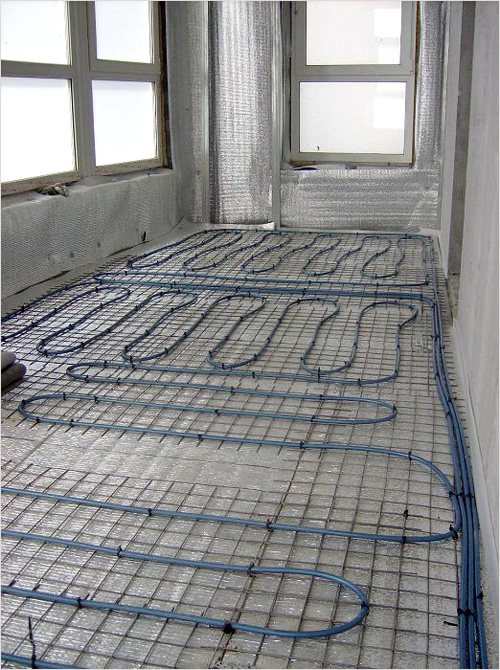
- Install reinforcement meshes along the contours of the pipes.
- Mount the pipes.
- Connect them to the heating network.
- Check the system for functionality.
- Make a screed.
- Lay in a finishing coat.
Important! A water floor is best when the house has an individual heating system.
Water heated floors on the loggia - advantages and disadvantages
Advantages:
- The same floor heating throughout the room.
- One-off costs during installation, as well as significant savings in future electricity bills.
- Visual absence of a heating system.
- Possibility of good heating of a large area using a small amount of funds.
Disadvantages:
- Difficulties in regulating the temperature of the floor.
- The water heat-insulated floor on the loggia is distinguished by the presence of certain difficulties during installation.
- Reducing the pressure in the riser.
- The presence of the likelihood of leaks and the difficulty of finding them.
- The need to use a water pump.
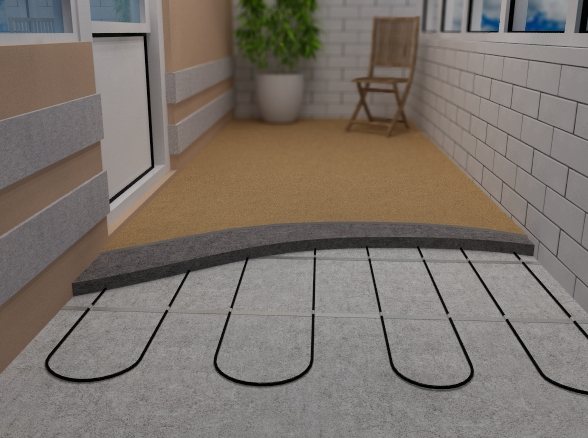
Balcony water floor
A warm floor on a balcony is rarely installed, since its installation is a rather problematic task. In most cases, it is found in private houses with a separate heating system and a large heated area.

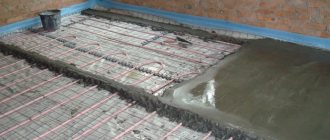
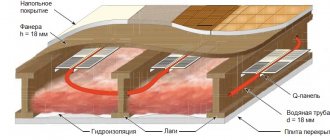
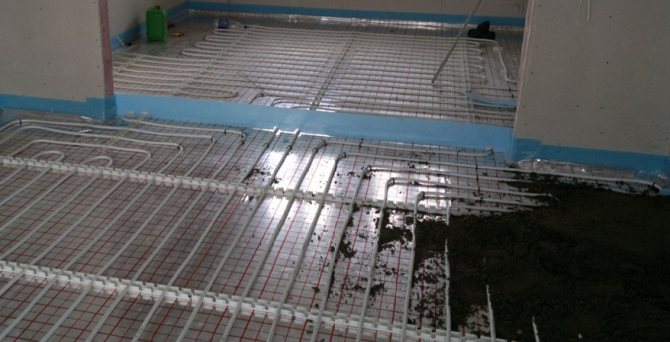
Installation of a warm water floor system
This system is quite complex in comparison with any of the electric types of floor heating.It has many different components, such as pipes, a manifold and a box for it, a pump and a thermostatic device.
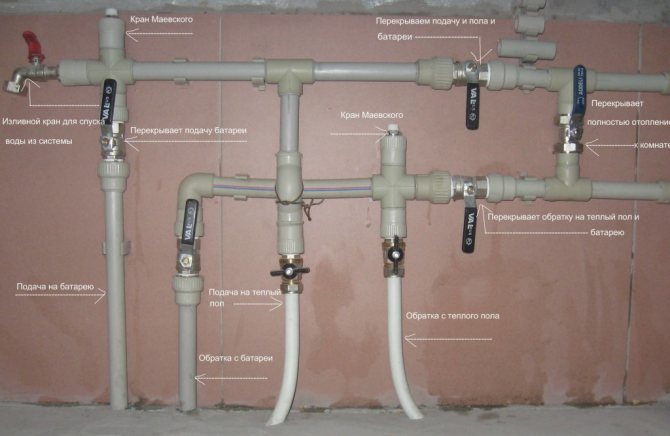
Connection diagram, collector
The installation process can be divided into the following stages:
- A heat reflector is placed on top of our waterproofing. Thanks to him, the heat will not go down, but will be reflected towards the room.
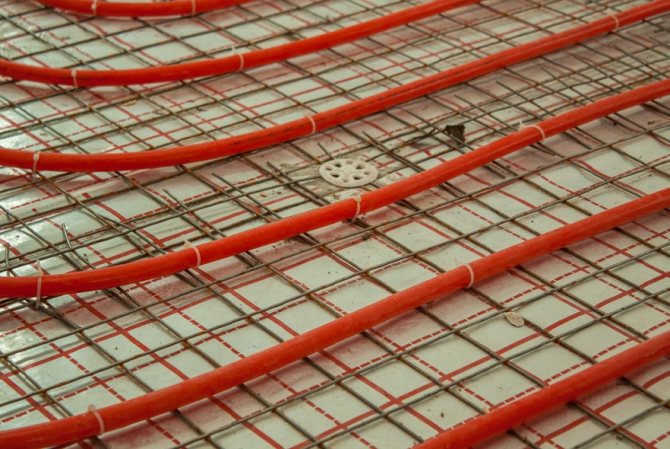
- Then it is necessary to lay our pipes according to a pre-planned arrangement. It is worth noting that the distance between parallel heating sections should be about ten centimeters. For small rooms such as a balcony, pipes can be laid every fifteen centimeters. This will save you material and energy costs for heating the system.
- The next step is to install the manifold box and the manifold itself. For him, you need to hang your own outlet or connect to the network through a switch. This is necessary to be able to turn off the pump to turn off the floor heating unnecessarily
- Then the thermostat is connected to the system and a test run is performed. If no leaks are found and the system is working properly, it is necessary to drive it several times.
- The run is carried out in two or three stages, the pressure in the pipes must be accelerated from zero to five bars, and the system must be allowed to work at such a load for about a day.
- After running, the pressure can be reduced to two bar and the screed can be poured. A reinforcing mesh is fixed on top of the pipes and mortar is poured.
Related article: Is it possible to cut a fire escape on a loggia
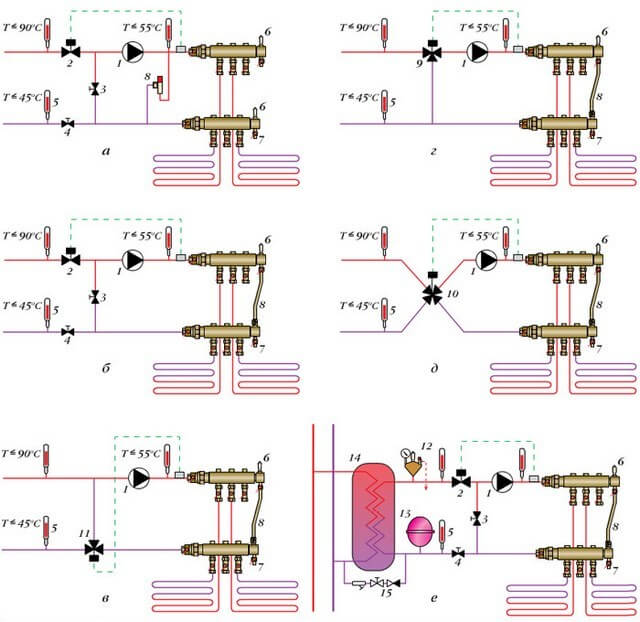
Recommended connection schemes for risers
When filling the screed, the system must operate at a pressure of two bars and at a constant temperature of twenty-eight degrees Celsius. This is necessary so that when the concrete dries, the channels necessary for the pipes are formed in the thickness of the concrete.
The system should work continuously throughout the entire drying period of the concrete screed, approximately thirty to thirty-five days. Then you can turn off the heating, if necessary. The thickness of the screed over the pipes must be at least three centimeters so that it has the proper strength and does not crack during operation.
Installed thermostats can work in two ways. In the first, it will set the water temperature in the system, so the overall temperature of the pipes and the room will be slightly lower. The second way is to set the room temperature.
Such thermostats are equipped with a heat sensor, and when the heat level drops by several degrees, the system turns on and begins to catch up with the required temperature. It is best to install such a sensor in the center of an apartment or a heated room.
Electric floor on the loggia - advantages and disadvantages
Advantages:
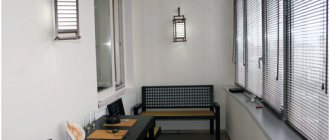
Arrangement of the floor on a cold loggia or balcony
- The possibility of heating the floor over the entire area of the room.
- Reasonable cost and ease of temperature control.
- Visual absence of a heating system.
- Local search capability for further troubleshooting.
- Availability of the possibility of settling in standard apartments without the use of special equipment.
Disadvantages:
- The presence of a certain amount of electromagnetic radiation.
- Significant expenses for payment of electricity bills.
Electric floor on the loggia
The most suitable option for heating balconies or loggias in residential apartments is an electric floor. Its most significant advantages are considered to be ease of installation and ease of use. Before installing a warm floor on a balcony, a video about which shows all the details and nuances of installation, you should carefully understand the principles of installation and completely follow it.
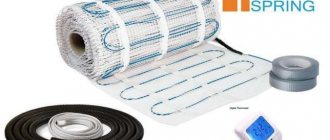
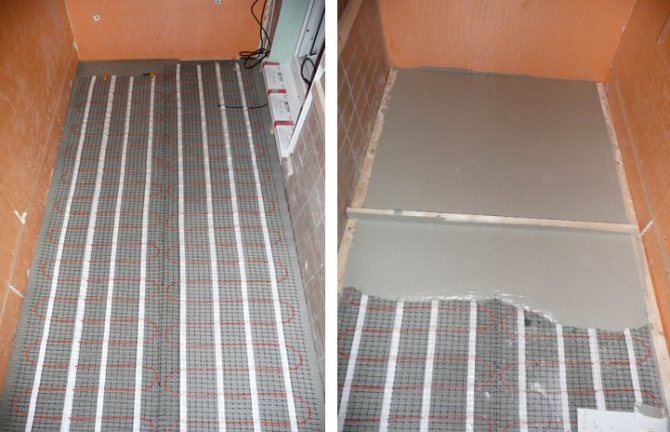
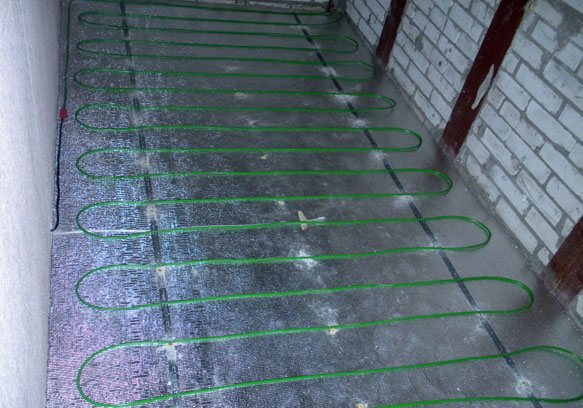
Heating mats
Recently, the answer to the question of how to make a warm floor on a loggia is often answered - to use heating mats.This option has become a worthy competitor to traditional cable floors, not to mention water ones. What is such a system? It consists of several nodes:
- base grids;
- one- or two-core cables laid on a grid.
The heating elements are cables. Such systems have gained popularity due to their unique properties:
- high efficiency;
- ease of installation;
- the relative cheapness of work;
- reliability;
- insignificant thickness - such a floor practically does not affect the height of the room, the surface rises by less than 2 cm;
- customizable to fit any coating configuration, the mesh can be cut without touching the cable.

We lay the mats
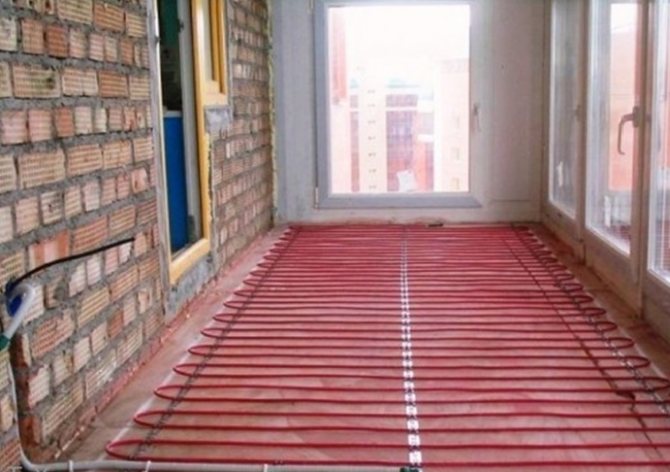
High efficiency is due to the fact that materials with high resistance are used in the manufacture of heating mats. The distance between the cables is less than with a traditional floor - 5 cm. The order of work will be as follows:
- Place the mesh directly on the concrete screed, which must be cleaned of dust before starting work.
- It is very useful to prime the screed to improve adhesion.
- It is necessary to check the system, for which you need a tester.
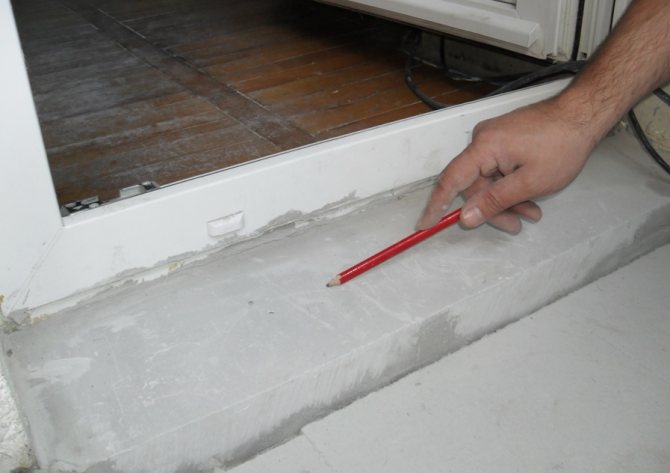
- For the wires, cut a groove in the wall and floor.
- The thermostat, as in the case of a cable floor, must be placed in an accessible place and not under furniture.
- Place the sensor in a dedicated channel, which is located far enough from the heaters.
- Secure the mesh with glue paste.
- After installation, you need to inspect what happened and check the performance of the system.
Important! No sharp kinks should form during installation.
Insulation of the loggia and warm floor - description of the installation process
- To begin with, it is necessary to calculate the size of the heated area, since in case of an error, a decrease in the pitch of the cable to be laid will be required, which is by no means recommended to be done.
- After that, it is necessary to start preparing the working surface, after which a layer of thermal insulation with a thickness of at least 50 mm is laid on the floor.
- A metal mounting tape is installed on top, then a heating cable is laid on it, observing a certain distance.
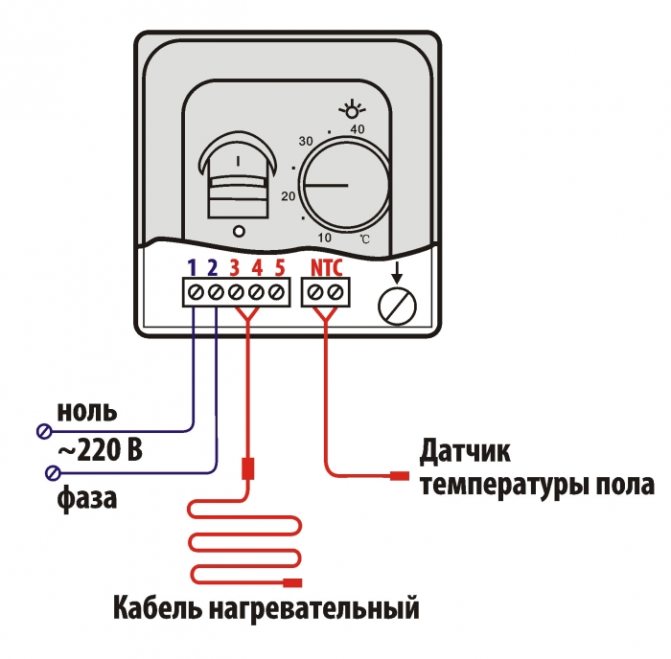
- Then a thermostat is placed on one of the walls, which controls the correct operation of the device. A special cable and a thermal sensor are connected to it.
- Then it is necessary to install the floor screed, the thickness of which should be in the range of 30-40 mm. To carry out these works, the base with the installed structure is poured with concrete.
- After the screed is prepared, the floor covering is laid on it.
Underfloor heating from a battery
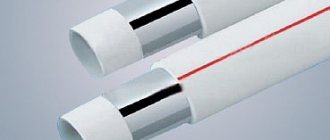
This is a rather costly and complicated option, but sometimes it is also used. The pipes must be securely walled up with a concrete screed. There is also a second option - installation under the floor covering. This is an easier and cheaper way. The topcoat is laid on a polystyrene-aluminum spacer. If the floor is wooden, pipes are placed between the joists.
The main element in this system is, of course, pipes, usually polymeric. In addition, you need:
- circulation pump;
- manifold system with all fittings and fasteners.
Important! In this case, it is important to choose a scheme that will not harm the neighbors in any way and will not have a noticeable negative impact on the overall operation of the heating system in your home. It is best to contact a licensed design organization, whose specialists will help not only develop a project, but also go through all the approvals. Not all connections contradict the legislation - for example, if there is only one connection point, and the floor is made throughout the apartment, there should be no problems with coordination.
If we talk about the process itself, then there are only two ways to insert:
- parallel connection;
- serial connection.
The second option is more efficient - the cross-section of the watercourse does not change, the flow remains stable. Unfortunately, at the same time, the temperature of the coolant decreases markedly, including at the neighbors.
Tiled and laminated floors
Laminate and tile are the leaders among finishing materials, and it is not at all excluded that you will choose one of them for finishing. In this case, it is necessary to take into account some points that can affect the quality of the warm floor:
- The material must be resistant to temperature extremes - this is especially true for laminate flooring, so do not forget to pay attention to thermal characteristics when buying - a class not lower than 31, thickness 8-10 mm.
- Pay attention to the Warmwasser and Underflowheating labels if you plan on installing water heating.
- The recommended temperature should also be on the label, the one that is not lower than 25 ° C is suitable for you.