
Advantages and choice of material for a wooden floor
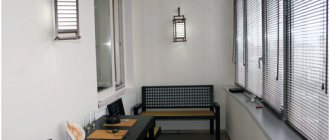
The balcony is an auxiliary area. It is not designed for large, dramatically changing loads. In addition, as the age of the house increases, the load-bearing capacity of the balcony slab decreases.
Therefore, the choice of wood as a material for the floor on the balcony is quite justified. Light weight, low thermal conductivity and sufficient strength in combination are the most preferable qualities that a material should have for such a purpose.
Advantages of wood for a wooden floor on the balcony:
Wood tolerates contact with sunlight and rain moisture normally.
Installing a wooden floor does not require a lot of tools and labor.
As the wood wears out, it changes easily.
Back to content
Wooden coverings
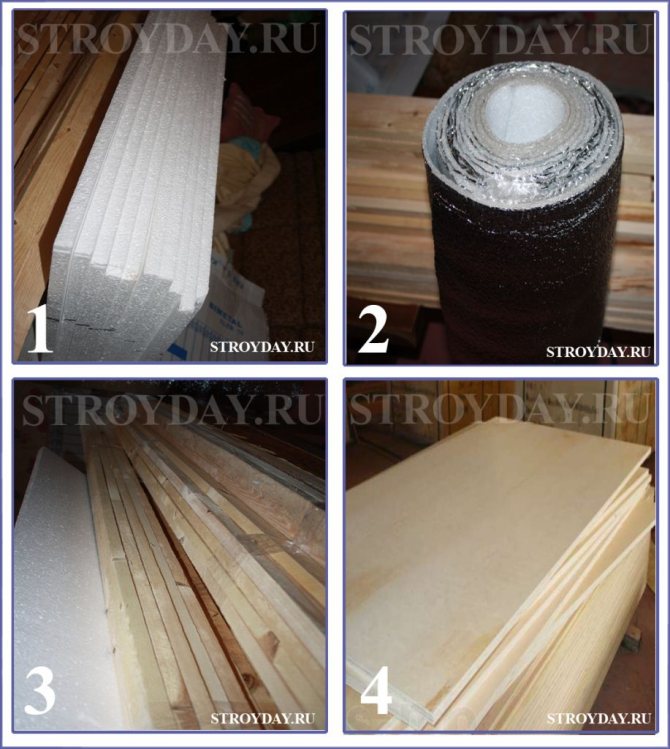
To build a wooden covering on the balcony you will need:
- Board 30 mm.
- Bars 30x40 mm.
- Cement, sand, water.
- Insulation 30 mm thick.
- Rotary hammer with a drill (6 mm)
- Screwdriver.
- Sharp knife.
- Self-tapping screws (6x65), dowels.
- Pencil, tape measure.
- Beacons.
- Linoleum.
- Plywood.
Such a "light" tie is needed so that the logs lie flat on it.
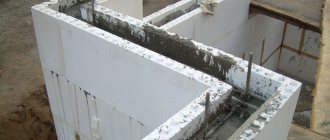
Before starting repairs on the balcony, assess the evenness of its slab. If the house is old and the screed is uneven, cracked, it is better to completely remove it. The slab is leveled with cement mortar 3-5 mm thick. Such a "light" tie is needed so that the logs lie flat on it.
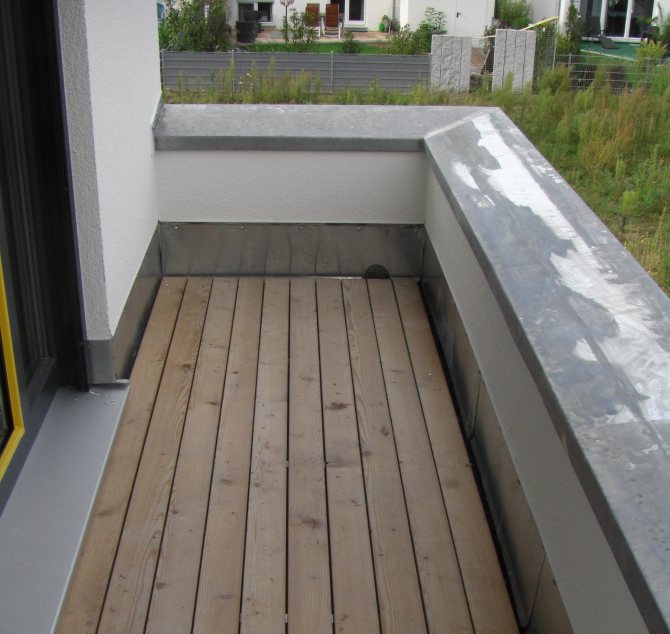
The floor of the open balcony is filled with rainwater, which must drain somewhere.
Therefore, the balcony slabs are laid with an outward slope.
When making a new screed and installing logs, you need to remember this.
Related article: Bathroom Shelves - Optimizing Space
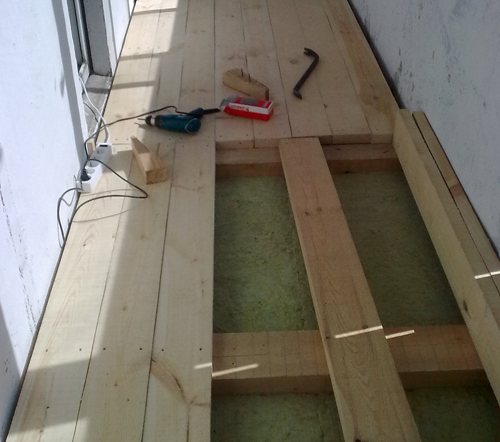
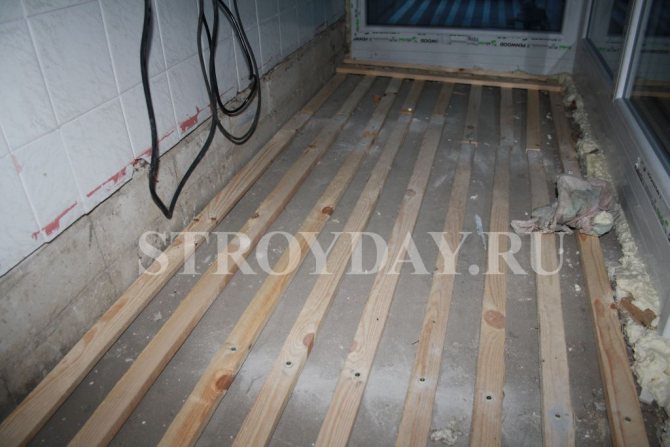
Wooden blocks are taken as lags. Lags and all other wooden parts are impregnated with an antiseptic. It will not be superfluous to paint them. This will protect the tree from rotting and damage by insects. This floor will last a long time. Lags are installed across the balcony (it is possible and along, depending on how the boards will be laid on the balcony - along or across).
Due to non-observance of right angles, the dimensions of the left wall of the balcony and the right one are most often different. Therefore, it is undesirable to cut all the logs at once. Having measured one side of the balcony and taking away 1.5-2 cm, the first lag is cut off. It is laid, stepping back from the side wall by 10-12 cm. The dimensions of the following lags are determined similarly to the first, they are installed in increments of 50-60 cm. The last lag should also be 10-12 cm away from the wall. For this, the middle lags can be slightly shifted. Placed logs must be attached to the balcony floor. Boards laid on fixed joists do not creak.
When laying the lag, you need to monitor the horizontal plane. The bars are leveled first. The level is placed on the logs, and, where required, beacons are placed. As them, you can use pieces of aluminum profile or hardboard. Be aware of the slope. Check the position of the bars and relative to each other. For this, the board is laid on the outer two beams. If necessary, add (or remove) beacons under the bars, and in the same amount on both sides of the bar.
Check the position of the bars and relative to each other. For this, the floorboard is laid on the outer two beams.
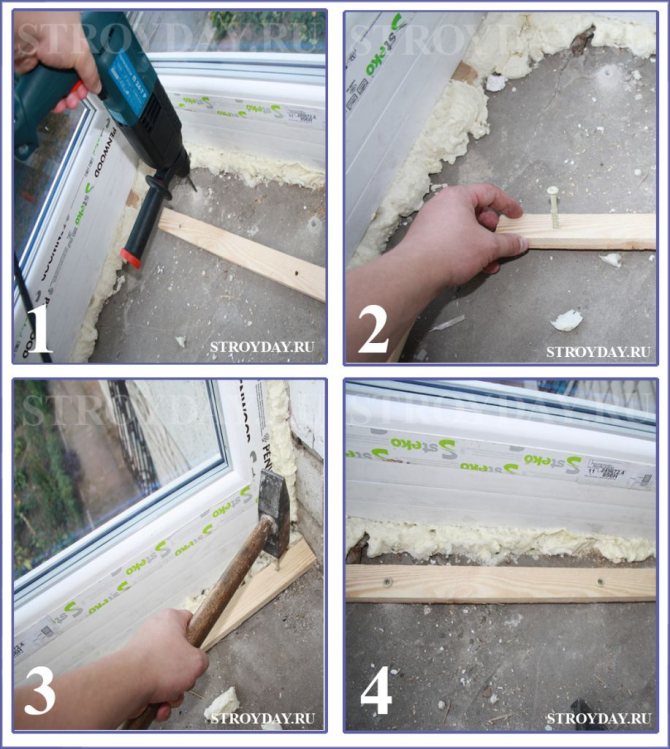
Fix the logs to the balcony floor using a puncher. First, a hole is drilled through the beacon beam in the concrete slab.Next, a dowel with a self-tapping screw inserted into it is driven with a hammer through a bar into a hole in concrete, after which the screw is tightened to the end with a screwdriver. Each bar is attached with 3-4 self-tapping screws. Painted floorboards are laid on the aligned and fixed joists.
Related article: Decorative flower beds: ideas for planting greenery in the garden (44 photos)
Linoleum can be used instead of boardwalk. It can be laid out directly onto a concrete screed, but the flooring will be cold. But if you first strengthen thick plywood on the logs, and then lay linoleum, then the floor will be warmer. The linoleum coating is easy to clean, it does not get dusty.
Above, the question was considered how to make the floor on the balcony, unprotected from rain and snow, so that it does not overload the remote plate and is durable. But on the loggia, the concrete slab can withstand greater loads than on the balcony. Therefore, answering the question of how to make a floor on a loggia, as the first option, you can offer the same wooden floors, but with additional insulation.
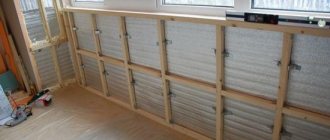
Features of insulation
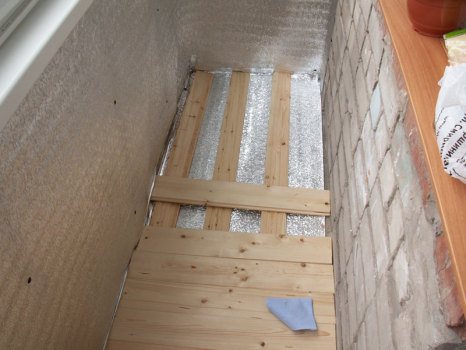
To do this, on the loggia between the logs, a heater is laid, cut according to the measurements taken between the bars.
Cut the insulation along the guide. A bar is used as it. A sharp knife with effort is carried out several times along the bar along the marking line and the insulation is bent to a break. It will break easily at the notch.
The cut pieces are laid out between the lags. If gaps have formed somewhere, they are filled with polyurethane foam. A board is laid on top. Everything, the insulated floor on the balcony is ready.
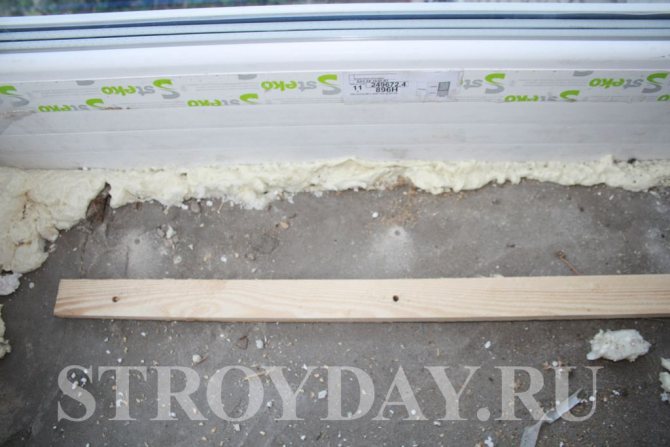
Preparatory work
First of all, you need to remove everything from the balcony that is on it. Remove old coating (if any). If necessary, the existing defects of the concrete surface should be plastered, it is good to fill the cracks with polyurethane foam.
Inspect the metal fence, if necessary, weld, paint, remove rust. Purchase materials for coating - a substrate, a timber for a log, a floorboard, fasteners (screws, corners, dowel-nails).
You will need some kind of antiseptic for the boards, as well as varnish or paint to protect the finished floor.
Back to content
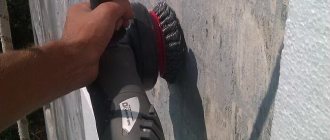
Waterproofing the balcony floor
The need for waterproofing is not an insurance policy. Without proper protection, the floor can begin to gain moisture, mold, metal parts of the floor and fencing begin to rust.
First of all, it is necessary to provide a slight slope for the drainage of rainwater. You can't let her stagnate on the balcony. One of the options for a waterproofing coating can be called a concrete-bitumen screed.
It will allow you to bring the desired slope and at the same time protect the balcony slab from moisture collection. Roofing material is laid on the screed as a second layer of waterproofing, or some other insulating coating is used, the choice of which is wide enough, for example, a special waterproofing membrane.
The canvas should be wider than the balcony so that its edges overlap the wall by 20-25 cm.
Video:
Back to content
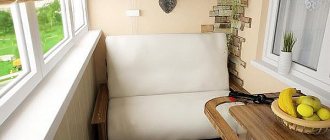
Finishing the floor on the loggia
Repair of the loggia
So, the floor on the loggia is ready, now you can proceed to finishing it. What options are there?
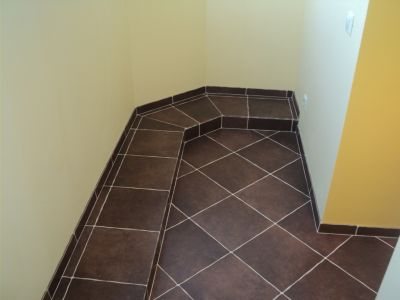
There are no restrictions on the choice of floor material here. You can take whatever you like. But at the same time, you will have to take into account some points related to the appointment of a new room. For example, if it is decided to equip a kitchen on the loggia, then the best cladding option is ceramic tiles.
Linoleum
Of all the finishing materials that are on the market today, linoleum is best suited for a loggia. Many can say that this is already the last century, that linoleum is already out of competition, and its popularity is too low.But you forget that any product on the market changes, because the competition is fierce, and each manufacturer is simply obliged to offer new models and brands of their products.
In this regard, linoleum does not lag behind other types of finishes. Let's not talk about Chinese cheap products that exude a pungent unpleasant odor. When you smell it, run out of the store - it's bad for your health. On the market, you can always find decent specimens that have excellent technical and operational characteristics.
In addition, good linoleum has a lot of advantages:
- High strength and wear resistance. Manufacturers assure that this material will be able to work on the loggia for at least 25 years.
- Low price when compared with other floor coverings.
- Simplicity of styling. Take my word for it - you can cope with such an installation process without any particular difficulties. Moreover, the evenness of the floor on the loggia, which you prepare with your own hands, is beyond doubt. And for linoleum, this indicator is fundamental. If the floor is even, then the quality of the coating will be excellent.
- Huge variety of material designs. What manufacturers do not offer! There are not only different colors, but also a large selection of imitations for other materials.
- By the way, we note that linoleum can be laid both on a concrete base and on a lag structure. In the second case, you will have to mount plywood sheets on the crate, which will create an even and reliable base.
Ceramic tile
Leveling the floor on the balcony
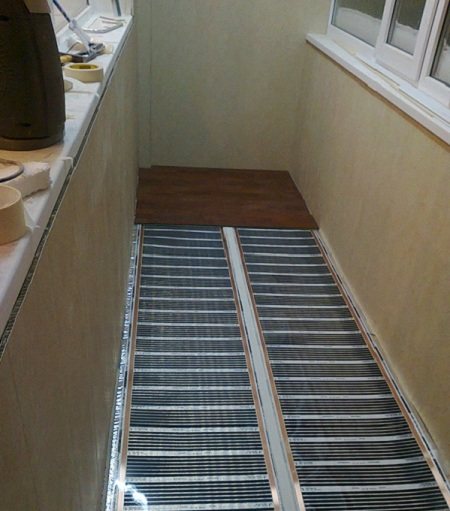
This cladding belongs to the category of "cold", therefore, it is rarely used on the attached loggia. But if you chose it, and the purpose of the room does not correspond to the given material - for example, a children's room or an office is being organized - then the floor will have to be insulated with a "warm floor" heating system or covered with a carpet or carpet. Is it worth it to fence all of this if there are other cladding options?
And yet, ceramic tiles are used on the loggias. The only thing to look at is the state of the foundation. Under the ceramics, you will have to fill the floor with a screed. There is a technology for laying tiles on a wooden or plywood floor, but this method is complicated and requires additional time and materials. The costs are considerable. And why do you need it? You need to follow a simpler path.
Laminate
This beautiful and durable material that imitates various types of wood is at the peak of its popularity today. It is he who can become the facing that will replace all the previous ones. And even more so on the loggia.
The room is small, the material costs for its renovation are low, so you can fork out. Moreover, this room will be residential as well. it means that beauty, coziness and comfort come first.
Therefore, anyone who is still thinking about what material to use on the loggia for flooring, take note of our advice - laminate.
Wooden floor
The wooden floors in the new premises are a classic. It is probably not worth saying that the plank covering is distinguished by its naturalness and high technical characteristics. Everyone knows that. But not every home craftsman knows how to properly carry out the installation with his own hands. Therefore, a few practical tips and a small styling scheme.
Wooden floors must be mounted on a lag structure, where wooden beams can act as lags. Experienced craftsmen say that the plank floor can also be laid on penoplex. This insulation is quite dense and durable, so it can act as a reliable flat base without problems. But this is not as easy as it might seem. Therefore, we will consider the process of installing a wooden floor along the logs.
So, the crate is installed, the insulation is also installed, you can proceed to the installation of the boards.Advice - you only need grooved boards, which are fastened together with a tongue-and-groove lock. Be sure to buy good quality dry material.
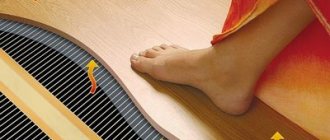
How to insulate a loggia
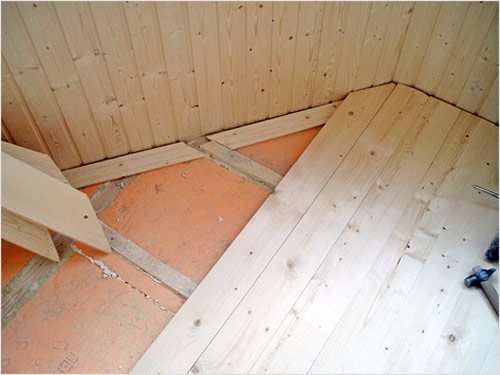
Usually, flooring elements are laid across the room, which visually increases the width of the room. A board is installed near the wall, a centimeter from it, and fastened with self-tapping screws to the logs. Why is this gap necessary? Wood as a natural material changes its size under the influence of different temperatures and humidity. That is, the movement of the flooring will be obvious. And this gap will compensate for the movement of the boards and the entire structure as a whole. An important point is to set the board exactly parallel to the wall near which it is installed.
You will now need a small rail that is the same length as the board. Install this rail on the logs at a distance from the already mounted board about 5 centimeters more than the width of the board itself. Fasten the rail to the logs with self-tapping screws. And now, between the first panel and the rail, the second element of the plank floor is laid. Insert the spike into the groove and drive in a couple of wedges between the second board and the rail, which must be prepared in advance.
So the two elements expand, and the fit of the two boards becomes tight. Attach the second panel immediately. Then knock out the wedges, remove the rail, move it to a new place and repeat the process with the third board. And so on until the end of the foundation. After that, the floor is finished, for example, painting or applying a protective varnish. And the last step is the installation of the skirting boards.
Do-it-yourself wooden floor on the loggia is of high quality, long service life, natural beauty and a high indicator of reliability. In addition, wood is a warm material, so no one, including children, will have problems with bare feet.
Frame under the plank floor
Not all home craftsmen understand how to correctly make a lag structure for wooden boards. There is nothing complicated in this process. You will need three beams 70 millimeters thick and a length equal to the length of the loggia. Install the beams along - one at the parapet, the second at the front wall of the building, the third in the middle between the first and the second. Fastening is done with self-tapping screws through through holes directly into the concrete base of the floor.
An important point is that all elements of the lag structure must be horizontally aligned. This is not always easy, especially for the first time, so the operation will take you some time.
Laying a wooden floor
The first step is to strengthen the first row of logs. The distance between them should be about 45-50 cm, they are attached across the balcony and attached to the floor with dowel-nails. They should not reach the walls by 2-3 cm in length.
The second step is the laying of the second, longitudinal layer of the log. This layer is the main one, it is made of a thicker bar and carries the floorboard layer on itself.
The lags of the main layer are located along the balcony, the distance between them is 45-50 cm, from the walls - about 3-5 cm.
This lag layer must be leveled horizontally, placing pieces of wood under them, if necessary, to adjust the level. Between the lags, it is advisable to lay a layer of insulation - mineral wool or some similar, which is cut with a knife to size and located in the intervals. There is a separate article for this.
Then they start laying the floorboard. It is cut into pieces across the balcony in such a way that there is a gap between the board and the wall of about 1 cm.From the extreme board, you need to cut a spike and attach it to the logs with self-tapping screws. The screws must be screwed into the groove at an angle so that they cannot be seen after attaching the next board.
Sometimes, instead of a floorboard, thick plywood or chipboard is used, but this option seems short-lived due to its low resistance to moisture, and even atmospheric humidity will destroy such a coating pretty soon.
Video lesson:
Back to content
Floor preparation
Any repair and construction process begins with a preparatory stage. In the case of a loggia, there are no exceptions. But, since this room will be attached to the main square meters of the apartment, several additional operations need to be added to the repair process. Let's go in order.
First of all, the floor on the loggia is examined for defects. If such exist, then repairs are simply necessary. The floors on the loggia are repaired by applying a cement screed. This solution not only fills all cracks and other flaws, but also levels the surface, which is an important factor in the further process of cladding.
But now you need to decide the question - to carry out floor insulation or not? This question should not be in front of you, because thermal insulation in this case is a necessary thing. Without it, it is impossible to say that the attached loggia will meet the standards of comfortable living. So, we will insulate the floors. What is the best way to do this?
There are several methods and technologies that depend on the selected heat insulator. Let's take a quick look at some of the positions to get a little idea of how to do this with your own hands.
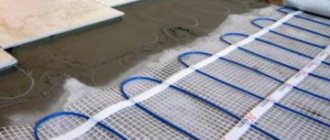
Thermal insulation of the floor with expanded clay
- A vapor barrier material is laid on the base of the floor.
- Expanded clay is poured on top, which is leveled horizontally.
- The material is tamped to achieve an even distribution over the entire surface and to reduce the layer.
- Roll waterproofing is laid on top.
- Reinforcing mesh is installed.
- A cement-based screed is poured.
Here is such a simple algorithm of actions. In the event that the loggia has a relatively large floor area, then to simplify the work, you can install a crate of wooden beams on the surface. By the way, it is this option that is usually used for the construction of a plank floor.
Thermal insulation of the floor with mineral wool
This process is carried out only on the frame. But all protective materials are present in it in full. Because mineral wool has a high level of hygroscopicity - it absorbs moisture well, under the influence of which its technical characteristics deteriorate. And the deterioration happens very quickly.
- A vapor barrier is being laid.
- Frame elements are installed - all the same wooden beams.
- Insulation is laid in the crate.
- The entire structure is covered with waterproofing material.
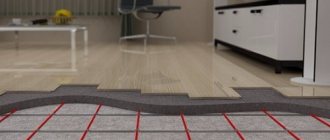
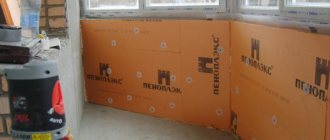
Floor insulation with penoplex
This thermal insulation material from the novelty category has excellent qualities. For its installation, nothing is needed - no protective layers, no frame.
Penoplex boards are attached directly to the floor using self-tapping screws or glue. Its strength can be envied by many flooring materials - it can withstand almost any load that the floor is usually subjected to.