Shelf for reading books above the heater
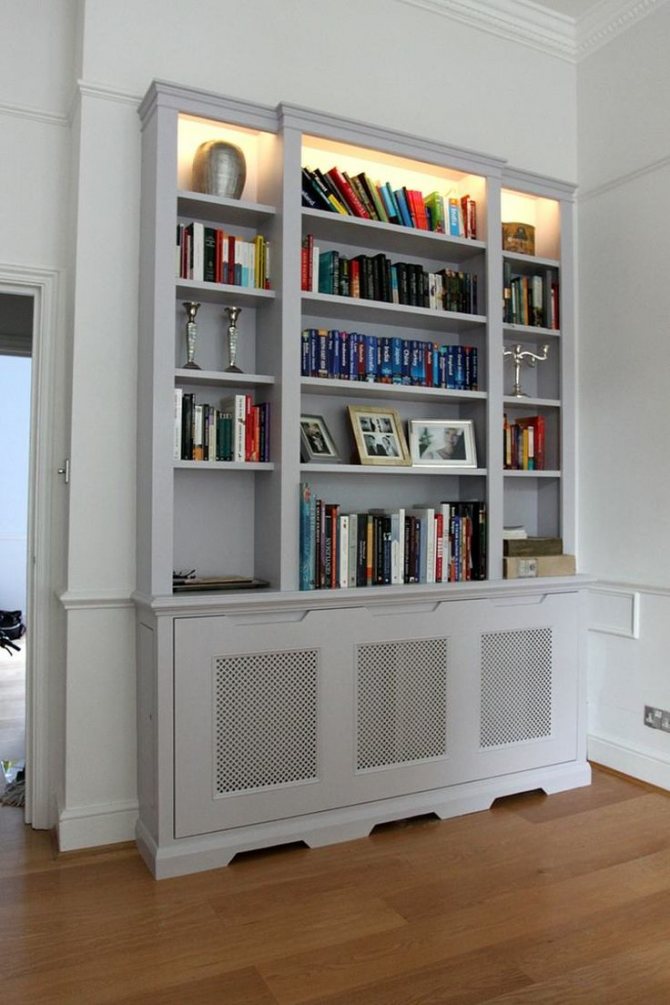
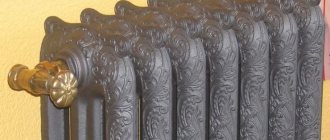
Regardless of what design is used, heating radiators can be easily decorated as a reading area. A decorative box is mounted in a teenager's room, nursery or bedroom. In this case, the seating position is arranged higher, at the level of the windowsill, and the battery is hidden behind a decorative grill.
In winter, it is comfortable to sit on the bench, because warm air warms it up from below. There you can not only read books, but also admire the view from the window. The grille is usually matched to the style and color of the interior.
Overview of prices for decorative elements in the Russian market
Let's consider the dependence of plastic ventilation grilles on the size. Prices are as of April 2020.
| Photo | Brand | Size, mm | Cost, rub. |
| Vents | 124×462 | 180 | |
| MV 430/2 | 453×91 | 170 | |
| MVM 10-3 Ks | 475×80 | 290 | |
| ABS | 455×133 | 110 |
For example. A similar element made of aluminum ("Bauset") with dimensions of 800 × 80 mm will cost the buyer 1100 rubles.
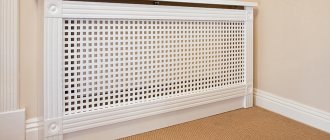
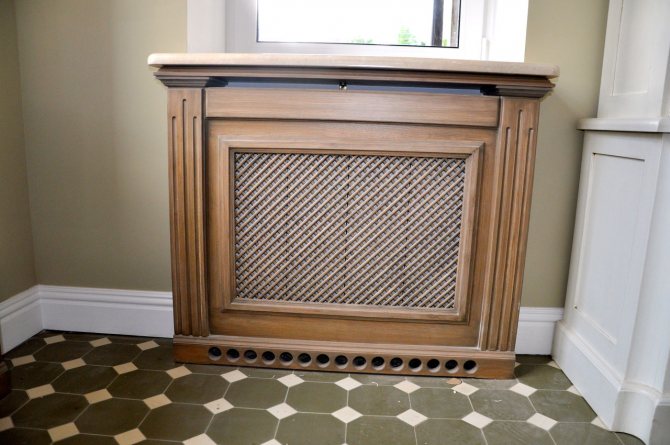
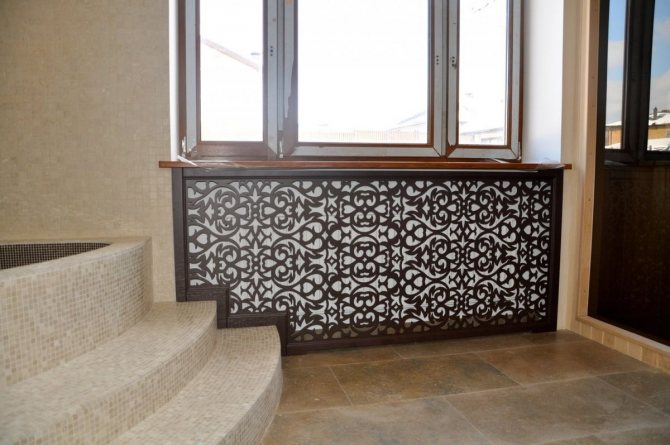
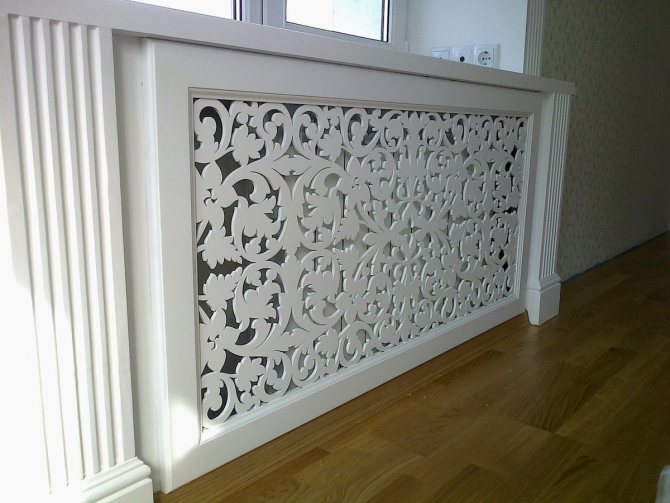
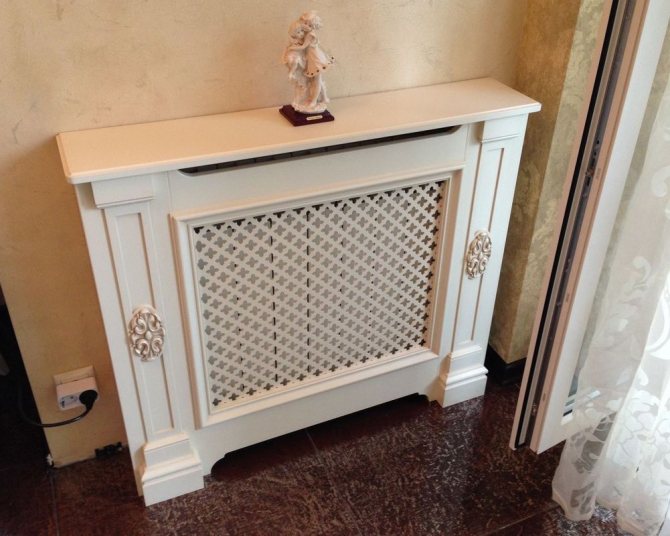
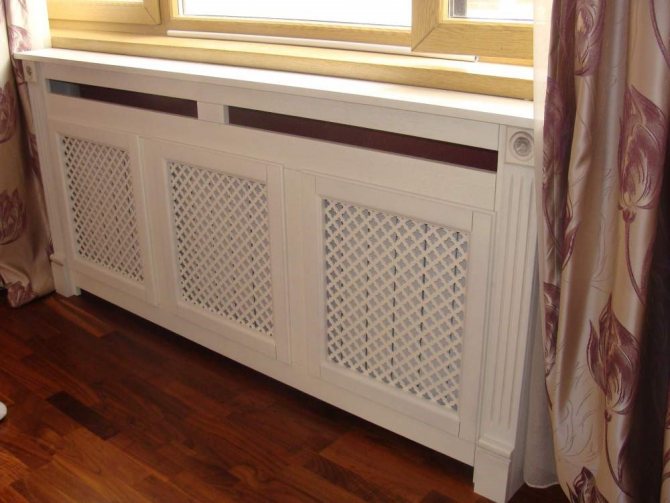
Decorative screen
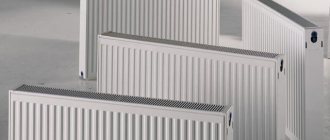
More often, decorative grilles for radiators are installed in a residential area. They must not impede air circulation around the heater and must be made of materials that are resistant to high temperatures. The structure is placed on the floor or fixed to the wall.
Advice! The screen in the form of a box with lattice doors is convenient in that the upper part is used as a table, and thanks to the doors it is convenient to remove dust from the device inside.
There are the following types of decorative grilles:
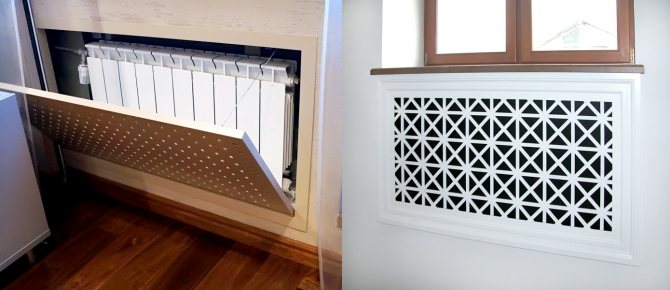
- Radiators installed inside a niche in the wall are hidden behind flat or facade screens. However, in this case, slots are made in the window sill above the heater for the exit of warm air masses.
- Suspended structures are attached to heating devices that protrude beyond the plane of the wall. The cover of the element is blind. It is at its expense that the structure is kept on the battery. The side of the screen is lattice.
- Attached models cover the radiator, like a wardrobe or chest of drawers. Usually this is a box without a back wall, which stands on the floor.
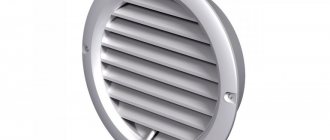
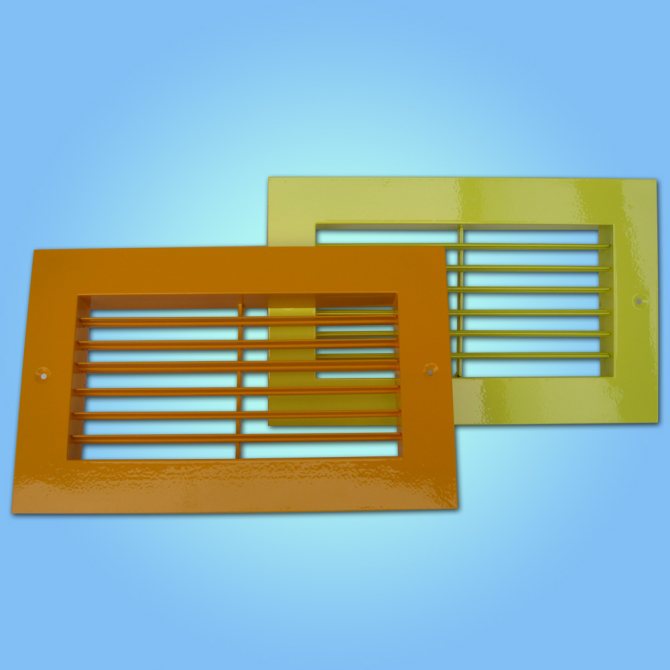
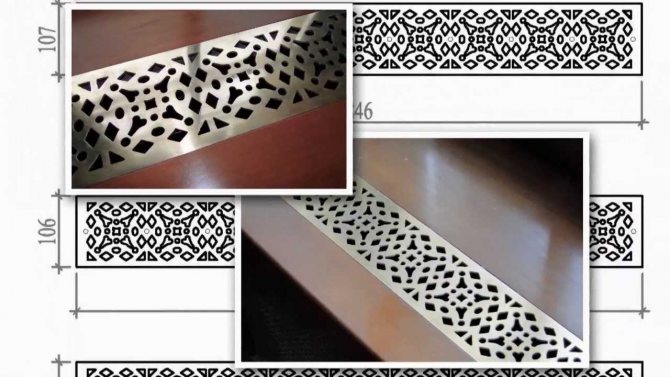
The radiator grill is made of materials:
Repair of heating batteries and what to do if radiators leak in an apartment
- Plastic elements are inexpensive and made from hygienic materials. However, even heat-resistant plastic deforms over time and turns yellow. The panel is lightweight. Plastic decor can be installed in rooms with high humidity.
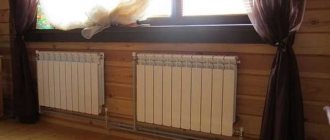
- Metal screens are durable and durable. Designer heating radiators are made of steel, but such devices are beautiful in themselves, so they do not need to install a screen. The grilles are made of stainless steel and are powder coated.
- MDF panels are inexpensive and will fit any interior. However, they cannot boast of moisture resistance, they contain toxic glue in their composition.
- Expensive and beautiful wooden screens have a short service life, so they need to be periodically varnished or painted to protect against negative influences.
- Plexiglas panels are lightweight and durable. Usually holes are drilled in them for air circulation. Frosted glass is used to hide the unattractive battery.
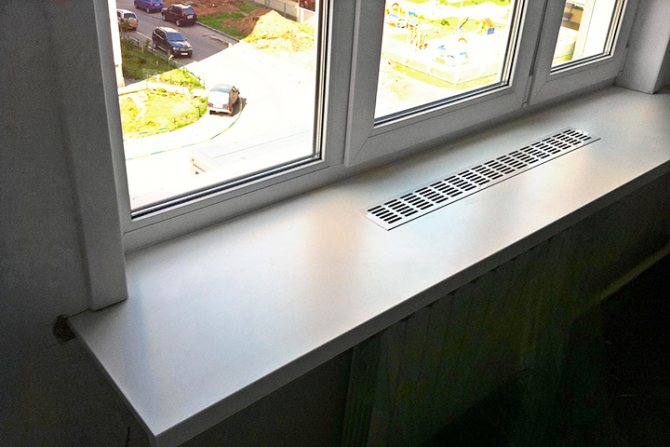
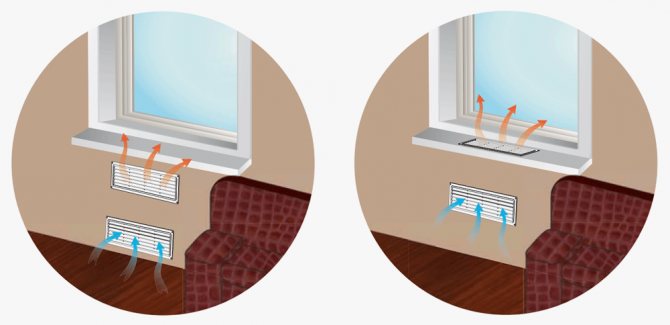


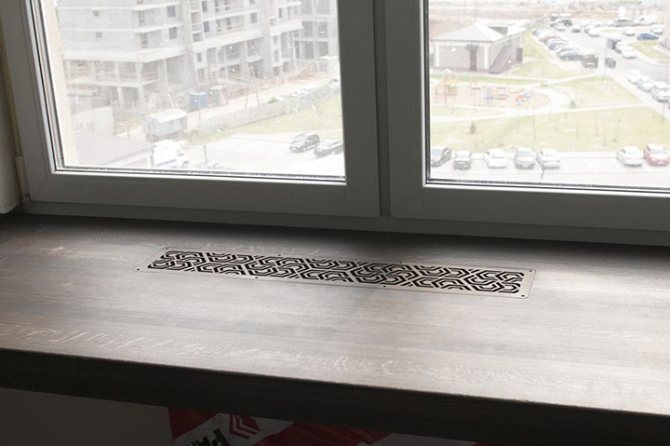
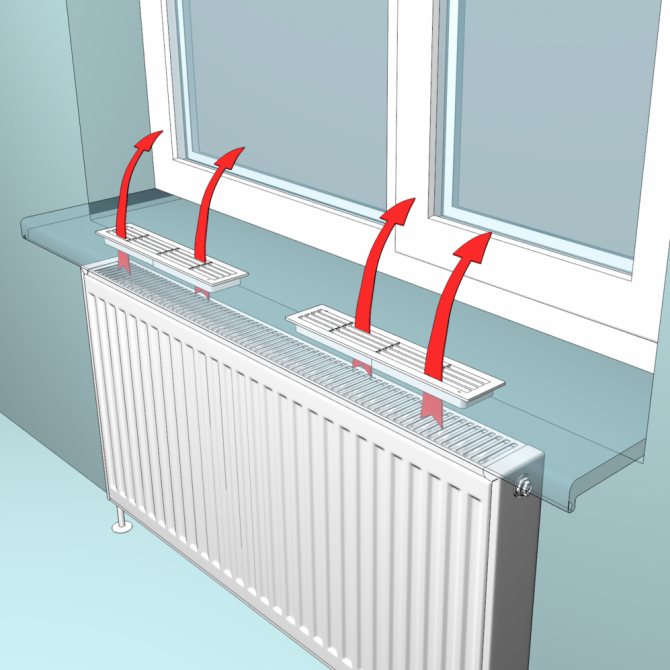
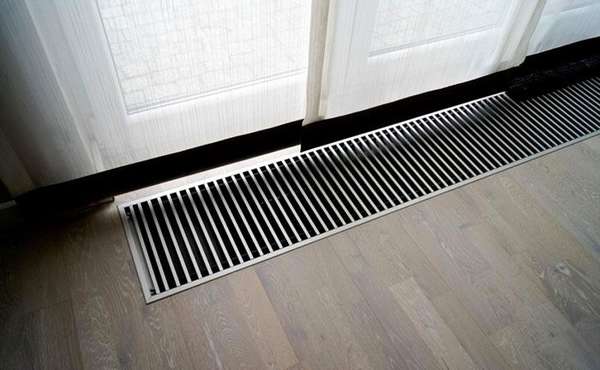
Advantages and disadvantages of convection grilles for a window sill
One of the main advantages of ventilation grilles is the solution to the problem of collecting condensate on the windows. This, in turn, normalizes the indoor climate, making it more pleasant and less humid. To such an irrefutable advantage, it is worth adding the following features:
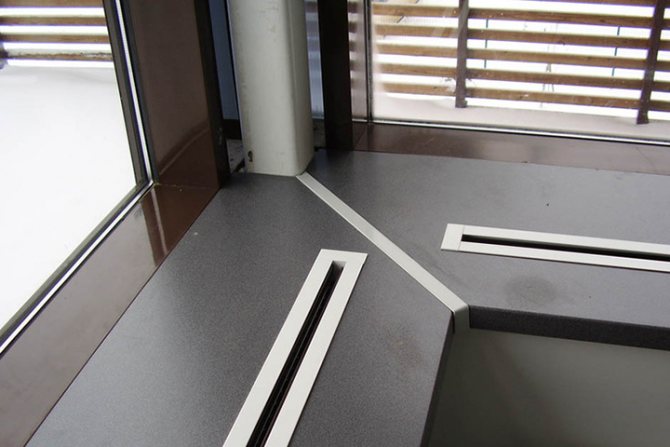
- Installation versatility - similar elements of window systems can be embedded not only in window sills. They are also great for worktops made of any material.
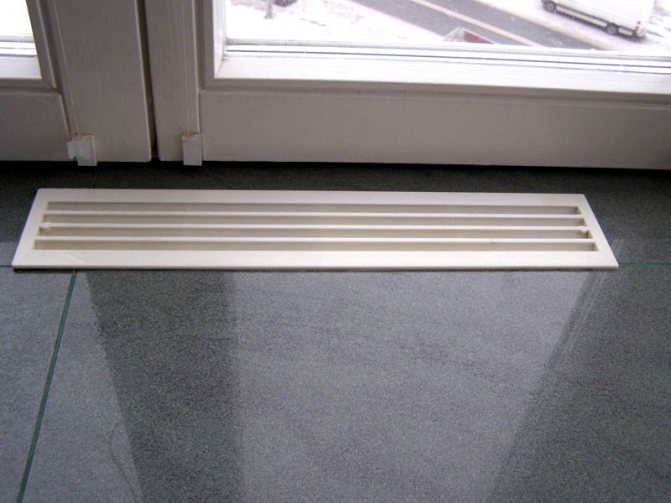
Countertop ventilation grill
- Manifold - such ventilation grilles for the windowsill can be bought in any design: from classic to extravagant baroque models. They are also made of various materials and designs - you can choose both conventional and closing ventilation sill grilles in a standard and unusual shade solution. The main thing is not to get lost in the richness of the assortment.
Decorative grilles for ventilation on windowsills
- Convenient operation- like plastic double-glazed windows, grilles for them also have a long service life. And it will not be difficult to take care of them - the radiator screen can be easily removed, washed, dried and just as easily put in place.
In addition to such advantages, it is worth noting a negative feature that is inherent in such elements of window systems - installation is available only for those who have all the necessary tools and minimal experience with plastic double-glazed windows or countertops - it depends on the specifics of the installation. It remains only to navigate the types, designs, sizes and prices for plastic ventilation grilles.
Painting options
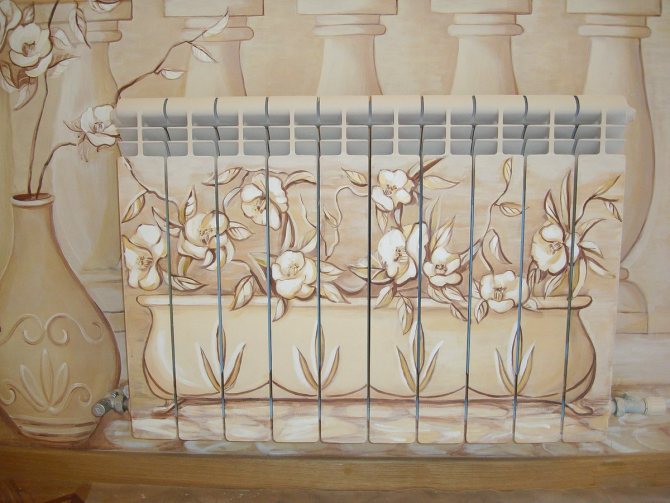
Beautiful heating radiators can be obtained by simply painting the heater. At the same time, you do not need to buy screens, and all the work is easy to do with your own hands. If you need to make the device invisible in the interior, then it is better to paint it in the color of the walls.
But you can go the other way and make the battery a stylish element of the interior by painting it in different colors, applying a pattern or ornament, which will become a continuation of the modular pattern on the wall.
Advice! In a music lover's or teen's room, you can paint sections like piano keys.
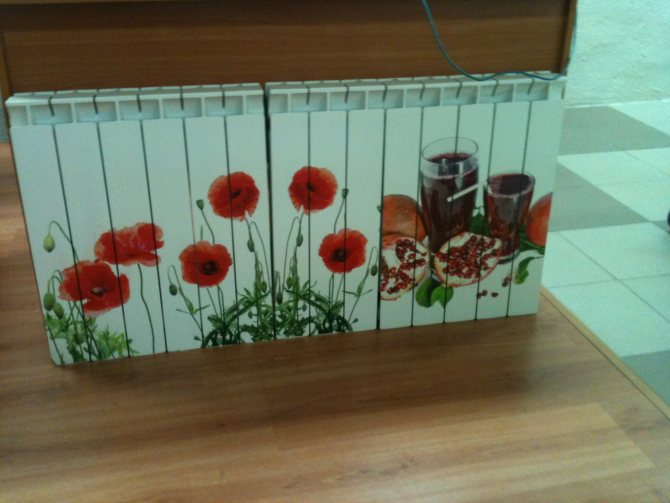
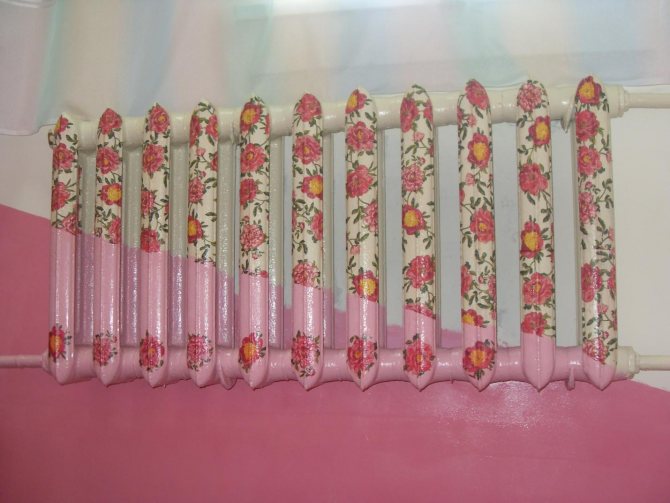
Decoupage technology
Using the decoupage technique, it is easy to make the decor of the heating battery with your own hands. Small fragments of drawings are glued onto the prepared surface of the radiator, which are selected in advance by subject and color. From above, the decor is fixed with two layers of acrylic varnish. It is most convenient to glue drawings from thin napkins on the embossed surface of the heater.
The decoupage technique is carried out in the following order:
- We remove the old paint from the heating unit using a special remover. After applying the solvent, wait a while and remove the swollen paint with a metal brush.
- After that, the battery is washed and dried. Then they paint in the desired color and wait for the paint to dry completely.
- Then cut out drawings from napkins along the contour. In multilayer napkins, remove excess layers.
- On the back of the prepared fragment, PVA glue is applied with a brush and the element is glued to the radiator. The surface is leveled to expel all the air. Subsequent cuts are glued with a little overlap on the previous fragments.
- After the glue mixture has dried, the decor is fixed with two layers of acrylic varnish.
Installation of decorative elements: the nuances of the work
Installation of ventilation grilles for countertops does not require special knowledge and skills. However, you should pay attention to some nuances. Now we will consider what tool is needed for editing, and then step by step we will analyze the algorithm for performing actions.
Tool required for installation
Basic materials and tools required:
- drill or screwdriver,
- jigsaw,
- Bulgarian,
- marker or construction pencil,
- assembly adhesive (use of silicone sealant is allowed,
- roulette,
- the grates themselves.
The toolbox is small. If the home craftsman himself is engaged in repairs in the home, then such tools are always at hand.Having prepared the necessary, you can proceed to the installation.
Algorithm for installation: step-by-step instructions
| Illustration | Action being performed |
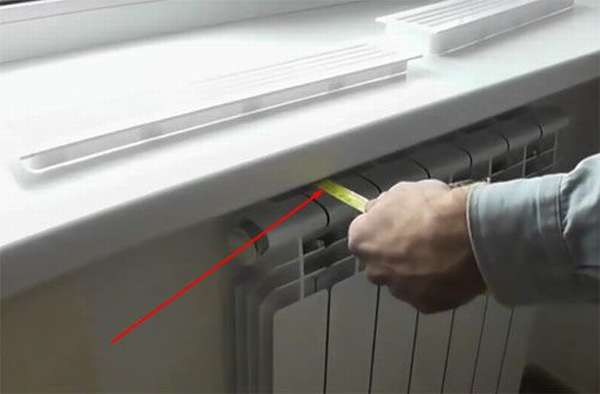
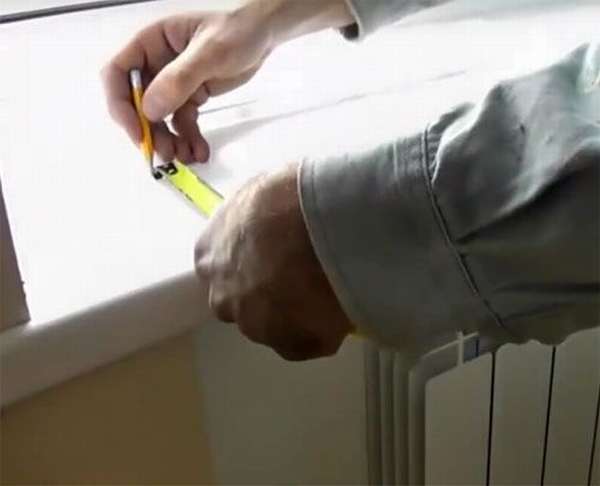
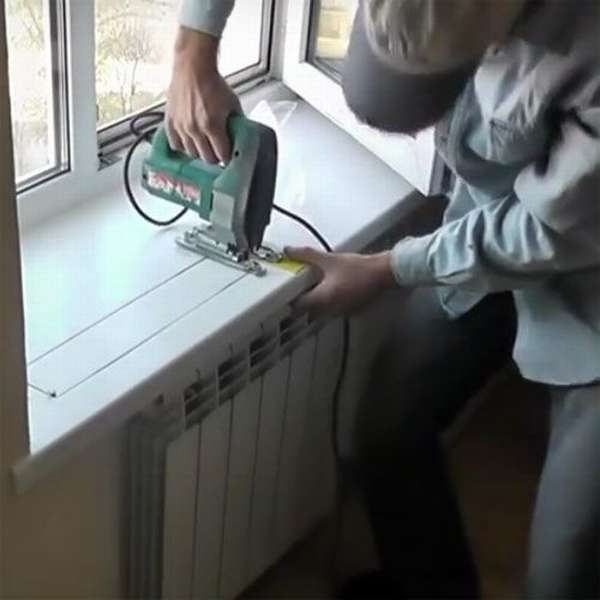
| We measure the depth of the ledge of the window sill with a tape measure, so as not to make a mistake when marking. |
| We mark this parameter at the top. This will be a land beyond which you cannot go. |
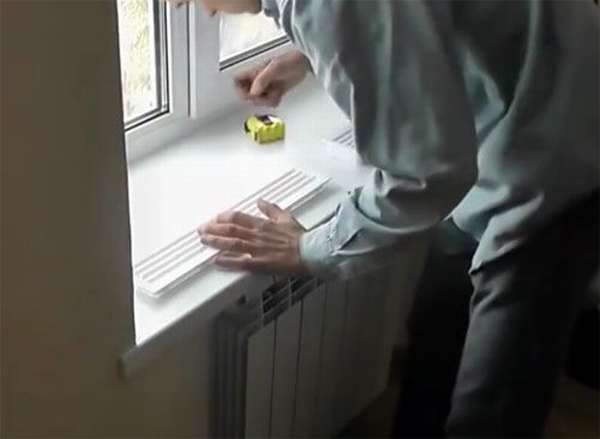
| Now you can attach the lattices as a template, placing them evenly. We outline them with a pencil or marker. |
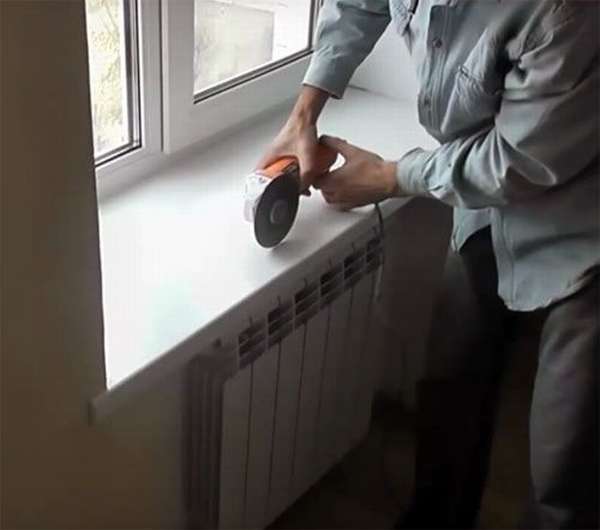
| We saw through with a grinder along the marked contour. You should be careful here - the cut should not go beyond the outlined edges. |
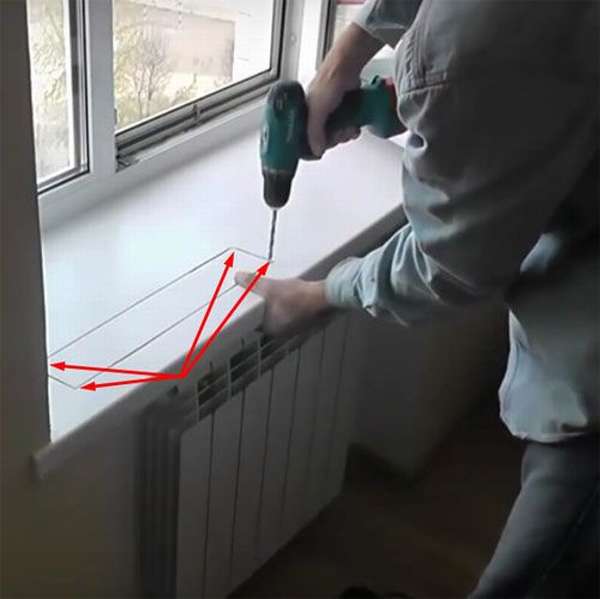
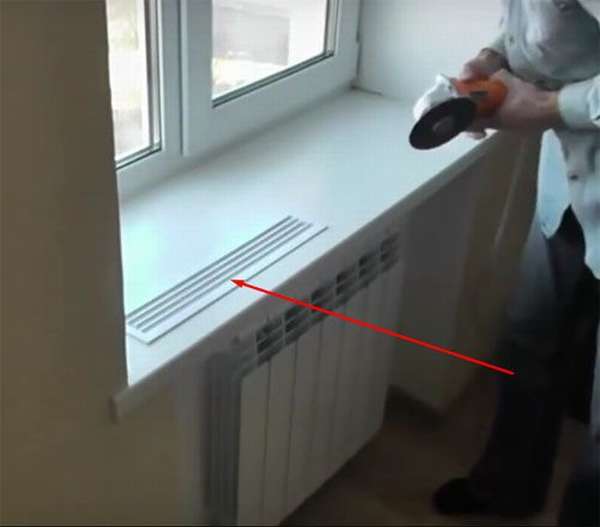
| Drill holes in the corners of the rectangle. For the reason that the grinder's cut-off wheel cannot cut the lower part, we need another tool. |
| Finish cutting with an electric jigsaw. By the way, in the absence of a grinder, you can only do with a jigsaw and an electric drill. |
| Trying on the lattice. If everything is in order, proceed to the installation of the second element. |
| At the end of the work, we coat the edges of the decorative elements with glue or sealant, set them in place and wait for complete drying. For density, you can press them by putting something heavy on them. |
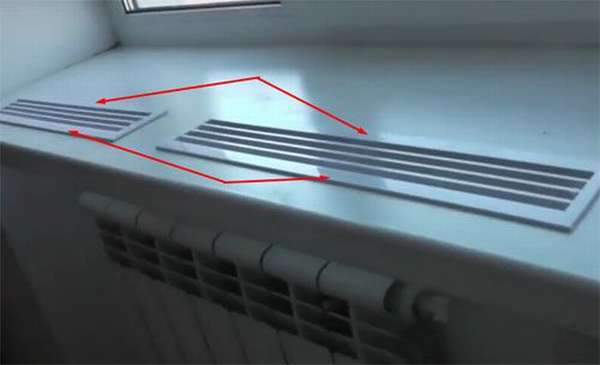
As the dear reader sees, the installation does not present any difficulty.
Homemade decorative grille
Don't know how to decorate heating batteries with your own hands? You can make a decorative lattice yourself.
The sequence of work is as follows:
- A piece of the desired size is cut out of plywood and a pattern is applied to it. When choosing an ornament, do not forget to leave jumpers so that after cutting, some of the necessary elements do not fall out.
- A jigsaw is used to cut a pattern along the contour. All sections are polished with sandpaper.
- Holes are drilled on top of the lattice for fastening along the edges of a niche in the wall, mounting hinges or brackets.
- The grille is opened with a primer and, after drying, is painted in the desired color.
- When the paint is dry, the element can be hung on a niche or a heating appliance.
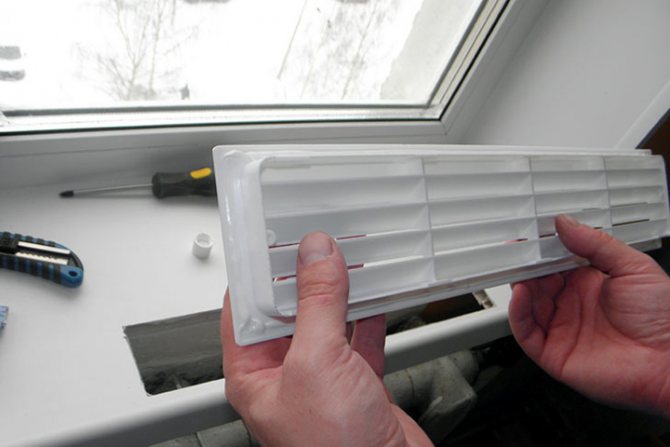
How to properly install ventilation grilles for window sills?
Installation of ventilation in the windowsill is possible with your own hands. This process is very simple, but requires proper grating placement. First, you should make a markup of its location on the windowsill and adjust the place so that it is exactly where the radiator is. Further actions are as follows:
- using a grinder or jigsaw, you should carefully cut a hole;
- then it is necessary to process it with sandpaper so that there are no rough edges and sharp edges;
- place a grate in the hole; if the structure is adjustable, then it should be mounted so that the slats open to the window, and not from it;
- use polymer glue or silicone to fix the grille.
By the same principle, you can install ventilation in a wooden window sill. Carefully work the edges of the hole so as not to spoil the appearance of the surface.
If you plan to put indoor plants on the window, then it is better to use narrow grates so that water does not flow under the windowsill when watering. Installation instructions and procedures can be found in the video tutorial:.
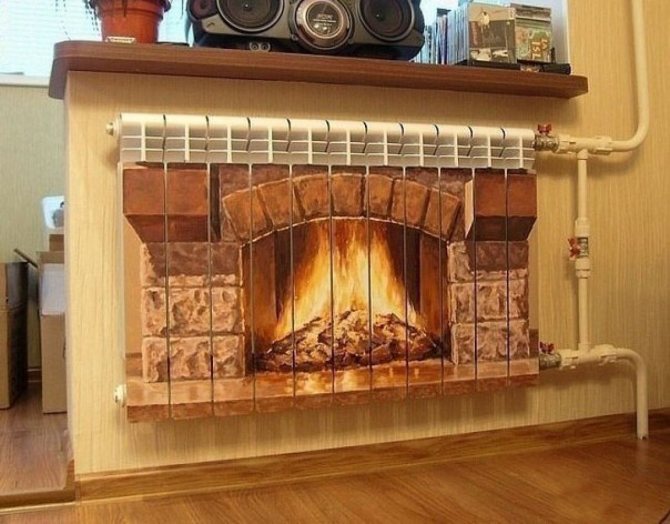
False fireplace
A false fireplace can be made from an ordinary battery. The main thing is that the heater is located on a central wall, for example, in the living room or dining room.
How beautiful to close heating radiators, screens and grilles on batteries
For work use:
- screwdriver;
- saw;
- 10mm plywood;
- furniture board;
- decorative metal lattice;
- pencil and ruler;
- self-tapping screws;
- styrofoam moldings;
- timber with a section of 3x3 cm;
- acrylic paint;
- wooden logs.

The work is carried out in the following order:
- First, make a wooden box without one wide side. The dimensions of the box should slightly exceed the dimensions of the heating device.
- A hole is cut out in the center of the other wide side, and a narrow long cutout is made at the bottom, like a log.
- In the upper part of the box, the fireplace tabletop is fixed, and a fireplace structure shelf is attached between the holes.
- The box is decorated with foam moldings.
- The recesses from the self-tapping screws are putty and then sanded. After that, the fireplace is painted.
- Then on the battery you need to draw a fire that burns in the firebox.
- Now the fireplace box is fixed around the heater so that the surface of the battery with the painted flame is in the center of the largest hole.
- We put real firewood in the “firewood”, and put decor on the tabletop. A metal fence is placed in front of the firewood.
Advice! If the walls of an impromptu fireplace are revetted with a stone or its imitation, then the structure will be indistinguishable from the real one.
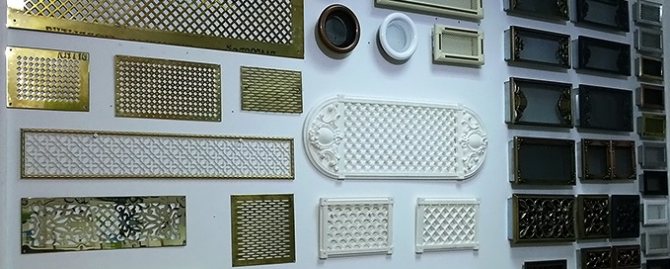
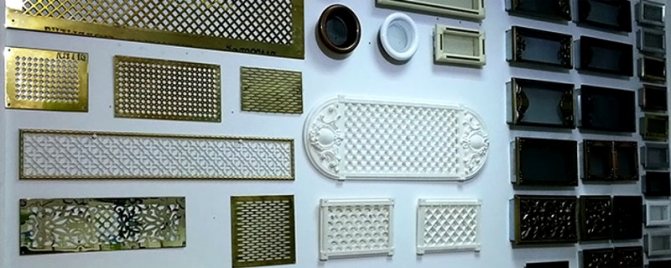
Brass Lattice Processing Technologies
Depending on the type of interior, you can choose brass grilles, the surface of which is processed in different ways:
- Brass with a glossy surface (polished);
- With a matte surface (sanded);
- Light aging effect (matte);
- Medium aging (matt brass);
- Strong aging (matte);
- Anti-aging brass with darkening effect (matt).
Brass rolled metal is capable of undergoing oxygen oxidation. If the outer side of the gratings is not treated with a protective compound, then dark spots appear a little later at the place of contact of the metal with fatty acids and esters (for example, fingerprints).
That is why we treat structures with a solution that forms a film on the surface that prevents darkening. To remove dirt, simply wipe the area with a cloth.
All Design Grille ventilation grilles come with a lifetime warranty.
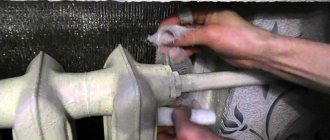
Pipe decoration options


The layout of the heating system in the interior can also be decorated. To do this, pipes are painted in the color of the walls, they are hidden behind plastic boxes or decorated with decoupage. If the walls are decorated with a pattern that will go over the pipes, then the wiring can be made almost invisible.
Ordinary rope can be used to decorate pipelines in the interior. The line is tightly wrapped with it and, if necessary, painted. This method is also good in that heat losses during transportation of the coolant will be reduced, because the pipes are well insulated.
Summarize
Such elements are a fairly convenient way to get rid of dampness and fungus on the slopes, frames of double-glazed windows. And the fact that the cost of plastic products is low, and the installation is quite simple, only adds confidence in the necessity or simply the cost-effectiveness of their installation.
We hope that the information presented in today's article was useful to our reader. If you have any questions, Seti.guru editors will be happy to answer them in the discussions below. Write, communicate, share your personal experience - it can be useful for novice home craftsmen. And finally, we suggest watching a short, but very informative video on the topic.
(
1 estimates, average: 5,00 out of 5)
Decor options for batteries in rooms for different purposes
In rooms for different purposes, the following techniques are used for decorating heating radiators:
- The heater in the living room or dining room can be hidden behind a plasterboard box or a false fireplace. The latter option is suitable for rooms decorated in chalet, Provence, Art Nouveau, as well as modern and classic styles.
- The kitchen battery is hidden behind a metal or plastic screen or decorated using decoupage technique. It is important that the style of the interior supports the chosen option.
- From the radiator in the bedroom, you can make a reading bench, a false fireplace. Also, the device is decorated with painting, decoupage or covered with a decorative screen.
- The heating unit in the nursery should be safe for the little owner, so it is better to close it with a wooden box with beveled corners and paint it in bright cheerful colors.
There are many ways to decorate batteries. From this variety, you can always choose the appropriate option. It is important that the structure does not take up much space in the room, it is functional and beautiful.