Types of heaters
Before starting work, it is better to familiarize yourself with the basic insulation materials for the garage. This will greatly simplify the choice of insulation for finishing the ceiling.
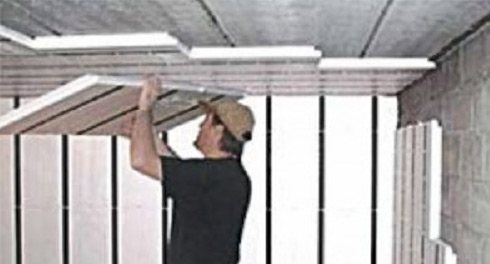
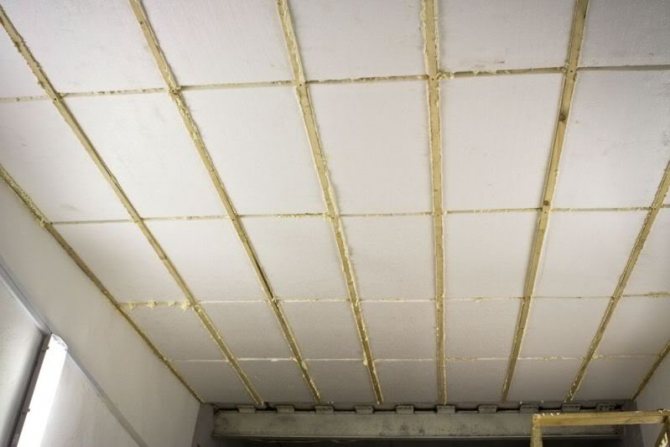
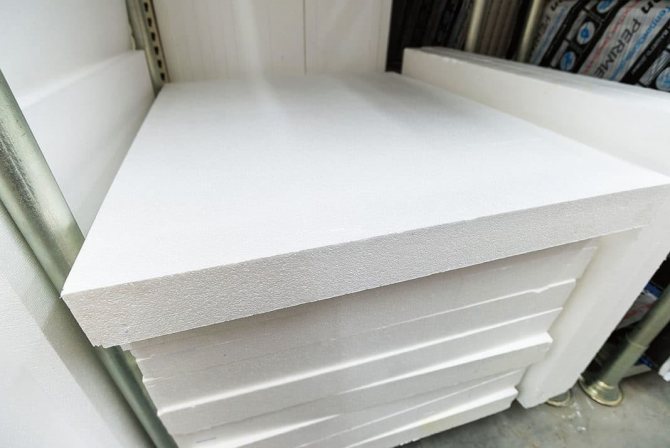
Styrofoam
Styrofoam sheets are considered the most common material for ceiling decoration in garages. Their main advantages are considered to be tolerance to high humidity, resistance to low temperatures, ease of use, low price, as well as long-term heat retention.
However, the sheets also have disadvantages, which it is better to familiarize yourself with before using them. These include poor protection against mechanical damage and high flammability. Experts advise using foam sheets with a size of 100 x 100 mm to cover the ceiling surface.
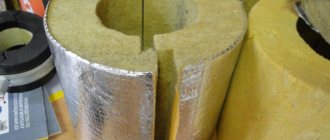
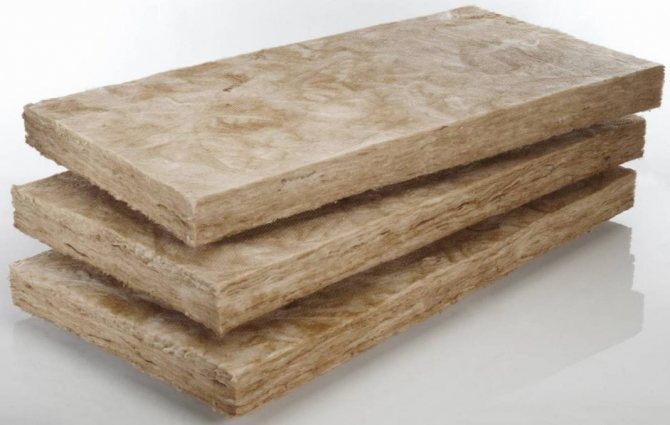
Mineral wool
Many people prefer to make thermal insulation using mineral wool. In this case, two main types of this thermal insulation material are used:
- Slag. It is considered to be of the highest quality and most reliable, since it is resistant to fires and temperature changes. However, builders do not advise using slag-type cotton wool in rooms with high humidity, since in such conditions it will quickly deteriorate.
- Basalt. This type of cotton wool is used in conjunction with a waterproofing material that will provide additional protection against moisture. Among the advantages of basalt material are low price and durability.
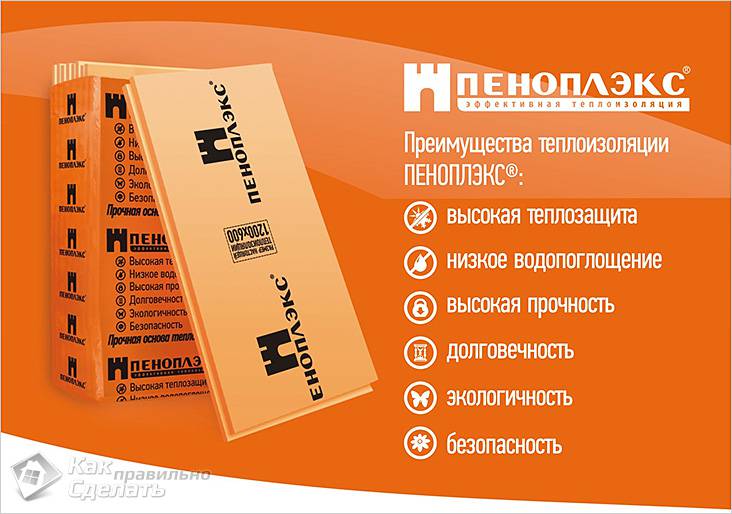
Expanded polystyrene
Some people confuse this material with polystyrene foam, but polystyrene foam has characteristics that are better to become familiar with. Its main advantage is considered to be durability, thanks to which expanded polystyrene does not deteriorate for 20-25 years. Also, the sheets are protected from fire, low temperature and humidity.
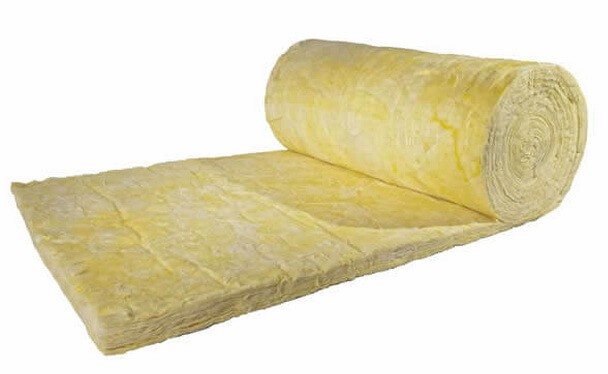
Glass wool
Glass wool is often used to save money, since it is cheaper than most other materials. It must be used very carefully, as it contains crumbling glass chips. Therefore, when working with glass wool, it is worth using gloves to protect your hands and special glasses that protect your eyes.
Expanded clay
Expanded clay is called a porous material that is made from shale and fired clay. It is considered universal, since it can be used to insulate floor coverings, walls and ceilings. Some people use it in horticulture and add it to the soil mixture.
Penoizol
Penoizol is least often used, since it has recently appeared on the domestic building materials market. People who are professionally engaged in insulation of premises are advised to use penoizol. It retains all its properties and does not deteriorate for about forty years.


Simple version of work
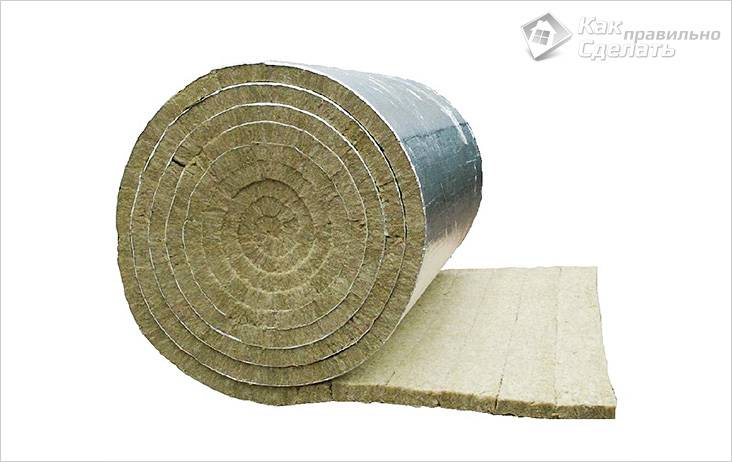
We will analyze the technology of wood floor insulation using rolled mineral wool. The work is very simple, and even those who have no experience in construction can do it.
Materials and tools
To work, you need the following:
| Illustration | Description |
| Roll insulation. Its thickness should be at least 50 mm, if you live in a cold region, then it is better to take a material of 100 mm. It is not difficult to calculate the quantity: you need to know the roof area in the garage.
|
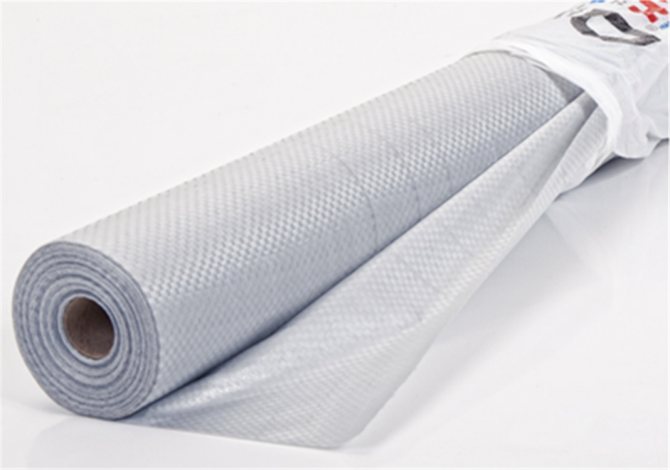
| Waterproofing. It is needed to protect the insulation from moisture penetration. The material must pass steam so that vapors from the mineral wool can freely escape. We recommend laying waterproofing both on the base and on top of the mineral wool, so multiply the garage area by two and do not forget to add 10% to the joints. |
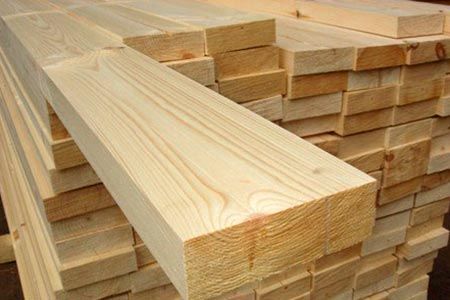
| Board or timber. We will construct a supporting frame from wood for laying the insulation. We used a 25mm board, but you can also purchase a 50mm board to make your job easier. The board must be dry so that the lathing does not deform after assembly. |
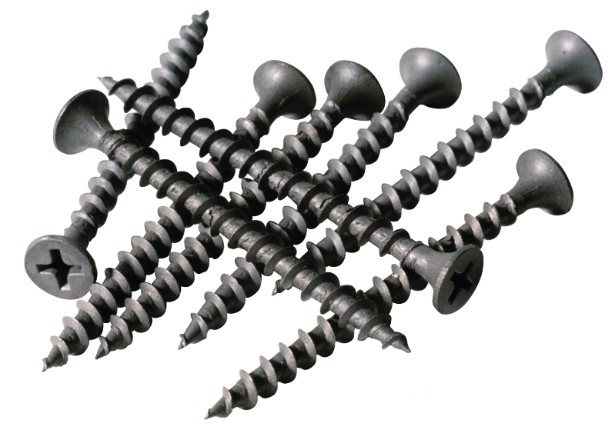
| Self-tapping screws for wood. We need two options: 41 mm and 89 mm. The first type will be used for assembling frame elements and for fixing the OSB slab to the ceiling, and the second for mounting load-bearing elements on the ceiling. |
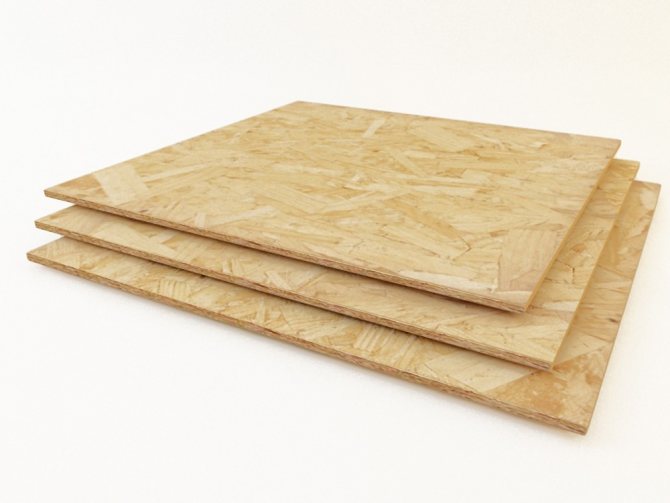
| OSB boards. They are used for lining the ceiling, so the structure will look much more attractive, and the mineral wool will be well protected from moisture changes. Use slabs with a thickness of 10-12 mm, this is sufficient. |
From the tool you need the following:
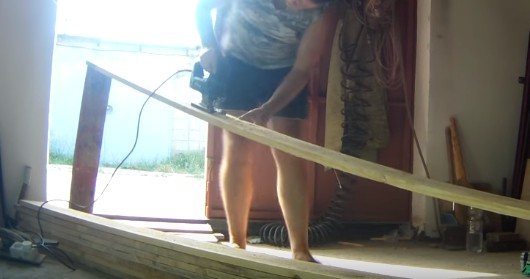
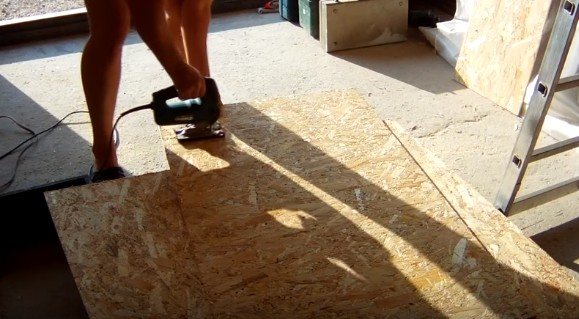
- Jigsaw. With its help, the easiest way is to saw the board and timber. If you do not have a power tool, then you can do with a hand hacksaw, you will not have to cut so much;
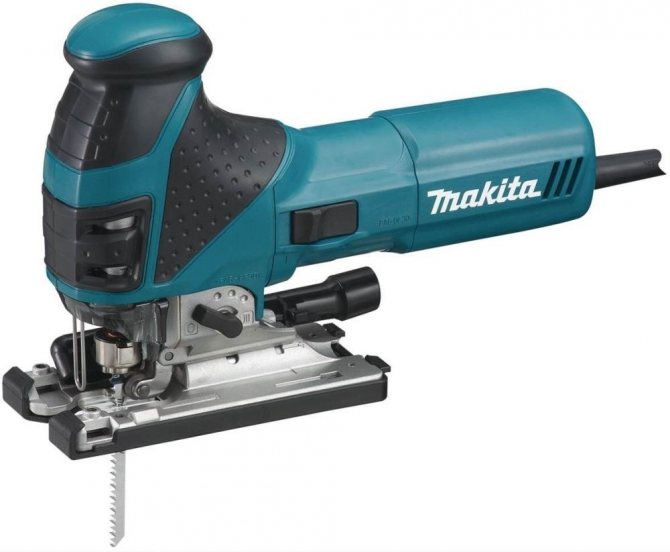
It is convenient to cut a board and a bar with an electric jigsaw
- Screwdriver. Without this tool, you cannot get the job done. It will be used both for drilling holes in wood and for screwing in self-tapping screws. Stock up on the necessary nozzles and drills for wood or metal;

The screwdriver is used the most
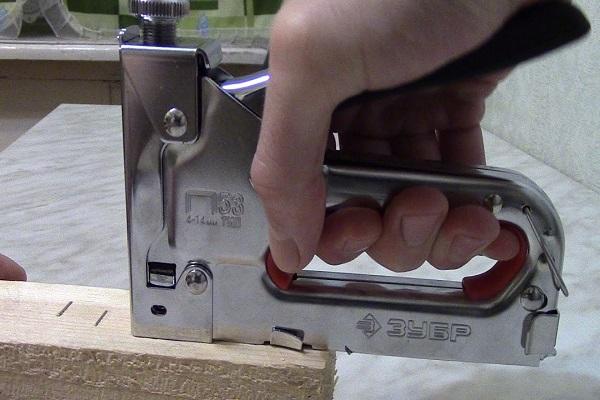
- Construction stapler. It makes it very easy to fix the membrane to the ceiling;
- Construction knife. Needed for cutting mineral wool.

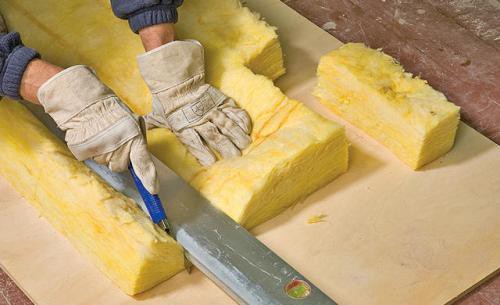
Minvata is cut with an ordinary construction knife
How the work is carried out
Let's figure out how to insulate the garage ceiling. The work instruction consists of the following steps:
| Illustration | Stage description |
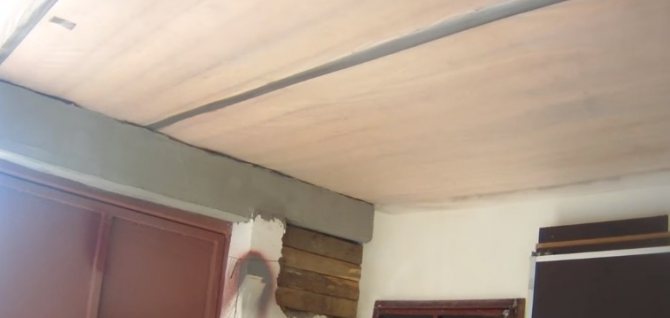
| Before insulating the ceiling in the garage, it is waterproofed. Everything is simple here:
|
| The board can be cut in two. This is done if the width of the lumber is 200 mm or more. The work is simple, but it cuts wood consumption in half. If you have a bar or a narrow rail, then this step is not necessary. |
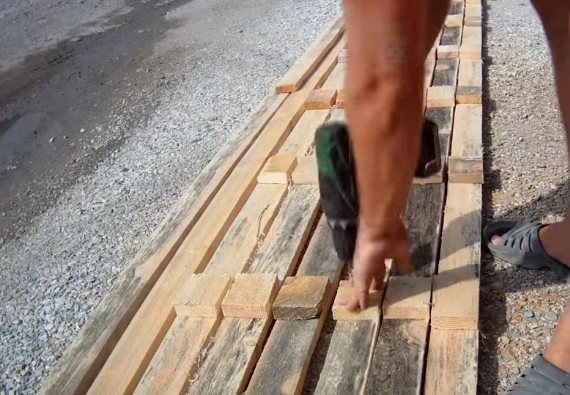
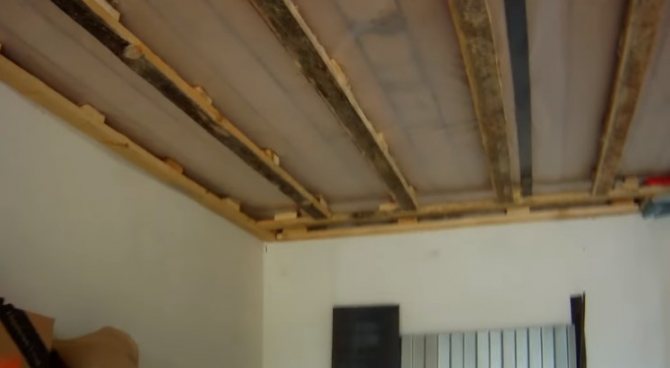
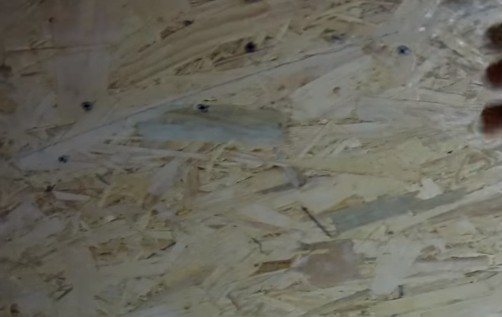
| Sheathing elements are being prepared. Since the thickness of our board is 25 mm, and the thickness of the insulation is 50 mm, on the back side we make spacers from pieces that are located every 50 cm. First, they should be laid out on all boards, and then drilled holes with a diameter of 3.2 mm for fastening with self-tapping screws. |
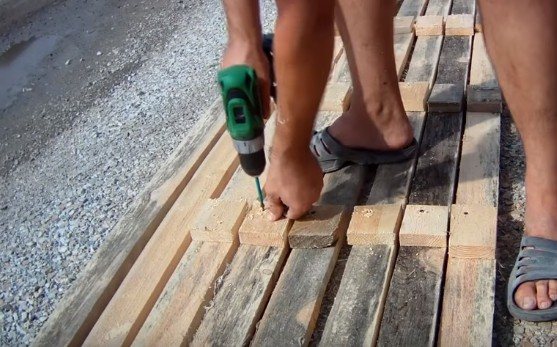
| Self-tapping screws with a length of 41 mm. Thanks to the fact that we pre-drilled the holes, this is easy to do and there is no danger of cracking the board. One fastener is enough for each spacer, no more needed. |
| Holes are drilled to attach the battens to the headliner. For this, the elements are turned upside down. You need to drill through a spacer, so we do not deform the elements during fastening, and even better fix the supports. |
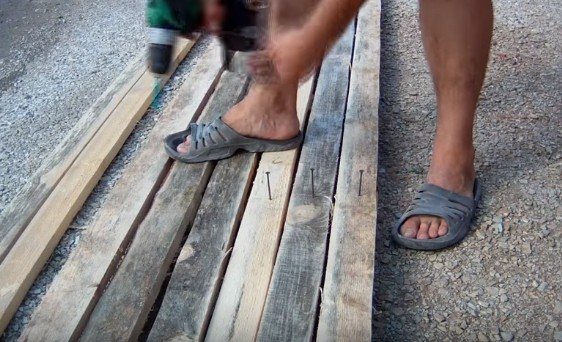
| Slightly screw the 89 mm self-tapping screws into the pre-prepared holes. This will greatly simplify our work later. The fastener must be positioned so that its tip does not protrude from the back side. |
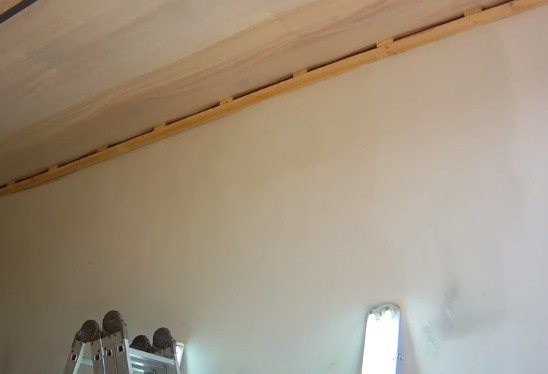
| We fix the rail along the perimeter of the garage.We just install it close to the wall and screw in the pre-prepared self-tapping screws. This element is needed in order to then firmly fix the OSB sheets. |
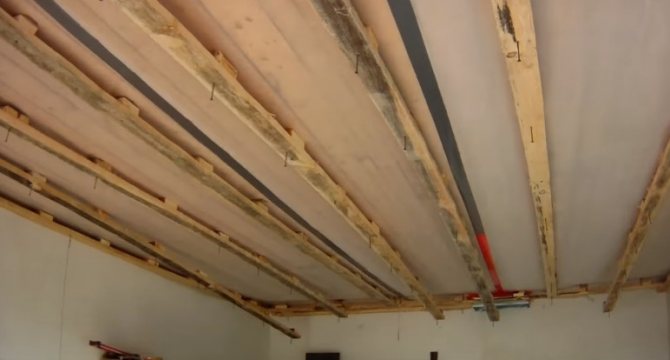
| The initial installation of the frame elements is performed. They are located in increments of 40 cm, so it is convenient to cut the mineral wool (it has a width of 120 cm) and the strength of the structure will be high. Just put the rail on the ceiling and screw in literally 1 self-tapping screw. If anything, you can always rearrange the crate and spend a minimum of time on it. |
| All elements are finally fixed. Since you have screws in place, you just need to tighten them. As a result, a finished structure is obtained with an indentation of 5 cm from the ceiling - just as much as needed to lay the insulation. |
| The thermal insulation material is cut into pieces of the required size. To cut perfectly straight, it is better to use a building rule or a flat wooden strip as a guide. You need to cut the elements so that they are 1-2 cm wider than necessary, this will allow them to fit tightly in the structure.
|
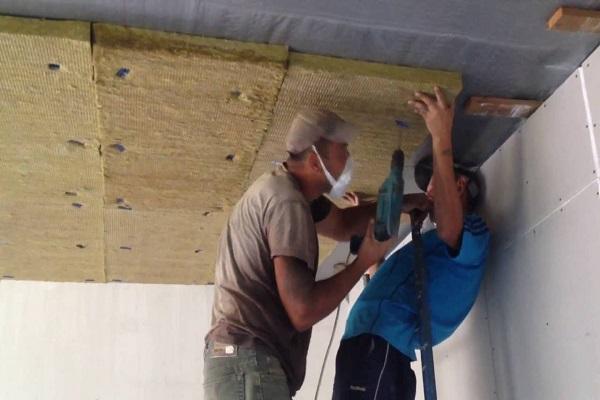
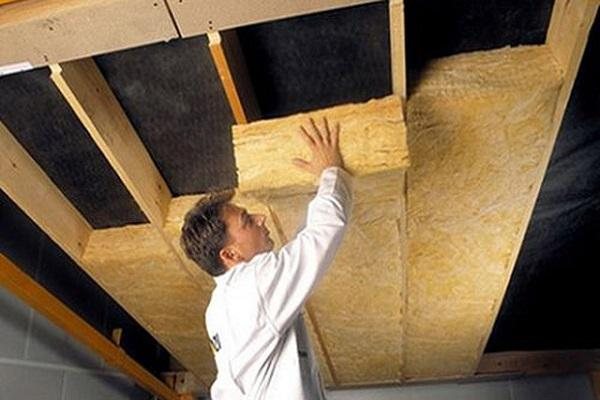
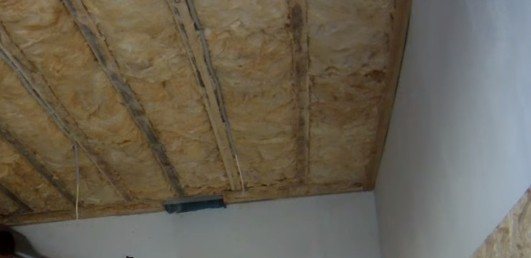
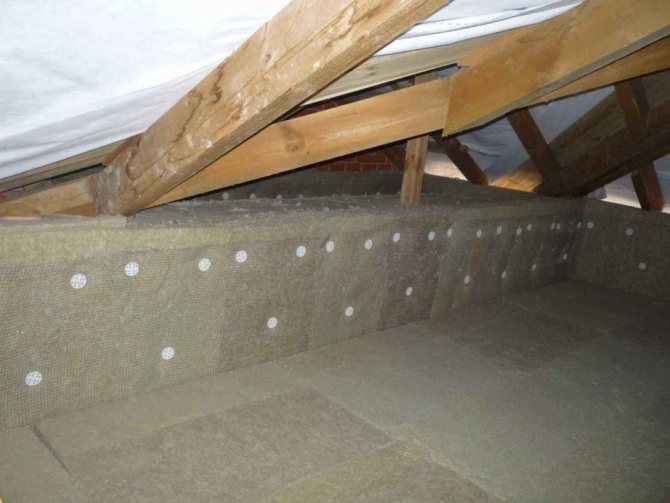
| The heat-insulating material is laid in the crate. Due to the fact that the pieces are slightly wider than the openings in the frame, they fill all the voids well and hold even without any fixation. Pay special attention to the joints of the pieces - there should be no gaps. |
| All niches are filled with insulation. The denser the material is, the better. |
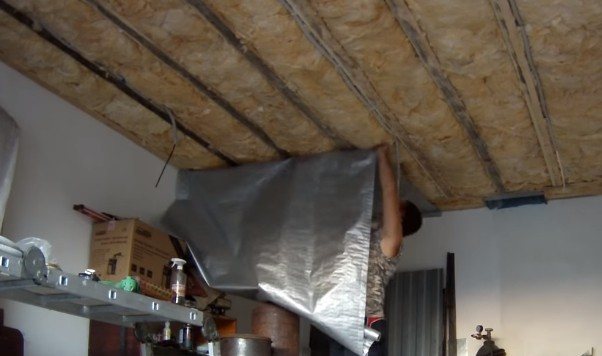
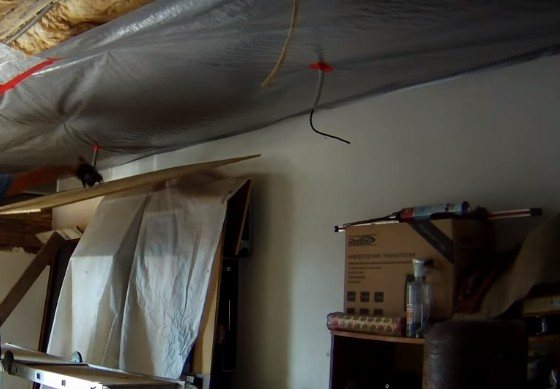
| The surface is closed with a waterproof vapor-permeable membrane. It is neatly positioned on the surface and fixed with a construction stapler. It's not very convenient for one to work, it is better to involve an assistant so that he holds the material, and you fix it. |
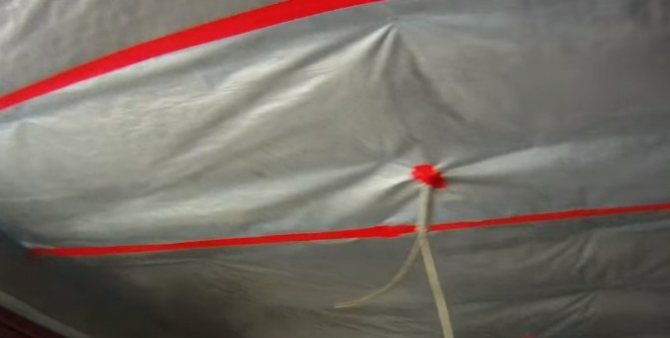
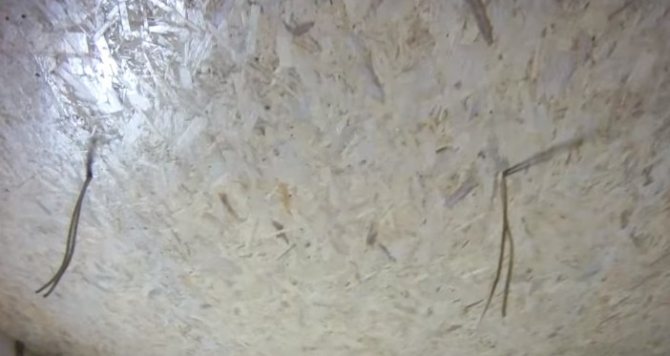
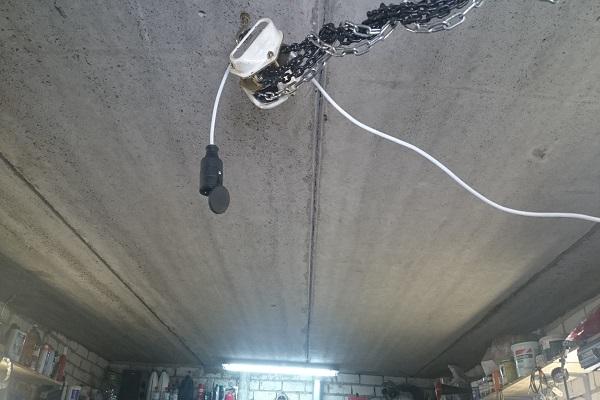
| A hole is made in the film at the place where the wires pass. But it must be sure to seal it with tape after the cable is stretched. This is very important, any damage compromises the integrity of the waterproofing layer. |
| The joints of the film are glued with tape. And do not forget that the edges of the membrane must have 100 mm overlaps. You need to use a special tape, the usual one does not provide adequate reliability. |
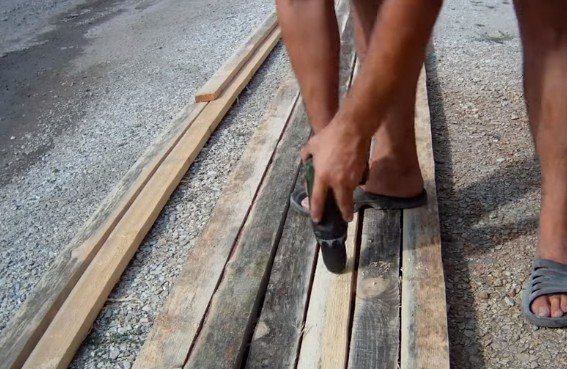
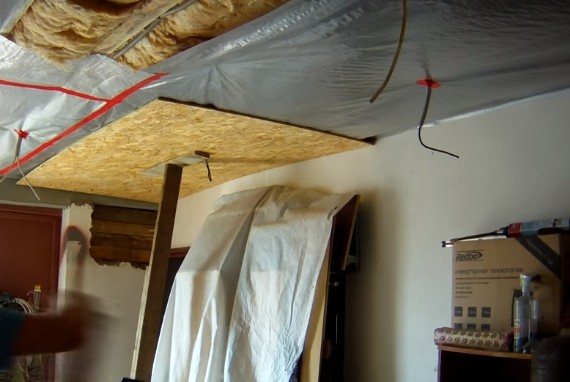
| OSB sheets are attached on top of the vapor barrier. If you work without an assistant, then build the same device as shown in the photo. It looks like a regular mop and should be long enough to place the support on the floor and keep the sheet on the ceiling. So you can fix the material without any problems. |
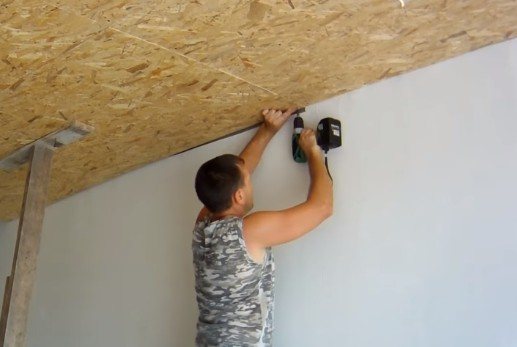
| Fastening is done using self-tapping screws 41 mm long. They are located around the perimeter in 15-20 cm increments and in the middle in 30 cm increments. When screwing in fasteners, do not overdo it so as not to damage the material. Self-tapping screws should be perpendicular to the surface. |
| At the joints of the OSB, the screws are located in a zigzag pattern. That is, the attachments on adjacent sheets should not match. This type of work provides high reliability, and the ceiling will not sag over time. |
| Sheets are cut with a jigsaw. Use fine-toothed blades so as not to severely damage the ends. |
| Holes are drilled in the OSB for the wires. It is best to do the markings in place to avoid mistakes. |
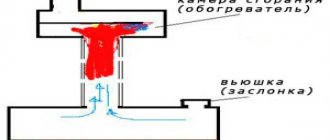
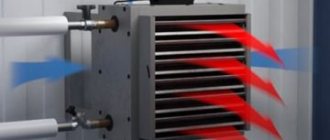
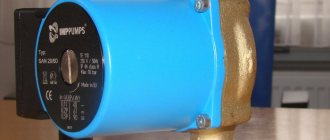
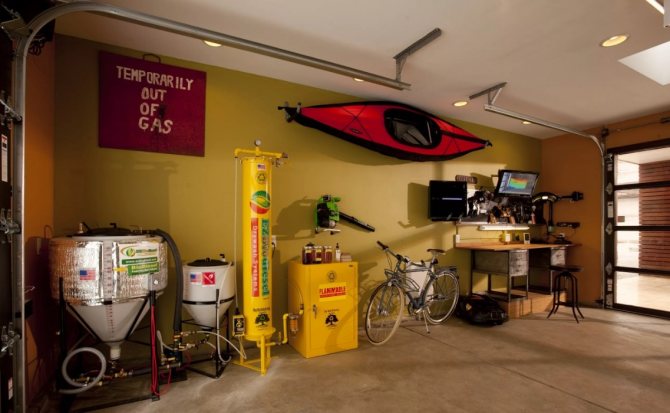
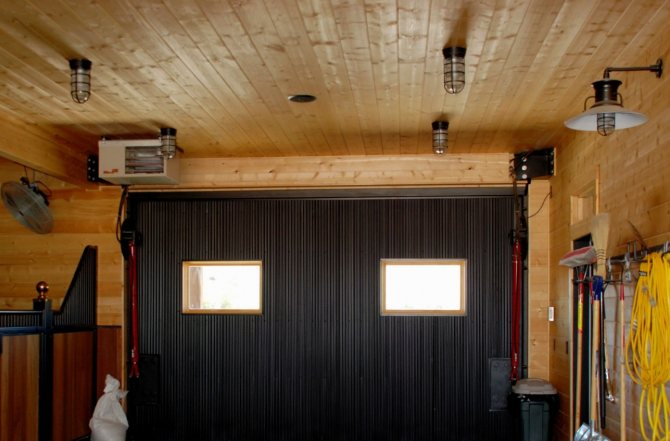
| If you need heating, you can use infrared ceiling heaters for your garage. They consume little energy and allow you to create an optimal temperature regime. |


Required tools
Before insulating the garage ceiling, you will have to familiarize yourself with the list of the main tools that will be needed to complete the work. To install the insulation material, you will have to prepare:
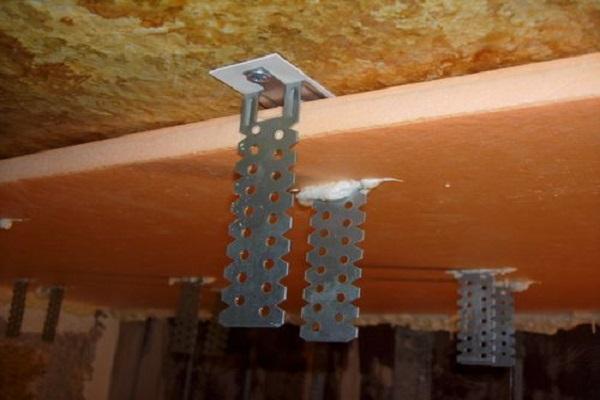
- Self-tapping screws. These are fasteners that are used to secure foam sheets or other thermal insulation products to the ceiling.
- Special glue. Some builders use glue instead of self-tapping screws, which is able to attach insulation to almost any surface.
- Steppler. Sometimes it is impossible to do without a construction stapler, which fixes the insulation with the help of plates.
- Roulette. No construction work is complete without this measuring device. A tape measure is used to measure and determine the optimal width and length of thermal insulation materials.
- Level. Builders advise using bubble levels to help determine and control the evenness of the ceiling surface.
- Saw. Used for cutting dense insulation material. When working with glass wool or mineral wool, scissors are used instead of a saw.
Instructions and stages of work
It is required to insulate the ceiling in the garage in compliance with all technological stages and using the necessary tools.
Materials and tools
The main materials and tools that will be needed for the installation of thermal insulation:
- the selected insulation;
- vapor-permeable membrane for waterproofing;
- dense polyethylene;
- cement mortar;
- mounting foam;
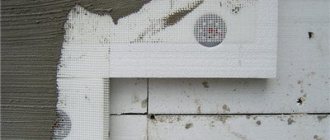
- reinforcement mesh;
- roofing material or bituminous mastic;
- wooden block;
- galvanized profile;
- antiseptic impregnation;
- glue;
- fasteners, scotch tape;
- tools - jigsaw, drill - screwdriver, spatula, construction knife, stapler.
Bars, metal profiles, lining and other external finishing materials are sawn with a jigsaw. A drill is required to secure the layers of insulation. The surface is cleaned with a spatula during preparatory work. Insulation is cut with a construction knife, and a vapor barrier is attached with a stapler.
For finishing from the inside, you will need drywall, plastic panels or other suitable materials.
Preparatory work
Carrying out preparation from the inside requires thorough cleaning of the surface from paint residues, lime, and dirt. Outside - on the roof or attic, you need to remove the old covering and debris. The existing cracks are carefully sealed with cement mortar. Insulating work outside is carried out in dry and warm weather.
Insulation of the ceiling outside
Outside, the roof or floor in the attic is insulated. Thermal insulation work of the attic floor can be carried out in a simple or more complex way. When choosing the first method, a heater is glued to the floor, which is covered from above with plywood or chipboard.
Insulation of the ceiling outside
The sequence of work with thorough insulation is as follows:
- A layer of sand no more than 10 cm thick is poured onto the floor of the attic.
- Thick polyethylene or geotextile is laid out on top, which will serve as waterproofing.
- Backfilling is done with expanded clay and a reinforcing mesh is laid.
- A layer of concrete mortar is poured and left until completely fixed.
Finishing can be omitted.
You can choose another way of attic insulation:
- A crate is made of a bar with a section of 40x40 mm.
- Mineral wool or foam is laid in the formed cells.
- A vapor barrier (for example, plastic wrap) is shot from above with a stapler.
- The final layer is laid with boards, chipboard or plywood.
Wood materials need to be coated and painted.
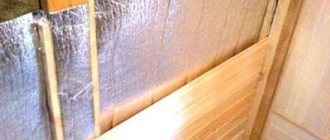
Roof insulation implies laying roofing material, and on top of it penofol.The final finishing can be slate, metal profiles, roll roofing.
Preparing the surface for insulation
Before carrying out work on the insulation of the ceiling, they are engaged in preliminary surface preparation. Despite the fact that the preparatory work is easy, it is still better to familiarize yourself with the nuances of their implementation in advance.
The indoor ceiling surface is completely cleaned of dirt and old finishing materials. After cleaning from dirt, the surface is carefully inspected and checked for mold or mildew.
If, when examining the ceiling, a fungus with mold was detected, you will have to get rid of them. To clean the surface, use bleaching agents or other solutions with similar properties. However, bleaches can help eliminate new fungus. If it is deeply embedded in the coating, you will have to completely remove the affected area and recoat it with a primer.
Experts advise, before insulating the ceiling, to cover its surface with primer mixtures, which contain antiseptic trace elements. These components will protect the ceiling from mold. Also, for priming, mixtures are chosen that are quickly absorbed.
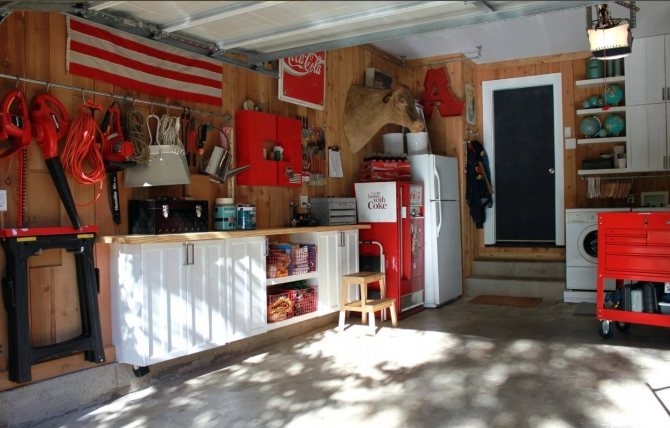
Do-it-yourself ceiling insulation in the garage from the inside
Remember one important thing: no insulation of the garage will be effective in low temperatures if there is no heating source from the inside... First of all, insulation is necessary to keep heat in the garage, not to let it go outside. If the insulation is done in order to prevent cold from outside, it is a waste of money: after a while the cold will penetrate into the garage and there will be a negative temperature in it.
Don't believe me? Go to an abandoned country house in the middle of winter, if you forgot a bottle of water there, then there will be ice in it. But how well the insulation is done can be checked by the time the temperature drops in the garage. If the insulation material has a low thermal conductivity, then the heat will be retained longer. Add to this vapor barrier and waterproofing - get a set of works on the insulation of the garage.
There are garages in the basement of the building. Here, the smells from the garage should not be allowed to spread throughout the house.
The requirements for a detached garage are the same: the warmth must stay inside... If, for example, they worked in the garage during the day and maintained the temperature of 10-15 degrees, then this temperature will drop overnight, the heater will turn on automatically. How often it will turn on depends on the quality of the insulation.
A budgetary option for insulation is gluing polystyrene foam PPT-25NAR, 1000x1000x50 mm to the ceiling, sheets are easily cut off, light weight. Measure the area of the ceiling. Buy slabs and fixing materials to cover this area. One slab weighs a little more than 1 kg and is attached to the ceiling with liquid nails or adhesive solutions. All that needs to be done is to prepare the ceiling: clean it of dirt and grease stains. Seal irregularities and seams with a quick-drying plaster.
If the ceiling is even, then it can be planted with glue, and if there are irregularities, then it is better to use an adhesive solution.
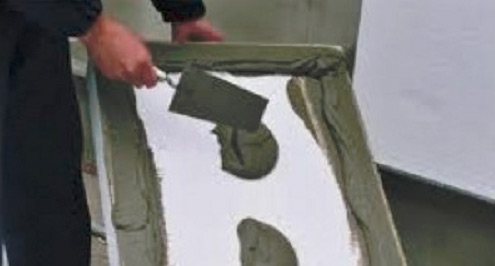
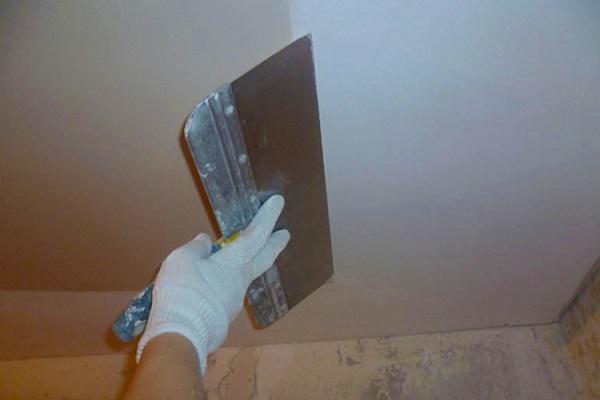
Apply the mortar to one side and level evenly over the entire surface with a notched trowel, then press it against the ceiling, hold for a few seconds, apply a level and watch how the tiles lay. There are rebated slabs on the market. They are better, the seams are almost invisible. Expanded polystyrene does not absorb moisture, after finishing work, plaster the entire surface for fire safety purposes.
Ceiling insulation technology
In order to properly insulate the ceiling in the garage with your own hands, you will have to deal with the nuances of the process outside and inside the room.
Outside
It is advised to insulate the garage outside only if there is an attic above the garage. When performing insulation work, the following sequence of actions is followed:
- The ceiling is thoroughly cleaned of old finishing materials, dust and dirt.
- The surface is upholstered with wooden bars, to which the insulation will stick.
- The thermal insulation material is fixed to the bars with a stapler, screws or glue. If there are wide gaps between the wooden beams and the insulation, they will have to be blown out with construction foam.
- The insulation is covered with geotextile or other vapor barrier material.
After the outer part of the ceiling is insulated, the heat-insulating layer is covered with a crate and finished.
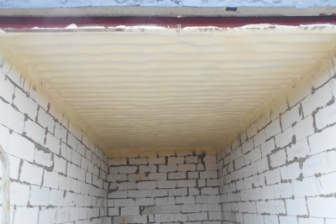
From within
For internal installation of insulation, it is not necessary to sheathe the ceiling with wooden bars, and therefore the adhesive solution is applied directly to the material and the ceiling. Cavities in the area of joining seams are filled with glue or construction foam. Some builders fix the edges of the insulation with dowels for greater reliability.

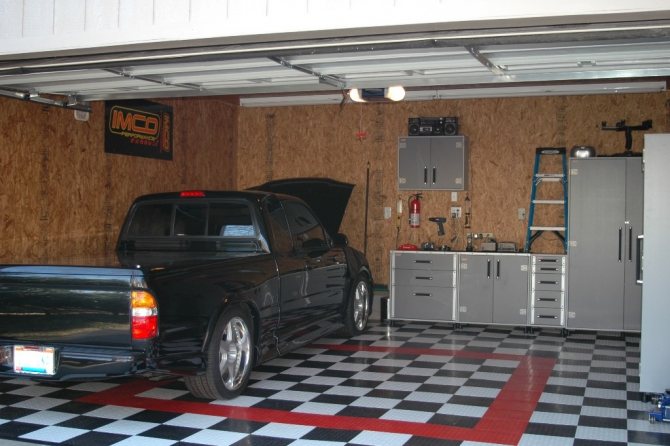
Why, in general, do you need to insulate the ceiling?
Speech in this article, as you know, is not about iron garages, but capital ones. And they, as a rule, are made of concrete, which, without proper protection, strongly saturates moisture.
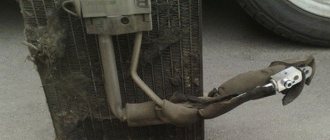
And moisture is the first enemy of the car, as it provokes the rapid development of corrosion on metal parts.
In addition to moisture, temperature also matters. If it is very cold outside, so does an uninsulated garage. This means that if you put a car heated up while driving, then as it cools down, condensation will form inside.
This harms the electrics, the body and everything that is possible inside.
The issue of insulation is especially relevant for those who put the car in the garage for a long time, for months. Just one winter spent by a car in an unprepared garage can significantly ruin it.
Also, one cannot fail to take into account the fact that roofs in concrete garages very often have cracks. That is, during the rainy and snowy season, water can constantly drip onto the car.
So, it is necessary to insulate the roof of the garage and this is not at all an excess. Moreover, it is not difficult to do it with your own hands, especially if you do not do it from the side of the attic.
What materials are used for cladding
After the ceiling is insulated, the surface is finished using various materials. With traditional cladding, the following are used:
- Plaster. Most often they use plaster mixes, which not only level the surface, but also additionally protect it from high humidity. Also, when plastering, a finishing putty is used, which can be painted in the future..
- Wood. Some people prefer wood, which will make the garage space cozier. For finishing, sheathing boards, wood paneling and beams are used. The main advantages of such materials are considered their aesthetics, thermal insulation and environmental friendliness.
- PVC. Another common facing material is PVC panels. Their advantage is the simplicity and speed of installation. Even a person who has never been involved in repair and construction work will be able to sheathe the ceiling with such panels.
Roof insulation
When buying material, you need to consider region of residence... The features of the climate are different everywhere, the insulation must be selected taking into account these conditions. For northern areas, the materials used should be more durable and dense.
The most common thermal insulation: fiberglass, polymers, mineral wool. Popular modern analogues include: astratek, penoizol, polyurethane foam, etc. Gable roofs allow insulation both from the inside and outside; single-pitched ones are easier to insulate from the inside.
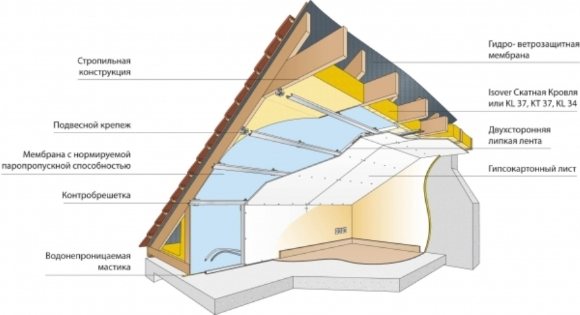
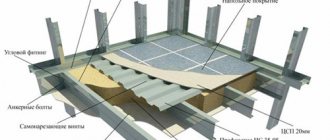
Roof insulated garage represents a "pie". If we consider it from the bottom up - from the inside to the roof, the following sequence is obtained:
- facing material;
- vapor barrier film;
- thermal insulation layer;
- waterproofing;
- roof.
Vapor barrier
It should be noted that waterproofing and vapor barrier materials can replace each other, since they have similar characteristics. For protection against fumes indoors are used:
- polyethylene film;
- polypropylene film;
- membranes.
Polyethylene films can be produced with the foil side directed into the interior of the room, can be smooth, without a single hole or perforated. Perforated used as waterproofing, solid - for vapor barrier.
Warming
You can save money on insulationusing as an insulating layer sawdust, but such protection cannot be called effective. In this sense, modern materials are much preferable, since they are distinguished by high rates of thermal insulation and fire resistance.
- Mineral wool - material with good technical characteristics. Due to the fact that it can get wet, it requires the mandatory installation of steam and waterproofing layers.
- Glass wool is a combustible material, although it is cheaper than other heaters. Available in rolls, work with it must be carried out with gloves.
- Styrofoam lightweight, does not get wet, and when it is pre-impregnated with fire retardants, it spontaneously extinguishes when ignited.
- Penoizol - liquid foam - fills in all the cracks and gaps, forming a one-piece monolithic block, and in its qualities is in no way inferior to other heaters.
IMPORTANT! So that the materials fulfill the load assigned to them and at the same time be environmentally friendly, without harming human health.
Waterproofing
Manufacturers do not skimp on the release of such materials, offering many options to the attention of numerous buyers. Builders in this case prefer polymer mastics and special membranes.
The membrane is rather thin (1-2 mm.), consists of several layers tightly glued to each other. Moisture does not accumulate under it. Withstands temperature differences in the range - from -60 C to +120 C, can serve more 50 years... Polymer liquid compositions are applied using a roller, are suitable for various roof structures, do not require repair work. A thin film is formed that is resistant to moisture and sunlight.
The roof takes the load from the outside and from the inside. Outside, rain, snow, strong wind hit it, and from the inside it is exposed to various vapors and too cold (if the room is not heated) air. In order not to succeed, as in the fairy tale about 3 piglets, in 2 of which the houses collapsed, you should know everything construction subtleties.
Read about how to make a cellar, a viewing pit, a caisson and a basement in the garage.