
Composition and production of extrusion insulation
The extruded heat insulator is made of small polystyrene granules and a blowing agent. The entire production process can be broken down into the following stages:
- Polystyrene granules are poured into an extruder and the substance is heated to 130-140 ° C.
- Foaming additives - porophores are added to the mass.
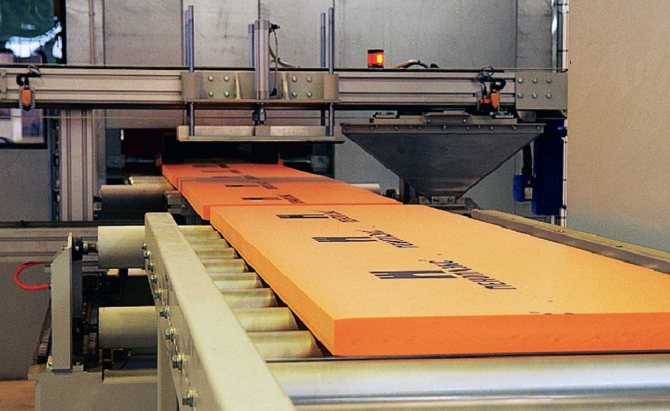
- The formed foam is squeezed out of the extruder, the composition is fed to the conveyor.
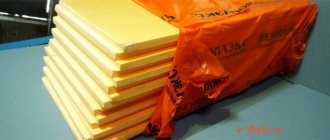
- The continuous sheet is cut into mats of the desired size and packed.
Extrusion method provides dense structure of insulation with the smallest pores. Freon evaporates from the cells, and atmospheric air fills its place.
To improve technical characteristics, in addition to polystyrene and porofols, the composition contains a number of additives:
- flame retardants - reduce flammability;
- antioxidants - prevent destruction during the operation of the insulation and prevent thermal oxidation at the stage of processing;
- modifiers, antistatic agents, light stabilizers - increase resistance to negative external factors.
Material specifications
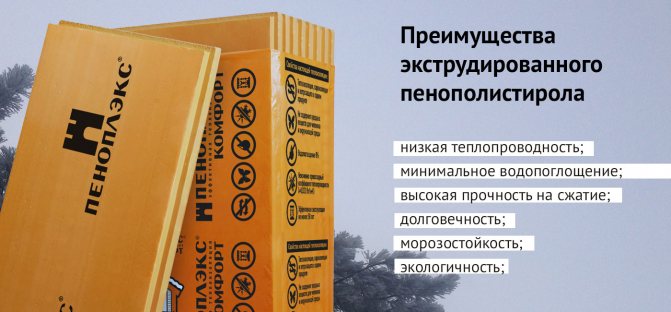
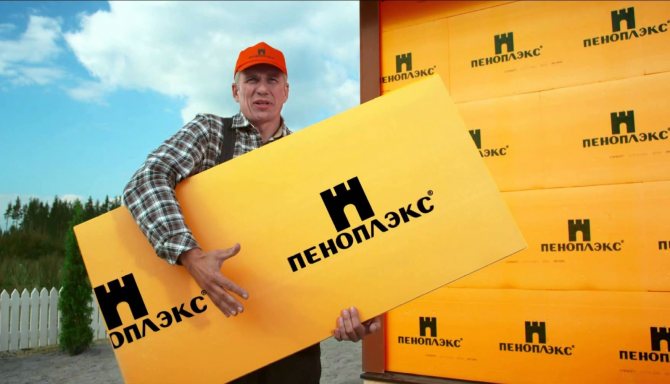
The most popular representative of extruded insulation is Penoplex. The properties, pros and cons, as well as the features of the use of a thermal insulator, will be considered with respect to this material.
Specifications:
- density - 25-35 kg / m3, depending on the category of thermal insulation;
- compressive strength - 0.20-0.27 MPa;
- water absorption per day - up to 0.4% of the total volume;
- tensile strength - 0.25-0.4 MPa;
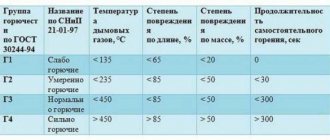
- fire resistance - group G3 - middle class (smoke temperature within + 450 ° С, burning duration - 300 sec);
- thermal conductivity index - 0.03 W / (m * ° С);
- operating temperature - from -100 ° С to + 75 ° С;
- standard dimensions of slab insulation: width - 60 cm, length - 1.2 m, thickness - 20-150 mm.
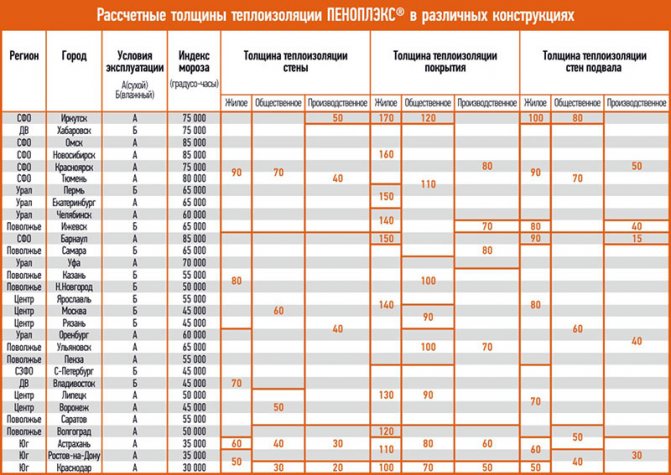
Calculator for calculating the thickness of wall insulation with Penoplex
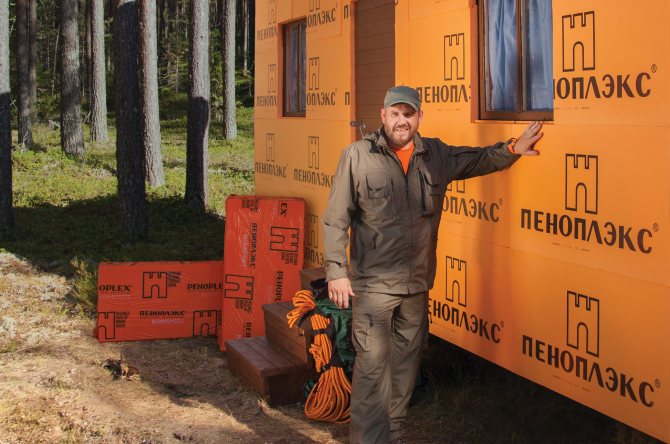
Penoplex is a popular brand of extruded polystyrene foam, the name of which has become a household name. This material is characterized by excellent thermal insulation and strength characteristics, excellent durability and resistance to negative external influences, which makes it a universal insulation for a wide variety of building structures, from the foundation to the roof.
Calculator for calculating the thickness of wall insulation with Penoplex
Very often it is used for wall insulation. But here's the question - Penoplex is produced in a fairly wide variety of thicknesses, from 20 to 150 mm. What option should you choose for your home? The best thing is to carry out some calculations, with which a calculator for calculating the thickness of wall insulation with Penoplex will help us
Some explanations for the calculations will be given below the calculator.
Calculator for calculating the thickness of wall insulation with Penoplex
Explanations on making calculations
The "work" of any insulation material is that it, included in the overall structure of the wall, due to its pronounced low thermal conductivity, would compensate for the "deficit" of thermal resistance required to achieve the normalized value. These values of resistance to heat transfer are established by the current SNiP for various types of building structures and for different regions of Russia, depending on local climatic conditions.
- It will be more convenient for the user to determine the desired value using the schematic map below. Please note that there are three values set for each region, which are different from each other.In the case under consideration, we are naturally interested in the indicator "FOR WALLS" - it is indicated in purple.
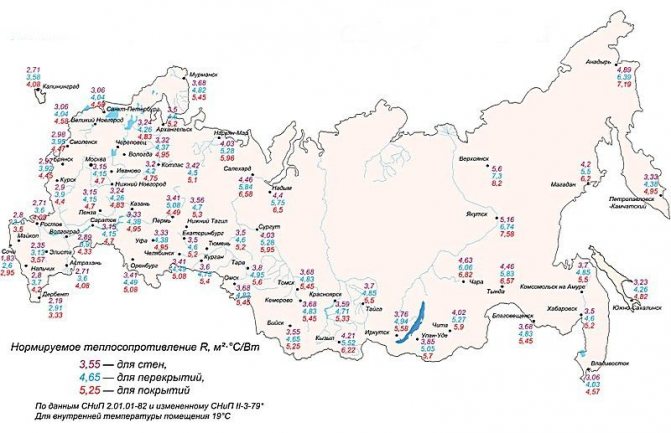
Schematic map for determining the required thermal resistance value
- The thermal conductivity coefficient of penoplex has already been entered into the calculation program, and it is not required to indicate it.
- Further, it is necessary to enter the value of the thickness of the insulated wall and indicate the material of its manufacture: each of the building materials has its own thermal characteristics.
- The next item is the exterior wall decoration:
- If the scheme of decorative cladding is applied according to the principle of "ventilated facade", then the finishing layer will not have any effect on the overall insulation of the wall, and it is not taken into account.
- When using the "wet facade" technology, that is, with the application of a reinforced plaster layer and, then, external decorative plaster, the finishing can be taken into account in the overall calculation, since its thermal resistance will be added to the general indicator of the wall.
- Similarly, you can take into account the finish made from one or another sheet (panel) sheathing, if no ventilated gap is left between it and the foamlex.
- The last block of the calculator - these are similar questions, but already concerning the interior decoration of the wall. It is clear that some materials, for example, a thin layer of putty followed by painting or wallpapering, will not bring anything significant to the "piggy bank" of insulation. But wood sheathing (or wood composite materials), cork finishing, plastering, especially with the use of “warm” plasters, can seriously affect the required thickness of external wall insulation, and it makes sense to take them into account.
- The result will be displayed in millimeters. It is easy to compare it with the standard thicknesses of the foam in order to choose the desired type of insulation boards.
If suddenly the calculator showed a negative value, then this suggests that external insulation with Penoplex is not required at all.
How to carry out independent wall insulation with Penoplex?
The technology cannot be called too complicated, but nevertheless it will require strict adherence to all recommendations, otherwise the insulation layer on the wall may simply "shoot back" and collapse. The nuances of technology are described in detail in the article of our portal dedicated to warming the mill with penoplex .
Strengths of Penoplex
Numerical indicators will allow us to draw a conclusion about the operational properties of Penoplex insulation. The strengths of the material include:
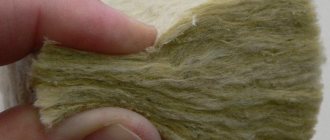
- Low thermal conductivity. Closed honeycomb structure promotes heat retention - the effectiveness of thermal insulation is superior to that of mineral wool and isolon.
- Minimal water absorption. Moisture does not penetrate inside the material. Water can only seep into external damaged cells. Minimal water absorption allows you to lay Penoplex without additional waterproofing.
- Resistance to mechanical stress. Thanks to extrusion, the cells inside the porous material are evenly spaced, which significantly increases the strength of the insulation. Under heavy loads, dents about 1 mm deep are likely to form.
- Ease of installation. Penoplex slabs are lightweight, which means that there are no problems with raising the material to a height. An additional plus - no weighting of the structure.
- Durability of operation. Many manufacturers of extruded polystyrene foam give on their products 50-year guarantee... The term is not overstated - the insulation has passed multiple tests.
Useful: Extension of the veranda to the house
How is the installation of Penoplex insulation
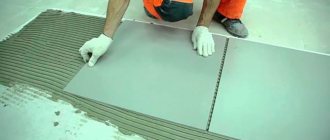
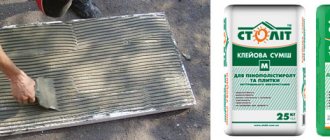
Plates are easy to cut and glued to a special compound
Installation of insulation boards is extremely simple. The material can be easily cut even with an ordinary knife.It is necessary to calculate the required amount of Penoplex in such a way that there are no gaps between the slabs.
To correctly calculate the number of penoplex slabs for your object, you can use the following penoplex calculator.
Keep in mind that the next time the material for the same room will come in handy no earlier than forty years later.
Disadvantages of extruded polystyrene foam
When planning the use of Penoplex, it is worth considering its weaknesses:
- High flammability and smoke generation. The self-extinguishing rate depends on the amount of flame retardant additives. After a ceasefire, the insulation emits acrid smoke.
- Toxicity. On contact with UV rays, Penoplex produces toxic vapors, so the material recommended for insulation outside the house.
- Susceptibility to certain reagents. The thermal insulator deforms under the influence of organic solvents and petroleum products. Penoplex is afraid of kerosene, oil paints and polyesters.
- Poor steam permeability. It is important to consider this quality when insulating a wooden house or frame structure. The use of Penoplex for thermal insulation of walls leads to the appearance of a thermos effect in the room. The problem can be solved when arranging forced ventilation.
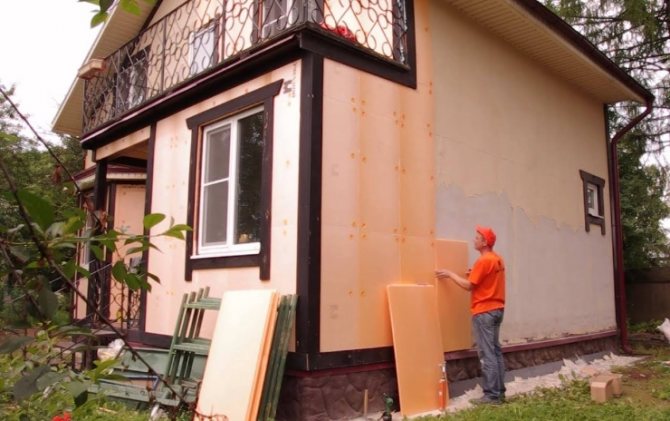
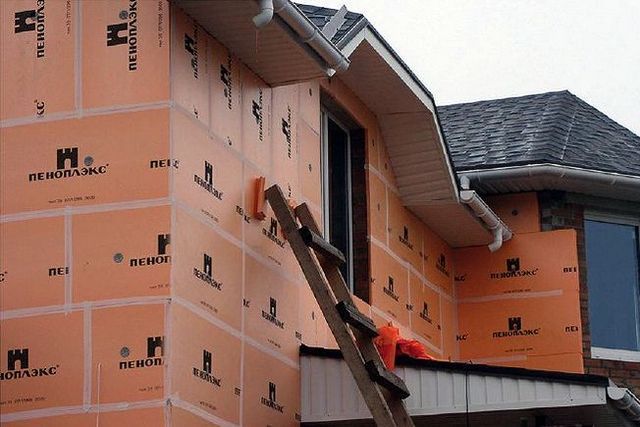
Application and installation
Facade
The use of foam for insulating a house outside has rather high quality indicators, but it will not be available to everyone, since the price of such a heater is several times higher than the prices for all similar goods (25 or 35 density foam).
To carry out the work you will need:
- clean the walls from dust, debris and grease stains;
- using a front roller or a wide brush, prime the base to strengthen it before carrying out the main work;
- installation of each sheet of foam is made on special glue and then fixed with foam dowels;
- The finishing of such a facade after insulation with penoplex is most often decorative plaster - "Bark beetle" or "Lamb".
All types of foam and any thickness are used for walls.... The choice will depend on the financial capabilities of the consumer and the characteristics of the building itself.
Plinth
Dowels for fixing should be evenly distributed over the area of the sheets, ideally 5 pcs. per sheet
This insulation option provides for:
- gluing penoplex around the entire perimeter of the house at the level of the basement by the type of facade insulation - with glue, but with additional fastening to dowels;
- after that, the insulation should be covered with a special plaster on the insulation, which can isolate the entire penoplex as much as possible from the effects of the environment on it;
- the basement is finished in a variety of ways: basement siding, profile sheet, clinker tiles and even decorative plaster.
Related article: How to determine the presence of wiring in the wall
Foundation
After the complete completion of the insulation work, the entire perimeter of the foundation must be covered with sand to cover the penoplex
Most of the heat goes through that part of the house that is closest to the ground - the foundation, so its insulation requires a special approach, and penoplex will be an ideal material for this.
The process of carrying out work on the insulation of the underground part of the building is very simple:
- The foundation - the load-bearing wall of the house, which is located below ground level - is cleaned of mortar residues.
- Further, waterproofing is applied over the entire area of the base to be insulated with foam. It can be bituminous mastic or dry waterproofing mixture. Work is best done with a wide brush. (You can read about how to properly waterproof a strip foundation with your own hands in this article).
- This is followed by the process of installing the penoplex - gluing each sheet separately on the same mastic or special glue for insulation. Foam dowels are used as additional fasteners. The only prerequisite is a continuous coating, which will make it difficult for heat to escape and prevent condensation from accumulating.
- Penoplex must be covered with a waterproofing film and only then carry out the accompanying drainage work.
It is best to use penoplex with a maximum thickness of 50 mm for insulation.
We also bring to your attention an article about the universal type of "Comfort" penoplex.
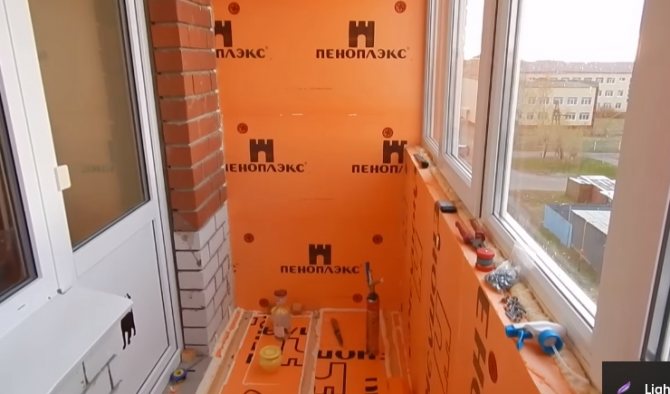
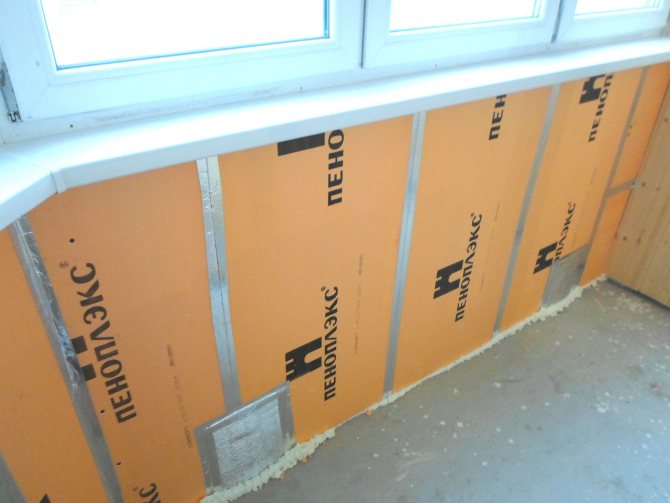
Balcony
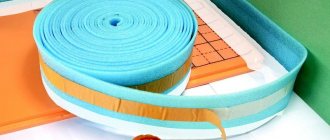
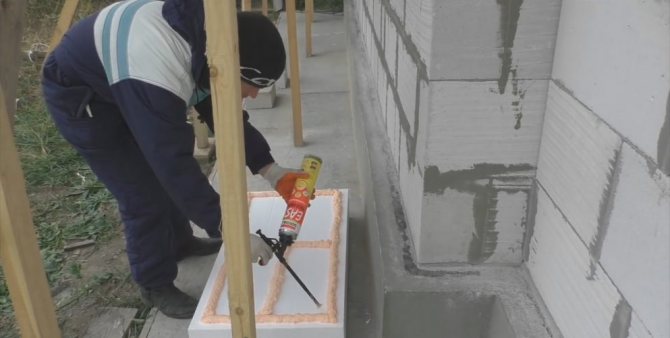
Seams and joints between the insulation for reliability should be sealed with glue foam or liquid foam
This part of the apartment is responsible for the preservation of the heat that goes out through the balcony block, so you need to act here with all responsibility.
Work on the insulation of the balcony with penoplex is carried out in stages:
- Alignment of all insulated surfaces.
- The foam is fastened by driving in fasteners - dowels for insulation.
- Before decorative painting, the penoplex is completely plastered and kept for 12 -24 hours until the adhesive mixture is completely dry.
When using PVC or MDF lining, the process will be slightly different:
- the foam is fixed by driving in fasteners - foam dowels;
- foam sheets are very quickly and reliably fixed between the crate;
- finishing the balcony with clapboard does not require an additional insulating layer.
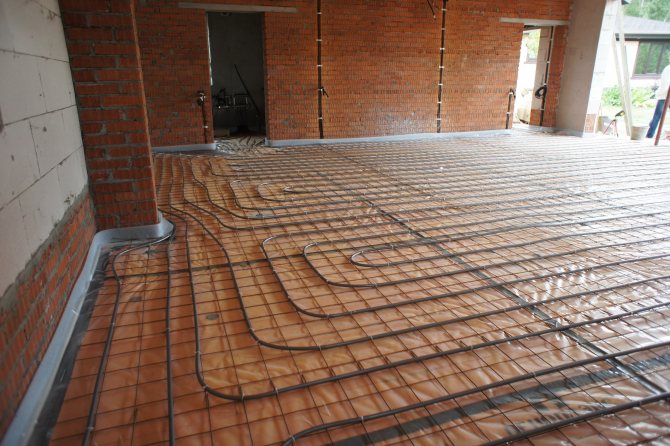
Thermal insulation of the floor under the screed with extruded polystyrene foam occurs by connecting the sheets using the existing grooves.
If it is planned to install a wooden floor, then the sheets of the penonex are stacked between the logs, having previously covered the floor with a waterproofing film.
The device of a warm floor on such insulation as penoplex is quite safe even without the use of additional insulation.
Thermal insulation of the floor in an apartment building will also create an additional layer of sound insulation. It is advisable to use insulation sheets with a maximum thickness of 40-50 mm.
Read how to insulate the floor in a private house with your own hands here.
Considering all of the above, we can conclude that such insulation as penoplex can be used in any room and under any weather conditions. The described options are far from all, for example, with penoplex, you can insulate a bathhouse and even a garage. The only condition will be the thickness of the foam sheet, on which the quality of the insulated surface directly depends.
We bring to your attention a video on the comparison of different types of penoplex:
Scope of application of the pressed insulator
Penoplex is actively used to insulate various structural elements of buildings. The material is in demand when performing the following works:
- Insulation of the foundation. Barrier insulation reduces the depth of soil freezing, prolongs the waterproofing period.
- External insulation of the house. Massively used for private houses and thermal insulation of apartment buildings, offices. It is possible to insulate a frame house with Penoplex, provided that there is effective ventilation.
- Insulation of the floor, interfloor ceilings. Penoplex is sometimes used as a substrate for underfloor heating.
- Thermal insulation of roofing cake, attic room.
- Insulation of balconies and loggias.
Reviews of those who insulated, prove the effectiveness of Penoplex. The measures taken significantly reduce heat loss and reduce heating costs.
Penoplex types: application features
Insulation is classified by purpose. The manufacturer took into account the peculiarities of using the material in different conditions and "corrected" a number of parameters.
It is not difficult to understand the classification. The name itself speaks of the scope of application of the pressed insulation:
- Penoplex-Wall. External insulation, installation under plastered facades. Plinth finishing increases the energy saving of the house, creates a noise barrier... The density of the material is 25-32 kg / m3, the strength index is 0.20 MPa.
- Penoplex-Foundation. In addition to the main area, it is in demand for warming septic tanks, arranging garden paths on a cement-sand base. Density - 29-33 kg / m3, strength - 0.27 MPa.
- Penoplex-Roof. Suitable for warming the attic, used as a heat-insulating layer in the composition of the roofing cake. Density - 28-33 kg / m3, grade strength - 0.25 MPa.
- Penoplex-Comfort. A universal material used for floor insulation, loggias, walls, roofs. The density is 25-35 kg / m3, the compressive strength is 0.20 MPa.
Penoplex 45 fits for thermal insulation of flat roofs and areas subject to significant traffic, such as highways. The density of the brand is 34-47 kg / m3, the strength characteristics are 0.50 MPa.
The use of insulation for the floor Penoplex Foundation
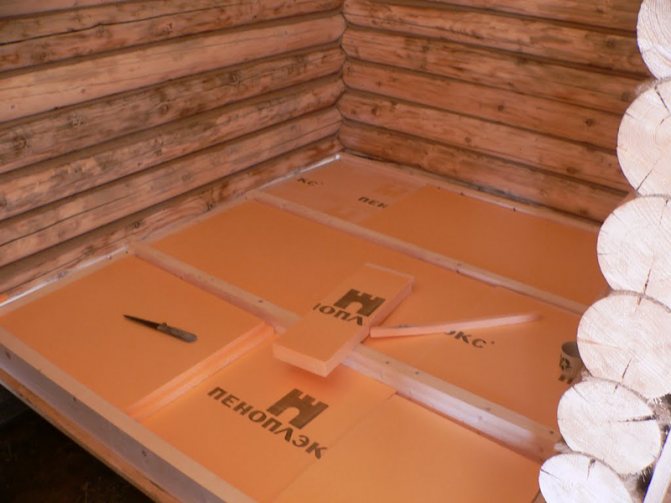
Penoplex Foundation is excellent for floor insulation
The floor is one of the most vulnerable surfaces in a home, especially if the apartment is on the ground floor. Incorrect screed, poor parquet or its complete absence, as a rule, cause serious heat transfer, which in turn causes unnecessary consumption of electricity for heating.
When choosing floor insulation, you should in particular pay attention to the level of moisture absorption. It is he who largely becomes the reason for ineffective repair insulation work, since the floor is often exposed to contact with water. When the water reaches the very material with low moisture absorption, the air in the cells is replaced by droplets, which then freeze and render this piece of insulation useless.
The special model of the boards Penoplex Foundation has a zero level of moisture absorption. Plates can withstand any weight without being deformed.
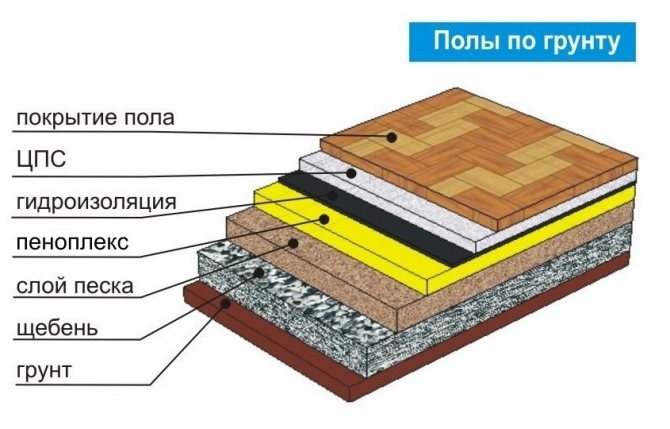
Warming of floors can be carried out in various ways:
- with preliminary sand and gravel processing,
- over ventilated undergrounds,
- on top of a concrete slab,
- between floors.
How to properly insulate a house
The tactics of performing work is determined by the scope of use of the extruded heat insulator. Fixation on vertical surfaces is often carried out with glue for insulation; on horizontal coverings, sheets are fixed with dowels.
Useful: Skylights: types, nuances of selection and installation
Wall insulation technology
The whole process of wall insulation on the ground floor you can do it yourself... For high-altitude work, it is better to attract professionals with special equipment.
During installation, be sure to use insurance. It is better to enlist the help of an assistant who will feed the panel material.
Sequencing:
- Preparation. Clean the walls of dirt, remove the remnants of finishing materials, dust the surface. Remove visible defects and irregularities - level with plaster.
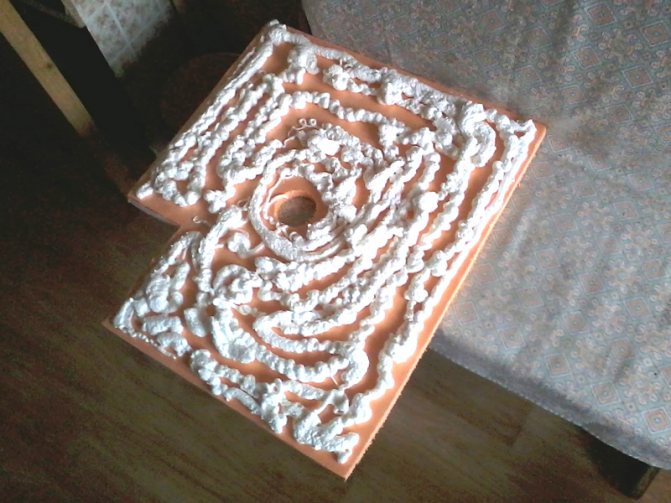
- Bonding. Apply the glue in an even layer to the board and press the insulation against the wall. Installation is carried out from the bottom row, as a support - a basement profile.
- Anchoring. Fixation is carried out after 3 days - after the glue has completely dried. Dowels are fixed at the rate of 4 pcs. for 1 sq. m, near windows and doorways - 6-7 pcs. for 1 sq. m.
Finally, foam the joints between the sheets. If a two-layer insulation is required, the slabs are laid out in a checkerboard pattern.... The final stage is the installation of a reinforcing mesh and plastering.
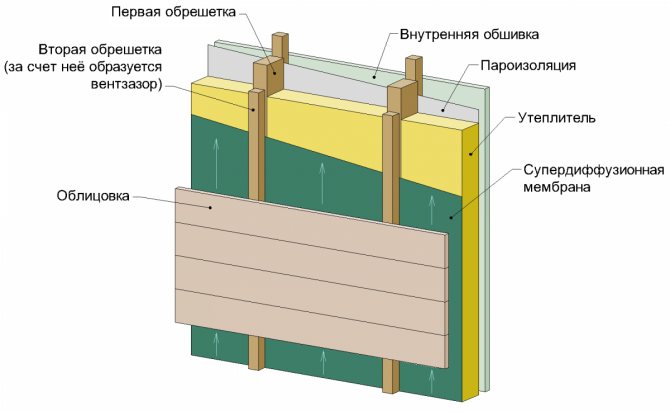
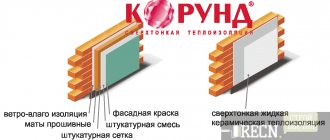
An interesting option for insulation with siding is double-sided slabs. The inner side is extruded polystyrene foam, and the outer side is decorative trim. Such material greatly simplifies the work. In one pass, it is possible to thermally insulate and revet the walls.
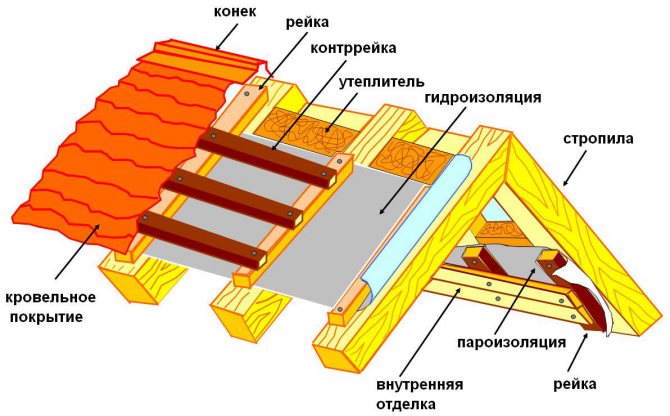
Roofing
The roofing cake is formed in the following sequence:
- Internal cladding.
- Lathing.
- Moisture resistant vapor permeable membrane.
- Penoplex.
- Rafter system.
- Windproof membrane.
- Roof covering.
Installation of insulation is performed when the rafters are assembled, the crate is nailed.
Stages of work:
- Install the starting rail at the bottom of the rafters.
- Lay out the slabs staggered.
- Fasten the material with self-tapping screws, glue the seams with tape.
- Fill the bars on top - the slats will provide a ventilation gap.
- Fill the crate for the installation of the roof covering.
Features of fastening to different types of walls
Houses and industrial buildings are built from various materials, each of them has features of wall insulation technology.
Brick
Rough brickwork has pronounced differences in height and unevenness, which interfere with the tight fit of the foam and reliable fixation to the glue. Therefore, the masters recommend combining various fastening methods:
- assembly glue;
- liquid Nails;
- dowels;
- self-tapping screws;
- cement mortar;
- polyurethane foam.
Before installation, the rough base should be prepared and primed. Drill holes for dowels with a puncher.
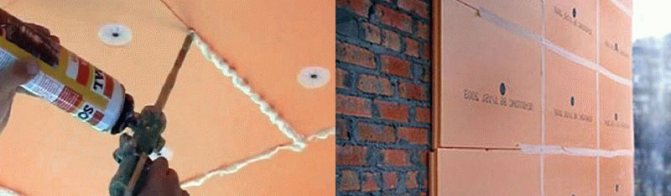
To fix the foam to a brick wall, it is recommended to combine methods, for example, use glue and dowels
Wooden
It is better to insulate wooden walls from the outside in order to avoid reducing the space of rooms and excessive moisture inside the house. Walls insulated with foam stop breathing - this is a minus of such insulation. Under the influence of changes in humidity and temperature throughout the year, the wood changes its size and remains unstable. A wooden house must be in place for at least one year and shrink.
Preparation of the base consists in leveling the surface with a plane, filling cracks and impregnating with antiseptics and fire retardants.
For fastening, a two-component glue is used that retains elasticity after drying, it prevents the sheets from peeling off during the thermal expansion of the wood.
Additionally, the sheets are fixed with self-tapping screws. If you plan to finish the facade cladding using a frame, then the insulation panels are laid in the crate cells.
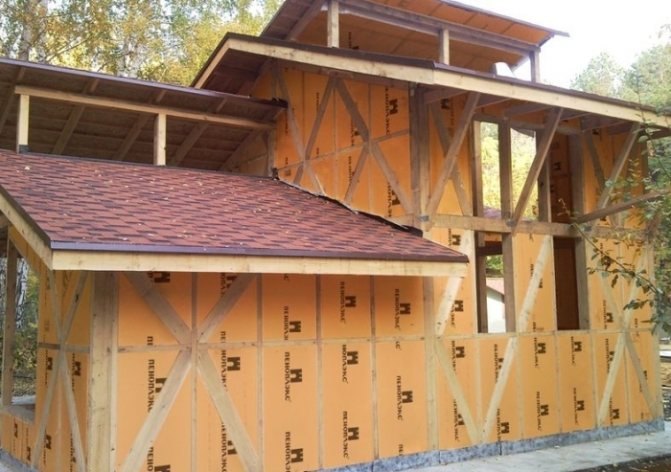
It is recommended to sheathe wooden walls with insulation outside
Blocky
Gas-block walls should not be left open, they absorb moisture and damp. It is imperative to treat the wall before insulation with impregnation, which reduces the consumption of glue and strengthens the structure of the base.
If the wall is uneven, it can be processed with a drill with a chisel attachment, cutting off the protruding parts. Fastening is done on the crate, if the finish is chosen in the form of wall panels and on glue and dowels, if frameless cladding is planned.
Before fixing the penoplex, the block wall must be treated with a special impregnation
The joints of the slabs should not coincide with the technological seams, each next row should be fixed with an offset. The adhesive composition should not contain aggressive chemicals that can damage the penoplex.
Concrete
The concrete base is very porous and highly absorbent. In this case, the consumption of glue is increased, and the adhesion is low. To solve this problem, it is necessary to treat the concrete with an impregnating soil. It will fill micropores and strengthen the structure of the material, increase adhesion, and also save the adhesive composition.
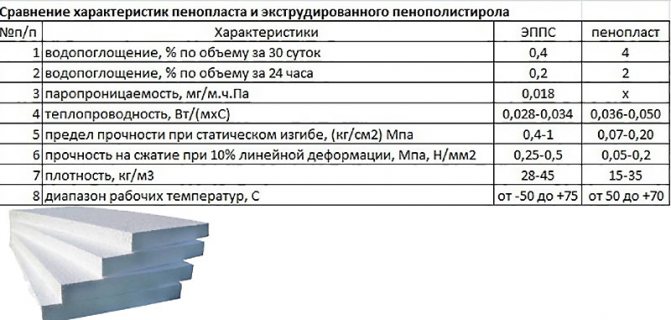
Penoplex and expanded polystyrene: comparison of materials
By insulation polystyrene foam is meant ordinary foam. Like Penoplex, it is produced in slabs, the maximum thickness of the heat insulator is 500 mm. For wall insulation, sheets of 50 mm or more are used, and a lower value is permissible for the ceiling.
Polyfoam is also made by foaming using expanded polystyrene granules. However, there is no compression extrusion step here. As a result, large cells are formed in the structure. This affects the strength of the insulation - foam is less rigid than Penoplex.
Expanded polystyrene is inferior in terms of thermal efficiency, density and water absorption. The level of vapor permeability of foam and Penoplex is comparable.
Knowing the purpose, forthcoming loads and operating conditions of extruded polystyrene foam, it is easy to choose the optimal type of Penoplex.Do-it-yourself installation of insulation, in addition to facade work at a height - in this case, you will need the help of construction climbers.
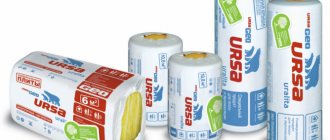
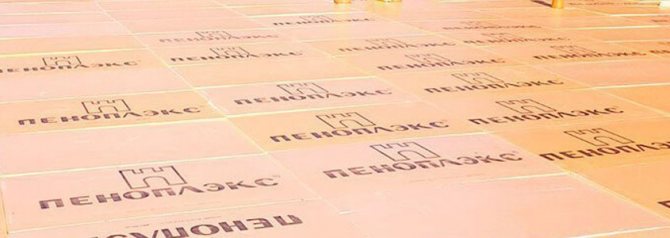
Dimensions and weight, quantity calculation
Penoflex thermal insulation boards can be of different thicknesses, so the packaging can have different sizes, it can contain a different number of sheets. It should also be noted that the dimensions of the slabs are indicated without taking into account the spikes / locks.
| Name and thickness | Dimensions (L / W) | Amount in a package | Insulation area per package | Packing volume |
| Comfort 20 mm | 585 * 1185 mm | 18 pcs | 12.48 m2 | 0.273 m3 |
| Comfort 30 mm | 585 * 1185 mm | 12 pcs | 8.32 m2 | 0.2704 m3 |
| Comfort 40 mm | 585 * 1185 mm | 9 pcs | 6.24 m2 | 0.2493 m3 |
| Comfort 50 mm | 585 * 1185 mm | 7 pcs | 7.69 m2 | 0.2429 m3 |
| Comfort 100 mm | 585 * 1185 mm | 4 things | 2.77 m2 | 0.2772 m3 |
| Foundation 50 mm | 585 * 1185 mm | 7 pcs | 7.69 m2 | 0.2429 m3 |
| Foundation 100 mm | 585 * 1185 mm | 4 things | 2.77 m2 | 0.2772 m3 |
| Pitched roof 100 mm | 585 * 1185 mm | 4 things | 2.77 m2 | 0.2772 m3 |
| Wall 50 mm | 585 * 1185 mm | 8 pcs | 5.55 m2 | 0.2776 m3 |
There are two methods for calculating the number of packages: using the volume or area of the package:
- You know the area to be insulated, find the area of the insulation of the required thickness in the package and divide the area to be insulated by this value. For example, you need to insulate 15 squares; plates with a thickness of 40 mm will be used. Insulation area in the package - 6.24 m². Consider: 15 / 6.24 = 2.4 packages.
- To calculate by volume, we multiply the area to be insulated by the thickness, we get the required volume. Further, by analogy with the example above, we divide the found figure by the volume of one package. We get the number of packages of insulation. Let's calculate for the same case: 15 m² * 0.04 m = 0.6 m³. According to the table, one package of this material has a volume of 0.2493 m³. we find the number of packages: 0.6 / 0.2493 = 2.4 packages.