Chimney on the roof - we do it reliably, tightly and safely
When installing a chimney on the roof, it is necessary to solve a number of problems, such as ensuring effective draft, sealing the passage of the chimney through the roofing cake and ensuring fire safety. In fact, there is no need to puzzle over these tasks, since there are already ready-made solutions. Actually, I suggest you familiarize yourself with them.
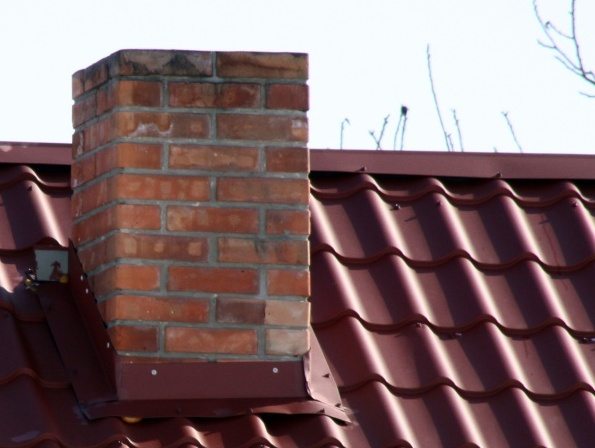
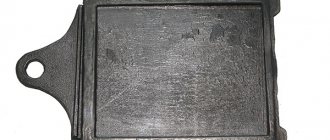
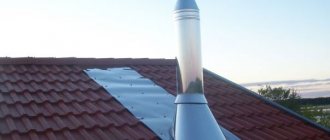
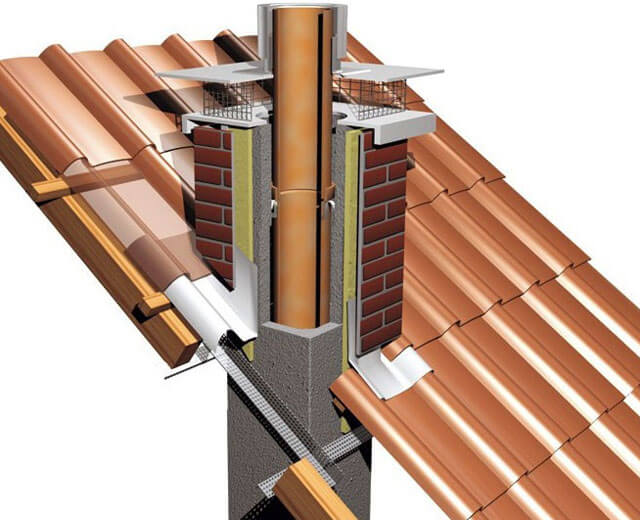
The passage of the chimney through the roof must be fireproof and sealed
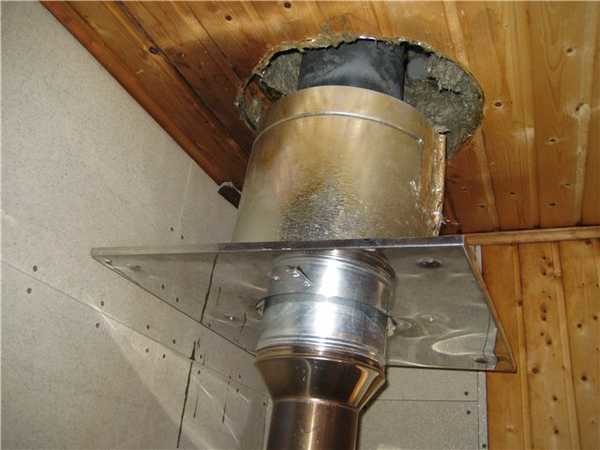
Installation of the outlet box
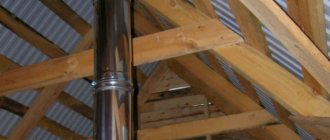
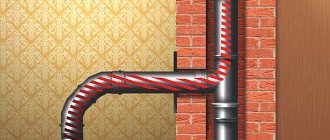
The chimney goes through several overlaps until the site is brought out into the street. It crosses the ceiling, the attic and out through the hole in the roof.
At each segment of the path, the pipe experiences a temperature difference and comes into contact with combustible materials. The key to installing the pipe is its thermal and waterproofing. It is these functions that the chimney box is designed to provide.
The tasks that the construction of the chimney box solves:
- Provide insulation from external temperature fluctuations.
- Insulate the hot pipe from combustible materials in the ceiling, roof, rafters.
- Ensure tight sealing of the opening between the flue gas venting body and the roof.
- Protect the area above the roof from the weather.
- Decorate the chimney, creating the visual integrity of the roof and chimney.
The chimney box is installed at the final stage of the heating system installation. The outer casing can be made by yourself or purchased ready-made.
The most common boxes for chimneys are made of metal. They use galvanized steel or stainless steel as the most durable material. Ready-made galvanized iron boxes can be purchased with a plastic protective coating in different colors, which expands the aesthetic solutions of the chimney.
For the manufacture of the chimney protection, a corrugated stainless steel pipe is used. It easily repeats the features of the bends of the roofing material. The thickness of the metal used is 0.45-1 mm. For self-assembly of the box, thin metal is a convenient material to work with.
In combination with mineral wool as insulation, metal boxes can be called a universal structure for protecting pipes of any configuration.
More specific are the following boxes:
- Wooden - used to close brick (square or rectangular) chimneys. They mount themselves. Requires the installation of an additional external protective casing made of metal or plastic.
- Plasterboard. The fireproof plasterboard box can be installed on both metal and brick or asbestos pipes.
- Plaster. Protective plastering is used for wood or coal stoves with brick chimneys. For the attic, it is enough to plaster and whitewash the hogs (horizontal section in the attic). The chimney section on the roof is protected with a metal decorative box.
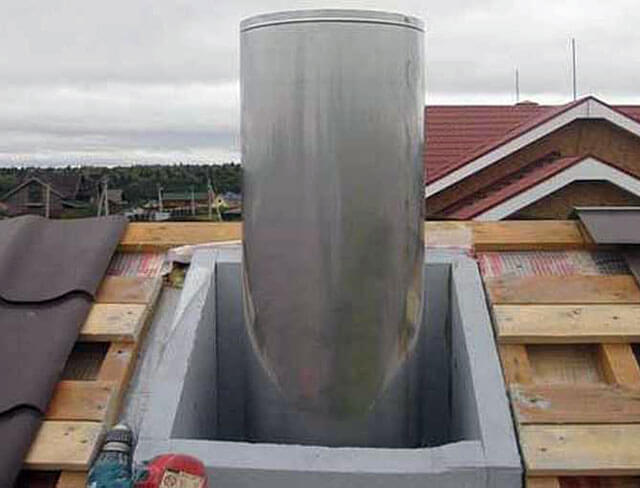
- The first step is to purchase or make a box from a refractory material, for example, metal or asbestos. The size of the box is selected in accordance with the section of the pipe, so that there is at least 15 cm between their walls.
- After making the hole, a box is installed in it, the upper edge is leveled to the level of the roof slope.
- The chimney is taken out through a hole in the duct.The edges of the waterproofing film and vapor barrier are glued to the pipe with a flame retardant sealant and reinforced tape.
- Expanded clay is poured inside the box or stone wool is laid for thermal insulation of the chimney. Thermal insulating materials are placed taking into account that they should not impede air circulation.
- Outside, the chimney pipe, depending on the shape and roofing material, is finished with an elastic penetration, a decorative apron or a metal pipe.
A well-made chimney outlet does not spoil the appearance of the roof, does not allow moisture to pass through and is safe from the point of view of fire safety standards. Observe the correct technology for passing tubes through the ceilings to protect yourself and your property.
Arrangement of the passage
The most difficult task that must be solved when installing a chimney is the arrangement of a sealed and fireproof passage through the roof. The fact is that the surface temperature of the structure in the passage section can be several hundred degrees.
We will conditionally divide the work into three stages:
The main stages of arranging the passage of the chimney through the roof
Next, we will consider step by step how to equip the passage of the chimney through the roof.
Preparation of materials
So, for arranging the passage, we need the following materials:
- Roof passage - is selected individually, taking into account the shape of the chimney, its size, as well as the type of roofing;
- Fire-resistant sheet material - you can use stainless steel, galvanized or any other sheets from which you can make a box to protect the roofing cake from fire;
- Stone wool (can be replaced with expanded clay);
- Flame retardant sealant.
In addition, you will need self-tapping screws for fastening the structure.
To arrange the passage through the ceilings or the roof, you must use a box filled with thermal insulation
Arrangement of the passage from below
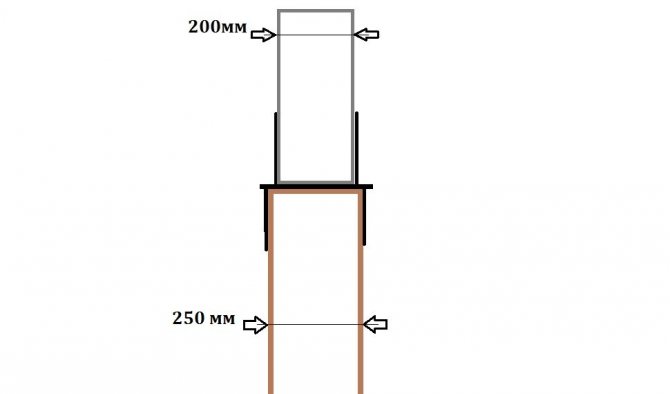
First of all, I would like to note that in the passage section, the distance from the chimney to any combustible material, including wooden elements of the roof, must be at least 25 cm. Moreover, the space between the combustible materials and the chimney must be filled with non-combustible heat-insulating material.
Therefore, the junction node from the room side is performed as follows:
| Illustrations | Actions |
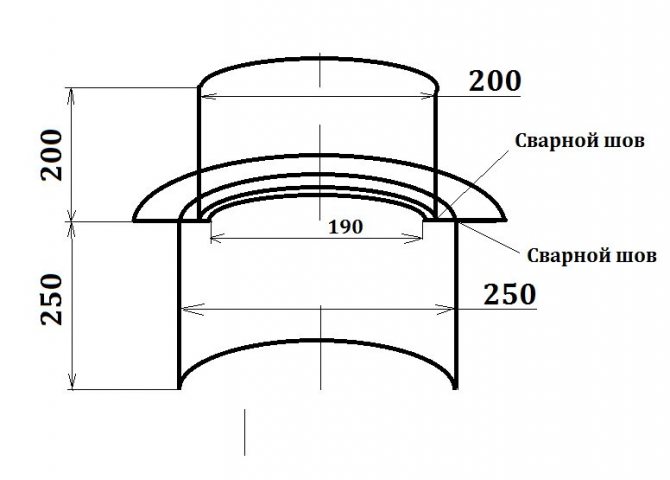
Making a box. Even before installing the chimney, it is necessary to make an internal apron, it is also a box. It is performed as follows:
| |
Arrangement of the passage:
|
Beginners are often interested in - can a chimney and ventilation be combined in one box? Do not do this, as smoke from the chimney can enter the ventilation duct.
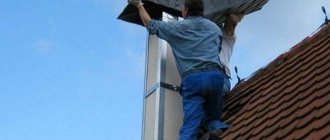
Arrangement of the passage outside
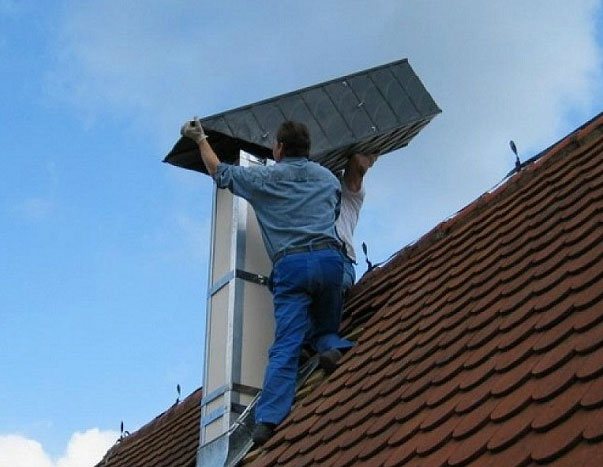
To seal the chimney outlet, it is necessary to use a special passage element. The installation process depends on the type of pipe.If the structure is rectangular, then the installation of the passage begins even before laying the roofing material:
| Illustrations | Actions |
Installing the wall profile (bottom apron):
| |
Installing the top bar.
|
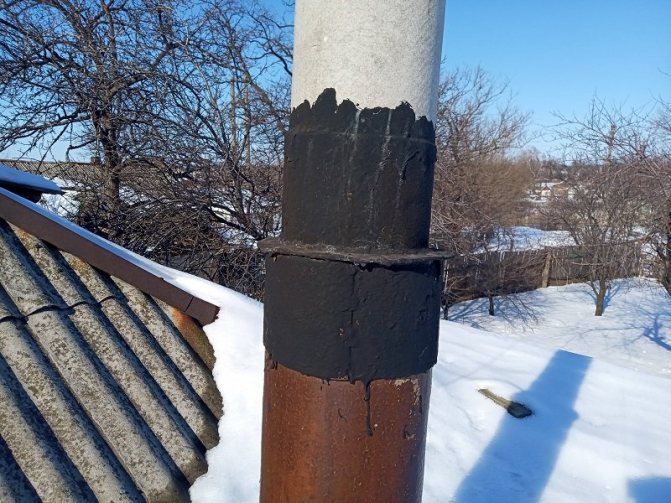
It is even easier to mount a passage to a round chimney - the casing is simply put on from above and attached to the roofing material with self-tapping screws. The junction between the roofing material and the casing is coated with sealant. If the roof is made of ondulin, then an elastic apron is used, which is simply glued to the surface of the roof covering.
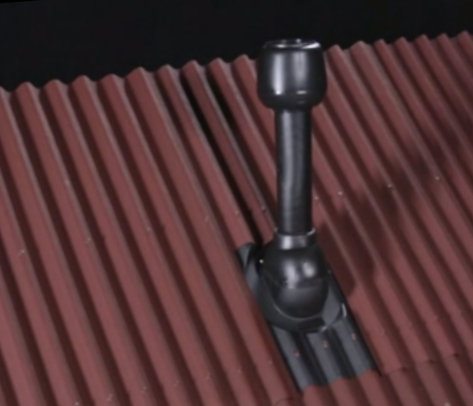
The passage of the pipe through the roof of ondulin


Metal feedthrough
Heating devices are available in any home, it is they that contribute to the creation of a comfortable indoor microclimate in cold weather, which prevails in most of Russia. However, heating to high temperatures in most cases causes fires. Therefore, the installation of chimneys through which smoke and fuel combustion products are removed should be approached very carefully.
One of the conditions for the high-quality organization of the exit of the pipe through the roof is the correct determination of the location of the chimney outlet. This factor affects the operation of the entire heating system, so mistakes are unacceptable here.
Therefore, the installation of a chimney from a soft roof must be carried out in strict accordance with building and fire safety standards:
- The distance from the highest point of the roof to the chimney should be 1-1.5 meters.
- The distance from the ridge to the top of the pipe must be at least 0.35 meters and not more than 1.5 meters.
- With an increase in the height of the pipe, the traction force in the furnace or gas boiler increases.
- The farther the chimney is from the highest point of the roof, the higher the chimney should be.
- The height of the chimney and its diameter should be determined in accordance with the recommendations of the manufacturer of the heating device or according to special calculations.
- When solving the problem of how to install a chimney pipe through the roof, it should be borne in mind that the total length of the horizontal sections should not exceed one meter.
- The exit of the pipe must be located between the elements of the rafter frame, in this case the integrity and strength of the system will not be compromised.
The main difficulty in organizing the exit of the chimney through the roof is the high risk of ignition of fire hazardous materials of the rafter system due to an increase in the temperature of the walls.
In private housing construction, most often the question of how to install a chimney through the roof is solved with the help of round metal pipes. In this case, the tightness of the outlet is achieved through the use of elastic penetration. This special device is made of rubber or silicone in the shape of a funnel with a wide round or square flange called an apron.
Before purchasing an elastic penetration, it is important to accurately determine the pipe diameter and the color of the roofing material. The universal model is made in the form of a stepped pyramid, therefore it can be used on chimneys of any size. To fit the sealing element, the penetration must be cut to the desired height.
To install an elastic apron, it is installed on the chimney outlet, pressed with a metal circle, in which there are holes for fasteners. The joint is treated with a heat-resistant sealant and fixed with self-tapping screws. If the chimney pipe is installed on a roof with steep slopes, then plastic passages are used, the flange of which has a given angle.
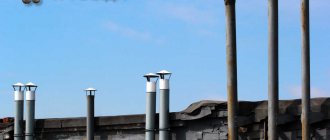
In addition to elastic penetration, metal passages can be used, which also help to solve the problem of how to fix the chimney on the roof. They can be purchased at hardware stores. With the help of this element, the passage of the chimney through the flat roof is arranged. Most often, the pipes are made of alloy steel, they are selected in accordance with the angle of inclination of the roof.
The installation of the metal through-pipe is carried out as follows:
- Markings are made on the roof surface with a marker and a hole of the required size is cut out for the chimney to exit to the roof. For cutting, you can use a grinder or special scissors, retreating into the circle by 1-2 cm.
- Clears the passage for the chimney, removing waterproofing material and insulation. If necessary, the elements of the rafter system are cut down.
- On the roof from the attic side, a fire-resistant material is fixed with a hole for a pipe and a size exceeding the diameter of the chimney by 15-20 cm.
- Insert the pipe into the hole and connect it to the laid chimney, tighten the joint with a clamp.
- The pipe is put on the chimney and fixed to the roof surface using sealant or self-tapping screws.
- The pipe is built up with new segments until the required height is reached.
The composition of the roofing cake includes various materials, each of which has its own degree of resistance to fire. However, the rafter system in most cases is made of wood, which does not have this property.
The safe exit of the pipe through the roof is provided by a passage box, the installation of which is carried out according to the following scheme:
- To begin with, they buy or make with their own hands a metal or asbestos box, the size of which is slightly larger than the chimney. The optimal distance between the walls of the pipe and the box is at least 15 cm.
- A box is inserted into the prepared hole so that the upper edge is flush with the roof slope.
- The chimney is taken out inside the box and insulation and vapor barrier are glued with sealant.
- The space between the pipe and the box is filled with expanded clay or stone wool.
- From the outside, an elastic penetration, a decorative apron or a metal pipe is put on the pipe.
A well-designed chimney fully complies with fire safety standards, retains moisture well and does not spoil the appearance of the roof. Compliance with all the rules when deciding how to get the pipe from the stove through the roof helps to protect the residents of the house and all property.
How to lead a stove pipe through a wooden ceiling - this must be done so that there is no trouble, as in the photo. The main task of the preparatory stage is to determine the place of installation of the stove and conduct the chimney to the street. Depending on the materials of the floor slabs and chimney pipes, it will be necessary to perform work taking into account several sizes:
- the maximum distance from the ridge to the peak of the pipe is 1000 mm, and the minimum protrusion is 350 mm;
- distance to the surfaces of wooden walls - at least 250 mm;
- length of the horizontal section of the chimney up to 1000 mm;
- when choosing the place of passage, we take into account the passage of the pipe through the roof structure. This place should be located between the rafters;
- when passing steel pipelines through wooden slabs, finishing elements and roof structures, we must use home-made, industrial boxes or couplings with an inner layer of thermal insulation.
The passage of the chimney through the roof is carried out by analogy with floor slabs. The only addition is to provide a reliable layer of waterproofing to prevent water leakage at the chimney exit.
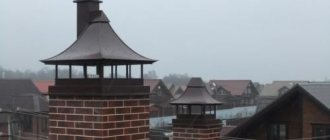
We use ceramic bricks for the stove on the roof, red, of high quality and brands. Here it is influenced not only by the high temperature of the gases, but also by the aggressive conditions of the outside temperature, wind and precipitation.
After crossing the floor slab, lay out the pipe to the point of exit through the roof structure:
- mark and carefully cut out the cavity of the chimney passage, make a size with a margin for the insulation layer;
- we equip the passage with a metal box with a cavity for the passage of the pipe. The upper cut should be carried out taking into account the angle of inclination of the roof, and is set slightly recessed inward;
- after the chimney exits outside, fill the entire space with a layer of thermal insulation, seal all the smallest voids with sealant;
- we put a layer of waterproofing under the surface of the roof structure. Then we put on a steel apron or a rubber sleeve on top. Carefully seal the edges with sealant.
The main material of the roof covering is laid on top, and the pipe is driven to the desired size. At the top, the "otter" is laid out and a protective visor is installed. It is not difficult to remove the chimney through the roof if you have a good tool and skills in brick and locksmith work.
The passage of the chimney through the roof, if the chimney is made of steel, ceramic or asbestos pipes, is made in the same way as with a brick chimney (instructions above).
We invite you to familiarize yourself with Dry floor screed - consumption, thickness and installation || How much does a dry floor screed weigh?
If it is necessary to install a high pipe, it is fastened with steel braces to special anchors embedded in the roof structure.
Heating devices are a necessary attribute of any residential building, providing a comfortable temperature for life in the cold season, which lasts 9 months in most regions of Russia. However, additional comfort comes with a certain degree of fire risk. Therefore, special attention is paid to the chimney, with the help of which smoke and combustion products are removed from the heat generators and discharged outside the room. This article will tell you how to get the chimney through the roof in compliance with all safety requirements.
The first condition for the high-quality output of the pipe through the roof is the correct placement of the chimney on the roof. The functioning of the entire heating system depends on this factor, therefore, in order to avoid errors, installation is carried out in accordance with construction and fire safety requirements:
- Chimneys are placed in the immediate vicinity of the highest place of the roof, at a distance of 1-1.5 m.
- The recommended chimney height relative to the roof ridge to ensure normal stove draft is 0.5-1.5 m.
- The higher the height of the chimney, the more traction force it provides in a stove or gas boiler.
- The lower the chimney is located on the slope, the longer its length must be in order for the recommended chimney height above the roof to meet the recommendations.
- Parameters such as the height of the chimney, the diameter of the section are selected according to the recommendations of the manufacturer of the thermogenerating device or on the basis of calculation.
- The chimney consists mainly of vertical pipe sections, the length of horizontally located segments should not exceed 1 m.
- The place of withdrawal is placed between the elements of the rafter system so as not to violate its integrity.
Most often, in private construction, they are faced with the installation of round metal pipes. To ensure the tightness of the passage, a special device is used - an elastic penetration. This product is made of high-strength silicone or rubber, funnel-shaped with a wide flange in the form of a square or circle, called an apron.

How to provide traction
Primary requirements
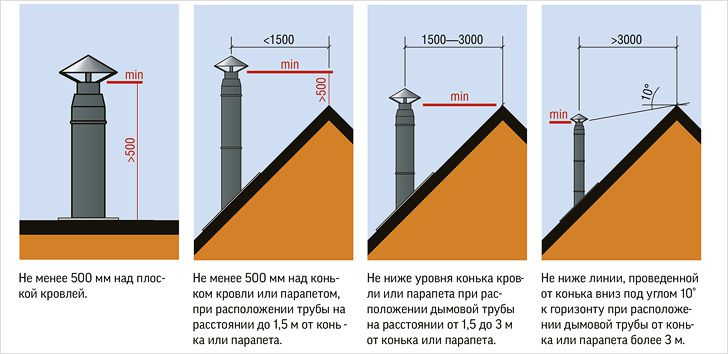
The thrust in the pipe occurs due to the pressure difference at the base of the pipe and beyond. Accordingly, the height of the pipe largely influences the efficiency of the draft. Therefore, when installing the chimney, the following rules must be observed:
- If the chimney is at a distance of no more than one and a half meters from the ridge, then it should be half a meter higher than the level of the latter;
- If the chimney is one and a half to three meters away from the ridge, then its upper point should not be lower than the ridge;
- If the distance from the ridge to the chimney is more than three meters, then it may be lower than the top point of the roof, but the line from the top of the pipe to the ridge should have an angle of inclination of no more than 10 degrees, as shown in the diagram below.
Related article: What kind of insulation is better for insulating the roof
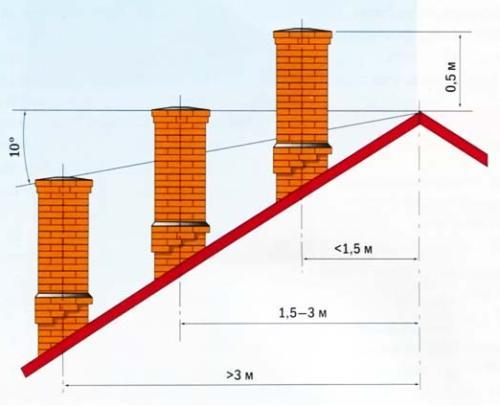
Diagram of the dependence of the height of the chimney on the location on the roof
I must say that the principle “the higher the better” also does not work. If the structure is too high, the gases cool down before being released to the outside, which leads to a decrease in draft and the formation of condensation. True, the insulation of the pipe helps to solve the problem to some extent.
An important point affecting the draft is the section of the chimney. It must correspond to the power of the heater. Therefore, before installing the chimney, study the technical documentation that comes with the heater.
We build up the chimney
If a chimney is installed on the roof, the height of which does not meet the above requirements, it must be increased. If the chimney is brick, then this operation usually does not cause problems, since you only need to add several rows of bricks to the existing structure.
If the chimney is metal, you can build it up as follows:
| Illustrations | Actions |
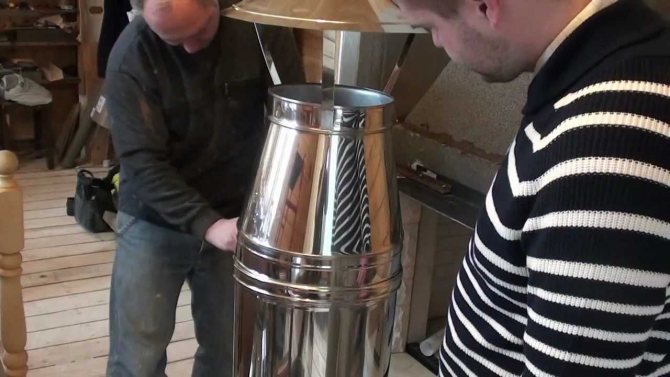
Preparing a new pipe:
| |
Extension:
| |
Fastening with braces:
|
This completes the installation.
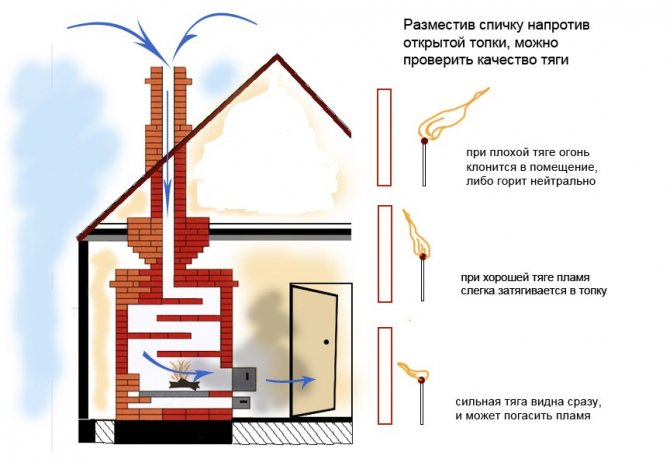
Checking and measuring the draft in the furnace
The presence and direction of thrust can be checked in simple and reliable ways:
- By deflecting the flame of a candle or match. To do this, open the door of the firebox and bring a burning candle to the opening. The flame will deflect in the direction of air movement. If there is none, you need to check the position of the gate and open it completely. Then check again.
- You can use a strip of newsprint in the same way.
- It is not necessary to measure the amount of thrust in a domestic environment. They are used by professional stove-makers to control the correctness of the work performed. For this, an anemometer device is used. It is placed inside the firebox, and the device reacts to the movement of air in it.
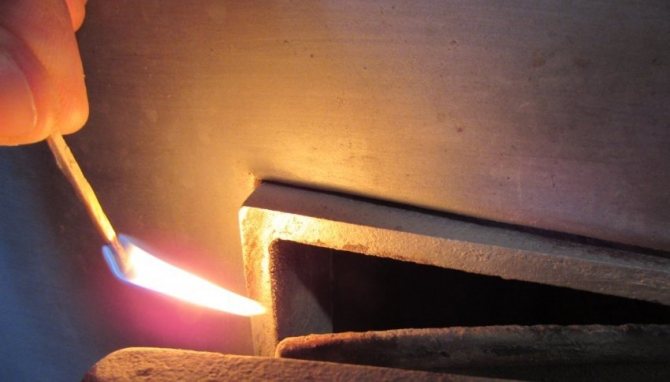
Reliable check of the presence of draft in the chimney by deflection of the flame
Faced the problem of chimney lengthening
The situation is as follows - two asbestos pipes come out (outer diameter 180, inner diameter 143), they need to be extended with the help of galvanized ones. There are galvanized pipes of diameter 135. How can they be combined with asbestos? Some kind of adapters? so that all this is tightly held, tk. build up 220 cm
It is not clear what kind of pipes, but in any case, you should not narrow the pipes. I advise you to find a pipe with a larger diameter and put it on top, fixing it with a clamp
chimney pipes, on the roof they come out touching each other. everything around is cemented, you cannot move them apart, i.e. put on top - a problem
What are the initial conditions. Maybe you can do without building a chimney.
initially everything was fine, then a neighboring wall of the second floor appeared nearby (the house is in half - one half is one-story, the other was rebuilt into two floors).On the roof of the one-story half there are chimney pipes, they turned out a meter away from the wall. There are turbulences from the wall and the boiler goes out. This is what the experts said. It is necessary to build up above the ridge of the neighbor's extension. it is 220 cm.
well, no one will tell
Those you have a two-pipe fast passage! Put one big pipe on them, roll it into an oval and put it on. Or order .. Just keep in mind, the pipe will start crying. I have an iron pipe, I am fueled with gas, I wrapped it on top with expanded polystyrene film with foil and fixed it with foil outside - protection from the sun and it turned out beautifully.
Winter however. Equip the existing pipes with clamps to prevent them from flying into the chimney, prepare a clamp for fastening the stretch marks, make or buy caps, pack with asbestos sheet and asbestos cord. Fasten the clamps with prepared guy wires, wrap the steel pipes with asbestos and push them into the existing chimney. Secure with stretch marks. Wrap the pipes with Isover, Ursa, etc. Wrap with foil, foil-coated polyethylene foam, etc. Wash the successful completion of the work three times. And it is undesirable to combine chimneys. I will not interfere with theory, this is on the topic of heating and ventilation.
Related article: Arrangement of a mansard roof of a wooden house
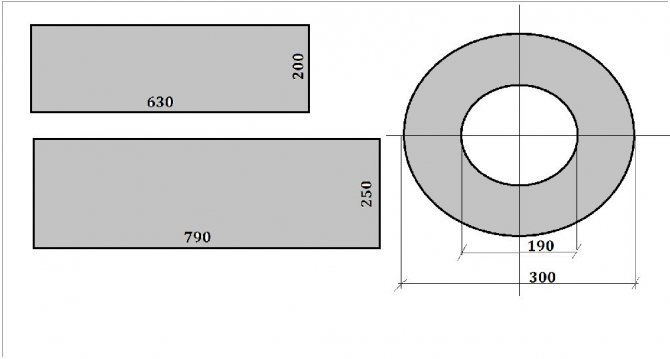
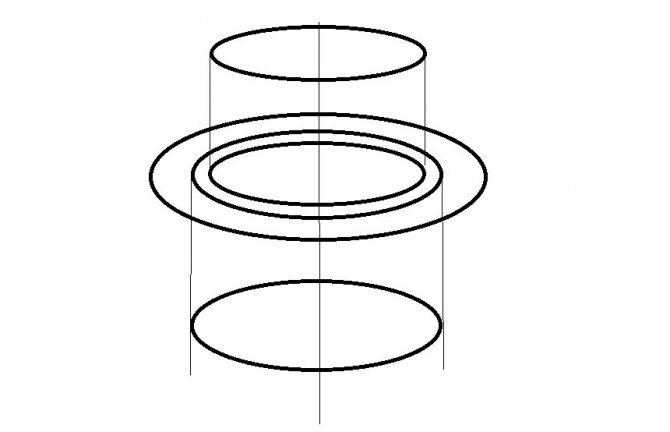
In your case, I would do the following: I phoned the companies engaged in tin production and ordered an F180 pipe with flaring on one side to F184, the length of flaring is 15-20 centimeters. After that, this pipe is put on the asbestos pipe and fixed with self-tapping screws. For complacency in the reliability of the fastening, you can put stretch marks. Use pipes Ф135 somewhere else, for example, in a bath. Because even a sandwich with its help is pointless to make (this is not a stainless steel, there is a big difference with the inner diameter). I do not recommend putting them into asbestos pipes, wrapping them with asbestos fiber. similar operations are being done on the ground. Otherwise, "snot" will turn out, and snot and carbon monoxide in the room is a RISK.
Application of asbestos cement pipes
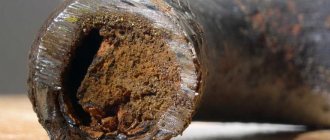
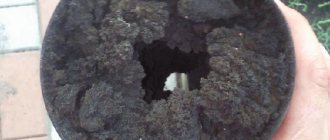
As stated above, the asbestos chimney was not designed, so it is not suitable for use at high temperatures. The maximum permissible temperature must not exceed 300 degrees... Many may disagree with this. Indeed, as a rule, asbestos chimney pipes are not installed immediately after the boiler, where the heating is very high, but after a certain interval, where the temperature is much lower 300 degrees... Why are chimneys from asbestos-cement pipes dangerous? Let's agree with this statement and consider what happens in the pipe. When any fuel is burned, soot is necessarily formed. The less the internal smoothness of the chimney, the more soot is formed... Asbestos-cement pipes are not smooth, so a large amount of soot settles on the walls, which can ignite at any time.
Consequences of a fire due to ignition of an asbestos pipe
In addition, if you plan to use an asbestos pipe to assemble a chimney with your own hands, you must:
- exclude the fastening of the pipe with the boiler branch pipe, that is, it is imperative to install the adapter;
- insulate the pipe.
To make a chimney from an asbestos-cement pipe, you need to choose the right diameter. In this case, the diameter of the pipe and the diameter of the outlet pipe of the boiler must match, although these elements will be joined through the adapter. If the boiler does not have a passport from which it would be possible to find out the diameter of the nozzle, then you can simply try on the pipe on the spot. An important parameter is not only the diameter, but also the height of the pipe. The chimney must not be less than three meters.
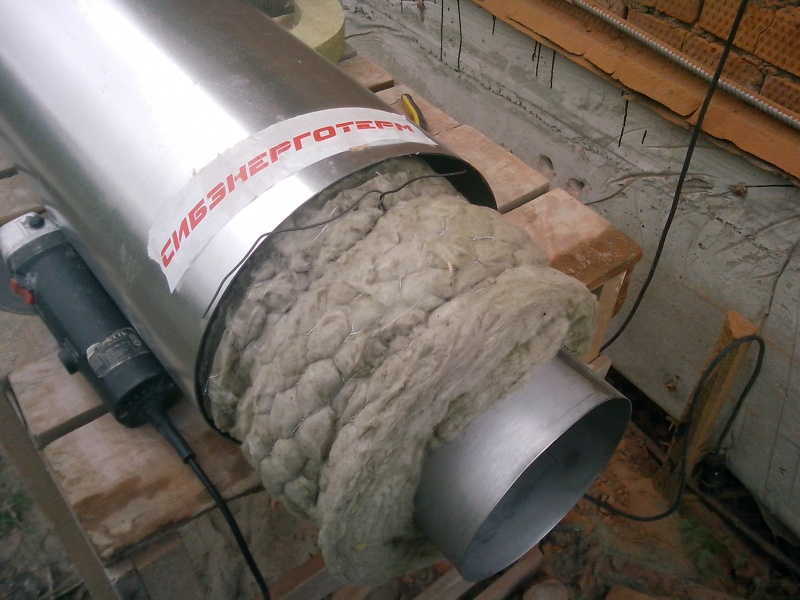
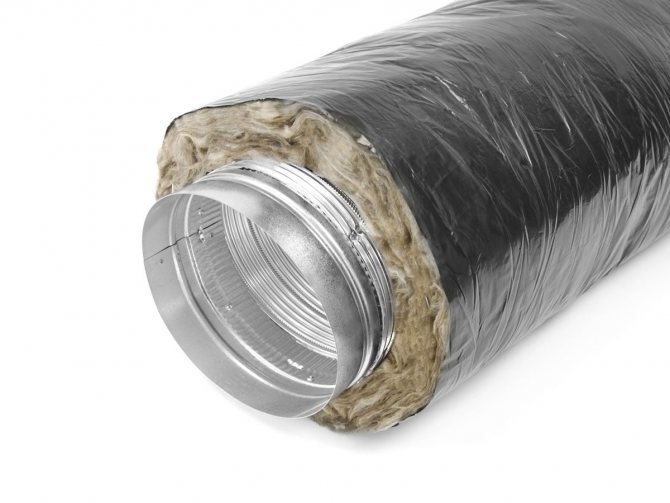
If you do not insulate the chimney or insulate it poorly, then condensation will form, which will quickly destroy the pipe. To insulate the chimney with your own hands, you can wrap it with basalt wool, and then make waterproofing.To do this, it is worth using foamed polyethylene foam, the material can be fastened with wire or staples.
You can insulate the chimney better, and you can do the work yourself. For this, a galvanized metal casing should be used. The casing should have a diameter 10 cm larger than the pipe diameter. The casing is put on the pipe, and the gap is filled with insulation
In what cases is it necessary to build up the chimney
- The pipe is less than five meters high
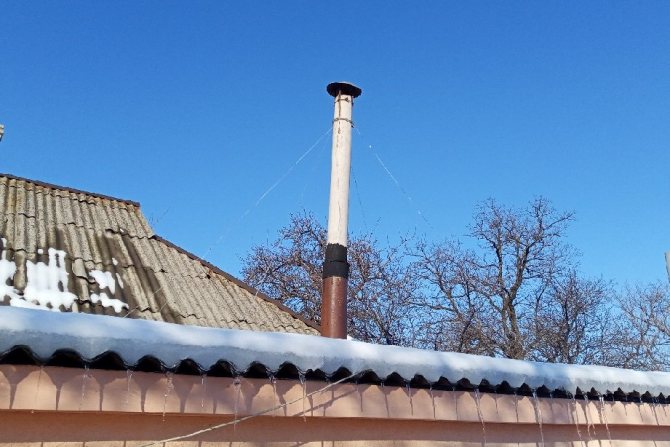
- The pipe head (visible part on the roof) is located in the area of the wind support
- The brick shaft consists of several ducts, including smoke and ventilation ducts.
Chimney height
According to regulatory documents and laws of physics, normal vacuum in the chimney begins when the chimney is more than 5 meters high. This does not mean that all heating devices, with lower chimney pipes, will not work correctly, i.e. smoke. But if your heating device smokes, and the chimney is below five meters, this is one of the reasons why smoke occurs. I will emphasize - one of the reasons! There can be many more reasons and not all of them are related to the height of the chimney. All the reasons can be established by a professional master of chimney and furnace works, but now we will only talk about the height of the chimney.
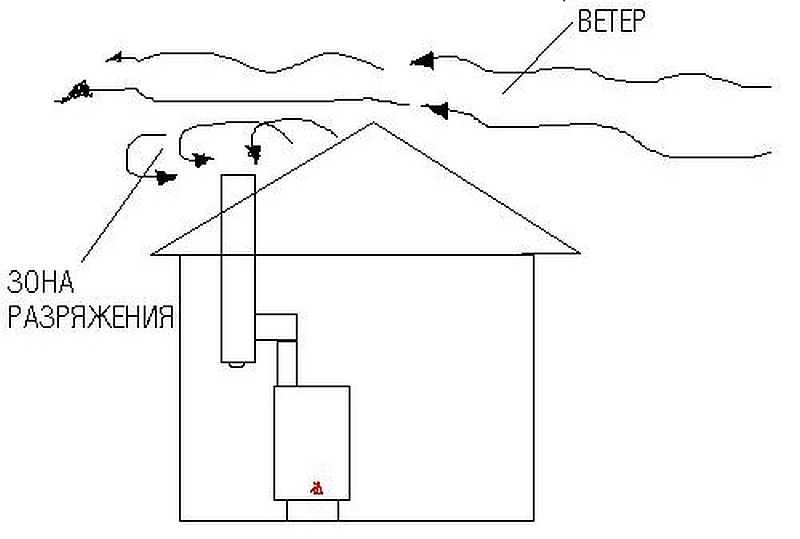
Wind support zone
The wind support zone is a part of the roof of the building in which the rascal wind, receiving swirls from the above-standing structures or the ridge of the roof, blows downward, including blowing into the chimney located in this zone.
Pay attention to the picture, if your chimney pipe is located below the dotted lines, then the pipe should be extended.
Brick mine with several canals
When a brick mine has several channels, for example from a gas boiler, a ventilation channel from a boiler room, ventilation channels from a kitchen and a bathroom, warm and humid air flows mix and settle on the inner surface of a common umbrella, turning into icicles and ice build-ups.
In the absence of supply ventilation, one should not exclude the formation of reverse thrust when one of the channels begins to blow in the opposite direction. If this happens, exhaust fumes from the gas boiler begin to enter the room, which means that you and your family members breathe carbon monoxide.
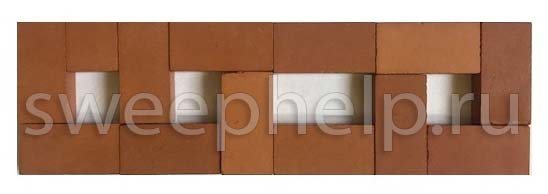
Chimney cross-section with multiple channels
In this case, one channel is built up from a heating device, for example, from a gas boiler.
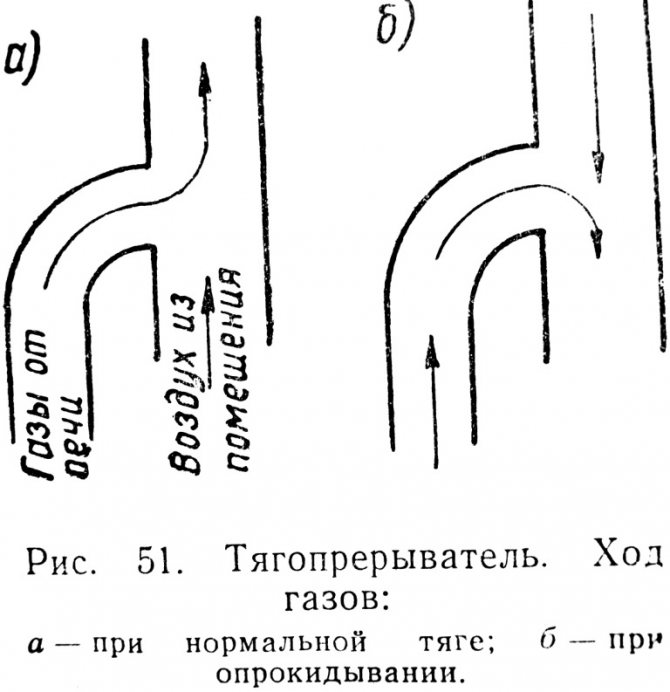
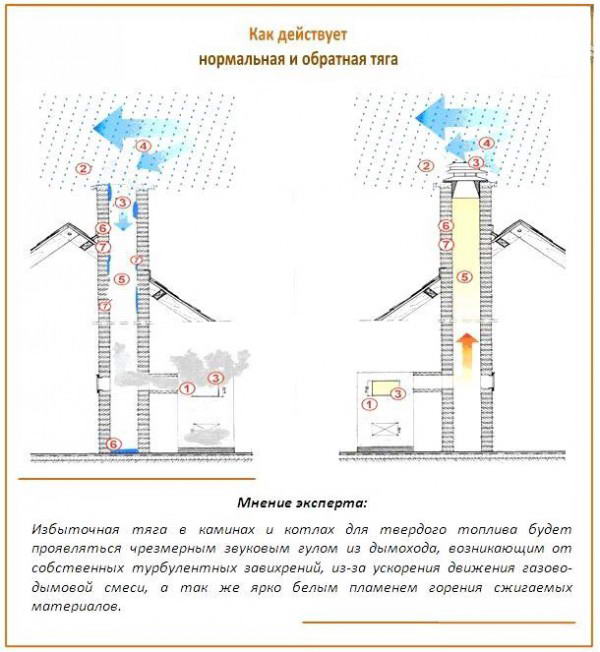
What is reverse thrust
This concept means a failure in the operation of the heating system and the system for removing combustion products. There are several reasons for the occurrence of reverse draft, and any heat consumer from their own heating units should know everything about this phenomenon. Because this is not only an everyday inconvenience, but also a life-threatening factor.
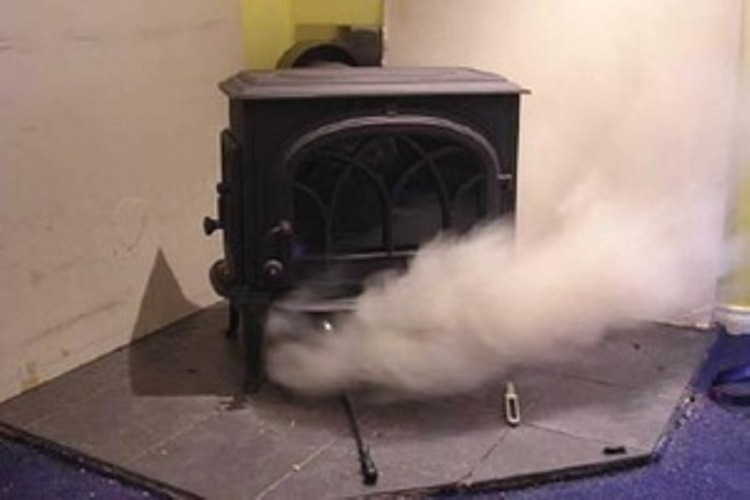
Draft - a targeted air flow from the heating unit to the exit from the chimney. Reverse thrust is a change in the direction of flow from the external environment to the furnace. In this case, there is strong smoke from the solid fuel stove or the penetration of combustion products from the gas appliance into the room. A damping option is also possible, then gas can enter the room, which in itself is very dangerous.
Draft largely depends on the design of the chimney
Chimney extension technology
If the chimneys are made of modern materials, stainless steel (double-walled sandwich pipes) or ceramics, for example Schiedel Uni, the chimney extension should be carried out with pipes of these manufacturers, strictly observing the work technology recommended by the manufacturers.
Brick chimneys are built up with either brick or stainless steel pipes. Stainless steel is used to build up chimneys or one of the channels of a brick shaft to remove combustion products from a heating device (stove, fireplace, gas boiler).
Masonry to stainless pipe adapter
When switching from masonry to stainless steel, there are two main issues to consider:
- The chimney section must not be narrowed. For this, it is necessary to calculate the area of the internal section of the existing pipe by multiplying the lengths of the internal surface of the pipe by each other and select the diameter of the round pipe corresponding to the area, calculating it using the πR² formula.
- The increase in the height of the chimney should be carried out with insulated, double-walled pipe sections. Single-walled pipes freeze in frost and air locks form in them, preventing the launch of boilers, lighting stoves and fireplaces.
Related article: The better to cover the roof of a wooden house
If the height of the pipe is increased over 2 meters, additional fastening elements should be provided.
Advantages and disadvantages of a sandwich pipe for arranging a chimney
Brick chimneys are most often square or triangular, they are taken out in a different way. In general, the construction of a chimney in a private house is a rather complicated process. The problem of how to correctly bring the pipe to the roof should be solved by an experienced stove-maker, not a home craftsman, since it is necessary to use special masonry.
The pipe is led out through a hole that is cut into the roof as the chimney masonry approaches. Moreover, the hole should be 2-5 cm larger than the pipe. For masonry, a heat-resistant brick is used, which has the property of retaining heat, but for complete safety, the inside of the passage is covered with asbestos sheets, which will protect the rafter system from fire.
The chimney of stoves and fireplaces made of bricks is most often square or rectangular in shape, therefore, other methods are used to bring it to the roof. This task is for an experienced stove master, not a home craftsman, because a special masonry technique is used in the process. When the chimney approaches the roof, a hole of the appropriate size is cut in it with an allowance of 2-5 cm, through which the stove-maker brings the chimney to the roof.
A soft waterproofing tape on a lead or aluminum base is attached to a brick pipe using a metal profile, the lower edge of which is fixed on the roof with a sealant. After that, the unsightly waterproofing is closed with a special decorative apron. It consists of four additional parts and is installed under the roofing material, making the passage neat and well protected.
This type of pipe has a number of advantages. The main ones are:
- Good traction, which is ensured by an even surface and no temperature fluctuations.
- An even inner layer that does not allow soot and soot to settle inside the chimney, which simplifies the operation of the device and preserves its functionality for a long time.
- Minimal formation of condensation, which is also due to the constant temperatures inside the chimney.
- Fire safety, due to the fact that the outer layer of the pipe does not heat up, this is prevented by the layer of thermal insulation, so all objects that come into contact with the pipe (primarily the building materials from which the walls and roof are made) will not change their temperature.
- Convenient comparison of the components, due to the configuration of the pipes themselves, which allows you to insert one part of the pipe into another and fix the joints with a sealant, which is more convenient and simpler than welding pipes using special devices.
- Simple installation, which is due to the sale of finished products, the presence of special modules for that part of the chimney where it touches the roof, as well as additional parts in the form of knees, bends, umbrellas.
- Low weight of the structure, which allows you to place it without additional fasteners and install it yourself.
However, in addition to a large number of advantages, sandwich pipes have a number of disadvantages:
- High cost compared to other types of pipes.
- Loss of tightness that occurs over time due to the fact that the space between the layers is not impermeable to air and water, which contributes to the gradual delamination of the pipe.
- Service life no more than 20 years.
Measurement methods
If you doubt that the draft of the chimney of a stove, fireplace or heating boiler is sufficient, you need to check. The easiest way to dispel doubts is to check with your own hands using an anemometer. If the device shows a thrust of 10-20 Pa, then it is considered normal.... The problem with this method is the low measurement accuracy of inexpensive anemometers, if the thrust is less than 1 Pa, then they will show that it is absent. More accurate professional devices are expensive, they are used by stove-makers.
If you do not have an anemometer, use one of the popular methods for determining the chimney draft force:
- Through the smoke. The most obvious sign that there is no draft is the presence of even a small amount of smoke inside the room, a large amount of smoke indicates a high risk of fire and carbon monoxide poisoning.
Causes of malfunctions
After making sure that there is not a sufficient level of draft inside the chimney system, it is necessary to determine and eliminate the possible cause of this defect. Experienced craftsmen claim that the most common causes of malfunctioning of flue ducts are:
- Design error. The choice of the chimney pipe should be based on the volume of the firebox. If the diameter is less than the calculated parameter, the weak one will not allow the smoke to leave their premises.
- Insufficient pipe length. A pipe length of less than 5 m does not provide a significant difference between indoor and outdoor pressure, which creates a weak draft.
- Incorrect location of the chimney. Furnace masters advise you to lay the chimney vertically, as narrow turns trap smoke inside the chimney, reducing draft.
- Long horizontal sections. If, laying the chimney, it is impossible to avoid horizontally located sections, then make sure that their length is no more than 100 cm. Otherwise, she will need an amplifier.
The first step in detecting problems in the chimney system is to sweep aside the most obvious reasons for insufficient draft. When inspecting, make sure that the joints of all pipe segments are tight, that there are no soot blockages. Check that no moisture has entered the flue gas ducts and that the atmospheric pressure is correct.
Service difficulties
The only way out is to constantly clean the chimney (see How to clean the chimney). But unlike brick and metal pipes, chimneys from asbestos-cement pipes are difficult to clean due to the difficulty of installing inspection windows.
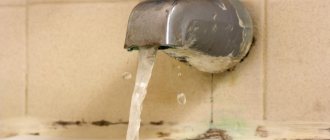
The main problem is condensation
Skeptics might argue that this explosion condition only applies to older furnaces and boilers. Modern boilers have increased efficiency, as a result of which their outlet temperature is much lower, 100 degrees, and an asbestos pipe for the chimney is quite suitable. This statement has its own reason. But again, we will not consider the issue superficially.
Indeed, all modern boilers have good efficiency, which is great. This means that such necessary heat does not fly out into the pipe, but is mostly used to heat your home.
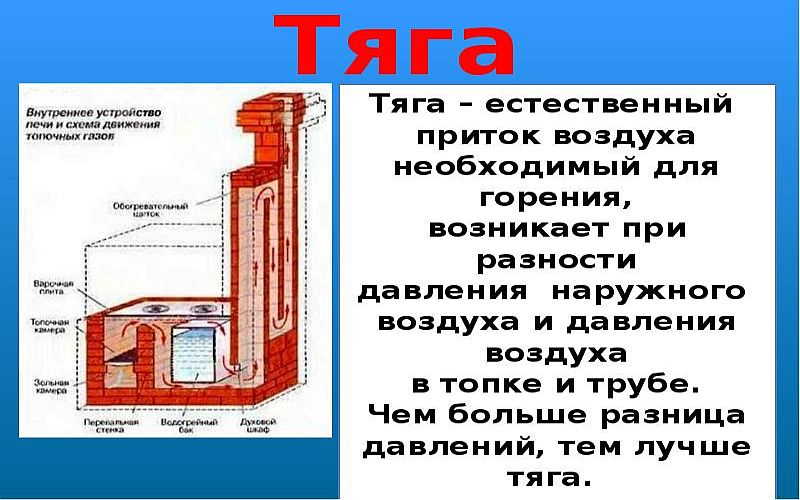
As you know, oxygen supply is required for normal fuel combustion. Oxygen is supplied together with the outside air. Oxygen is supplied together with the outside air. Air is supplied by traction. But what affects the quality of traction?
Of course, the quality of the chimney. Many people think that the chimney is intended for the removal of fuel combustion products. But it is important to know that by removing the combustion products, the chimney ensures the flow of fresh air into the firebox, which ensures normal combustion inside the stove, boiler, fireplace. This is how cravings are formed. The greater the temperature difference in the pipe with the outside temperature, the better the draft.
The greater the temperature difference in the pipe with the outside temperature, the better the draft.
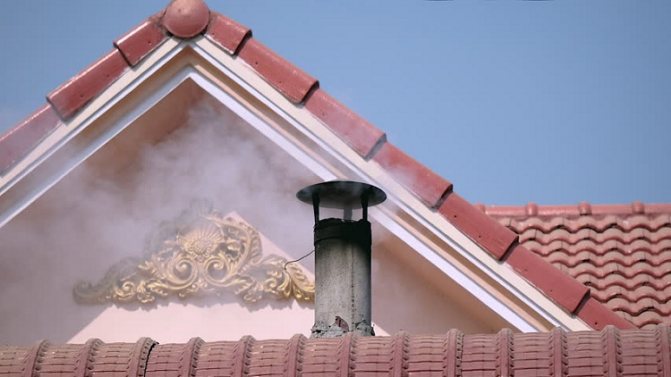
Many have faced this problem. The old boiler worked fine with a regular brick chimney. It's time to change the boiler. They installed an ultra-modern, economical, high-efficiency unit - and the problems began.
Not only does the boiler not work as stated in the documentation, in addition to everything else, unpleasant-looking spots began to appear on the walls where the chimney pipe passes and such a beautiful brick pipe installed on the roof began to crumble.
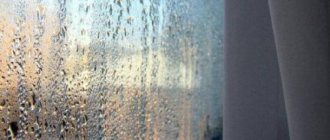
Condensation stains
What is the reason? There is only one answer - condensate. Whoever thinks that an asbestos chimney for a chimney in this case would be at a height is deeply mistaken. How so, because asbestos-cement pipes are not afraid of water, they are designed for this. That's right, for water. But the condensate in the pipe is not really water. Or rather, not water at all. The condensate in the chimney is a very aggressive solution of a mixture of combustion oxides and moisture that destroys the chimney material.
Other ways to increase the draft of the chimney
Consider folk methods of increasing traction in smoke exhaust communication:
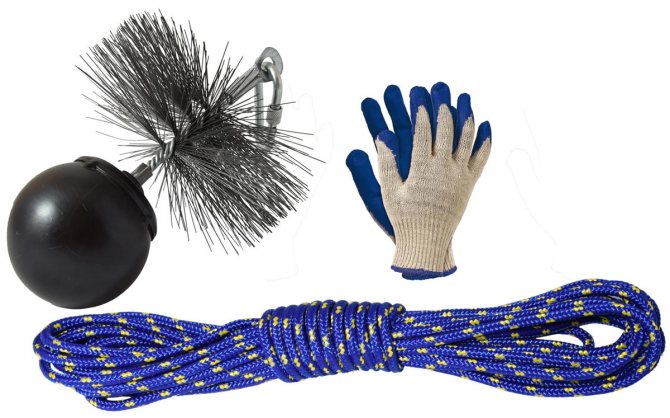
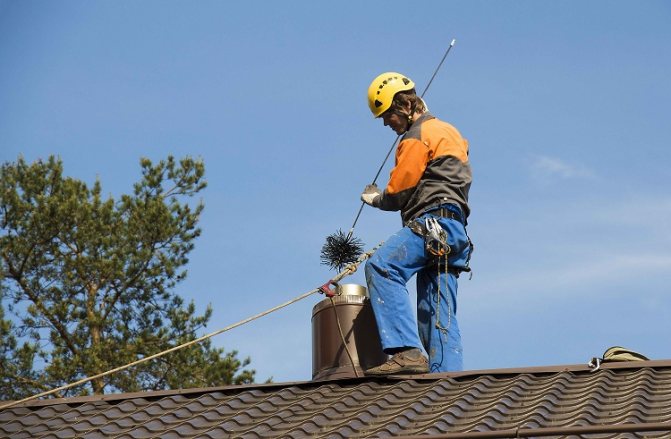
- chimney cleaning by means of a special metal ball, which is attached to a cable;
Helpful information! Trash plugs in the chimney canal break through quite simply: a ball fixed on a cable slowly descends along the channel until 1–2 m is left to the intended obstacle.
- ensuring the tightness of vulnerable areas of the chimney (holes, cracks, etc.);
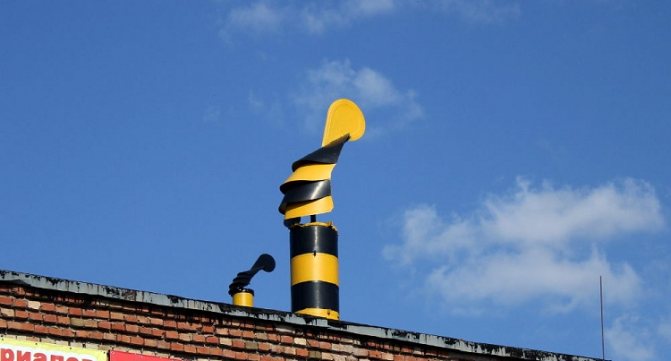
- cleaning the weather vane from dirt or icing. In addition, it happens that the weather vane breaks down, then you need to take care of its repair;
- ventilation of living quarters, which will create the necessary thrust support;
- creating additional vacuum by preheating. To warm up the communication, you can use several ordinary newspapers that need to be burned.
Any of the above devices or activities can help in a given situation. When organizing additional measures to enhance traction, it is recommended to be careful and observe fire safety rules.