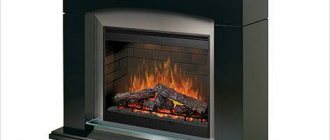
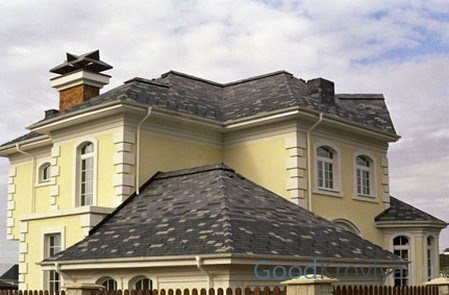
Widespread in Western Europe weathercocks are gradually beginning to find their place on the chimneys of the roofs of Russian houses. True, they have not reached such a scale of popularity in our country. Few people know that in addition to their decorative functions and the ability to indicate the direction of the wind and speed, these devices have a number of other qualities that are useful for the operation of stoves. The question of how to make a fungus on a pipe with our own hands, we will now consider.
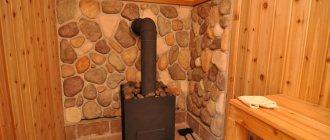
The main goal pursued by the owners by installing canopies for chimneys is to prevent reverse draft in the stove. By installing a weather vane on the chimney, homeowners use it to reduce the effect of parasitic air currents on the chimney, which, with high winds and low atmospheric pressure, can create reverse draft. This device has a number of other names. A weather vane is called a nozzle, a lid and a weather vane, an exhaust hood and a chimney. The point, in essence, is not in the name of this device, but in its positive functions.
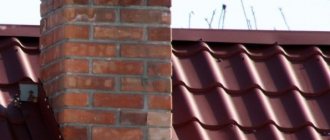
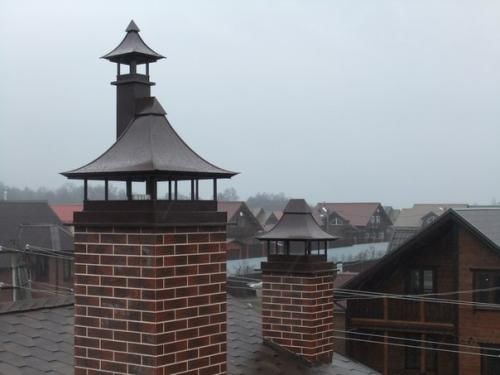
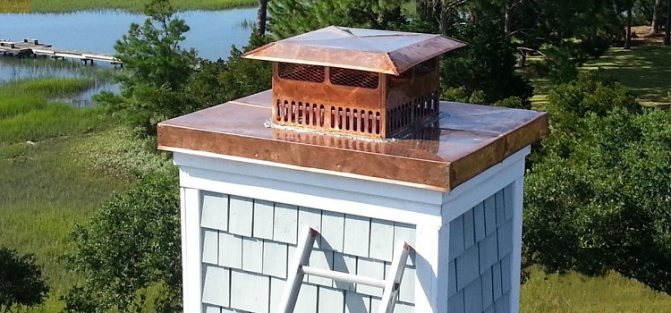
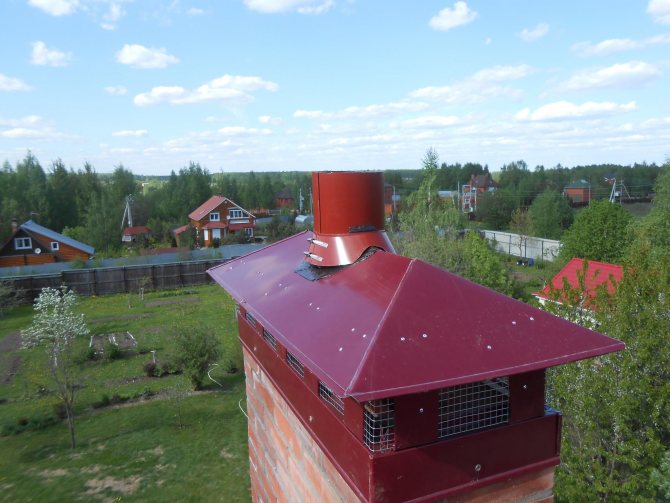
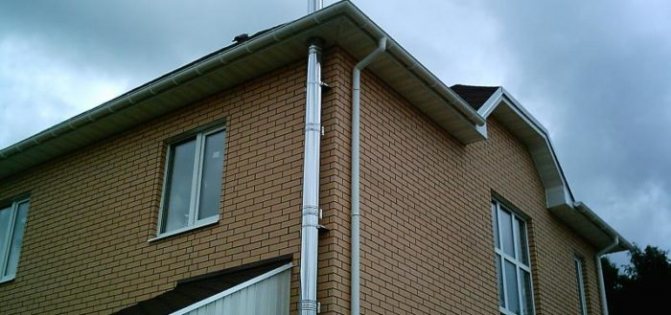
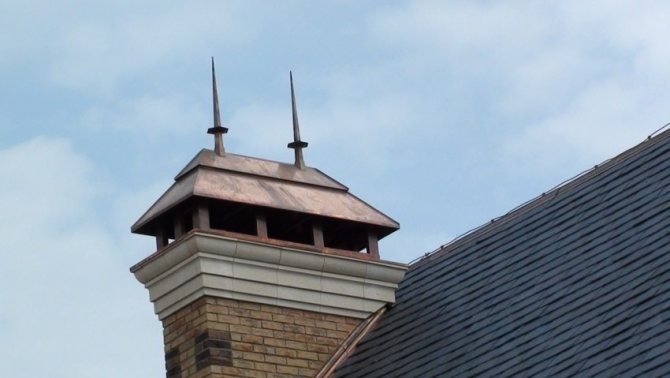
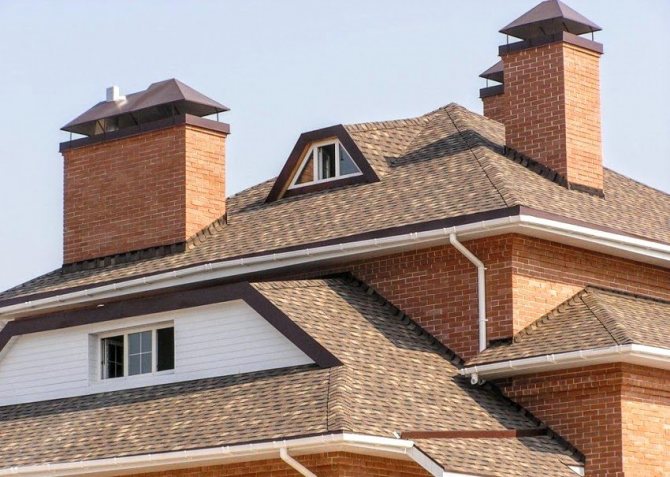
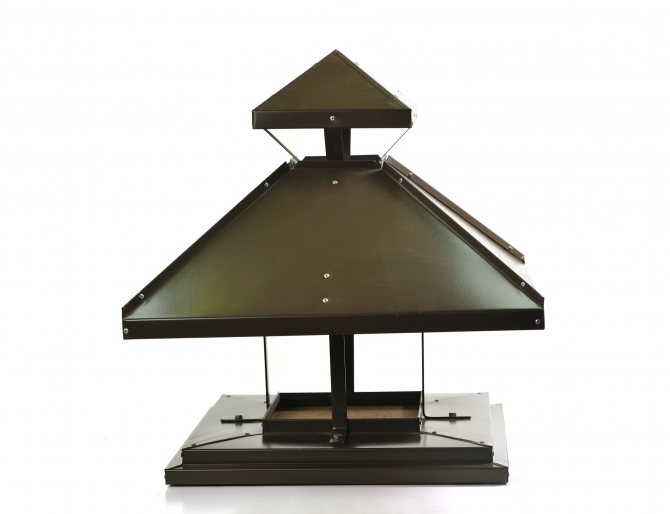
A well-chosen hood looks very advantageous in comparison with a simple chimney
Construction properties
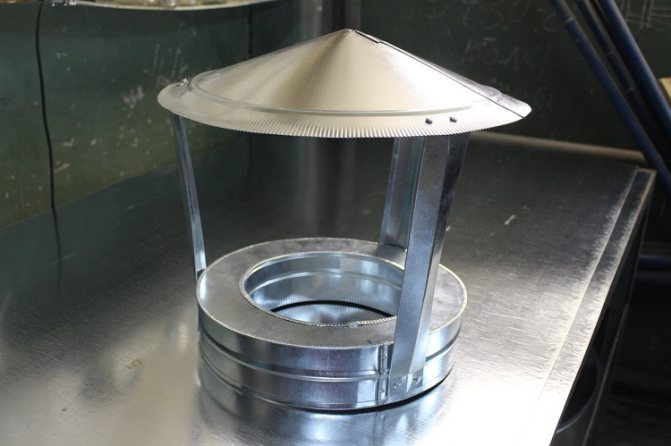
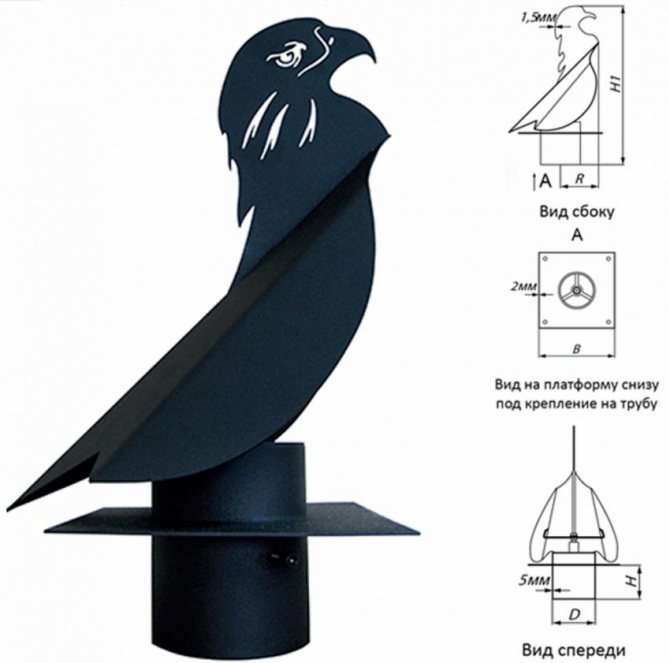
The product consists of two parts:
- Cover. Protects from precipitation
- Dropper. Drains water that flows down the pipe
This design was invented together with chimneys. After snow, rain and even birds got into the first structures, protective caps were invented that eliminated these problems. After a while, such a device was supplemented with aesthetics. Since that time, chimneys not only protect ceramic chimney pipes, but also decorate homes.
visors for the chimney pipe on the roof
Design features
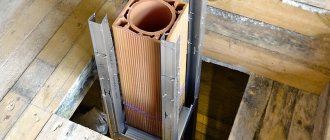
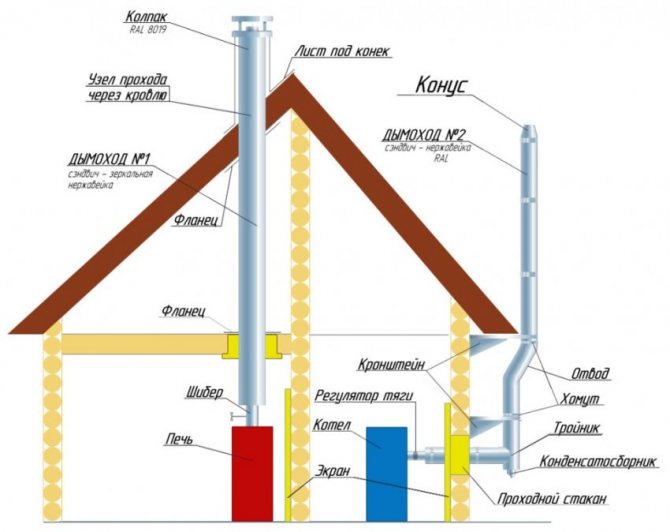
Every chimney has the following parts in its design: a cap, a base and three or four supports. The base is placed on the chimney head and has the shape of a square or circle. It depends on the purpose of the chimney, and its dimensions slightly exceed the dimensions of the chimney itself. It usually takes one metal strip to make the base.
When the system is multi-channel and has ventilation, it makes sense to build a complex base consisting of several parts. The first one will be at the bottom, standing on the bricks, covering them. After that, we will install pipes on this structure with a diameter exceeding the diameter of the channels. Their number should match the number of smoke and ventilation ducts. On their top we mount supports and caps - if the channel is chimney or we install a nozzle (when the channel performs ventilation functions and the presence of ventilation pipes). Ventilation is an important factor for the correct operation of the heating system.
The task of the supports is to create space for the movement of smoke. Often, a mesh made of metal is placed near them. As a result, the stove tube becomes protected from the penetration of foreign objects.
The hat can have any shape, the main thing is that due to its size, it prevents precipitation from entering the chimney system.
You need to know that regulatory documents prohibit the installation of weather vanes, visors, chimneys on chimneys if the heating is running on gas. Do not install such devices on flue gas chimneys in order to avoid problems.
Materials for the canopy over the chimney
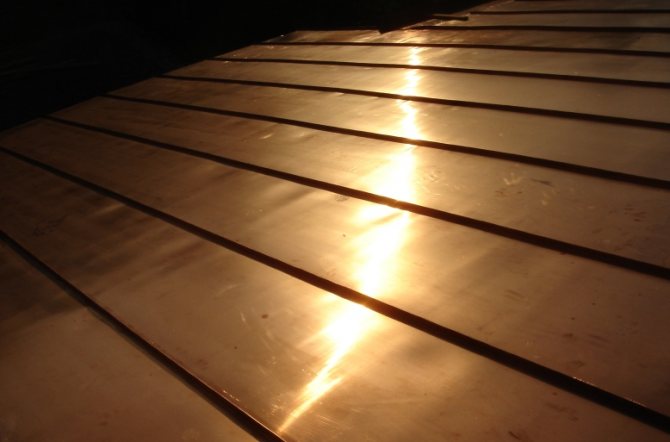
When making a visor for a chimney pipe with your own hands, you can use various materials. The most common are zinc, stainless steel and copper. They are quite resistant to water and acids.If you use other materials, then after a while the visor over the chimney will become unusable. Nevertheless, copper is considered the most durable material for these purposes. A visor made of such a material looks beautiful and has the highest indicators of resistance to water. Chimney canopies photos and videos will be below.
how to make a visor for a chimney pipe
Purpose and device
The visor for the chimney enhances the draft indicators in the structure. This is due to the deflection of air currents. In addition, such a device can be equipped with a mesh, which will prevent debris from entering the system. Let's consider other functions of this device:
- chimney, covered with a visor, protected from rain and snow;
- presentable appearance of the chimney on the roof;
- increase in the efficiency of the chimney by about 10–20% (if installed correctly);
- strengthening the brickwork of the chimney.
Important! It is also worth noting that such a simple device as a visor on the chimney eliminates turbulence or air turbulence in the chimney. This is very important, since when turbulence occurs, the smoke in the system can change direction. As a result, it will enter the dwelling, and not be diverted outside the house.
A visor is a necessary element of any chimney structure. The installation of this device is recommended in all cases, regardless of the individual design features.
Preparing to install a visor on the chimney with your own hands
Before you make a visor for the chimney with your own hands, you need to draw up a drawing for installation on paper. It is important not to forget about the skirt-shaped drip. With the help of it, water does not flow down the pipe. The vane itself protects the chimney from all sides.
do-it-yourself chimney visor
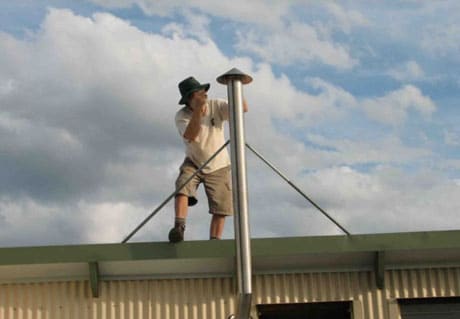
Making a visor for a chimney with your own hands, drawings and diagrams are in the first place. Next, you need to make sure that he behaves steadily under various atmospheric phenomena. Since the location is rather difficult to access and it is not very convenient to climb there all the time. The best chimneys are considered to be copper or stainless steel. It can also be made from shaped pipes or other available materials, but it will be less practical and reliable. With the right choice of material, it will last for many years.
The choice of material for the manufacture of the visor
To date, the choice of materials for the visor is quite large. They use copper, aluminum, galvanized. But, as a rule, preference is still given to stainless steel with a polymer coating. It is worth noting that some companies offer their customers the additional installation of not only a protective mesh, but also screens that reflect heat. Such a screen will protect the visor from overheating of its polymer surface.
The hard-to-reach location of the visor suggests its resistance to precipitation. That is why this element must be performed with high quality, from the most resistant materials. This material is copper.
Before proceeding with the installation of the chimney and the visor, it is recommended to correctly design all your actions on a sheet of paper. Do not forget to include in the project a drip that looks like a skirt. This element will help prevent snow and rain from entering the chimney masonry from the outside. As a result, the visor will reliably protect the chimney both outside and inside.
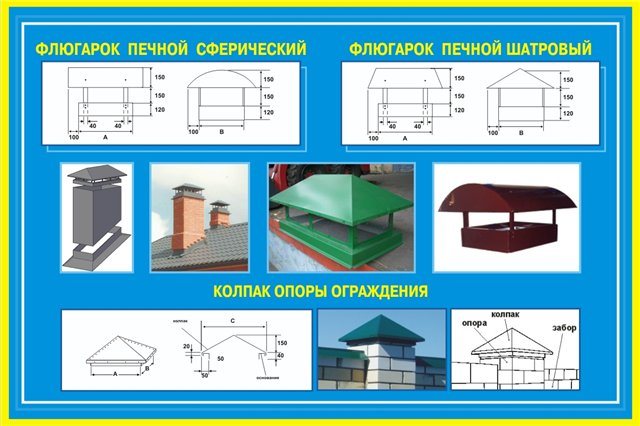
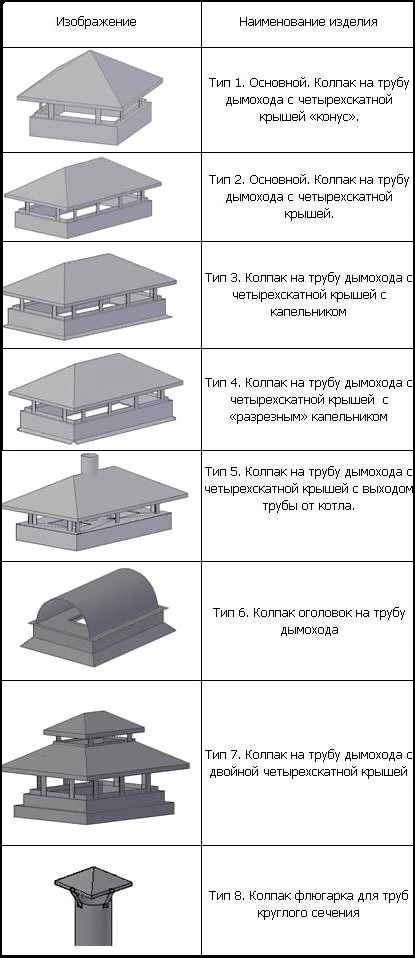
Visors are of the following types:
- Flat
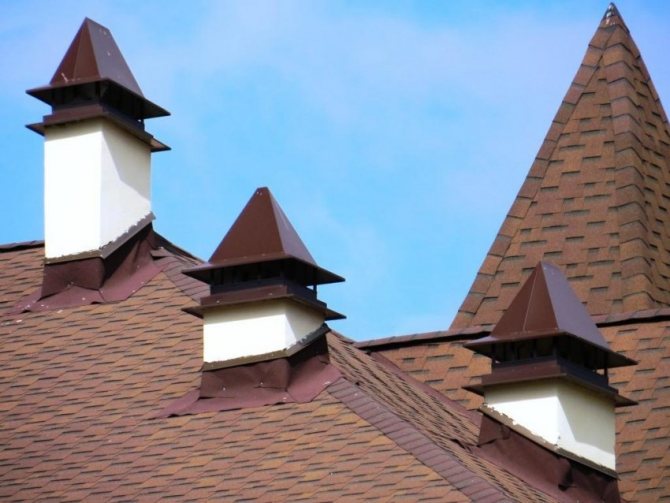
- In the form of a house, with a hipped roof
- In the form of a house, with a four-pitched gable roof
- With a semicircular roof
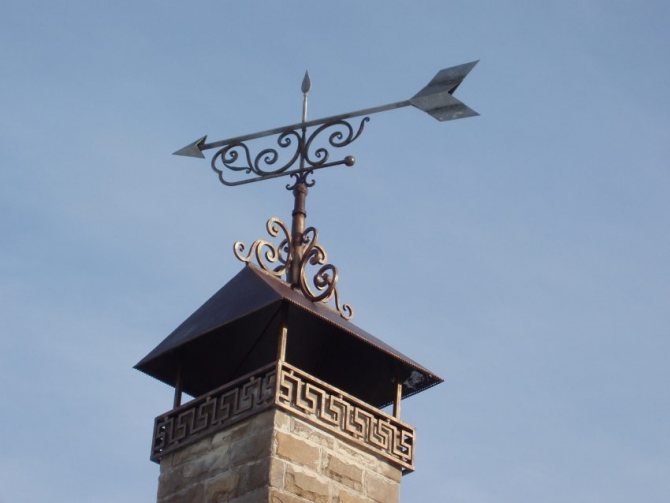
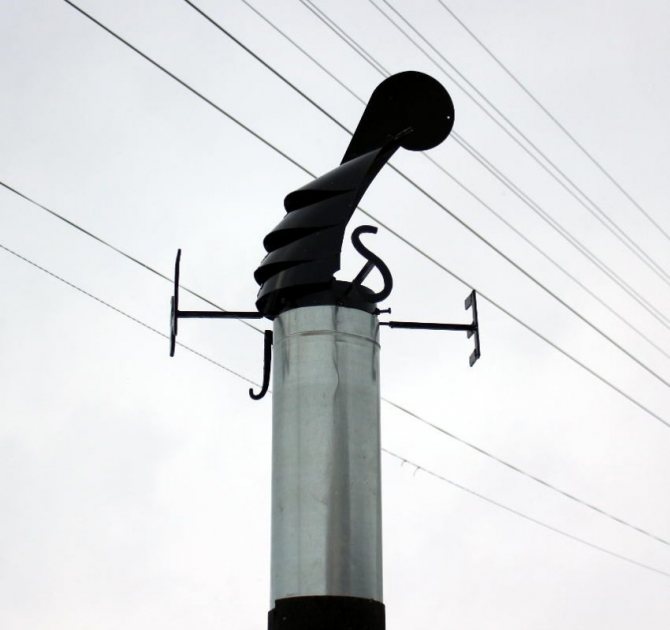
- With a weather vane
- They have a cover that opens.
Types of visors in shape:
- Vaulted (semi-cylindrical)
- Tent
- Four-slope
- Gable
- Spire-shaped
- Quadruple
- Flat.
A flat canopy made of copper is usually placed on the roofs of Art Nouveau houses. The European style of building a house involves the use of a canopy with a semicircular roof. But thanks to the use of a visor on a chimney with a gable roof, good ventilation occurs, as well as reliable protection of the structure from filling it with snow. In the visor with a built-in weather vane, you can make a special damper, thanks to which the combustion products will freely go out in windy weather. A weather vane, which can be opened, is very practical to use, since it can be used to clean the chimney ducts without effort.
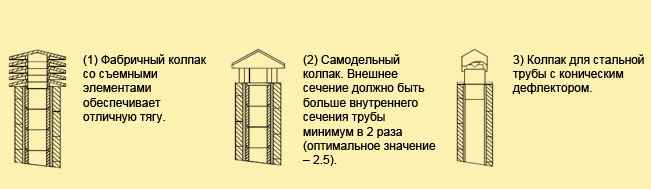
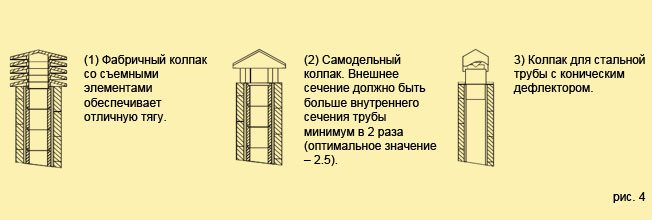
v Using an easily removable visor made in the factory gives good traction.
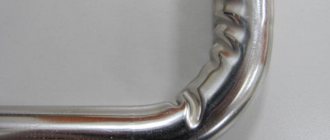
v In the visor, made by yourself, the outer section is made 2-2.5 times larger than the inner section of the pipe.
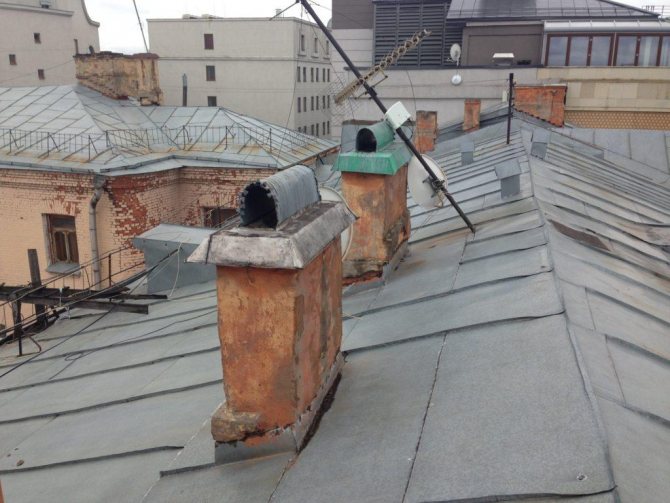
Starting the installation of visors, you need to learn to understand the reasons why the chimney fumes. It:
one). Incorrect chimney diameter.
2). Small height of the chimney on the roof and incorrect placement.
3). Blowing out cold air in an intensified gusty wind. This creates a certain pressure on the combustion products that go outside. This leads to a drop in draft and the bulk of the smoke accumulates inside.

By material
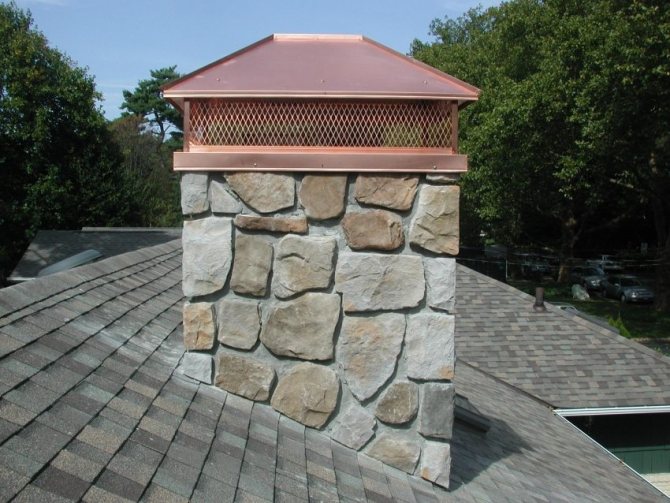
The durability of the visor depends on the quality and type of materials. When choosing options, pay attention to the copper fixtures. Such material, aging, becomes more attractive and will reliably serve for 50 years.
The main part is an umbrella, it is better to be made of stainless steel or galvanized. Or you may have to remove the cap annually and paint it again.
Yielding to the copper visor in terms of service life by 15-20 years, stainless parts are much cheaper.
Titanium is attractive for its durability and good metal properties, but it costs more than stainless steel.
Therefore, in this question (which cap is better?) There is no unequivocal advice.
Someone buys a copper hood with an architectural composition, or a simple galvanized umbrella - any structure must reliably protect the chimney. And appearance is a secondary concept.
Advantages and disadvantages
The advantage of installing a hood on a chimney is:
- more aesthetic appearance of the chimney duct;
- protection of the inner space of the pipes from the ingress of foreign objects and various debris;
- protection of the chimney material from the effects of precipitation;
- the chimney covers part of the mouth, not allowing the flow of wind to overturn the draft.
There are not so many disadvantages of installing an umbrella on the chimney, but they are quite significant:
- the product is installed in the path of the exit of combustion products and serves as some obstacle to their free outflow. An incorrectly selected and mounted model can reduce traction and lead to smoke in the room;
- The water vapor generated during fuel combustion goes out with the smoke through the chimney to the street and condenses, in contact with the cold metal of the hood, and then freezes when the temperature drops below 0º. As a result, icicles freeze on the chimney, which blocks the passage opening of the pipe and impedes the smoke removal process.
Deflector materials
Various materials are used to make a chimney. The most common among them are: copper, as well as steel (galvanized or stainless).
They are quite stable in relation to water. But for the construction of canopies for chimneys, very strict requirements are imposed on resistance to corrosion. If you use other materials, after a while the visor will become completely unusable.
However, the most durable material is copper.The deflector made of this material looks beautiful and aesthetically pleasing, and also has the highest indicators of resistance to water.
What is a chimney cap for?
Now there is a huge selection of visors on the market. They can have a conical shape or be made in the form of a weather vane, differ in appearance, size and other parameters. You can make a simple structure from a stainless sheet on your own if you have a tool and minimal skills in working with metal.
Caps are installed on the chimney heads for the following purpose:
- The design prevents wind from blowing into the pipe, which can lead to back draft and the ingress of combustion products into the room.
- A chimney cap can serve as a decorative function and complement the exterior of the house, emphasize its special architectural style. In this case, zones with decorative ornaments are installed.
- The umbrella protects the brick structure from precipitation and wind, so that it can serve for a longer time.
- The visor prevents leaves and other debris from entering.
- A canopy with a net is an effective solution to prevent birds from nesting inside the chimney.
Don't be fooled by the manufacturer's claim that installing a bonnet will provide good traction. A metal element not only does not improve traction, but also worsens it, since it prevents combustion products from escaping to the outside. The only exceptions are designs with deflectors, but that's a completely different story.
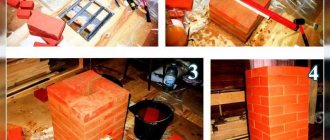
How to do it yourself
In fact, such a structure is not the height of engineering thought, and is quite accessible for independent construction even for an ordinary person who has ever held a ruler and metal scissors in his hands.
Among the various tips and recommendations for the construction of such a device, many should be heeded, but work should be started from the simplest thing - to make a working drawing and preferably a paper model.
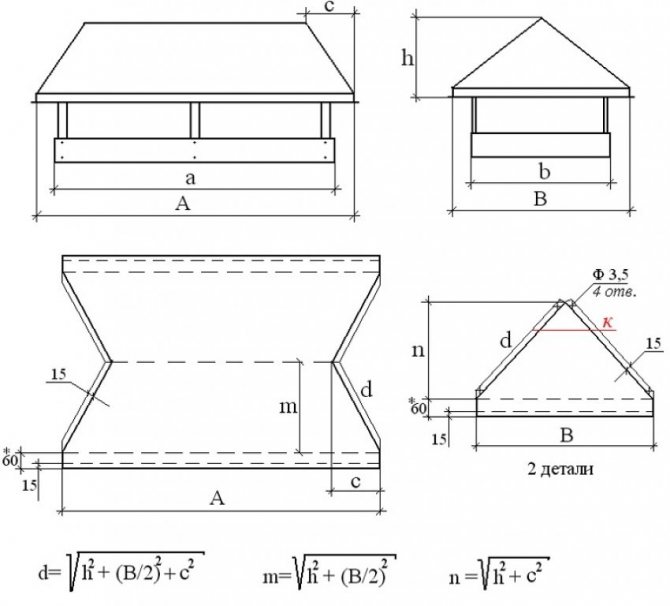
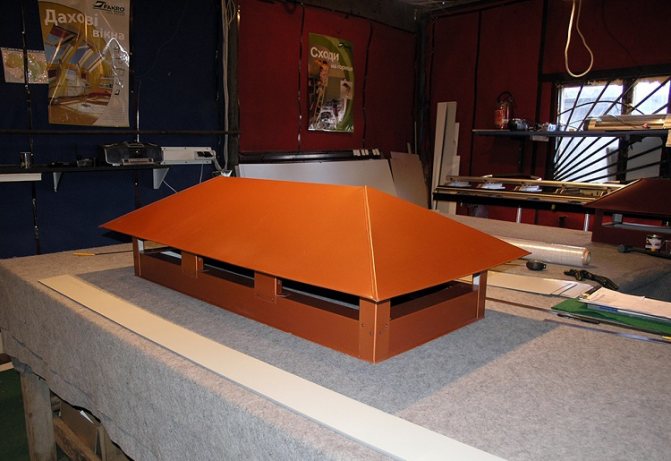
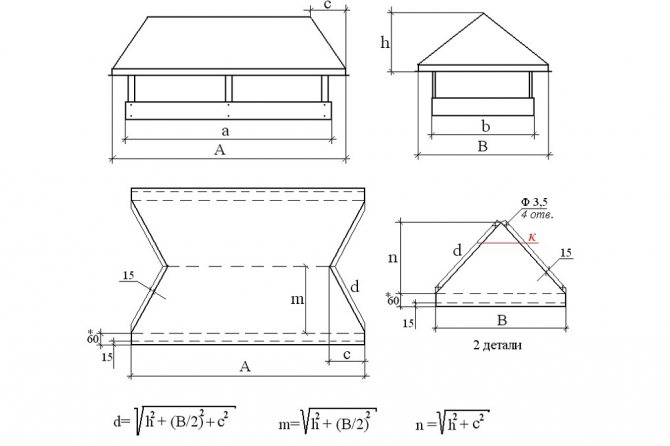
Blueprints
The simplest and most reliable option for self-production is a cap in the form of a mushroom with four sides - this design is quite simple and does not require large costs both during manufacture and installation.
The main element here is the flatness of the sides. Most often, measurements are made of the external size of the chimney.
The main data for the development of a drawing is:
- The height of the fungus.
- The length of the edge connecting the sides of the pyramid.
- Base side length.
- Chimney perimeter by external measurement.
In fact, such a cap is a pyramid with four sides, set on a base - a rectangle equal to the cross-sectional area of the pipe and with a perimeter corresponding to the perimeter of the pipe.
The sequence for developing a working drawing can be as follows:
- Taking measurements from the chimney.
- Determination of the dimensions of the cap.
- Making a working sketch of the product.
- Creation of a working drawing.
- Gluing a large-scale visual model from paper.
When calculating, it is mandatory to check all data before transferring to metal.
As a basis, you can choose options for self-made caps, which are presented on various sites for DIYers. But even at the same time, it is not out of place to make a large-scale model.
Step-by-step instruction
To make the simplest chimney you will need:
- Sheet metal with a thickness of 0.5-0.8 mm.
- Rivet rivets.
- Riveter.
- Scissors for metal.
- Drill with a set of drills.
- A hammer.
- Wooden bars for metal bending.
- Clamps or other clips.
The stages of practical work will be as follows:
- The working drawing is transferred to sheet metal.
- Metal cutting is in progress.
- The edges are bent along the fold lines, mounting holes are made.
- Details are fastened with rivets.
- The top is arranged on the racks and connected to the bypass of the pipe.
- The resulting structure is attached to the chimney.
In the manufacture of this structure, the best option is a painted metal or galvanized sheet. After connecting all the parts to improve the anti-corrosion properties of the coating, it is recommended to additionally paint the inner surfaces of the cap with a metal primer.
It is also recommended that when installing on a chimney, close the chimney channel with a rag to prevent debris and broken brick from getting inside the channel.
The principle of the weather vane
The basic design principles are based on the following actions:
- The air currents while going around the walls at the upper of the cylinders hit and, sliding along them, "wrap" up and suck out the gases that come out of the chimney.
- After the chimney is installed, air moves more intensively in the chimney, as a result of which draft and ventilation are increased.
- If the wind is oblique / vertical, the visor increases the thrust. Air is able to penetrate through the holes in the upper cylinder, sucking the smoke out of the chimney.
- The downward direction of the wind slows down the smoke output, as turbulence appears under the very top of the deflector.
Installing deflectors
Do-it-yourself chimney visor can be made in two ways.
- To make a vaulted chimney in a simple and generalized way, you will need 5 parts - a rectangular sheet of metal, copper or galvanized steel and 4 posts.
- Cut a rectangle out of the prepared sheet so that it overlaps the chimney opening with a large margin.
- Using a steel angle, make 4 posts and drill holes at the ends for fastening.
- Fasten the pre-curved posts at the corners of the prepared metal rectangle with rivets.
- Bend a sheet of metal into an arc and insert the ready-made visor into the opening of the smoke channel. Pay attention that the ends of the posts fit well against its walls.
- Drill holes in the brickwork and fix the device using nails.
- A weather vane is installed on an asbestos-cement pipe with a diameter of 12 cm.
- Use M6 bolts and nuts to secure the struts to the lower cylinder.
- Take the top cylinder that is widened towards the bottom and attach it with a yoke to the bottom cylinder.
- Collect the reverse cone on the folds.
- Install the resulting tapered visor using rivets.
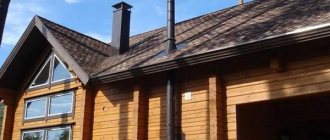
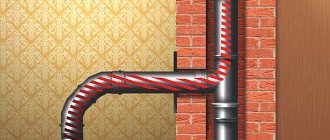
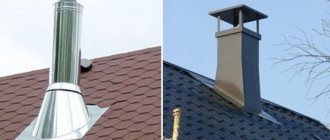
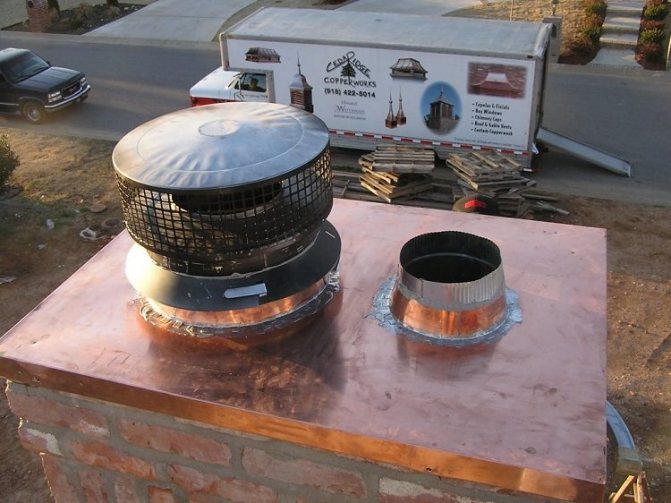
Installing a deflector on a sandwich chimney pipe
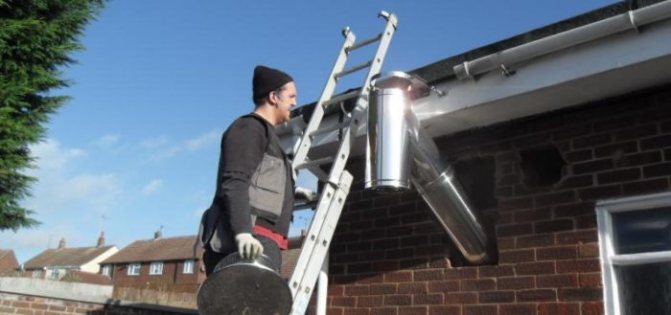
How to install the hood
To install the hood, you must:
- tap the brickwork in the upper part of the chimney to check its reliability, replace the bricks if necessary, fill the empty joints with mortar; put the base of the cap on the pipe; fix the structure on the chimney with dowel-nails or other fasteners.
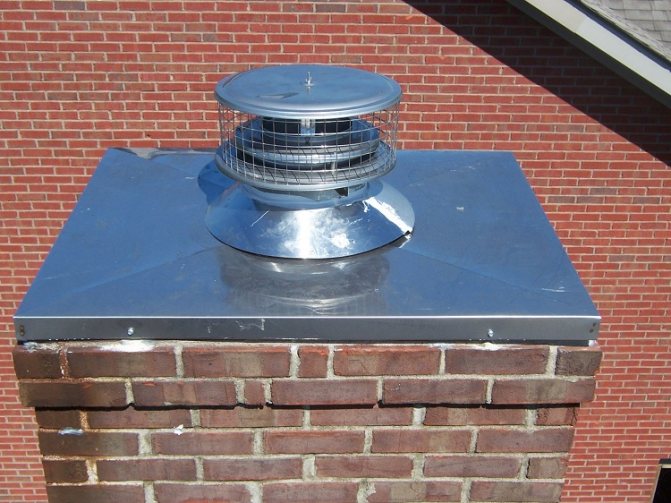
Installing the hood
There must be at least two fasteners on each side of the pipe. The optimal pitch for the long sides of the pipe is 25-30 cm. For the installation of copper heads, it is better to use fasteners from the same material; for the rest of the caps, stainless steel fasteners are suitable.
Varieties
The variety of configurations of chimneys and roof masonry led to the development of different forms of protective caps, as well as design, style solutions, dimensions of elements.
Structures are divided into:
- typical;
- multi-slope;
- hipped;
- supplemented with a weather vane;
- flat top models;
- round products with a cone-shaped umbrella;
- complemented by a lid;
- spark arrester models;
- models with hip roof, etc.
A standard wind vane for a pipe is made of metal sheets and has a pyramid configuration. The element is attached to the apron using brackets. The model is universal, it is performed depending on the dimensions of the pipe of different dimensions.
The top of a four-slope wind vane on a pipe is optimal for pipelines of rectangular configuration and made of bricks.The shape is similar to the structure of the roof.
The cap with a rounded umbrella is used for buildings in German, Swiss and other European styles. The element has high aesthetic characteristics, is compact, but the model's traction indicators are not effective enough.
Weathervans with flat rectangular umbrellas are used in the design of buildings in the direction of Art Nouveau, minimalism. However, it must be borne in mind that the flat configuration makes it difficult for snow to fall, the brackets have a large load. Strong compounds are used to prevent deformation.
A round vane with a cone-shaped umbrella is used as a protective element for pipes with a circular cross-section. Models do not supplement with drips.
Elements for protecting the chimney with a multi-slope configuration allow high-quality ventilation of the chimney. In winter, the structures prevent the ingress of snow drifts.
Models with a closable lid are easy to operate, repair and clean. The ventilation opening provides free passage of combustion products.
Models with spark arresters are designed for stove devices operating on peat raw materials, wood. The products are intended for roofs made of fire hazardous materials (wood-based panels, solid wood).
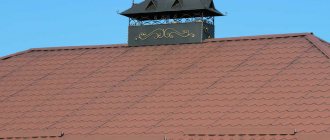
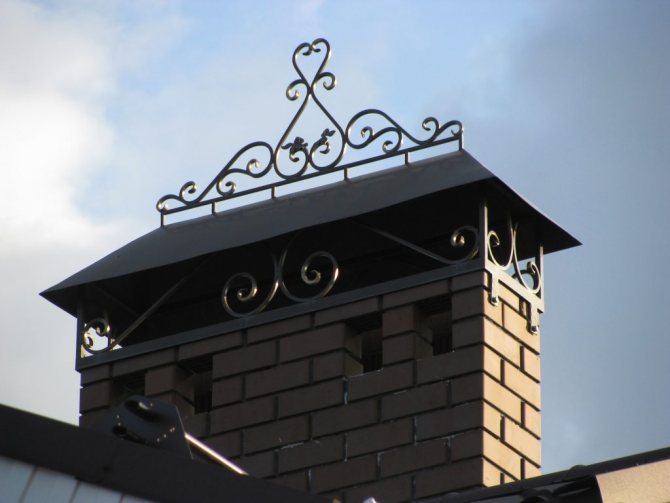
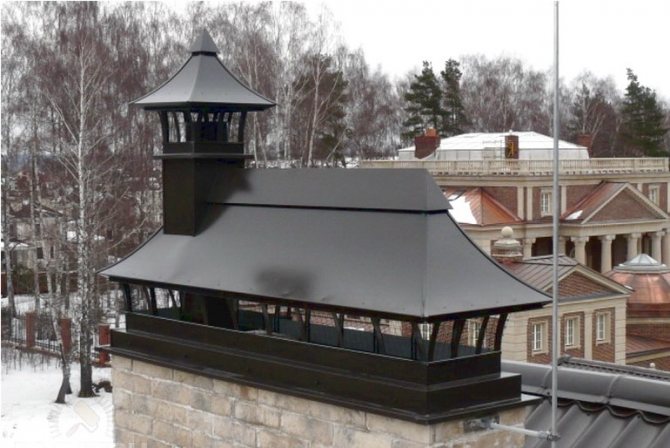
The hood, complemented by a weather vane, is distinguished by its decorative effect and is used in semi-antique buildings (Renaissance, Gothic, etc.).
The hip roof structure is more robust than other types. The product is optimal as protection against rain, snow, hail.
Depending on the project, the weather vane is supplemented with functional details (flaps, hinged doors). However, it is important to preserve the functionality of the structure for reliable operation and durability. Complex hood configurations can create noise and vibration in the chimney.