What it is?
A dry technical definition says: an overpressure valve is an armature that automatically releases excess water when overpressure occurs.
It is a direct-acting device, since it reacts directly to the effect of the heated medium. (water or other heat carrier).
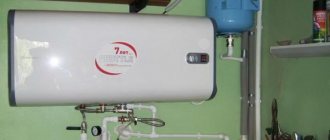
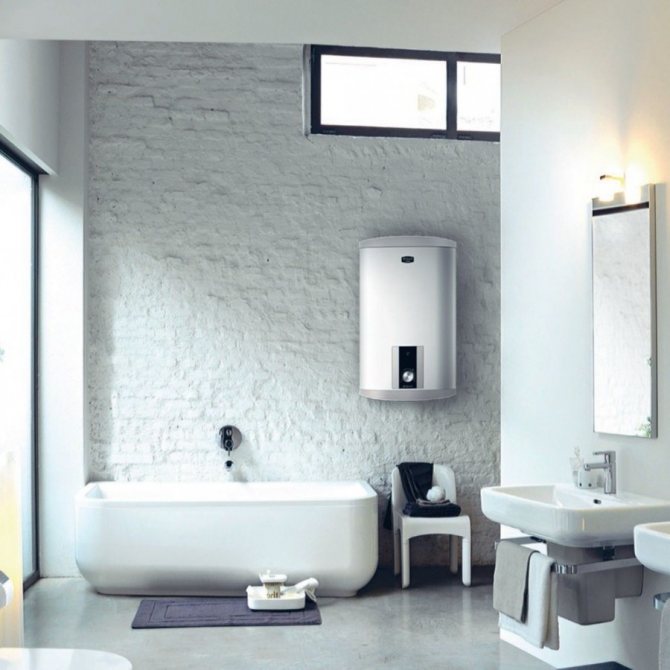
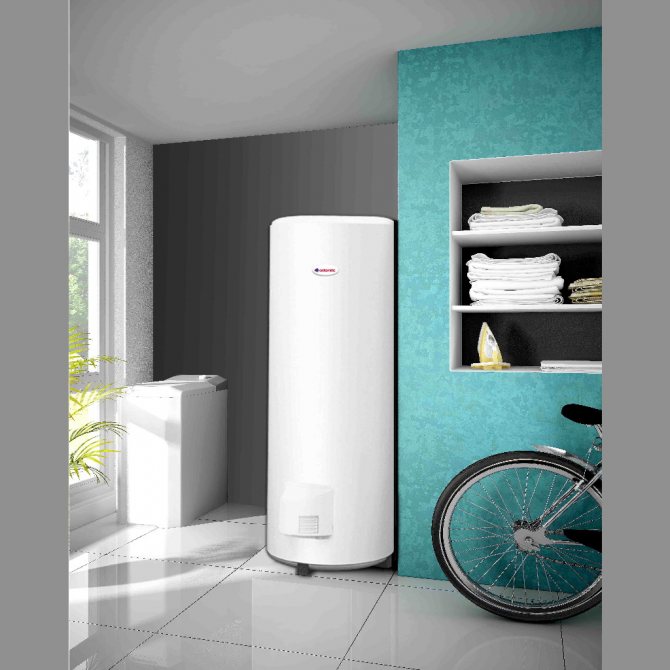
As a rule, an overpressure valve is included in the basic equipment of all compact water heaters.
Sometimes an overpressure valve is confused with a check valve. Often times, both devices are housed in a single housing, which is why confusion arises. But, these devices are used for different tasks and are fundamentally different from each other.
What is it needed for?
The task of the valve is to discharge excess hot water in the working tank of the heater. The expansion of the water creates a lot of pressure that threatens the integrity of the appliance.
The valve automatically drains some water, bringing the total volume to the nominal value. This saves the heater and protects equipment and people from contact with hot water.
Excessive volumes of water are discharged through a special branch pipe connected to a drainage system or a special receiving tank.
Consequences of absence

When heated, the liquid increases its volume (expands) by 3%... This means that in a heater with a working volume of 10 liters, an additional 0.3 liters will appear.
If the size of the tank is not designed to accept additional volumes of water (and this happens most often), the heater body will be destroyed. Then a crack will appear, into which water will begin to go.
Most of the heaters are designed in such a way that the decrease in pressure in the working vessel is immediately compensated by feeding from the network. Therefore, the flow will be constant until the container is replaced or repaired..
What is the procedure for?
The event is simple, takes a minimum of time, knowing all the nuances, it can be carried out without the help of masters. It is needed in three situations:
- Location of the water heating device in a cottage or other unheated room. Due to the fact that it will not work all season, the liquid should be removed for the winter. This is due to the fact that under negative temperature conditions ice will begin to form and the likelihood of boiler breakdown will increase.
- Replacing the magnesium anode. All work is allowed to be carried out exclusively with a dry container. Replacement is required at least once every 12 months. Magnesium strongly attracts various impurities, which prevents them from settling on the walls and causing spontaneous destruction of metals. They only corrode the substrate without affecting the material of the equipment.
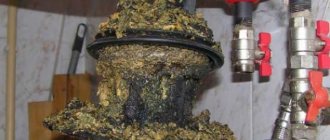
- Cleaning the container (tank). The main reason is the accumulation of scale. Against the background of water hardness, when heated, heavy impurities settle on the surface (plaque is formed). A few days later, it begins to turn to stone, which interferes with the heat transfer of the tubular electric heater. As a result, the consumption of electricity significantly increases (by about 30-40%), but sufficient heating does not occur. In addition, the multiplication of pathogens is also the cause of the drain.
A number of signs will tell you about the need for an event. These include: the appearance of strong noise during operation, leakage, long heating time of the liquid and low head.
Important! If the boiler is still under warranty, you should call the service center master for cleaning.
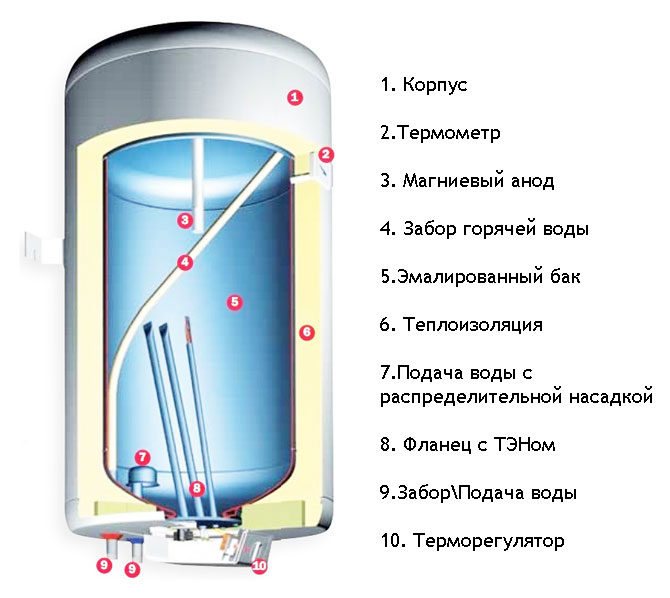
Device and principle of operation
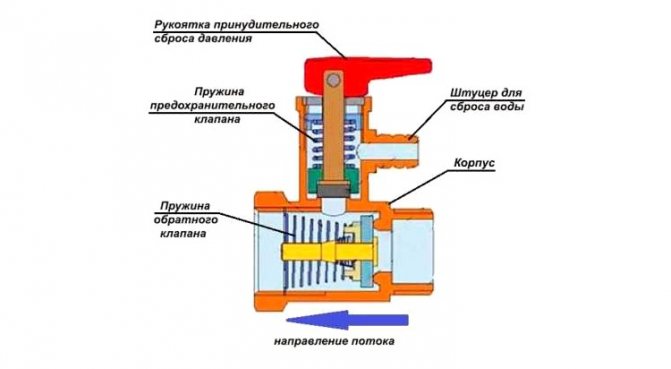
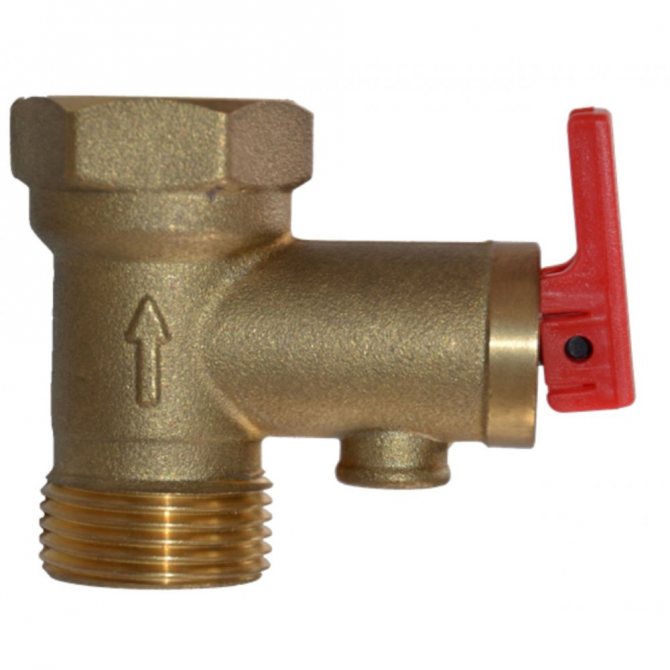
The overpressure valve is a direct acting spring loaded valve.Its outlet is closed by a ball pressed against the hole by a spring.
When the H2O head in the heater exceeds the spring force, the ball opens the passage and releases the excess water. As soon as the pressure drops, the spring presses the ball again and closes the outlet.
There are different valve designs, where not only a ball is used as a locking mechanism, but also a wedge, a poppet element, and other parts. However, the general principle of operation is the same for all designs.
Outwardly, the valve resembles a conventional tee fitting, but a water drain handle is installed on its perpendicular outlet. The outlet is equipped with ribbed projections for connecting a tube that connects to the drainage system.
Views
There are several types of such devices.... First of all, they are divided according to the value of the limiting pressure:
- for containers up to 50 l;
- from 50 to 200 liters;
- above 200 liters.
As a rule, devices of the first and second groups are one-piece. More powerful safety valves are designed for high pressures (typically up to 7 bar).
There are models with and without a drain handle. The former are more convenient, they allow you to check the operation of the device or manually reduce the amount of water in the container.
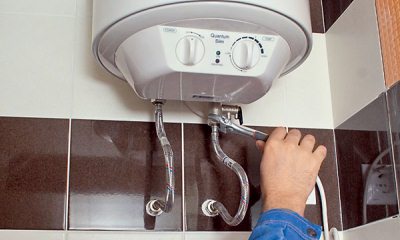
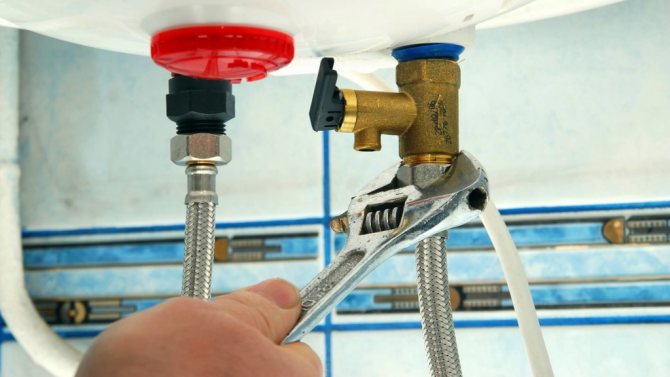
We twist the pipes
If amateurs were involved in the installation of your boiler, then they probably did not install either a safety valve or a tee
Therefore, in order to drain the water from it, you will have to arm yourself with a wrench. What should be done:
- Shut off the cold water in the apartment;
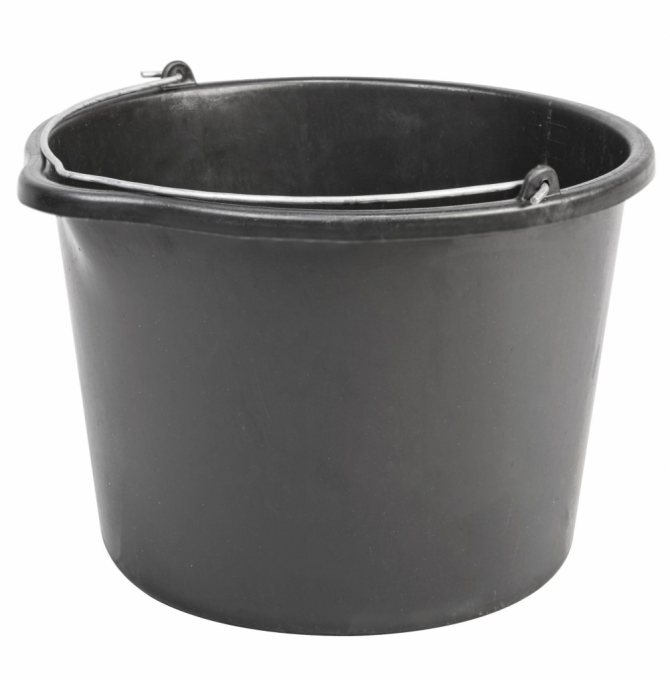
- Prepare a container of sufficient volume to drain the water;
- Slowly unscrew the tap or hose through which hot water comes out of the boiler;
- Remember. How many revolutions had to turn the tap to unscrew it.
Advice
If you do not have a container of sufficient volume, prepare a hose, a garden one will do. As soon as water begins to flow out of the storage water heater, immediately try to put it on the tap or pipe.
After you drain the water from the boiler, you need to reinstall the hose or tap. To do this, wrap the thread with fum tape against the direction. Make two or three turns. Then screw it into the water heater the same number of turns as it took to unscrew it.
Read more on how to drain the boiler through the water inlet look in the video at the end of the article.
How to choose a boiler model?
If the heater is equipped with a safety valve as standard, the same model must be purchased for replacement. However, sometimes situations arise when it is necessary to install the device on an old boiler model that is not equipped with such protection.
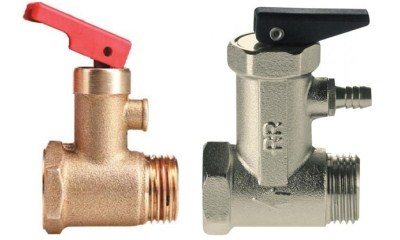
In such cases, it is customary to be guided by the color of the drain handle:
- red - the model is designed for a maximum pressure of 0.6 MPa;
- black color - 0.7 MPa;
- blue color - 0.8 MPa.
The boiler parameters can be found in the instructions. Sometimes the ultimate pressure is indicated on a special plate or paper sticker installed on the body of the device.
It is necessary to choose a device in exact accordance with the forthcoming load... If it is designed for less pressure, the water will constantly drain. If the rating of the valve is much higher than the operating value, the device will not work in case of overload, creating a danger for the heater.
Step-by-step installation instructions
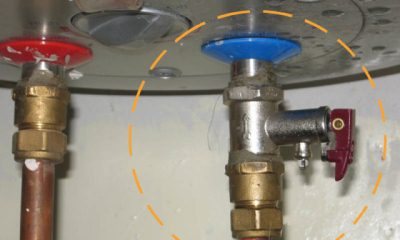
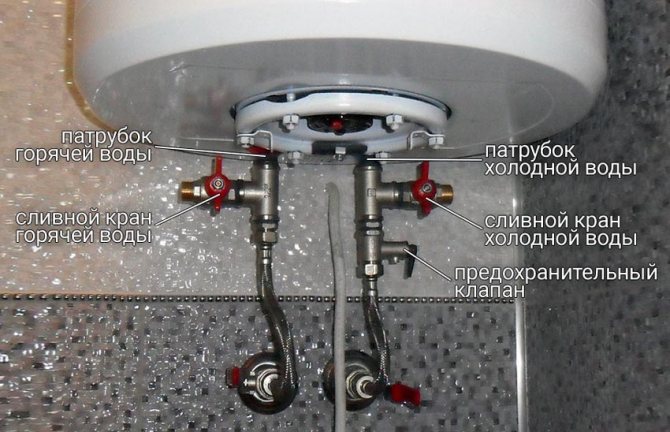
An overpressure valve is installed on the cold water supply line to the water heater. There should not be any additional devices or shut-off valves between the boiler and the device.
On the body of the device, an arrow shows the direction of the water to eliminate installation errors.
Tools and materials
To install, you will need:
- FUM tape or sanitary flax;
- transparent tube to the outlet;
- gas wrench (small).
Winding is needed to seal threaded connections. It is necessary to use the gas wrench carefully so as not to rip off the thread or tear off the pipe on the boiler.
The transparent tube is pulled over the outlet and the other end is placed in the sewer.... The tube does not have to be transparent, but it is more convenient to control the drainage process if you can see the mode of dumping excess water.
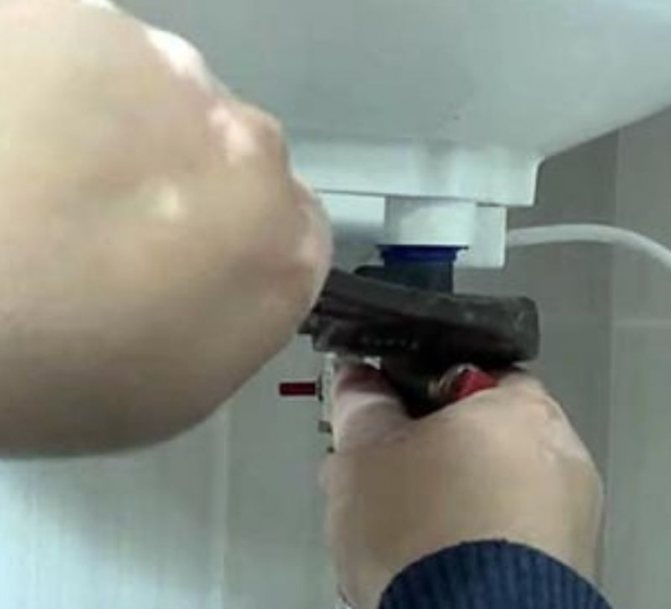
Installation process
Before starting the installation, it is necessary to disconnect the power supply from the boiler, drain the water and turn off the supply valve.
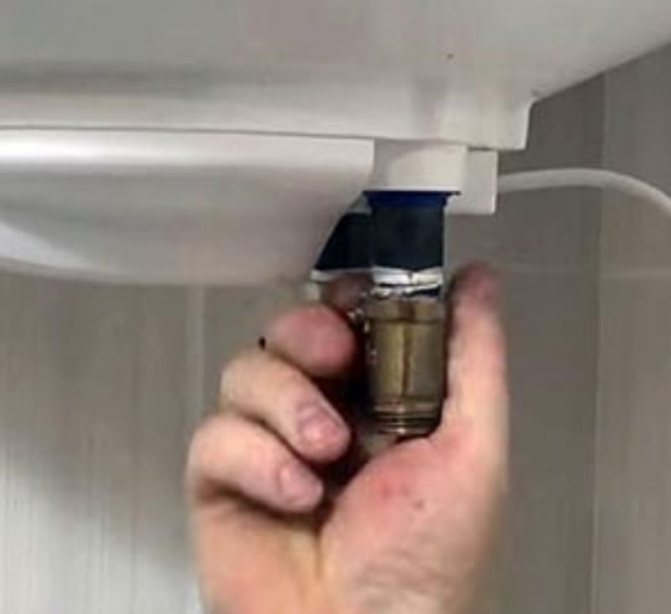
The valve assembly is usually screwed directly onto the heater make-up connection.... Plumbing tape or FUM tape is applied to the threaded connections, after which the valve body is screwed on.
The outlet must point downwards. Then the flexible supply hose is screwed on and the water drain tube is stretched.
To test the performance of the protection, pour water and turn on the heating. When the device reaches the nominal mode, the drain handle is set to the vertical position. If water has flowed from the pipe (it can be seen through the transparent walls of the pipe), then the installation is done correctly.

All methods of draining water
To empty the boiler, it is not enough to open the drain valve. When using this method, no more than 2-3 liters of liquid will come out of it.
Important! A prerequisite is the penetration of air into the tank, since without this condition the rest of the liquid will not spill out.
To understand how to drain water from the Termex boiler, you can use the instructions below.

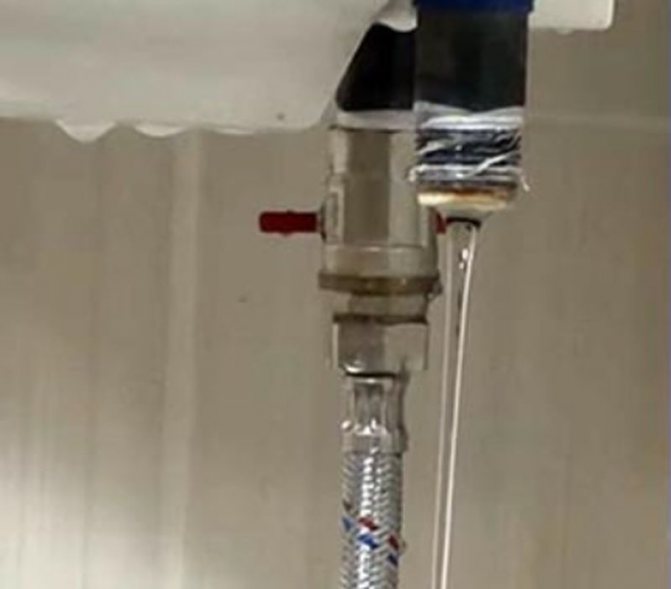
Due to the safety valve
For an easy descent, you must initially take care of the correct installation of the water heater. When all the installation conditions are met, the liquid can be quickly drained using the safety valve:
- It is necessary to close the shut-off valves into which cold water enters, and then completely drain it using a mixer tap.
- After the liquid stops flowing out, the tap must be closed and the valve on the safety valve must be turned. When air enters, the fluid flow will resume. If there is a special plug in the tank, then it must be opened. If it is absent, then you need to use an additional drain cock, which is located on the DHW pipe.
- Liquid from a heater with a volume of 80 liters or another volume will pour out through the spout after 65-85 minutes.
Through the hole in the cold water pipe
Initially, you need to take care of reducing the pressure using a method similar to the previous method. After stopping the flow of water from the mixer tap, you need to resort to the following actions:
- Before starting to release the pressure, the valve should be closed on the cold water supply pipe. After that, it is closed on the hot water supply pipe. After such actions, the liquid inside the storage tank will freeze.
- Place a container under the boiler, the volume of which is larger than the tank. The cold water supply tap is unscrewed with an adjustable wrench, then the plastic pipe is retracted to the side.
- The safety valve is unscrewed from the outlet in the water supply using the same key. Water that has not previously come out of the tank will begin to drip or run out little by little. The next step is to open an additional drain cock. Water will rush, and it will take less than 3 minutes to empty the tank. The current strength can be changed by closing the airlock.
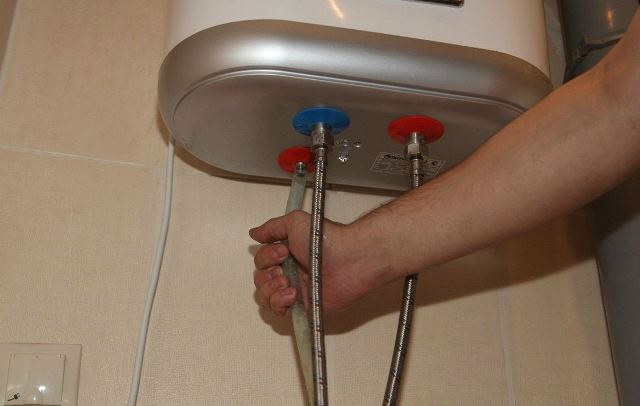
Through hoses for water intake and supply
If the boiler is connected correctly, then draining using this method will take no more than 8-10 minutes. Algorithm for draining through the water intake and supply hoses:
- It is necessary to stop the supply of water and electricity to the boiler.
- Release water from the pipe by opening the hot water valve and the mixer tap. In this case, the valve does not need to be closed, since through it the air will flow into the tank.
- Put on the drain hose and open the tap to drain the water.
- Close the valve after properly draining.
The use of these methods will help to correctly and safely drain the liquid from the boiler. It must be remembered that sometimes it is best to entrust this matter to a professional, so as not to disrupt the serviceability of the electrical appliance and not to endanger your health.
Useful articles, news and reviews on our Yandex Zen channel
Subscribe to
Malfunctions: their causes and elimination
There are two types of malfunctions:
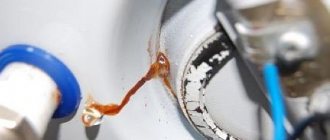
- Continuous leakage from the outlet. This indicates overpressure in the water supply system. The problem is solved by installing a gearbox.
- No release of excess water at high pressure in the tank. This means that the valve is damaged or has a higher pressure rating. In any case, the device must be replaced by choosing a suitable model at par.
It is necessary to periodically check the functionality of the device. Replacing it will be much cheaper than repairing or buying a new boiler.
What to do if it flows from the safety valve from the water heater, the video will tell you:
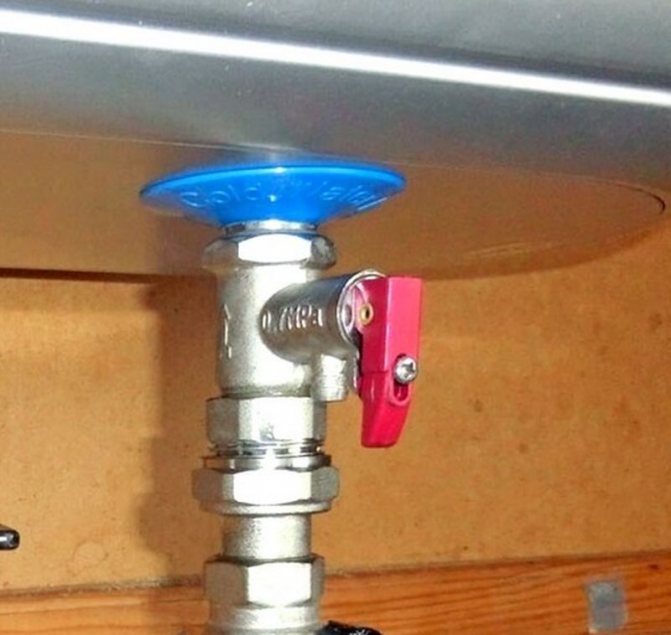


Draining through the safety valve
This is the simplest option (after the previous one). Most water heaters are equipped with a safety valve with a relief valve (see photo). To drain the water without unscrewing the pipes. Just lift the valve lever as shown in the photo.
If the boiler is not located above the bathtub, you can put a thin hose on the nozzle. A dropper tube will also work.

The location of the safety valve and the direction of its opening.
The disadvantage of this method is that the water will drain slowly. But if you do not want to completely spin the valve and disconnect the hoses, then this option is for you.
It so happens that the emergency valve of the boiler rusts. Dirt clogs into it. If you can't open it, try cleaning it, spray it with WD-40 rust converter and wait. If after that it is not possible to drain the water from the boiler - read on.