Rest in the country or in the village is an opportunity to enjoy nature in all its manifestations. As a result, many owners abandon standard cooking methods and prefer to cook food over a fire. The right solution would be to build your own oven for the summer kitchen, making family lunches and dinners a real ritual.
This article will help you understand the features of factory models of stoves, step by step will indicate the nuances of designing and creating such a cooking and heating device at home.
Recommendations for choosing purchased designs
The key indicator in purchasing a ready-made kitchen stove is the type of fuel on which it will work.
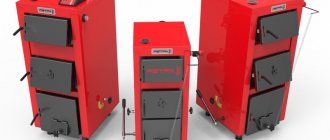
The factory-made summer stove has several design options.
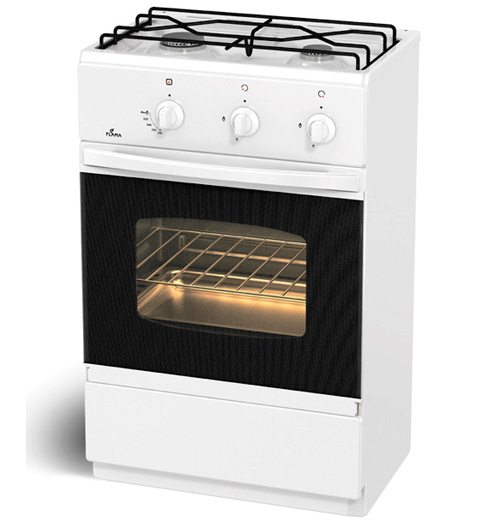
- If there is gas nearby, you should consider buying a gas stove with an oven. Its heating temperature is adjustable. The device is ready for operation at any time and does not require the cost of finding fuel.

- A cheaper solution would be to buy an electric stove. Easy to operate and convenient to transport.
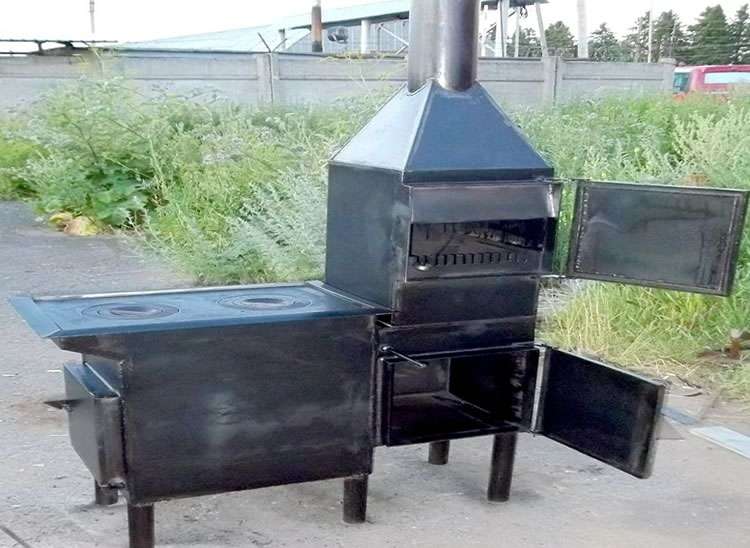
- In the absence of communications, an excellent wood-burning option is a solid fuel stove. Suitable for the most remote suburban areas.
- Universal cookers allow the use of several types of fuel, which significantly saves time on cooking.
It is worth noting that in operation, factory models have a number of advantages:
- a large selection of finished products of various sizes, colors; metal alloys and refractory mixtures are used as materials;
- the scheme of operation of the device minimizes the risk of fire and smoke leakage;
- lightweight structures.
- fast assembly and installation.
However, a do-it-yourself project of a closed or open summer kitchen with a stove will take into account the features of the site, the wishes of the owner and save money. In addition, step-by-step construction instructions have now been developed for furnaces of varying complexity.
Budget options can be:
- Russian stove for a cauldron;
- two-burner stove with oven;
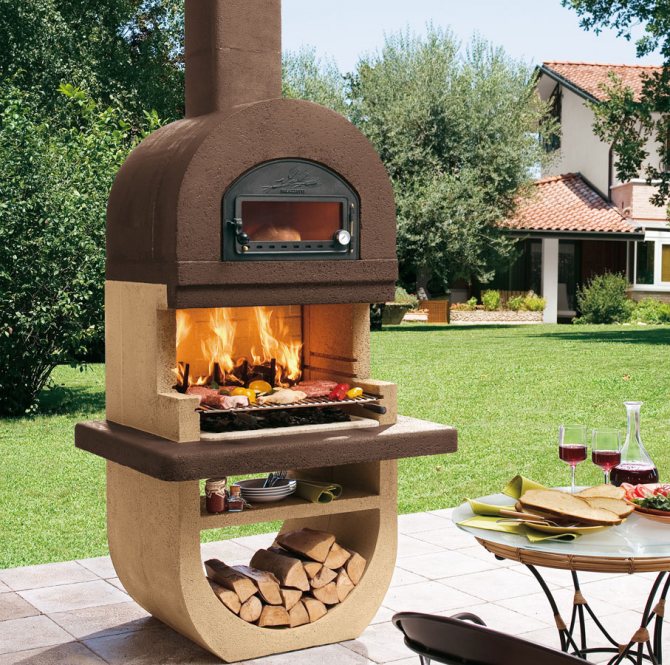
- barbecue oven with barbecue.
It is important to remember that when creating a furnace, you need to draw up a drawing accurately in order to take into account the nuances of construction, the amount of material required and the amount of work.
A number of practical tips for buyers of ready-made fireboxes
Increased requirements are imposed on the oven for the summer kitchen: on its surface, not only the preparation of soup or second courses is required, ideally the owner should use the frying plate as fully as possible - bake fish, make kebabs, etc. Therefore, the issue of erecting a stove should be approached responsibly, having correctly calculated the necessary materials and thought over the technology of work.
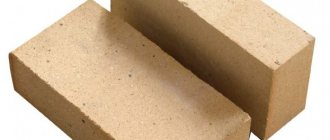
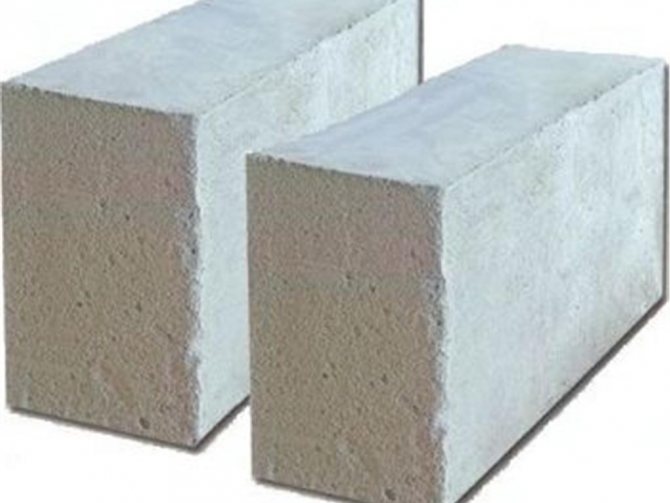
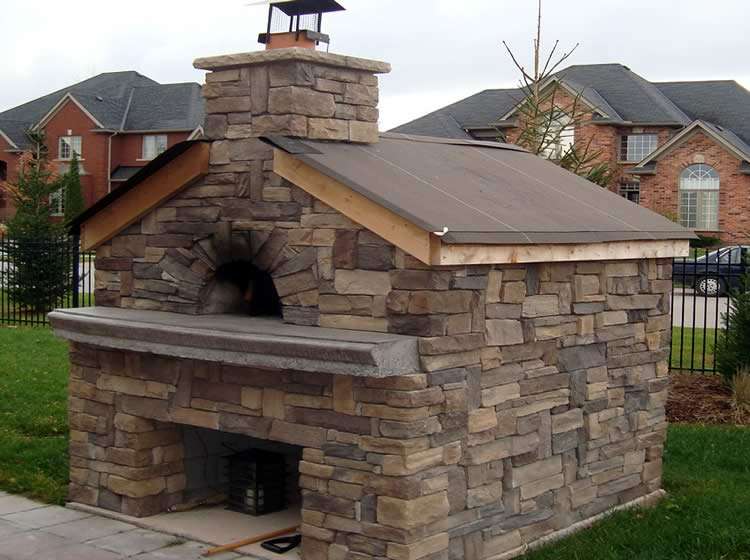
For work, you will need any high-strength material, it can be a brick with refractory parameters or aerated concrete. Constructions made from these building materials are practical, visually attractive and functional.
Ready-made fireboxes are practical, visually attractive and functional.
Important: some owners of country houses, if they want to save time, buy ready-made stoves with a metal firebox for their summer kitchen. It remains only to assemble the oven for the summer kitchen with your own hands and that's it - you can enjoy aromatic dishes cooked in the open air and soaked in a special atmosphere.
But this option is not suitable for all residents of their own homes for financial reasons - the cost of the finished stove is quite high, so many people prefer to build the structure on their own.The most budgetary material for this event is aerated concrete, its price is half that of refractory bricks. But such masonry, among other things, needs cladding, otherwise heat loss will reduce the performance of the entire building.
It is worth noting the following about the advisability of buying a ready-made furnace firebox: the apparent relief of labor ultimately turns into the same efforts, because the base for the firebox will have to be made in any case. The total cost of installing a ready-made and a home-made firebox is identical, all builders talk about this.
The finished stove for the summer kitchen is assembled according to the scheme, the principle of action resembles working with a conventional designer. Special glue is used to connect the parts.
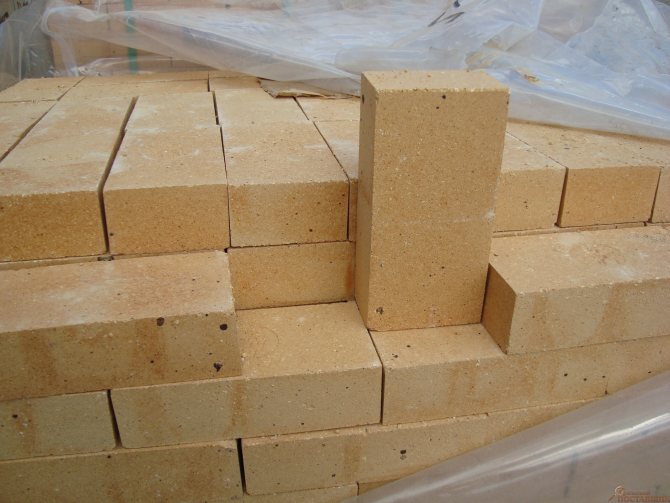
Fireclay brick or aerated concrete
To make a structure of this type, it is better to purchase aerated concrete or refractory bricks. These materials are capable of withstanding high temperatures, do not burn out under constant heating, and retain heat inside the device for a long time.
Will significantly save financial costs, the purchase of aerated concrete. But after laying it, the oven must be lined without fail so that the heat inside remains as long as possible.
It should be noted that refractory bricks have several advantages:
- moisture resistance;
- there is no need to carry out facing work;
- long service life;
- external aesthetics.
But the cost of brickwork will cost much more than aerated concrete.
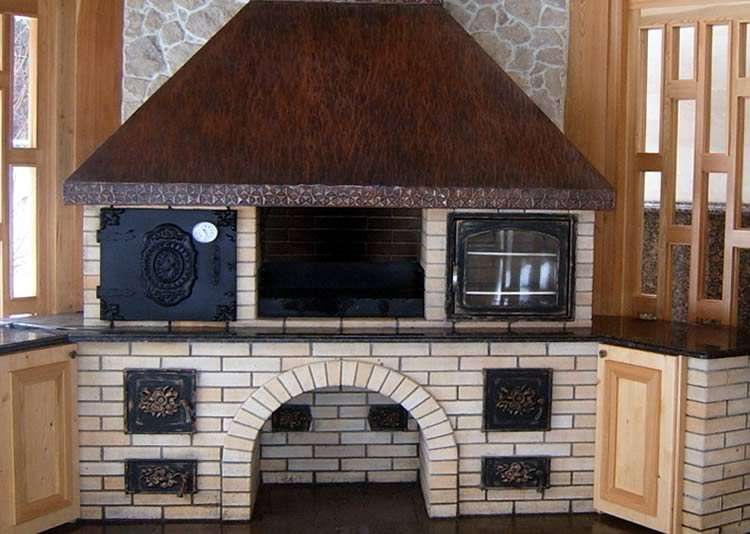
When designing a product, it can be supplemented with the functions of a smokehouse, barbecue, barbecue, or develop a compact heating and cooking structure without any adaptations.
Wall masonry
When starting to build walls, you need to consider that:
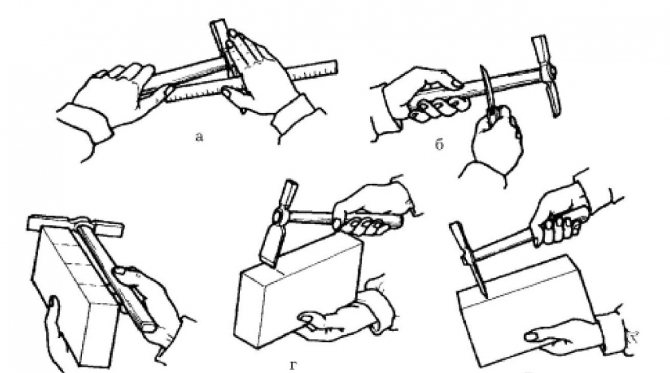
- Brick rows begin to build from the corner. Their evenness is checked by the level.
- It is recommended to use the masonry technology in half or in one brick.
- Each subsequent row is shifted by half a brick.
- Lintels, support beams are installed under window and door openings in the places of masonry.
- The finished walls are checked for cracks. The gaps are filled with cement-sand mortar.
- Surface irregularities are removed with a float, sandpaper.
Preparation and pouring of the foundation
The first step in the step-by-step building construction instructions is to lay a solid foundation.
In the case of a stove, this stage can be skipped if the weight of the future structure will not exceed 700 kg and the summer kitchen has a solid and even floor. If the design drawing of the furnace involves the construction of a large-sized product, laying the foundation is required.
Important recommendations.
- The depth of the base under the structure must be at least 0.5 m.
- With the simultaneous construction of a summer kitchen and a stove, the gap between their bases must be filled with sand or screenings. Then tamp.
- The area of the foundation must be at least 5 cm larger than the total area of the structure on each side, so that the shape of the furnace remains unchanged when the soil subsides.
- If the construction work is not carried out on rocky soils, then it is necessary to form an additional layer of crushed stone, the so-called sole, the height of which will be at least 15 cm. Having received a flat surface, it is tamped.
- An additional layer of rubble 30 cm thick is applied to the tamped sole, and then poured with concrete. If the territory of the summer cottage is covered with damp soil, it is better to replace the rubble layer with a solution of cement and sand of the same thickness.
Using brickwork with a bandage as part of the base, it is recommended to fill the distance between this layer and the ground with a mortar of cement and sand.
Oven construction technology for a summer kitchen
After completing all the stages of the preparatory work, you can start building a universal stove for a summer kitchen in the country.The work will consist of arranging the foundation, pouring the foundation and masonry of the structure with the simultaneous installation of metal parts.
Preparatory work
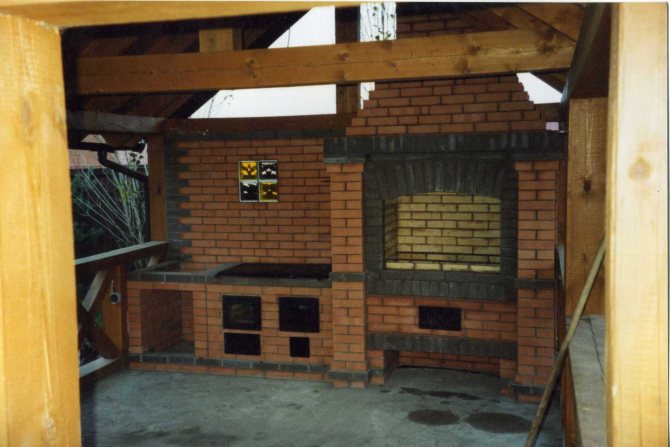
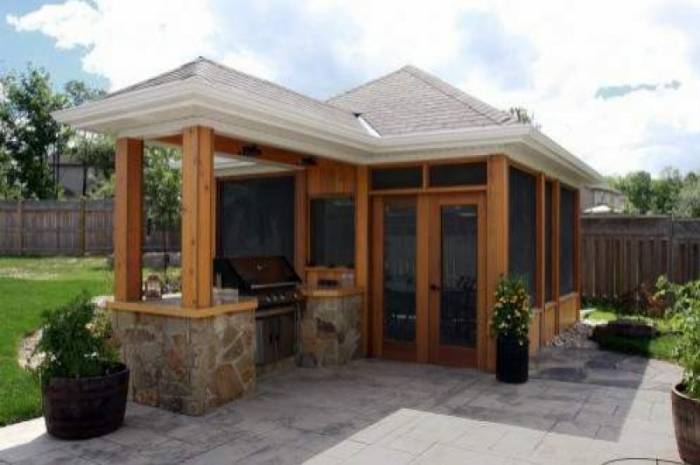
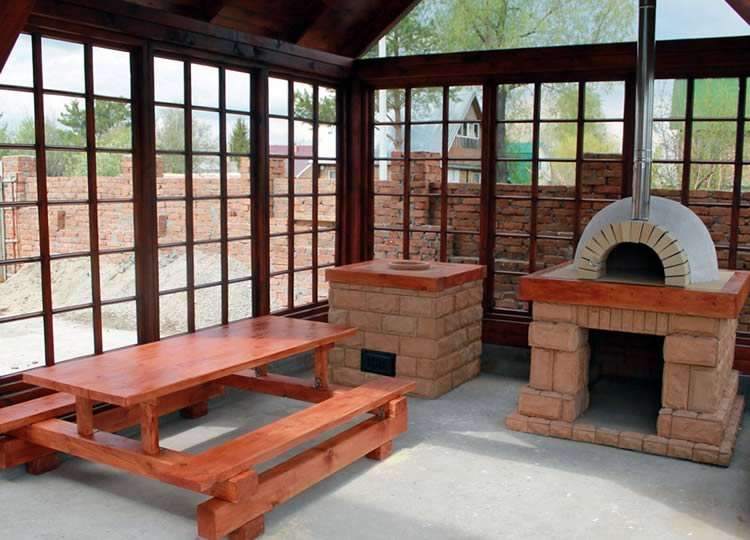
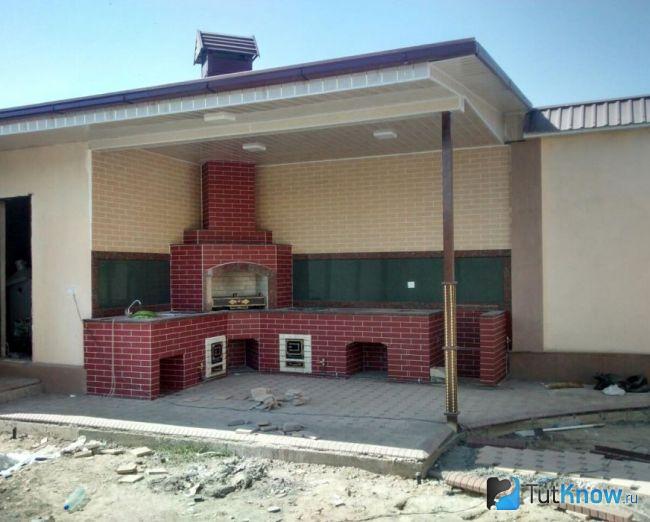
It is rational to build such a stove for a summer kitchen that would be universal - it had the functions of many of the above devices and could heat the room in spring or autumn. It is quite possible, and now we will try to do it together. But first you need to go through the preparatory stage of work.
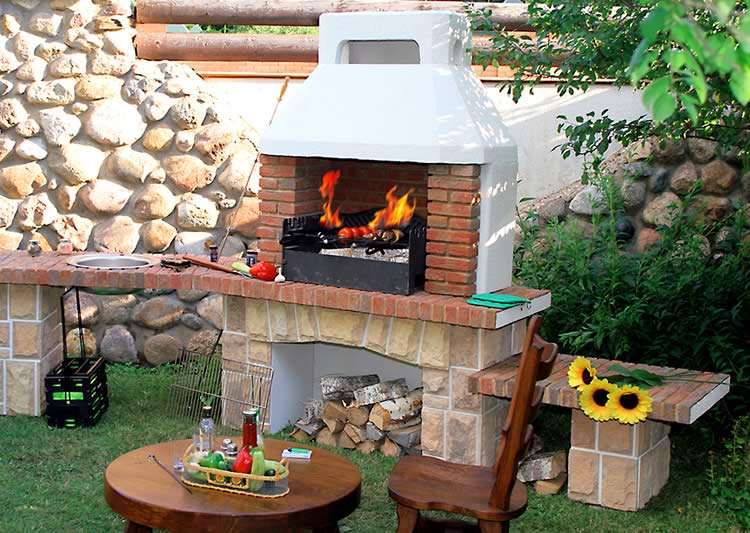
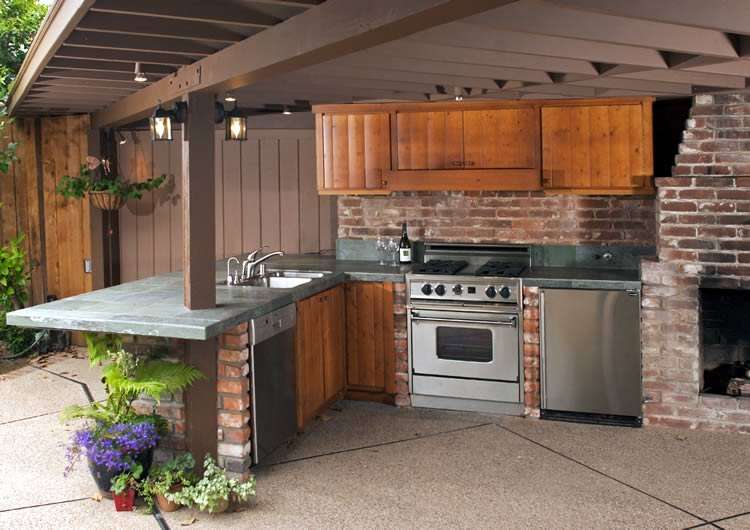
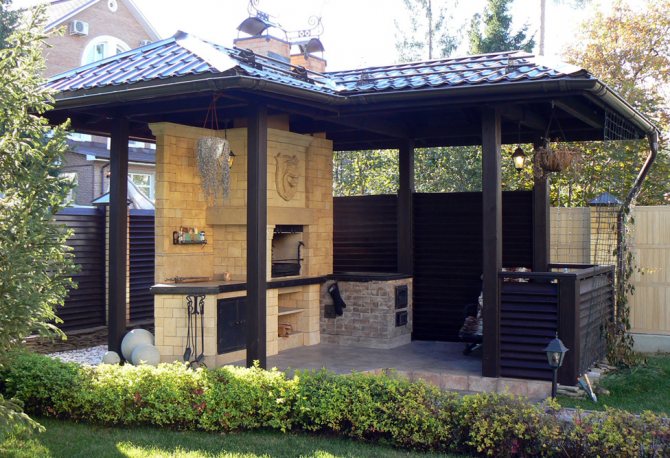
When determining the cooking zone for food, there are some requirements to consider. The first is the proximity to the place of eating. In the presence of an open-type summer kitchen, the oven located on the street can serve as part of the equipment of the building. If it needs to be built as a separate element, it is recommended to install a gazebo next to it, or at least a table under the awning.
Of no small importance is the proximity of the water source and the availability of supplied electricity, remoteness from the yard toilet, cesspool, road or barnyard. If the site is small and its area does not allow choosing a comfortable place for cooking, the summer kitchen with a stove can be fenced off with a high fence.
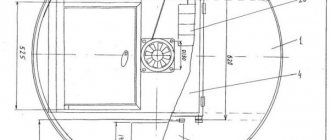
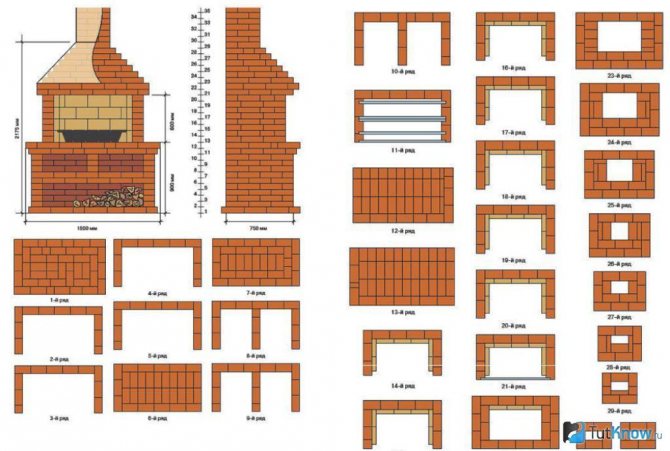
It is very difficult to develop a design for a stove for a summer kitchen on your own, because you will have to calculate the draft and smoke exhaust, which must be performed correctly. Therefore, choosing one or another furnace design, it will be correct to order its project from an experienced craftsman. Another option is to find for free or buy a detailed description of the construction of a structure with the necessary drawings on the Internet.
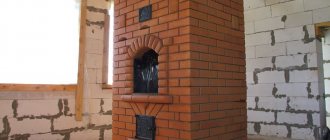
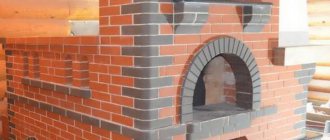
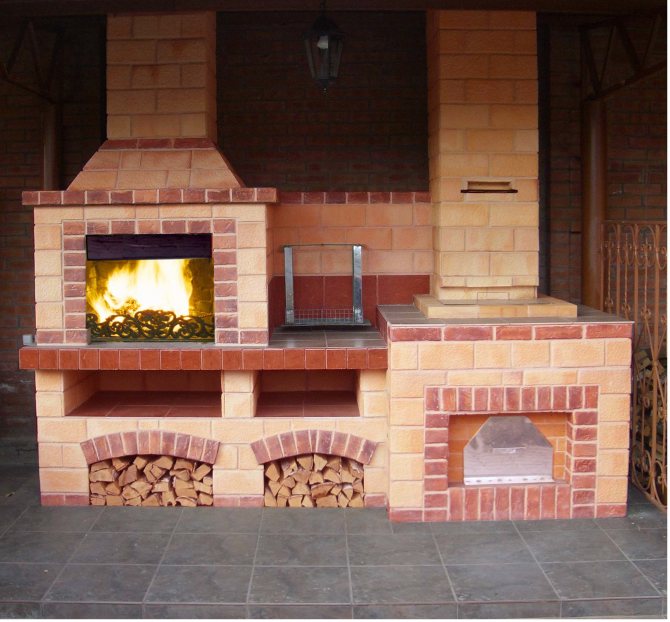
For the purposes of this article, we use, as an example, the manufacture of a stylized Russian-style oven with a grill, barbecue and barbecue. If you need any other model, you will have to make calculations and select everything you need for work yourself. In this case, from the materials you will need:
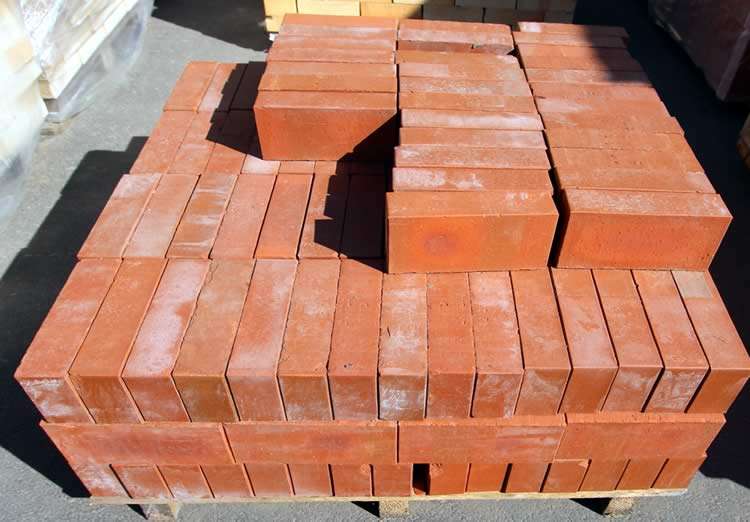
- Clay refractory bricks - 750 pcs.;
- Cement M400 - 300 kg, clean sand - 900 kg;
- Dry masonry mix - 650 kg;
- Crushed stone or brick chips - 600 kg;
- Cast iron blower doors - 3 pcs .;
- Grates - 2 pcs.;
- Furnace shutter - 1 pc .;
- Firebox doors - 2 pcs.;
- Roofing material - 1 roll;
- Hob - 1 pc .;
- Grill and barbecue grill;
- Metal doors - 2 pcs.
Please note that this list contains only basic materials. Some little things, such as steel wire to temporarily hold the oven doors, or other parts may be required during operation, but you can figure it out on your own.
The list of necessary tools and devices should include: "grinder", pick, concrete mixer, shovel, mortar trough, mallet and tape measure, cord, as well as a building level.
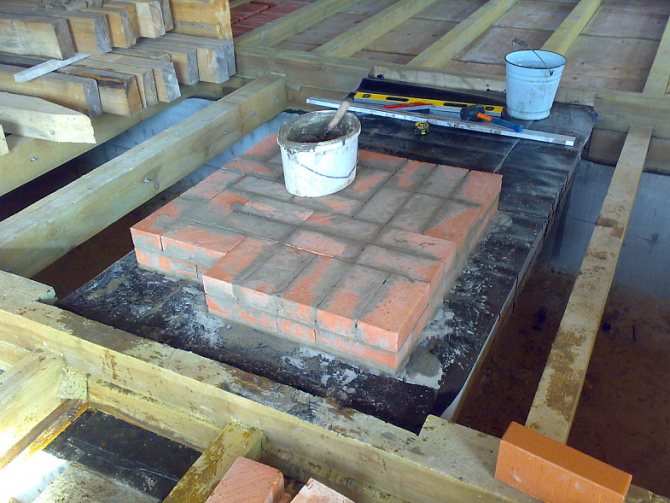
Pouring the foundation for the furnace
A brick oven needs a high-quality foundation. And it does not matter at all which model we are talking about, whether it is an outdoor one or a stove for an isolated room. All of them must have a foundation, especially with a structure weighing more than 750 kg.
Therefore, work should begin with the preparation of a solid foundation for it. In the process of planning the site, it should be borne in mind that the dimensions of the base should be 100-150 mm larger than the dimensions of the furnace in the plan.
We proceed as follows:
- From the place where it is planned to fill the foundation, we remove the soil to a depth of 0.4-0.5 m. In the resulting depression we fill in sifted sand with a fraction of 0.8-0.9 mm. After that, it must be leveled and tamped well. The thickness of such a pillow should be 15-20 cm. The end of a small massive log can be used to seal it. To make it convenient for them to work, a rail can be nailed to the opposite end of the tool, which will serve as a handle.
- The next step is to create a crushed stone pillow on top of the sand layer.Its thickness should be about 300 mm, but crushed stone can be saved if you first lay 200 mm of broken brick or concrete chips, and then fill the remaining 100 mm of space with basic material.
- After crushed stone preparation, you can pour the furnace foundation. Its top plane should be at floor level. This may slightly affect the overall thickness of the sand and rubble base.
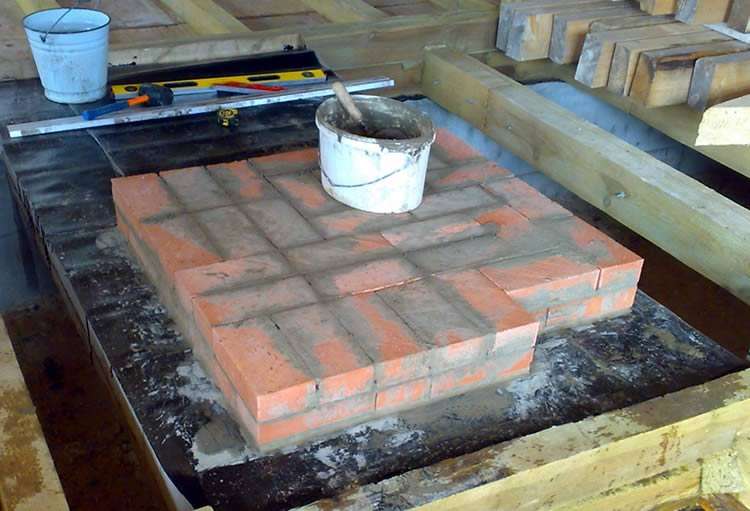
Brick Laying Instructions
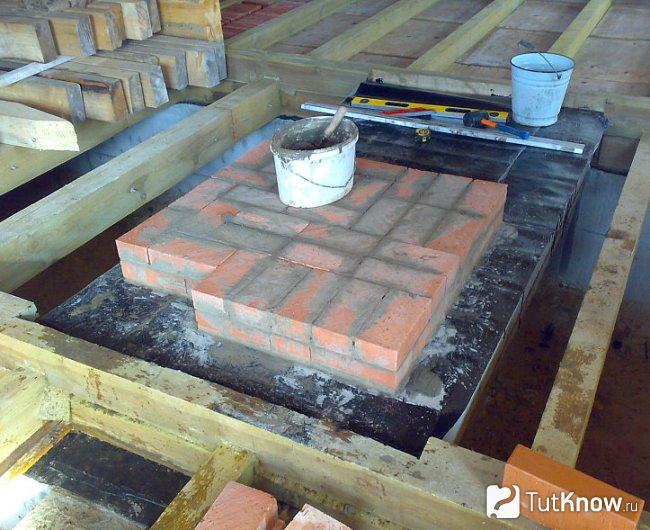
After some time allotted for the drying and hardening of the foundation slab, you can begin to perform the brickwork. Before laying bricks for the first layer, it is necessary to waterproof the foundation surface. The lower layer of insulation is made of roofing material, and then we cover it with PE film on top.
The further procedure is as follows:
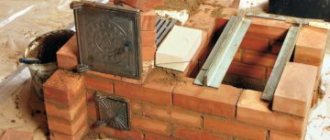
- We lay the first row of bricks dry directly on the plastic wrap, previously sprinkled with sand, taken in a small amount. In this case, only the joints in the row between the bricks should be smeared with a solution.
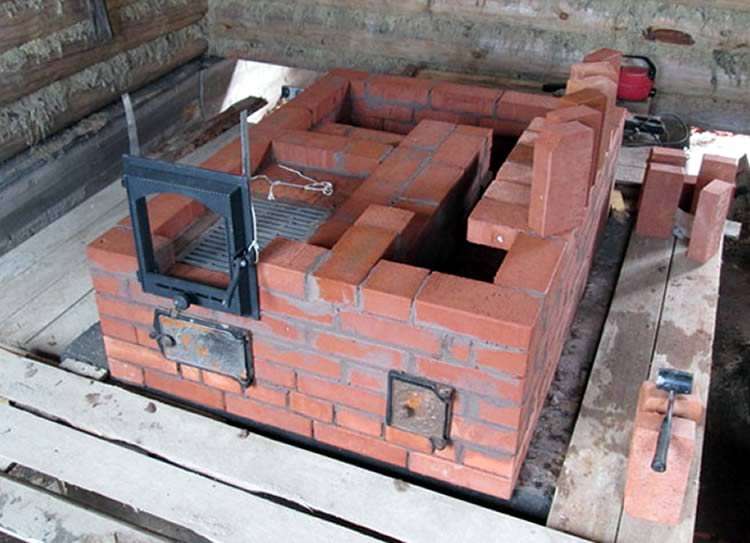
- An indispensable element of any furnace is a blower. Therefore, now you need to determine a place for it and designate it with a door. To do this, in the selected place we cover the brick with mortar, wrap the door around the perimeter with an asbestos cord, mount and temporarily fasten it with wire.
- We install the subsequent rows on the solution, but we fit them to the door frame of the blower, carefully controlling the angle.
- Above the blower in the masonry, we make small protrusions on which we install the grate. It is not worth embedding it in the walls of the oven. This is fraught with devastating consequences, since the cast iron grate expands when heated and can rupture the device.
- The fifth next row of masonry is performed with a brick placed on the edge, and the sixth - with a brick flat.
- We carry out the seventh row with a brick on the edge, at the same time we determine the place and install the furnace door in it. Its fastening is carried out similarly to the blower door.
- The eighth row starts with flat brick quarters. You need to prepare three quarters.
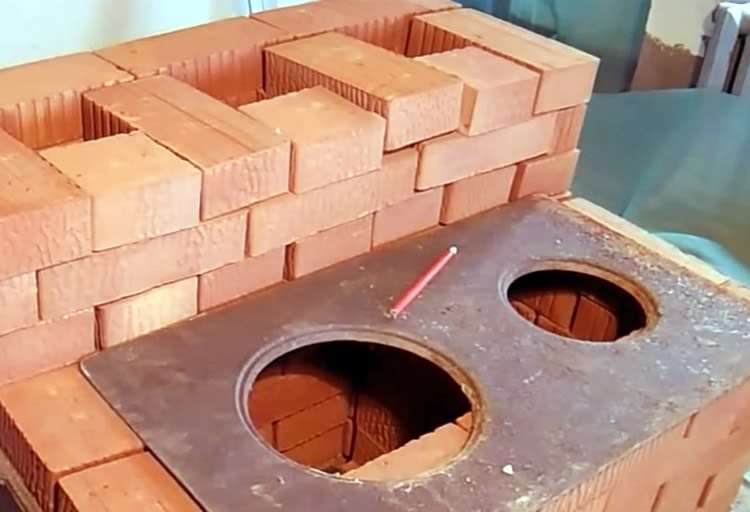
- The ninth row, like the seventh, is laid on the edge and the hob is installed on top.
- From the tenth row, we begin to lay out the base of the combustion pipe.
- Performing the eleventh row, we mount the valve. Before that, it should be abundantly greased with clay and wrapped with an asbestos cord.
- On the next rows, we narrow the masonry to create a chimney.
- After that, we mount the grill and consider the process complete.
Important! When laying the chimney, care must be taken not to move the center of gravity of the stove to the side. Therefore, the building level must be used very often.
The main stages of the construction of the furnace
It is possible to build a cooking and heating device, strictly following the guidance of experienced craftsmen, in one day. For this you will need:
- 200-300 pcs. refractory red bricks;
- 2 pcs. doors for the blower and firebox;
- stove (it is better to purchase cast iron with burners);
- grate bars;
- steel sheet 3 mm thick;
- fire-clay;
- sand.
The main thing is to take a responsible attitude to the implementation of each of the stages.
- The brick is soaked in water for a day.
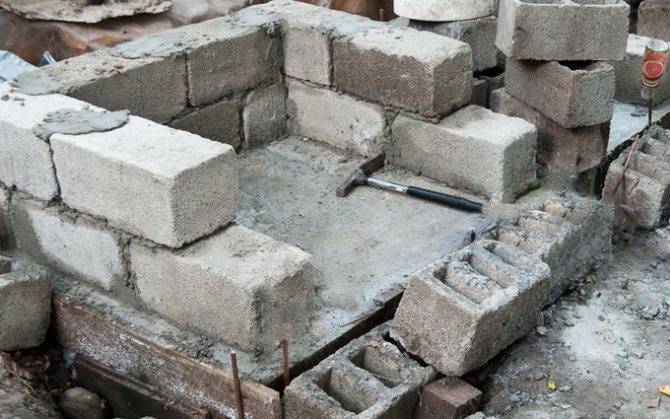
- Then the foundation of the furnace is laid out from 2 solid brick rows.
- At the beginning of the 3rd line, it is necessary to mount the blower door.
- Next, an ash chamber is formed from a brick order.
- On the 5th row, grates are attached, while the distance between the masonry and the grate should be at least 5 mm.
- In the next 3 lines, the firebox is formed. The doors are reinforced with steel strips and asbestos mortar.
- Now you need to lay out the chimney or install the purchased iron pipe.
- The installation of the cast iron plate is carried out only after the solution has completely solidified. It should be laid on pre-prepared metal corners.
- The bottom of the ash pan will be a sheet of steel laid under the firebox. And by fixing a removable grate inside the chimney, it will be possible to cook smoked meats in the oven.
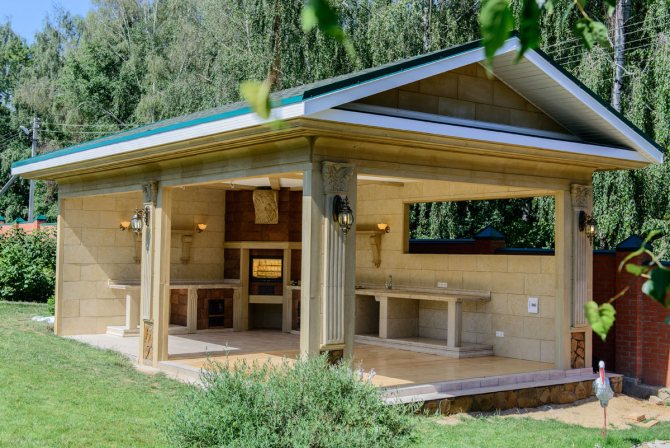
Erection of the foundation
The summer kitchen is a massive structure and therefore must have a solid foundation, the appropriate type of which is determined based on the size of the structure and the expected load.
You can find out how to choose a base for a building, what features of each type of masonry, you can from the article "Foundation for a gazebo."
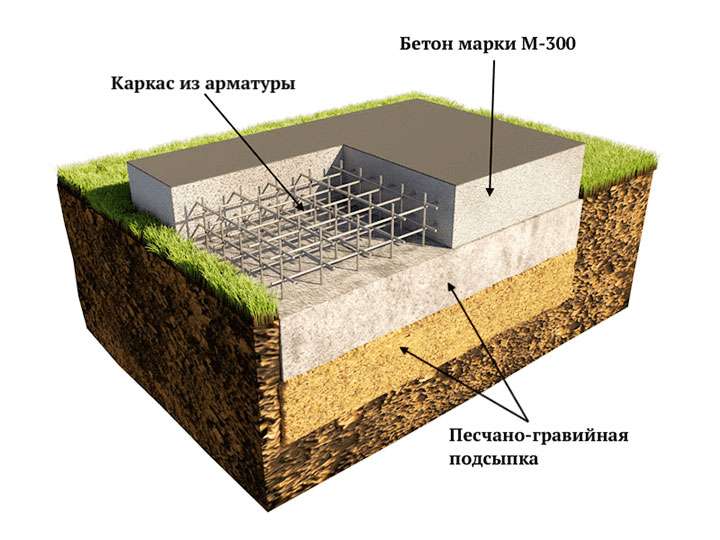
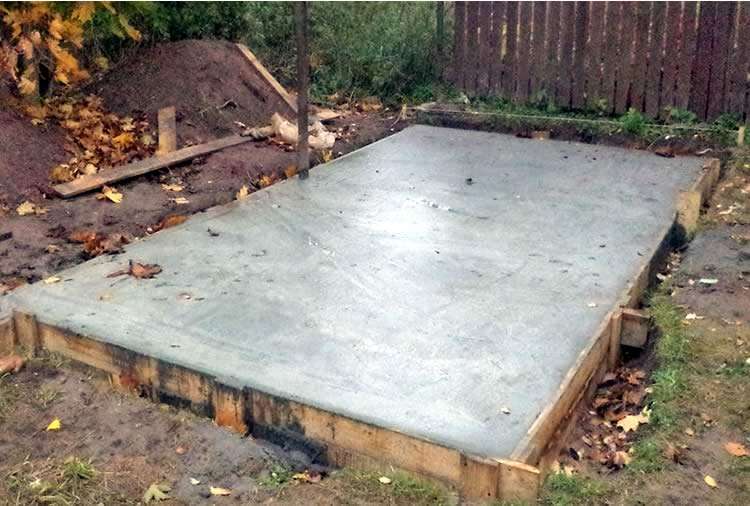
Photo: construction of a monolithic foundation. Read the article: "The foundation for the gazebo."
Often, for brick structures, a monolithic or strip foundation is poured with a depth of up to 80 cm. The mortar hardens within 1-2 weeks, depending on weather conditions.
When the base is ready, you can start arranging the floor. It is laid out with tiles or stone on top of the cement screed.
It is worth considering that the floor level in an open kitchen is made at least five, or even ten centimeters above the ground. This prevents rainwater from entering and accumulating on the floor of the room.
A few tips for quality masonry
For beginners studying the description of the sequence of construction processes, experienced craftsmen recommend paying attention to certain subtleties.
- Before proceeding with the formation of the base of the furnace, waterproofing must be performed. To do this, roofing material or cellophane is placed on top of the dried screed.
- The first rows are laid without mortar. Therefore, each brick must fit snugly against each other.
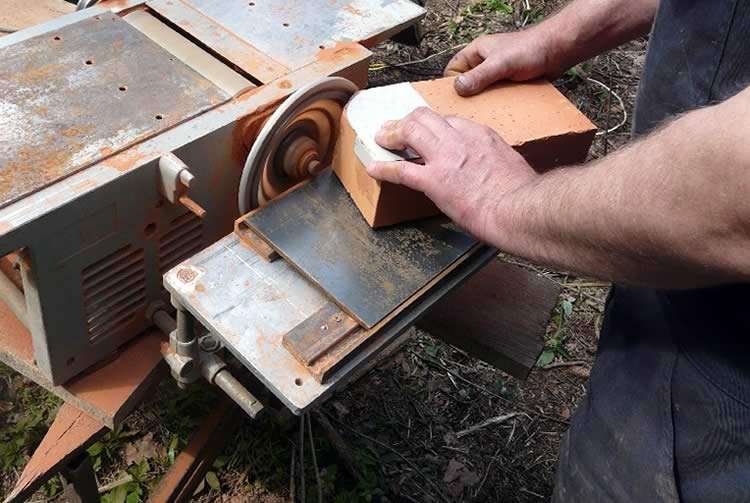
- To eliminate its irregularities, use a grinder.
- The corners of the structure must be straight. In order not to be mistaken with the degree of inclination, it is better to purchase a construction triangle.
- If the concrete is poured on a hot day, then it must be periodically moistened until it dries completely. Otherwise, the surface of the solution will be covered with cracks.
When making the dressing, it is not recommended to use fireclay and ordinary types of bricks at the same time, since the seams between them will begin to burst from different heating temperatures.
A handmade stove will save the cost of ordering the services of specialists and will be a guarantee of high-quality performance of all stages of work. And the author's design of the structure will make it a decoration of the entire room.

The main factors of choice
So, when choosing a stove, you need to pay attention to the following points:
Nuances to look for when choosing a stove for the kitchen
Next, let's take a closer look at all the existing options and differences of kitchen stoves.
Energy carrier type
In terms of the energy carrier on which the oven can operate, the choice is not so great. On sale you can find the following options for stoves:
- Electrical. These cookers are easy to use, can often turn on and off automatically, as well as work in certain programmed modes. However, in terms of energy consumption, they are much more expensive than gas ones, since gas is a cheaper energy carrier. Therefore, it makes sense to purchase an electric oven for the kitchen only if there is no gas in the house.
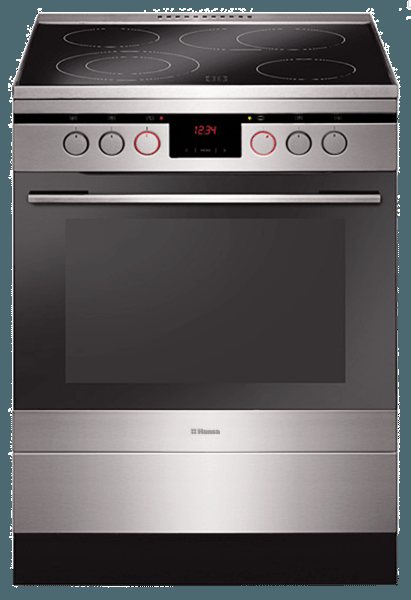
The electric stove is convenient to use and fireproof
Keep in mind that electric household hobs differ in the way the heating element works. The most advanced are induction hob ovens. They consume less energy and are automatically turned off when the pots or pans are removed from the stove;
- Gas. Professional chefs prefer to cook over an open fire as the food heats up quickly and evenly. In addition, gas burners allow you to stop heating almost instantly or quickly raise the temperature. Thus, it is easy to control the cooking process.
But the main thing is that gas ovens, as I said, are more profitable than electric ones. Their only drawback is the increased fire hazard;
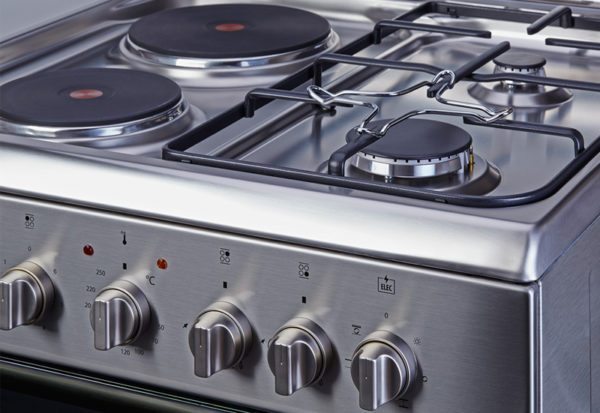
For private houses, a combination stove is the best option.
- Combined. They are an excellent solution in a village house that is not connected to the central gas pipeline. The stove can be connected to a gas cylinder, but in case of interruptions with this fuel, you can always use the electric burners, and vice versa.
Before connecting the electrical network, it is necessary to lay a separate branch using a cable of sufficient power. Ordinary household sockets are not suitable for connecting an electric stove.
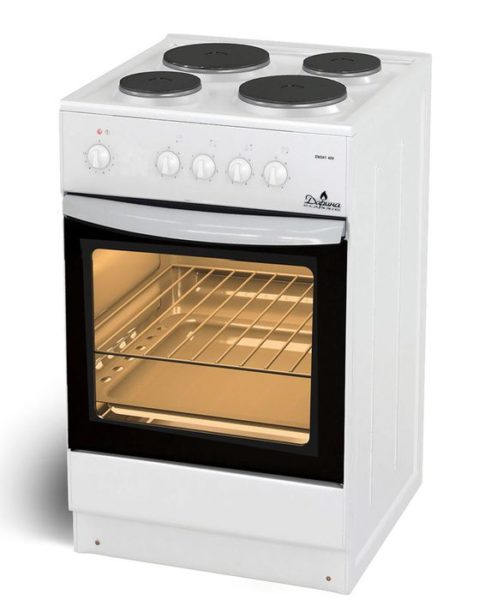
Traditionally, the stove has four burners.
Number of burners
Traditionally, the stove has four cooking zones. However, there are models that have a small fifth burner, designed to heat the container or maintain a certain temperature.
There are also mini ovens that have only two burners. Their main advantage is their compactness. Therefore, they are perfect for a small country house or, for example, an apartment in Khrushchev where a small family lives.
For a small kitchen, you can use a two-burner mini-stove
In a country house, you can install a solid fuel stove with a hob. As a result, you can not only heat the room in winter, but also cook food. The only thing is that she will have to install a high-quality chimney in compliance with all fire safety requirements, especially in a wooden house.
Configuration
First of all, furnaces, depending on the configuration, are divided into two types:
- Stoves with an oven;
- Stoves without oven.

The hob can be installed separately from the oven
I must say that separate mini electric ovens or mini ovens save space in the room, since they can be placed separately in a place convenient for you. For example, you can place a cabinet under the hob for storing kitchen utensils. In this case, the oven can be installed on a separate shelf.
Also, stoves differ in their location in the kitchen. They are of two types:
A corner stove is also a good solution for saving space in a room, so it can be recommended for owners of small kitchens. However, keep in mind that corner models are not always convenient to use.

In a compact kitchen, it is advisable to install a corner stove
Another important point of choice is the installation method. According to this parameter, the furnaces are divided into the following types:
- Autonomous... They are a separate device that is not tied to furniture, i.e. it can be installed anywhere in the kitchen;
- Embedded... This is a modern version of the slabs. Their hob is usually cut into the countertop, and the oven is built into the cabinet. The design of such plates looks more interesting and harmonious.
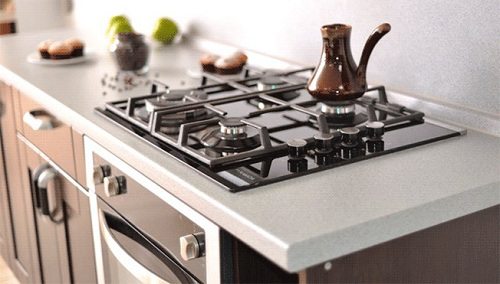
Built-in ovens look harmonious and modern
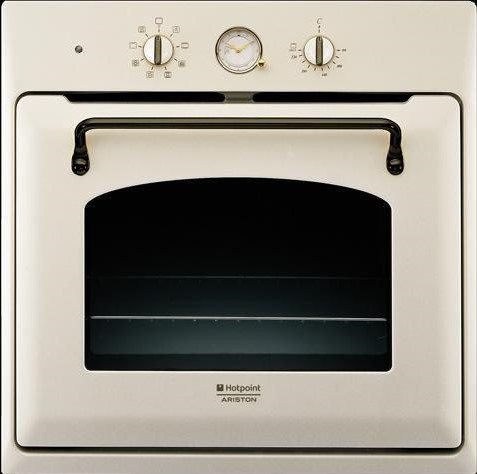
When choosing a stove, consider the interior design. If, for example, the interior in a private house is made in a retro style, you can find a stove in the same style, as a result of which the kitchen will look more harmonious.
I must say that built-in models are more expensive. Therefore, you must decide which option to choose, depending on your financial capabilities and the characteristics of the furniture.
Oven volume
If you use your oven frequently, pay attention to its volume. Just do not confuse the total volume with the useful one.
Ovens are considered compact if the oven volume is up to 40-45 liters. If you have a large family and you often use the oven, it is better to purchase a model with a usable oven volume of at least 60-65 liters.
The timer allows you to set the time to turn off the cooking zones and the oven
Functions
If earlier kitchen stoves had only the most necessary - burners and ovens, but recently they have been "overgrown" with many useful functions, such as:
- Overheat protection. This function applies to the oven - if it is turned on, but at the same time it is not used for a long time, an automatic shutdown is triggered;
- Timer. Allows you to set the shutdown time of the stove. In addition, the timer records the start and end times of the cooking process;
- Gas control. If for any reason the burner goes out, the gas supply is automatically blocked;
- Protection from children. Thanks to this function, children will not be able to turn on the oven with their own hands, open the oven door or change the settings;
- Automatic ignition. This function automatically ignites the flame when you turn the knob of the stove;
- Touch control and display... As a rule, such devices have an intuitive interface, so the instructions for operating them are quite simple.
As you can see, all these features make cooking easier, but at the same time, do not forget that they are reflected in the price of the product.
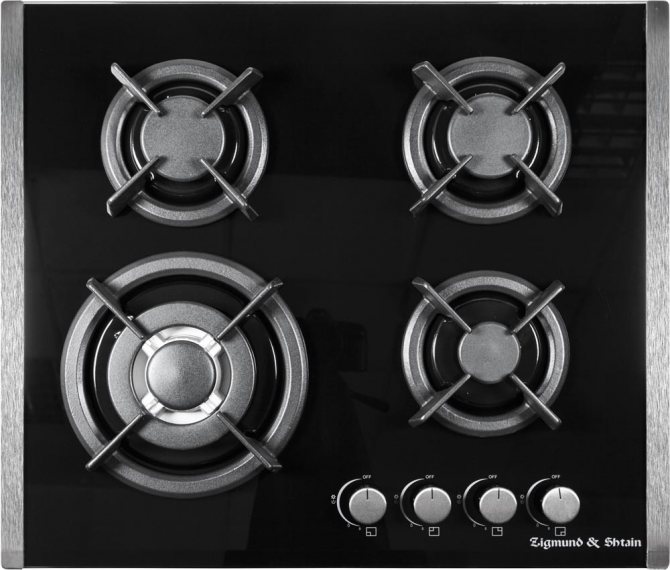
In the photo - Zigmund & Shtain high-quality gas hob