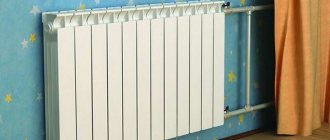
Radiator design and useful information
Regardless of what kind of radiator you are going to disassemble - aluminum, bimetallic or cast iron, you need to know their internal structure.
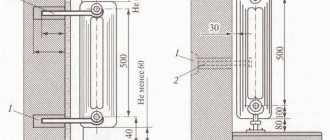
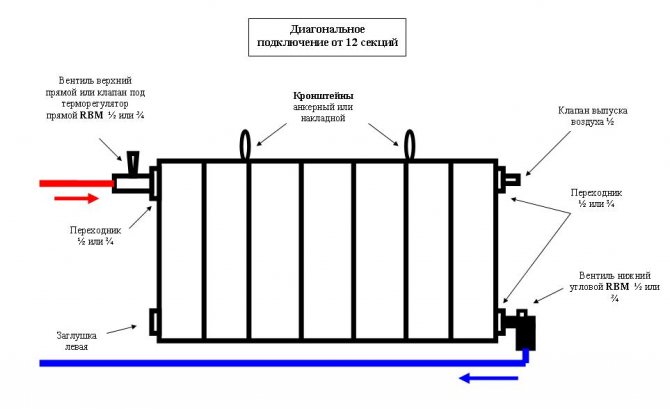
All sections of the radiators are interconnected by nipple-nuts with external thread. They are screwed in the middle of the sections to the same depth.
The inner part of the nipple nut is not perfectly round, but has protrusions so that it can be gripped and unscrewed. The thread on it is usually right-handed, but occasionally left-handed.
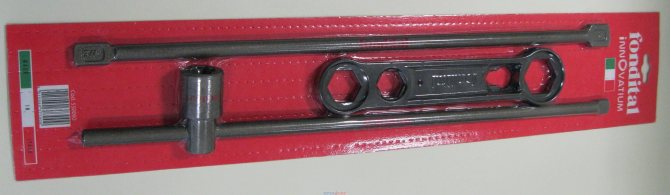
There are two types of nipple wrenches (see photo). Some have a square grip seat that makes it easier to turn. Others have a hole or ear into which a turning lever is inserted. If you are not going to engage in constant disassembly and assembly of radiators, such a key can be rented.
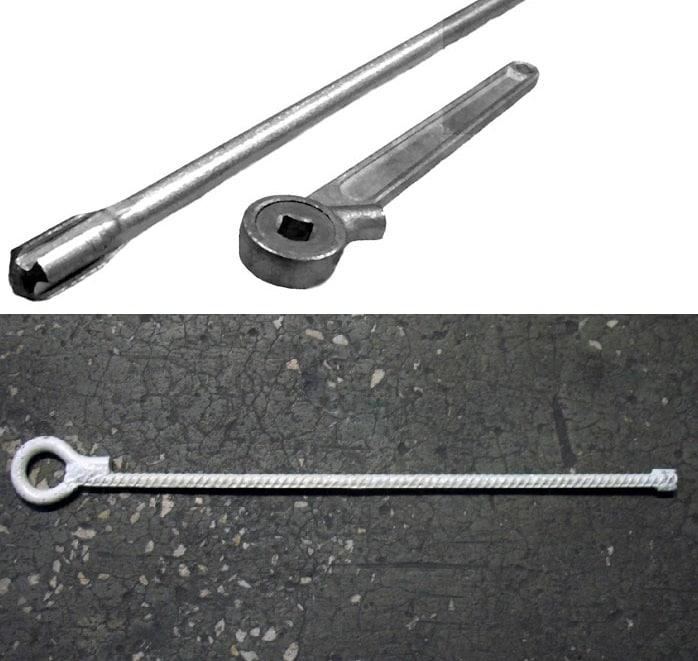
Two variants of nipple wrenches.
If you have a nipple wrench without fasteners handy, use a gas wrench to work with it.
Battery assembly
In principle, having the necessary tools at hand, even a beginner will be able to assemble or disassemble an aluminum radiator with his own hands.
To install an aluminum radiator heater with your own hands, you must:
- Place the battery on a flat surface. This is necessary in order to inspect the device before installation and check all the joints for possible cracks or chips.
- Before connecting the elements of the heater, the threads at the joints are cleaned not only of debris, but also of factory paint. This is done using fine-grained sandpaper. This is important, as the paint layer can crack in the future, leading to a leak. For the sake of presentation, manufacturers paint not only sections of radiators, but also their joints.
When cleaning the battery from paint, you need to make sure that the sandpaper does not leave scratches on it, which can also cause leaks in the future. - All gaskets should be washed in soapy water, and if antifreeze is supposed to be used in the heating system, then they need to be degreased, since this carrier is able to penetrate into any, even the smallest, irregularities.
- Before connecting the sections, it is advisable to study the drawing of the key for assembling an aluminum radiator in order to know how to use it. This metal is very soft, so any too much force can damage the threads and then you will have to buy a new section.
- A paronite seal is put on the nipple nut on both sides. The key is placed on top and can be easily turned a couple of times, the same is done with the bottom hole. Only after the joints have been tacked can you tighten them with a lever more tightly.
- The hole that will not be used is closed with a plug, and a Mayevsky crane is attached to the other and the assembly of the aluminum radiator is ready.
After all sections of the radiator have been assembled, it can be connected to the heating system and checked for possible leaks. Since aluminum batteries are quite lightweight, they can be easily connected by hand, even without the appropriate skills.
How to disassemble an aluminum heating radiator with your own hands
First of all, you need to prepare the tool. For work, you will need an adjustable or open-end wrench of the appropriate size (for couplings, valves, plugs). For disassembly, you need a nipple wrench with a handle. If there is no handle, it can be replaced with a gas wrench.
Before disassembling the radiator, of course, you need to remove it. To do this, you need to shut off the heating system and wait until the battery cools down (work cannot be performed while the connections are warm).
Valves or couplings are usually installed at the water supply points. Using an adjustable wrench or open-end wrench, unscrew them so that they remain on the pipes and not on the radiator. Remove the radiator from the wall mounts.
In the upper and lower parts from the end there are plugs or Mayevsky taps. To remove them, a regular wrench will do. Remove them only from one side - left or right. Sometimes the thread direction markings are indicated on the plugs. The left one is marked with the letter "S", the right one - with the letter "D".
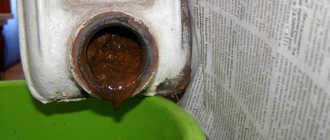
Inside the radiator, at the joints of the sections, there is a nipple nut (see photo) with an external thread. Insert the nipple wrench inside so that its head fits into it. Try scrolling it left or right - there are nuts with left and right threads.

This is what a nipple nut looks like for aluminum and bimetallic radiators.
When you have determined in which direction the threads are going, back off the nut two full turns. After that, do the same on the other side. This way you can unscrew the nut evenly without disturbing the geometry of the radiator.
Parsing into segments
To properly disassemble an aluminum radiator, you will need a special tool - a nipple wrench, which is made for this particular job. As a rule, it is not in stores, since it is a product of the mind and work of plumbing workers. You can get it in two ways.
The first is to try your luck in the local market (if there is one), where various used tools and other useful things in the household are sold. It is likely that you will find what you are looking for there, and at a reasonable cost. The second option is to contact any plumbing workshop and ask them for a nipple wrench for rent.
When your search is successfully completed, you can start directly disassembling the equipment. There is a specific order for this procedure.
- The first thing to do is to shut off the water in the riser to which the radiator is connected and drain the coolant from the system. If you are the owner of a private house, you can do it yourself. If you are dealing with a centralized heating system, then such issues can only be resolved through the organization that manages the building. To do this, you need to write a statement and then wait for the arrival of a specialist. By the way, in the case of living in an apartment building, you can carry out such work only during the period when the heating season is already over. Otherwise, you simply will not be able to get permission, since stopping the centralized heating system will bring cold not only to yours, but also to your neighbors' apartments.
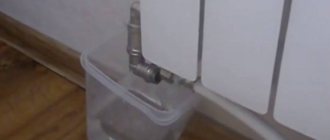
- After you figured out the disconnection of the water in the system, place containers under the joints of the radiator and the main line to collect the remaining coolant that will flow out during the separation of the equipment.
- Unscrew the fittings connecting the battery to the line. Check their condition at the same time. If you notice any shortcomings - cracks or "smoothed" threads - it is better to replace these elements with new ones. Just keep in mind that not all metals are combined with aluminum radiators. For example, fittings made of brass or copper cannot be used categorically, as this may cause an electrochemical reaction that will lead to the onset of corrosive processes.
- After detaching, remove the radiator from the brackets holding it.
- Now it's time to use the very tool that you worked hard on getting it. The nipple wrench must be inserted into the battery exactly to the point that you are going to dismantle.Then you need to get the end of the tool into the hole provided for this on the connecting element. Once you have succeeded, turn the nut in the desired direction half a turn. In general, for this stage, it is advisable to invite an assistant who will fix the radiator in one place while you are fiddling with the connections. So, turned the nut half a turn, go to the one on the opposite side, and there repeat the same operation. Thus, by gradually unscrewing each element in turn, you can completely separate one section from the other. Be careful and patient - each nut needs to be turned just a little, about 5-7 mm. Otherwise, the section can be strongly skewed, resulting in damage to the radiator elements, and there will be a need to replace them.
- After unscrewing the correct nuts, remove the segment, and then check all the gaskets supplied with it. The quality and condition of the rubber seals plays an important role. Deformed gaskets can cause leakage. Therefore, in case of the slightest doubt about their suitability, it is better to replace these elements with new ones. Moreover, it is advisable to purchase paronite gaskets, since this material has proven itself best of all. If this is not possible, then try to find at least silicone seals. It is not recommended to put rubber ones, as they quickly fail.
How to disassemble a bimetallic heating radiator
Before disassembling a bimetallic radiator, check what metal its core is made of. If the inside of the sections is made of copper, there is a risk of deforming the ends of the horizontal tubes. In the future, this will lead to a violation of the tightness of the radiator.
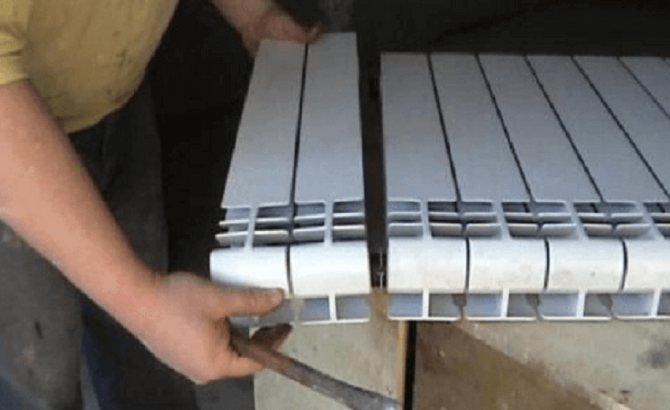
To avoid damaging the copper core, use two nipple wrenches. As soon as you tore off the connecting nuts, work them synchronously (see photo). If there is no second key, then turn each side separately no more than one turn.
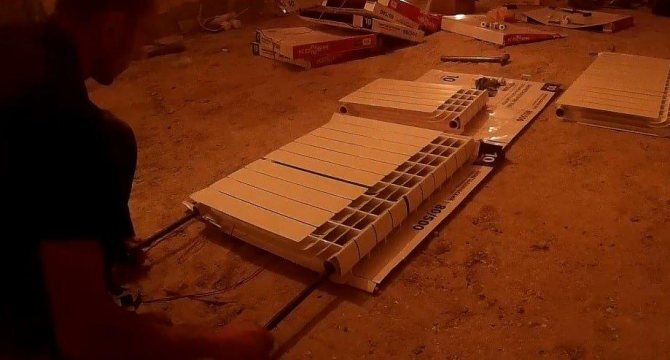
Simultaneous operation with two nipple keys when disassembling a bimetallic radiator.
The procedure for disassembling a bimetallic radiator is the same as for an aluminum one:
- Turn off the heating system and wait for the battery to cool completely;
- Remove it from the wall;
- Insert the nipple wrench so that its head fits into the connecting nut;
- Unscrew it as described above.
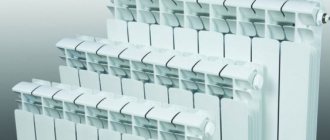
General information
Not so long ago, only cast-iron radiators were used in heating systems, however, now the choice of heating devices has expanded significantly, in particular, aluminum and metal batteries have appeared. Moreover, each type of them has its own design features, respectively, the process of disassembling them looks different.
Therefore, below we will consider how to disassemble heating batteries with our own hands of all the most common types.
Advice! It is not necessary to disassemble the device to remove scale and other contamination. There are special liquid formulations that do the job well.
In the photo - a key for radiators
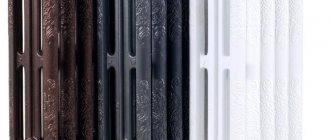
How to disassemble a cast iron heating radiator
It is much more difficult to disassemble a cast iron battery than an aluminum or bimetallic radiator. As a rule, her age is much older, so all connections are hopelessly stuck, so you have to sweat.
To work, you need the following tool:
- Nipple wrench;
- Gas wrench, preferably with a long handle;
- Bulgarian.
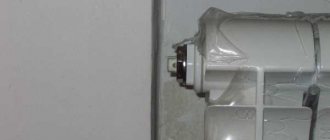
In old houses, cast iron batteries were often welded to pipes. Therefore, you will have to cut off pieces of pipes from all sides, where they are brought to the radiator.
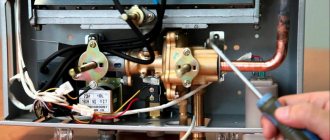
If the pipes have couplings (see photo) or nuts, unscrew them with a gas wrench.It happens so that they are firmly stuck, and paint has got into the grooves. In this case, moisten the joints with a solvent to remove the paint, then treat them with a rust converter.
What if the cast iron battery cannot be disassembled?
There are cases when the heating system is old and everything is very neglected. One way to disconnect sections is to warm them up. To do this, warm up the joint with a blowtorch until the alloy acquires a crimson hue and try to rip off the nut. If you succeed in doing this, do not unscrew it, but repeat the procedure on the other side of the sections.
If it is impossible to disassemble a cast-iron radiator in the usual way, you will have to use a grinder.
Important!
Do not use a chisel, hammer, or sledgehammer to break the joint. So you run the risk of hopelessly damaging both sections.
Cut the sections so that the grinder circle passes exactly where they join. So you will damage them minimally and in the future this will not affect the quality of battery operation.