
How to determine the temperature of heating devices in an apartment. A specialist's answer.
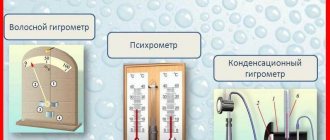
In order to measure the temperature of a heating device, like absolutely any other object, there are devices called pyrometers.
A pyrometer is a device for non-contact measurement of body temperature. The principle of operation is based on measuring the power of the thermal radiation of the measuring object, mainly in the infrared and visible light ranges. The cost of these devices on the Internet varies from 2.5 to 35 thousand rubles. The measurement error does not exceed 1.5%.
To understand how it works, imagine a children's Chinese pointer for 10 rubles. We aimed an infrared beam at an object and measured its temperature. Such devices are available in sufficient quantities in the branches and regional offices of TSK and MOEK - Moscow organizations that generate, transport to the consumer and sell heat.
Only these organizations will not measure the temperature of heating devices. For the simple reason that it is not said anywhere and no one knows what it should be, because calculations of heating systems are made in such a way as to ensure a constant (theoretically) indoor temperature. For the housing stock it is +18 degrees C.
The design temperature of the outside air for Moscow is taken as minus 28 degrees C. This means that if it is minus 40 degrees in Moscow, the heating system will heat your apartment as if it is 12 degrees warmer outside.
There is a so-called temperature schedule - the main law of heating systems. According to this graph, the maximum temperature of the water flowing into the first radiator (heater) of the system, the so-called. "Supply", for the residential sector 95 (because at a higher temperature, sublimation occurs - the ignition of dust in the room), and the highest temperature coming out of the last device, "reverse", is 70 degrees. This is when the outside air is minus 28 and below. You will be able to "catch" the heating system only if you have less than 70 at the calculated temperature of the outside air at the inlet to the device.
Knowledge of room temperature standards help to detect a malfunction and apply for a decision to the appropriate authority.
Temperature indicators are regulated by norms GOST and SNiPa.
What are the temperature standards in the apartment according to GOST in winter and summer
The main indicator is indicated in the document by number 51617-2000. In accordance with it, the temperature should be:
- on a flight of stairs - 14-20 degrees;
- in the lobby and corridors - 16—22;
- in hallways, living rooms and other rooms of an apartment - 18—25;
- in the bathroom - about 24.
More precisely regulates the temperature GOST 30494-2011:
| Season | Premises | Recommended value +/- 1 |
| Cold | Residential | 21 |
| Residential, in the north | 22 | |
| Kitchen | 20 | |
| Restroom | 20 | |
| Bathroom | 25 | |
| Interroom corridor | 19 | |
| Children | 24 | |
| Warm | Any | 23 |
Minimum rates
Heating of premises is important at any time of the year, but especially in winter.

The heating system has typical temperatures that must be respected.
There is a small interval for each room.presented in the table above. As such, there is no minimum threshold.
But there are several indicators, a fall below which indicates a malfunction. This applies to space heating: temperature drops are permitted by law up to 12, 8 and even 4 degrees, but only for a short period of time - 16, 8 and 4 hours respectively.
Maximum indicators of water temperature in radiators
SNiP 41-01-2003 sets temperature limits from above: for piping from one pipe, heating of the coolant is allowed up to 115 degrees, of the two - up to 95 ° C... Despite the permitted values, the values rarely exceed 80-85 ° C.
Reasons for the lack of heat in the apartment
There are 5 problems, each of which has a solution:
- Deterioration of the piping during operation
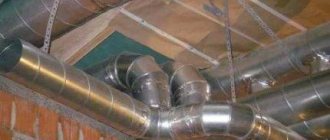
A high percentage of apartment buildings were built during the Soviet era. Age pipelines and boilers provide the building with heat, but do not have the proper efficiency.
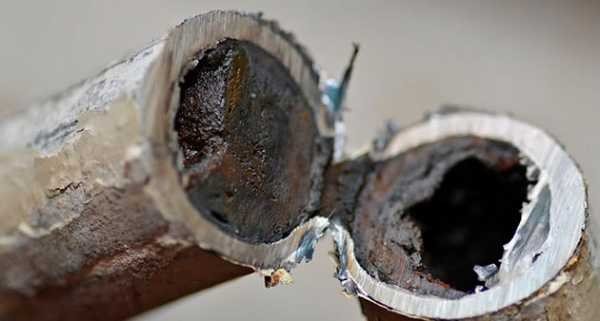
Photo 1. Blocked pipes in the old heating system. Because of this, the flow of the coolant is disrupted and the radiators do not warm up well.
Outdated equipment is rarely replaced, there is no thermal insulation in the distributors, and side problems arise. The solution is to overhaul the entire building system, but for this you need to contact the supplier with the appropriate act, with the signatures of the tenants.
- Poor hardware setup
In some houses, heating services are serviced by untrained specialists or high-quality personnel, but who do not have engineering schemes. This leads to incorrect regulation of the strapping, respectively, a malfunction. Dealing with this is somewhat more difficult: the management company is unlikely to recruit new employees in connection with a single complaint. Therefore, it is recommended to submit a collective letter with a request to resolve such an issue.
- Errors that occurred during the creation of a project or installation of heating are possible.
You can fix them with a major overhaul with redevelopment and replacement of pipelines.
- Unlawful tampering with the structure or modification of the harness by the user or third parties.
Some residents of apartment buildings independently change the heating system in their apartment, without thinking about the consequences for their neighbors. Violations are:
- increased number of radiator sections;
- expanded heating area;
- connection of additional equipment, for example, heated floors.
- High thermal conductivity of building walls, low radiation protection, other violations of technology during construction.
This mainly applies to old houses, in which insulation is made of low-quality materials or is absent. They also wear out over time, which spoils performance.
This results in a loss of heat going outside. Sometimes a similar problem affects modern buildings: builders may use an unsuitable, less efficient, but cheaper analogue.
As a result, the tenants suffer. The solution to this problem is almost complete overhaul of the heating system, building overhaul.
The annual rise in the price of resources makes the end consumer think not only about their savings, but also about the quality of the provided utilities. One of the most significant expenditure items in paying for an apartment is heating, so consumers monitor its parameters especially carefully. To do this, it is worth finding out what is the temperature of the batteries in the apartment in 2019.
Summing up
Replacement of radiators is not included in the concept of cosmetic repairs, it is part of a major overhaul. This is not started every year and even more than once every 3-5 years.
Against the background of possible costs, radiators seem to be secondary, but do not take them lightly: the climate in the apartment directly depends on these devices. For designer interiors with a pronounced style, it is fundamentally important to think over the location of the radiators: an unsuccessful or standard version of a radiator can easily spoil the look and mood.
Finally, we note that there are only a few weeks left before the launch of central heating in multi-storey buildings. It's time to replace your old radiators if you haven't already.
Warm batteries and a comfortable climate in the house!
Installation of heating radiators is a rather difficult task that is better to be entrusted to specialists.However, their work must be carefully monitored. How to do it?
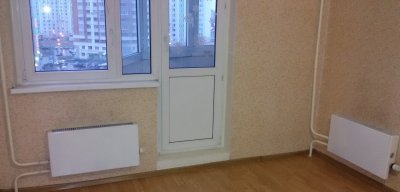
Temperature norms of the heating system in an apartment building
The heating scheme in apartment buildings is built in cooperation with a centralized system to which pipes are connected. Through them, the coolant is sent to the apartment building, where its further supply is regulated by the inlet valves. After that, the water goes through the risers and eventually enters the batteries and radiators of each apartment.
The described processes, as well as everything related to the rules for providing the population with communal resources, is reflected in the Decree of the Government of the Russian Federation of 05/06/2011 No. 354 "On the provision of communal services to owners and users of premises in apartment buildings and residential buildings" (hereinafter - Resolution No. 354). Requirements for the quality of heating are fixed in section VI of Appendix No. 1 to the rules of Decree No. 354.
In addition, detailed rules for the provision of heating services are spelled out in the Order of Rosstandart dated 06/11/2014 No. 544-st “GOST R 51617-2014. National standard of the Russian Federation. Housing and communal services and management of apartment buildings. Utilities. General requirements "(hereinafter - GOST R 51617-2014) and" GOST 30494-2011. Interstate standard. Residential and public buildings. Indoor microclimate parameters "approved by order of Rosstandart dated 12.07.2012 No. 191-st (hereinafter - GOST 30494-2011).
Air temperature standards in the apartment
The feeling of comfort from heating a room is subjective. However, there are uniform standards due to the physiological needs of a person, as well as the purpose of the premises in which he stays.
Although there is a fairly wide range of norms prescribing what the temperature of the water in the heating system of an apartment building should be, the standards for the thermal regime of air in an apartment are very unambiguous.
So, in accordance with the standards, the following temperature regime should be maintained in the apartment during the heating season:
- in the living room - 18 ° С;
- in a living corner room - 20 ° С;
- in the bathroom - 25 ° С;
- in the toilet (separated from the bathroom) - 18 ° С;
- in a combined bathroom - 25 ° С;
- in the kitchen - 18 ° C.
This standard in accordance with GOST allows you to preserve the health of residents without exposing them to adverse conditions.
How to check a heating radiator for leaks at home
The service life of cast-iron heating radiators is so long that residents take their work for granted, therefore, in the event of a leak or fistula in the wall of the device, they do not know what to do. It is especially unpleasant if the breakdown occurred in the midst of cold weather, but even in the off-season, you cannot leave the heating elements unattended. As a rule, preventive work carried out by heating network workers can reveal the presence of dirt or leaks in the device.
In this case, there are simple ways to eliminate a leak in a cast-iron radiator.
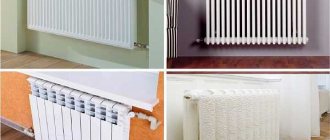
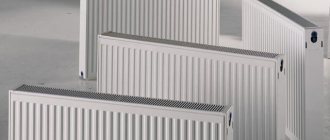
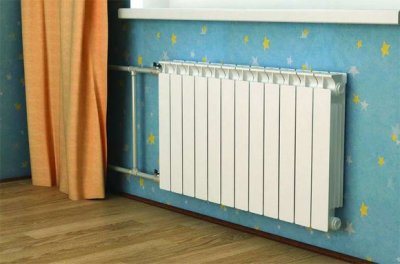
This type of heating device consists of sections. Models of the old type even today are produced in the form of "accordions", while the new generation has a flat outer panel that provides better heating of its entire area.
These devices use two types of heat transfer in operation:
- Radiation, or as professionals call it, radiation makes up 25-30% of the heat. It not only heats the air, but is transmitted to nearby objects, providing a better heating of the room.
- The convection produced by the heating battery ensures the constant movement of air masses around the room, and accounts for about 75% of the heat transfer.
The device of the cast-iron battery, despite all the external changes, remained the same. It consists of sections equipped with:
- plugs;
- locking devices;
- traffic jams;
- shank and thermostat;
- locknuts;
- nipples and gaskets.
As strong as cast iron is, even it has its limits.As a rule, the service life of cast iron radiators is 25-30 years, and with proper care and optimal working conditions, they can work without interruption from 50 to 100 years.
The same cannot be said for the parts that hold the sections together, such as the gaskets. With frequent water hammer, they can "wobble" or crack from time to time. In this case, a leak appears between the sections of the cast-iron battery, which, if not eliminated in time, can cause a serious accident and a threat to human health and life.
To avoid this, you need to check the condition of the cast iron radiators after the end of the heating season. In this case, completely different malfunctions in the heating system can be detected.
Although cast iron perfectly tolerates the imperfection of the central heating coolant, and the batteries from it have channels wide enough so that debris does not accumulate in them, even they may have problems. And this despite the fact that this metal has no wear. The following factors may be responsible for the fact that the cast-iron battery burst or a fistula appeared in its walls:
- Everyone knows the large weight of radiators made of this metal. If, during the installation of the structure, not strong enough brackets were used, or there were few of them, over time it can sag under its own weight and bend over. Even a slight deviation of just a couple of millimeters will reduce the efficiency of the device, and if the imbalance is not corrected, then after a few years, corrosion will appear in the place where the coolant is absent. At first, it will look like a small brown speck that will grow with each heating season until a fistula forms in its place.
- The reputation of "long-livers" is characteristic of both old and new models of cast-iron radiators, but provided that they are mounted in the circuit of an apartment building no higher than six floors. If the heating system is reliable and does not “sin” with strong water hammer, then they can be installed in nine-storey buildings. Otherwise, under a strong pressure of water, a cast-iron battery can leak at the joints of the sections. In the event that a cast-iron battery leaks during the heating season, you need to know how to repair it in advance. Today there are a lot of sealants that will help the device "hold out" until warm days.
- The internal structure of domestic batteries is such that the cast iron from which they are smelted has roughness that is completely absent in imported counterparts. That is why, over time, a lot of debris is deposited on the walls, with which the water in the heating network is filled. Suspensions, particles of rust and metals, all this settles and makes the wide channel narrow so much that it is no longer able to pass the coolant unhindered under high pressure. In this case, the structure can burst anywhere, and then you will have to urgently decide how to eliminate the leak in the cast-iron battery.
- Gaskets and nipple threads are the weak "link" of heating devices... If cast iron does not have a limitation period, then this cannot be said about the parts that make up the battery. In order not to bring the situation to the point that the repair of the cast-iron battery is required, the joints must be checked after each heating season and the gaskets must be periodically changed on them.
As practice shows, most often it becomes known that something is wrong with the heating system when the repair of cast-iron radiators is already required. To know about a problem in advance, you need to listen for "help signals" that indicate the presence of defects.
There are a number of factors that indicate that something is wrong with the heating circuit or batteries. These include:
- Feeling cool in the room. In this case, it is worth asking the neighbors how warm they are in the apartment. If everything is in order, then you can start looking for problems in yourself. The reason may be elementary contamination of the channels, the skew of the device or the presence of fistulas.In the first case, it is enough to rinse the batteries, in the second - to fix or change the brackets and check the correctness of installation with a building level, and in the third - to provide assistance to the "sick" radiator.
- If an incomprehensible plaque appears on the battery, visible to the naked eye, then the reason for this is worn out gaskets. We'll have to turn off the system, dismantle the batteries and install new ones, for example, made of paronite.
- The leak is immediately noticeable. If it is small, then you can do with a clamp or cold welding, otherwise you will have to completely change the device.
It should be remembered that even small defects can develop into a big problem if they are not eliminated in time. Do not rely on temporary clamps and patches. Only heating specialists can determine the reliability and tightness of the heating circuit and its elements.
For any breakdown, there are a number of reasons accompanying it. Fistulas on the pipes of the heating system or on the radiator are no exception. If a small brown speck appears on the elements of the heating network, you should not think that this is the paint coming off. In fact, this is the beginning of an often irreversible process, but knowing how to close a fistula in a cast-iron battery, you can stop the destruction and extend its service life. Reasons for the appearance of corrosion:
- Taking into account the frequent increases in the cost of utilities, some craftsmen are cunning and, for the sake of saving electricity, connect a zero cable to the heating circuit. The currents that begin their "journey" through the pipes by means of the coolant exactly cause the formation of corrosion. It is possible to identify a dishonest neighbor if there are several fistulas, and they appear with a certain regularity. A call to the appropriate service will help to save the situation in order to identify the offender, and do-it-yourself repair of cast-iron batteries.
- Too high acidity of water can harm even corrosion-tolerant cast iron.
- The batteries have expired or deposits on the sides have damaged the metal. In this case, even a small fistula or crack under the influence of water pressure can cause the battery to burst and a stream of hot water will flow out of it.
Any of the options requires urgent intervention. If the cast-iron battery only leaks slightly, then you can do without disconnecting the circuit and dismantling it. The clamp can save the situation. If the water only drips, then a one-sided pad will do, but if it runs in a thin line, then it is better not to risk it and use a double-sided clip.
In the event that the coolant tore apart the place where the fistula was located, the question immediately arises whether it is possible to brew a cast-iron battery... As a rule, cold welding becomes an emergency aid, but even if it has restored its tightness, it is necessary to call the masters from the heating network to check the condition of the heating system.
There are several methods that allow the batteries to hold out not only until the end of the heating season, but also for a couple of years. These include:
- If a leak occurs at the junction of the sections, then it can be quickly eliminated with a bandage and epoxy glue. The material is impregnated with glue and wound around the leak. After it grabs, you can paint over this place in the tone of the battery, but the main thing to remember is that such an "operation" is considered temporary, and it is better to buy and install a new section after the end of the cold weather.
- If a fistula or crack is found, a clamp will be required. You can buy it at a building materials store, or you can make it yourself from rubber or tin.
- Cold welding for cast iron batteries is the best way to quickly fix a defect. This is a special sealant that looks like children's plasticine. It must be thoroughly kneaded and applied to the damaged area.The tool sets quickly, is resistant to temperature extremes and is quite suitable for quick and temporary repair of a cast-iron battery.
Knowing how to weld a cast-iron battery using a welding machine with an inverter circuit, you can save the device from leaks for a long time.
Depending on how serious the breakdown is, the actions to eliminate it depend. So, if the leak is small, then you can do without disconnecting the battery from the circuit, and repair will require:
- Place a container under the place of breakage in case of a breakthrough or an oilcloth with a rag to collect water.
- The place of the gap or crack must be cleaned to the base with a cable or emery. It is necessary not only to remove the paint layer, but to expose the metal itself.
- Degrease the prepared area with some kind of solvent.
- If special glue or epoxy is used to eliminate the breakage, then strips of thick cloth or bandages will be required. Apply the product to them and wrap them in several layers over the gap.
- In the case of cold welding, no fabric is needed.
- A clamp is put on and screwed onto the place seized by the sealant, but it is important to make sure that its clamps are on the opposite side of the leak. For example, a crack has formed on the inside of the radiator, which means that the clamps will be on the outside, and vice versa.
- If the breakdown is serious and hot water gushes from the battery, then you need to call the emergency team, and not try to stop the leak yourself without the necessary tools.
Even the highest quality repair does not guarantee a long service life of the device. The restored cast iron radiators will still have to be changed, and the sooner this is done, the safer it will be in the apartment.
You can repair cast iron batteries yourself if you have the tools and the necessary materials, but only in case of minor defects. Cold welding is the easiest and fastest way to get the heater back "in operation", but even it does not guarantee that everything will be in order in the future.
To make sure that the heating circuit and all its elements will last a long time and will not be a threat to people's lives, you need to either completely replace the repaired structure after the end of the cold season, or invite specialists to check its reliability.
Usually on a car, when the engine is running, you may see a leak in the radiator, or maybe not, especially if the leak is between the tubes (honeycombs). And on the radiator of the stove (interior heater) it is even more difficult to find the place of the leak, since it is hidden under the dashboard. In any case, to eliminate the leak, the radiator must be removed from the car, and then precisely determine where the coolant comes from and eliminate the leak. How to do this for novice drivers, we will consider in this short article.
Now a large number of different drugs have appeared that supposedly eliminate small leaks from the radiator. But most of them either don't work, or they can clog the radiator or kill the pump. Therefore, it is advisable not to use such drugs, or to use only those that have been tested by one of your friends or acquaintances.
But it is best not to engage in such experiments, but simply remove the radiator from the car by unscrewing the clamps on the pipes and unscrewing the mounting screws. Before doing this, do not forget to drain the coolant from the cooling system. Most radiators have a drain plug at the very bottom.
After removing the radiator, you need to accurately find the leak. To do this, we need a simple device made from a piece of a wheel chamber. An old chamber is taken from a car wheel, and a circle with a fitting for pumping with a pump is cut out of it. The circle must be cut out of such a diameter that it overlaps the filler neck of your radiator by about 5-10 mm.
Before checking the radiator, both of its pipes are plugged with rubber or wooden plugs (the expansion tank hose connection is also), and after that it can be checked. There are three reliable ways to check.
The first way to check the radiator.
With this method, water is poured into the radiator, and then a pump hose is put on the fitting of the cut out mug from the chamber. Further, this circle is tightly pressed against the neck of the radiator, and the assistant begins to create a pressure with a pump, about 1 kg (bar). In this case, water will immediately be visible from the leak.
For a more convenient check, of course, it is better to make the device shown in the figure on the left, but for this you have to buy another radiator cover during disassembly and make a hole in it. However, you can check the radiator for leaks without this device, simply pressing the circle with your hands to the neck (it is better to work with an assistant).
The second way to check the radiator.
With this method, you need to have a large container with water, for example, a bath (if the radiator of the stove is checked, then naturally a large capacity is not needed). But you don't need to pour anything into the radiator. Here, both nozzles are plugged in the same way, and a rubber circle is applied, with a hose connected to it from a pump or compressor.
Further, the radiator is completely immersed in a container with water, and a pressure of about a kilogram is injected into it. Air bubbles immediately begin to emerge from the leak. Immediately, you need to pull the radiator out of the water and mark the leak with a marker or chalk.
Third way of checking .
This method is even simpler and it is used when the driver roughly knows the place of the coolant leak, that is, he saw the place of the leak on the car. Here, too, air is injected into an empty radiator, and then a brush is taken, dipped in a soapy solution and this brush is smeared over the area being checked. As a rule, soap bubbles immediately begin to form from a crack or from a hole, and this place is marked with chalk or a marker. It remains to repair the leak.
The radiator from the stove (interior heater) can be checked in any of these ways, only the stove radiator does not have a filler neck, which means we press the circle to one of the nozzles, and plug the remaining nozzle with a stopper. Natural champagne cork may work. It all depends on the diameters of the pipes (if necessary, grind the cork on emery (we make it thinner).
The same applies to the radiators of some cars that do not have a filler neck. In such radiators, the coolant is poured through the expansion tank.
Radiator repair.
Before repairing, you should first thoroughly clean the crack or hole (and around the hole too) from paint and corrosion products and degrease the repair site with a solvent.
Next, you need to close up the crack. If you do not have equipment for welding or brazing, you can try to seal the crack or hole with "cold welding". There are plenty of such drugs on sale now and there are quite decent ones.
But it is still better to solder the defective place or weld it. Soldering or boiling depends on the metal from which the radiator is made. On older machines, the radiators are brass, and this can be properly soldered using solder and a powerful soldering iron.
And in order for the soldering to go faster and easier, it is advisable to heat the defective place with a propane torch. Now there are very convenient small burners on sale (see photo above and on the left), powered by a small can of gas.
Anyone with a gas welding kit and a matching torch is even better. In this case, it is already possible to use not tin, but hard silver solder (rod), which is much harder than tin. But you can also solder with tin, because there is no high pressure in the radiator.
To make soldering more convenient, the radiator honeycomb can be moved up or sideways with a screwdriver, as in the photo on the left.And when soldering, it is useful to pour tin into the tank, to which the radiator tubes are adjacent, since most often it is in this place that cracks appear.
As for the aluminum radiator, which is installed on more recent cars, then everything is somewhat more complicated. Aluminum tends to oxidize in air immediately after stripping, and this is the whole problem when soldering it.
Although now it is already possible to find fluxes intended for soldering aluminum on sale, it is still better to prepare (clean up) the defective place, and then take the radiator to the argon welder.
With the help of an argon-arc apparatus, even very thin metal (aluminum) of the radiator honeycomb can be welded. But it happens that the crack is in an inaccessible place, and it is problematic to crawl with the burner. In this case, you will either have to try to fill this place with tin (melting the tin with a gas burner), using a special flux for soldering aluminum, or look for a new radiator.
As for the sealing of aluminum radiators using cold welding, many compounds do not adhere well to aluminum (although there are expensive and good preparations for aluminum). You can try to fill the defective area with epoxy glue.
After repairing the radiator, it is again checked by pressure in one of the above described ways, and if everything is fine, it is installed in its place.
It happens that after the repair of the radiator, the coolant still goes somewhere, but visually this place is not visible. How to find a hidden leak, you can read here in this article.
I hope this article will help novice drivers independently check and repair the radiator, success to everyone.
Battery temperature rate
Factors affecting space heating include thermal conductivity, other technical characteristics, and the procedure for installing batteries. Therefore, compliance with the rules for their installation and use will ensure that the temperature of the heating radiators in the apartment and in the house meets the established standards.
In addition, you should carefully consider determining the number of battery sections depending on the area of the room. For example, a device in which the coolant is heated to an identical temperature will have different effects on the heat flow at 5 and 7 sections on it.
Minimum value
In order to ensure the norms for heating air in residential premises, certain temperature regimes of radiators must be observed. However, at the legislative level, the minimum permissible indicator for the temperature of the battery itself is not established.
It is logical that at a low temperature of heating equipment it is impossible to provide + 18-25 ° С in housing during the cold season.
If the batteries do not provide the proper level of heating, it is worth starting to search for the cause. Before checking what the temperature of the pipes is, you should pay attention to the features of the placement of the device and the availability of free access to the battery.
It is quite possible that the matter lies only in the fact that the radiator is covered with furniture, which prevents the circulation of heated air, or it is fenced off with a special protective panel.
Maximum value
In turn, more attention has been paid to what the upper rate should actually be in winter. So, the permissible maximum temperature norm of a radiator in a dwelling is 95 ° C if the dwelling is equipped with a two-pipe heating system.
If the system is one-pipe, the maximum battery temperature should not exceed 115 ° C.
It should be noted that the figure is 85-90 ° C as the optimal recommendation. It is defined for practical purposes. This maximum water temperature in the heating system of an apartment building is associated with water boiling at 100 ° C. If this figure is exceeded, the radiator breaks down faster.
Temperature measuring instruments
The principle of operation of dilatometric thermometers is based on the thermal expansion of bodies. Dilatometric thermometers are not indicating devices, but are used, as a rule, in alarm and protection circuits. Devices of this type include temperature relays (TR-200) and dilatometric electrical thermoregulatory devices (TUDE).
Gauge thermometers consist of a balloon placed at the point of temperature measurement, a connecting tube (capillary) and a spring pressure gauge.
If the temperature of the heat carrier inside the boiler or in the system changes sharply, it will not become known immediately, but after a short period of time.
Bimetallic thermometerBimetallic thermometers, in turn, are divided into axial and radial.
The difference between these two types of products is the position of the dial axis. The axis of the radial thermometer is parallel to the sensor, and that of the axial thermometer is perpendicular. The most reliable devices are manufactured by Watts, Dani and Introll.
Alcohol. This type of thermometer is a vessel made of thermal insulating material with a degree scale, which is printed on the surface.
How to measure battery temperature correctly
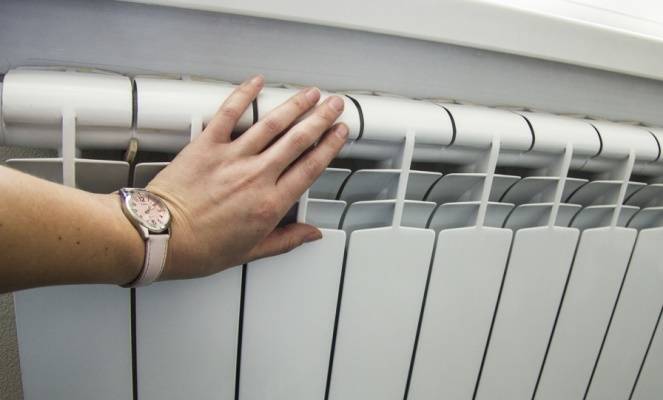
When the issue with the coolant is clarified, you can think about how to measure the temperature of the battery in the apartment. This is easy to do in the following ways:
- Use a regular household thermometer. It needs to be applied to the battery and wait for the moment when it heats up. To take into account the error, it is better to add 1-2 degrees to the obtained data.
- Apply an alcohol thermometer by attaching it to the radiator with tape, and then insulating it with insulating material, such as foam rubber. The information obtained by this method is indicative in dynamics. The device can be left for a long period to constantly monitor the situation.
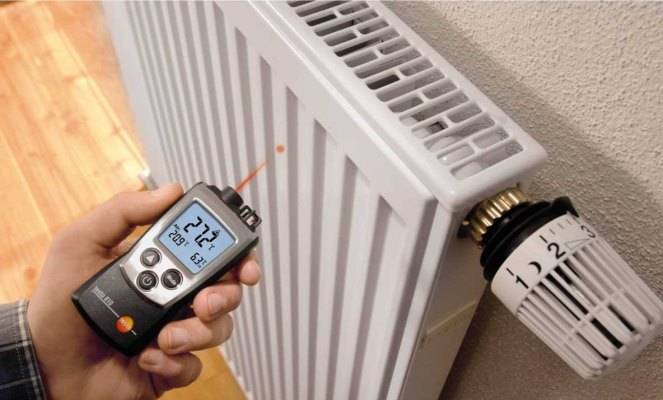
- Use an infrared thermometer. In practice, they differ in a small error, moreover, they do not require direct contact with the heating device. And the result is delivered instantly.
- Use an electrical measuring device with a thermometer and a sensor. The sensor is installed on the battery, and the device displays its value when the “measure temperature” function is selected.
Methods for measuring water in radiators
Many people wonder how to measure the parameter of the coolant in an apartment? There are several ways:
- Use a regular thermometer (on the surface).
- With an IR thermometer.
- Apply an alcohol thermometer.
- With the help of an electric thermometer.
If you measure the coolant in an apartment with an ordinary thermometer, then another 1-2 degrees should be added to the final figure. The use of devices with infrared radiation gives more accurate data. The indicators of an infrared thermometer (pyrometer) may differ from the actual values by only half a degree.
To constantly measure the temperature of the heating radiator, you can resort to using an alcohol meter. Attach it to the battery, for example, with adhesive tape and wrap with a material with thermal insulation properties (foam rubber, flywheel).
An electric thermometer can also be used for such measurements. Just tie the wire to the heatsink. It will show heating readings.
Important! If you decide to call a commission in order to measure the temperature of the battery, then the measuring device used by specialists must be certified. All actions of employees must comply with GOST 30494, clause 4 of the section "Methods of control".
How to act if the norms are violated
If it was found that the batteries in the apartment are cold, you should find out whether this is a problem exclusively for this room or all residents of the house have encountered it. A collective appeal always attracts more attention than an individual one.
If the quality of heating is unsatisfactory, which does not comply with SNiP, a complaint can be filed:
- to a service organization: an association of homeowners, a management company, a housing construction cooperative;
- resource supplying company;
- emergency dispatch service;
- housing inspection. It usually has a special hotline for such calls.
Organizations will take the complaint over the phone and then file it. After that, specialists will establish and eliminate the reason for the lack of heating, fixing the violation.
Later, on the basis of the act of inspection of heating networks, recalculation takes place for the period of absence of heat.
If the above organizations do not take any measures to restore heating, you should file a complaint with Rospotrebnadzor and the prosecutor's office.
Selection nuances
The working pressure in the radiators indicates the amount of constant impact for which they are designed. In heating networks, it occurs due to the circulation of the heated coolant and depends on the following features of the heating circuit:
- length of pipelines;
- the number of batteries.
In addition, the magnitude of the arising load is influenced by the way of organizing the heating of the premises, which can be autonomous or centralized. Each option has its own characteristics and allows you to install a certain type of radiator.
An autonomous heating network is used to create comfortable living conditions in low-rise private houses. It is in demand in the absence of a centralized system and operates at an operating pressure that varies between 3-5 atmospheres. If the heating network is laid in a one-story house and is closed, then this figure is 1.5-2.5 atm.
What is the working pressure in the centralized system of an apartment building? This information can be obtained by contacting the management company or the housing office. Typically, the indicator varies from 8 to 16 or more atmospheres and depends on the following factors:
- the height of the house;
- the power and condition of the equipment with the help of which the coolant is supplied;
- remoteness of the building from the heating point;
- the diameter of the pipeline network in the apartment;
- the location of the room and the distance from the common riser;
- the degree of wear and tear of the communication elements.
When buying a radiator, it is necessary to select a specific model so that its working pressure exceeds the maximum value of a similar indicator of the heating network by at least 2 atmospheres.
The test pressure must also be taken into account when selecting batteries. It reflects the maximum exposure that a product can withstand over a short period of time. This parameter is determined in the course of testing in the factory at the enterprises involved in the production of radiators.
It shows the resistance of heating devices to hydraulic shocks that sometimes occur in centralized heating systems.
conclusions
The legislator has set standards for the characteristics of the heating system, paying particular attention to the optimal temperature in the living room. Its value is the most important for residents, and it is also easy to check. If it is lower than it should be, then the battery is not hot enough. And in case of non-compliance with the standards, you can file a complaint with the service organizations, not forgetting to recalculate the payment if you discover the fact of providing heating services of inadequate quality.
Lawyer. Member of the St. Petersburg Bar Association. Work experience over 10 years. Graduated from St. Petersburg State University. I specialize in the field of civil, family, housing, land law.