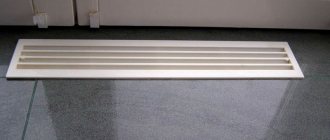
Purpose of the flow extension

Most often, the flow extension is used with side connection of radiators.
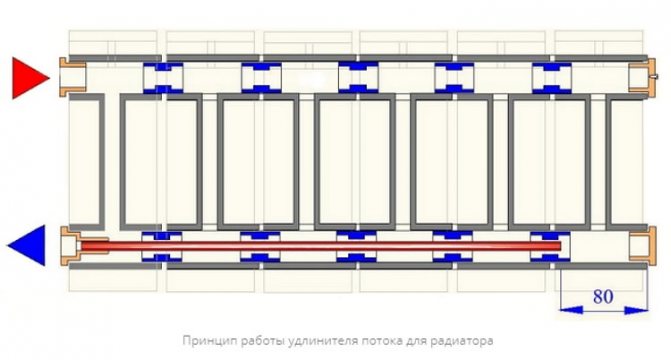
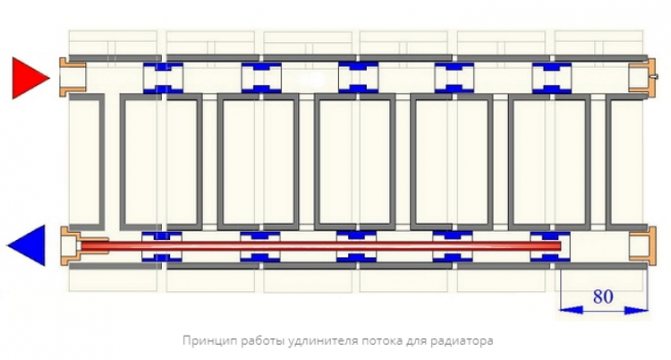
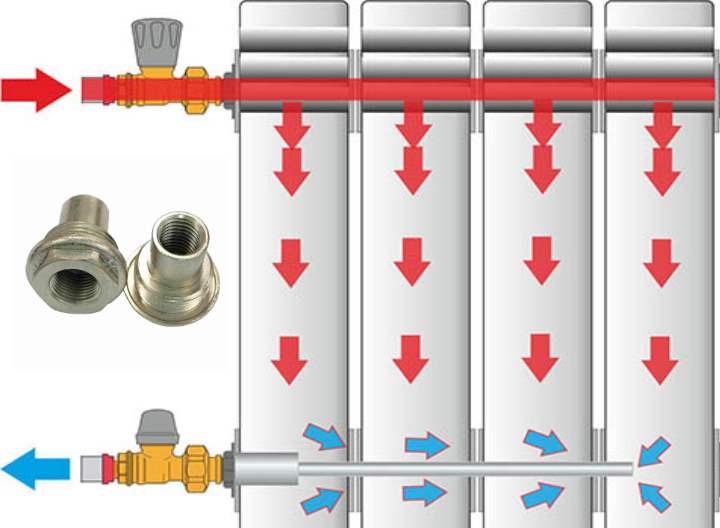
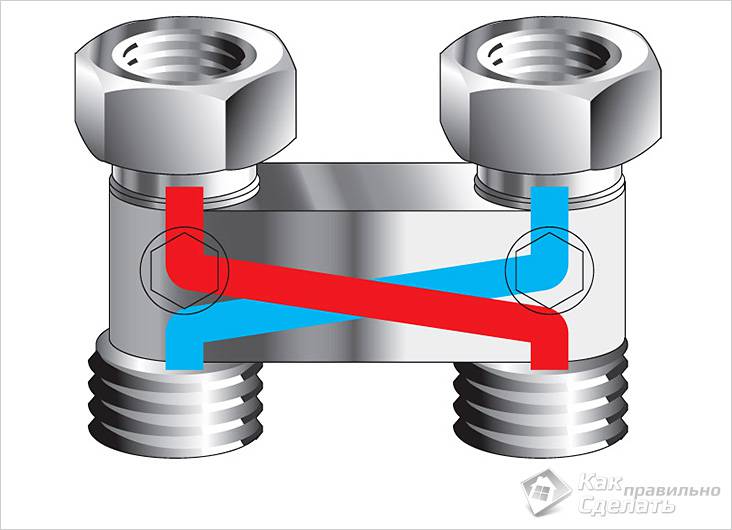
The part is used to change the direction of flow of the thermal medium, which allows the battery to heat up evenly without reconnecting. The duct extension is suitable for radiators connected from one of the sides. Often it is installed on a reverse connection, due to which the water moves diagonally.
Usually the part is used for long batteries (the number of cells is more than 10), since their design contributes to uneven heating. The further the section is from the pipe through which the water is supplied, the more likely it is to remain cold. The easiest way to fix this is to mount an extension cord. This will help make the circulation smooth and efficient. The device is suitable for bimetal batteries (with aluminum and steel components). It is rarely used for cast iron structures.
Radiator design
When choosing radiators, the main focus is on the efficiency and quality of the product. It is also worth considering the types of construction and material of manufacture. Today the range of radiators is quite extensive. It is worth taking into account in what conditions the equipment will be used.
But no matter how well the radiator is chosen, if its length has 10 sections or more, then when connected, it will heat up unevenly. Its productivity will be reduced, since the further from the supply pipe the heating element is located, the more unevenly the water circulates. Therefore, either they make an inclined connection, or introduce a more efficient method. It is the use of a radiator flow extension, which is well suited for bimetal, aluminum and steel products.
But before deciding such issues, it is worth familiarizing yourself with the differences in radiators. Modern heating devices of this type can be made from various alloys. For example, it can be a cast iron, steel, aluminum, bimetallic, copper radiator, etc. They also have a different appearance:
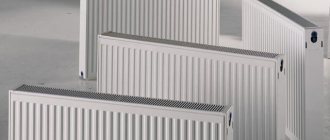
- A panel radiator made of aluminum is perfect for your own heating. Inside there are steel heating panels connected by converter fins. This gives a high rate of efficiency.
- Tubular steel radiators through which hot water flows. This is a simple construction.
- Aluminum radiators. There are two types of them: injection molding and extrusion. It is recommended to use them only for autonomous heating. Due to the nature of the material and the weak atmospheric pressure inside the system, they cannot be used for central heating.
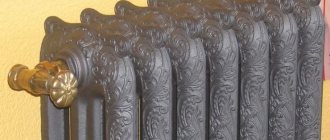
- Cast iron radiators. The very first type of radiators. The heater gains heat for a long time, but it has good heat transfer. Ideal for district heating.
- Bimetallic heating radiators. This construction combines materials of steel (from which the core is made) and aluminum (which covers the shell). They have a sectional design. Such radiators are suitable for both autonomous heating and centralized heating.
A wide range of designs allows you to create a high-quality system under any conditions.
Pros and cons of using

A flow extension with shut-off valves can be made by yourself or bought in a store.
The main advantages of the device are ease of installation and increased efficiency of the heating system. To buy it or make it yourself, you will not need a serious investment.To install the device, it is enough to have basic locksmith skills. Productivity gains are achieved without adjusting the existing battery wiring.
The duct extension for a bimetallic radiator has certain restrictions on its use. It can be installed only on radiators connected one-sidedly from the right or left side. They must also be equipped with shut-off valves on the return and water supply side. If this is not the case, the fitting will fail. You will have to contact the wizard and reconnect, which is labor intensive.
Ready-made extension cords are quite rare in stores, but they are easy to make yourself or order via the Internet.
What do you need to make an extension fitting?
Let's take a look at what you need to make an extension cord. First, you need to acquire the following materials and tools:
- solder sleeve (twenty);
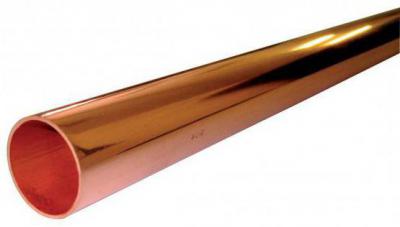
- a piece of copper or plastic water pipe with a cross section of 18 mm and walls not thinner than 1 mm;
- adjustable gas burner with nozzle;
- pipe cutter (thanks to him, you can cut a piece of pipe of the required length without deforming it);
- solder;
- metal brush;
- bevelling tool (it will allow you to get rid of the burrs at the ends of the pipe qualitatively);
- hard brush;
- silicone gasket;
- flare tool (if there is none, you can use a pipe expander).
After the preparatory work has been completed, you can start working to restore the normal functioning of bimetallic heating batteries. All shut-off valves on pipes that lead to the radiator must be in the closed position. In the case of a one-pipe connection scheme, it is necessary to close one tap, after which it is necessary to drain the water from the heating battery.
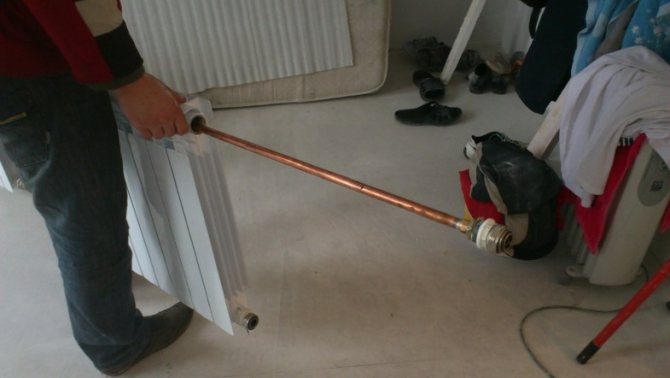
Theoretically, installation of an extension cord is possible without dismantling the radiator. But in this case, this procedure will be quite inconvenient. Because of this, it is best to remove the radiator. This is pretty easy to do.
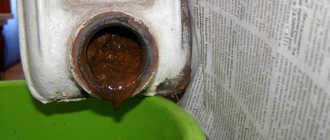
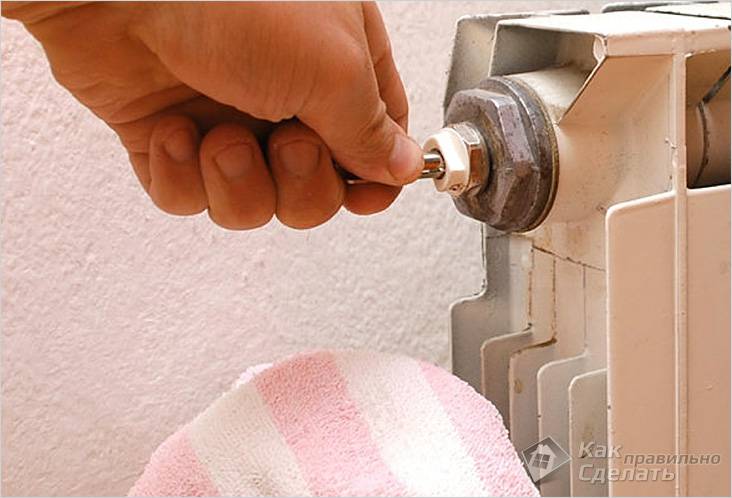
It is necessary to unscrew the plug together with the detachable connection. In this case, it is necessary to immediately check in what condition the silicone gasket is. If it is damaged, it must be replaced immediately. Its price is quite low, but the function it performs is quite important. It is not worth saving on this element.
Then it is necessary to disconnect the pipes from the heating battery and carefully remove it from the brackets. Then you can start the main stage of work.
How to install a radiator extension?
Let's get down to the main process. Firstly, using a pipe cutter, you need to separate a piece of the required length from a piece of copper pipe. The edge of the product should turn out, thanks to the pipe cutter, quite even. This can be achieved if the pipe is held strictly perpendicular to the pipe cutter.
Then, using a stiff brush, carefully remove the burrs from the cut edge. After that, using a steel brush, the inner surface of the pipe walls is processed.
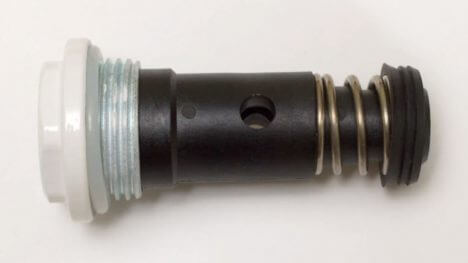
Extension cord features
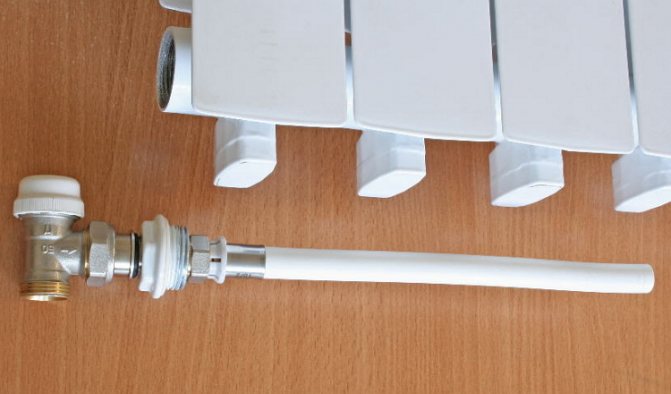
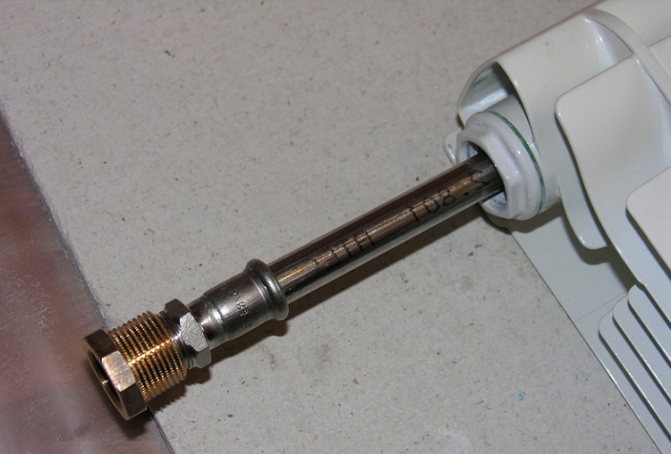
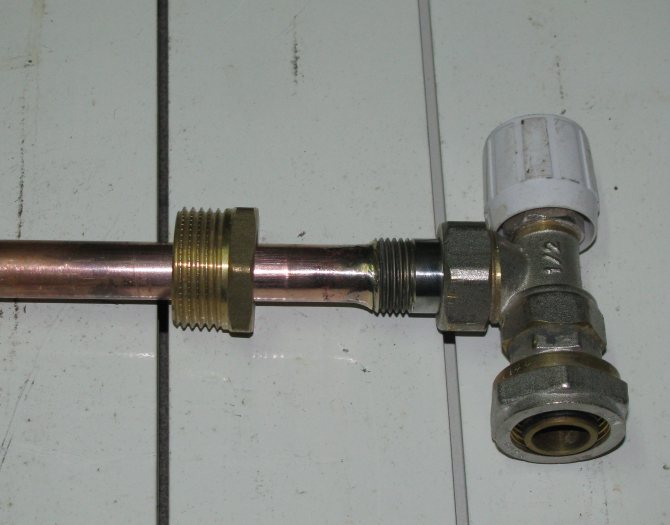
The main components of a radiator flow extension are a small (0.5 ”or 0.75”) fitting and tubing attached to it. The latter can be made of different materials - stainless steel, copper, polyethylene or metal-plastic. Copper pipes cannot be used in conjunction with aluminum radiators and parts: when interacting, these metals are oxidized. The part mounted on the reverse connection changes the direction of movement of the coolant so that the maximum efficiency is achieved. This method will be effective for long radiators (0.8 m or more).
Purchased extension cords
The flow extension for the Valtec bimetallic radiator is used for uniform heating of convectors with a large number of sections.This product is manufactured as a nickel-plated brass fitting that has a 1-inch male thread. There is also a female threaded nipple for 16mm or 18mm copper tubing.
View gallery
Manufacturers of Valtec radiator flow extensions produce a product with right-hand and left-hand threads. Also available in a range of 1/2 "and 3/4" sizes. If desired, the device can be made without much effort by yourself.
DIY extension cord
When self-manufacturing, it is better to use a copper pipe.
It is not difficult to make such a design yourself if you have all the required components and a suitable type of battery connection. The cranes through which the radiator is connected must be ball and equipped with American women. They need to be closed and the water drained. Then you can start installation work.
Procedure:
- On one of the lateral sides there is an upper case. It must be unscrewed together with the detachable fastening element mounted there. This must be done carefully so as not to damage the paint coating. Then it is advisable to replace the silicone round. It is possible to dismantle the heating battery completely, if it seems more convenient for work.
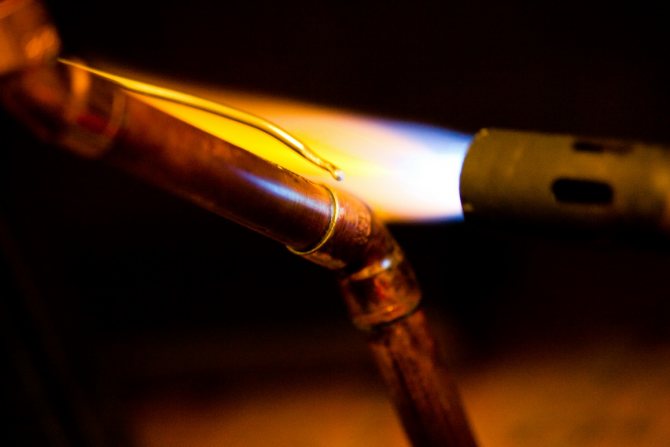
- Proceed directly to the assembly of the extension structure. The tube cut with a special tool will need to be soldered to the sleeve. First, it is cleaned from the inside from plaque and dirt with a brush. Soldering grease works well as a flux. With a small brush, it is applied on top of a part with a smaller diameter. Then one element is inserted into another and excess fat is wiped off. The joint begins to be heated with a burner until a silvery hue appears.
- After that, solder is applied to it. If the heating is done correctly, the solder softens from the high temperature, flows into the joint area and fills the space. When this happens, you need to wait at least a minute until the molten metal finally solidifies.
- An American woman with cleaned inner walls has a diameter of 1.9 cm. The clutch has a slightly larger diameter. You can use a small file to remove excess. You need to do this carefully so as not to damage the parts. For clogging, you can use wooden spacers.
- Sometimes you have to experiment with the length of the tube. Sometimes the length to the middle of the radiator is optimal, but it is preferable to start with a longer one. If necessary, the excess length can be cut off later.
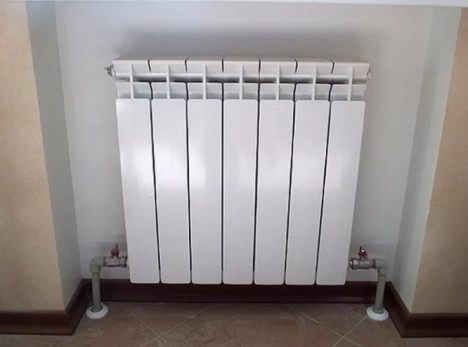
The extension device is mounted in the hole and screwed. You also need to replace the gasket and the battery itself. To remove air masses from the system, a Mayevsky crane is used.
Required tools and materials
Installing the flow extension into the radiator
It is necessary to select a piece of pipe that will perform the function of elongation. The thickness of its walls should be at least 1 mm, and the section should be 1.8 cm. The length is taken approximately equal to the length of the heating battery itself. If necessary, it can be shortened in the future. It is important not to forget about the ban on the installation of copper elements in one structure with aluminum ones (including bimetallic radiators with parts made of this metal). Ignoring this rule is fraught with the destruction of all reacting parts of the system.
For installation, you will also need to prepare the following parts and tools:
- Straight soldering socket with an outer diameter of 2 cm.
- A pipe cutter that allows you to evenly cut a piece of an extension to the required length without deforming the metal. When working with this tool, the workpiece is kept at a right angle. When the trim is complete, the bumps can be removed with a brush.
- Beveller. With its help, burrs are eliminated in the places adjacent to the ends of the tube segment.
- Metal brush and stiff brush.
- Pipe expansion device.
- Solder.
- Soldering torch.A simple device of small dimensions will do, you can fill it with gas used for lighters.
The silicone gasket installed in the connection should also be replaced with a fresh one.
Using a duct extension
What it is
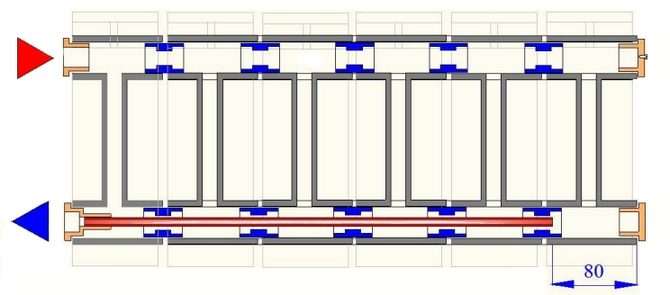
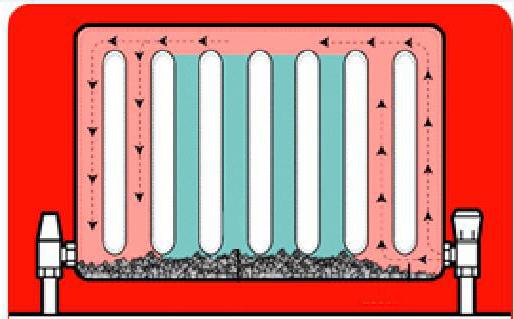
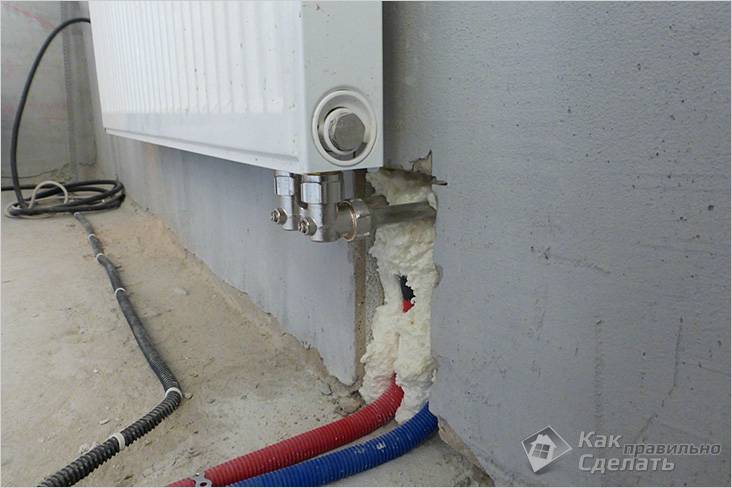
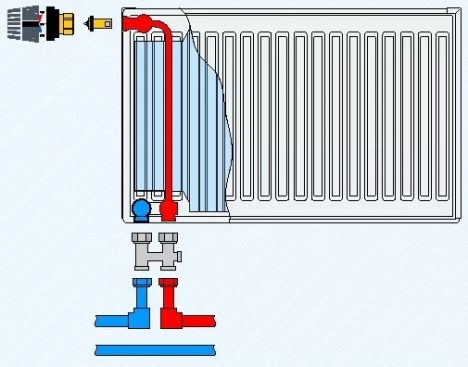
- If there are more than 10 sections in the radiator, then there is a possibility that when connected to the side, they will heat up unevenly, that is, the farther the section is from the supply pipe, the colder the coolant will be in it, since the circulation in the heater will pass at different speeds. Therefore, in order not to redo the side connection to a diagonal one after installing the battery, which can cause certain problems with the arrangement of the interior of the room, you can install a duct extension for radiators with your own hands.
- After installing such a device, the circulation of the coolant takes on a uniform character. - the internal diagonal movement of water begins to pass at the same speed and thus the problem of uneven heating of the battery is removed by itself.
But it turns out that not everything is as simple as it really should be - the fact is that buying a duct extension cord in a plumbing store or even ordering it on the Internet is a whole problem and the reason is the most commonplace - no, not a high price , but their absence. But for those who have a desire to equip their life, we solve this issue - the adaptation can be made independently.
Do it yourself
In order to perform such a manipulation with the radiator, there is one important condition, which, however, must be fulfilled for very many situations - this is the presence of shut-off valves on the supply and return pipes, where ball valves and "American" valves will be connected.
To dismantle, first of all, you need to turn off both taps and carefully unscrew the upper left or right foot - there is a possibility that the silicone gasket will be damaged, therefore, it is best to buy it in reserve - fortunately, it has a penny cost. Of course, it is best if you completely free the battery from the pipes and remove it from the brackets - it will be much more convenient for you to carry out further work on the floor.
Now let's figure out how to make an extension cord, but first of all, to implement the project, you need a piece of copper water pipe - its outer diameter should be 18 mm, and the wall thickness should be at least 1 mm. In addition to the pipe, you will need a twentieth soldering sleeve - its outer diameter is not 20, but 19.5 mm.
To solder the sleeve to the pipe, you need a set of special tools, such as:
- A pipe cutter with which you can cut copper pipe without deformation;
- Chamfering tool, with which you can remove chamfer and burrs at the ends after cutting;
- Expander or flare tool;
- Steel brush for cleaning copper surfaces before brazing;
- A brush for cleaning the treated surfaces from dirt that will interfere with the soldering;
- Solder;
- Adjustable gas burner with nozzle.
Note. You can also use a compact gas burner based on camping stove cylinders for this purpose.
First of all, you will need to solder the sleeve to the pipe, but first you need to cut it straight off - we use a pipe cutter for this, only the pipe itself needs to be kept strictly perpendicular to the tool so that the edge turns out to be even.
Then we remove the burrs with a brush, which in any case will be at the cut end and clean the surface from the inside with a brush. We remove burrs and dirt, and then apply the flux to the surface of a smaller diameter, evenly distributing it with a brush.
Attention! Never sand the surfaces with sandpaper! Copper is a very soft metal, so grains of abrasive will remain in it, which will interfere with high-quality soldering.In addition, do not apply an excess amount of flux - when heated, it will flow into the pipe and a frozen drop will form there, which will cause extraneous noise when the water moves.
We insert the parts into each other, wiping the squeezed out flux with a napkin and evenly warm the ends, determining the readiness by the color of the flux - with sufficient heating, it acquires a silvery color.
We apply solder to the joint - it will melt from the temperature of the pipes, without heating from the temperature of copper and, spreading to fill the voids - this is due to the capillary effect.
When you see that the solder begins to collect in drops, immediately stop the process, but continue to hold both ends (without blowing on them) until they solidify - this will take less than a minute.


Popular manufacturers

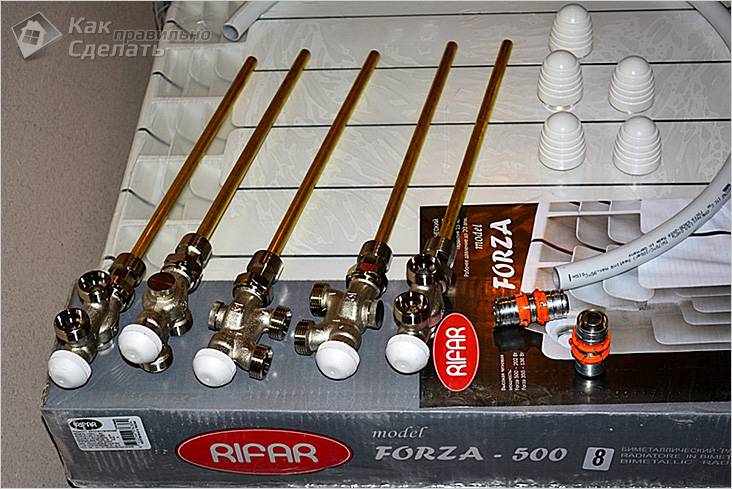
Rifar radiators are sold with ready-made flow extensions
Well known flow extenders for bimetal batteries are from Valtec. This Russian-Italian company produces products for uniform heating of multi-section radiators. Fittings are made of brass and nickel plated. They have an external thread of 1 inch and a branch pipe designed to connect to a pipe of 1.6 or 1.8 mm. In the catalog there are small-sized options in 0.5 and 0.75 inches. Parts with right-hand and left-hand threads are produced.
The domestic company Rifar mainly produces sectional radiators made of bimetal and aluminum. Suitable extension cords are available for different battery models. Most are 0.75 "in size.
The lengthening of the flow will be an excellent solution in a situation where the sections of the convector far from the supply remain unheated. The device has a low price and is easy to make at home. Suitable for sectional radiators with a length of more than 0.8 m and connected on the right or left side. When buying or making it yourself, you need to pay attention to the compatibility of parts made of different metals.
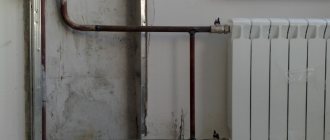
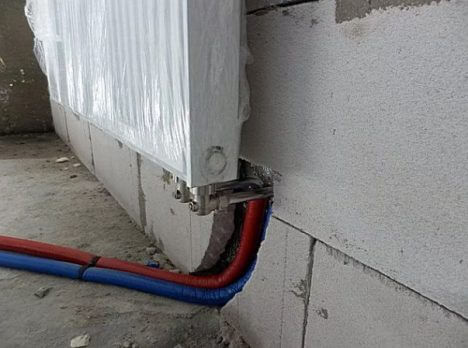
Bottom radiator connection where is the flow and where is the return
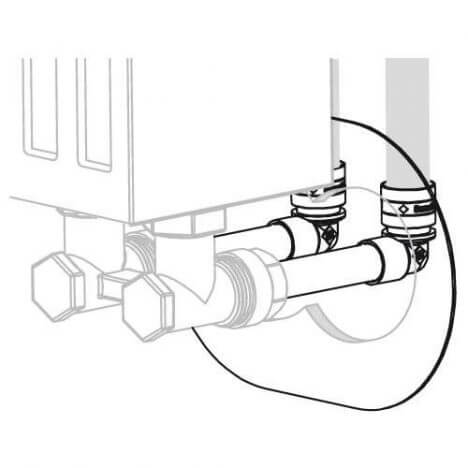
Many users of our site are looking for information about how Kermi radiators are connected, and what kind of jumper they have inside or the so-called bypass, which is a tube originating from the bottom of the supply connection itself (as Kermi knows, it is from the bottom). From this lower connection pipe, the tube inside the radiator rises and adjoins the tap, with the help of which the coolant supply is regulated.
Well, due to this tube, the correct thermosyphon circulation of the coolant inside the radiator takes place. This is also done for convenient temperature control in the heat carrier supply radiator. Due to this, such a radiator can be used to build a radiator branch up to fifty meters in length on the principle of natural circulation (without pumping by pumps) natural - gravitational or thermosyphon circulation of the coolant will pump itself by itself.This is what distinguishes correct radiators with a bottom connection from a conventional radiator connected to the bottom - bottom in the picture below.
In the figure we see the usual - a sectional radiator that does not have a tube inside it that would raise the coolant upwards as it cools down, so the usual sectional radiator for its natural circulation must be connected top - bottom diagonally - this is mandatory and washed off reliable connection to be used in natural circulation. And in the case when a conventional sectional radiator is connected to the bottom, it must be pumped with forced hydraulics and it will always be airy.
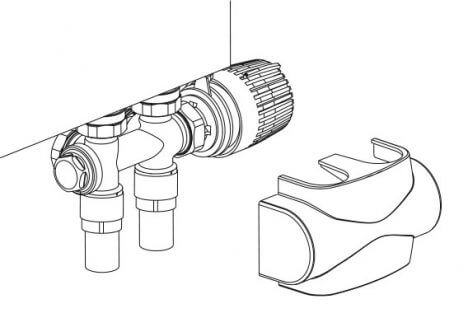
But this is fixable, and if you really want to, you can depict the bottom of the bottom of an ordinary panel radiator .. For this you need to buy a flow distributor - do not confuse it with an extension cord. The flow distributor is just such a thing.
It is needed in order to plug the intersectional flow between the first and second sections inside the battery with a gasket supported by a spring, then the heat flow will have to go up and this is the same as the tube for radiators with a bottom connection, well, or it is all the same that the diagonal connection is when the input is from above and the output from below from the opposite side. But back to Kermi radiators, their bottom connection and bypass connector.
Connectors for Kermi radiators with a standard distance along the axes of 50 mm - which corresponds to the standard center-to-center size of most radiators with a bottom connection, unlike Rifar Monolith, but not about it now .. That means - fucking battery connectors with a bottom connection are straight and at an angle of 90 degrees so that the eyeliner goes into the wall. And with straight connectors, the liner will be hidden in the floor.
This is a straight connector for laying pipes for the heating branch under the floor.
And this is a corner connector for laying the heating main inside the wall.
This is what the standard bypasses look like for all radiators with bottom connection, only “Rifar Monolit” has its own standard, which is wider than usual and makes up the distance along the axes not 50 mm but 80 mm.
Are all these expensive bypasses really necessary? In principle, it is not necessary, you can completely do without the bottom. For example, here's how to connect a radiator - directly.
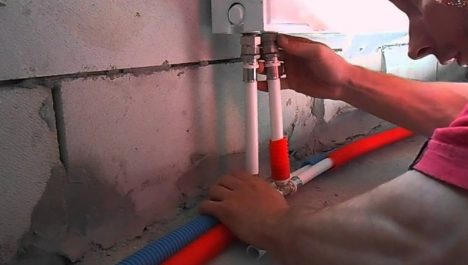
If there are special requirements for aesthetics, and even if the pipes will be laid inside the walls, then it is recommended to install corner connectors.
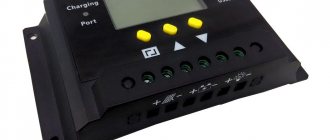
How the device works
The principle of operation of this device differs from the traditional counter. And although they are often confused due to lack of awareness, they are not the same thing. The meter calculates the volume of hot water that has passed through the pipe on which the sensor is mounted. The heat spreader is different. It is installed on the heating battery and periodically (the interval is calculated in minutes, depending on the setting) records the temperature of its surface at the point of attachment, and the sensitive element - of the air in the room. The difference in readings is recorded in the electronic memory of the device. It is en / independent, since the power supply to the unit is autonomous, from a mini-battery.
The recorded data serve as the basis for calculating the consumed heat. It should be understood here that the measurement results are expressed only in arbitrary units. To get the values in Gcal, you need to do a recalculation. For this, such a concept as a radiator coefficient is introduced. Its value is determined by two factors - the size of the battery and its type. That is, the distributor takes into account heat transfer, depending on its material (cast iron, bimetal, and so on) and design. All well-known companies engaged in the production of heating radiators must indicate the value of the coefficient in the sample passports.
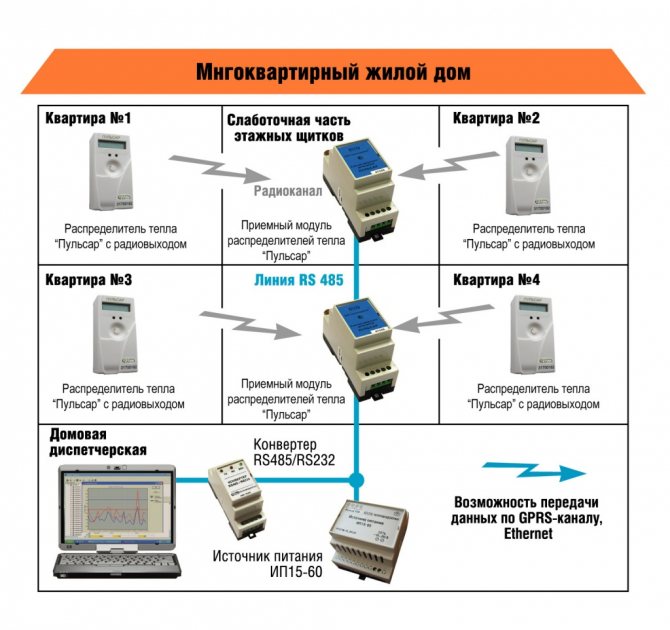
In practice, it turns out like this: utilities calculate heating by the quadrature of the premises. But, for example, apartments have a different number of batteries, their sections, there is a difference in the models of radiators, the quality of housing insulation. That is why some owners in reality consume Gcal much more than others, even if the area of apartments is equal. Distributors make it possible to eliminate such "injustice", and in fact, the imbalance in payment for this service.