Various types of pipe camouflage
There are various ways to hide elements, allowing apartment residents to show creativity and imagination.
The most popular are:
- creation of closed heating systems;
- masking heating elements with furniture;
- the device of boxes in which communications can be hidden;
- decorating pipes with linings and other design elements.
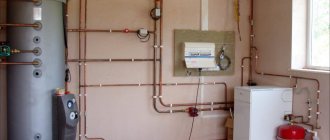
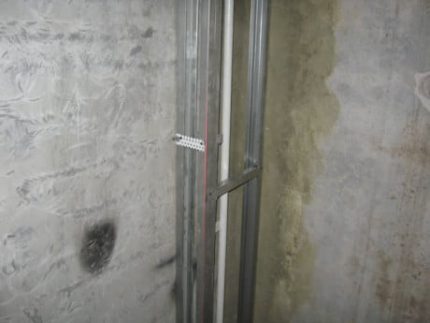
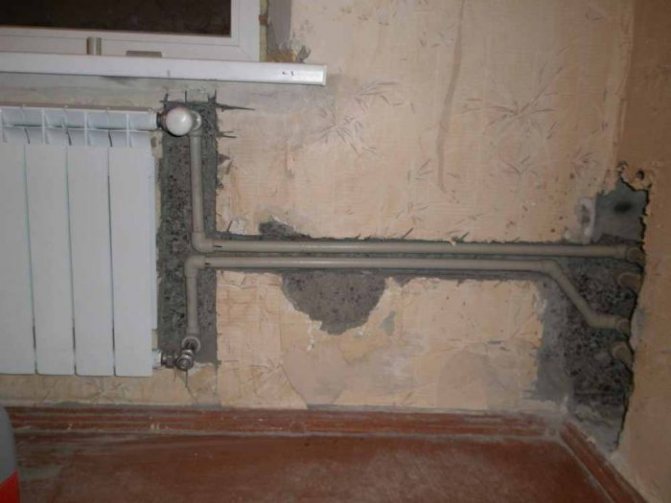
To create closed systems, all pipes passing through the apartment are retracted into channels-grooves specially made in the walls, after which the contours are sealed with plaster.
This method requires the perfect quality of communication elements: even minor defects can cause leaks and breakouts that are difficult to eliminate over time. A special danger in this regard is represented by metal-plastic pipes, for which fittings are used, but leaks are possible in steel or copper pipelines if the welding technology is not followed.
We suggest that you familiarize yourself with How to start a major overhaul in an apartment
When camouflaging, communication networks are covered with household appliances and furniture, located behind a closet, under a sink or sink. Such a solution is easy to implement in the kitchen, but in living rooms, especially those designed in the spirit of minimalism, this is often difficult.
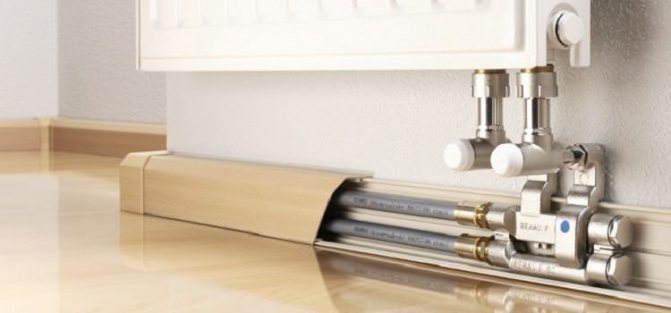
Decorative boxes are a reliable way of masking communication elements. They allow not only to disguise the pipes, but also add zest to the interior design
The most popular methods for concealing pipes are boxes made of different materials, as well as the use of decorative elements such as rings, ropes or ropes, stained glass windows.
We will consider the nuances of decorating heating elements below.
Methods for decorating heating pipes
Suppose that in your apartment there are old heating systems, which are out of place heating pipes: the design of such objects can be limited only by your imagination and material capabilities. Let's list some of the simplest and most accessible ways for everyone to show creative individuality:
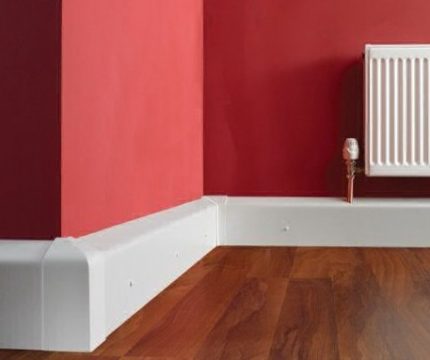
- The simplest solution is to simply paint the protruding pipe in the color of the wall.
- Investing a little more - both labor and time - will require decoration.
- The most time consuming is, undoubtedly, an attempt to hide pipes behind furniture or to build a simple structure specially for this purpose.
You can make decorative boxes for heating pipes from any suitable material that will correspond to the design idea of decorating a room:
- drywall;
- wall panels made of polyvinyl chloride or MDF;
- laminate;
- parquet board on a slatted frame.
The most popular is drywall. This material allows you to create structures of various configurations. Read about the features of its installation in the article "How to hide heating pipes".
It is quite easy to decorate a plasterboard structure that hides the pipes by painting it, for example, in the color of the walls or by pasting wallpaper.
How to hide heating pipes in a room with a decorative screen
Knowing how to hide the heating pipes in the wall or using a plasterboard or decorative box, you can create comfort and harmony in all interior details in the room.
BUT! It is worth saying that according to SNIP there are no rules for masking heating pipes inside the walls, since it is FORBIDDEN to hide heating communications in blank walls! Pipes or radiators must not be embedded in supporting structures or partitions.
But if you nevertheless decide at your own peril and risk to hide the heating pipes in the wall, or have chosen safer options, then you should understand some important nuances:
- Any way to mask pipes or radiators will result in heat loss.
- Nothing should interfere with the circulation of the heated air, so that the room warms up evenly, and the windows do not sweat.
- In advance, you need to think about free access to the battery and the threaded pipe connection in case of an emergency.
- The drain valve, the coolant shut-off valve and the thermal head must always be visible. They cannot be embedded in the wall.
There are three ways to close the heating pipes:
- Hiding communications in walls or floors;
- masking of the pipeline in the box;
- decoration of heating equipment.
Let's take a closer look at each of the options.
Before studying the process of how to mask pipes inside walls and floors, it is worth studying the recommendations on which structures are allowed to be bricked up. As already noted, SNiP categorically prohibits placing any pipes in the walls, but in practice, heating communications are still placed in concrete. How to minimize risks?
It is impossible to hide old pipelines in the solution. If you decide on this, then the highways should be replaced with new modern materials. It is better to replace them with new ones before that. The method of laying communications depends on the material of the products used.
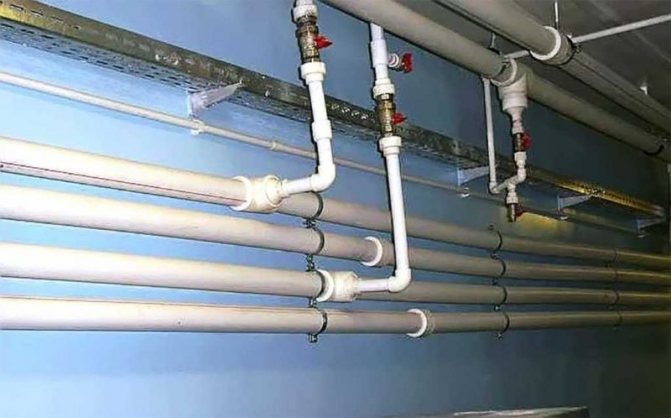
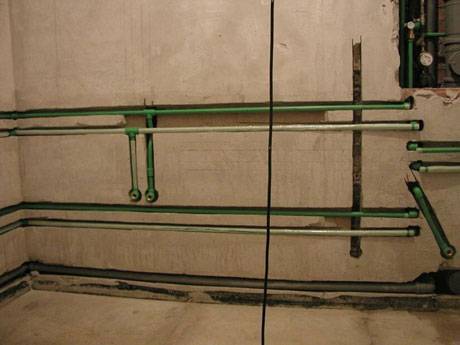
Plastic pipes made of polypropylene have a linear thermal expansion of up to 0.5 cm, therefore, when installing them, a sufficient number of expansion joints must be provided. On metal-plastic products, before laying inside the walls, you need to put on special casings that protect communications from concrete and reduce heat losses. In this case, the detachable connections must not be walled up.
Before hiding the pipes, it is worthwhile to draw a diagram of the equipment laying in advance, and, following the diagram, make indentations of the appropriate size on the wall. The depth of the grooves should take into account the placement of the insulated line and mortar in the recesses.
The sequence of installation of heating pipes inside the walls:
- First, you need to draw up a scheme for laying the highway, taking into account the cross-section of the pipes, thermal insulation and the thickness of the wall layer.
- Then it is necessary to drill holes in the wall to accommodate the piping, tees and bends.
- After that, the tubes are placed in thermal insulation and installed in the prepared recess.
- The line is carefully fixed with fixing brackets with dowels in the wall.
- Next, you need to check the operability of the pipeline, and if there are no deviations, close it with a solution.
Sealing the heating line to the floor is carried out in the same way, but taking into account some peculiarities. After developing a detailed installation diagram, grooves are grooved in the floor so that the top of the pipes is slightly below the floor level. Next, we isolate the line, check it, lay it and hide it in the floor with concrete mortar. In order for the coolant to circulate normally through such a system, it is necessary to install a pump.
An already working heating system can be hidden behind a false wall or simply hide the heating pipes in a frame box made of plasterboard, plastic or wood.
A false wall is assembled from a metal profile and drywall, the surface of which can be coated with wallpaper or painted. But such a solution will hide up to 25 cm of free space. If there is not enough space in the bedroom or other room, then it is better to build a box that will mask only the heating equipment.
To assemble the box you will need:
- metallic profile;
- self-tapping screws with dowels;
- cladding material;
- screwdriver;
- cutter;
- knife for cutting sheathing material;
- drill;
- profile cutting scissors;
- measuring instruments.
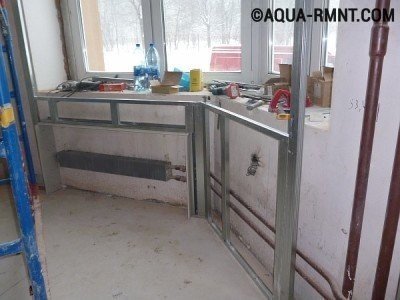
First you need to build a frame for the box made of a metal profile, which is fastened with self-tapping screws. To do this, it is necessary to make markings around the pipeline and radiators, taking into account the width of the profile, the thickness of the finishing material and the distance from the communications to the walls of the box.
If you need to close the riser in the corner of a room with uneven walls, then the rational solution would be to make the corners formed by the walls and the box 90 °, and equalize the protruding angle along them. Having made the markup, you can start assembling the frame by screwing the rack profiles to the walls. Then attach the guides to the floor or ceiling. The profile is fastened together with a cutter.
After that, depending on the design features of the box, one or two corner profiles are installed. If the gap between the posts is more than 0.25 m, then it is necessary to introduce additional jumpers parallel to them. If the racks are higher than 1.5 meters, then horizontal jumpers must be added.
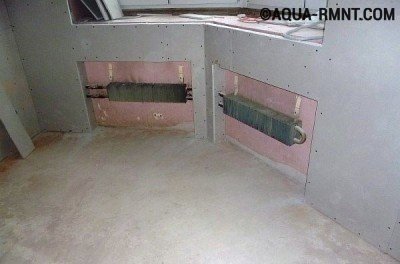
Upon completion of the construction, the frame is taken to its facing. If drywall is used, then before closing it with a pipe, the chamfers must be removed from the sheets. But if the box is faced with tiles, then there is no need to chamfer.
First, the side parts are fixed, and then the central ones. After installing all the elements, you can revet the box with the selected material: wallpaper, tiles, or paint to match the walls. Special corners are put on plastic parts to mask the joining areas.
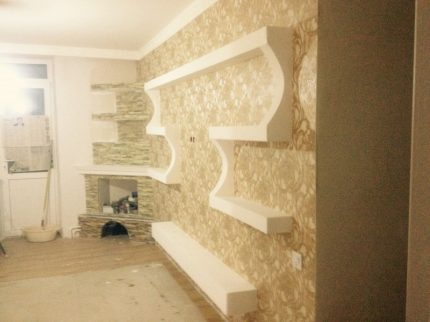
Plasterboard is reinforced with a corner profile. The box looks very attractive, the front part of which is made in the form of a stained-glass window. The effect can be enhanced by using internal lighting.
Separate components of the structure are allowed to be made removable or hinged in order to ensure the maintenance of the system.
In rooms where heating equipment occupies a significant part of the walls, a false wall is often built up to a shelf or up to half the height in order to disguise unsightly communications.
Closing the heating elements of the room with a box, a false wall, and even more so, bricking them into the walls or floor significantly reduces heat transfer. But when considering ways to hide pipes, it is worth saying that sometimes they do not need to be hidden. Masking by decorating is the best option, which will not only preserve the return of heat, but also decorate the interior. The main thing is to make the decor match the style of the room.
Metal communications, for example, can simply be painted in the same color as the walls. In this case, the paint must meet the following requirements:
- resistance to mechanical stress;
- heat resistance;
- non-toxicity.
Based on this, water-dispersion paints, acrylic and alkyd enamels are used to paint metal heating elements.
Winding them with jute or hemp rope will help to beautifully mask the heating pipeline. Note, however, that this also reduces the heat dissipation of the system.
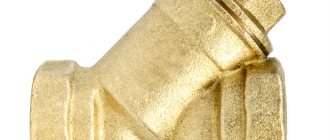
We invite you to familiarize yourself with the Balancing valve for the heating system
Pipes horizontally located under the ceiling can be easily closed by hanging curtains or curtains on them.
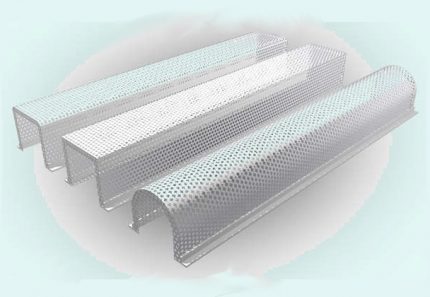
Also, for masking heating elements, you can purchase a ready-made box made of perforated metal, fire-resistant plastic or wood. On sale, you can choose the right option for any room design. Thanks to the small holes, heat penetrates the room.
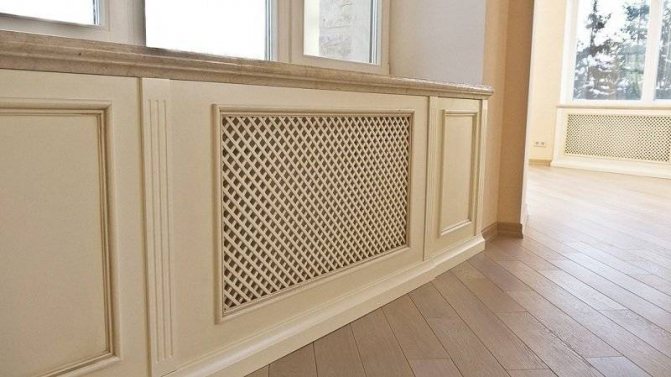
Screens-boxes are a great option for decorating radiators:
- help to completely hide the battery;
- the box can become an interior item;
- the screens are easy to install, they are easy to take care of;
- protect against burns or other injury.
Another common way than to close the radiator is custom-made furniture or built-in furniture (shelves, wardrobes, folding tables, seating).
The easiest way to hide the heating system is in structures made of plasterboard. This material attracts by its combination of ease of processing, excellent performance properties, and relatively low cost.
You will find a guide for assembling a protective and decorative structure in bathrooms in the article, the contents of which we recommend to read.
Another important advantage is the compatibility of plasterboard boxes with various finishing methods, which makes it possible to perfectly fit the structure into any interior.
To make a drywall box, you will need the following materials and tools:
- screwdriver;
- scissors (cutter, hacksaw) and drywall planer;
- drywall sheets (for the bathroom and kitchen it is better to take a moisture-resistant one, for the rest of the premises - standard);
- wooden beams (metal profile);
- dowels, self-tapping screws for fastening the structure;
- building materials for filling, priming, finishing;
- skirting boards.
Decorative accessories will also help to improve the appearance of the structure, with which you can mask the joints of the box with the walls / floor (sockets, onlays, rings, plugs). The work is carried out in several stages.
First of all, you need to determine the dimensions of the structure, for which accurate measurements of the heating pipes are carried out. When calculating the parameters of the device being manufactured, it is important to add a few centimeters to the depth and width indicators for a free fit: the heating pipes should not touch the walls and frame components.
In accordance with certain dimensions, wood planks or metal profiles are cut under the frame, as well as drywall sheets are cut (in this case, a minimum number of seams should be allowed).
The starting profile, which will serve as the basis for the assembly of the frame, is fixed to the floor. Other parts of the structure are attached to it, creating a crate.
If the structure of the plasterboard box turns out to be too massive, it is recommended to reinforce it with guides, which will allow you to more reliably fix the slab sheathing
The edges of the cut drywall parts are processed with a special plane for this material, after which they are applied to the frame base and fixed with self-tapping screws. To protect the edges of the plates from damage, the corners of the device can be glued with special overlays, which are made of metal with perforations.

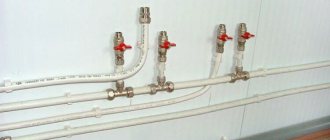
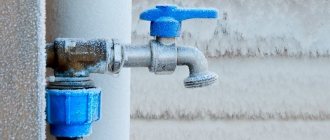
Installation of plastic water supply
To lay the system from scratch, in addition to the pipes themselves, you will need:
- fitting;
- stubs;
- tees or crosses, if branching is planned;
- clips for fixing.
A shears for cutting, a shaver for deburring and a welding machine are required.
If the question of how to properly brick the polypropylene pipes into the wall arose after the entire system was assembled, the list is reduced to thermal insulation materials, fastening brackets and means for erecting false walls.
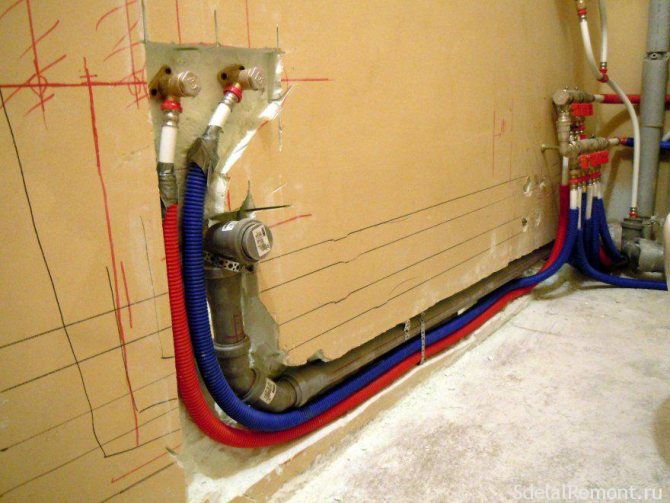
Strobes for plastic plumbing in the wall
Requirements for laying plastic plumbing
Fittings, tees and couplings are selected according to the diameter of the pipes used. Most often, like the main elbow, they are made of polypropylene. However, they are used only for branching, fixing measuring devices and re-direction of flow: pouring fittings and collapsible assemblies with material is prohibited. In the thickness of the wall, there can only be a soldered non-separable joint made by special welding equipment and checked for tightness of this welding.
In any case, a shock-absorbing "cushion" must be created around the wall laid in the thickness, allowing the pipe to "walk".
Technique for masking a polypropylene pipe in the wall
- Layout of the direction of the pipeline, taking into account the placement of functional outputs.
- Calculation of the possible deformation ratio. For large system lengths, a formula is used that provides for a pipe elongation by 1 cm per meter. The calculation is made for a liquid with a temperature of 70 degrees Celsius. The technique of creating a compensation unit, that is, laying out a small section with the letter P, will correct a significant elongation and serve as prevention of accidents.
- Installation of the pipeline in compliance with all requirements. It is necessary to choose polypropylene pipes, the wall thickness of which corresponds to the planned operating conditions.
- A corrugated pipe can be used to compensate for casting expansion when laying plastic pipes in the walls of toilets and bathrooms. When laying a channel from a U-profile, additional placement of a heat insulator is recommended, the same principle is applied when laying in a pre-prepared groove. The role of a heat insulator and at the same time a material for depreciation can be: energoflex, foamed polyethylene or polyurethane foam.
- The fixation is based on clamps and supports.
- Is it possible to hide polypropylene pipes in the wall completely, finishing finishing, should show a test "idle start".
- The easiest way to restore a wall is to mount a plasterboard partition.
- After the completion of the work, it is advisable to save the layout of the pipeline, since accidents of such systems often occur due to the fault of the craftsmen who try to fix, for example, a mirror in this section and pierce the plastic pipe with their own hands.
Asking whether it is possible to embed polypropylene pipes into the wall, with the finished structure, the masters are advised not to take risks and organize a small "cabinet" with access to the pipe instead of a solid monolithic wall. Firstly, this structure is guaranteed not to collapse from plastic vibrations. Secondly, in the event of an accident, there will be access to the pipes. The free space in the cabinet can be used to store household items.
Features of factory products and homemade products
All structures designed to hide heating systems can be divided into two broad categories: ready-made fixtures and specially made boxes.
Such devices are purchased in specialized stores, where a large assortment of products in different colors, sizes and designs is presented. In shape, such structures can be angular, rounded or rectangular.
The first option is especially convenient in the corners of the room for masking risers, as well as if the heating system is located close to the ceiling or floor. Other modifications are perfect for pipes that are laid along the perimeter of the walls and a free-standing riser.
Various solutions are practiced. For the design of pipes, parts of factory-made polymer air ducts are suitable. When choosing such options, it is advisable to pay special attention to the quality of the material, since low-grade polymers under the influence of heat can turn yellow, swell and lose their appearance.
Metal boxes can be painted with permanent dyes that withstand prolonged heating well. Such elements prevent dust from settling on the pipes, which makes cleaning easier
Boxes made of ordinary or perforated metal look very impressive. If a practical goal is pursued, it is better to give preference to the second option, since thanks to the holes, the metal elements provide better heat dissipation.
Another option is low-cost MDF structures, which have an attractive appearance and good performance. The disadvantages include a small range, which is dominated by "deaf" devices without holes, which reduces heat transfer.
Despite a significant selection of ready-made boxes, do-it-yourself designs are very popular.They not only allow you to save money, but also allow you to ideally solve the problem of how to ideally hide the heating pipes in the interior, taking into account the exact dimensions and style of the room.
Boxes and linings for heating communications play not only a decorative role, but also perform a protective function, excluding direct contact of the body with a hot pipe, which could lead to burns
The most sought-after materials include:
- Brickwork. An effective, but rather complicated method of disguise, for which you will have to work hard. In addition, such a box can hardly be disassembled if necessary.
- Drywall. By far the most common material.
- Plastic lining, fixed to a frame made of metal or wood.
- Boxes made of natural wood. Eco-friendly designs that adorn any interior; usually made to order.
The most common ones include plasterboard boxes, which are easily installed around pipes on a metal-profile frame. The choice of material for manufacturing depends both on the design of the room and on personal preferences and financial capabilities.
Use of decoration
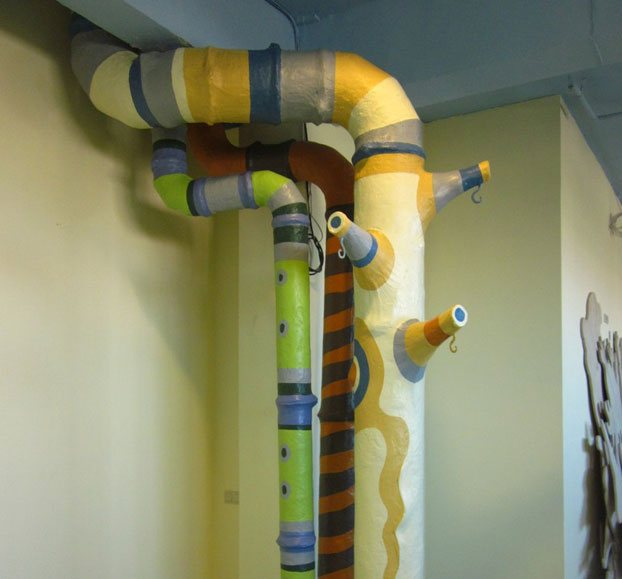
There are a lot of options to decorate heating pipes and other communication pipes without stitching them into boxes, walls, floors or ceilings. You can decide on one, based on the general concept of finishing the premises.
In the kitchen, for example, you can simply paint the riser in the color of the wall decoration. This may not be very expressive from the point of view of aesthetics, but this type of finish will ensure the moisture resistance of the pipe and its endurance to temperature shocks, and also guarantees absolute safety for human health.
Important: For this kind of finish, you should choose high-quality paint. And paint only a cold contour - on a hot one, the composition will dry quickly and will crack almost immediately.
An excellent option for finishing "unhidden" pipes is special screens. They work great in kitchens and bathrooms as well as toilets. You can independently make such screens from wood or plastic, MDF or metal sheets. And you can buy ready-made, since today in specialized stores selling building materials and related products, a huge selection of similar parts (various colors and patterns, different shapes and sizes).
Installation of purchased screens is a matter of a few minutes. And this is one of the simplest finishing operations. You just need to install the elements in the right places, and then use a special mount, and the pipes will be closed nicely and securely.
However, such screens also have to be chosen. And not only "to taste". You need to look at their performance. It is important that the screen is perforated and allows air circulation in the room. In addition, you need a guarantee of maximum heat transfer from the riser, etc. As for the aesthetic side of the issue, you can choose stained-glass or backlit screens if the interior design requires it.
Another option is heating pipes located under the ceiling. You can decorate them with cornices, as well as wrapping them with textiles, ribbons, twine, etc.
In any case, heating and utility pipes should not remain an object that spoils the interior, even if we are talking about a bathroom. They should either be hidden, or harmoniously support the interior, or be played out in an original way as an expressive decorative element.
(82 voice., middle: 4,70 out of 5)
Acrylic bathtubs - do-it-yourself installation and product selection rules
Diy two-level stretch ceiling
Similar posts
The use of natural wood
Structures made of natural material look great in any interior, however, it must be borne in mind that wood does not conduct thermal energy well.To improve heating, it is recommended to use open-top units or coarse-mesh grids.
It is also important to consider that high temperatures negatively affect wood-based materials. Under their influence, the wooden box can gradually dry out and deform, and the paint can swell.
To avoid this, it is necessary to ensure that the device does not adjoin the elements of the heating system: wooden slats should move away from them at a distance of 3-4 cm.
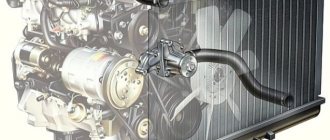
Features of polypropylene pipes
To mount the pipeline, high-quality and reliable material is required. This can be, for example, stainless steel or galvanized steel. Over time, polypropylene ousted these types from the construction industry. The main reason was the combination of useful properties at a reasonable price.
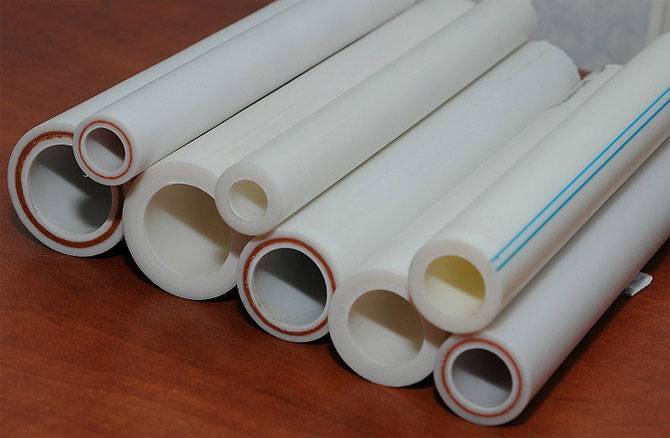
Polypropylene is suitable for hot and cold water supply, heating. The material is durable and does not require maintenance, so you can safely brick the water pipes into the wall.
The main thing is that their use does not exceed the temperature limit of 95 ° C, when the material loses its pressure resistance and deforms. In water pipes and heating systems of the housing stock, such pipelines operate at lower temperatures of the working environment, so no problems should arise.
The disadvantage of the material is thermal expansion, which can directly affect the integrity of the wall into which the pipes are walled. The expansion coefficient of polypropylene is quite high. The linear increase can be up to 10 mm per meter of pipe at 70 ° C, respectively, the pipe diameter also increases slightly.
The higher the temperature, the more the expansion coefficient of the pipe increases. Therefore, special attention should be paid to the laying of heating networks, their correct installation, the choice of types of pipes that meet the conditions.

A few more tips from professionals
1. Pipes can be hidden behind roller shutters. As a result, you will retain access to the communication and will be able to carry out a preventive inspection or repair at any time.
2. In the kitchen, pipelines can be placed in the cupboards of the kitchen set. This option is the most profitable.
3. Do not forget that when constructing drywall boxes, you need to take care of access to the valve. In this case, it is recommended to make special windows in the structure.
4. The distance between the electric cables and the pipeline must be at least 2-3 centimeters.
Among other things, there are non-standard solutions that allow you to answer the question of how to hide a heating pipe in an apartment or house. In the kitchen, the radiator can be placed in a small cabinet. This is a rather profitable move, since an extra closet will not hurt in this room. In children's rooms, the radiator and heating pipes can be decorated, painted or decorated with decorative materials.
We suggest that you familiarize yourself with How a fire alarm works - sensors and detectors in a house and apartment
Masking heating pipes in a private house is an event that requires not only money, but also, in some cases, connecting imagination. How exactly to hide pipes in a private house is, of course, up to you to decide, because the choice of method depends on specific circumstances. A room with a properly chosen pipe masking method will also be warm and even more comfortable.
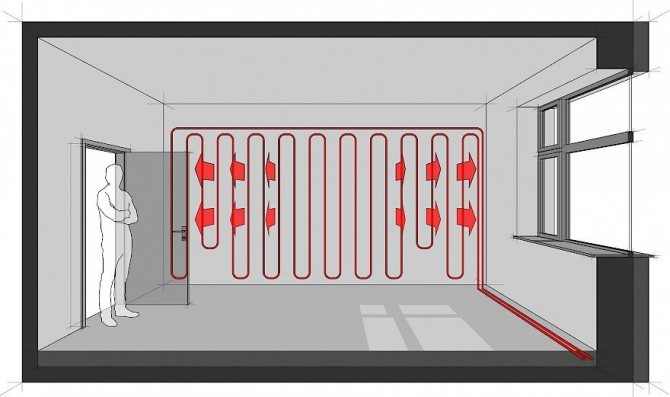
The main advantages of wall heating
As it becomes clear, there are many problems with the installation of heating pipes in the wall. However, this method of the device has its own advantages, which distinguish it favorably from other options for traditional heating of residential premises.
The main advantages include the following:
- attractive appearance of the room.There is no longer any need to hide parts of household communications in any way, so much more opportunities for design solutions open up;
- the distribution of heat is more uniform, which is explained by the increase in the area of heat energy output. Due to the fact that the pipes are laid from the very bottom, there are no cold areas in the floor area. Here it is worth remembering that the installation of aluminum plates will help to further improve heat transfer and coordinate the distribution of heat, which also make it possible to use a smaller pipe;
- properly distributed heat will reduce the average temperature in the room, but there will be no discomfort for the residents of the house. However, a decrease in heating indicators by about two degrees will save up to 20% of heat energy;
- thanks to the warm walls, it will be pleasant to be in any area of the room, and not only near the batteries, as is the case with traditional heating;
- in the hot season, it will be much easier to regulate the microclimate inside the room. For this purpose, you just need to activate the in-wall circuit for parsing water. This will solve two important problems at once: firstly, the water supplied to the mixer will be warmer, and the temperature inside the room will be lower.
In order to design a high-quality wall-mounted heating system that functions stably throughout the year, it is very important to follow all the above rules and recommendations.
Such work can be done with your own hands, but in the event of any difficulties, there is always the opportunity to resort to the help of professional and qualified specialists who are able not only to perform the necessary installation work, but also to provide detailed photos of such heating systems and detailed videos on them. correct installation.
One of the options for hidden heating pipes is shown in the video:
Option # 1 - masking pipes inside walls or floors
In polypropylene products, the linear expansion reaches 5 mm, therefore, in the process of laying them, it is necessary to provide for the required number of expansion joints. Before bricking them into the wall, special casings are put on metal-plastic pipes, which reduce heat losses. In addition, regardless of the type of products used for laying the heating main, it is not allowed to brick the detachable fittings.
Before masking the heating pipes, it is necessary to draw up a scheme for laying the line. Based on it, special recesses are made in those places where the pipes will be walled up. The size of the strobes is calculated taking into account the thickness of the mortar for embedding and the thermal insulation material. For reliable fastening of the line, holes are made in the wall into which dowels and brackets are inserted. Having prepared the holders, they put a casing on the pipes and lay them in the wall.
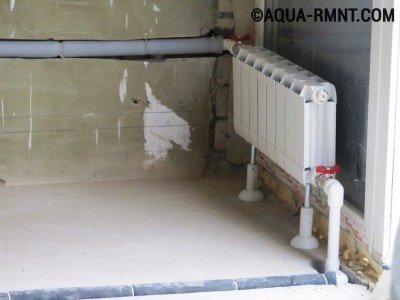
Before you start laying heating pipes in the wall or floor, you must put on a special casing on them. It will help eliminate heat loss
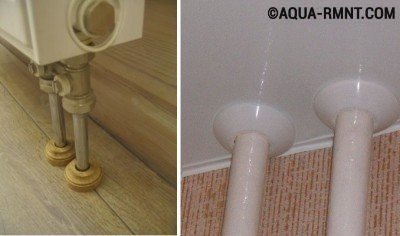
In the process of bricking pipes into the floor, it is not always possible to arrange the hole beautifully. For these purposes, you can use a decorative overlay, which can be matched to the tone of the floor covering.
The first step is to build a frame for the box. It is made from a metal profile or wooden bars, which are fastened with self-tapping screws. First, markings are carried out around the pipes, depending on their location on the floor, walls and ceiling. In this case, it is necessary to take into account the width of the profile or bars, the size of the finishing material and the distance from the pipes to the walls of the box.
In case of closing the risers located in the corner of the room, it happens that the walls are not even. It is more expedient in this embodiment to make the corners formed by the walls and the box 90 °, and equalize the protruding angle along them. After marking, proceed to the installation of rack-mount profiles to the walls.Then they attach the guides to the floor and ceiling. The profile is fastened together with a cutter.
The height of the corner frame for vertical pipes is more than 1.5 m. Therefore, for its strength, it is necessary to fix horizontal lintels. If the distance between the posts is more than 0.25 m, they also need to be strengthened
Further, depending on the design of the future box, one or two corner profiles are mounted. If the distance between the posts is more than 0.25 m, you need to make additional jumpers parallel to them. If the racks are higher than one and a half meters, you need to install horizontal jumpers. After the construction of the frame, they begin to clad it.
After all the elements of the frame have been installed, they proceed to cutting the sheathing material. This should be done so that there are fewer joints.
Initially, the side elements are fixed, and then the central ones. After the completion of the installation work, the final finishing of the box is started. The plasterboard structure can be pasted over with wallpaper or painted to match the walls. Special corners are applied to the plastic elements so that the joints are not visible.
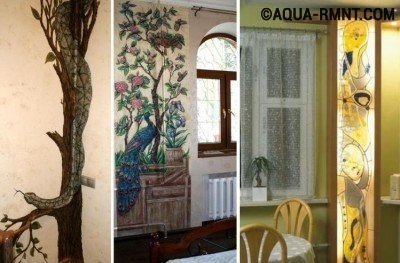
The disguise of heating pipes can be turned into a real work of art, a decorative stained glass window with internal illumination looks interesting
Some structural elements can be made removable or hinged with small doors for system maintenance.
In rooms where heating elements occupy a large wall area, it is possible to build a false wall. They do it according to the same method as the box. First, the frame is mounted, and then sheathed with a suitable material. However, keep in mind that a false wall reduces the area of \ u200b \ u200bthe room. Also, a ready-made box is used to hide the heating pipes. On sale, you can choose the right option for any room design.

To mask heating elements, you can purchase a ready-made box made of perforated metal. Small holes allow heat to enter the room
You can decorate heating pipes by wrapping them with jute or hemp rope. Note, however, that this also reduces the heat dissipation of the system. You can use another rather interesting option - fasten the bamboo split along the pipe. Additionally, castings, flowers or other decorative elements are hung on the heating elements. It all depends only on the imagination of the decorator. Pipes horizontally located under the ceiling can be easily closed by hanging curtains or curtains on them.
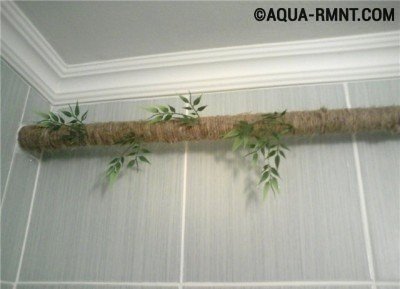
By wrapping a horizontal pipe with a rope, you will not only hide it, but also create a decorative element that decorates the room. And a few green twigs will revive her
But there are good ways to avoid this problem:
- Placement inside floors or walls. It is aesthetically pleasing and also very convenient. To lay the line, it is required to make grooves, the pipes should be wrapped with heat-insulating material and laid in the made recess in the wall, and then everything is sealed or sewn up with drywall. all connection and valves should not be embedded in the wall - in case of a burst, it will be necessary to break everything. Yes, it is also impossible to insulate old pipes in this way.
- Laying in a box. The second method is cleaning the pipeline into a plasterboard box on a metal box. It can be painted, wallpapered or plastered - this gives a wide range of options for decorating heating pipes. Alternatively, you can opt for perforated metal - this is the style and also has excellent heat dissipation. It is also possible to hide the gas line under the finished plastic box. If you have made a choice in favor of plastic, you need it to be of good quality - some varieties of this material begin to turn yellow and swell from heating, so it is better to check the technical characteristics.Remember the rules - the pipe must be at least 5 cm away from the box walls, and you also need to provide access to fittings and taps.
- Coloring and decorating. The pipeline should be painted in a color that matches the shade of the walls or, on the contrary, will be contrasting. Decorate the risers with a tourniquet and rope. Sometimes a bamboo stroke is made for them, and later you can put paper applications on top, decorate everything with fabric or leather using the decoupage technique, which is very popular at the moment. It is required to paint heating elements only when they are cold - with the heating turned off, but with rapid heating, the paint may begin to crack.
- Disguise with furniture. This is the easiest way - you can slide the heating riser in with a cabinet and there will be no hassle. This is convenient only for the bathroom and kitchen, where most often pieces of furniture stand close to the walls. Special holes can be made in the side and back walls of kitchen cabinets. At the same time, in living rooms the task will be more difficult, because radiators and risers are located on the wall where the window is installed, and there is no way to put a cabinet there.
- Close the screen. Decorative screens are a great way to cover both risers and radiators. It can be glass, transparent plastic, or made as a stained-glass window - stylish, beautiful and intriguing. If there is a backlight, then it will add mood to the interior and after that it can serve as a night light. So that there are no problems with heating, there is an option to create decorative gratings through which heat will enter the home. In this case, the screens must be removable.
- False wall. To hide the heating pipes in the house, a false wall is often used. Behind an artificial wall there can be not only heating risers, but even a gas main, as well as electrical wires and a coaxial cable for TV. Remember only that such a structure will reduce the space of the room, and some elements should still be freely available. For example, gas workers are extremely unhappy if people try to hide a gas pipe.
- Suspended ceiling. This method is not very popular, and yet it can be used for private houses, if the heating wiring at the first stage is done under the ceiling, and the second under the floor. In this case, it is required to make a stretch ceiling, although, with its elegance and practicality, it slightly reduces the space of the room, and this time the height.
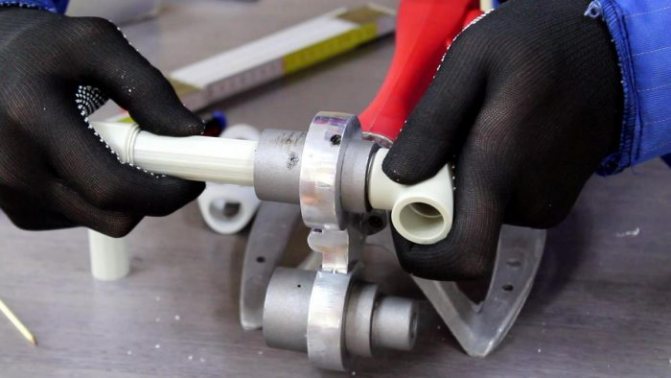
Laying of polypropylene pipelines.
The laying of heating pipelines made of polypropylene has the same nuances of its own as the laying of pipelines from other materials. The nuances directly depend on the fact that polypropylene is a specific material that requires knowledge about its behavior in heating systems.
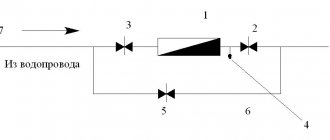
In order not to face problems in the future, you need to understand what the correct installation of polypropylene pipes depends on. At the dawn of its spread, polypropylene pipes were divided into reinforced and unreinforced. Unreinforced polypropylene pipes were used mainly for laying water mains, cold and hot. The use of unreinforced polypropylene pipes in centralized water supply systems is quite widespread, but includes some nuances, such as the presence of special expansion joints on the line itself. These expansion joints are designed to neutralize linear expansion of the pipes. When, for example, hot water passes through an unreinforced polypropylene pipe, there is a significant increase in its longitudinal measurements. Simply put, it lengthens. If it is difficult to fix this elongation by eye, then in a closed volume this linear expansion leads to deformation of the riser, for example, in the lateral direction. To put it even simpler - the pipe was flat, but it became a snake. And it can be even worse.The panacea for such wild deformations was the use of pressure compensators. The compensators themselves have been known for a long time, but we are used to not paying attention to them, since they have become a familiar surrounding landscape in some places. These are huge letters P in the places where heating mains pass on the outskirts of the district. And if you look closely, they are located at equal intervals between themselves, mainly on long and extended highways.
In the case of polypropylene pipes, everything is not so simple. Convenience and ease of installation of polypropylene pipes are combined with their physical characteristics. But it is quite possible to minimize this effect with conventional installation, as well as observing small rules when marking the passage of highways. In particular, U-shaped expansion joints can be combined with areas where the pipe passes through the wall. To do this, it is enough just to make a hole slightly higher or to the side, depending on the location and that's it, the factor is considered taken into account, since the expansion joint is installed and the holes are carefully drilled. The fact is that it is unrealistic to drill a hole in the wall under the pipe directly near the corner without large-scale (relatively) destruction. After such drilling, you always have to carry out decorative and finishing work.
Reinforced pipe, in turn, does not protect or prevent pipe bursts, as marketers like to position it. The reinforcement of the pipe plays precisely the restraining role in matters of linear expansion. But if earlier the reinforcement was carried out exclusively on top of the pipe, now the pipes with fiberglass reinforcement are the most widespread. They do not hold back expansion as effectively as with metal reinforcement, and they also need to be approached with an understanding of the nuances.
The best way when installing highways made of reinforced polypropylene pipes is the one in which, at the corners and bends of the pipes, do not bring them two centimeters to the wall. Why so - because the unreinforced pipe, after cooling, returns to its original dimensions, and the unreinforced pipe remains in an expanded state. This is probably due to the fact that the glass fibers used do not shrink back.
2018-07-19T16: 17: 04 + 00: 00
July 19th, 2018 | Installation of heating systems, Heating from polypropylene, Errors in the heating system |
Conclusions and useful video on the topic
The videos below demonstrate the manufacturing process of the most commonly used boxes for masking heating systems: plastic and plasterboard.
To hide the heating pipes, it is important to choose the most effective masking method correctly. It will allow not only to remove engineering communications from the eyes, but also to decorate the apartment. Having invested taste, imagination, creativity, you can choose a unique finish for decorating pipes, even without special skills in carrying out repair and construction work.
Preparing for installation
The primary task is to draw up an assembly drawing for future highways. In fact, the pipeline plan should be carried out taking into account all connections, taps, process cabinets, shut-off valves. Detailed planning helps to avoid redundant connections and waste of material, as it is determined in advance which parts and in what quantities are needed.
Note! It is better to keep the plan drawn up. It can be useful for system maintenance and installation of new communications. For example, for tapping an additional crane.
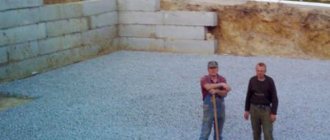
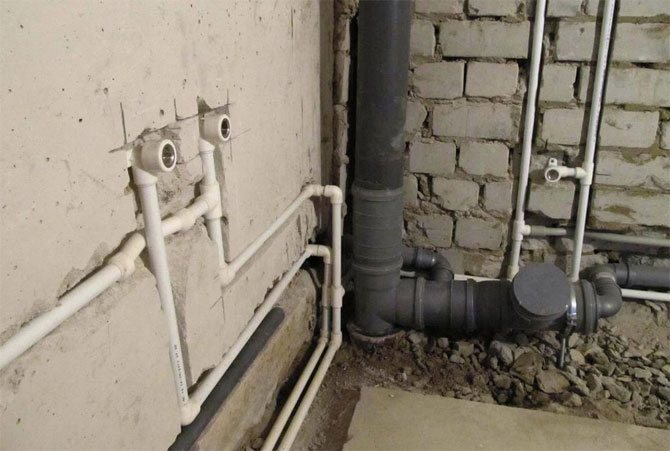
The walls for the hidden installation of pipes will have to be gouged, that is, a channel for laying the pipe line must be cut out in the concrete. It is advisable to pre-mark the working area in order to make an even and high-quality channel.
It is advisable to take into account that it is not recommended to groove walls in panel houses, since the thickness of the panels is usually small.The most suitable walls are thick brick or concrete. They can be ditched without fear.
Next, you need to mark pipes and fittings in order to know the direction of welding and the order of installation. If necessary, it is better to cut the products in advance.
We recommend that you familiarize yourself with: Service life and capabilities of polypropylene pipes
To carry out installation work, you need tools designed for polypropylene:
- scissors for cutting;
- a shaver for removing the reinforcement and a chamfer for leveling the cut surface;
- welding machine with temperatures up to 260 ° C;
- wall chaser or grinder for cutting a cavity in the wall;
- chisel and hammer or hammer to remove material between strobes.