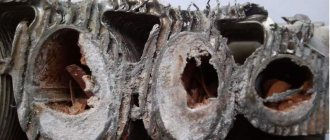
Flushing a bithermic heat exchanger is a mandatory procedure that increases its service life. Indeed, without regular cleaning, this unit can fail very quickly, which will entail serious additional costs.
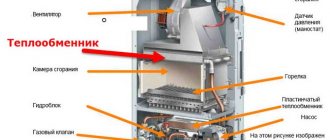
A bithermal heat exchanger is a device that is mounted directly in a heating boiler, namely in its combustion chamber. This device is used to heat water to the desired temperature in heating systems, as well as hot water supply systems.
The bithermal heat exchanger has a tube structure located in another coaxial tube. In order to increase the degree of heat transfer of this equipment, metal plates, usually made of copper, are soldered or pressed onto its surface. The inner pipe acts as a heater for the hot water supply system, and the outer coaxial pipe is used for the heating system.
BWT heat exchanger cleaning solutions:
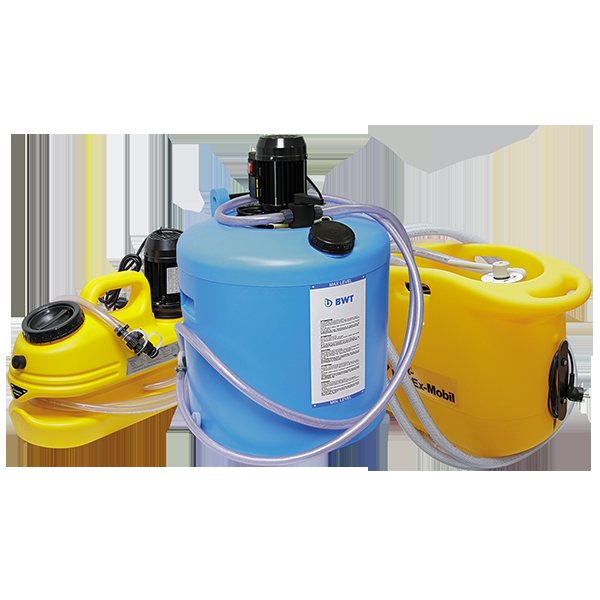
Washing installations
Reagents
To get the consultation
Such equipment is exposed to high temperatures, which reach 100 ° C, since it is located directly inside the boiler. Due to this high temperature, metal damage in the heat exchanger occurs much faster. It is rather difficult to clean a bithermal heat exchanger, since this device is not separable.
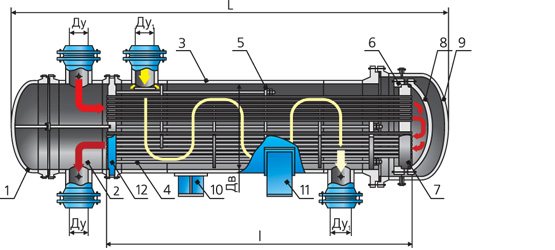
Description of the heat exchanger with a floating head "TP"
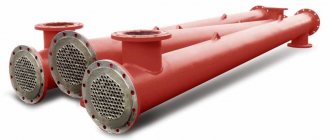
The floating head heat exchanger is one of the demanded types of shell and tube heat exchangers and is widely used in refineries and various other industrial enterprises.
The main feature of this device is the presence of a temperature compensator in the form of a so-called "Floating head".
Below are 2 options "Floating head":
- The upper figure is a design with the possibility of removing the tube bundle without dismantling the head itself, characterized by a reduced thermal efficiency due to the presence of bypass flows (TEMA designation).
- The bottom figure is a design that requires dismantling of the head to extract the tube bundle (TEMA designation S). The most common in domestic refineries.
In both cases, the presence of a floating head makes it possible to use the heat exchanger at a large temperature difference between the process media in the tube and shell cavity of the apparatus.
Thus, this type of apparatus is more versatile in comparison with heat exchangers of a rigid-tube structure and can be used in a wide range of combinations of various media with a large temperature difference. However, due to the presence of floating. head heat exchanger cost also increases. Therefore, the use of this equipment must be technically justified. When specifying the code of the device, the abbreviation “TP”- heat exchangers with floating head according to TU 3612-023-00220302-01 VNIINeftemasha.
By the way, read this article too: Types and purposes of reboilers of various designs
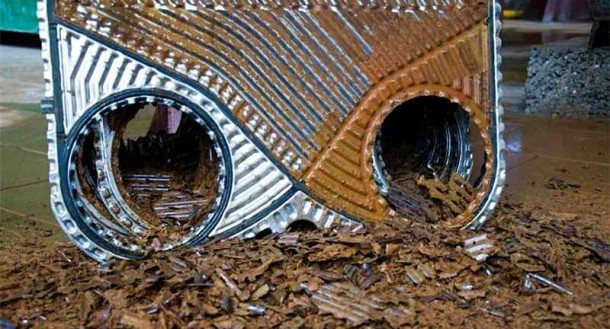
Cleaning the heat exchanger plates
After determining the type and degree of contamination, you need to choose a cleaning method. Cleaning should be carried out regularly, without waiting for the formation of hard deposits, which are much more difficult to remove. The easiest way to remove organic contaminants is to clean the plate with a stiff fiber brush and then rinse it with hot water. Also, a jet of water under pressure is often used for cleaning.Inorganic deposits will be removed as well, but after soaking the plates with a mild chemical composition. The choice of chemicals for cleaning the heat exchanger directly depends on the type of contamination. If any plates are damaged, they should be replaced with new ones.
Design
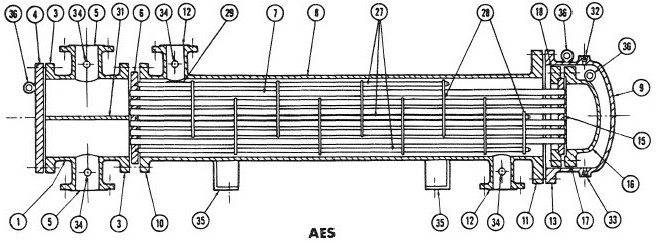
1 - anterior chamber; 2 - rear camera; 3 - outer flange of the head; 4 - head cover; 5 - inlet / outlet branch pipe of the head; 6 - stationary tube sheet; 7 - pipes; 8 - casing; 9 - casing cover; 10 - casing flange from the side of the stationary head; 11 - casing flange from the collapsible side - either a floating head or a tube plate; 12 - inlet / outlet pipe of the casing; 13 - flange of the casing cover; 14 - stress compensator; 15 - floating tube sheet; 16 - floating head cover; 17 - flange of the floating head cover; 18 - separate annular flange of the rear floating head; 19 - separate annular flange of the rear head; 20 - guide supporting flange; 21 - rear head cover; 22 - tubular rear head (mixing chamber); 23 - oil seals; 24 - seal; 25 - rear cover flange; 26 - bolts; 27 - connecting rods and struts; 28 - supporting partitions; 29 - spreading plates; 30 - longitudinal partition; 31 - partition-rib or dividing plate in the head; 32 - inspection fitting; 33 - drainage fitting; 34 - fitting for measuring instruments; 35 - mounting posts; 36 - eyebolt for installation work;
Features of replacing the heat exchanger in the Navien boiler
Not all models of gas boilers have the same design. Replacing the heat exchanger in the Navien gas boiler has its own characteristics and will require other actions:
- open the case cover, there will be an iron box under it;
- disconnect all wires from the box and unscrew the bolts;
- disassemble the box;
- identify the heat exchanger and remove it;
- replace the old one with a working circuit;
- assemble the box and replace the cover.
This process is shown in detail in the video.
…
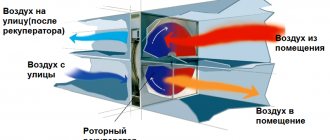
Principle of operation
The principle of operation of a heat exchanger with a floating head - hot and cold liquid enters the corresponding cavities of the apparatus. As a rule, hot liquid is supplied to the annular space, and cold to pipes, but there may be opposite cases, depending on a number of factors: operating pressure, contamination of the medium and the need for cleaning, hazard class of flows and some others.
By the way, read this article too: U-tube heat exchangers
When the pipe walls are heated, linear expansion occurs and the tube bundle lengthens. The floating head device makes it possible to compensate for this elongation due to the free movement of the head in the rear chamber of the heat exchanger when the pipes are lengthened or shortened when they are heated or cooled, respectively. This design of the floating head is widely used in refineries due to its reliability and prostate.
As a rule, in factories, these devices, of the same size, are often assembled into groups forming horizontally located pairs - double heat exchangers. This arrangement allows you to reduce the necessary:
- Place required for installation;
- The amount of strapping required;
- Improves service access.
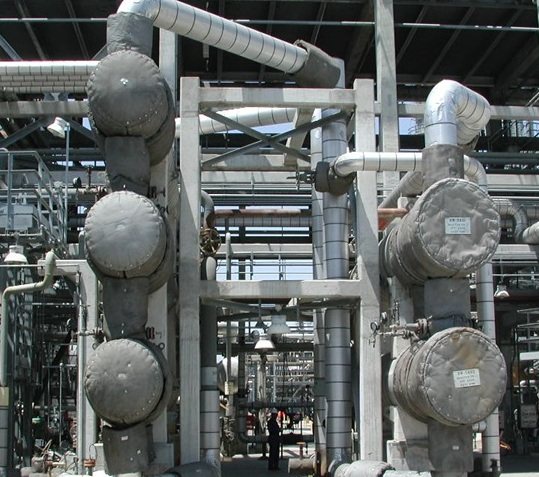
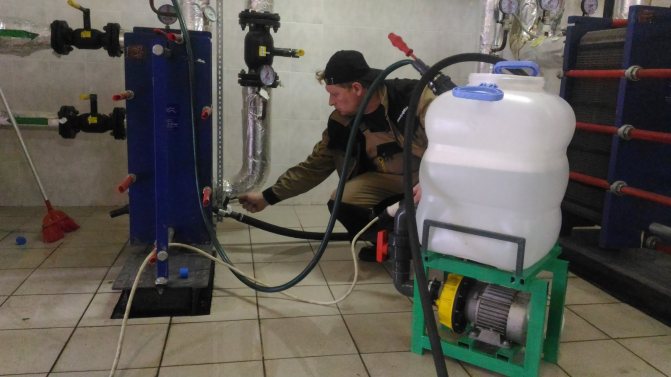
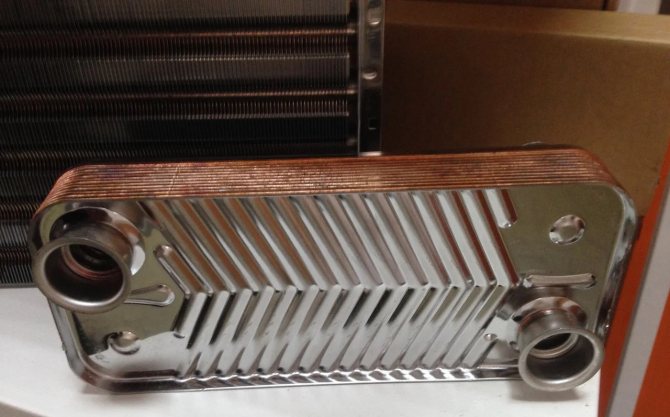
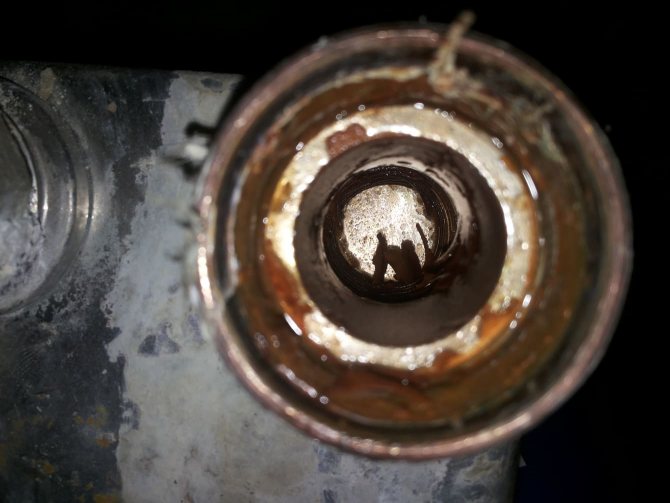
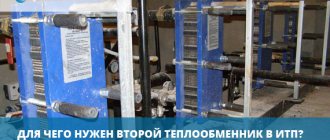
Plate heat exchanger assembly
Make sure the frame ports are clean. Clean and lubricate the support beams to ensure smooth sliding of the plates. Hang the plates in the correct order. It is worth wiping the gasket of each plate with a rag for best contact with the next plate. The plates cannot move relative to each other in the frame, but they can be installed incorrectly by mistake (vice versa). With the correct order, the edges of the plates form a uniform pattern. When using clip-on plates, their protrusions should form a single pattern when tightening the plate pack.The plate tightening should be started in the reverse order. Start with the top and bottom bolts and pull them diagonally. Tighten the bearing beam bolts and corner bolts (if any) last. Check if the distance between the base plate and the pressure plate matches the original measurements. Measure each bolt. Do not tighten the plate pack too tightly - the plates or gaskets could be damaged.
Floating Head Heat Exchanger Repair
The floating head heat exchanger has the ability to remove the tube bundle from the body. To do this, it is necessary to relieve the pressure and disconnect the device from the piping by plugging the inlet and outlet pipes of the process media.
Repair of a floating head heat exchanger consists of the following stages:
- Cleaning the surface of the tubes from external and internal pollution and corrosion;
- Checking the integrity of the tubes, flaring, replacing or plugging the tubes if necessary;
- Checking the tightness of flange connections and replacing gaskets;
- Hydraulic testing of the apparatus;
- Checking threaded connections.
Extraction of a tube bundle is one of the most difficult operations and requires heavy lifting equipment, usually a winch in combination with a crane.
By the way, read this article too: Shell and tube refrigerator
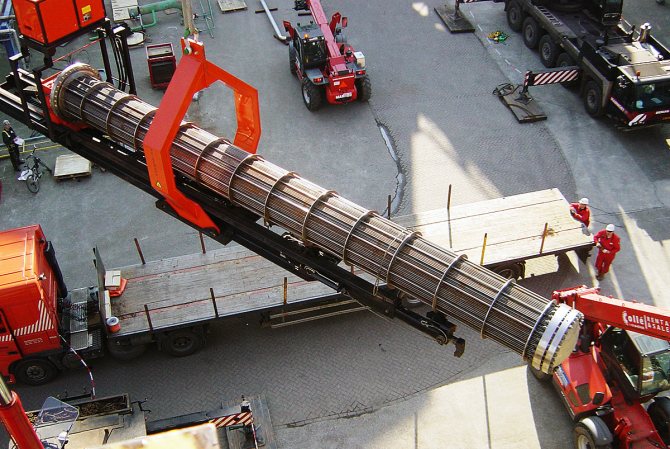
Plate heat exchanger maintenance procedure
Modern plate heat exchangers are of high quality and reliability and can operate smoothly for years. But any heat exchanger is subject to wear, contamination and destruction over time, so from time to time the heat exchange equipment requires maintenance to maintain the declared performance characteristics. Some of the materials in this article may be useful to those who are going to carry out maintenance of the heat exchanger. Recommendations are given in relation to powerful dimensional devices.
How to repair a boiler with your own hands: step by step instructions
After a specific breakdown has been accurately diagnosed, you can begin to eliminate it. Of course, in the event that there is confidence that this is a feasible task that does not require special skills and equipment.
Preparatory stage
- First of all, it is necessary to disconnect the device from the power supply, and also tightly shut off the gas valve. Even if the repair is not associated with elements directly in contact with fuel, this condition is mandatory.
- If it is difficult to estimate the time of restoration work, and they can theoretically take several hours, you should completely drain the water from the heating system or pour an antifreeze solution there (if it is not there). The fact is that during the repair, the air temperature in the room can drop to negative values, and the water will freeze.
- Safety precautions: along with shutting off the gas valve and de-energizing the system, it should be remembered that the working surface must cool down to an acceptable level before repairing. Otherwise, touching it may cause burns.
Cleaning the heat exchanger
If the boiler overheats, this may indicate 2 reasons:
- The automation that controls the operation of the device is faulty.
- The heat exchanger is clogged (soot deposits).
Automation is repaired only with the help of special equipment, which in most cases is not in the house. But it is quite possible to clean the heat exchanger yourself.
The sequence of actions is as follows:
- Turn off the boiler, let it cool down.
- Shut off the taps.
- Remove the front cover.
- The remaining water is discarded (open a hot water tap or a valve inside the mechanism to drain water from the heating system).
- Remove the heat exchanger.
- The heat exchanger is cleaned first mechanically, then - in a solution of vinegar and citric acid, taken in equal quantities (you can use a tablespoon per liter of water). Instead of a solution, you can also use special formulations purchased in the store.
- The heat exchanger is kept in such a mixture for 1-2 hours until it is completely cleaned.
- Then washed with running water and wiped dry.
- They put the heat exchanger back, close the lid, fasten all the parts.
Chimney cleaning
A decrease in draft and overheating of a gas boiler can certainly be associated with a clogged chimney. It is in this part of the system that the greatest amount of soot accumulates. However, the accumulation of dirt is quite rare, since the gas does not provide an abundant amount of waste.
DIY repair of double-circuit boilers
Especially often it is necessary to repair double-circuit boilers, since they work in an enhanced mode, heating the premises and storing hot water for domestic needs.
NOTE
During the repair of gas boilers, the dismantling of structures is almost always necessary. It must be carried out carefully, remembering the connection sequence, in order to then correctly assemble all the elements of the system.
Repair of a wall-mounted gas boiler (cleaning and flushing the heat exchanger with special means) is clearly shown here: