Necessary equipment and materials for work
Welding machine
Building a stove from a cast-iron bathroom with your own hands will require the use of the following tools:
- Angle grinder (grinder);
- Cutting and cleaning discs for angle grinders;
- Electric drill, drills;
- Pliers, wrenches;
- If available - equipment for gas cutting of metal;
- Opening tools - shovels, scrap;
- A hammer;
- Trowel, spatula;
- Capacity for solution preparation;
- Measuring tool - tape measure, plumb line, metal corner, building level;
- Welding machine for chimney mounting, mask, electrodes;
- Hacksaw for wood (for the construction of formwork).
The beginning of construction presupposes the presence of a cast-iron bath. The stove from the bath has a foundation, since the total weight of the structure takes on a decent value. In addition to the bathroom, you will need the following materials:
- Cement;
- Sand;
- Red brick;
- Water;
- Clay;
- Metal sheet with a thickness of 4 mm;
- Metal corner;
- Homemade or factory-made grille of the appropriate size;
- Metal and door hinges;
- Chimney pipe with a wall thickness of at least 3.5 mm, a diameter of 100 - 125 mm, a length of 2.5 - 3 meters;
- Foundation waterproofing material - polyethylene film;
- Rabitz;
- Boards 20 - 25 mm thick, nails, slats 20x20 mm.
Instrument preparation
You will need tools for processing metal and erecting brickwork. To cut a cast-iron bath, grind its edges, make holes for fasteners, you will need:
- laser level, plumb line, tape measure, marker - for marking;
- grinder with a set of wheels (for cutting metal - with a diameter of 125 mm and a thickness of 1 mm, for grinding);
- coarse and fine cut files, sandpaper;
- electric drill, drills 9-11 mm;
- hammer, pliers, metal nippers.
In addition to metal parts, there will be brickwork at the base of the structure, so you will need a nozzle for mixing the cement mortar, a container for it, a trowel, a spatula.
If you do not use a grinder all the time, you can rent it
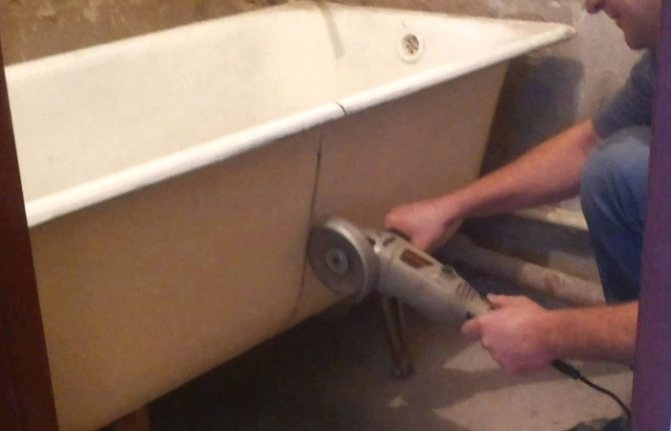
Cast iron bath cutting
Cast iron bath cutting
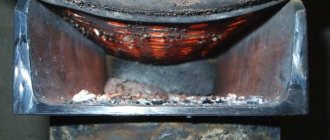
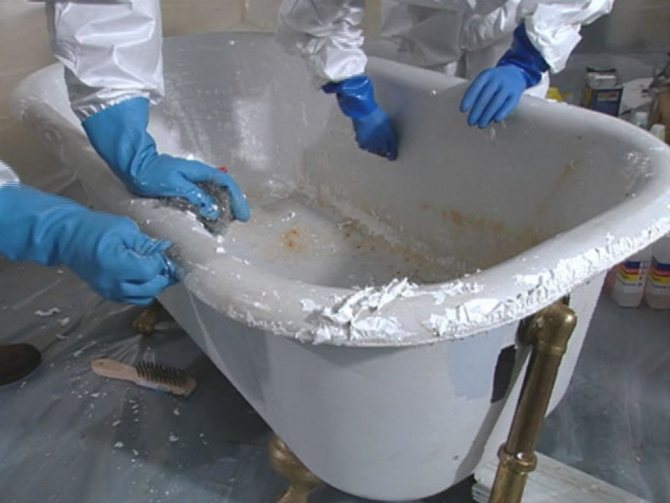
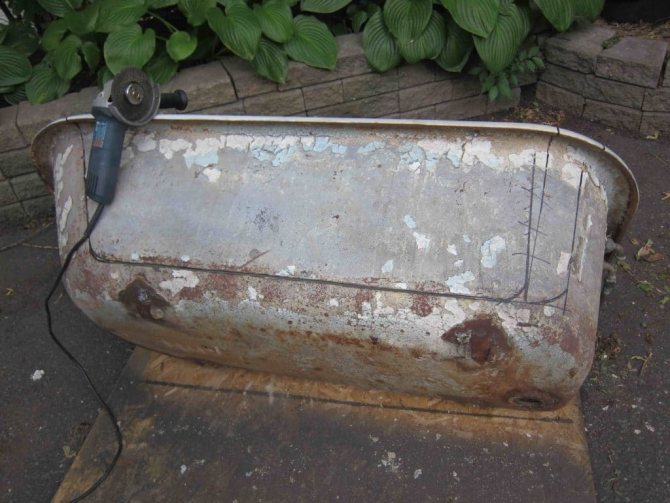
The first stage of construction is cutting the old bathroom across into two equal parts. This operation is performed using a grinder. First, the cutting line is marked - the line is applied with a marker on the enamel or with chalk on the outside of the bowl. Cutting is best done on the outside of the bowl, but if this is not possible, you can cut along the inside.
Cutting cast iron products is a long and laborious job. For this work, a professional tool is used, in the absence of one, it is necessary to take breaks in work, otherwise the grinder may burn out.
When working, you must comply with safety conditions. It is better to put on a protective mask on your face, otherwise the smallest particles of enamel can get into your eyes. When cutting cast iron, a large amount of dust is formed - breathing must be protected with a gauze bandage or a respirator. The room where the work is carried out must be isolated from adjacent rooms - dust cleaning will subsequently cause serious difficulties.
When cutting the bowl, the bath must be fixed so that it does not pinch the grinder's disc. Broken disc fragments during operation can cause injury. It takes an average of 45-60 minutes to cut a bathroom (excluding breaks). The speed of work always depends on the level of proficiency in the tool.
It is necessary to take into account the structure of cast iron - it has low impact strength. Therefore, it is impossible to apply strong blows, strongly load the bath with mechanical forces.
Furnace installation
A stove from an old bathtub, located in a summer cottage or land plot of a private house, consists of three main parts:
- Firebox from an old bathroom;
- Furnace foundation;
- Brickwork, cladding.
After preparing the bathroom (cutting into two equal parts), they begin to build the foundation.
Foundation construction
With the help of pegs and a cord, they mark the future foundation. The foundation is made of concrete mortar or brickwork.
First, a rectangular trench is torn off, its depth should be at least 500 mm. A layer of sand and gravel is laid at the bottom of the trench, the layers are compacted. A layer of waterproofing is laid on top of the pillow - usually a plastic wrap. In the central part, a formwork is being built to raise the base of the foundation under the firebox. Most often, a general formwork is simply constructed and the foundation is poured to a height of at least 250 - 300 mm from the ground level.
The free volume is reinforced and filled with a solution of cement and sand in a ratio of 1 measure of cement to 3 measures of sand. Otherwise, the volume is filled with brickwork.
After completing the work on the construction of the foundation, he is given time for a high-quality solidification.
Assembly work
Assembling the oven from the bath
After the foundation has solidified, they begin assembly work. The first half of the bowl is installed on the base of the foundation (without drain holes). On top of the reversal of the bowl, a sheet of metal cut according to the bathroom template is laid on a heat-resistant sealant.
Holes are sometimes cut into the sheet for use as a hob.
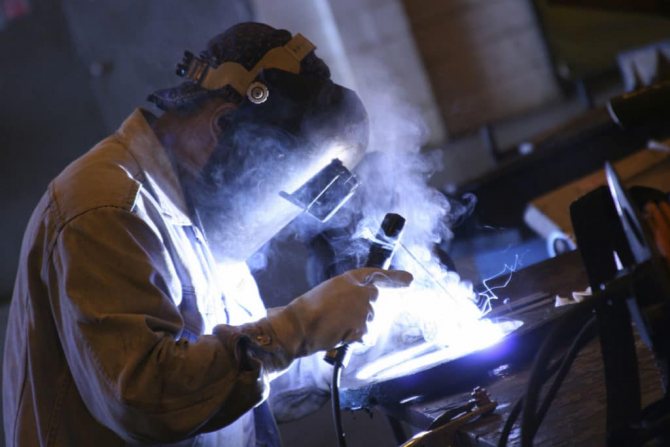
A hole is cut in the overlap sheet, corresponding to the diameter of the selected chimney pipe. The pipe is welded to the floor sheet using electric arc welding.
The second half of the bathroom is laid on the floor sheet. The joint is pre-laid with a heat-resistant sealant, instead of the drain (bottom) hole, a passage for the chimney is cut. First, a hole is marked along the section of the pipe used, then holes are drilled according to the marking. It is dangerous to knock out a drilled element - cast iron is fragile - therefore, the holes are connected by the slots of the grinder.
Holes are drilled along the perimeter of the joint of two hemispheres of the bathroom, the joint is tightened with M10 or M12 bolts. The fasteners are installed with a step of 150-200 mm. When tightening the bolts, you do not need to apply excessive force - the cast iron may burst. In the lower hemisphere at a height of 15 cm from the lowest point of the vault, supports for the grate are bolted. The installation of supports is mandatory, otherwise, when the grate moves, the burning firewood will fall into the lower part of the furnace and the quality of combustion will be disturbed. The main work on the construction of the furnace has been completed.
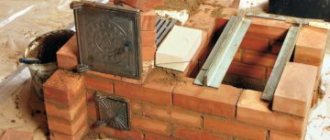
The front part of the firebox is equipped in two ways - from metal and into brickwork. In the case of using a sheet of metal, it is marked and cut to the appropriate size with a grinder. It is fastened to the split end of the furnace through metal corners attached to the bowl and the sheet through the holes with bolts. In the plane of the sheet, openings are cut out for the small (lower) blower door and the large upper furnace door (used for loading fuel). Doors are usually installed on welded hinges.
The cost of metal and the amount of work with such an implementation of the front part of the furnace exceed the option of installing brickwork. When laying from the end of the firebox, mortgages and openings for installing doors are left in it.
After assembling the front part, the lower hemisphere of the furnace is lined with bricks. First, the first angle is displayed (along the plumb line), then the laying is continued along the perimeter of the firebox.
After the masonry has solidified, work begins on the thermal insulation of the upper hemisphere. For this, a chain-link mesh is laid on it. The mesh should fit snugly to the surface of the firebox - for this, it is fixed to the brickwork along the perimeter.The chain-link serves as a frame, a supporting structure for a layer of clay. The first layer of a prepared clay mortar of medium viscosity is tightly hammered into the mesh. After partial hardening, a final clay layer is applied and leveled.
The clay should harden - it must be covered from precipitation with a film, without restricting air access. After hardening, the clay is most often covered with several layers of lime whitewash.
A fungus must be installed on the chimney pipe to protect it from precipitation.
Some craftsmen recommend using cast iron baths for building a sauna stove. Moreover, the cast-iron bath acts as the basis of the stove and at the same time serves as the upper arch of the firebox; ice water can be splashed on it in a hot state. In this case, cast iron can crack. To make a stove for a bath from a cast iron bath - count on some luck, not know the properties of cast iron.
What and how else can you make from the old font?
Brazier
It is in demand among summer residents and fans to combine outdoor recreation with eating dishes cooked on fire. Benefits of a barbecue from the bath:
- cast iron alloy retains heat from coals for a long time;
- ease of manufacture;
- can be divided into zones for different dishes or use separate grates.
It is possible to make a brazier with a lid from two baths, which will be a full-fledged version of the stove.
To obtain a simple version of a heat-resistant grate with a base from a bath, you need:
- Make a pallet on which a cast-iron trough will be installed. This can be brickwork or a welded-to-size stand made of pipe scraps. The point of action is to isolate the bath from the ground to prevent heat loss. If the factory legs are preserved, think about how to give additional stability.
- After welding the corners, place a grate of a suitable size. It should be removable, like in a regular grill.
Use strong door hinges to attach the second tub as a lid, as well as vertical stops on the sides to prevent the heavy trough from falling back and forth uncontrollably. Attach a handle on top for easy opening.
garden furniture
Advantages of bath garden furniture:
- the ability to withstand a weight of more than 100 kg;
- minimal susceptibility to wear and tear;
- strength and durability;
- color design and decoration to your taste.
Depending on the direction of cutting the bath, you can get:
- a sofa or bench if you cut off the sidewall along the longitudinal side;
- 2 armchairs, if you cut the bath across.
Before you start making garden furniture from a bathtub, you need to prepare:
- welding machine;
- tools for cutting and grinding metal;
- primer, brushes and paints for external work;
- gloves;
- means for protecting the organs of eyes and breathing from metal dust.
Process steps:
- Remove all unnecessary parts from the font - this makes it easier to prime and paint.
- Mark the cutting lines with a marker according to the idea and cut the cast iron.
- Seal the drain hole, coat the surface with a primer according to the instructions.
- Paint furniture, legs and decor elements in the desired colors.
- Attach the refurbished factory legs back or change the seat height using your own.
- For insulation, use a mattress and pillows.
Water
The idea will be appreciated by lovers of solitude and contemplation. For a pond / fountain, you can choose a beautiful frame from live plants, populate it with aquatic inhabitants and even birds.
The advantage of using a cast iron bath in home pond construction is the strength and durability of its walls, which will keep the soil at the edges from falling and collapsing. In addition, you do not need to spend money on additional waterproofing materials.
Sequencing:
- Determine the location, dig a hole.
- Remove unnecessary parts from the trough, seal the drain hole hermetically, cover chips and scratches with waterproofing paint.
- Seal the bottom of the pit with sand, place a font, fix its location with sand, soil, stones.
- Reinforce the inner surface of the bath with steel mesh and cement mixture.
- Install a pump for the fountain (optional), start decorating the landscape.
Flower bed
The Internet is full of ideas on how to make a flower bed from a variety of things that have lost their value - beds, carts, shelves, and even shoes. It is not difficult to follow the same path with a bathtub - just fill in the earth and plant the plants. The advantage of using an old font in creating a flower bed should take into account its strengths:
- the ability to withstand heavy weight;
- corrosion resistance;
- strength of form and walls.
These advantages come in handy when creating a structure with a weight, for example, not just a flower bed, but a greenhouse flower bed that has a cover. In such a mini-greenhouse, it is practical to plant capricious, thermophilic varieties of flowers, seedlings or strawberries.
Design features:
- the cover can be made removable;
- the drain hole does not need to be plugged so that excess water flows out unhindered.
The bulk of the work in this version is devoted to the creation of an arched dome on a wooden frame. Attach it to the bathtub with door hinges.
The advantages of using an unnecessary bathtub as a fireplace are as follows:
- no need to make a special foundation and hood;
- minimum of dirty construction work;
- easy installation;
- stability and durability of the structure.
Basic steps to get a home fireplace:
- Protect floors and walls at the installation site layer by layer with materials for thermal insulation, waterproofing, cement-reinforced screed.
- Make a base for a cast-iron fireplace from non-combustible materials with thermal insulation properties - brick or foam concrete blocks.
- Cut off 1/3 of the tub from the side of the drain and work with the remaining 2/3. Cut the door for firewood at a height of 20 cm from the cutting line on the bottom side. Put on hinges, attach a handle.
- If the fireplace is installed in the corner of the room, then on the back side weld 2 sheets of iron at right angles to each other and to the sides of the trough, leaving space for the chimney installation.
- After installation of ventilation, carry out finishing work - plastering, revetting.
We suggest that you familiarize yourself with How to clean tiles from grouting without damaging the cladding surface: Overview Video
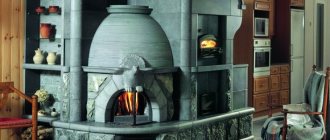
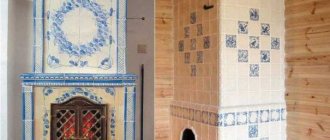
External facade decoration
The external design of the stove depends on the wishes of the owner. The masonry can be plastered and painted, various decorative mosaics and natural stone are applied to it. Decorating the structure is not always necessary - the stove from the bathroom will always look like an amazing structure on the site.
The construction of a stove from an old cast-iron bathroom is an event that requires equipment and some skills in carrying out installation work. But the construction of the stove is worth it - it has an excellent design and will serve its owner for many years, surprising with culinary delights and decorating the estate.
What is the foundation for
Having cut the main part of the future stove into two identical fragments, you can start building the foundation. It is the main stabilizing element of the structure. Without a solid cement foundation, regular shrinkage will occur (do not forget about the weight of the metal) into the soil, which can render brickwork unusable.
The technology for constructing a concrete base can be different. A small stand can be built without additional supports; for the construction of a high one, you will have to put together a blind area. The main purpose of the blind area is to give the concrete base an even shape.
Diagram of the device of a concrete foundation with a blind area