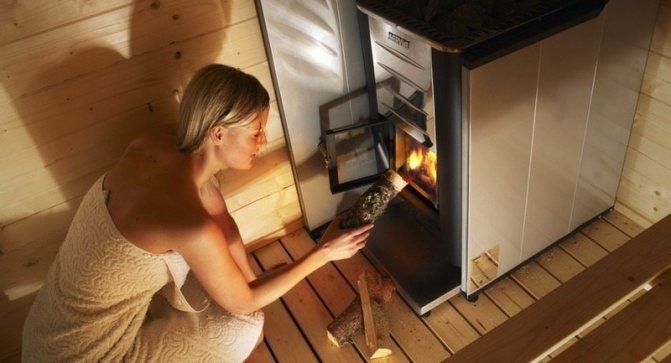
Operating principle
No wonder they say that everything new is well forgotten old. The ancient Bible echoes this proverb: “What was, will be; and what has been done will be done, and there is nothing new under the sun ”(Ecclesiastes 1: 9). Indeed, all physical and chemical laws were invented and put into practice long before our birth, so a person can only use them for their own purposes.
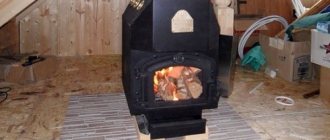
So, few people know that to enhance combustion in steam locomotives and other similar units actively used in past centuries, water was used as a combustion catalyst. Remembering this feature of a publicly available liquid, some modern Kulibins came up with a simple design for a furnace, where water as fuel helps to increase the efficiency of heat transfer by tens of percent.
The fact is that when water vapor is heated to a temperature above 600 degrees, a combustible mixture of hydrogen and carbon monoxide is formed. In combination with oxygen, it burns remarkably and contributes to an even greater rise in temperature. This is why severe fires and high temperature fires cannot be extinguished with water or snow. On the contrary, this method contributes to an even greater flare-up.
However, if you take control of this feature of the most common liquid, you can achieve an amazing effect that helps to improve the combustion process.
The main advantages of this method are:
- More complete fuel combustion and less combustion waste.
- The absence of black smoke, respectively, less soot - a cleaner chimney.
- Higher combustion temperature, greater heat transfer.
- Excellent burning of raw firewood, no smoke at the same time.
- The combustion time for the same amount of fuel is almost doubled.
In this video, more about the stove on water:
It turns out that the use of a furnace design on water is much more effective than the usual option.

About consumable and solution
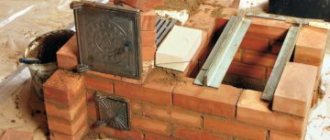
For those who are interested in how to build a stove in the house and what consumables are needed for this, experienced craftsmen recommend using ceramic and refractory (fireclay and refractory) bricks. It is undesirable to build a furnace from silicate. It is better to prepare the solution based on clay. If red brick is to be used, then red clay is needed. To prepare the solution, river sand and clay (2.5: 1) are used. The contents are diluted with water. Ready-made mixtures are sold on the shelves of specialized stores. From the fittings, you should get grate grates, soot cleaners, valves, dampers, blower and furnace doors.
DIY making
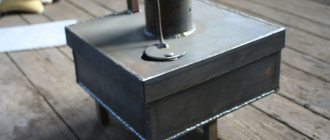
So, deciding to make a stove that runs on water, the first thing to do is determine the basic design of the future heater.
Using this method, any oven can be converted into an economy option.
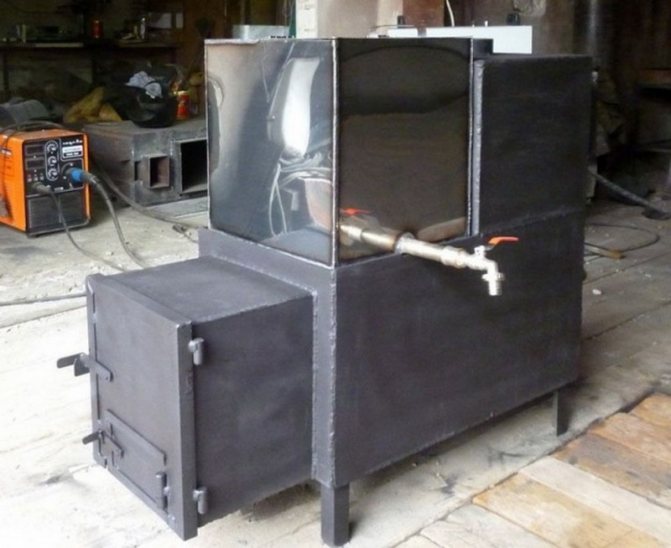
Most often, such a heater is already available and it just needs to be modified. Here is a flow chart:
- Find a container for water and fix it.
- A steam generator is made.
- They think over its fastening and heating method in order to get steam.
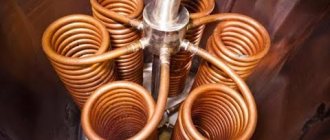
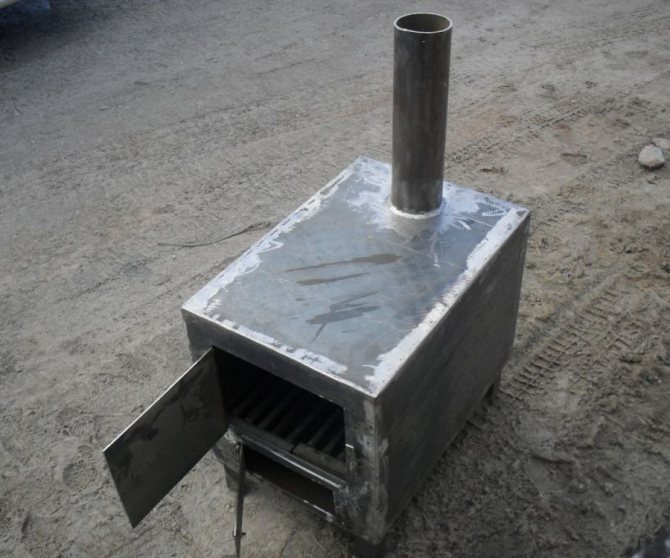
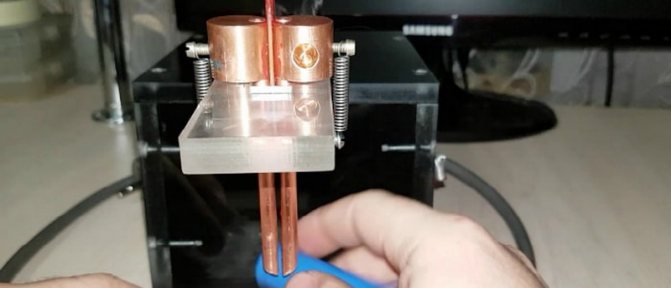
- Make a superheater. Usually it is a thin-walled stainless steel tube with uniformly cut holes. It is wrapped with a stainless steel mesh - this device will serve as a noise damper.
- Think over the connection and fastening scheme of all parts. The superheater must be located on the grate of the furnace in order to have good oxygen access to it.Many people come up with additional devices so that it does not get clogged with ash and the oxygen supply is constant.
- Check the device for efficiency and fire safety. The absence of smoke from the chimney when the stove is on fire indicates correct operation. All rubber, wood and plastic parts of the device must be kept at a fireproof distance from fire and hot parts of the structure.
More details about the stove on water in this video:
Installing such a design can save a lot of money. In addition, as a fuel, the water in the stove reduces air pollution from combustion waste. Even the simplest way to modify the stove can lead to remarkable results.
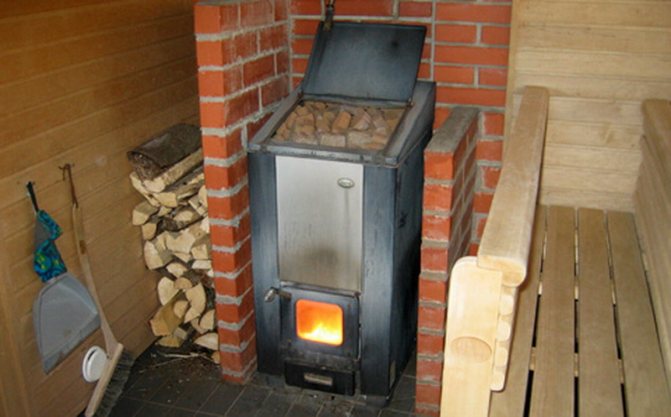
For example, some summer residents use a water blower. That is, a metal container with water is inserted under the firebox. As a result of evaporation and heating, such a simple method turns an ordinary stove into a water one and improves its performance many times over.
Stove heating in Ukraine, as they say, is experiencing a rebirth. The reasons for this phenomenon are clear without any explanation. That is why the Kharkiv innovator Oleg Petrik suggested using the technologies of pulverized coal thermal power plants to increase the efficiency of home stoves, and for this it is not at all necessary to have the skills of an experienced locksmith.
How can the efficiency of a coal (wood) stove or solid fuel boiler be increased without the use of additional energy resources?
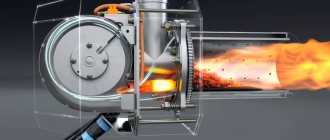
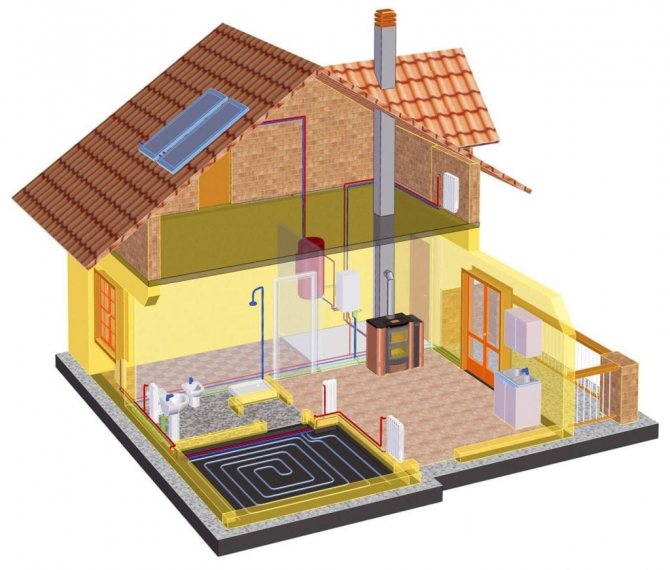
The principle of operation of the technology is quite simple: water from a reservoir (steam generator) turns into steam with a high temperature (400 - 500 C) and is fed directly into the flame, acting as a kind of combustion catalyst that increases the productivity of the heating installation.


Foundation for construction
Before you build a stove, you need to lay the foundation for the future structure. The work is carried out in stages:
- First you need to dig a pit. Depth 45-50 cm.
- Sand is poured to the bottom and carefully compacted. The thickness of the layer is 8-10 cm. A layer of gravel is placed on top.
- Next, you should install the reinforcement grid and fill it with cement mortar. The mixture contains crushed stone, sand and cement in a ratio of 1: 2: 1. The pit is filled by one third.
- Then the second layer is filled. The mortar is represented by sand and cement (3: 1). It should be filled in such a way that 5 cm remains to the top of the pit.A second mesh with a mesh size of 7x8 cm is also laid here.
- Pour the third and last layer of cement mortar and level with a rule. The structure is covered with polyethylene film.
The concrete will freeze within 30 days. To make it stronger, experts recommend moistening it every day. At the end, the foundation is lined with strips of roofing material.
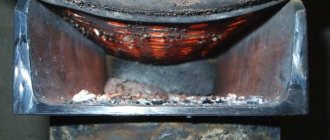
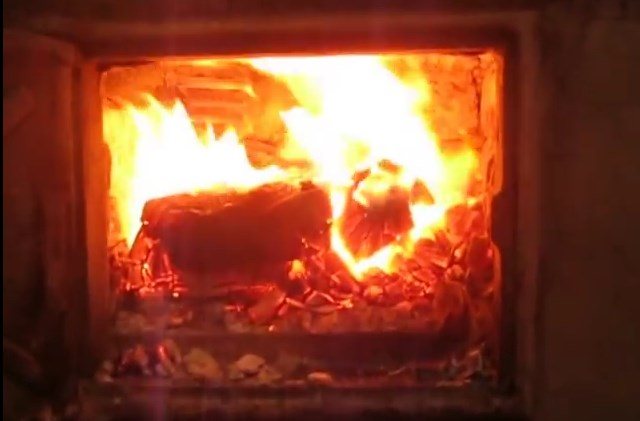
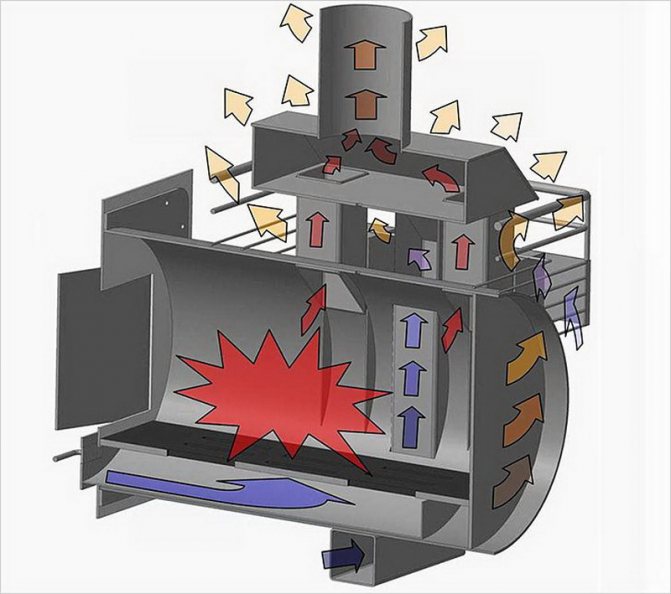
PRINCIPLE OF OPERATION:
A self-regulating amount of water is supplied to the hydrogen generator through a tube, which, passing through a transducer made of natural material, is saturated with molecular hydrogen and, together with hot air (pulses), is fed into the furnace firebox under glowing coals. The coals begin to burn brightly and give off heat, while not turning to ash for a long time.
In fact, "MIRACLE MEMBRANE No. 01" is an analogue of a wax candle, where the role of wax is played by water, and the coals of burning wood are a wick.
"MIRACLE MEMBRANE No. 01" is completely safe, since the water in the tubes is a water seal, prevents the penetration of oxygen from the air and the formation of an explosive gas.
"MIRACLE MEMBRANE No. 01" can be used in gas furnaces, hydrogen water must be supplied to the iron plate heated by a gas burner.
The power of "MIRACLE MEMBRANE No. 01" can be calculated for use in industrial furnaces.
Get acquainted with the new invention "MIRACLE MEMBRANE No. 02" The principle of operation is based on the newly discovered phenomenon of water properties: - ignition of supercooled humid air when it passes through hot coals.
In ancient Arkaim, our ancestors melted metal with the help of humid air. In the furnace of the furnace, the temperature rose to 1500 degrees C. To achieve such temperatures, they passed humid air from the well through the reactor and fed it to the furnace of the furnace.
In Miracle Membrane No. 02, moist air, passing through the reactor, is converted into “water gas” and, after passing through hot coals, ignites. This explains the savings in firewood. The "water gas" burns and gives heat, and the coal of the wood is a wick (analogue of a candle).
Using our technology, you will be able to make "Miracle membrane No. 02" yourself and get real savings in fuel by 50% due to an increase in the temperature of coal combustion!
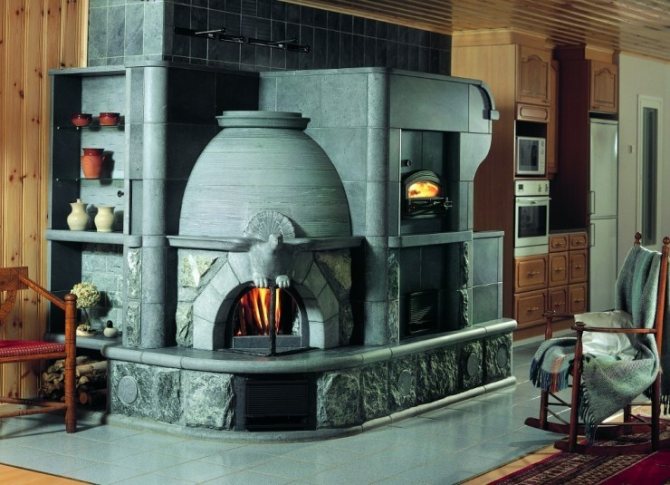
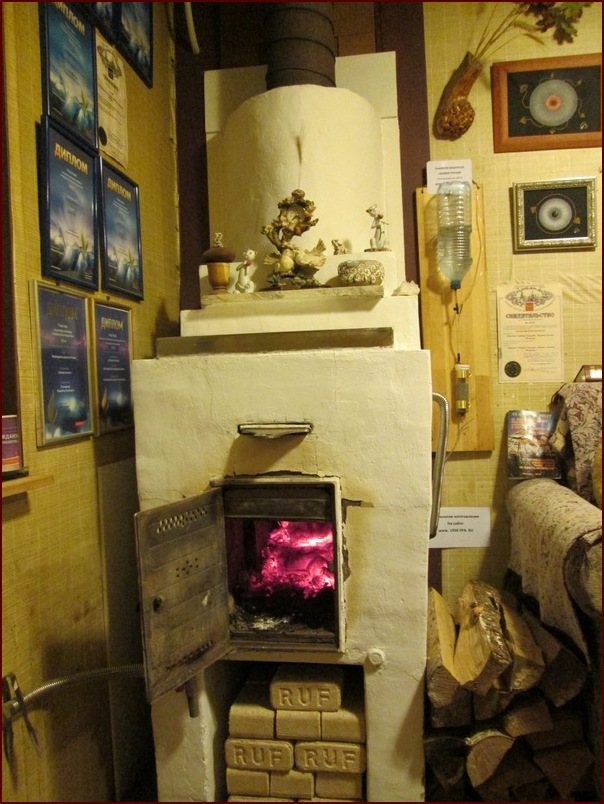
Practical advice and real photos of finished ovens
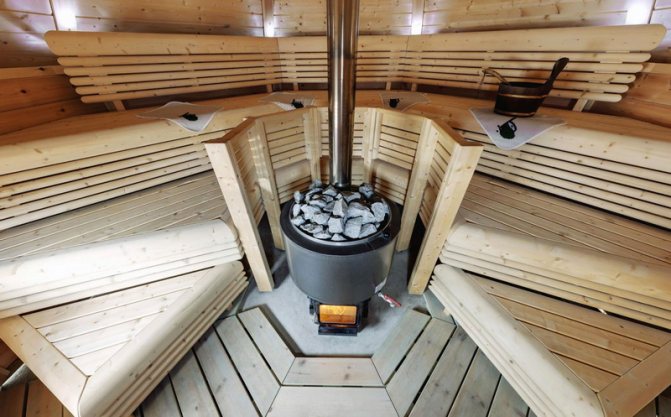
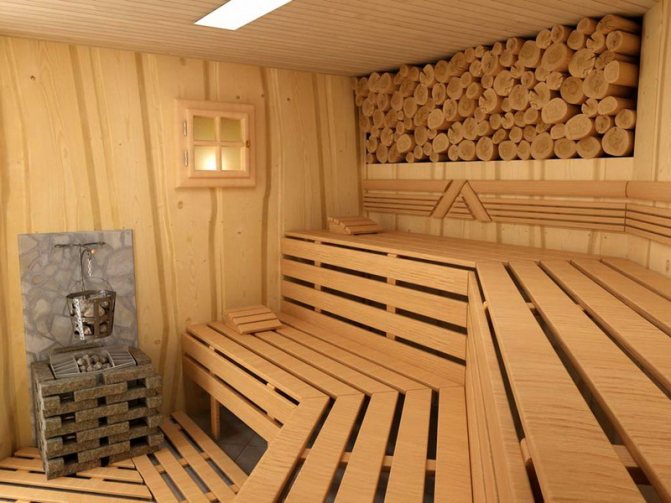
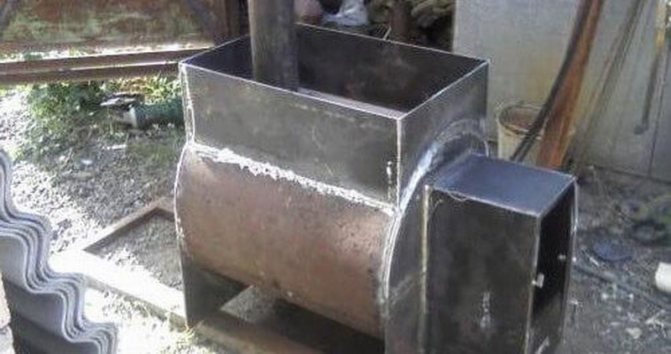
A master or a beginner - everyone can turn on their imagination and come up with their own way to improve a self-made sauna stove. Such a correction may affect the dimensions of the furnace or completely revise the design features of the heating device.
We will provide some useful tips so that you can determine the best option for yourself and make a suitable wood-fired sauna stove.
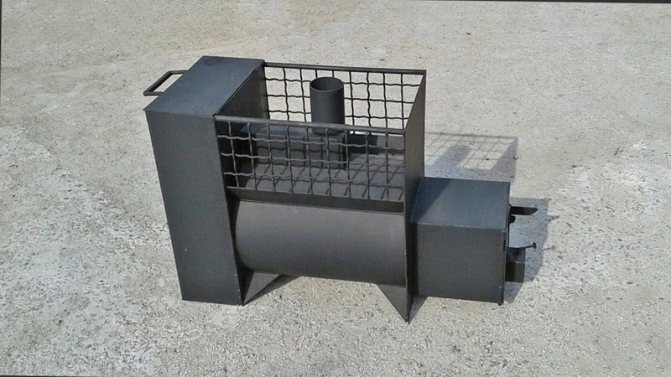
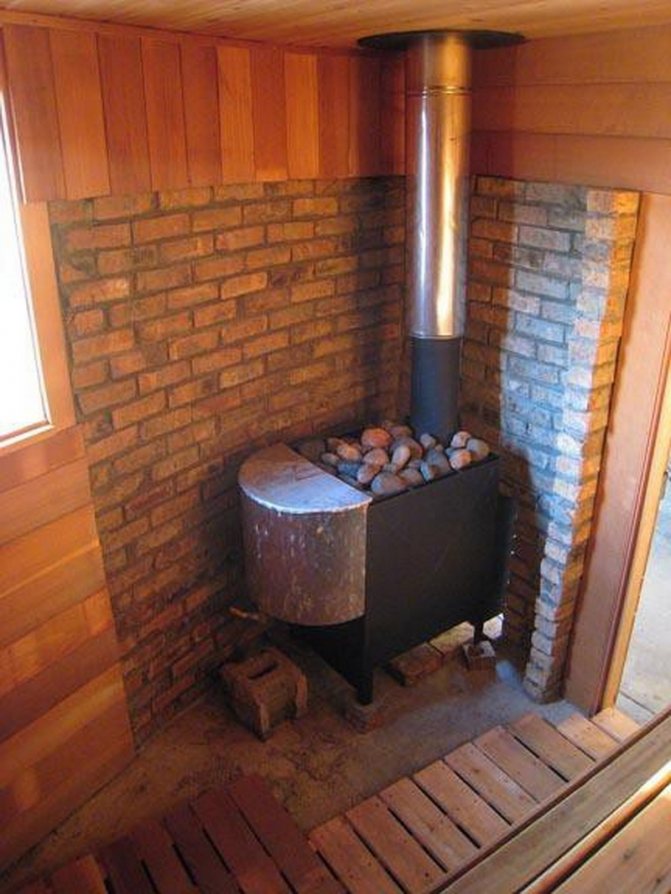
The legs of the product are best made as longitudinal skids. This technique will help to avoid excessive pressure on the floor covering by evenly distributing the stove weight over several floor planks. This makes sense, since in addition to the weight of the stove itself, the weight of stones and water in the tank also presses on the floor. The legs can be made from any metal that comes to hand with the desired dimensions. And the sled itself is made from a square. It is best not to make the slide too large, as it will protrude beyond the surface of the stove and you can trip over and injure yourself.

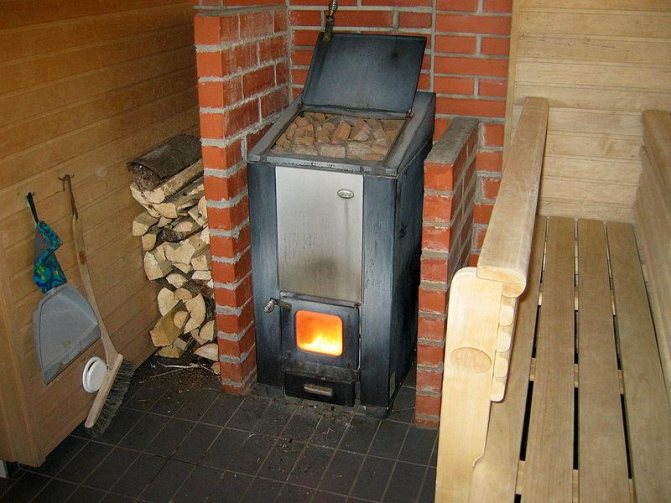
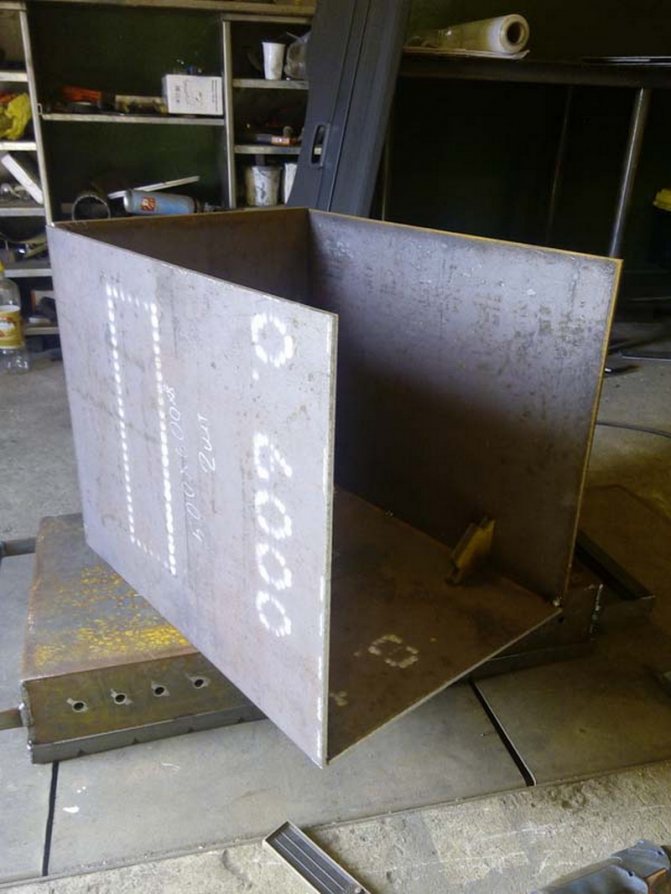
The bottom and sides of the furnace are laid out with refractory bricks, so the metal walls heat up less and the heat in the furnace will linger longer. Bricks for such purposes are different: heavy (which conduct heat) and light (they insulate heat). Insulating ones are used mainly for melting-type furnaces so that the high temperature inside the structure does not transfer to the surface (they can be completely cold at the same time). We indicate this separately so that you do not make a mistake when choosing a material. Lightweight insulating bricks not for sauna stoves. If you plan to increase the thermal conductivity of the structure in this way, do not forget to take into account the space in the firebox for them.
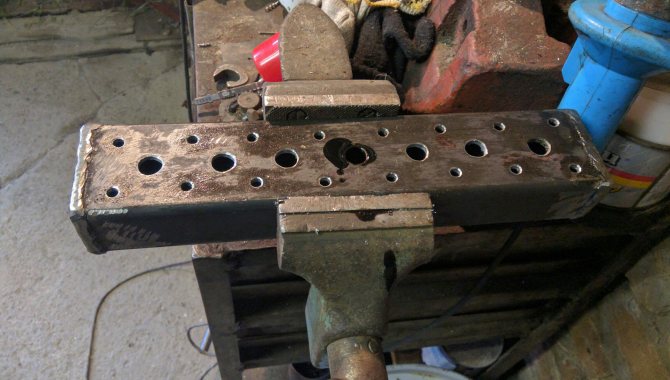
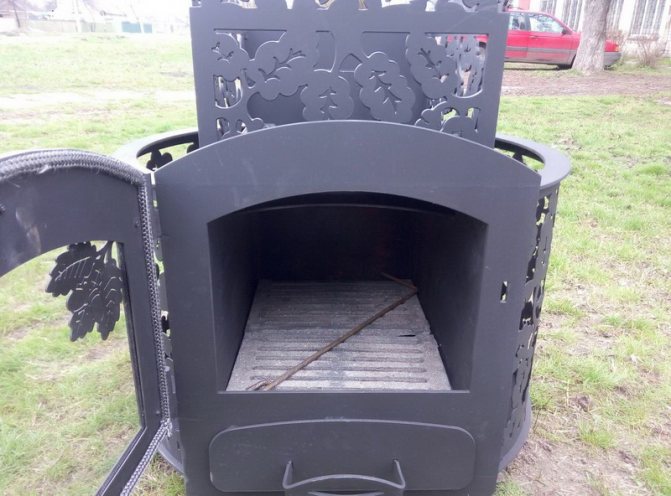
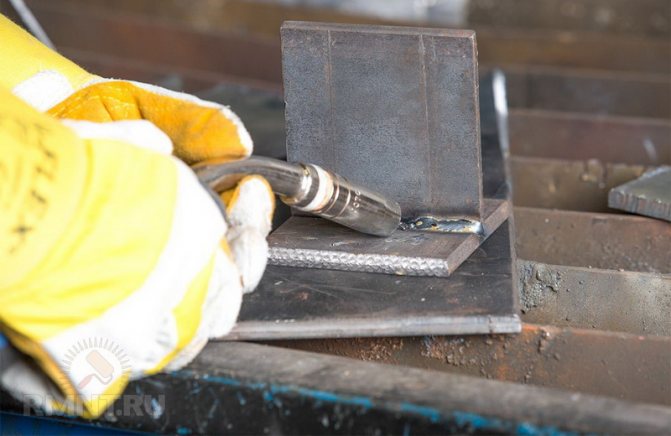
Doors can be made from pieces of metal remaining from cutting holes. In order to obtain pieces of metal suitable for further use, try to cut straight when cutting, and use discs of small thickness to reduce the width of the cut. Such discs add laboriousness to the process, but this “pays off” due to the time saved for making the door later. Metal consumption is correspondingly less. The doors themselves will be slightly smaller than the holes for them, even with the minimum thickness of the cutting disc. In order to prevent them from falling inside when closing, we make stops. Small metal strips will do and weld on the back of the slot. In order to also increase the tightness of the door with this technique, weld the stops not individually, but around the perimeter of the hole for the door.
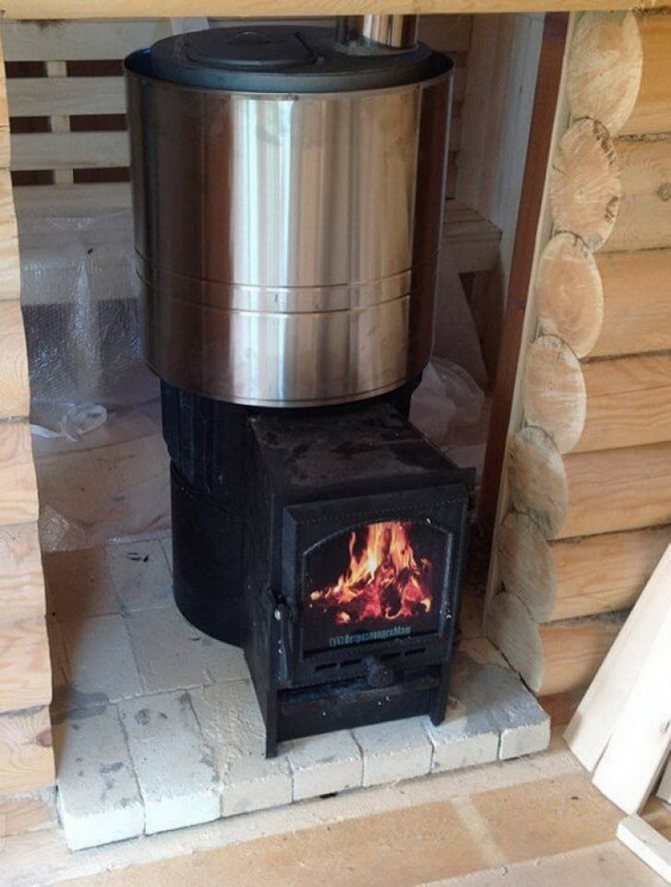
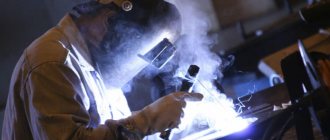
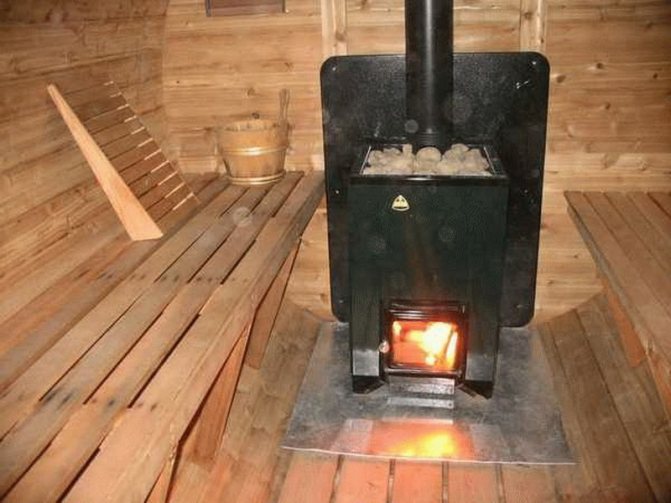
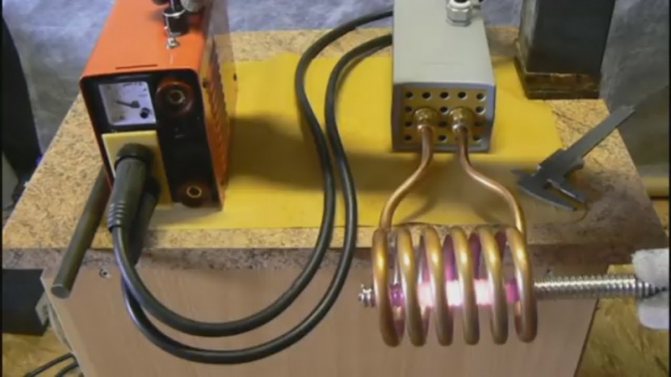
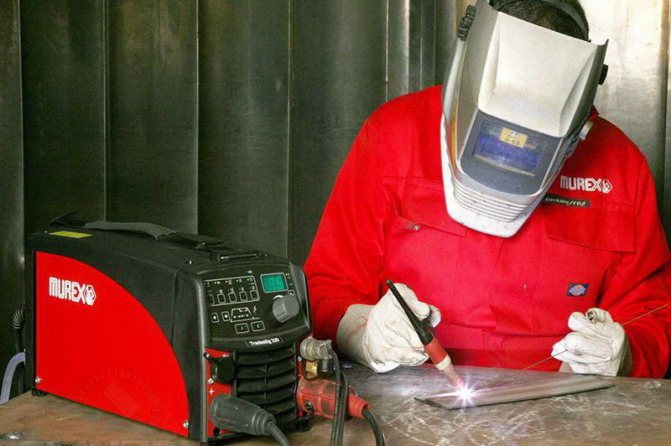
It is better to make a container for water from stainless steel. To weld such a metal, you will need the appropriate electrodes. To weld stainless steel requires experience, since the process is more complicated than conventional welding. The current must be adjusted specifically for stainless steel.
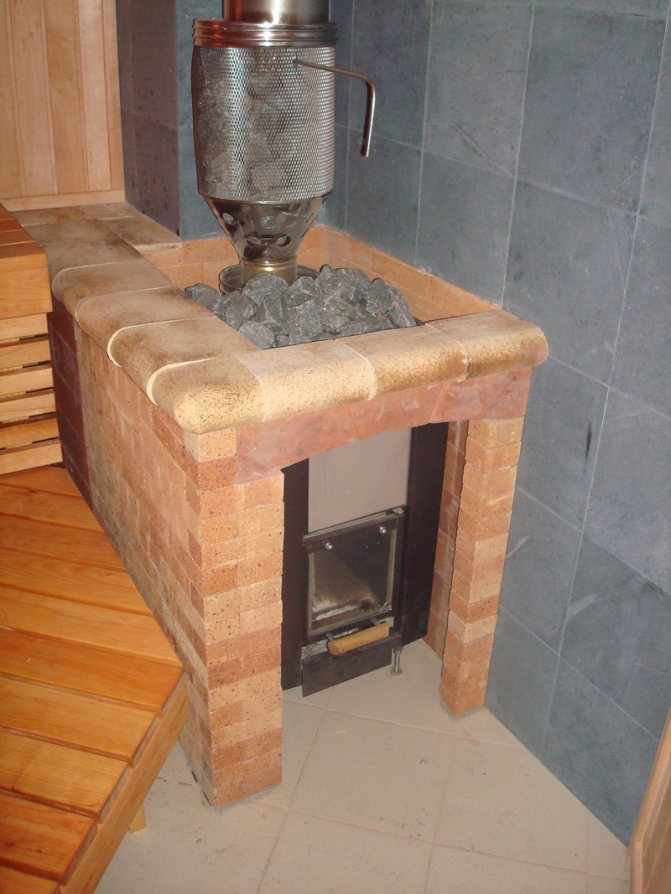
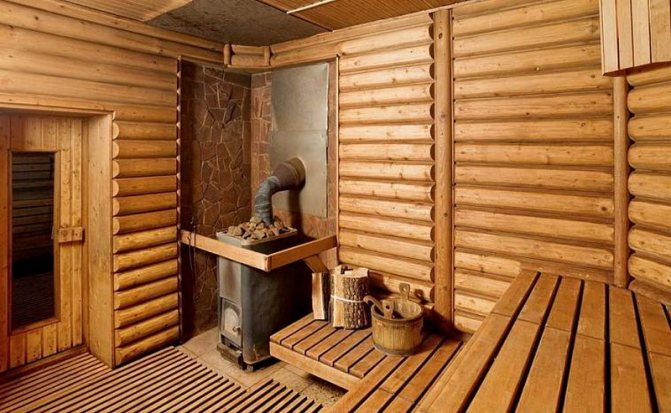
To protect yourself and children from accidentally touching the hot stove, install a safety guard around the stove structure. It can be attached to the device itself or be portable. The main thing is that the fence creates safe conditions for using the bath.
Is your stove not producing as much heat as you would like? Everything can be corrected.To increase the amount of heat supplied by the stove, it is necessary to add the area of the structure itself. You can weld metal plates to the sides of the structure. They will be a kind of radiators, complementing the amount of heat emanating from the stove.
Another way to add warmth: take two curved pipes with a large diameter (about 50 cm) and weld them on both sides of the stove so that one end looks down (and is below the stove), and the other up (above the structure). Due to this technique, due to the difference in temperatures inside the pipes, the air from below (cold) will be drawn inward, and from above it will come out hot.
It is better to supplement the firebox door with a device for adjusting the air flow. The easiest way to make it is from a piece of pipe. To do this, take a small metal pipe (up to 10 cm) and a piece of sheet metal. We make a hole in the door along the diameter of the pipe and cut out a round piece from the sheet of metal, which will be slightly smaller than the diameter. We drill two holes in the pipe at the same level along the pipe axis. The distance between them should be equal to more than half of the diameter itself, otherwise the air flows will pass worse. A piece of wire rod of a suitable size is threaded through the holes. The top edge folds like a handle. The circle that we previously cut out of a sheet of steel is welded to the edge of the wire rod.
This is only part of the techniques that are used when making homemade sauna stoves. Imagine, implement and share new methods of improvement from your practice.
How to get technologies for the production of "MIRACLE MEMBRANE No. 01 and No. 02" ?!
Send donation via payment systems
in the amount of 1,000 rubles.
Transfer from a card or phone to Yandex wallet
account number 41001193789376
Transfer to Pay Pal
Transfer to Qiwi
Transfer to Visa Classic
Account number: 4276380050142798
Your financial assistance goes to further development of the "Miracle of Membranes" to increase efficiency and to support the national program "REVIVAL OF THE SPRINGS OF RUSSIA"!
The interregional program "REVIVAL OF THE SPRINGS OF RUSSIA" is a PEOPLE one. We work only on private donations from citizens and do not accept funding from commercial government and political organizations.
LEADER OF THE PEOPLE'S PROGRAM
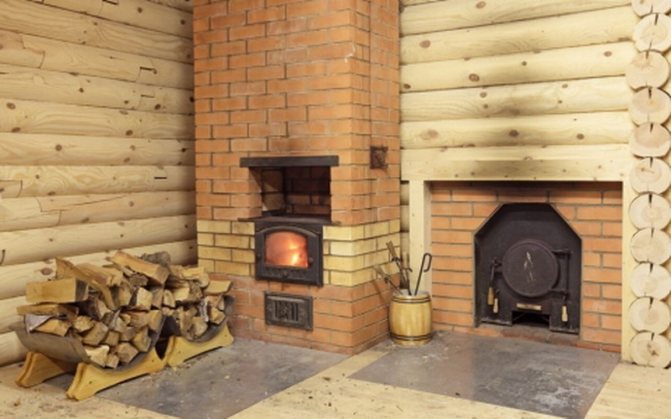
About species
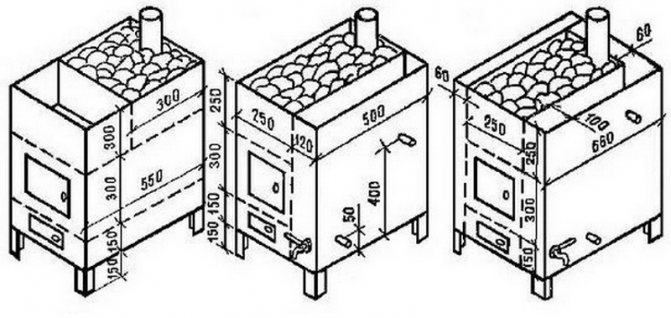
If a decision is made to build a stove, experts recommend first of all to familiarize yourself with the types of various brick structures. Thus, furnaces are:
- Heating and cooking. They are equipped not only with a hob, but also with an oven, a drying niche and a tank in which you can heat water. Judging by the reviews of the owners, heating and cooking stoves are ideal for heating one or two rooms. For those who do not know how to build a stove correctly, experienced craftsmen recommend building it into the wall, turning the hob and firebox into the kitchen, and with the back wall into the living room. As a result, the oven will be used as a partition on which you can cook food. The bedroom and living room will be supplied with dry heat from the wall.
- Heating. They are compact stoves designed exclusively for heating. Judging by the numerous reviews, you can build such a stove both in the country and in your own home.
- Cooking rooms. In addition to cooking, they can also heat a room with a small area. With the necessary supply of firewood, you can not be afraid of cold and dampness. In the event of a gas or power outage, it is easy to prepare hot tea and dinner on the cooking oven.
B-B-Q
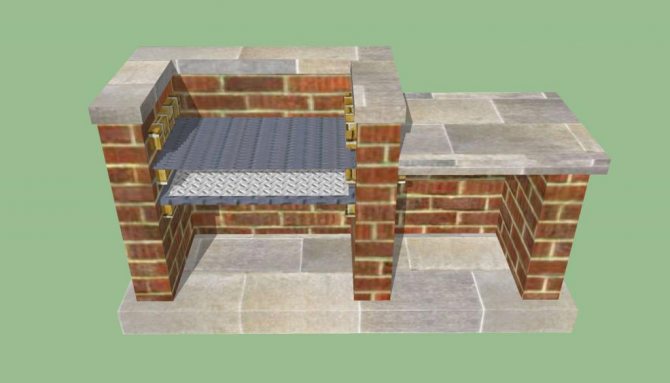
Many owners of suburban areas are interested in how to build a stove on the street. Judging by the reviews, you can melt them in any weather. The most popular design is considered to be a brick barbecue stove. To build it, use a simple brickwork in the form of the letter "P". Due to the fact that the furnace itself is small in size, it can be built with a not very massive foundation. It is made of fireclay bricks and ready-made metal structures.First of all, the master needs to prepare a place in the yard. The stove must be on the leeward side, otherwise the smoke from it will enter the house. First, a reinforced foundation is made.
Then a project is created with the help of "dry masonry". Then the furnace is disassembled and a solution is prepared from clay, cement and river sand. A stove is being erected with ordinary masonry. Bricks are knitted with nails or wire.
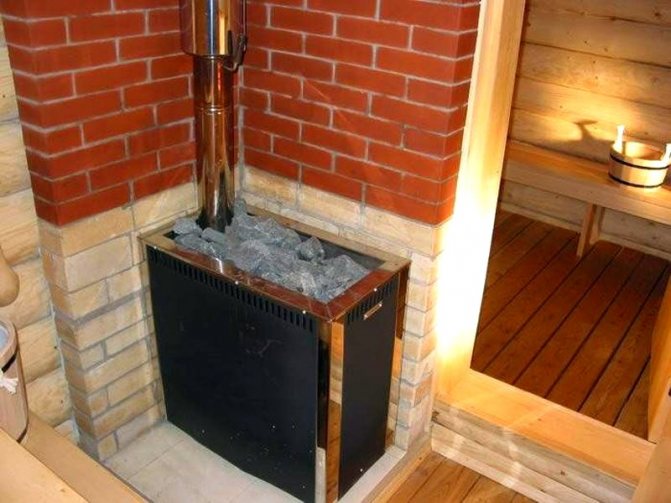
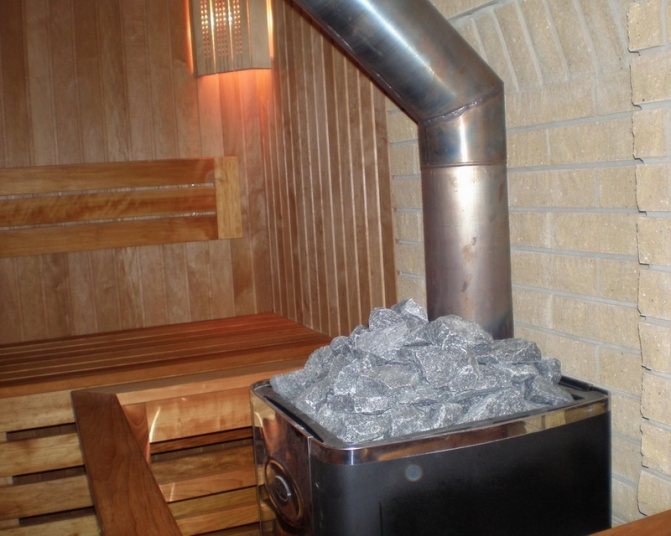
How to build a sauna stove? Start
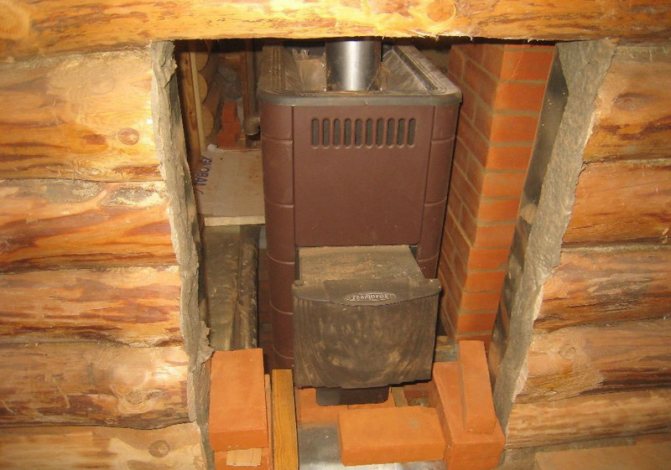
It is important that the foundation of the “heater” is located at a distance of 100 mm from the foundation of the bath. Well compacted dry sand is used to fill the gap between them. If the structure itself is made of combustible materials, the rear wall of the furnace is sheathed with a 4 mm metal sheet. It will also be useful to use asbestos cardboard. The following solutions are suitable for the foundation:
- Lime. Prepared from slaked lime and sifted sand in a ratio of 1: 2.
- Cement. Made from cement and sand (1: 2).
- Combined. The composition contains cement, lime and sand. The ratio is 1: 6. The sand is added at your discretion.
The foundation is done as follows:
- In the place designated for the construction, you need to dig a depression in the ground with a depth below the level of its freezing.
- Pour clean sand (15 cm) on the bottom, add water and tamp. Sprinkle on top with crushed stone or broken brick (20 cm)
- Surround the resulting pit with formwork, the walls of which should be 50 mm above the ground. Roofing material or waterproofing film is immediately laid.
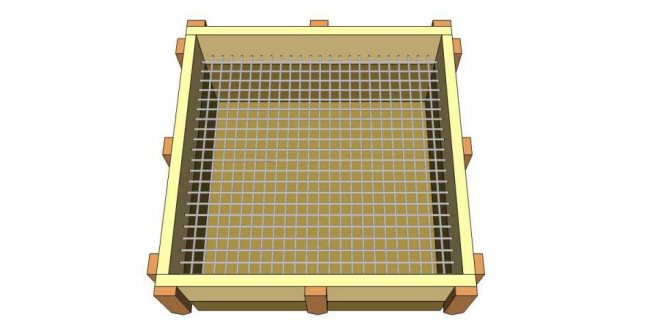
- Equip the bottom of the pit with a reinforced frame. The volume of the metal bar is 1.2 cm, the cell size is 100 mm.
- Pour concrete solution into the resulting structure. Next, the screed is carefully leveled using a rule. A film is laid on top of the concrete. It will be possible to prevent cracking and drying out if the foundation is moistened from time to time.
- Dismantling of the formwork is carried out after 4 days. By this time, the concrete will harden. Bituminous mastic is applied along the edges of the screed.
- Put sheets of roofing material in two layers on top. It will act as a waterproofer.