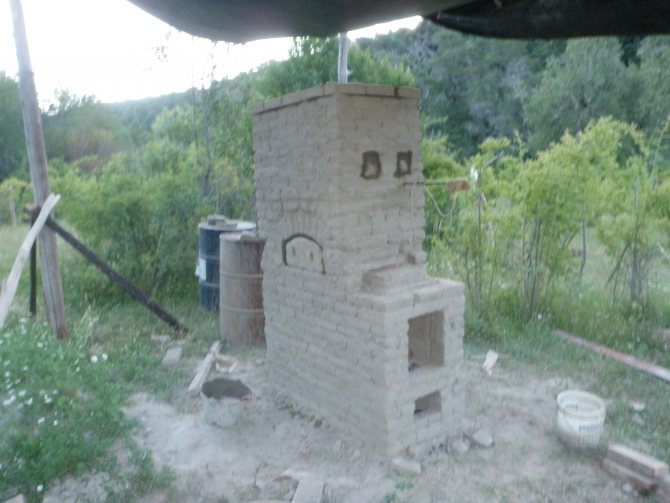
Do-it-yourself brick oven repair in the country is quite real. Is it possible to give a second chance to a heating stove, which stood in the country for ten years without major repairs and was the only source of heat for the country house. In principle, you can. Here we will introduce you how you can repair a brick oven without the cost of calling specialists. We will repair the oven ourselves!
For this you need:
1) carry out a visual inspection of the oven.
2) Decide what needs to be changed.
3) Determine what else may well serve.
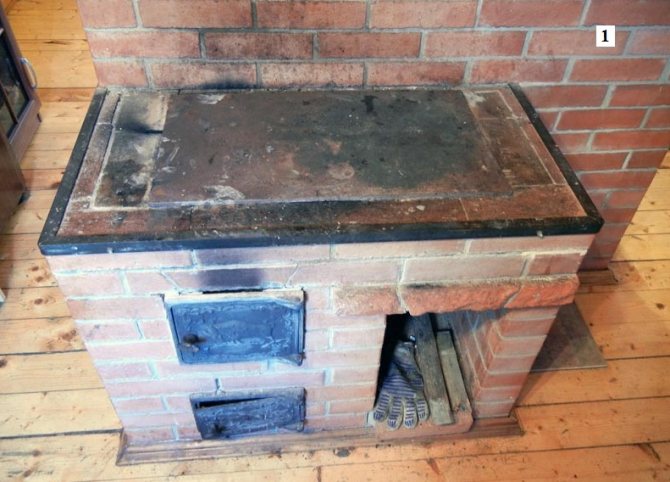
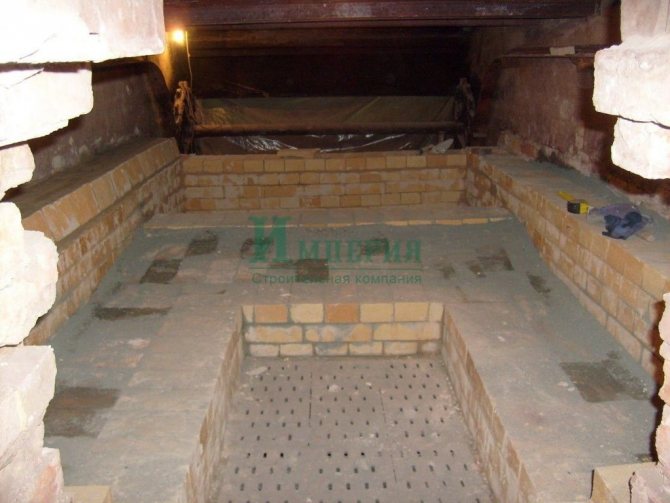
Today we will be dealing with the repair of a brick oven. In this case, the furnace complex, which is located on two floors of the dacha.
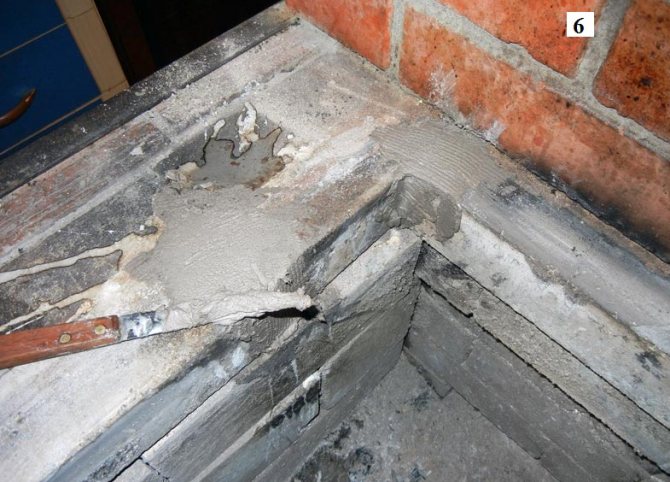
The secret of lining the firebox
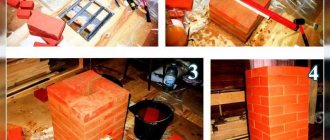
To prevent the row of tiles from sinking down, we lay a corner by 25 mm in the groove of the masonry. Its thickness is approximately 4 mm, and this is the width of the aisle of the tiles. The door fittings will completely cover the space not covered with tiles, and the corner itself will not allow the tiles to slide. After the glue has set, carefully remove the corner from the masonry.
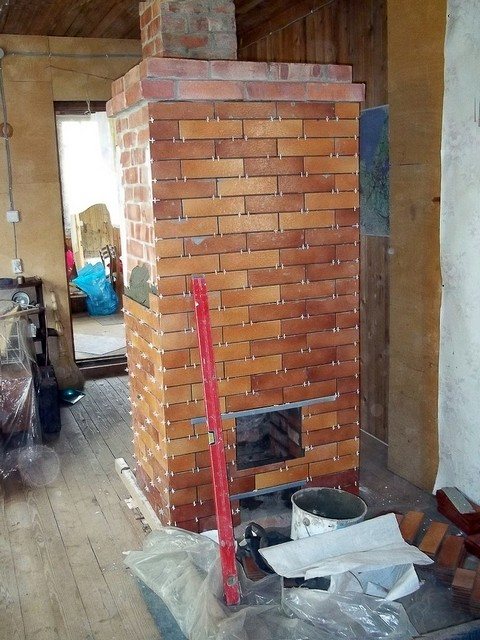
Here is the secret of gluing tiles - the corners are installed above the view and above the firebox.
Pay special attention to the "synchronization" of the rows of tiles, they must go one into one from one wall of the stove to another.
Grouting
After about 10 - 12 hours, after the glue has finally set, we need to grout the joints. We remove all the crosses (spacers between the tiles) and apply grout. You can use Ceresit Grout - it is heat resistant. It is sold ready-to-use, white, so that its color matches the color of the tile - add a little chocolate color to give the desired shade. We apply with a continuous method. How much you need will sit in the seams, then we will remove the rest of it from the surface of the tile.
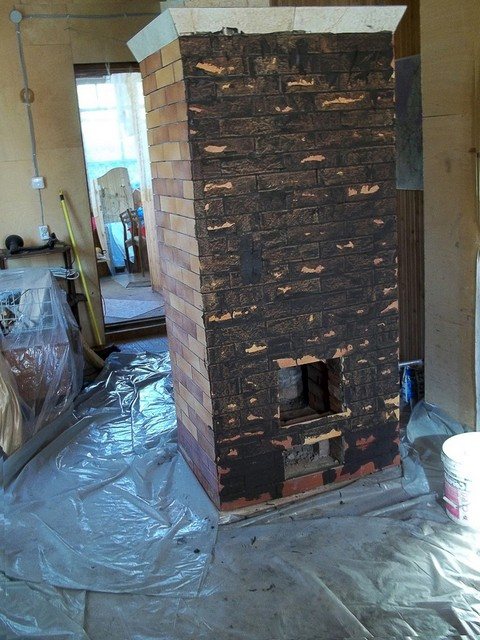
We made a grout on the front of the stove. We wait three hours and remove the grout with a damp cloth or sponge. Everything should be easily removed from the tile surface.
Be careful. One has only to overexpose the grout on the tile, and you will no longer be able to remove it without the help of abrasives, and this, in turn, can spoil the appearance.
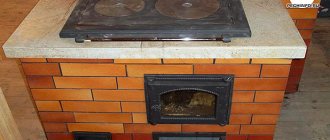
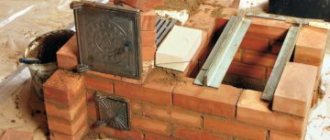
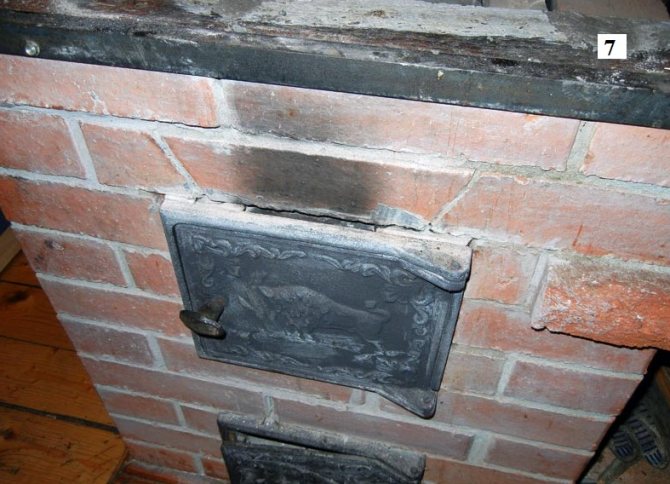
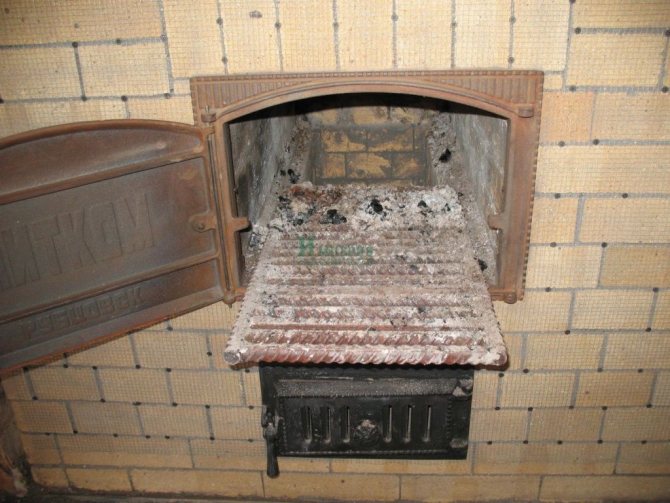
Installation of furnace fittings
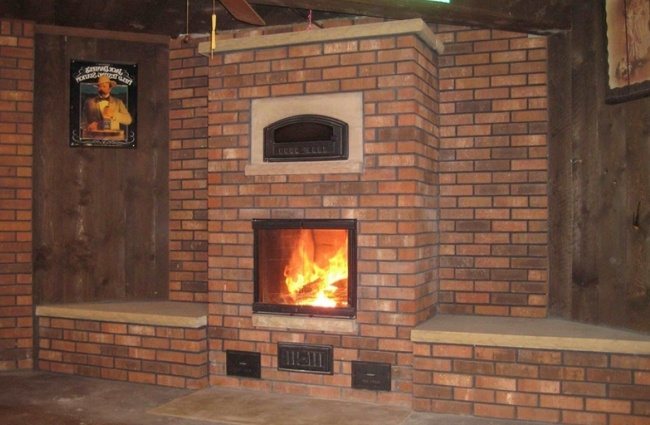
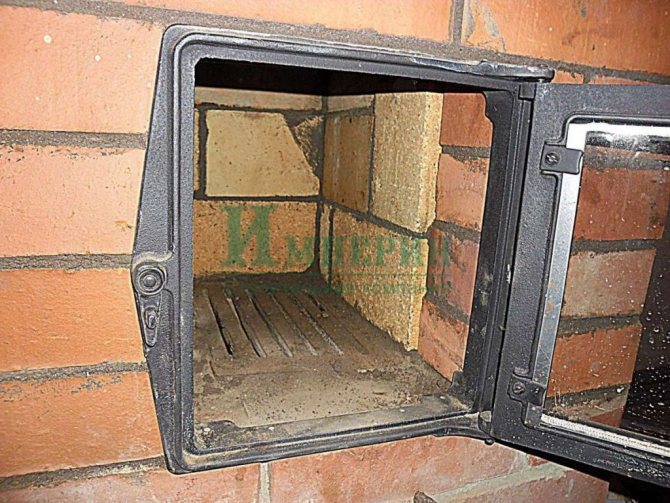
We are proceeding with the installation of furnace fittings. We take all of it from one manufacturer, I used the Finnish company SVT. For decoration we use 50 * 50 mm Senegal porcelain stoneware steps. This is a fairly strong and heavy material, but it looks very expensive.
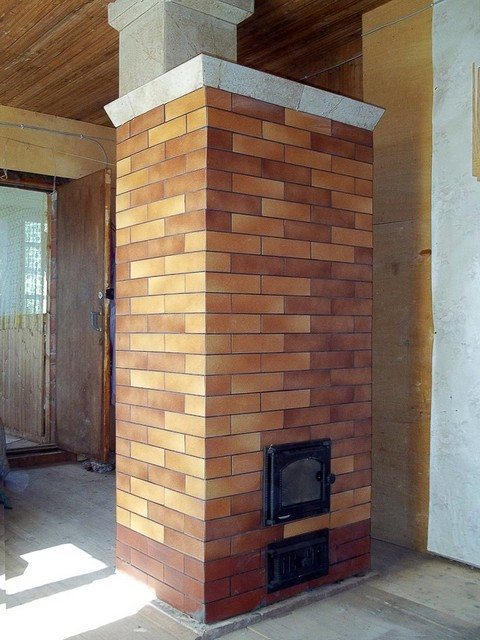
We finish the pipe and the top of the stove with porcelain stoneware.
The technology is as follows. We apply glue, the same as for tiles. We screw self-tapping screws into the seam of the masonry, put plates on them and then tighten everything with tape around the pipe. We leave it for a day, remove the scotch tape, check the reliability, unscrew the screws - it turned out very effectively!
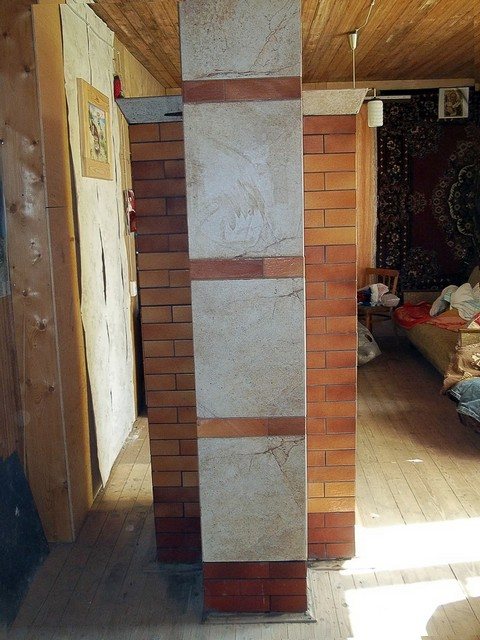
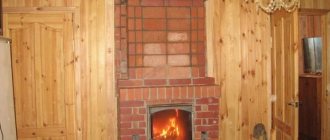
View of the second floor oven from the end.

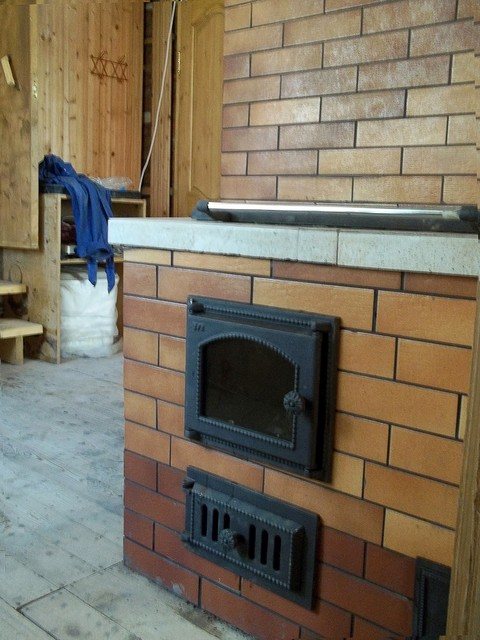
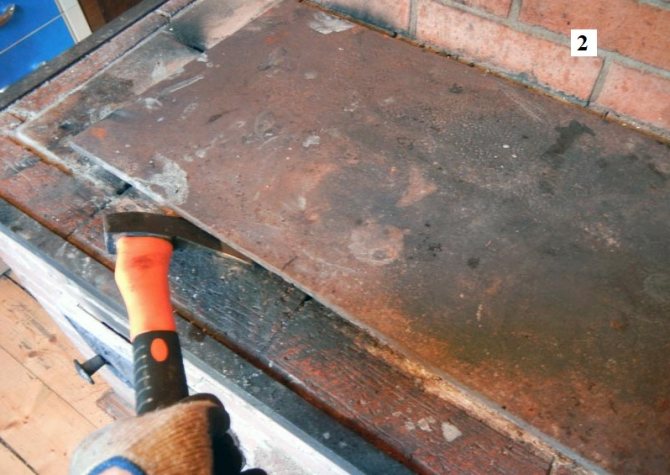
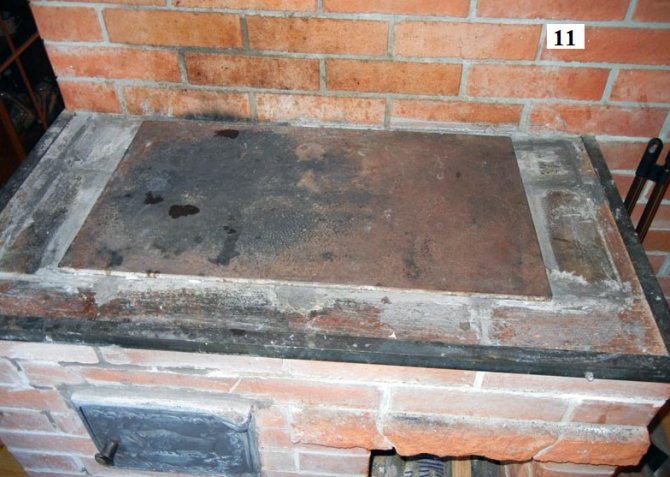
The final touch. We install accessories for cooking - a hob, a firebox door and a blower. We fix everything with concrete dowels.
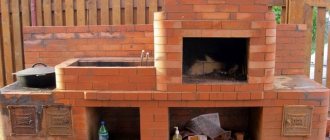
If we compare what was and what has become, it’s hard to believe that the repair of the brick oven was able to bring it back to “life”!
We suggest watching the video:
What kind of repair does the furnace need
Like any other heating unit, a stone stove, including the Russian one, needs care and repair. Repair of the stove, depending on the degree of wear and tear, can be divided into three types: (See also: Stove with a stove bench with your own hands)
- Maintenance;
- small;
- capital.
Maintenance is used as a preventive measure and to protect the furnace from serious damage. Repair is carried out in order to eliminate minor defects that appeared during operation.Current repairs include work on strengthening weakened parts, sealing seams and cracks on the surface of the furnace, and, of course, periodic whitewashing.
Small repairs include such works that do not require rebuilding the furnace, but require serious attention, because neglect can lead to disastrous consequences. Such works, when it is possible to repair the stove with your own hands, include updating the furnace hearth and lining, repairing chimneys, etc. Each damage that requires minor repairs appears as a result of aggressive, tough operation. Lining, for example, deforms when exposed to very high temperatures. This can be facilitated by the use of coal or anthracite. The so-called "under" wears out due to friction during regular movement of utensils on its surface.
Overhaul is a rather complicated process and requires some knowledge. If the stove is built by you, anything that can break, you can fix it without too much trouble. It is not difficult to make repairs, even when you have minimal knowledge in construction. Much more preparation is required if you are faced with the masonry and repair of the stove for the first time. The types of faults requiring major repairs are: (See also: DIY Russian stove)
Any furnace repair will be effective and error-free if the correct "diagnosis" is made first. Since the overhaul is quite a serious matter and is fraught with certain difficulties, it is better to entrust this matter to the master.
Restoration and decor
You can decorate the oven with the following materials:
- Heat resistant tiles. This type of tile must be laid on a clean and flat surface using construction crosses for joints. The tiles can be combined with various bas-relief edging and frescoes. The advantages of the tile are obvious: it is easy to care for it, and it also retains a presentable look for a long time.
- Coating with paint-enamel. The walls of the stove are covered with white paint, which reacts well to temperature changes. On the main background, you can apply drawings with paints, using stencils or paint the oven with aerosols. But it should be borne in mind that when heated, enamel paint will emit an unpleasant odor at first, which will pass over time.
- Whitewashing or lime. Add salt to lime and water to give the stove a crisp white shine and shine. Whitewashing and lime are natural antiseptics that have a beneficial effect on human health and do not emit harmful substances.
List of some repairs
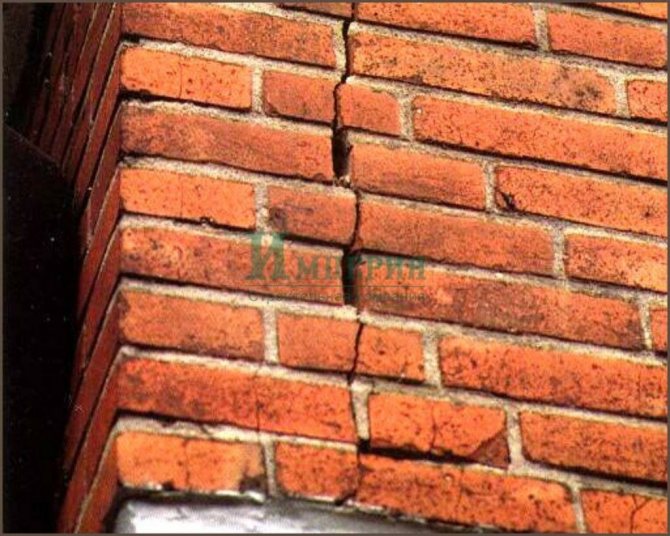
So, you decided to repair the fireplace yourself. What prompted this decision? Usually there are two main reasons, which are the disappearance of draft and the appearance of cracks on the walls of the fireplace.

Furnace restoration
- Small cracks can be repaired with plaster mortar. If a crack has formed not only in the decoration, but also in the brick itself, then a specially prepared clay solution will come to the rescue. Clay, sand and cement are mixed in a ratio of 3: 8: 1. Having brought the mixture to the desired consistency, let's start preparing the surface. The place where the crack has formed must be deepened. Then you will have to remove dust and crumbs with a damp cloth so that the solution adheres better. The resulting space is sealed with a tourniquet molded from the ready-made solution.
- Poor traction is usually caused by a fallen brick. We have two tasks: to remove the fragments of the old brick and install a new one in its place. The success of this work depends on the foresight of the stove-maker who laid the pipe. Anticipating that sooner or later the chimney will have to be cleaned, experienced craftsmen advise to make several doors for cleaning along the length of the channel.If this is not possible, then secret hatches are left, which are covered with bricks without mortar. To make them easier to find later, the bricks are not laid along the plane of the wall, but given out a few millimeters in front. After that, the chimney is finished with plaster. During cleaning, you should find the protrusions and beat off the plaster, and the desired brick can be removed with ease. The chimney access hatch is ready.
Over time, any fireplace, any stove externally changes. Cobwebs of cracks appear, the rows of masonry are shifted relative to each other. The metal walls of the hearth burn out, and condensate in the pipe has long ago provoked the development of rust.
Even with such a complete list of faults, you should not rush to disassemble the device. Many craftsmen are ready to help, this will be a real restoration of the fireplace, which will give it a second life.
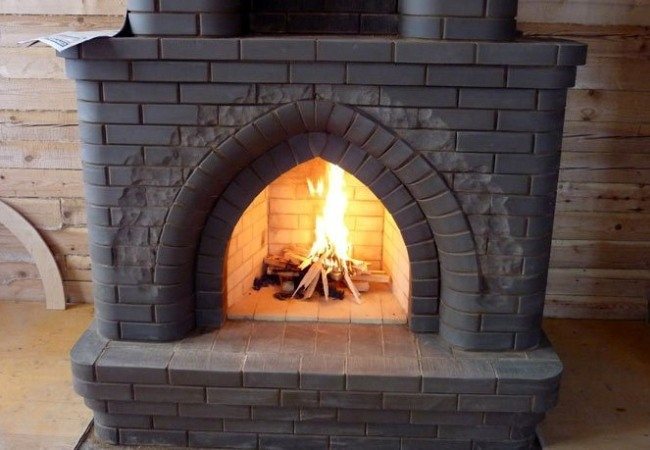
The fireplace system is ready for use again
The master will replace the nodal metal parts of the furnace, strengthen the structure with screeds, which will be masked with a layer of new plaster. With this approach, it will be useful to refresh the exterior with new materials.
Good to know: How to make a small fireplace with your own hands, step by step instructions
If the fireplace initially worked incorrectly, the flame was constantly extinguished during ignition, and at any of the stages the smoke penetrated into the room, then you need to analyze the structure. In this matter, for sure, only the master will say whether it is profitable to repair the fireplace or it is more profitable to break it and build a new one, in which all the shortcomings will be eliminated.
Routine repair: its possible causes and ways to eliminate them
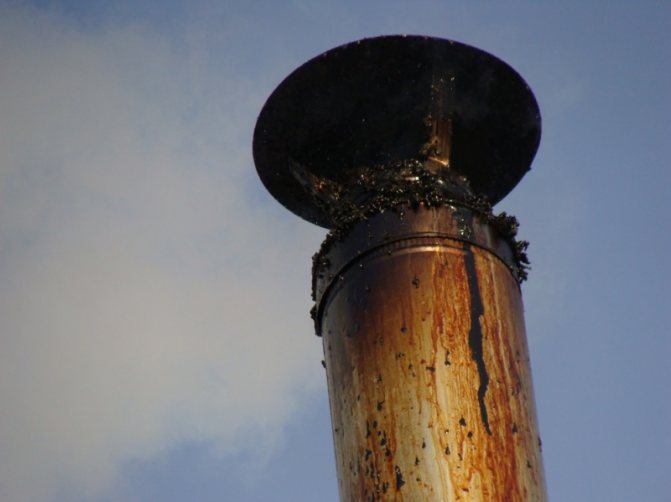
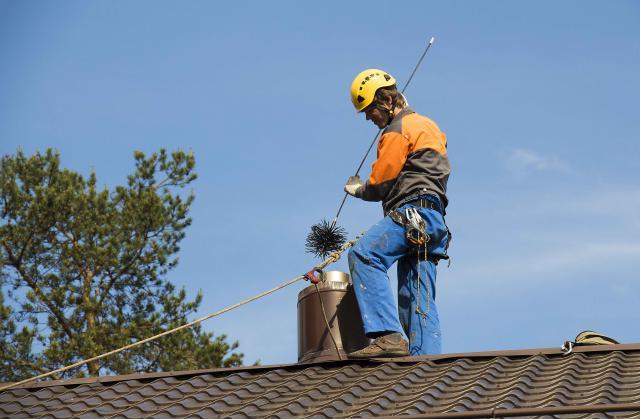
The first thing that makes it necessary to repair the stove is poor draft, as a result of which the stove begins to smoke heavily. The most likely cause of poor draft is soot deposits in the chimney and chimney. A soot layer of only 3 mm reduces the heat output of the oven by almost half. A thick layer of soot not only inevitably leads to an almost double overconsumption of fuel, but also significantly increases the risk of fire. Therefore, the passages in the chimney through which the smoke is removed and the chimney must be systematically cleaned of soot. For this, a long pole is usually used with a brush attached to the end or a large rag wound and tied. You can also use thick wire instead of a pole.

Diagram of the device of the Russian stove.
If the stove burns well in dry, warm weather, and when cold weather sets in, it starts to smoke, then the reason is most likely in damaged thermal insulation or insufficient thickness of the chimney or chimney. In this case, the passing gases are rapidly cooled, significantly reducing the thrust. The repair will consist of removing the old plaster and smearing all the joints in the chimney and chimney, and then plastering again, increasing the thickness of the plaster layer to increase the thickness of the walls.
Also, cracks and cracks that appear on the surface of the stove or chimney, through which cold air enters the stove, can also cause a deterioration in draft. Such a suction will inevitably lead to the fact that the fuel will burn poorly and the stove will smoke. Cracks must be eliminated. This is done using clay mortar.
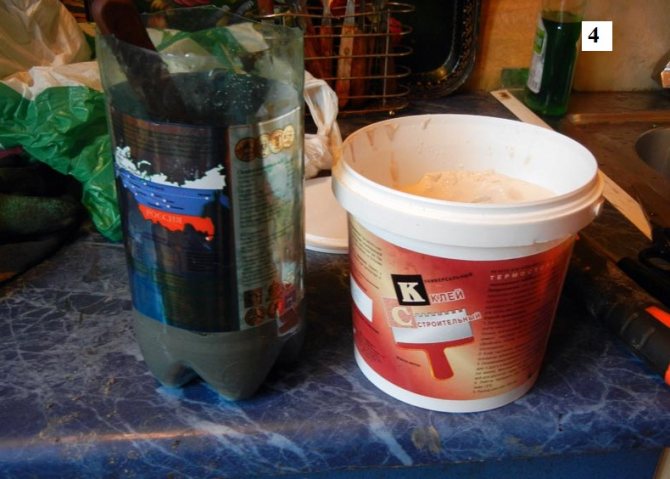
A few words about the preparation of clay mortar for repairing the oven.
The clay solution should not be made either too greasy or too skinny, since both types will inevitably take on new cracks, and efforts to repair the stove will go down the drain.
But if the components are correctly observed, then the composition practically does not crack upon drying and does not give precipitation. In this case, it is very important that the prepared solution is homogeneous, without lumps and without areas with one clay or one sand. To make the mortar more refractory and at the same time elastic, shredded asbestos fiber can be added to it. A properly prepared solution should be similar in density to sour cream.
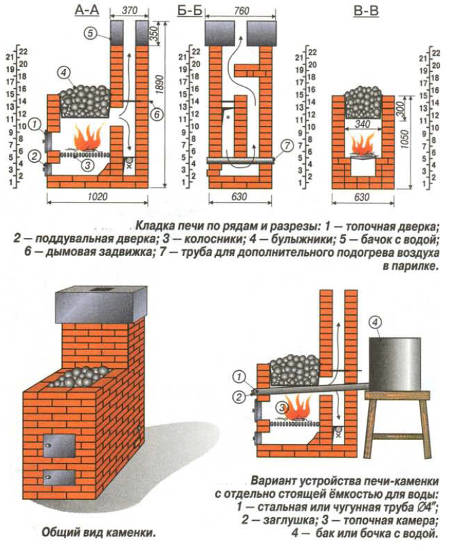
Diagram of the device and masonry of a brick oven with an open stove.
The cracks found in the brick oven are eliminated in this way: first you need to clear the crack and deepen it by 2-3 cm, after which the cleaned place is moistened with water and immediately rubbed with a solution. In this case, it is a prerequisite that the mashing process follows immediately after soaking. Even a small break is unacceptable here.
To carry out in-line repairs, you will need tools:
- mortar blade;
- trowel;
- scouring.
Independent work
Every time, as soon as it comes to the implementation of construction work, each of us begins to be interested in the question of the possibility of doing them with our own hands. It's not about saving money, it's the elementary pride of a person who believes that he has golden hands. In order to competently combine desire and capabilities, we list the situations when you can rely on your own strength.
Good to know: Fireplace shield, turnkey solutions and DIY
If you yourself made the laying of the fireplace, the installation of the chimney and the arrangement of the firebox, or at least took an active part in this, then a positive result is not guaranteed, but you can really assess your capabilities and quickly find the cause of the malfunction and a way to eliminate it. If from all experience there is only ignition of a finished fireplace, then it is better not to take risks and realize that only a masonry master can competently perform all the work.
If all repair work is classified, then you get three groups, which differ from each other in the complexity of the implementation and the required skill. It remains only to check which group the personal case falls into in order to prevent serious mistakes that will lead to more unpleasant consequences.
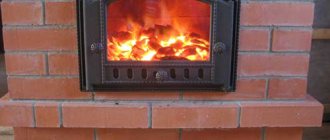
Fire in the hearth
- The first group is light work. This work should be done by every owner of the house who has a wood-burning fireplace. If you are not ready to service the device in the slightest way, then you should think about the relevance of the installation in general. The list of works includes cleaning of chimneys, repairing cracks, replacing a grate, cleaning an ash pan, repairing doors. These works should be started on their own, since it is impractical to attract outsiders due to the simplicity of the manipulations.
- Work of average labor intensity is often accompanied by partial dismantling of the masonry. This is the replacement of the lining, burnt-out metal products in the furnace, the installation of new bricks instead of the fallen ones, the removal of foreign bodies from the chimney. Here, each owner has two options for the development of events: calling the master, who will professionally repair stoves, fireplaces, or self-repair according to a strictly defined algorithm. It is not so difficult to recognize this type of repair work. If there were no complaints about the functioning of the fireplace for a long time, and suddenly it began to smoke, melt poorly, heat poorly, then the reason is not in the design, but in temporary malfunctions.
- And the most time-consuming work, which can only be entrusted to specialists, requires skill and experience. Moreover, if you made a fireplace with your own hands, then you yourself are a specialist, because no one knows the intricacies of the device better than you. Difficult work includes the elimination of various flaws in the design, if possible. The saddest option, when the fireplace will have to be completely dismantled, should not be ruled out.
Good to know: Which brick to use for facing the fireplace, choose the appropriate option
Typical questions when repairing a stove with your own hands
How to close up the cracks?
To begin with, the cracks must be cleared 20-40 mm in depth and all the old mortar must be removed. After that, the cleaned surface must be moistened with plenty of water. To clean the cracks, salt and asbestos powder must be added to the clay solution in small portions, after which all holes must be carefully rubbed with the resulting mixture.
How to replace a cracked brick?
Before laying a new brick, the cracked one must be removed from the seat and the place for the mortar must be cleared. The new brick must correspond to the size, otherwise after a while it will also need to be changed. The place of masonry and the new brick must be moistened with plenty of water, then spread with a clay mortar and put in place.
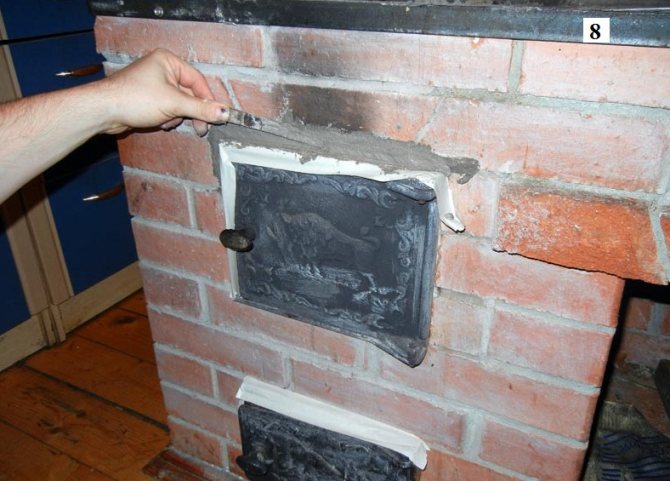
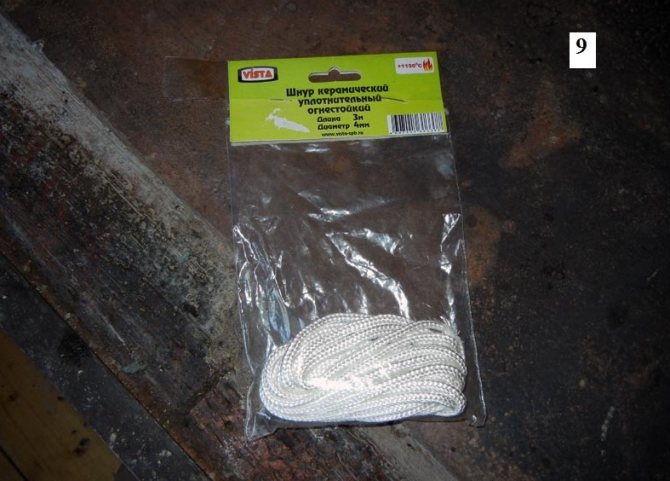
How to use ceramic heat-resistant cord?
Mostly cracks occur near the stove door. In order to compensate for the expansion of the cast iron fittings, a sealant is used - a ceramic heat-resistant cord. Feel free to check its quality in the store to avoid being counterfeited.
The area around the fittings must be cleaned and washed with a mixture of water and heat-resistant glue (1: 1). After that, you need to lay the cord around the perimeter and treat it with a solution, adding a small amount of heat-resistant glue or cement to it in advance.
If you have problems finding such a cord, you can replace it with basalt or felt.
http:
How long does it take to dry the stove?
In order for the masonry to be strong, a day after all the work, you can slightly melt the stove, thereby ensuring the gradual drying of the solution.
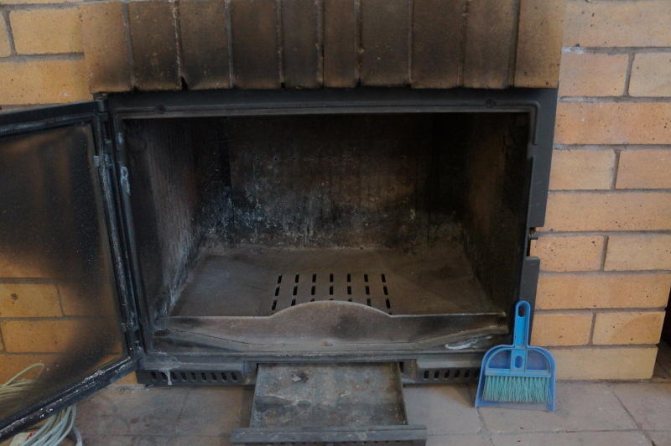
Chimney cleaning
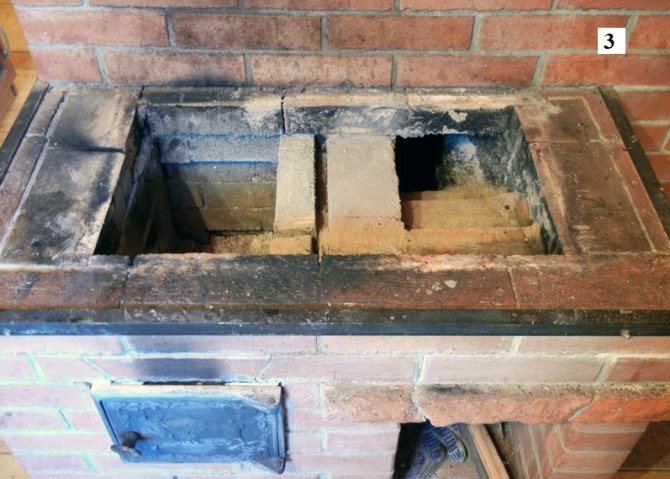
If the stove itself is in good condition, but does not work effectively, we will start repairing it with our own hands by cleaning the chimney ducts. To do this, you need to open special doors in the design of the stove. If they are not there, then bulges on the brickwork should be visible, which indicate the place of the knocked-out bricks. It is necessary to clean these places of plaster, if any, and carefully pull out the bricks.
This will open the inner passage of the chimney, which needs to be cleaned. Wielding a brush, a broom and a scoop, the soot must be collected and discarded. You can also check the thrust here. To do this, you need to light a piece of paper and bring it to the cleaned hole, the smoke should quickly go up.
Metal ruff
If necessary, do-it-yourself cleaning of the chimney is carried out from the roof. It happens that a broken brick clogs the passage of the chimney, and then it must be pushed from above with a long stick or weight tied to a chain or rope. And at the bottom, remove all the leftovers and debris in the revisions mentioned above.
You can also clean the chimney with aspen wood. This is if the chimney is only clogged with soot, and there are no pieces of brick. Aspen burns at a very high temperature and the soot can burn out.