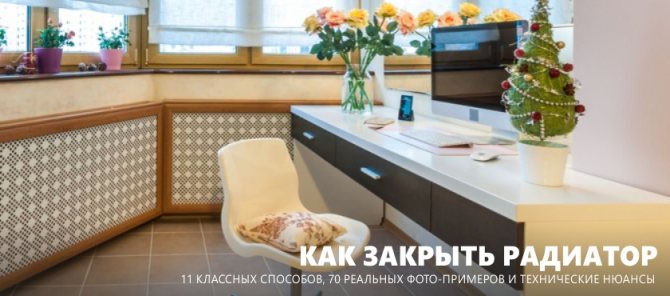
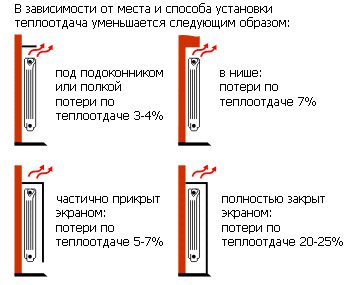
We have all seen that heating radiators in living quarters are located mainly under windows. And many are wondering: why should batteries be placed under windows? What is the reason for such a layout of the heating system? It turns out that this is not without reason - the radiators under the window openings actually work more efficiently and can heat a much larger area.
The kitchen along the window is not scary!
The eternal problem is the lack of space. Especially in the kitchens of old houses, where this room did not have enough space and most of them today are from 6 to 9 squares, which is very small. One has only to look at the photo of such a room, you immediately wonder how to arrange it correctly so as not to reduce the space and accommodate everything you need.
Some people solve this problem with quadrature by combining several rooms or by making a studio kitchen, that is, a separate corner for cooking and a living or dining area. This is a good enough option, but not everyone agrees, especially if the apartment is one-room. On the one hand, the kitchen automatically becomes visually larger, and on the other, you get the feeling of sleep in the dining room.
Alternative
Of course, you can save space with furniture. For example, put a kitchen island with everything you need for cooking or a small corner equipped with everything you need. However, this will not particularly solve the problem, especially if there is a large window and you want a wide window sill, which will also take up part of the space. There is a good option - to combine business with pleasure.
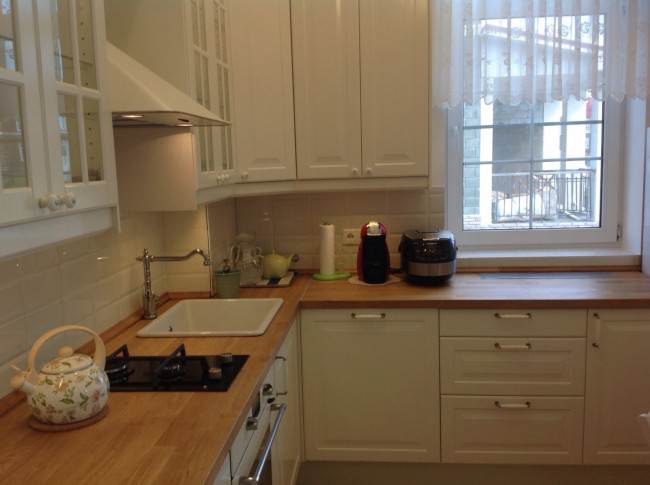
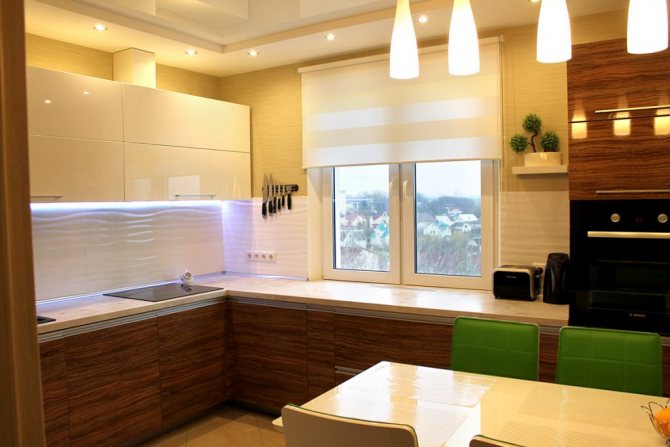
Placing the kitchen along the window is not a new design solution, but it is very popular. Especially when it comes to small spaces. Usually, the entire wall along the window is empty if furniture is placed on other walls. And it turns out not quite rational use of space. If furniture and interior items are placed along the wall with a window, then two others can be used to organize a rest corner and a dining area.
This option has one more plus - light and air. That is, it turns out, in the case of a strong child, in addition to the hood, you can open a window and quickly ventilate the room, getting rid of heavy odors. However, there is another side to the coin. In the case of the sunny side, bright light can interfere with cooking, therefore, if the decision to install the kitchen along the window is solid, you can close the window with special blinds or shutters to protect from the bright sun. Also an important detail in this arrangement of the room is the absence of curtains and curtains. They will not only be inappropriate, but also dangerous, because there must be a stove or hob nearby.
Battery
Another seeming obstacle to space conquest is the battery. It is far from a secret that in most rooms the battery is located strictly under the window. When installing furniture there, you need to come up with a good way out of the situation. Basically, you can go in two ways: difficult and simpler.
Battery transfer
It is rather a very difficult path. After all, it is impossible to do this independently, without skills, and most importantly, special equipment. More precisely, it is possible, of course, but the one who does it will be responsible for the consequences. In this situation, the old fittings along with the pipes are cut off. From the remaining ends of the pipes, special polypropylene or other polymeric products intended for this product are drawn to the right place where the battery will be located. Then everything is welded back.
Decorating
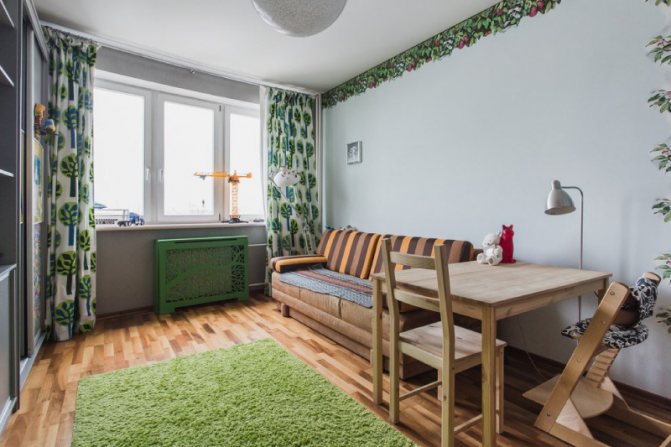
The furniture can be placed under the windowsill, leaving a gap for the battery. You can cover it with a decorative screen or decorate it yourself a little. For example, paint in an original way. If, for example, the color of the furniture is black or white, you can paint it in the spirit of a piano with keys, but if the kitchen is multi-colored and assumes the presence of bright colors, then it would be appropriate to paint the battery in a rainbow order.
Hide and forget
Another uncomplicated way can be disguising the battery, for example, under a false wall. To do this, it is enough to make a crate from a metal profile, and then tighten everything with drywall, leaving special ventilation or vents with doors. In this case, the wall will look pretty neat along with the furniture.
Conclusion
The placement of furniture is an important issue, especially with small rooms, so it is worth planning and thinking things over several times before proceeding.
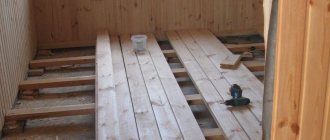
DIY wall decoration behind heating batteries
Recently I came across a topic such as decorating walls behind central heating radiators with my own hands. I want to share my experience, because there are nuances, and I think that they will be of interest to you.
Wall decoration behind the radiators. Think about the little things
It turns out that when people make repairs in their apartments, they completely forget that the decoration of the walls behind the radiators is just as important as the decoration of the main walls. And after finishing the work, they realize that the batteries, in fact, are not completed, the wall behind them is ugly, and of course it needs to be brought into the appropriate form.
Why is this happening? Here are some reasons:
- the heating battery covers a part of the wall, so there is no need to do something behind it;
- there will be long curtains from the eaves to the floor and the batteries will not be visible at all;
- decorative screens will be hung on the batteries.
It is difficult to disagree with these points, since they are absolutely fair. But, not every family is able to plan all future repairs, as they say, on a turnkey basis, and many little things are thought out along the way. For example, after the completion of the repair, it turns out:
- probably in this room with such wallpaper, blinds are better, or short curtains to the windowsill, and not to the floor;
- the room is relatively small in area, and if you hang decorative screens on batteries, they will look very cumbersome and steal space in the room.
So it turns out that the primary vision regarding batteries has changed. It turns out that there will be no long curtains or decorative screens. So what then? A terrible untreated wall behind the radiators, which is very visible in the absence of curtains? By the way, there are houses where there are 2 windows in the rooms. So 2 scary walls will be visible?
What is the difficulty, you ask? Just think of a small piece of a wall, it can be done in a couple of days. However, this is an erroneous, at first glance, opinion. If the wall behind the batteries is really crooked or with potholes, then you can't just stick the wallpaper on it, most likely it will have to be leveled at the very least, which means you have to fiddle with the primer, and with plaster, and with putty. Read my detailed article on preparing walls for wallpaper. After gluing the wallpaper, you need to remember to cut out and fix the baseboards, which are solid external and internal corners under the batteries. The worst thing is that if your major repairs have already been completed, then the apartment is relatively clean. And just imagine, in a mini-version you actually have to repeat the entire repair from start to finish with a small piece of the wall.
True, I can reassure you a little, because there are certain assumptions that will still allow you to reduce the time. So let's get started. In parallel, I will take into account the time spent on such repairs.
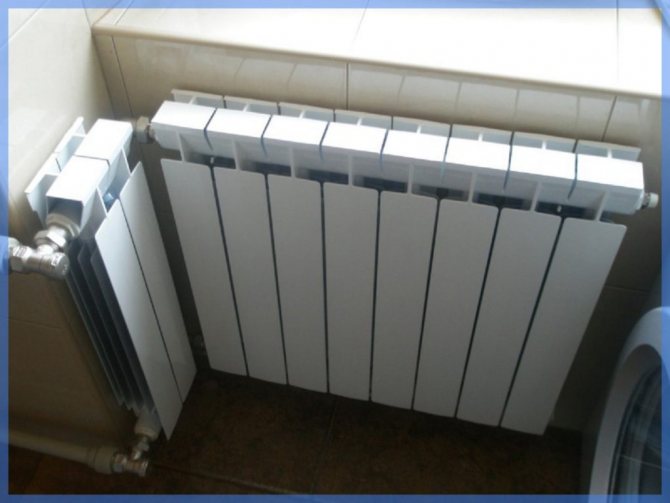
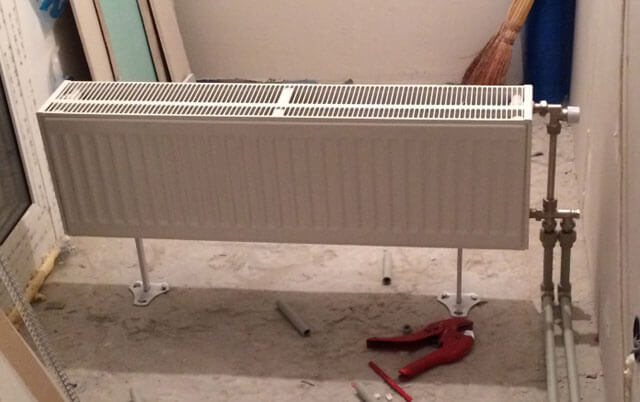
Dismantling the heating battery
The first thing to do is to remove the radiator.Although a jumper (bypass) is installed in front of it, and by shutting off the taps, you can independently carry out dismantling, you still need to take into account one point. If the heating in the apartment is not turned on, then you can remove it yourself, but if the heating has already been supplied, then who knows, in what condition you have ball valves that shut off the battery. What if they leak over time? In this case, self-catering can turn into a big trouble both for you and for your neighbors, and it would be better to call the master.
It is necessary to prepare a place for future repairs, purchase the necessary materials and tools. Plus, call the wizard to remove the battery and do not forget to include the time for the wizard's work itself. We plan for everything for 1 day.
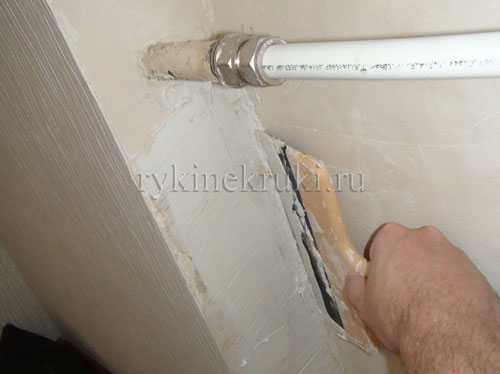
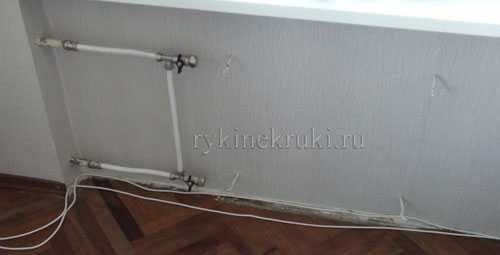
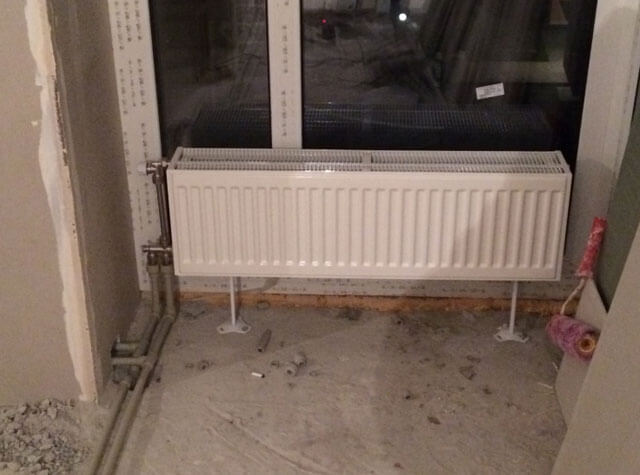
After the work of the wizard, we will see the following possible picture:
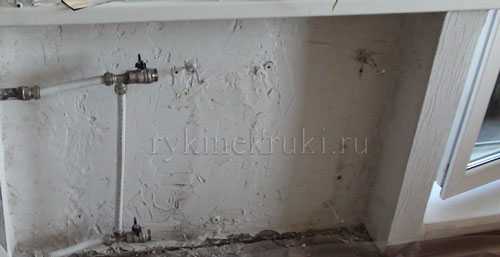
Initial treatment of the wall behind the battery
In the picture above, you can clearly see that the wall behind the battery has not been processed. If this is the first time you remove the battery, then most likely there will be not a white, but a gray dusty wall with old stubborn paint. It is clear that you cannot immediately glue the wallpaper on such a wall. If you decided not to glue the wallpaper, but to make the wall cladding a decorative panel, as can be clearly seen in the pictures in the article Correct installation of a central heating battery in an apartment, then in any case, the wall needs to be processed at least in order to remove the smells of old walls and old repair (advice from my personal experience).
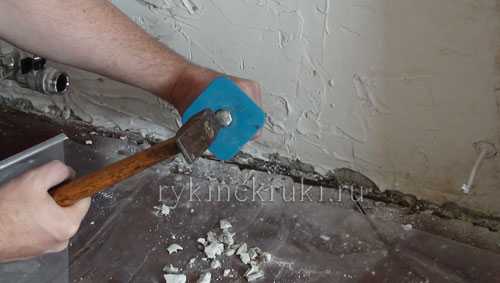
So where do you start? We begin to beat off the extra bumps on the wall, the remnants of old putty and paint with a hammer and chisel. Especially we pass in those places where the plinth should be attached to us. Planned time about 1 hour:
Then it is imperative to remove all debris and prime the wall (see the Primer for walls heading).
We prime the wall 2 times. The priming itself takes 10 minutes, but the drying time for each of the layers is 1.5 hours.
Total: cleaning + wall priming + drying time is about 4 hours.
How to plaster behind a battery
Next, you need to align the wall. From our initial picture, it is clear that the wall will have to be plastered. It is in this place that you can breathe out once with relief: it is not necessary to plaster on the lighthouses! Even if you lie a little and make a slight curvature, then it will definitely not be visible under the batteries. Therefore, we take plaster and begin to level the wall by eye. I have a separate section on How to plaster walls.
We take about 3 hours to prepare the plaster solution and the work itself (for a non-professional):
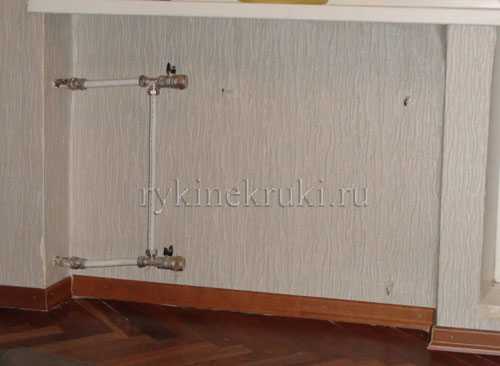
And now an important point that many people forget. The plaster takes a long time to dry. 2 to 7 days. (if, of course, we want to do everything according to the correct technology). It all depends on the thickness of the plaster layer, the season, the dampness of the room itself. But still we take an average time of 4 days. A sign of complete drying of plaster, for example, gypsum Rotband, will be a change in the color of the wall from cream to snow-white, as will be seen in the following picture:
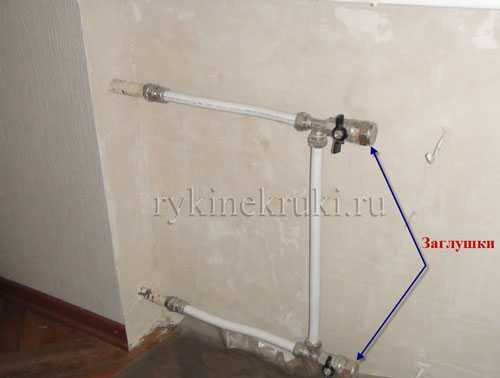
Yes, I almost forgot. If you are making repairs during the heating season, then I highly recommend that you install plugs immediately after removing the battery for your own safety. It is important to read about this here.
How to putty behind the battery
As soon as you have received a snow-white wall, you need to prime it once (we take 2 hours to dilute the primer, apply it, and dry it) and immediately proceed to the putty. Here you can also do it easier than we did when filling large walls. It is not at all necessary to buy a dry mix and prepare it. It is quite possible to do with ready-made putty. This will significantly save time:

| By reading my blog, you are probably making repairs. Add to your bookmarks this page... All useful home improvement stores are located here. |
The putty is applied in a thin layer. I think in 1.5 hours you can do it quite well:
Drying time of the putty is 1 day. The second time, I think, is not worth puttingty.
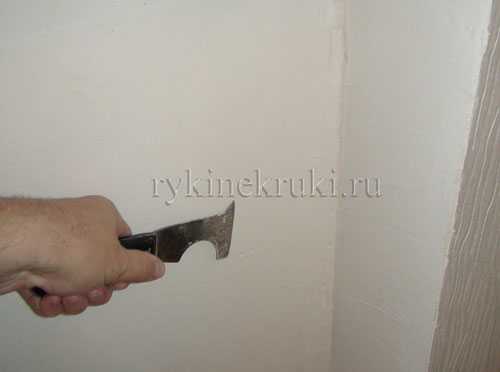
How to sand walls behind a battery
Now there is one more important nuance. After the putty, if we follow the right technique, we have to sand the wall. But do not forget that sanding with sandpaper is a sea of dust. But the main repairs have already been done. Therefore, here you can go for a simplification, as in the case of plaster without beacons. We will not sand the wall with sandpaper. We'll just take a sharp spatula and cut off any excess filler micro-bumps. Dust will be minimized, and the wall will still be smooth enough. Even if the wall does not work out perfect, then for the case with batteries, as they say, it will do. Works for 0.5 hours:
How to glue wallpaper behind a battery
Now we prime the wall for the last time (again 2 hours together with drying) and you can start pasting the wallpaper:
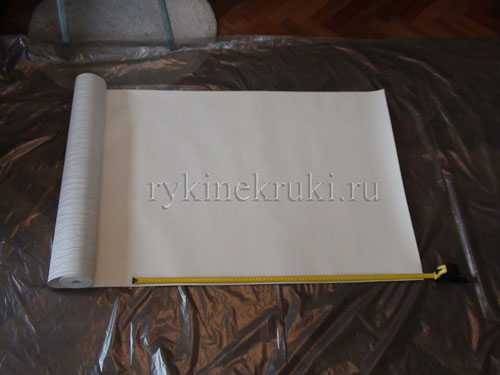
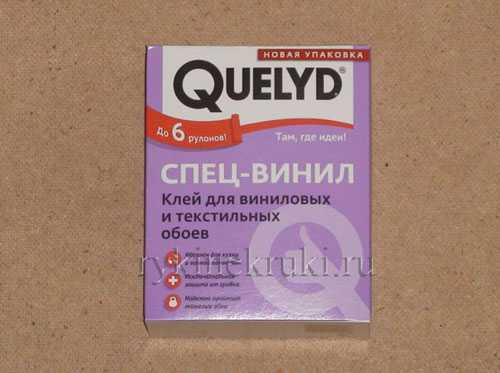
We select the glue that is suitable for this type of wallpaper. For example, in the picture, you see paper-backed vinyl wallpaper. This glue is suitable for them:
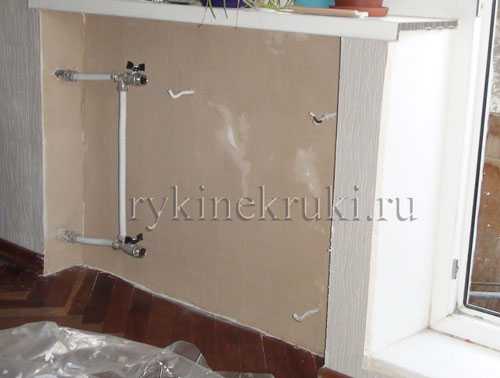
We prepare the glue according to the instructions and glue the wallpaper. We take 0.5 days for pasting, taking into account the preparation of glue, marking the rolls and pasting. There is an important comment on gluing panels. You need to glue one sheet on one side of the niche under the battery, and start gluing the second sheet on the other side of the niche. This is done so that the seam is exactly in the center of the battery, and not somewhere where it will be clearly visible, since our battery does not cover the entire niche:
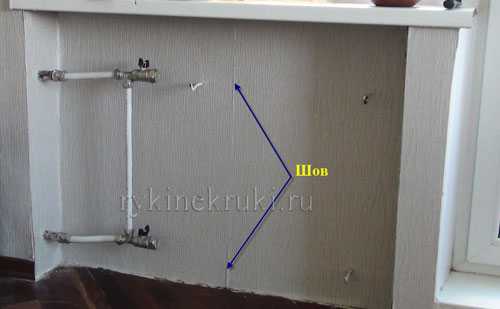
If the niche is long, then we begin to glue the canvas on one side, the next to it end-to-end, but on the other side of the niche we also glue one canvas:
How to attach a skirting board behind a battery
After pasting the wallpaper, you can immediately start marking the plinth, where possible wires will be hidden. The main problem here is that the corners are solid. You will definitely need a miter box and a saw. But I have a very detailed article on this topic, so just take a look at it: How to attach a skirting board. Allow 0.5 days for the baseboard. You need to measure everything, cut off all the corners correctly, then drill the wall with a puncher in the right places, drill the plinth itself and attach it to the wall.
Heating radiator installation
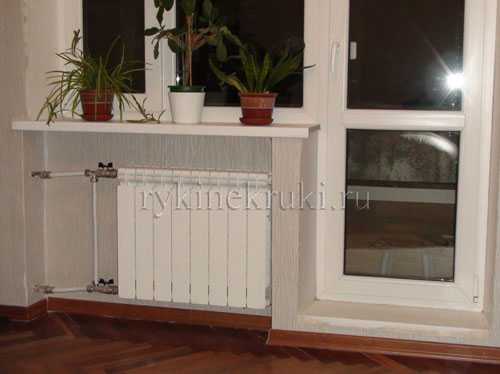
So, everything is ready, and you can invite the master to hang the battery in place. Now, if you can probably remove the battery yourself, then hang it back - it is better to entrust the master. I highly recommend not doing it yourself. If you don’t twist pipes every day, don’t wind flax on threads, then you don’t have this skill. You do not know how much flax you need to screw in and with what force to tighten the nuts, but this work is very responsible:
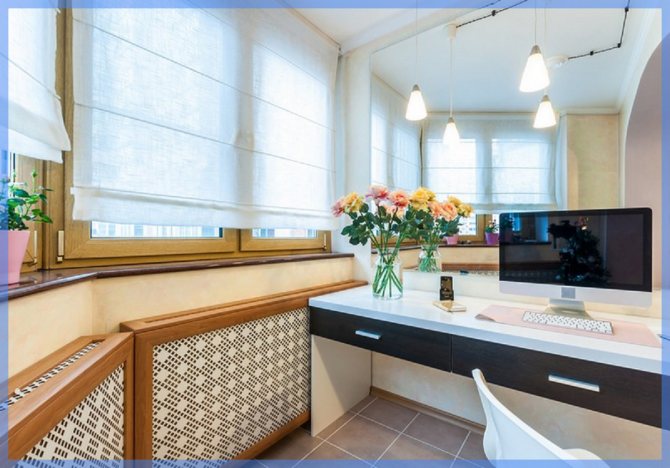
Well, everything is ready, you can arrange flowers on the windowsill and admire your work:
Summing up on wall decoration behind radiators
Washing under the window
This layout option allows the hostess to admire the view from the window, and also disguises the radiators in the room. When placing the sink next to the window, you need to carefully consider the details before starting the installation.
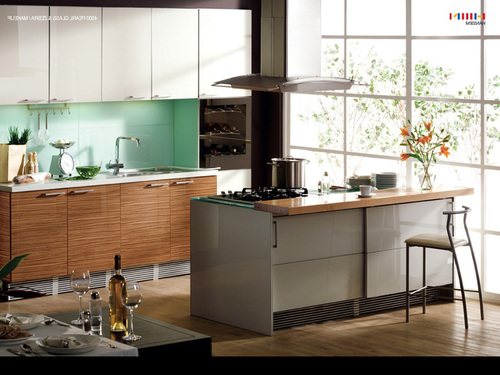
On the island part there is a hob and a cooking zone. The right overhang of the furniture structure can be used as a small bar counter.
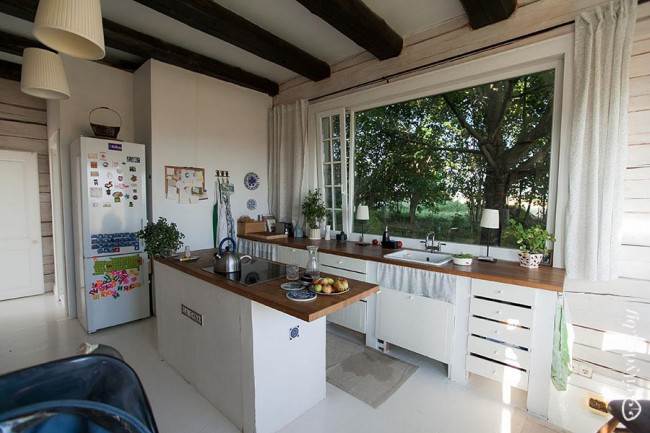
Country style kitchen with an island and a work area near the window
Choose a compact mixer, otherwise the tap will interfere with the opening of the frames. It is better to purchase a model in which the water flow is directed downward so that moisture does not get onto the windowsill.
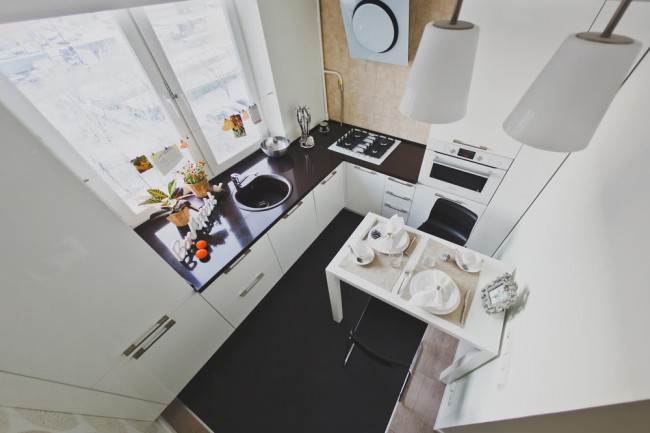
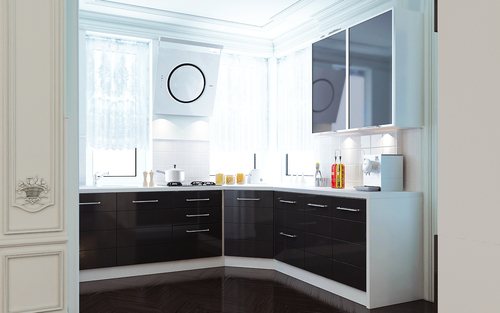
Minimalist corner kitchen with black countertop
Roller blinds are a color accent in this interior. They do not take up much space and close the opening from the sun, if necessary.
Bright roller blinds in the country style kitchen
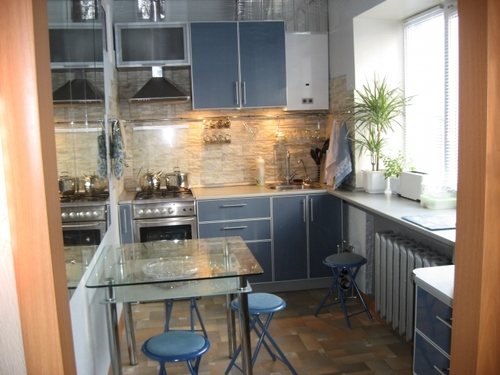
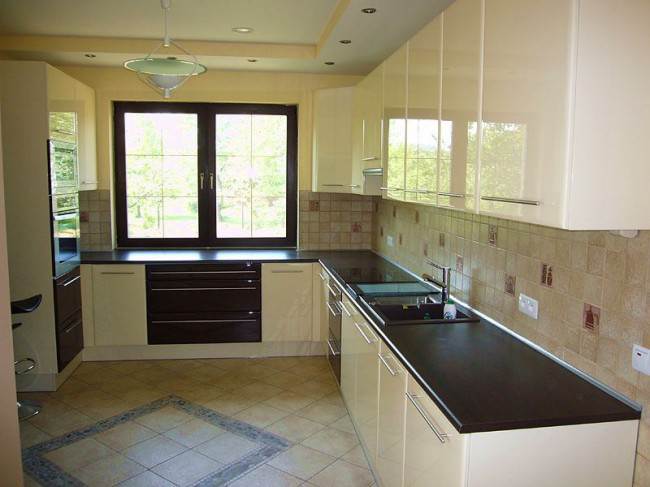
U-shaped set with a sink near the window opening. In order to wash the dishes with comfort, a recess for the legs was made in the basement part.The crane with a high spout does not interfere with the opening of the frame, due to the sliding glass unit system.
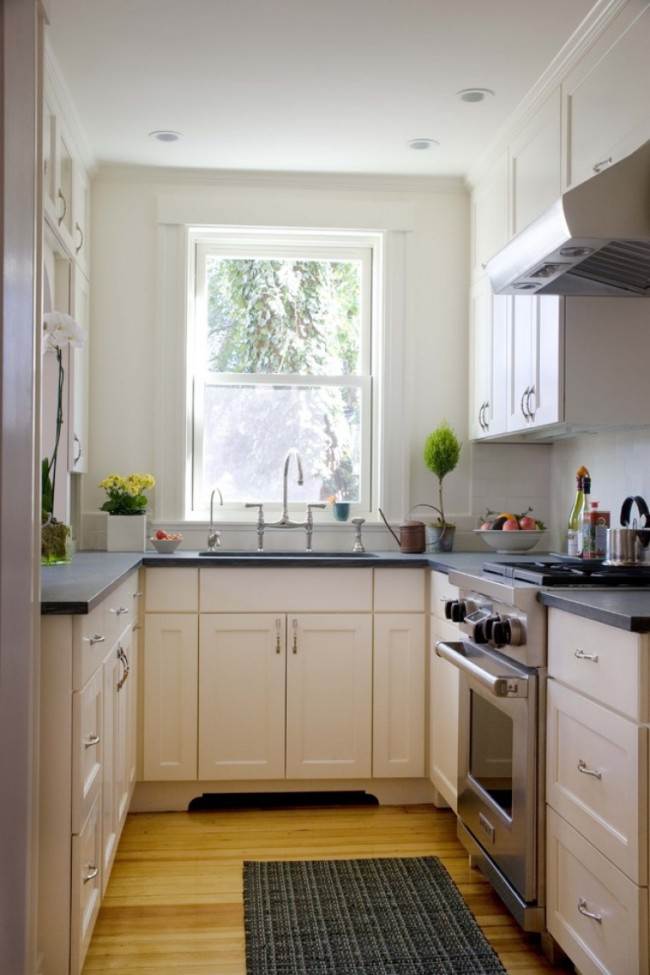
White u-shaped kitchen with a sink near the window
An additional lamp was made above the sink, which is useful only in the dark.
Work surface along the window
If the battery under the window is closed, the ideal option for heating in this case is the "Warm floor" system, or a compact convector installed under the countertop. Thus, the cabinets will not impede the flow of heat into the room.
The depth of the cabinets, in the part of the window opening, can be made less than the standard 600 mm. In order to place the dishes, 400 mm is enough.
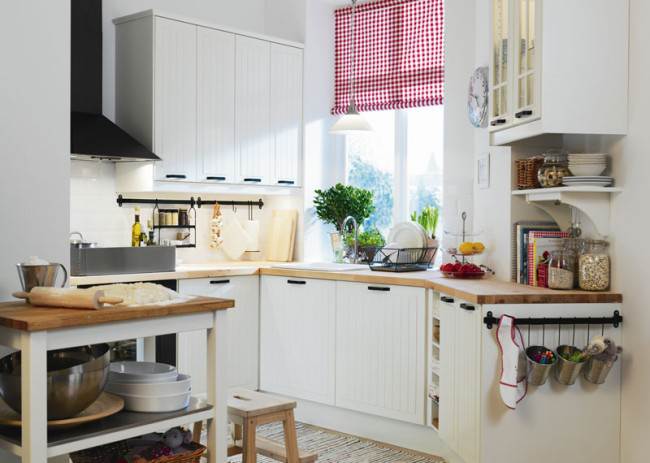
Working area next to the window in the country-style kitchen
If you want to complement the country-style with an elongated curtain, give up the piles of textiles. It is better to choose a small tulle in combination with one long curtain, as in the example of the realized interior.
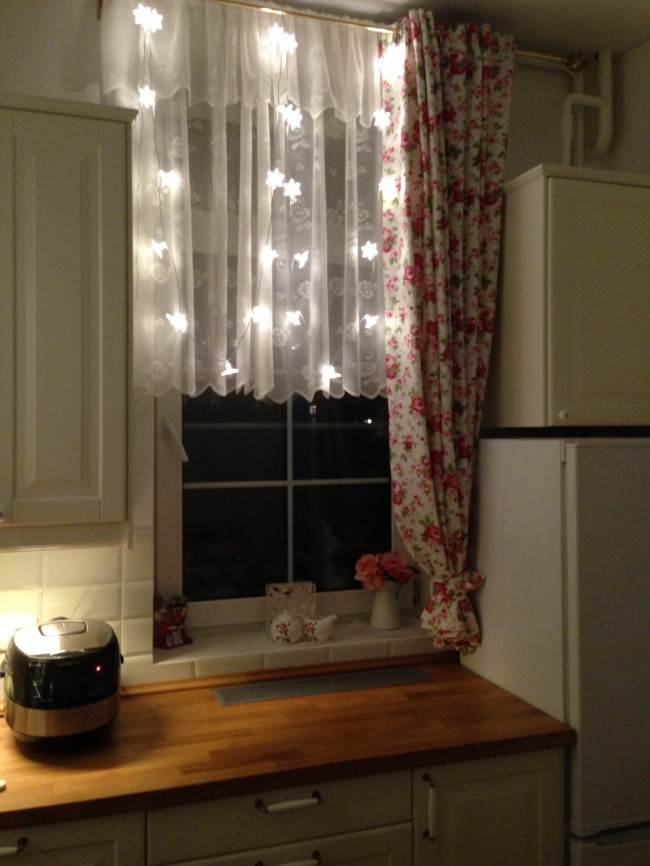
Window decoration with textiles next to the work area
For a miniature room in a Khrushchev, using the area near the window opening is an excellent option to accommodate all the necessary functions and make a full-fledged kitchen.

A wood-like countertop is used as a work surface; you can also make a dining area here. Since there are no lower modules in this part, it will be quite comfortable to sit at the bar counter.

Bar counter under the window in the kitchen
The spacious work surface allows the whole family to cook in the same kitchen without interfering with each other.
Dark wood texture in interior decoration
U-shaped set with a large working area near the window.

Continuation of the working area of the kitchen flush with the windowsill
Practical blinds in the design of the U-shaped kitchen with a bar counter.
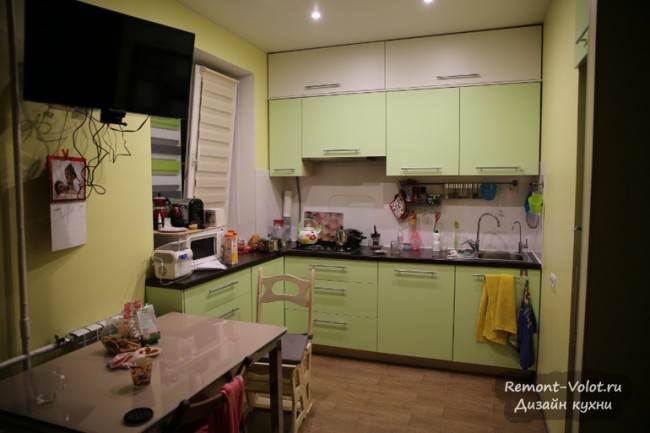
White and green set with a working area instead of a window sill
Classic curtains take up a lot of space and will get in the way in the work area. Better to choose blinds, pleated blinds, roman or roller blinds. This design can be combined with any style in the interior by choosing the right material and shade.
Eco-style kitchen with spacious work area
In a narrow room, it is better to refuse swing doors. For convenience, construct the lower tier from modules with drawers. This option will allow you to sort all the items into different departments.
Heating radiator installation
The main way to adjust the required distance to the walls is a high-quality and competent installation of heating devices with your own hands or with the help of specialists. Let's dwell on this aspect in more detail.
Installation of floor views
This mounting option is optimal for products with a high weight and made mostly of cast iron. Such batteries are equipped with removable or stationary legs, which are fixed to the floor. Depending on the base material, fastening can be carried out with self-tapping screws for wood, self-tapping screws and plastic dowels, dowel-nails.
The wall bracket is also a necessary element of the floor heating installation. It is set to the required height, which is defined as the desired distance from the floor to the upper longitudinal radiator pipe, taking into account the gap. With the help of fasteners and marking the places of their installation, the optimal distance to the floor, wall and window sill is achieved.
We hang a wall radiator
Each heating device is completed with one or another type of hangers used for installation on walls. The material and strength characteristics of the brackets must correspond to the mass of the heating battery, taking into account its filling with a coolant. Otherwise, the system may leak.
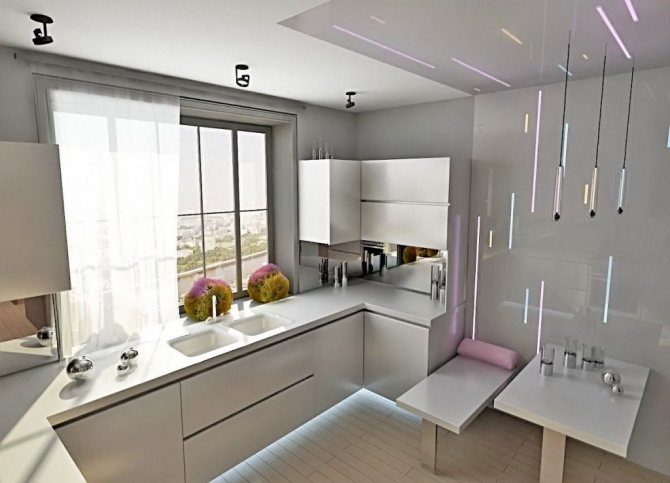
Kitchen along the window [15 ergonomic options for the home]
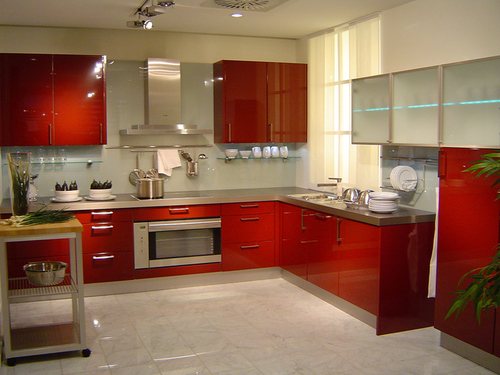
Interior in modern style
The work area located along the window is not often found, for which there are several reasons in the form of a battery and the lack of the necessary access to the window.However, in some situations, such a design is the only way to get the most optimal solution for organizing space. In what cases is the location of the kitchen set along the window justified and does such a kitchen layout have its own characteristics?
Large windows fill the kitchen with natural light
Layout advantages
Owners of a small area of 6-9 sq. m every centimeter of space is important, in such a situation it is simply not possible to leave a corner unused. And for the owners of a narrow kitchen to put a set along the wall means making it even narrower. In this case, the location of the working area along the window will help balance the elongated size. In addition to the forced necessity, this design has some advantages:
- Functionality.
In a small room, the use of space along the window makes it possible to increase the area of the headset without cluttering the space. - Stylishness.
Abroad, the layout of the kitchen under the window is very popular. This design meets all modern trends and looks super stylish. - Window
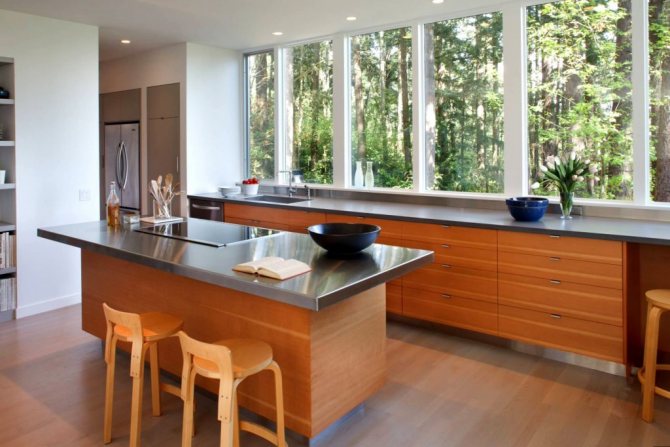
can also be used by enlarging the worktop with the window sill and thus expanding the working area. - Lighting.
By working next to a window during the daytime, you get natural light in the kitchen and a great view from the window at the same time. Isn't it more pleasant to look at trees than at a blank wall? - Originality.
How often can you find such a layout? The use of a window will make the interior more modern and unusual.
The use of space by the window will make the kitchen visually larger
Spectacular idea with mirrored inserts
Advice! Do not place under a window
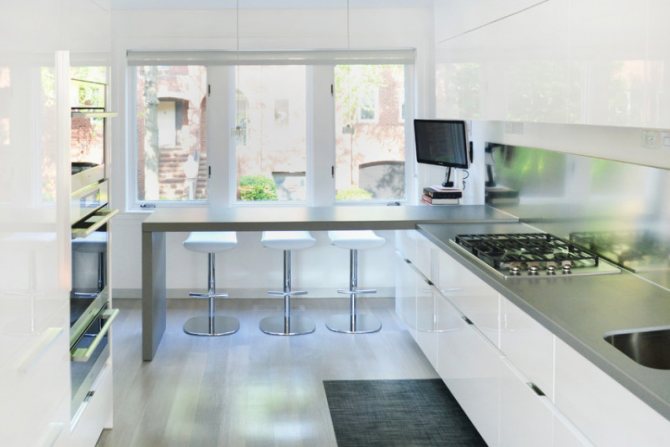
hob.Install the hoodand it will be difficult to comply with all safety rules in this case. There are more interesting ideas for using the window.
Table top
In a small kitchen, worktops a, located along the window, is convenient, functional and beautiful. Such a design requires adherence to a certain rule: the work surface must be flush with the windowsill.
Advice! When planning to use a window, make sure that the continuation of the countertop looks harmonious. Before proceeding with the repair, you need
calculate the dimensions of the headset
.
The window sill can be used as part of the work surface
The standard layout involves placing the battery under a windowsill. If this is your option, then when installing the countertop under the window, the radiators will have to be moved. There are usually cabinets under the work surface that store kitchen utensils. When choosing a headset, it is always worth starting from the area of \ u200b \ u200bthe kitchen.
For example, a small room is great for a worktop that transitions into
bar counter... And the medium size allows you to make it a separate work area without combining withdining room
.
Table top that turns into a dining table: convenient and practical
When implementing such a design project, it is required to leave free space so that the window sashes can be easily opened. It is enough not to clutter the surface with tall objects and accessories. If this is not possible, install sliding doors that open in the same way as a wardrobe.
Advice! For very small spaces, they are often used
folding tabletops- they are conveniently adjustable and allow you to free up space
.
Delicate decoration in pastel colors
Advice! If the kitchen area allows, you can install
corner setalong the window. Such a solution is notable for its beauty and convenience, especially if there is not only one window in the kitchen.
Battery under the window
If the radiator gets in the way and prevents you from achieving the desired design, there are several solutions to consider.
- Replace the battery withwarm floorcompletely removing it.
The advantage of this solution is the ability to use different headsets without adjusting them to the installed heating. But not any floor covering can be insulated, besides, costs will increase. - Move to another wall.
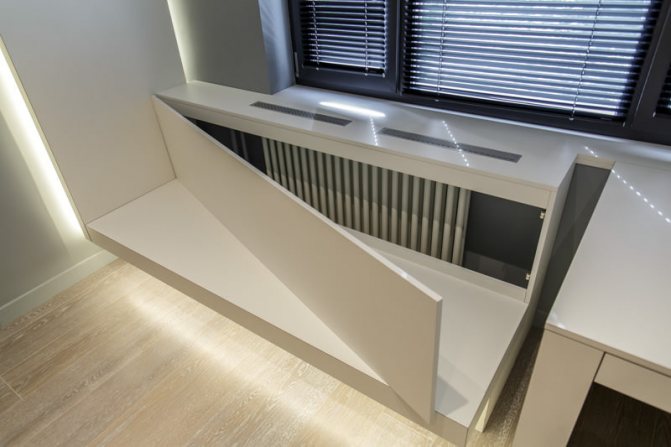
Moving the battery will also require additional costs, but access will be open and the headset will fit without any difficulty. - Make a box under the battery.
This option is suitable if a sink is planned to be installed under the window. Drawers can be tricky, but as a last resort, opening doors can be used. - Sink the radiator deep into the wall.
This will require partial demolition to free up space. At first glance, the option seems laborious, but a specialist will do everything in a few hours, and the cost will be lower.
Small stylish kitchen
Choose the best option, taking into account all the features of your kitchen, layout and wishes. If in the apartment the battery is already located in the wall, then it will be easier to create a kitchen design to your liking.
What should be the screen for the battery
Heating batteries give off heat to the environment by means of radiation of thermal energy and direct heat exchange with air, which is facilitated by active convection of air in the room. The screen for the radiator, ideally, should not at all affect the efficiency of heat transfer. When choosing a suitable design, negative effects on heat transfer should be minimized.
Based on this requirement, a number of rules can be expressed that must be taken into account during manufacture:
- The presence of a ventilation gap at the bottom of the radiator width for air access to the radiator surface is at least 7 cm.
- The presence of a ventilation gap on the top along the width of the radiator is at least 10 cm for the release of warm air.
- The distance from the extreme part of the radiator to the front panel of the screen is at least 5 cm.
- At least 50% of the front of the screen is gaps. For any selected lattice, more than half of the area is made up of through holes.
- The entire inner surface is painted black.
- A heat-reflecting screen is mounted on the wall behind the heating radiator.
- The construction is made removable, at least the front panel, for access to the radiator.
If there are thermostats on a siphon-type radiator, they should not be closed even partially, valve isolation is allowed, but the siphon should be outside the screen.
If these simple rules are not followed, the heat from the radiator will accumulate under the screen and, most likely, will return to the coolant, go into the return line. The power of the radiator will decrease, because it directly depends on the temperature difference between the coolant and the air in the room, as a result, less heat will enter the apartment.
Design
The screen for the radiator can have several versions, depending on the location of the radiator and the design of the niche in which it is installed.
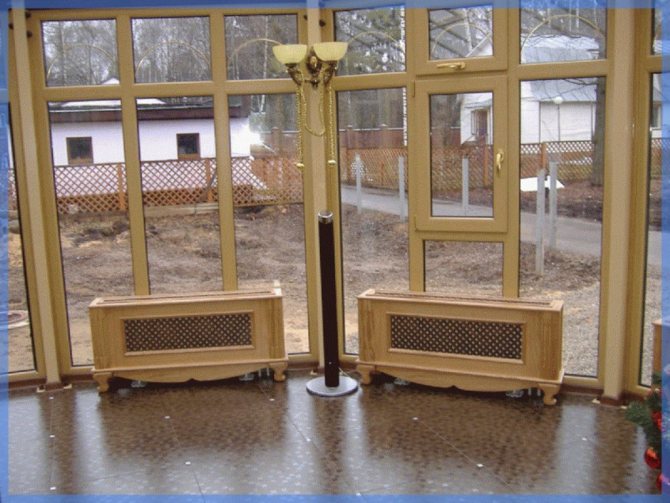
One-piece screen box. For a radiator located on the wall without sinking into a niche or strongly exposed to the inside of the room.
An overlay screen from only one front panel, if the radiator is completely recessed beyond the border of the niche under the window and sill.
A plasterboard false wall with a grill opposite the radiator.
In the first case, the most versatile option is obtained. If you understand how it works, you can reproduce any other option required in a particular situation. A frame is assembled along a frame made of wooden bars or a metal profile of the smallest size in cross-section, which is subsequently sheathed with decorative panels and a grill in the front part.
In the side walls, slots are made for pipes that fit the radiator, or the screen expands enough to completely hide the outlets of the pipes, if they were originally laid inside the walls. Mounting is carried out to the wall behind the battery, for which hanging loops on the screen and a bracket on the wall are used.
The required clearance from above can be hidden from view by placing an additional shelf made of laminated MDF above it. It should be spaced from the screen by the width of the gap itself, that is, at least 7 cm. This is quite enough to visually hide the radiator. The shelf will be a nice and useful addition to the battery decor.
Separately, it is necessary to stipulate the features of screens mounted in plasterboard false walls. It is not enough to simply position the grille opposite the radiator. It is necessary to limit the space around the radiator from the rest of the space behind the false wall. For example, by wrapping the edges of a metallized polyethylene foam heat-reflecting shield, secure them to the back of the drywall. On the upper and lower parts of the grille, respectively, above and below the radiator, ventilation gaps are necessarily formed, which are finished with plastic trims from PVC panels.
Rest zone
Placing a dining table or a small sofa by the window is a great option for a medium-sized kitchen of 9-15 square meters. m. If the area does not allow combining the kitchen with the living room, then you can create a dining area in the kitchen. As a rule, it is better to place a table with chairs by the window. Also, this design project is suitable for a small kitchen with two windows. So, on the one hand, there is a working area, and on the other, a dining area.
Great option for placing a dining table
There are a little more opportunities in the design of the window in the recreation area, because beautiful curtains to the floor are quite suitable for tea drinking, indoor plants will look great on the windowsill. It can be done in the same style as the work area, or become a bright spot.
For example, for
scandinavian stylethe addition of blue, gray or cherry shades is characteristic to make the white kitchen even more contrasting and light
.
This option is especially relevant if there is no loggia where you could spend time, relax and eat. If necessary, in such a kitchen, you can even install a table by making a mini-cabinet.
Advice! Consider an option
L-shaped layoutby placing all the furniture along the blank wall and capturing part of the wall with a window. Such a design will help save space and visually expand the space.
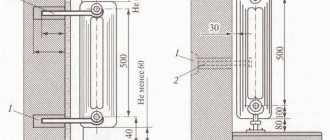
How to determine the required distance
Many construction work carried out inside residential premises is regulated by building codes and regulations (SNiPs). There Is A SNiP And For The Installation Of Heating Batteries.
From it you can not only find out what distance between the wall and the radiator must be observed, but also other parameters of its installation:
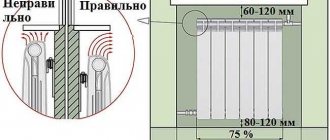
- the device should be located directly under the windows so that the centers of the opening and the battery coincide;
- the width of the heater should not exceed 70% of the width of the window sill, if any;
- the distance to the floor should not exceed 12 cm, to the windowsill - 5 cm;
- the distance to the wall is within 2-5 cm.
Features of the arrangement of devices
There are several parameters that affect the selection of the optimal clearance. Most often, it is influenced by the material of the walls of the house and the size of the window sills. In some rooms, you can observe an unsightly picture when the batteries protrude significantly beyond its limits.
Note! A significant reduction in the gap between the wall and the heating system devices is facilitated by additional surface treatment of vertical structures with special heat-reflecting materials, the price of which is affordable. These include foil insulation or aluminum foil screens.
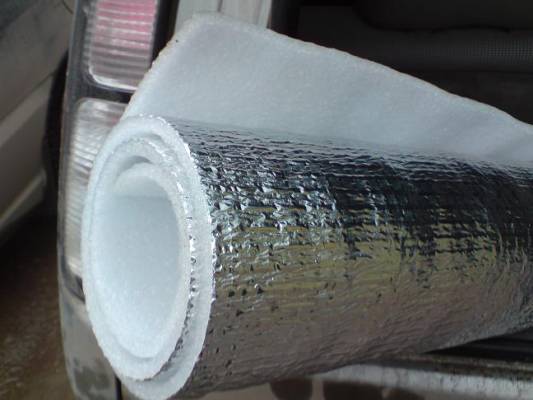
Foil heat insulator
Kitchen design along the window [10 photos] ✅️ Super ideas and recommendations for the interior!
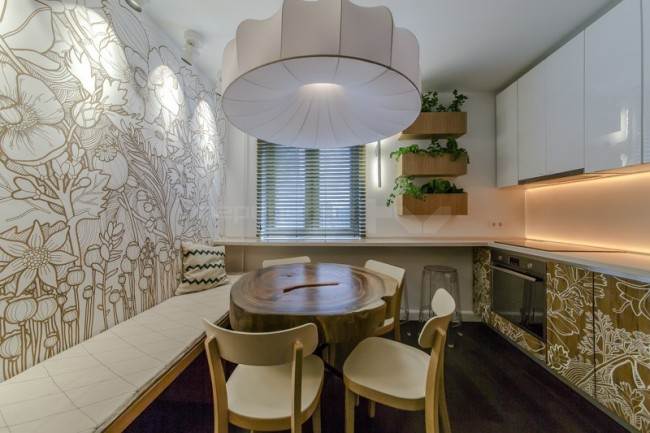
It is not so easy to decorate a small kitchen, but then a horizon of fantasies and interesting ideas opens up in order to use all the space as advantageously as possible. Therefore, the place near the window also has to be taken into account. How, then, is the correct arrangement of furniture?
What can and cannot be placed along the window? Let's take a look at a few ways that will help you and push you to come up with interesting ideas for the use of space of your own.
Kitchen with sink by the window

How can you diversify the routine of washing dishes? Of course, install a sink under the window, then you can admire the surroundings, and besides, save on electricity, since you will have enough light during the day.
Of course, if you do not live in a private house, but in an apartment, then some effort will be required, since it will be necessary to lengthen the water communications from the drain riser and build it into the window sill-countertop connected to the headset.
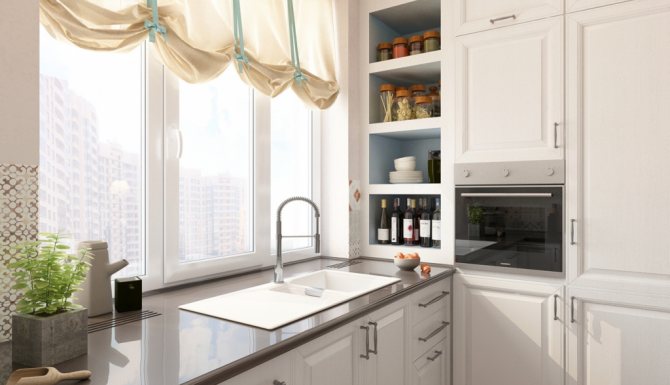
When choosing such a design solution, keep in mind that walls and slopes must be treated with an antiseptic primer so that mold does not appear. In the worktop, arrange a ventilation grill to circulate air from the radiator to the glass.
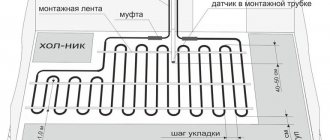
Radiator placement guidelines

The efficiency of the radiator depends on its location
Experts pay great attention to the correct location of heating devices. In this case, the room will be heated with the greatest efficiency.
Basic recommendations for choosing a location for installing batteries:
- For high-quality air circulation around the battery, it is necessary to maintain a distance of 3-4 cm between the heat-insulating layer and the heating device. With a decrease in this gap, air exchange becomes more difficult and the efficiency of the system decreases.
- If it is impossible to create insulation, the inner surface of the wall is covered with a layer of foil. It serves as a heat reflector that directs flows into the room.
- When installing batteries under the window sill, a gap between the radiator and the floor of up to 10 cm must be observed. The distance from the radiator to the window sill should be at least 8 cm. This is due to the fact that the board is an obstacle when the warm air rises upwards.
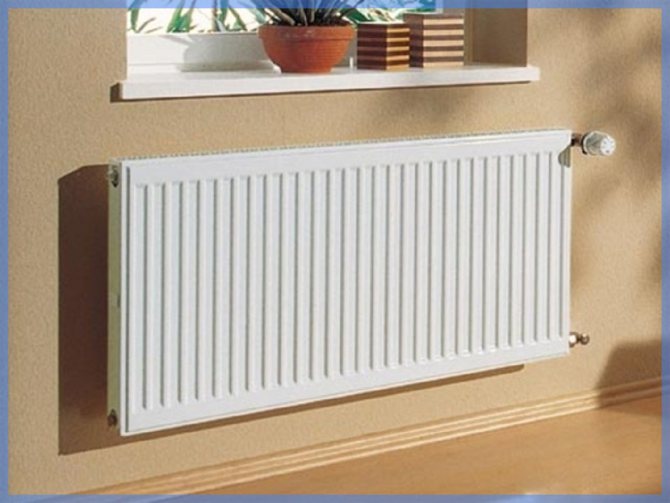
- If the house has large windows, batteries 30 cm high are used. Then condensation will not form on the glasses.
- The radiator is installed at a 90 ° angle. If abnormal, air will accumulate and corrosion will form.
- The battery should be installed exactly in the middle of the window. Then it will cut off the streams of cold air and will not allow them to penetrate into the room.
Recommendations

- Choose deep sinks for your design, otherwise your window will be constantly splashed by water.
- Decorate the space between the window and the sink with indoor flowers, they will have enough light, and most importantly, you will not forget to water them.
- Although daylight will be enough for you, make sure that the sink is illuminated.
- When choosing curtains for such a window, it is best to stop at those that have a lifting function.
Dining area by the window
If for you the most important thing in the space of a room is not a working area, but where you can sit with the whole family and have a meal, fly away with your thoughts somewhere in your cherished dreams and, plus, get aesthetic pleasure from beautiful curtains, then be sure to organize a cozy dining area.
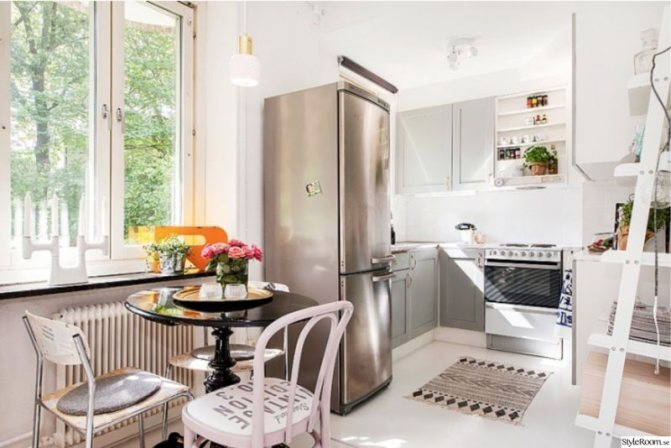
If your space allows, then you can put just a table by the window, and if not, then a folding table will be your saving and convenient option. The bench along the window will look beautiful, moreover, it will provide more seating than chairs and under the seats it can be equipped with drawers for storing kitchen utensils.
conclusions
It is always necessary to maintain the correct distance from the wall to the heating radiator, regardless of the design of the product, its shape or other performance characteristics.
It does not matter what heating system is in the house or apartment: one-pipe or two-pipe, central or autonomous heating. For heat exchange between the air and the radiator, in any case, space is needed.
If this rule is not adhered to, the energy efficiency of the heating system will be significantly reduced, and the radiators will serve a shorter period. As a result, the cost of energy resources, repairs or replacement of components of the heating system will increase.
How do I hide the battery?
When buying a kitchen, almost everyone thinks about: what to do with the battery? There are several solutions, let's look at them.
- The most expensive way is to dismantle the battery and install a warm floor. But, this option replaces a lot of problems associated with the connection and installation of heating.
- Installing the battery in a special recess, for example, a tabletop. In this case, do not forget about the heat transfer grill.
- You can close it with a cabinet with a sink, which just does not have a back wall.
No need to be upset if the size of your kitchen is not what you would like, it is the window that will help you find a solution in the arrangement of furniture. For advice, you can contact the designers, or you can plan everything yourself by reviewing the ready-made photos of the interiors.
How to attach a floor-standing battery
You have to fix the battery on the floor if it is very heavy and it is simply dangerous to hang it on the wall. There are special floor brackets for this purpose. In terms of cost, they are higher than wall-mounted ones, but they have no equal in terms of fastening reliability. Most often, long heating radiators made of cast iron are attached to the floor, but sometimes the structures of aluminum and steel radiators also provide for floor fasteners.
Advice. Brackets designed for mounting floor radiators are most conveniently fastened before the screed is poured in order to close the fastening point.
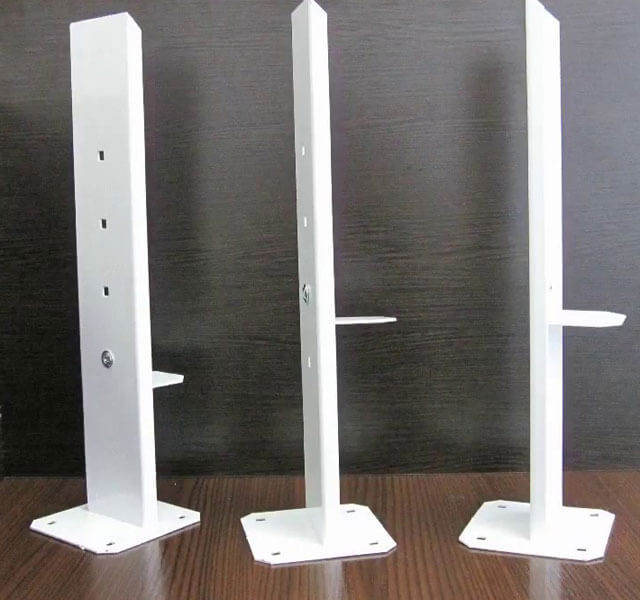
Steps for floor installation of a radiator:
- select two brackets that are suitable for a given battery weight;
- on the base allocated for the battery, the racks are installed with the help of anchor bolts, maintaining a distance to the wall of at least 6 cm;
- perform concrete work, covering the base of the brackets and bolt heads with a screed;
- hooks are put on the racks, set at the required height, they are fixed with bolts (metal gaskets are also installed for protection, if this is provided for by the kit);
- the radiator is hung on the hooks, carefully aligning it horizontally.
The floor anchoring system has great advantages, since the entire weight of the battery is placed on the floor. The space left from the floor to the battery allows the air to circulate.