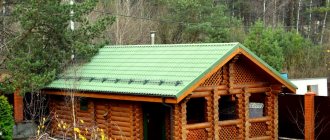
The construction of new private houses is distinguished by a rational approach to the issue of energy conservation. But what to do with buildings that have stood for more than 30-40 years. Not everyone will be able to start a complete reconstruction, but it is quite possible to increase thermal protection. You need to start by examining the surfaces of walls, roofs and foundations.
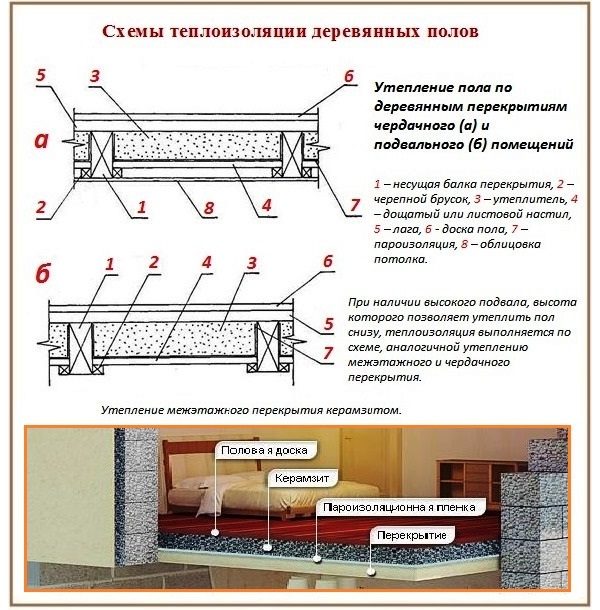
Maintenance should be done if necessary. It makes no sense to install insulation material on dilapidated buildings. There will be little benefit from such isolation. But to make the sealing of small cracks, holes and potholes, which do not pose a threat of reducing the bearing capacity of the structure, is within the power of everyone. As a rule, cement mortar is used for these purposes. Window and doorways require special attention, because through the cracks in them the lion's share of heat leaves the room. When preparing a house for winter, do not forget about floor insulation. First, you need to figure out which base is under the boardwalk.
Option number 1: floor insulation in a house standing on the ground
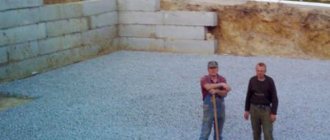
This method of arranging the floor has as a base a concrete screed or slab, laid without reference to the foundation. When erecting a structure, this method saves time and money, so builders often use it. According to the technology, it is impossible to lay slabs on loose sagging soil. Due to shrinkage, the concrete base sinks above the level of the subfloor, which forms a flow of cold air into the dwelling. Heating the room in winter is problematic. But the situation can be remedied.
Insulation stages
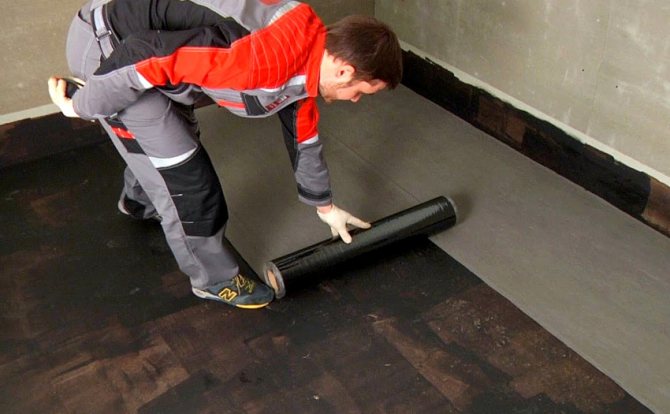
1. Dismantle the plank covering.
2. Level and compact the soil (if it appears on the concrete surface due to cracking).
3. Make a bed of expanded clay or crushed stone (at least 10 cm).
4. Cover the backfill layer with coarse sand (at least 10 cm).
5. Tamp the surface.
6. Pour the concrete screed.
7. After complete solidification of the solution, cover the waterproofing layer (use a special film or roofing material).
8. Install the extruded polystyrene foam boards. The joints between the insulation should be kept to a minimum.
9. Line the reinforcing metal mesh.
10. Pour the surface with a finishing screed, using a cement-sand or self-leveling mixture.
11. Next, a floor covering is laid on the surface or a "warm floor" system is installed.
After such installation, it will be comfortable to walk on the floor even in severe frost.

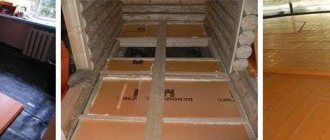
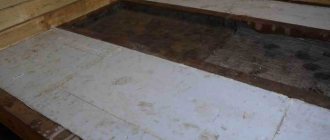
Option number 2: floor insulation above the basement
Before proceeding with the thermal insulation of the floor, you need to explore the basement. For the normal functioning of the air and creating optimal humidity in the basement, it is necessary to carry out ventilation. If the foundation is the walls of the basement, the basement of the house should be insulated. For this, it is better to use the outdoor installation method.
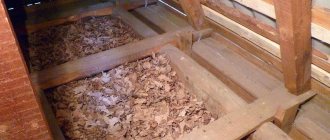
If the floor is unpaved in the basement, it must be thoroughly tamped and covered with coarse sand with a layer up to 20 cm thick.
nastroike.com
Thermal insulation methods
- The production of work can be carried out in various ways. Both the basement ceiling and the floor itself can be involved in the process of thermal insulation. It is he who is the area where the largest amount of heat is lost. This is especially true for concrete slabs, which is a cold material. If you do not protect the concrete surface from cold air and blowing, you will have to forget about the efficiency of the heating system.
- If the level of humidity in the basement is increased, mold may appear in the apartment or house, which will negatively affect the health of the residents. High levels of humidity and colder temperatures in the home will make people sick more often. In order to close access to moisture inside the premises, you will have to take care of high-quality waterproofing. Knowing which materials are best suited for this purpose, and owning the list of tools necessary for work, any person without construction skills can cope with the task.
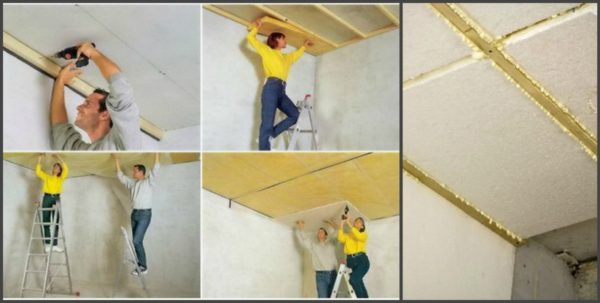
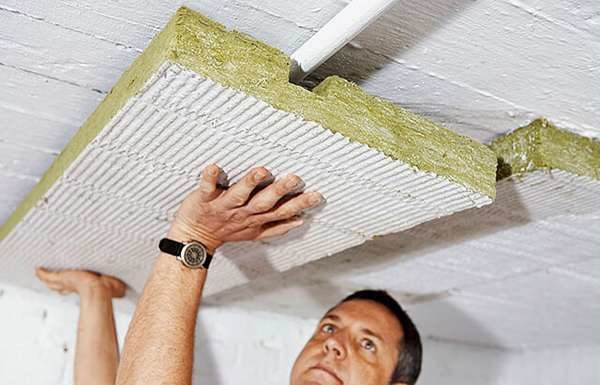
- If heat insulation is done from the side of the basement room, the finishing will be placed on its ceiling. This will ensure the protection of the overlap from the side of the dwelling. This method does not differ in the variety of materials offered. You can use slab or roll insulation, which will be fixed to the ceiling with an adhesive. You can use dowel nails. One of the most expensive and effective solutions can be the use of sprayed polyurethane in liquid form. To apply it, you will need special equipment and the involvement of specialists.

Insulation of the floor in a wooden house can be done in two ways - on the logs and on the rough base. The first method is used to insulate wood or concrete surfaces. Any of the above materials can be used as insulation. All the load is evenly distributed on the surface of the logs, so the strength and density of the material used are not important. When insulating the floor along the logs, one should take into account the fact that the height of the room will decrease by about 10 cm by raising the floor.
Floor insulation methods
The second method requires a more durable and stiff material as insulation in order to exclude the possibility of its settling under the influence of loads. The role of the rough base can be played by wood flooring, concrete screed or densely compacted soil. The installation of the heat-insulating layer can be carried out under the floor covering. The result of the work done will depend on the correctness of the actions performed and the quality of the insulation used.
Insulation of the floor on the rough base
Building with a basement
Owners of private buildings intended for permanent residence often think about how to cheaply insulate the floor and not spend a lot of money on work. You don't need to save too much. Inexpensive insulation made from low-quality materials will only lead to one loss. But you should not carry out complex work, where you can really do without them. In buildings with a plinth, alas, this cannot be done.
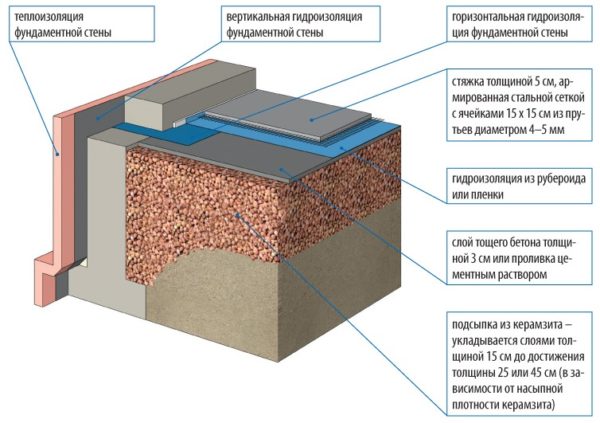
Since the ground masses usually freeze to a significant depth, insulators should be installed in areas where the maximum exposure to cold occurs. The best option is external insulation of the basement walls. Due to this, the soil will be deprived of the opportunity to contact the wall surface.
A good option for insulation is extruded polystyrene foam. This is not to say that it is very expensive, but you cannot call it cheap either, since a large number of products have to be used at the facility. Expanded polystyrene plates have all the necessary properties to reliably protect the base from freezing. It is advisable to carry out the insulation itself along the entire height of the supporting structure.
The correct calculation of the thickness of the insulation material is calculated on the basis of many characteristics, from the variety of soil masses to the depth to which the soil freezes. When the underground areas of the foundation are covered with expanded polystyrene, they are subsequently covered with earth. The basement area is allowed to be finished with any suitable material. It serves as the final decorative and protective layer of the insulation system.
Insulation of the house from the basement
If there is a basement in a private house, it is imperative to devote time to its insulation.This will not only avoid heat loss, but also prevent the destruction of the house from prolonged exposure to dampness. Different materials can be used to perform thermal insulation work, for example, foam or foam insulation. Many craftsmen use mineral wool to seal the floor of the house.
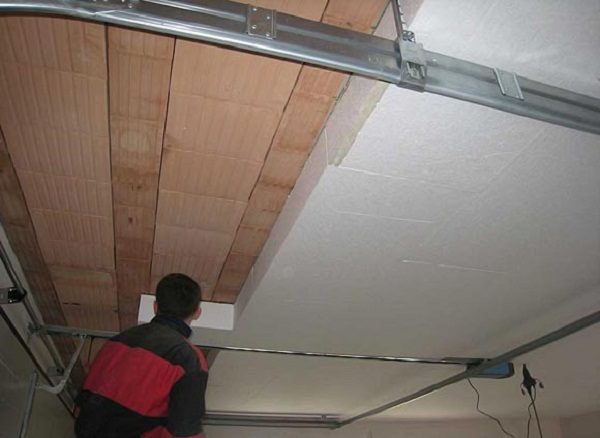
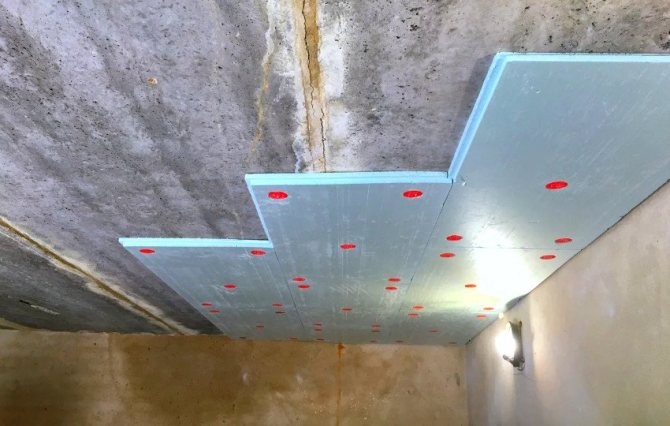
Insulation of the basement ceiling with foam from the inside
Before starting repair work, it is necessary to prepare the surface by cleaning it from all kinds of debris and dust. After cleaning, it is advisable to treat the surface with an antiseptic, and then a primer. This sequence will help ensure reliable adhesion of the insulation to the surface, as well as protect it from the decay process. The process of fixing the heat-insulating material cannot be called complicated, so even a beginner can cope with such a task.
Floor insulation scheme in the basement on the ground
It is only necessary to apply a little adhesive to the surface of the insulation, and then press the material against the ceiling for a while. After a few seconds (the exact time is indicated on the glue package), the insulation can be released - it is securely attached. Repeat the procedure with each of the sheets of thermal insulation material.
How to insulate the floor on the first floor
Warming the floor in a country house made of wood is an important event that allows you to create optimal living conditions. Only with the use of high-quality heat-insulating material can a warm atmosphere in the house be ensured, therefore, its choice must be approached correctly. Fortunately, the modern market offers a wide selection of heaters that differ not only in price or thermal insulation properties, but also in the method of installation. Therefore, in order not to face troubles in the future, when choosing a heater, it is imperative to consult with specialists.
Thermal insulation of a wooden floor
The floor is right above the basement
It is not always possible to properly isolate the foundation and basement. In this case, the work is carried out inside. Before proceeding with the necessary activities, the underground space is thoroughly dried. If it is already dry, you can start creating ventilation holes. Is there ventilation already? Let's assume you're in luck. Therefore, it remains to tamp the soil, after which sand is poured 15-20 cm.
Next, you need to put lags and nail the cranial bars to them. The latter are mounted along the entire length of the beams. Then a special board roll is installed. There should not be any gaps or cracks in it. An alternative to boards is special boards with good moisture resistance.
The roll is covered with a film that is unable to pass water. Instead of a film, wax-type paper is sometimes used. Both the film and the paper take over the tasks of the waterproofing layer.
Warming
Insulation material is placed on top of the waterproofing. The optimal solution is either basalt or staple glass fiber. The listed products are able to "breathe".
Following the laying of insulators, it is the turn of the subfloor. Everything is simple here. Wood blocks, chipboards, unedged boards or other material are nailed to the previously installed beams. A gap of about 1 cm is left between the floor and the wall structures. Purpose - ventilation. The gap will not spoil the appearance of the room, since it is subsequently necessarily masked with baseboards.
How to inexpensively insulate the floor in compliance with the technology, which involves the use of logs, ventilation holes, nailing boards and other elements? Honestly, no way. BUT do not think that the described works cost prohibitive sums. The price is quite adequate when compared with various measures for the construction of a residential building.
Of course, very cheap materials can be used. Such a floor will quickly deteriorate.We'll have to do it all over again. You end up paying one and a half or even double the cost. So it is better to immediately warm up normally so that the system will serve for decades.
Thermal insulation from the basement side
Don't want to take apart your existing floor? Perhaps you will be satisfied with a solution based on complex thermal insulation of the basement ceiling located in the basement. This is done as follows:
- take thin wooden slats, mount a vapor barrier type film with them to the ceiling filing (the size of the linen overlap is 10 cm);
- nail the blocks made of wood, with a step that is equal to the dimensions of the insulation materials;
- lay insulators between the bars (mineral or glass wool, polystyrene and analogs);
- strengthen the heat protection with a wire mesh or wood slats;
- fill the boards.
The technology allows both to reliably insulate the home floor and to save oneself from a lot of indoor work. The advantage is as follows - the footage is taken away from the basements, not living quarters. Considering that basements are rarely fully used, weaning of 10 cm or more can really be neglected.
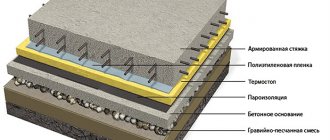
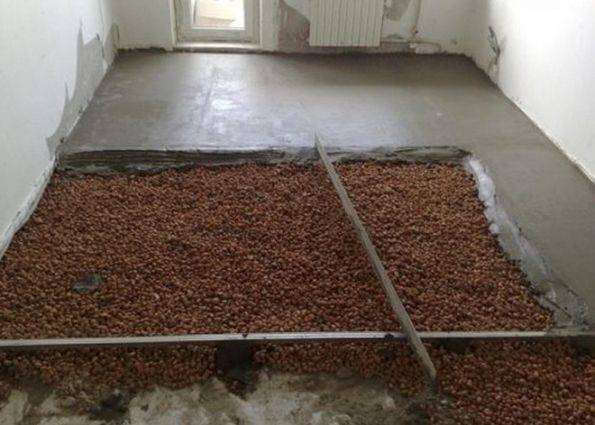
Floor on the ground
The floors of the premises are based on a concrete slab that lies underneath. A monolithic product is assembled using different technologies. In some cases it is associated with wall structures, in others it is not. We will not go into construction nuances. The main point is that the floor located on the ground must be insulated. How? According to the following time-tested technology:
- leveling and tamping of soil masses;
- backfilling of crushed stone or expanded clay (thickness - 10 cm, purpose - protection of the slab and insulation from low temperatures and water penetrating from the outside of the building);
- creating a layer of coarse sand;
- installation of a finished slab or production of a screed;
- waterproofing flooring;
- laying of thermal insulators;
- end screed;
- floor covering.
Now you roughly know how to insulate the floor in a house on the ground in accordance with classical technology. The most subtle moment here is in the slab. Its installation or creation from scratch will require a lot of money, time and effort. By the way, if you are going to make a warm floor, heating elements are mounted between the gasket of the insulators and the final screed.
Finally, a few words about thickness. Although there are strictly set indicators, it is not always possible to comply with them. The thickness and height of the ceiling surface imposes its own limitations. In rooms with high ceilings, the thickness of the insulation is neglected. For greater reliability, sometimes they even use two-layer thermal protection. Low ceilings cause a lot of problems and sometimes do not make it possible to fully carry out the insulation process.
x-teplo.ru
Material selection
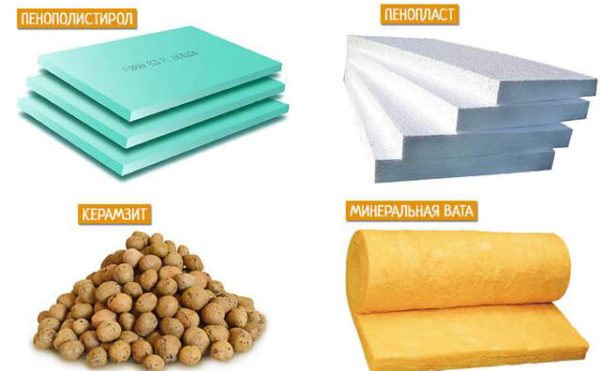
Materials for floor insulation in the house
- resistance to rodents with high humidity;
- durability of the material;
- complexity of installation;
- the financial capabilities of the owner of the house (some materials are not cheap).

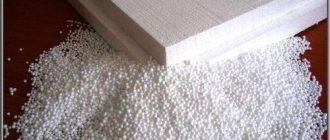
Floor insulation with foam
What is the best way to insulate the floor in a wooden house?
Table. Overview of wood floor insulation.
We invite you to familiarize yourself with the Art of composing bouquets of fresh flowers
| Material name, photo | Description |
| Expanded clay | It is a small granule with a porous structure. Expanded clay perfectly retains heat, and small rodents and harmful insects are not found in it. The optimal thickness of the expanded clay layer is 20-30 cm. |
| Styrofoam | A fairly lightweight and easy-to-install material used to insulate houses and apartments. Polyfoam is moisture resistant, but is afraid of rodents, which quickly destroy it. |
| Wood shavings | One of the cheapest heaters, which can be bought without any problems at the nearest wood processing enterprise. Wood shavings actively retain heat, but are not moisture resistant. |
| Slag | Excellent material for house insulation.Slag needs waterproofing, which significantly complicates the installation process. But on the other hand, slag is a durable material. |
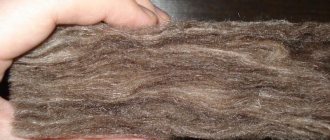
| Glass wool | Inexpensive heat-insulating material that not only keeps heat in the house, but also dampens sounds. Among the disadvantages of glass wool is the tendency of the material to shrink over time. |
| Ecowool | Another type of insulation with low thermal conductivity. For the installation of ecowool, a special installation is required, since it is quite difficult to manually blow it into the underground space. |
Thermal insulation materials for the floor
Expanded vermiculite can also be used as a friable insulation for the floor. It is a natural material with a granular structure. Vermiculite is lightweight and has high heat and sound insulation properties. In addition to construction, vermiculite is actively used in the country house.
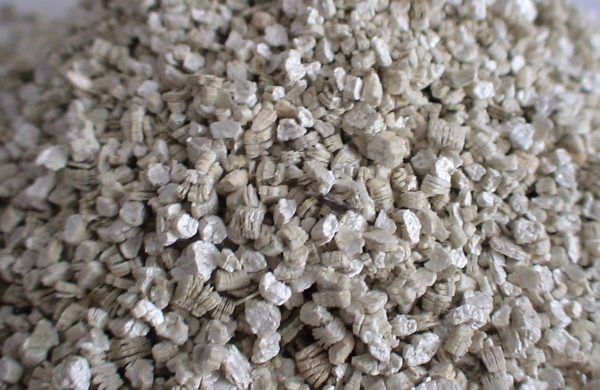
Expanded vermiculite
Why insulate the floor above the basement?
- The floor above the basement is cold
- Mold and mildew will gradually grow on its surface and on the walls.
The appearance of such troubles leads to:
- To spoilage of the performed repair
- Accelerated structural failure
- Decreases the health of people living in the house
When an unheated basement is planned in a residential building, thermal insulation of the floor above the basement is always necessary. Since, firstly, the walls are not insulated in a cold basement, and the temperature in the basement is negative in winter. A cold floor means uncomfortable indoor conditions and a significant waste of energy resources for heating. And, secondly, the moist soil in the underground throughout the year continuously gives off moisture in the form of water vapor, which is saturated with wooden logs. The surface of the basement ceiling that is not insulated and not protected from moisture will easily transfer cold and dampness to the room that is located above. The basement microclimate promotes the development of mold and mildew on the walls.
Therefore, the insulation of floors should be taken seriously: layers of steam, hydro and thermal insulation should be included in the construction of the floors.
As a rule, wooden beams with a width of 150 mm are used for flooring. When installing insulation between the beams, the heat-insulating layer turns out to be heterogeneous, because every 60-100 cm, instead of the insulation, a load-bearing wooden beam will be located. Depending on the pitch of the beams, the share of insulation in such a "pseudo-thermal insulation" layer accounts for 70 to 85%. And the rest of the floor surface is nothing more than heat-conducting inclusions called cold bridges. In order for a wooden beam not to be a cold bridge, but to perform heat-saving functions, its thickness must be at least 60 cm (for example, a house in the Moscow region). It becomes obvious that even when using a wooden beam with a section of 20x20 cm, that is, three times less than the required height, the heat loss through the cold bridges will be three times higher than the normalized ones!
From this, 3 conclusions can be drawn:
- cold bridges do not provide full insulation
- installation of insulation between wooden beams should be done only in houses of seasonal residence (for example, summer cottages)
- insulation between beams should be considered only as additional to the main continuous layer, in order to increase the heat-shielding properties of the floor structure.
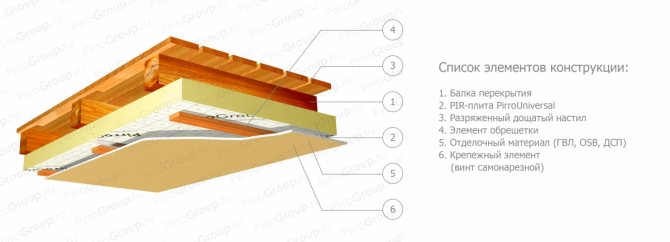
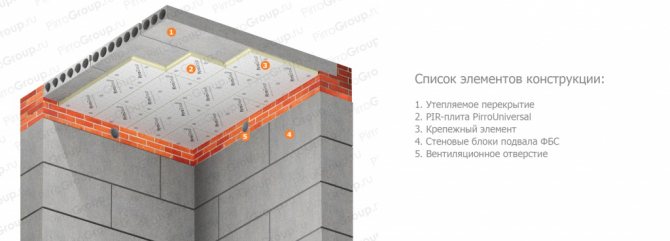
pirrogroup.ru
Insulation of the floor over the heated basement
If the basement is heated, all its walls are insulated, and the temperature difference between the rooms located one above the other does not exceed a couple of degrees, then the basement ceiling is insulated in the same way as the interfloor floors are insulated. And since it is easier and cheaper to lay insulation on the floor than on the basement ceiling, the work is done in this way.
If mineral wool of low density or polystyrene with a density of no more than 15% is chosen as insulation, then it is better to equip wooden logs, place insulation between them, send a rough floor. And then lay the final flooring.
Insulation of the floor over the unheated basement
It is quite another matter if the basement is not heated. Maybe this contributes to a longer preservation of products, but it also affects the efficiency of heating. After all, some of the heat goes through the basement. To optimize heating costs, you need to insulate the floor over the basement.
The order of work is presented in the figures of the diagrams.
As can be seen from the figure, basement insulation is carried out both from the side of the house (outside) and from the side of the basement (from the inside). That is, the ceiling of the room is insulated.
- For the first case, the order of work is similar to the insulation of interfloor ceilings. Only the recommended thickness of the insulation should be at least 10 cm (depending on the type and density). For insulation on the floor, you can use polystyrene, expanded polystyrene, basalt wool (mineral wool) or loose insulation (expanded clay). Thus, the basement is insulated during the construction process or when it is possible to remove the floor covering.
- In the second case, when there is no way to insulate the floor, the basement is insulated along the ceiling. And before proceeding with the work, you need to find out what constitutes the basis of the ceiling - wooden beams or a concrete floor slab. The approach to insulation will be different for each case.
Insulation of the ceiling of the subfloor
The path to a warm home starts from the basement. A warm and dry subfloor creates a microclimate throughout the house. If the lower part of the building is not insulated, neither strong walls nor high-quality windows will help to maintain a comfortable temperature.
To create an optimal microclimate in the subfield, it is necessary to ensure:
- Insulation of the basement;
- Foundation waterproofing;
- Organization of ventilation;
- Insulation of walls and floors.
The main goal of all measures is to create the correct mode of operation of the basement, that is, to restrict access to cold inside the room, to ensure the removal of moisture that forms inside, and at the same time to prevent heat leakage. Compliance with these conditions will allow solving the following tasks:
- Protect the base of the house from deformations.
- Reduce the rate of destruction of the foundations of the old house.
- Reduce heat energy consumption.
- Exclude growth in the fungus subfield.
- Make effective use of the subfloor area.
Insulation is selected depending on the behavior of the basement at different times of the year.
The following factors also influence the choice of material:
- Indoor humidity level;
- The presence of heating;
- The presence of drainage around the building;
- The purpose of the underground.
Hardware stores offer thermal and waterproofing materials with various characteristics. The following are popular and available:
- Styrofoam. The cheapest insulation. Differs in lightness, resistance to decay, moisture resistance, low price. The combination of these qualities makes foam the most popular material for insulating wooden houses. The disadvantage of foam is that it attracts rodents, is fragile, has high flammability and releases harmful chemical compounds into the atmosphere.
- Expanded polystyrene. Replacement foam with greater strength, with a groove-comb system for a seamless connection. Basements are often insulated from the outside and from the inside.
- Polyurethane foam. Spray-on material that fills all gaps when applied to surfaces. Creates a completely sealed coating, does not burn, does not rot. Disadvantages of the material: high price and impossibility of self-application without special equipment.
- Penofol. Flexible insulation. Provides decent thermal insulation. Fireproof and waterproof.
- Minvata.Soft insulation, suitable for use only inside completely dry rooms. Under the influence of moisture, the mineral wool begins to rot and gradually decomposes.
- Expanded clay. The use of this bulk material is only possible to insulate the floor and protect the foundation from the outside.
Fastening the insulation to the underground ceiling requires the preliminary construction of the frame. It is made from wooden blocks or metal profiles. Before laying the sheets of insulation, the tree is impregnated with a moisture-proof compound. Insulation can be "put" on glue and installation of the frame is not required.
Ceiling insulation work is carried out as follows:
- The surface is cleaned and leveled;
- Apply moisture-proof impregnation;
- The selected thermal insulation material is laid.
Thermal insulation on wooden beams (lags)
Wooden joists or floor beams are commonly used in low-rise construction and cover a small basement area. In addition, wood has a lower heat transfer rate. This means less heat passes through the wood.
Basement insulation technology for wooden floors:
- beams or logs are installed on the ceiling in increments of 60 cm or 1 m. Depending on the type of insulation. So, the width of the strip of basalt wool is 60 cm, of foam and polystyrene foam - 1 m;
- a superdiffusion membrane or vapor barrier film is fixed on the ceiling. At the same time, in order to avoid the appearance of cold bridges, the film must be brought onto the wall, at least 10 cm. In addition, the film must be overlapped, and the joints are glued with special tape. Its feature is the ability to reliably protect the film and insulation from moisture ingress. The film is fixed with wooden slats.
- when closing the beams (logs) with a film, you need to leave 10-15 cm free from each end of the log. This is necessary so that the moisture content of the wood can be regulated in a natural way;
- have a heat-insulating material, the thickness of which depends on the type and density (as a rule, it should be 10-12 cm). The material is fixed using mesh or wire. To avoid the appearance of cold bridges at the junction of the wall and ceiling, you need to put a 5 cm insulation on the wall;
- carry out the finishing of the ceiling. The insulation is closed with an osb slab, drywall. And in the case of rigid insulation, you can fix the mesh and putty.
moydomik.net
Insulation on a concrete floor
In this case, it is advisable to use a hard insulation. It is fixed to the concrete floor of the basement with glue and dowels. Then it is closed with a net and plastered.
If you prefer a soft insulation, then you need to fill the ceiling with wooden slats or a galvanized profile for drywall (the thickness of the profile should be equal to the thickness of the insulation), cover it with a vapor barrier film, install thermal insulation and decorate the ceiling.
Related article: Interior doors bleached oak in the interior of the apartment
We hope this information will help you decide how to insulate the floor over the basement and reduce heat loss in the house.
Insulation
Types of heaters
As a heater, both bulk and roll or plate materials are used. Bulk insulation is expanded clay, vermiculite, slag, mineral fibers, shavings.
Slabs are prefabricated slabs or blocks of materials with low thermal conductivity. Recently, polyurethane foam insulation has gained great popularity, which is blown into the space of the insulated structure.
Mineral wool insulation
But the most popular, especially in private construction, are flexible, soft materials. Such insulation is good because it is easy for them to give the necessary shape, they are convenient when laying. The most common insulation is the so-called mineral wool in the form of mats or rolls.
Advantages of mineral wool insulation:
- good indicators of thermal conductivity;
- not flammable and does not support combustion;
- lightweight, saving on supporting structures;
- convenience and speed of installation.
Disadvantages:
- hygroscopicity;
- you need a base for laying.
TOP-3 manufacturers of mineral wool
| Photo | Name | Rating | Price | |
| #1 |
| Rockwoll | ⭐ 98 / 100 | More details |
| #2 |
| Knauf | ⭐ 97 / 100 | More details |
| #3 | Isover | ⭐ 96 / 100 | More details |
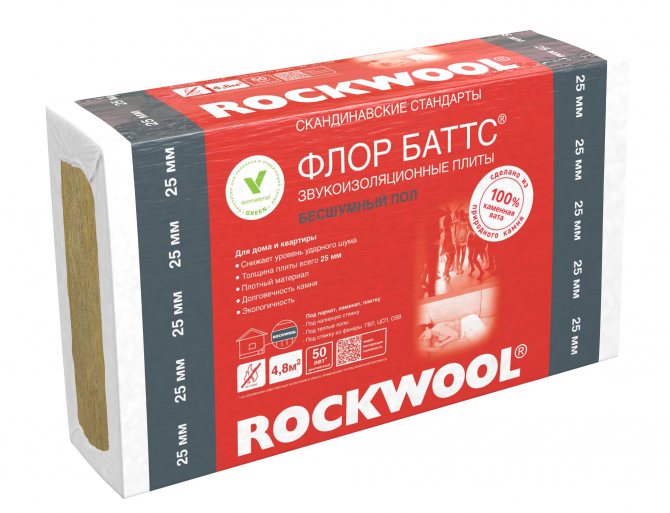
Rockwoll
The company is considered the market leader in the production of mineral wool. The manufacturer has a wide range of products.
Rockwoll
pros
- environmental friendliness;
- fire safety;
- soundproofing;
- price-quality ratio;
- long service life;
- lack of shrinkage and shedding;
- a wide range of sizes and packaging options.
Minuses
- work requires personal protective equipment.
Rockwoll mineral wool
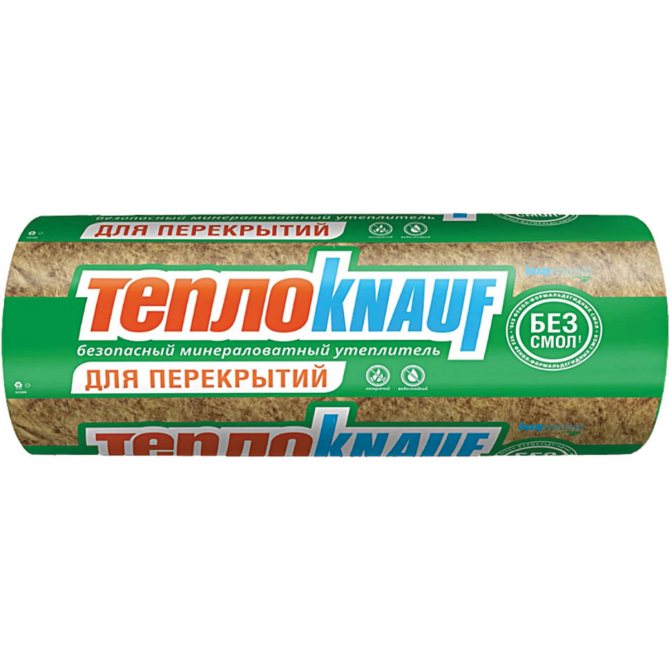
Knauf heaters are safe materials made using innovative technology and from natural ingredients.
pros
- excellent heat and sound insulating properties;
- easy installation;
- non-combustible material;
- without smell;
- resistant to insects and rodents.
mineral wool Knauf
Isover
The material is supplied in rolls and slabs. Products are manufactured using a special technology that allows you to perfectly cope with the tasks.
Roll insulation ISOVER
pros
- easy installation;
- affordable price;
- a wide range of;
- environmentally friendly material;
We offer you to familiarize yourself with Orange roses
Minuses
- low resistance to moisture.
mineral wool Isover
Vapor barrier - why is it needed
The insulation must be protected from moisture. Any insulation, if it gets wet, very much loses its heat-shielding properties. And since mineral wool is a hygroscopic material, you need to take care that moisture does not get on it.
But protection is required not only from water. Protection is required against steam penetration. Vapor barrier plays an important role in creating optimal operating conditions for the insulation.
Without going into the concept of partial pressure, we note the importance of understanding two points:
- it is the vapor barrier that is the barrier that does not allow moisture (in the form of steam) to penetrate the insulation;
-It is important to correctly determine in what place of the "pie" the vapor barrier should be placed.
Vapor barrier placement principle
In order to briefly, but at the same time unambiguously understand where the vapor barrier should be placed, you need to remember: steam always spreads from a place with a higher pressure to a zone of lower pressure. Simply put, warm steam always (practically) spreads from the room to the outside. This must be remembered and then it is easier not to get confused with where it should be placed.
It follows from the above that the vapor barrier is not placed "above" or "under" the insulation. It is placed "between" a warm room that is a source of steam (usually heated indoor rooms) and a cold room (outdoor space) where this steam moves. Therefore, in the case of insulation of the attic floor, the vapor barrier will be under the insulation, and in the case of insulation of the wooden floor above the basement, above the insulation.
Concepts vapor barrier, waterproofing, membrane
In order for the vapor barrier to be effective, i.e. worked correctly and did not harm, the film must be laid on the right side. To do this, you need to study the manufacturer's instructions and consult the seller. A wide variety of materials are now available for protection against steam and water. But there is a difference between them. The scope of their application depends on the type of premises, their humidity and temperature conditions, ambient air temperature, for which structure they are used - roofs, ceilings or walls. Often confusion comes from the concepts themselves: vapor barrier and membrane, instead of waterproofing, vapor barrier is used.
Vapor barrier designed to protect against water vapor that is in the air of the room. In fact, steam is a water-saturated gas, or you can say the gaseous state of water. The vapor barrier must have a low vapor permeability, i.e. she must not let steam through. It is approximately equal to 10 grm2 days.
Basically, a vapor barrier is a film. They can be roughly divided into:
- vapor permeable or "breathable" (membranes);
- vapor-tight, practically impermeable to neither steam, nor water, nor air.
Waterproofing designed to protect structures from water. Water molecules are larger than gas molecules.
Membrane... Now the word membrane has become very popular. Membranes are already more high-tech films. With regard to the topic of vapor barrier, we can say that this is a material capable of permeating or, on the contrary, capturing certain substances. The most common expression is a vapor-permeable moisture-proof membrane. This means that this material does not allow water to pass through, but at the same time it allows steam to pass through and allows moisture to evaporate. It is these properties that are required during construction to protect thermal insulation.
The direction from where the membrane passes steam and from where it does not allow water to pass from different membranes can be different, depending on the place of its destination. Therefore, you need to be very careful when choosing and ask the seller for all the necessary characteristics.
Features of installation of vapor barrier for floor insulation
The floor of a wooden house without a basement and overlap
- The subfloor is being mounted - it is better to treat it with an antiseptic
- The first layer of vapor barrier is laid - with a continuous sheet without interference, with an overlap of at least 15 cm
- Insulation is laid - tightly between the logs without leaving gaps.
- We cover the insulation with a second layer of vapor barrier - a breathable membrane
- To provide a ventilation gap, the top layer of the vapor barrier is nailed to the side of the joists with a rail, flush.
Features of the
The insulation is closed in a waterproofing bag made of vapor barrier. It is important here to make the bag airtight - if moisture gets in, the insulation stops working
There must be at least one ventilation gap - between the parisolation and the finished floor. This will eliminate the effect of "sticking" of the membrane to the floor and will allow the trapped moisture to evaporate freely.
Stages of installation of a vapor barrier for a wooden floor above a cold basement
- Substrate preparation and antiseptic treatment of wooden structures.
- Overlapping material (150-200 mm) on the floor frame. The vapor barrier layer should be solid, without defects and flaws, cracks and gaps. If it is a film material, it is mounted with the smooth side to the insulation, the rough side to the base or to the ground. This surface is designed to contain capillary vapors and facilitate their gradual removal.
- Insulation installation. For example, mineral wool is tightly laid without gaps and crevices into the floor frame on a hydro-vapor insulator, foam or expanded polystyrene, the thickness of each is determined by a thermal calculation.
- Laying the second layer of waterproofing. The heat insulator is closed with another layer of vapor barrier (the film is installed with the rough side up). The canvases are connected with mounting tape or special tape.
- Installation of counter rails for organizing a ventilation gap between the film and the flooring.
- Finishing flooring.
- Laying the topcoat (parquet, linoleum, laminate, etc.).
Features of the
Antiseptic treatment of rough material and logs will significantly extend the life of your floor.
Floor vapor barrier device on a heat-insulated reinforced concrete floor above a cold basement
- The steam-waterproofing layer is mounted on a reinforced concrete floor slab. It should turn out to be solid, without defects and flaws, cracks and gaps. A layer of glassine, roofing material, other roll material or bitumen mastic (liquid rubber) is used as a hydro-vapor barrier.The best option in this case is a new generation of deposited or sprayed insulation;
- Insulation, which is used as expanded clay, granular slag or mineral wool, is mounted on a hydrobarrier that prevents the penetration of capillary water into the structure. The thickness of the insulation layer is determined by the heat engineering calculation;
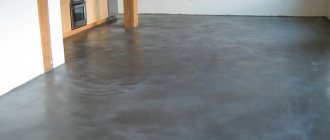
- A cement-sand screed is performed on the insulation;
- The vapor barrier is mounted on a screed. It becomes a barrier between warm and cold space;
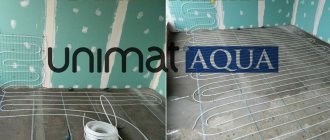
- The construction of the floor covering is carried out along the screed. The final covering can be wooden, tiled, mosaic, you can install a "warm floor" system.
Features of the
Environmentally friendly "liquid rubber", sprayable waterproofing material - effective protection from both steam and water. Durable, resilient material with high vapor diffusion coefficient for automatic or manual application to flat, strong, rigid substrates in small, medium and large areas. Quickly solidifying and forming a one-piece, seamless, elastic membrane, it adheres perfectly to the base and hermetically seals all places of abutment and passage of communications: corners, pipes, parapets, skylights, etc.
Basic structural schemes for the floor of the 1st floor
Consider the construction of the floor of the 1st floor above an underground or unheated basement.
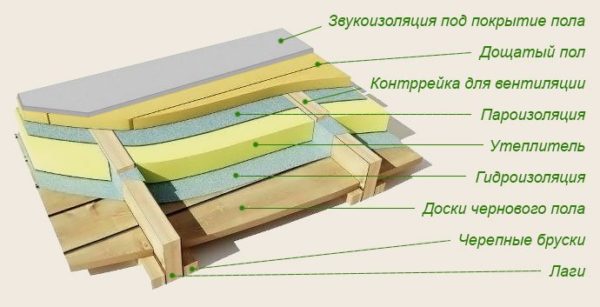
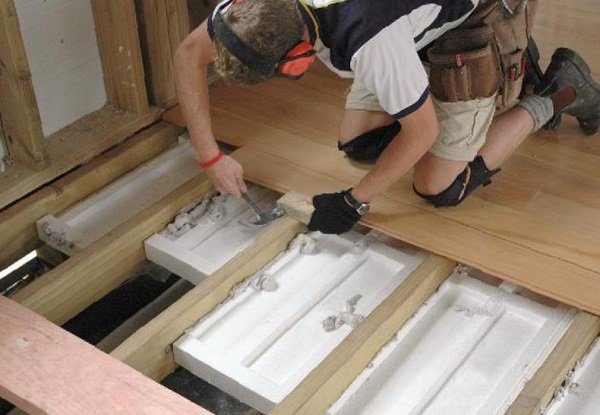
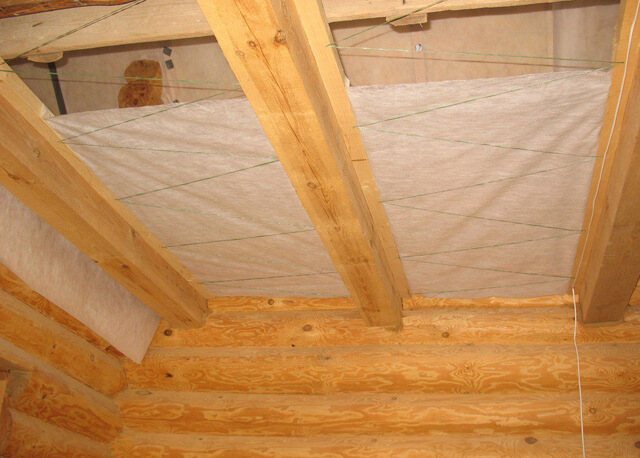
The scheme of the wooden floor of the first floor without waterproofing
The basic layout of the ground floor is as follows. The subfloor is laid along the load-bearing beams, which rest on the foundation. A rough floor is necessary in order to lay out insulation on it. Insulation fits into the space between the beams. A vapor barrier is lined on top of the insulation. It is imperative to arrange an air gap between the vapor barrier and the boardwalk to evaporate condensate that may form on the vapor barrier from the side of the room. It can be organized by nailing bars 2-3 cm high. A boardwalk is arranged on top of which the finishing floor is laid.
The supporting structure of the floor is beams. The pitch of the beams is usually 60-80 cm. You can choose the step so that it would be convenient to lay insulation between the beams. Then the step will be equal to the width of the insulation plus the thickness of the timber.
In the places where the beams are attached to the stone structures between them, there must be a waterproofing gasket made of, for example, roofing material or bitumen mastic. Between the timber and the foundation wall, it is necessary to make a gap for ventilation, the timber should not adjoin the wall closely.
Rough floor. To attach the subfloor to the beams, smaller blocks, "cranial bars", are attached. Subfloor boards are laid on them. Here you can use a low grade 15-50 mm thick board.
Wooden floor of the 1st floor with waterproofing
Sometimes waterproofing is provided in the floor structure. It is appropriate if the basement is very damp and there is a high level of groundwater. Then it becomes necessary to protect the insulation from below. For this, waterproofing is arranged under the insulation. This waterproofing must be made of a water-repellent but vapor-permeable membrane. In order to avoid annoying mistakes, it is better to call the upper film simply a vapor barrier (even if the manufacturer calls the film itself a membrane), and the lower one - waterproofing. And here, ideally, a membrane should really be used - a vapor-permeable waterproof one.
An example of the use of improper waterproofing
This video is a very clear example of the fact that water can form in the insulation. This video is very common on YouTube under various names. It is often called "incorrect vapor barrier". The vapor barrier itself is not visible in the video. Perhaps the authors of this design used the lower film as some kind of vapor barrier.
But the point is that the bottom film was supposed to be waterproofing, waterproof on one side, but vapor-permeable on the other.
o-builder.ru
Insulation of the foundation
In wooden houses, the foundation most often serves the purpose of the basement, therefore it protrudes relative to the walls of the house. With a high standing groundwater, it is important to pay attention to the freezing of the soil around the basement.
If at the construction stage the insulation and waterproofing of the foundation was not carried out from the outside, you will have to dig a trench around it in order to deepen the sheets of insulation. For waterproofing the underground around the house, you will additionally need to make blind areas.
https://www.youtube.com/watch?v=
From the outside, the foundation is insulated with cement-bonded particle boards 15-20 mm thick or with foam. The slabs are attached to the foundation with special glue. Then the insulation is reinforced and plastered, or covered with decorative stone.
To drain water around the basement, a blind area is made of asphalt or concrete. The blind areas are mounted with a slope to the side outside the walls of the house. The presence of a blind area will additionally protect the foundation insulation from moisture penetration through it and subsequent destruction.
The essence of the first floor floor insulation
Basically, the floors between the first floor and the basement are made of concrete. The same picture is observed in the variant with the base of the house, if there are no basements at all. In some cases, reinforced concrete was used, in others - conventional with the use of crushed stone.
Concrete is a specific material. It absorbs heat quickly, but it is difficult to heat it up. Without a constant heating source, it instantly cools down. Therefore, concrete floors will be an inexhaustible source of cold in a house or apartment. Hence the recommendations of builders regarding the separation of concrete from the floor using thermal insulation materials.
In the context of thermal insulation resembles puff pastry: there are many balls and each has its own purpose. The sequence of these balls looks like this:
- concrete slab or foundation-fill;
- insulating film (protection against steam);
- insulating material;
- waterproofing;
- foam concrete (finishing screed).
Their combination and combination of positive qualities will not allow cold air to penetrate from below through the floor into the apartment.
Each of the layers has a specific purpose:
- The insulating film will protect the insulation from moisture. The basement is an unheated room with a high level of humidity. This dampness rises and destroys the thermal insulation. The vapor barrier prevents the process.
- Thermal insulation is responsible for keeping warm air in the room.
- Waterproofing film will protect against excess moisture inside the room.
- The finishing screed is only needed for laying planks or other flooring.
Building secret. Having decided to insulate the floor, it will require a thorough inspection of the basement. Look for cracks or other structural damage. This is especially important when there is an unheated basement under the apartment.
The same inspection should be carried out in the room where the insulation is carried out. If cracks and breaks are found, they are removed with polyurethane foam. From above, the sealed cracks are covered with cement.
Ventilation device
The first stage of insulation is a device in the underground of the ventilation system, which will circulate air inside the room and prevent the formation of condensation on the surfaces.
Underfloor ventilation consists of installing two pipes from different sides of the room. The optimal arrangement of pipes is on the south and north sides of the house. Installation of pipes is carried out in accordance with the laws of physics, cold air tends downward, and after warming up, it rises up.
The supply pipe is located at a height of 20-30 centimeters from the basement floor, and the entrance pipe is 40 cm from the ground. The outer opening of the pipe is covered with a fine mesh - protection against rodents entering the basement.
The outlet pipe is placed 30 centimeters below the basement ceiling. And its upper end is taken out to the roof of the house. The top of the pipe is covered with a protective cap. This arrangement of pipes will ensure optimal air movement in the underground and protect the room from mold.
Floor insulation is most often performed by laying expanded clay. The sequence of work is as follows:
- A layer of sand - 5-10 centimeters is poured onto the leveled and cleaned of the old flooring floor.
- Laying waterproofing material: plastic wrap or roofing felt. The edges of the film with a height of 10-15 centimeters are brought onto the walls and fixed in any available way. When laying, the strips of roofing material or film should overlap each other by 20 cm.
- A layer of expanded clay 15 centimeters high is poured onto the surface of the film and leveled along the beacons installed along the perimeter.
- A cement screed is poured over expanded clay with preliminary laying of reinforcing elements.
What is the best way to insulate a concrete floor?
The construction market is full of various insulation materials. Some are widespread and in demand. The most popular and versatile material is mineral wool. It is suitable for insulation under a concrete screed or immediately under a wooden floor covering.
If there are logs under the floor covering, then use bulk insulation. Lags can be located on top of the poured concrete or act as the basis of the floor. In this case, you can still resort to insulation in the form of foam. It fills all the space between the beams.
For this type of insulation, use:
- polyurethane foam;
- expanded clay;
- vermiculite;
- perlite.
The first is foam insulation, the rest are loose.
In the case of laying the floor immediately along the screed, there is no need for logs. Then they use another type of insulation - sheet. A ball of polystyrene or mineral wool is placed between the boards and the concrete.
Sometimes it is allowed to immediately lay the laminate on top of the waterproofing film. The only condition is a high density of insulation. But according to the rules, the reinforced screed should be poured. So the work will be of better quality, and its reliability will increase several times.
The listed methods of floor insulation are suitable for unfinished premises. Otherwise, they will require significant construction work. To make insulation, you first have to dismantle the floor covering, and then update it.
It is possible to insulate the floor without significant reconstruction. Thermal insulation is laid on top of the tile or linoleum, under which they give a protective film against moisture. Then you can cover the insulation with a laminate immediately or make a pre-screed.
What material can be used to insulate the floor
Here is a list of materials that can be used to insulate the floor above the unheated basement from the side of the house:
1. Expanded polystyrene with a density of 35 kg per cubic meter, including extruded. Excellent thermal insulation properties, water resistance, vapor permeability, ease of installation, low price.
Special profile mats are made of PPP for laying underfloor heating.
Cons of the material: flammability and toxicity when burning.
2. Mineral wool (usually basalt). Also high-quality insulation, non-combustible, environmentally friendly, easy to process and inexpensive. Minus: hygroscopicity. When wet, most of the heat-shielding properties are lost. When installing mineral wool insulation, it is necessary to lay a vapor barrier membrane on top, because cotton wool is a vapor-permeable material.
3. Expanded clay. Loose material, fired clay granules. Non-flammable, environmentally friendly, cheap. Low weight, can be used to insulate wooden bases. It is used both separately and as part of a concrete screed.
Minus: hygroscopicity. When wet, the weight increases and the load on the floor increases.
4. Ecowool - fluffed cellulose. Ease of processing, environmental friendliness, non-susceptibility to damage by rodents and fungus.Does not shrink, does not lose heat-shielding properties when wet. Does not support combustion, but smolders. It is used dry and in solution. Negative: special injection equipment is required for styling.
5. Sawdust. Environmentally friendly, cheap and warm material. Cons: flammability, hygroscopicity. In its pure form, it is prone to decay, damage by rodents, insects, fungus. It is used as a mixture with lime and gypsum or clay.
6. Liquid polyurethane foam. It is applied from a spray gun in an even layer over the entire surface of the base, it forms a hermetically sealed even coating without voids.
It can be applied on a reinforced concrete slab, on a rough floor or between logs. Cons: flammability (G1, G2), susceptibility to destruction by UV rays, spray gun is required for application, not too low price.
Most insulation can be installed both under a concrete screed or without it. In this case, the choice depends on the base material: you cannot put a screed on the wooden floor, it will not support the weight of the concrete. The screed is a common structural element of underfloor heating if they are installed on top of a concrete slab.
The minus of the screed is that it greatly reduces the height of the room (for example, the total thickness of the water heated floor in this case can reach 10 centimeters).
Increasing the reliability of floor insulation
The secret of high quality work is hidden not only in the material, but in the technique of its execution. You should not neglect the rules and advice regarding insulation work. The result of the procedure will depend on this.
For example, choosing mineral wool as a heater and preparing to lay it on a concrete floor, you will need:
- A mixture of sand and cement to serve as a rough finish. It must be leveled and tamped.
- Waterproofing layer. There is a special film for this. But it can be replaced with a more affordable material, for example, roofing material.
- A layer of mineral wool. Plates are located tightly so that there are no gaps between them. There is no need to glue the seams. Resting against the walls with their edges, the plates will mutually compact.
- Another layer of film (can be replaced with roofing felt). These are protective measures against the accumulation of moisture in insulation, since most materials have a tendency to this.
- Filling the screed. Its thickness is only a few centimeters. While the concrete is still fresh and liquid on top of the poured layer, it is necessary to stretch the galvanized metal mesh. It will strengthen the screed. On top of the mesh, you will need to pour another ball of concrete, the optimal height of which is 2 cm. It is recommended to use foamed concrete for the screed. It is lighter than usual and easier to work with. In addition, it has thermal insulation characteristics. Concrete with mesh provides a reinforced screed - insurance against cracks.
- Laying the floor covering. It can be anything, at the discretion of the owners. But new floors are laid only after the concrete has completely hardened.
uteplenievdome.ru
Hello Alexandra!
You write: "cold damp basement", "blowing from the front door, ventilation is bad" - "advise us what to do?"
In our opinion, the answer is obvious. To make an apartment warm and dry above a cold and damp basement, you need to do the following:
- Insulate floors. If possible - external walls too.
- Eliminate the penetration of moisture from the basement.
- Close the gaps in the front door. Install seals, put platbands, upholstery the door with vinyl leather, placing a soft insulation under it. It happens that cold air penetrates through the keyholes, lining helps. It would be nice to install a second wooden door if the entrance is metal.
- Restore ventilation. Only normal ventilation coupled with sufficient insulation will solve the problem with mold. Do not keep windows tightly closed all the time. We recommend that you ventilate the premises from time to time; for this in winter, it is enough to periodically open the micro-ventilation if you have modern windows installed.
Better yet, install ventilation valves in the frames.
Installing an exhaust fan in the bathroom and in the kitchen will also be beneficial. Check if the exhaust ventilation is working. If the craving is not enough - actively complain to the housing department, it is their job to find out which of the neighbors from above has arranged a cozy niche for the refrigerator, depriving you of fresh air. The ideal solution is the installation of forced supply and exhaust ventilation with heat recovery, however, this is expensive.
- Make a warm floor in the bathroom. But in the rooms it is better not to rush, first take measures to insulate floors, walls, and reduce humidity. Maybe, installation of additional heating is not needed.
- It may be worth increasing the heat transfer of the radiators by installing a couple of additional sections for each of the radiators. However, this is not always justified and technically feasible, you should first consult with a specialist.
Read more about points 1 and 2: insulation and dampness control. We strongly recommend upgrading the floor structure. Alas, for this you have to carefully disassemble it first. You don't have to throw anything away, all materials can be reused. Next, we do the following:
- Roll out a vapor barrier film over the floor slabs. It must be brought onto the walls just above the level of the finished floor, and the joints between the rolls must be glued with construction tape.
- We install the logs, leveling them with shims. You should try to fix them securely and strictly horizontally.
- We fill the space between the lags with insulation, it is better to use non-combustible mineral wool. If the thickness of the insulation is less than 10 cm and it is possible to raise the floor level, it is worth filling a block on the logs in order to increase the thickness of the heat-insulating layer.
- We spread a vapor barrier film on top of the insulation, connect it to the bottom layer, glue all the joints. Thus, we will protect the fibrous material not only from dampness from the basement, but also from damp air from the apartment.
- We lay boards.
- If additional floor heating is required, infrared film heating elements with a minimum thickness and maximum heating area are suitable for these purposes. An additional layer of foil-clad insulation should first be laid on the boards, for example, foamed polyethylene with a thickness of 3-4 mm.
- We roll out the heating elements, connect them to the thermostat and the sensor, test them, fix them with tape to the floor.
- We install the final floor covering. It can be a laminate with a backing, it is better to choose the thinnest and most inexpensive. Or linoleum, carpet, under which it is recommended to lay solid sheet material: plywood, OSB, chipboard. In our opinion, it is easier and even a little cheaper (plywood costs money) to lay the laminate.
A useful video that shows you step by step how to properly lay a warm floor under the laminate. Also shown is the installation of an infrared floor under linoleum and carpet. Pay particular attention to removing the bottom backing underneath the electrical terminals and wires. Often they do not do this, which leads to the fact that the laminate "wiggles" when walking, and the wires fray over time.
- If the boards of the old floor are bent "hump" or "boat", the laminate is laid perpendicular to them.
- A heating cable should be used to heat the bathroom floors, it can be placed in the screed or adhesive layer on which the tiles will be laid. The main problem is whether there is insulation under the existing floor. If, as usual in old panels, there are five centimeters of expanded clay - no wonder that "in the bathroom ... like in the refrigerator." In an amicable way, the floor also needs to be opened. Replace the waterproofing, if it is leaky, instead of bulk insulation, put 10 cm of extruded polystyrene foam. Above - reinforced cement-sand screed 4 cm, tiles and underfloor heating cable.If such a "correct" option is not available to you, you can glue a relatively thin (4-5 mm) foil insulation onto the existing floor, and lay a new ceramic tile on it, placing a heating cable in a layer of glue. However, you need to understand that in the absence of serious insulation, a significant part of the heat will go down into the concrete. In this case, the electricity consumption for heating will be quite high.
As for the insulation of the outer walls:
- The best insulation option is from the street side. Often such services are provided by operating organizations. Unfortunately, you yourself do not have the right to make changes to the design and appearance of the facade of the building; permission from local executive bodies is required. The thickness of the insulation must be calculated in accordance with the design of the outer wall and local climatic conditions. If this is not done, the thermal insulation may be insufficient and the "dew point" will not be in the insulation, but in the concrete panel, which can lead to an even greater increase in humidity in the apartment and the destruction of the glue that will fix the insulation.
- If it is not possible to place a layer of insulation from the outside, the thermal insulation will have to be done from the inside. True, you will lose a little in the area of the rooms. The thickness of the insulation is not critical, the dew point will still be in the panel. It is better to use a non-combustible effective insulation, such as mineral wool. Relatively cheap semi-soft mats can be placed in the frame, sewn up with drywall. Fix rigid slabs to the wall and plaster.
teploguru.ru
How to insulate the floor from the basement side?
- Why is the insulation carried out?
- Material selection
- How to carry out insulation?
- Do-it-yourself basement work
Floor insulation is a very important task in providing warmth and comfort in the room. This issue becomes especially important when the apartment is located on the 1st floor, when there is a basement under it. Insulation of the floor covering from the basement side is also relevant in a private cottage.
Options for floor insulation above the basement.
Why is the insulation carried out?
The process of heat exchange in a private house or apartment very often depends on the construction of the floors, since their surface is the place of the greatest heat loss. This is especially true when the base of the floor is made of concrete. Concrete is a durable material with good performance and is therefore very often used for sub-floors.
Basement ceiling insulation scheme with mineral wool.
Despite its good characteristics, concrete is also a very cold material. If the concrete coating is used in a residential area, then it will need to be sufficiently well insulated, otherwise any heating will be ineffective.
The presence of a cold surface will create uncomfortable living conditions in the room, which will lead to high heating costs. In addition, if there is no thermal insulation of the surface under which the basement is located, this will cause the formation of dampness and mold on the surface of the walls.
To avoid this, you need to arrange a high-quality insulating structure. At the same time, floor insulation is a rather simple procedure. It can be performed by any owner of the premises on his own, having the necessary material and tools.
Material selection
Currently, there are several types of insulation material on the construction market. This material is produced in bulk, liquid, roll and block form. Moreover, any of them can be used to insulate the room under which the basement is located.
Various slabs and mats are used as block material. This type of insulation has a low thermal conductivity coefficient and low weight. Block insulation is very good to use from the basement side.They can be used together with roll material, which will increase the overall thermal insulation. The block type of material is made from mineral wool, foam, basalt fibers or other materials with a composite structure.
Scheme of floor insulation with expanded clay.
Bulk materials include the following:
- expanded clay;
- sawdust;
- foam crumb;
- slag waste.
Their use will completely fill the free space between the floor surface and its base. You can use bulk materials directly on the open ground or in any private building, at the bottom of which there is a cold basement.
Mineral wool, any composite with a cork base or any multilayer foil-based insulation can be used as a roll insulation. The thickness of such materials can be different, but mostly it has a size of 8-10 cm.
As a liquid insulation, various cement-based solutions are used, which contain foam plastic chips, wood chips, expanded clay or other similar materials.
At present, foamed polymeric floors based on penoizol are widely used. To lay it, you must use specialized equipment. Which is quite difficult to do on your own.
How to carry out insulation?
In order to correctly perform the required work, it is necessary first of all to dismantle the old coating. This must be done carefully, so that later it will be possible to reuse it.
To insulate the floor, at the bottom of which the basement is located, it is imperative to take into account the load that will occur on all layers of the structure. To minimize them, all material must be stacked in a specific sequence.
To carry out all the installation work, you will need the following tool:
Floor insulation tools.
- screwdriver;
- Screwdriver Set;
- a hammer;
- knife;
- building level.
The first step is to dismantle the old coating. After the old coating is removed, it is necessary to inspect the log. Damaged logs will need to be replaced. After that, they must be treated with an antifungal antiseptic, which will help in the future to avoid the formation of mold on their surface. As the antiseptic dries out, waterproofing can be laid.
After that, the necessary insulation is laid. In the event that the height of the lag is quite high, 2 layers of material can be laid. Here you can perform a combination of insulation on its different layers (bulk and roll).
Then you need to put a vapor barrier film, and a plywood board on it. On top of the plywood, you can lay a thin roll material (backing), the thickness of which is 1-4 mm. And only then the finishing surface is finally laid out.
At the stage of building a house, it is better to do preliminary insulation. It is performed in the same order. This will avoid further operational problems.
Do-it-yourself basement work
Floor insulation scheme in the room above the basement.
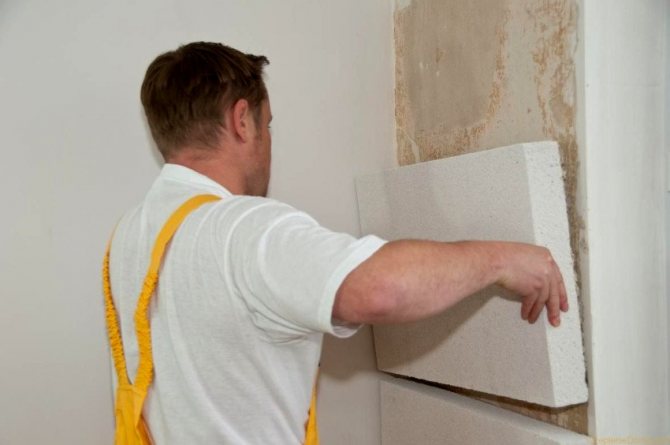
If possible, it is possible to carry out insulation work from the basement side. It is performed on the ceiling of the basement. For this, polystyrene is best suited, since it is not afraid of high humidity.
Styrofoam is glued to the ceiling surface with special glue. After the glue has dried, the gaps between the boards must be filled with polyurethane foam. When the foam hardens, its excess must be removed with a knife.
You can use other similar material. But foam is one of the most inexpensive. Moreover, if damaged, it can be easily replaced.
In order for the insulation to perform its functions efficiently after work, the seams between the layers of the vapor barrier and waterproofing film must be glued with tape. This will ensure their tightness.
To prevent condensation from forming on the insulation in the future, the ventilation openings must not be covered. Ventilation will also help keep the flooring in good condition.
In the event that the apartment is on the 1st floor and there is a basement under it, you should not postpone the installation of insulation for a long time.
If you tighten with them, then the room will be cold and damp.
And in the future, this will lead to the formation of fungi and mold not only on the surface of the floor, but also on the walls.
moyagostinaya.ru