Making warm beds in the greenhouse: types of heating
The sun's heat warms up the beds only by the beginning of May, in some regions and towards its end. The artificially heated soil is suitable for planting plants already in March, while the root shoots are in comfortable conditions, which contributes to their strengthening and plant growth. In addition, the heat generated by the ground helps warm the air in the greenhouse.
Advantages of warm beds:
- Early planting and reaching maximum yield in the first summer months;
- Getting a good result even on relatively fertile soil;
- Reducing the need for plant nutrition;
- Increased fruiting period;
- Reducing water consumption during irrigation;
- Weed control.
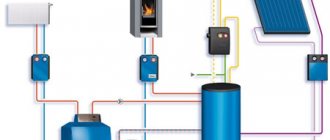
The preparation of a warm bed in a greenhouse is carried out in autumn or early spring. There are several options for heating the garden: electric cable, water pipes, biological compost. When using a cable, it is laid under the soil in advance and heated with the help of electricity. These designs are highly efficient but costly to maintain.
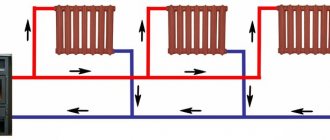
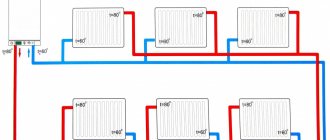
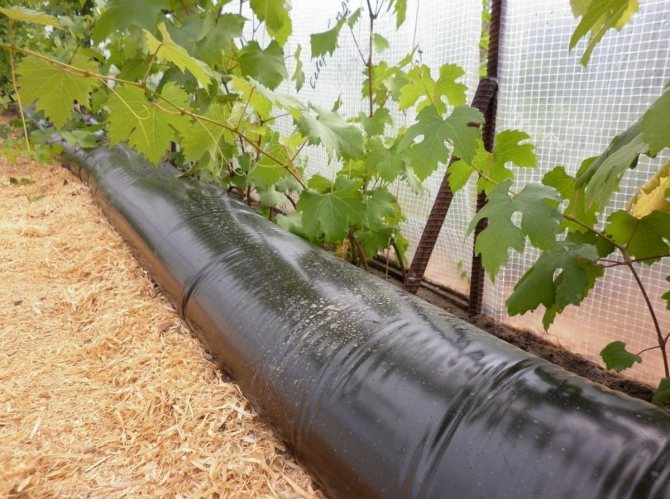
Water heating is used with the use of special pipes made of polymer material, which are laid under the ground.
Hot water flows through the pipes, capable of heating the earth. For biological beds, plant residues and manure from livestock activities are used. The decay process becomes a heating element, as a result of which the temperature of the soil rises. This is the most economical way to heat your beds. Each method has its own pros and cons. The gardener selects the most appropriate option based on his own views on growing plants.

Classic version
It is worth starting with a description of the greenhouses. At the moment, the industry produces a number of design solutions. However, the main one is the solution with the use of glass units. In the absence of funds, double-glazed windows should be replaced with ordinary polyethylene, while during the construction process it should be soldered (exposed to high temperatures). Thus, you can create 2-3 sealed chambers on one frame, which will look like a glass unit. Such designs of greenhouses are widely used at the present time, therefore, methods of heating such structures will be considered below.
The first option for heating is with normal sunlight. It is a natural and cheap (free) energy source. In this case, the environment will not be harmed, and a competent organization will require very little money and some time.
Heating the soil in a greenhouse in this way is often referred to as the "greenhouse effect". The principle of operation is as follows:
- ultraviolet light in the form of sunlight penetrates freely through glass or film;
- transfers light energy to the ground and other objects and plants inside the greenhouse.
- soil and other objects, heating up, heat up the air under the polyethylene.
Light energy is transformed into thermal energy, which cannot leave the greenhouse - it is stopped by layers of polyethylene.
At the same time, such heating can be controlled, thereby increasing the greenhouse effect. To do this, the greenhouse should be built in an open area, where nothing will obstruct it. Usually such a greenhouse is called a solar greenhouse. The control of such structures is quite simple. To do this, you need to find a mirror or foil film (with a mirror-silver surface).These materials are installed in the morning on the side opposite to the sun, so that the rays passing through the roof of the greenhouse are focused and fall from the wall onto the soil of the greenhouse.
Around noon, when there are no shadows for several hours, a mirror or mirror film is removed so that direct sunlight falls from above onto the ground. When the sun begins to set, a mirror or film is already attached to the opposite wall so that they reflect the rays of the setting sun.
Thus, a completely satisfactory heating of the ground in the greenhouse is carried out, and control makes it possible to increase the amount of energy received by the soil by almost 1.5-2 times.
To achieve the maximum heating effect, it is necessary to correctly build a greenhouse - it must have an arched vault, and its location should be made so that the ends are on the north and south sides, and the longest walls are on the west and east.
It is all easy to implement with your own hands in a short time, it is enough just to control the solar flows yourself.
However, such soil heating has the following disadvantages:
- in spring or autumn, there is often a change in weather and a fairly large number of cloudy days when there is practically no sun;
- the heating of the soil is extremely slow, so it is necessary to pre-warm the soil about 1-2 weeks before sowing the seeds;
- energy management requires daily human presence.
Below are more technologically advanced heating methods.
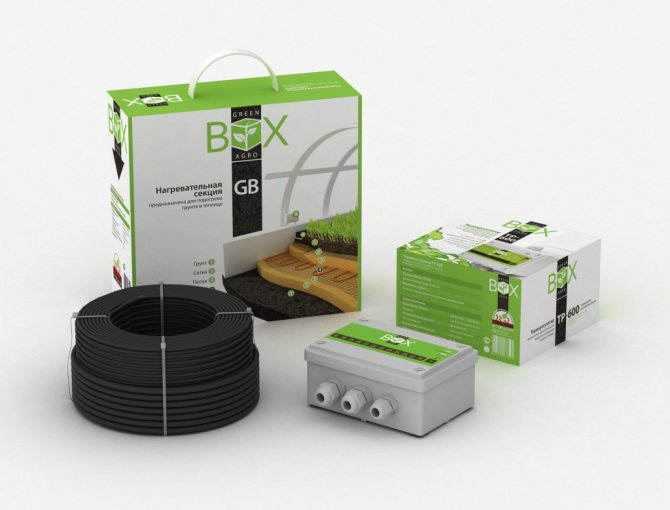
Heating the ground in a greenhouse using an electric cable
Cable heating of greenhouse beds allows you to maintain the soil temperature as accurately as possible, which makes it possible to effectively grow plants.
The main advantages of the electric heating system are:
- The ability to grow any, even exotic crops;
- Increased productivity;
- Possibility to regulate soil temperature;
- Ease of installation of the cable system;
- Long service life.
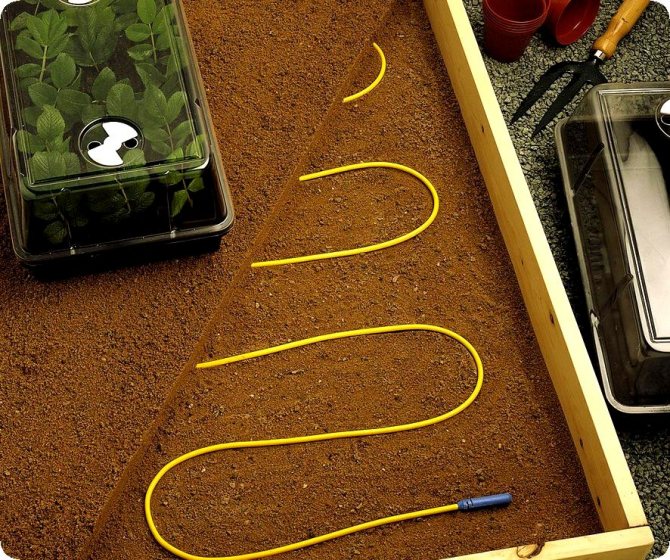
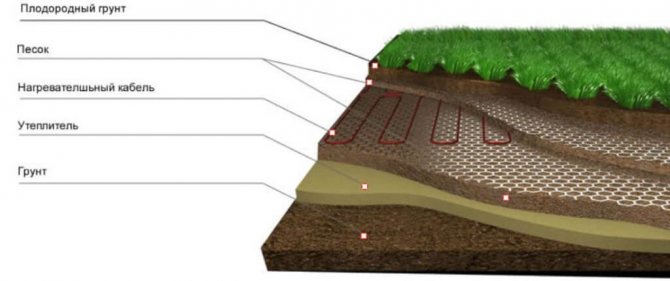
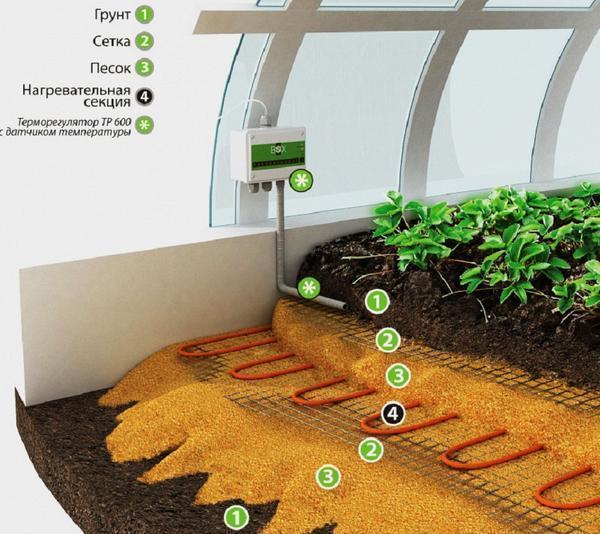
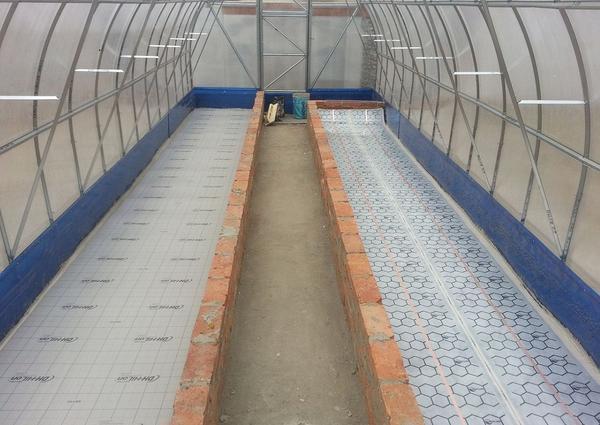
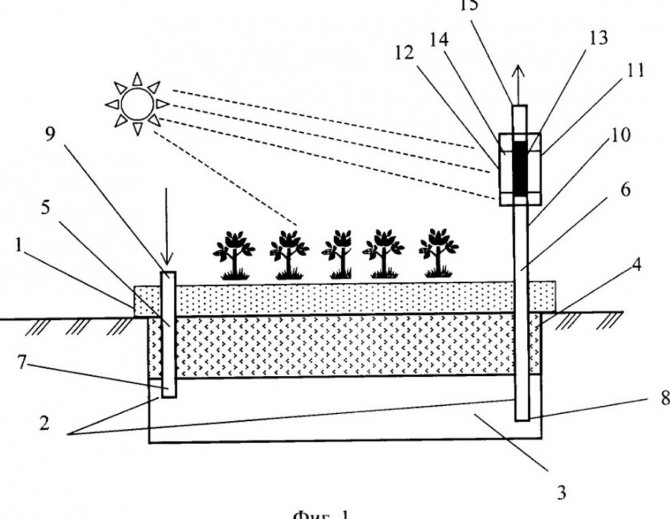
To arrange the beds, it is necessary to remove up to 40 cm of the upper soil. Next, lay the material for thermal insulation so that the energy does not go into the lower layers of the earth. Prepare a 5 cm pillow with sifted sand, spill with water and tamp.
To protect the cable from various rodents, you need to install a special mesh over the sand.
Next, lay the electric cable on the mesh with a snake. The laying distance between the tape should be no more than 20 cm. Using special clamps, fasten the wire to the mesh, fill it with sand and tamp it, creating another pillow. Further, in order to avoid mechanical damage to the cable during excavation work, put another mesh and cover the entire structure with earth. Thanks to this device, plants can be grown in greenhouses regardless of weather conditions, using additional lighting in autumn and winter. In return, the family will receive fresh vegetables at any time of the year.
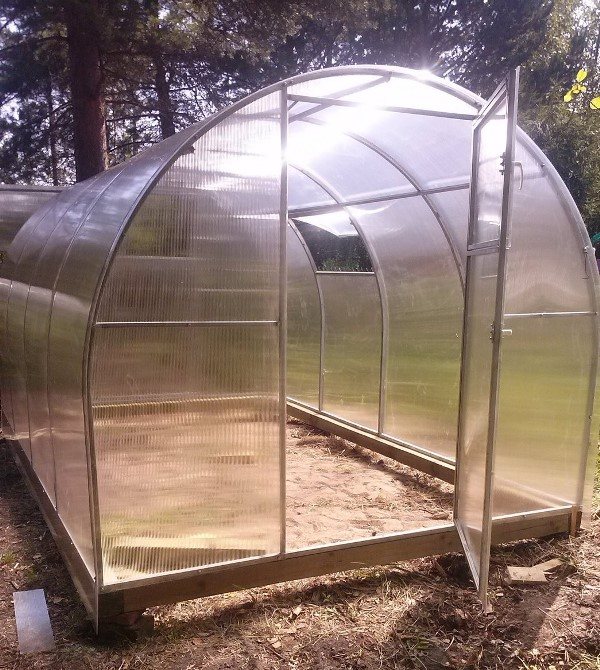
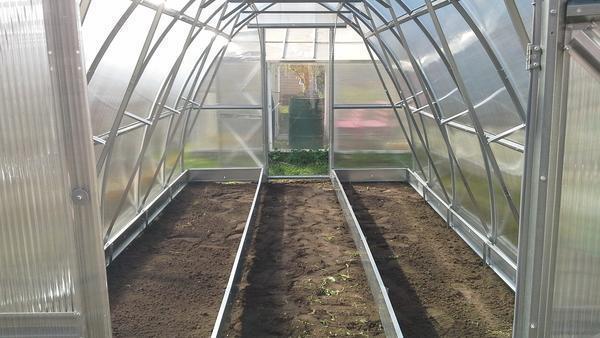
Simple do-it-yourself greenhouse with heated soil
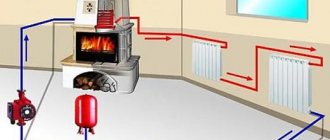
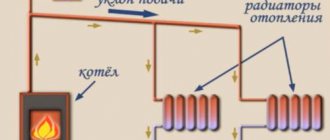
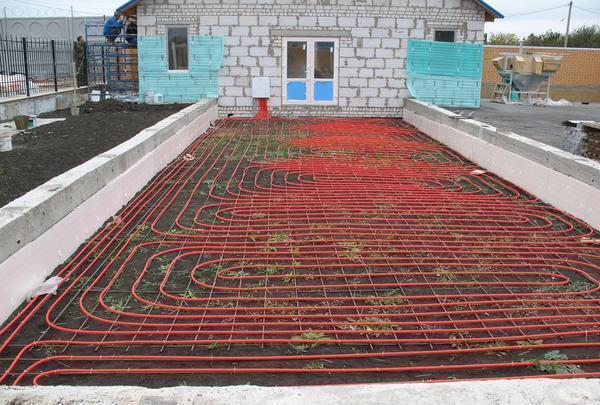
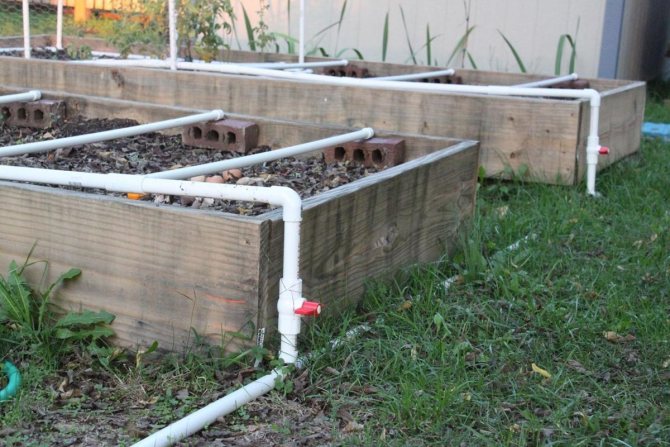
Water heated beds also have a number of advantages. Firstly, the condensation that forms on the pipes additionally moistens the soil. This design provides uniform heating of the air in the room. To heat the greenhouse, you will need a gas or electric boiler, you can also use a small brick or metal stove with wood.
You need to purchase a smoke outlet pipe for it. The selection is made in accordance with the configuration of the heater.
To install a furnace or boiler, it is necessary to prepare a foundation, for a brick structure - a concrete one. The metal boiler can be placed on a sheet made from a mixture of asbestos and cement. Further, the structures provide stability and attach the chimney, hermetically sealing the connection points.
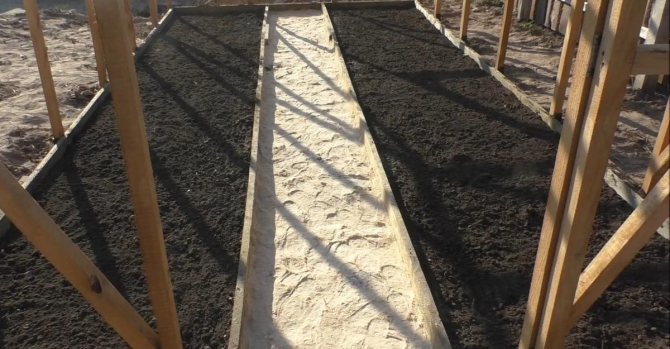
Thermal insulation of beds with pipes, necessary work:
- Remove soil 35-40 mm thick;
- At the bottom of the trench obtained, a material for thermal insulation is laid out, usually foam is used;
- Pipes for water are placed on top and connected to the heating system;
- Fertile soil is laid on top of the pipes.
This heating method is considered optimal, however, it is necessary to ensure that the water temperature in the pipes does not exceed 45 ° C, otherwise the roots of the plants can be burned.
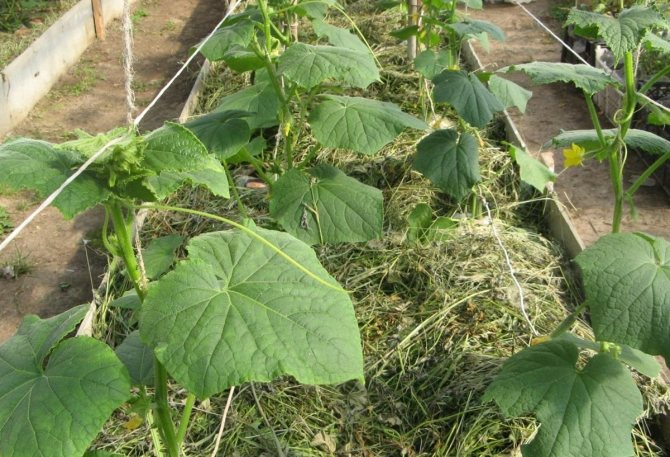
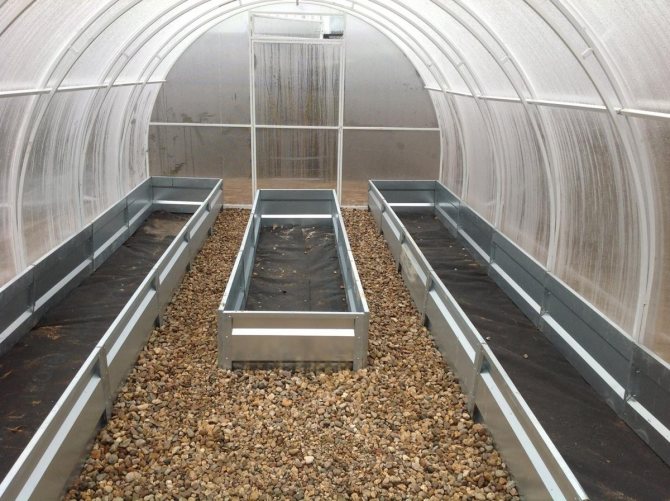
A warm bed in a polycarbonate greenhouse: a biological method
The biological method of heating the beds is made using natural biofuel, laid in the subsoil. As a filler, plant residues, sawdust and manure are used, which is shed with water for the decay process. Such beds are the most economical design.
Warm beds powered by natural fuel are usually divided according to the type of construction:
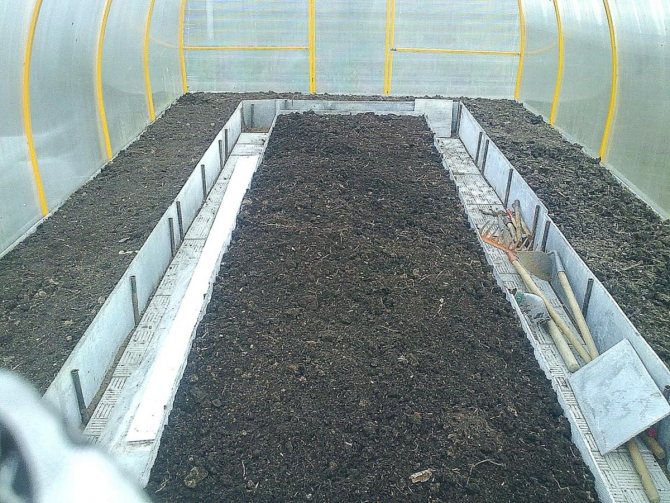
- Buried, when fertile soil is removed, a trench is pulled out, compost is laid and filled from above with soil so that it is at the level of the total mass of the earth;
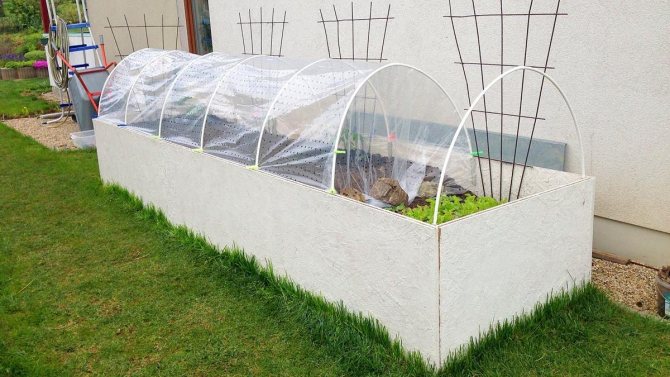
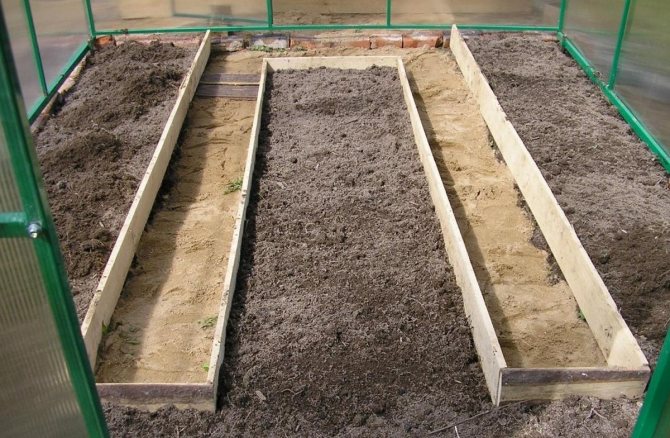
- Raised beds, the top layer of earth is removed from the surface and placed in special wooden boxes, which serve as protection against crumbling and leaching of the earth during operation;
- Hilly bed, laid without a box on top of the main platform;
- A combined option, when the lower layers with organic matter are laid at ground level, and the fertile soil layer is fixed with a box.
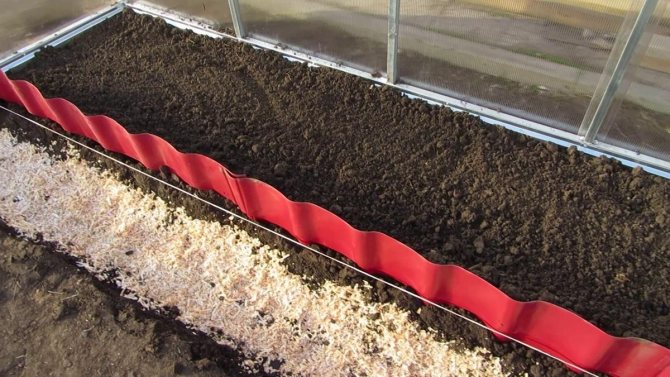
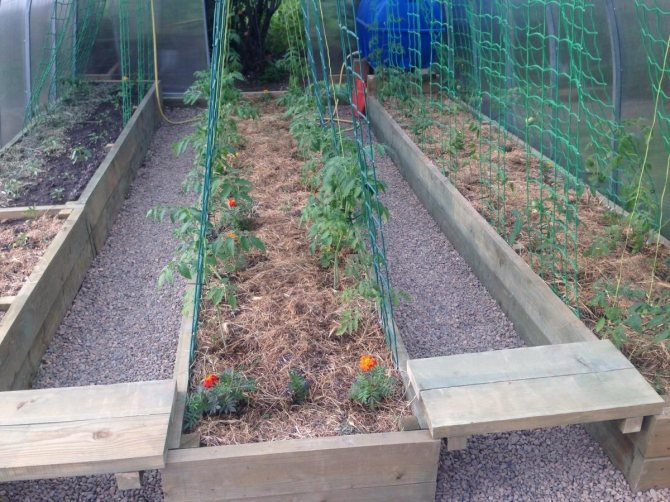
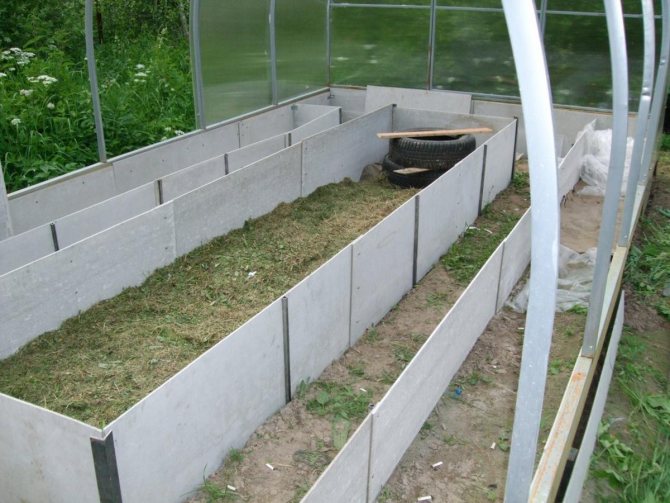
To make the construction of a combined warm ridge, it is necessary to mark places for future plantings. Then carefully remove the sod layer, setting the fertile soil aside. Next, you need to dig a trench up to 60 cm deep. To protect it from freezing, foam plastic or a closed plastic container is placed on the bottom of the trench. Next, the first layer of organic matter begins, consisting of large branches, wooden chocks, large objects of plants.
This layer will play a drainage role. Then a paper backing consisting of waste paper is laid.
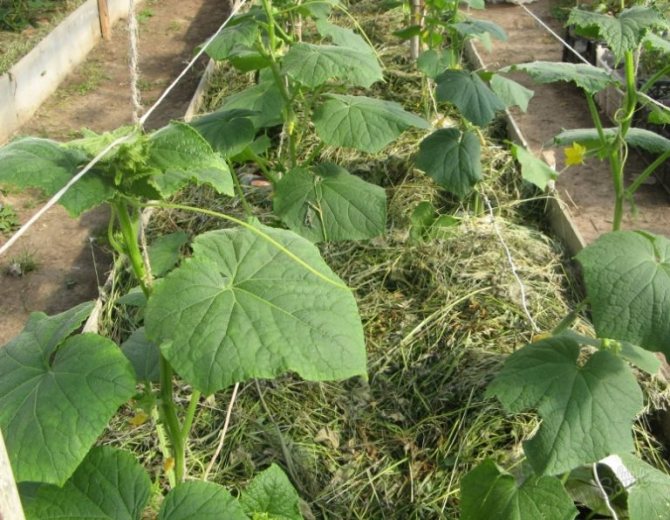
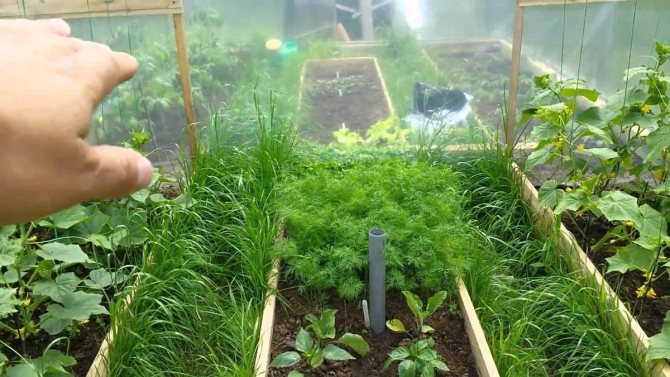
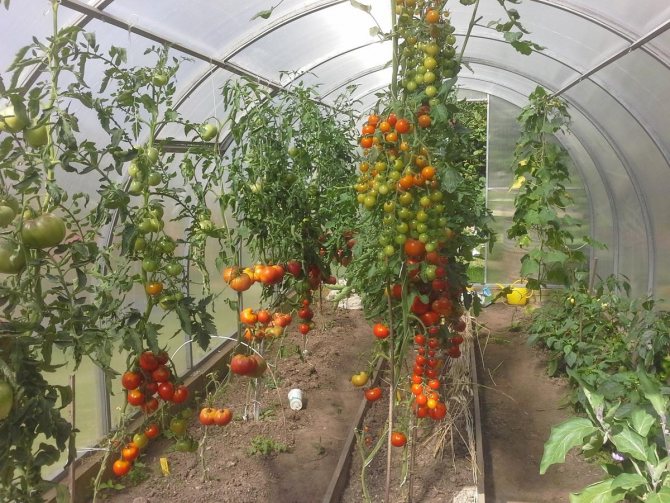
After that comes a layer of finer organic matter, food waste, tree leaves, small stems of grass. Next, we fill in ready-made compost, or semi-rotted manure, to start the decay process. We install a pre-prepared box into which we will pour fertile soil. Each applied layer must be well shed with water. We cover the last layer with fertile soil. Organic soil is perfect for planting tomatoes, pumpkins and cucumbers. The decay process is able to warm the ground for 2 months.
A quick way to heat up the soil in your garden bed for heat-loving vegetables
Everyone knows that some of the vegetables we grow outdoors come from warmer regions. Of course, even here they grow among zealous gardeners, but their heat requirements are noticeably higher than, for example, potatoes, which are familiar to our climate. How to help tomatoes, peppers, pumpkin seeds?
Speaking about the "thermophilicity of plants", we must understand that first of all we mean the warmth of the soil. Even in relatively cool air, when the roots are in warm soil, plant growth is more active.
With us, the opposite happens: in the spring in a greenhouse in the sun, the air warms up strongly, and the earth is still cool at this time.
It turns out that plants grow large leaves so that they do not overheat with the help of evaporation, and at the same time, underdeveloped roots in cold soil simply cannot provide the bush with moisture.
Therefore, I propose the idea of warming up the soil in the most elementary way.
How to make a homemade sun trap?
There are many varieties of warm beds - these are high beds, and buried beds, and manure ridges. All of them have one thing in common: they are based on nitrogenous substances, which, when compacted, begin to burn with the release of heat. This warmth and warms the earth, in which the roots of plants are located.
In addition to warmth, the correct bed also contains a large amount of food. This is especially true for northern regions, where there is a short period of heat.
But, in addition to the advantages, there are weak points in the device of such beds:
- This is a very time consuming job! Although, once created, such a bed can "work" for up to five years.
- In the early years there are a lot of nitrogenous substances (something should be burning), which means that not all vegetables there will grow correctly. For example, this works best for pumpkin seeds, but not for everyone. Cucumbers and zucchini will grow very well in such a bed, you can get a large harvest. And all because we eat their fruits green. And what happens if you plant a pumpkin on a dung ridge? Yes, it will also grow and develop well, but when the time for fruit ripening comes, the plant will simply drive out new lashes - there is still a lot of nitrogen in the ridge. And the fruits, although they have grown, simply may not have time to ripen. And the imbalance in nutrition towards nitrogen is not always good.
- It takes time to start the combustion processes.
With the advent of transparent film, it became possible to capture solar energy in a small amount (hotbeds, greenhouses).
But here, too, not everything is so simple: it seems that there is a greenhouse, and it is warm in it, and sometimes it is hot, and the plants do not grow as they should.
Why does the earth stay cold for a long time with such heating? The sun's rays, passing through the film and hitting the black earth, should heat the surface, but this does not happen as quickly as we would like.
It's all about the processes of evaporation - the sun's rays, heating the earth, evaporate moisture, and it, rising up, forms condensation on the surface of the film. Then this moisture falls to the ground again and evaporates again. And at each stage of the transformation of moisture, thermal energy is required.
It turns out that when the plants are planted on time, the air in the greenhouse can warm up to 30 ° C, while the soil temperature is still within 15-18 ° C.
Well, as a result, we get the oppression of plant growth. The roots in cold soil cannot receive normal nutrition, and the stem and leaves are in warm air and actively evaporate moisture.
Photo by the author
But if we cover the ground in the greenhouse with transparent film, we will get several bonuses at once. Judge for yourself.
This can be done on a regular garden bed a couple of weeks before planting. Moreover, the technique does not require a lot of physical effort and time (just spread the film), or financial costs (you can take any piece of old film).
It is important that this “solar stove” can be “turned on” and “turned off” at any time at will (the result will be within 3-5 days).
What's going on under the tape? The moisture is trapped and there is no evaporation. Soil temperature immediately begins to rise, and with this:
- bacterial processes are activated and, as a result, the rapid growth of weeds begins. This is just an indicator of soil warming;
- moisture and nutrition are made available to plant roots;
- the development of plants is many times faster when compared with the usual uncovered soil in a greenhouse.
What bonuses do you have?
1. If you prepare the land in this way two weeks before planting the seedlings, even just in the open field, then even before planting the seedlings you will collect a rich crop of weeds. Almost all the seeds will already wake up, and you just have to weed them and then, most likely, there will be no weeds in the garden.
2. For outdoor conditions, such a "sun trap" is an ideal rooting plant for cuttings, where it is warm below and cool above. The roots will form before the leaves - this is what you need. And the only thing to do is to pierce the film and stick in the handle.
3. Even if this third bonus was the only one, it would be worth using this technique! The ground is warming up, our "favorite" slugs begin to wake up and come out of hiding places.In two weeks, almost all of them will wake up and come to the surface in search of food. And you just have to scatter the Thunderstorm preparation (preferably at night) two or three days before planting the seedlings - and all the slugs will gather on this bait. In an ordinary greenhouse, they begin to wake up gradually, as the earth heats up - just starting from the planting of seedlings and for another couple of weeks. It turns out that I ate here, took a bite here and every day something is spoiled, and the drug does not help (they just didn’t all wake up).
What did some gardeners use to heat the earth in the past?
For example, watering with boiling water before planting seedlings in the holes. But when the ground is cold, it is useless - the heat from boiling water in 10 minutes will disperse to the sides and the ground, as it was cold, will remain so.
Or placing dark or transparent hot water bottles between the plants. Yes, water, of course, has a heat capacity, and when heated, the heat in the water will be retained, albeit for a short time. But the sun's rays do not reach the ground and the ground remains cold. What is the point of heating the air if the roots are in cold ground? The soil is like the sea - it is not so easy to heat it, but then it will heat the air itself (in the role of a buffer).
Or the use of black film or light lutrasil on the soil (mulch). The black film will heat up by itself, but will not warm up the ground. And light mulch will reflect the rays of the sun and also will not warm the earth. These two options are good for summer use when you need to hide plant roots from extreme heat.
Who cares - just try it! You can leave one bed for control to clearly see the difference.
With my method, the film can be left until autumn and practically not water the plants - enough abundant watering just before planting. But you can add a drip irrigation tape under the film in such a greenhouse. And you can add moisture during the growth of fruits - this is only a plus. The landmark in this case is the appearance of ovaries (not flowers!). Only during this period can you mulch and gradually turn on watering.
Do you have any questions or just want to thank the author for an interesting post? Go to the page of Yura Kuzminykh in social networks.
How to warm up the ground in a greenhouse in spring
Having a polycarbonate greenhouse, I want to start sowing plants in early spring. To do this, it is necessary to warm up the soil and air in the greenhouse.
There are various ways to increase soil temperature:
- Electric heating by air, a simple and affordable method, you need to purchase a heater-fan and connect it to electricity;
- Electric heating of beds with a cable, an easy-to-install system that allows you to heat the soil to the required temperature and maintain it in this state;
- The infrared method, using special lamps, a feature of this option is the ability to heat only plants without increasing the air temperature in the greenhouse;
- Water pipes serve as an excellent heating element for the ground, beds and shelves while moisturizing the soil with condensate.
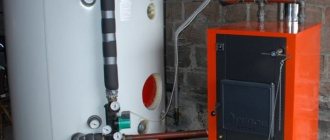
Which boiler to use
Since it is important to maintain a constant temperature in the greenhouse, the best option is automatic boilers paired with a thermostat inside the greenhouse. But it’s a matter of means. All these units are not cheap at all. However, if possible, buy automated ones. In addition to maintaining a stable temperature, they also save fuel. How? They give out the amount of heat that is needed at the moment to maintain the set temperature. That is, they will not allow your plants to freeze (if there is fuel) when the temperature suddenly drops, giving out their maximum power. But they will not give out excess heat with no less sudden warming.In this case, they will simply go into circulation mode and will drive water through the pipes without heating (or with minimal heating, depending on the type of fuel) until the temperature drops below the set temperature. Then the active mode is turned on again, but only until the set thermal mode is reached.
If you are going to heat with wood or coal, pay attention to pyrolysis boilers. Although they are expensive, the laying of firewood in them burns up to 8 hours, and coal, in general, for a day. And you don't need to "live" in a greenhouse or keep a stoker.
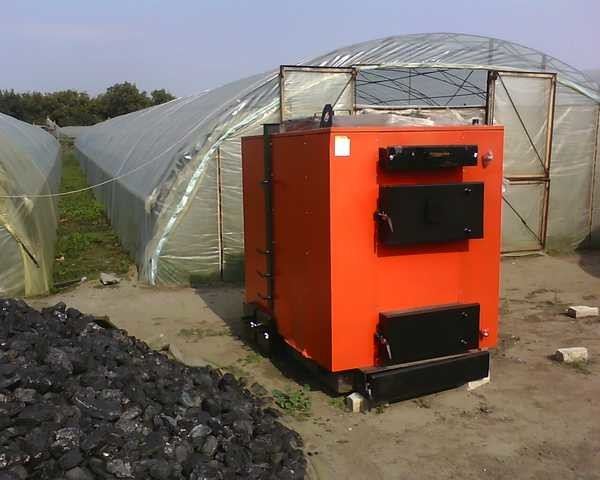
Boilers with automated control showed themselves best in the greenhouse, and you need to choose any fuel that is available, and at the same time, it is inexpensive
How to calculate the boiler output for a greenhouse? In the general case, the surface area of the greenhouse is multiplied by the heat loss coefficient for the material that covers the greenhouse, and all this by the required temperature difference.
The temperature difference is considered between the minimum during the heating period on the street, and the required one in the greenhouse.
For example, we will be heating from February to April. The lowest temperature, let -18 o C, will be maintained inside +20 o C. Total delta (difference) 38 o C. Now let's calculate the boiler power for such conditions in a greenhouse 10 x 5 x 2.5 m. Covered with a double film. The area of all "film" surfaces of the greenhouse is approximately 150m 2. The coefficient of heat loss through the double film is 3.5. Total we get: 150 * 3.5 * 38 = 19950W. Rounding up we get 20kW. For reliability, you can take a slightly more powerful boiler, about 24-25 kW (in case of expansion or abnormal cold weather).
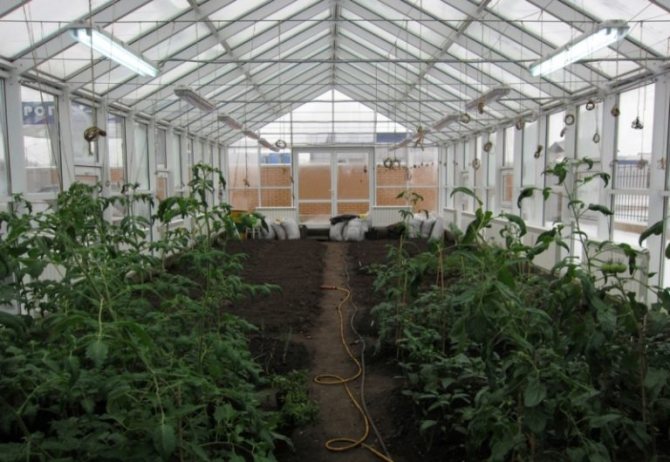
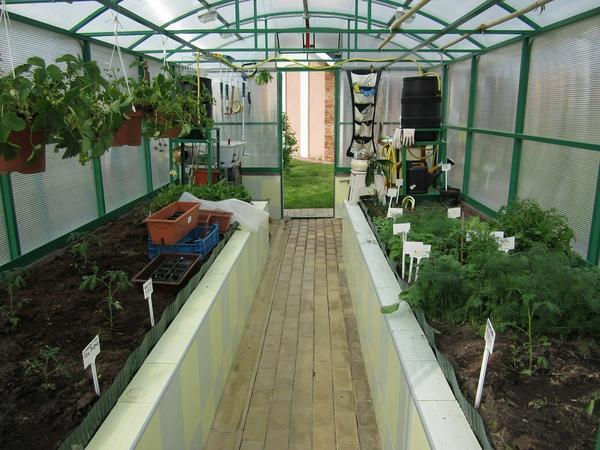
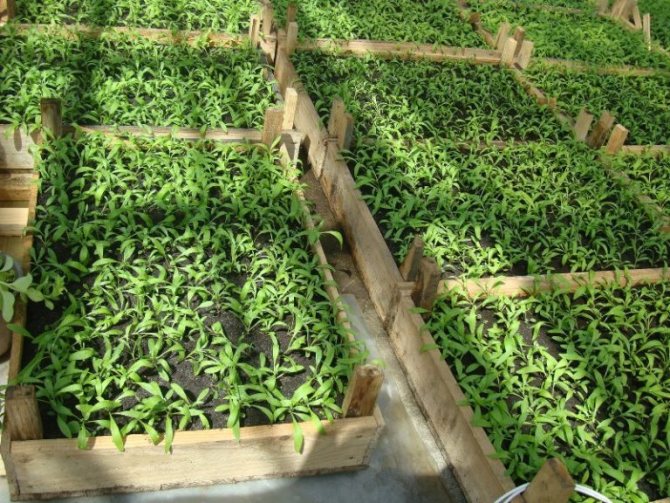
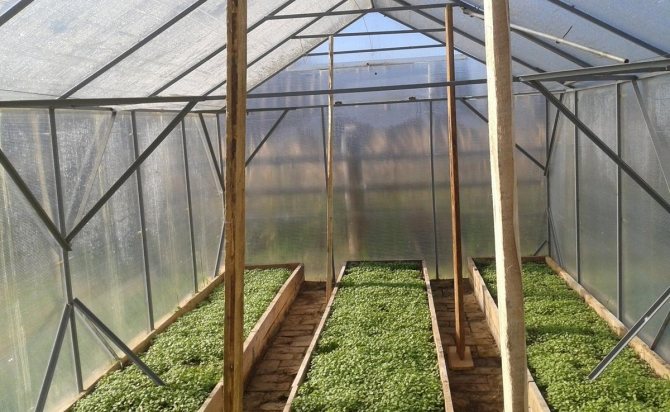
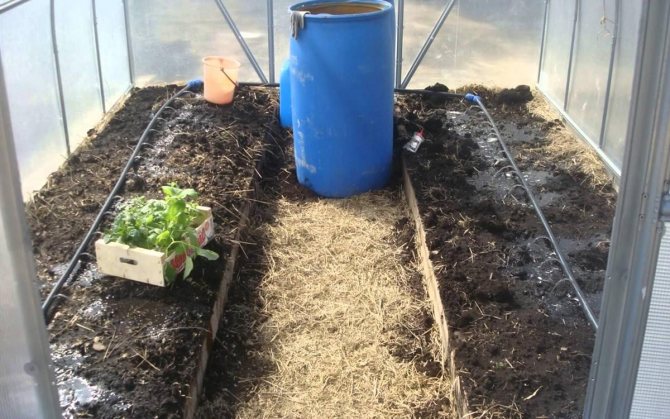
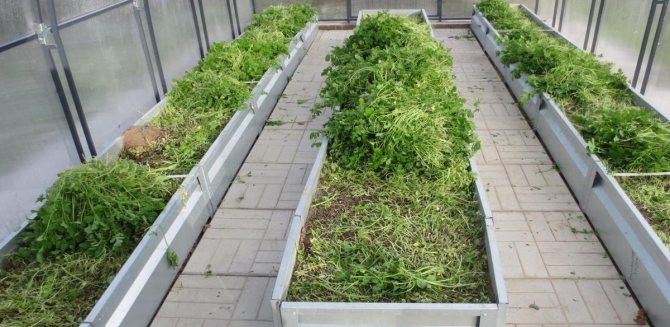
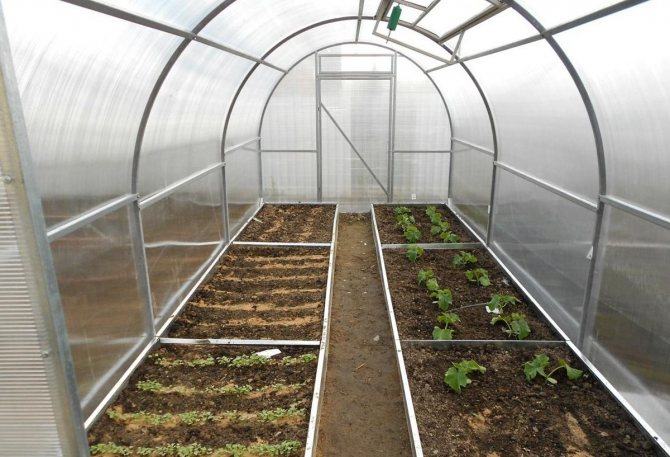
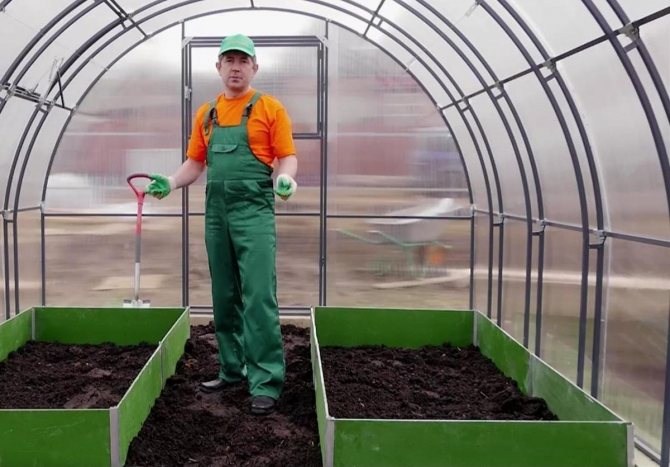
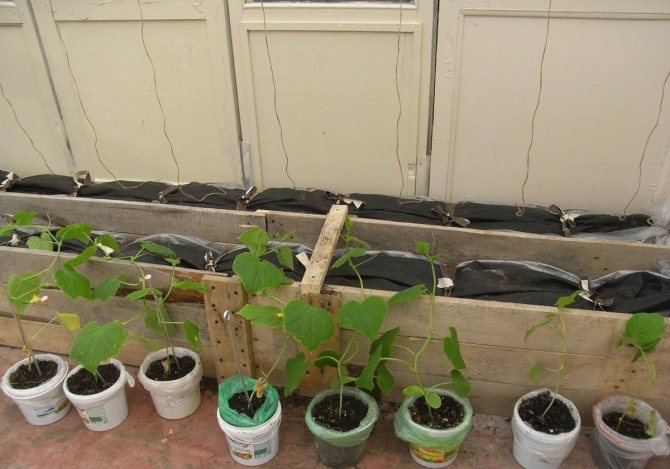
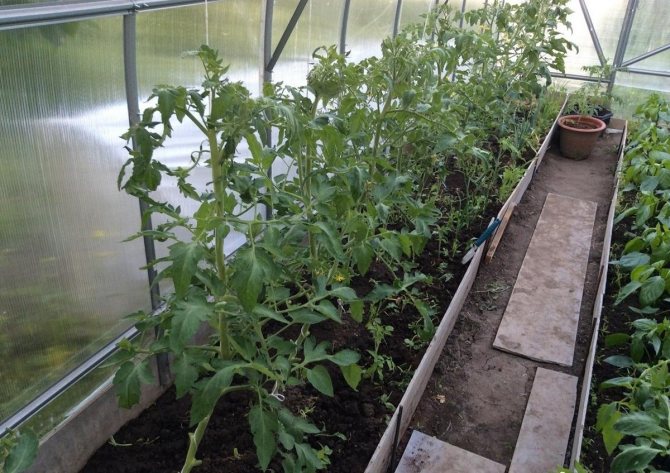
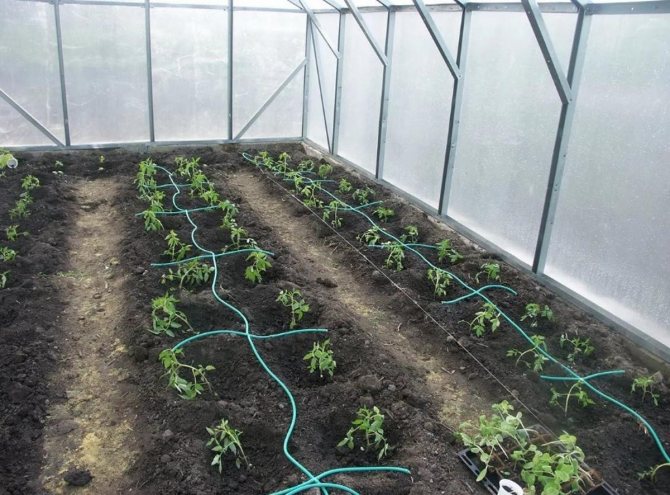
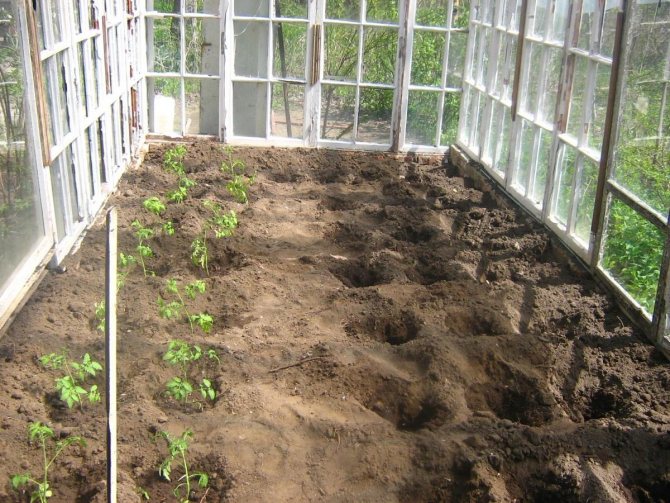
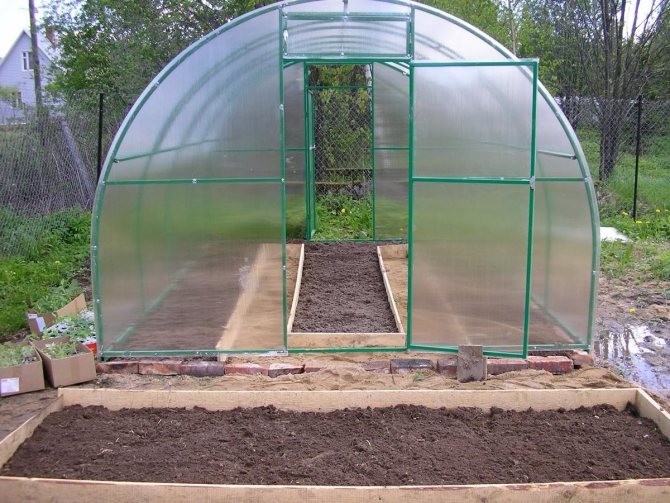
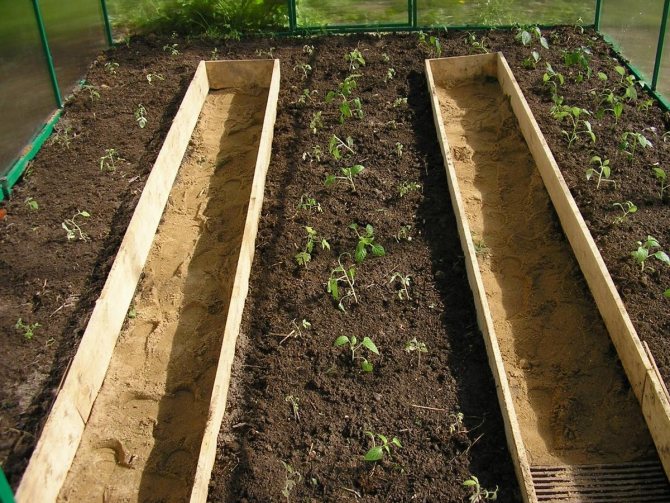
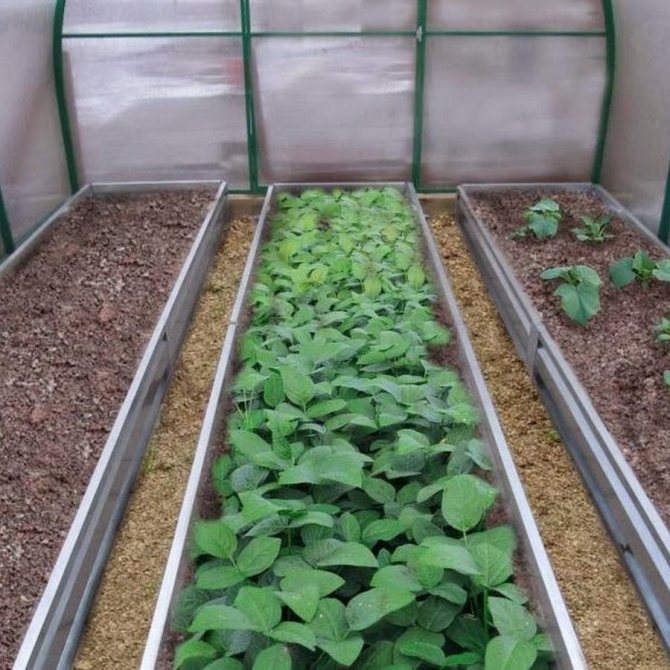
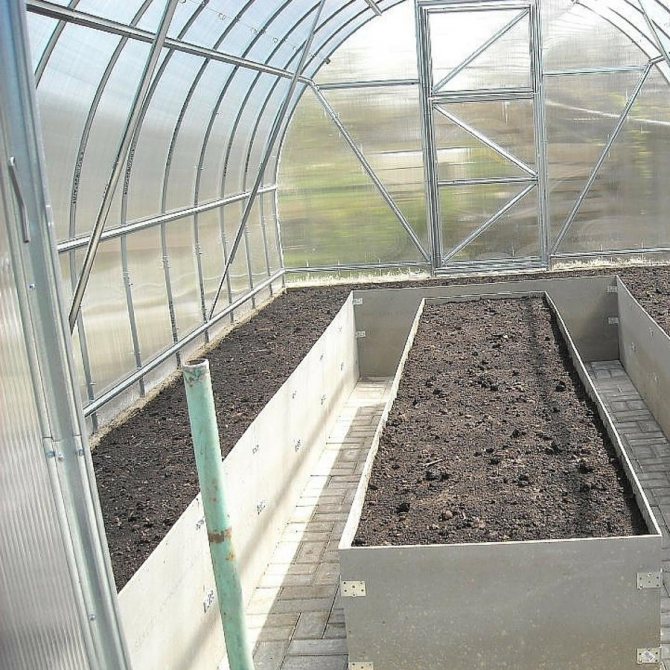
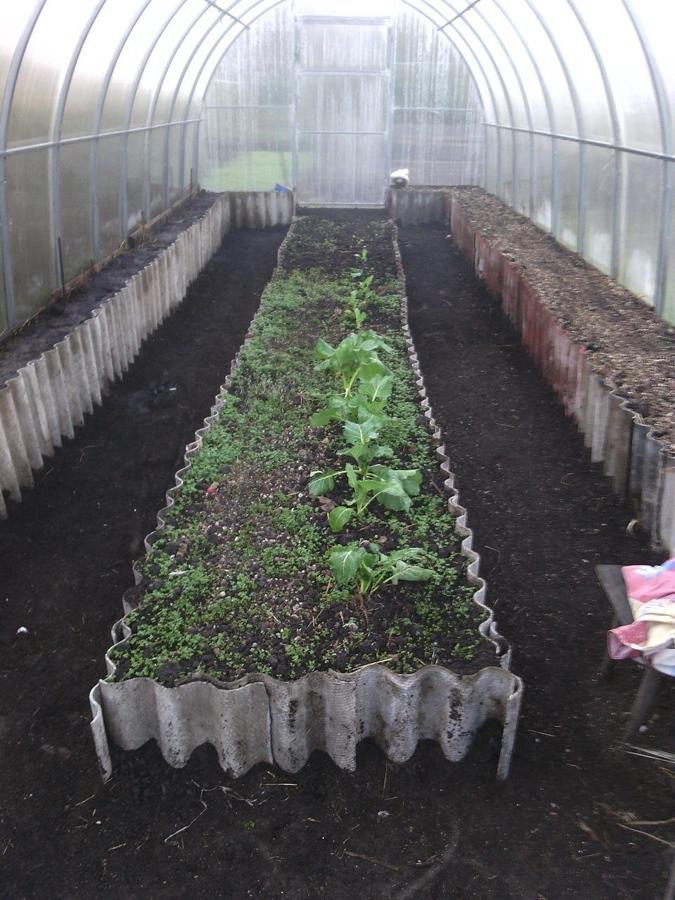
Examples of warm beds in the greenhouse (photo)

- Author: admin
Rate the article:
- 5
- 4
- 3
- 2
- 1
(2 votes, average: 5 out of 5)
Share with your friends!