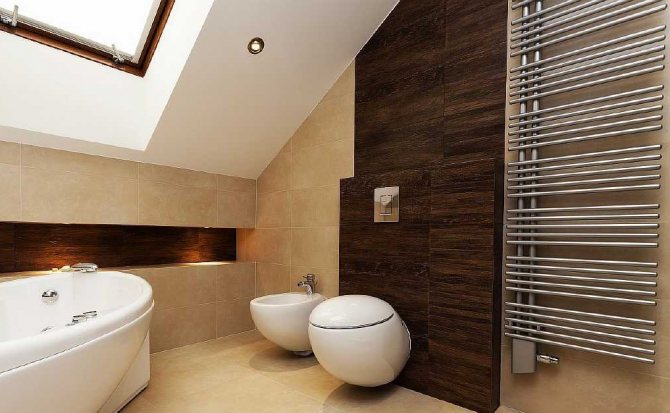
In many apartments, a heated towel rail serves not only to dry things, but is also responsible for maintaining the desired indoor climate. Over time, he becomes unusable or simply does not suit the owners with his appearance. And in old apartments it happens that it is simply unsuccessfully located. Then the question arises: how should a heated towel rail be replaced correctly and is it really possible to do it yourself?

The complexity of the work will depend on many factors. In the simplest case, the services of a locksmith will cost one and a half to two thousand rubles, and the work will not take more than two hours. But if you need to make changes to the hot water supply system, then the cost of installing a heated towel rail will increase quite significantly. Even if you doubt your abilities and decide to hire professionals, it will be useful to know how to replace a heated towel rail in the bathroom. This will help to control the quality of the work being carried out and to avoid problems in the future, the primary source of which is an illiterate installation.
Choosing a new heated towel rail
How to change a heated towel rail in a bathroom with your own hands in the quickest and easiest way? The replacement process will cause the least complications if the new model does not differ much from the old one. What should you pay attention to here?
The most important parameter can be considered the distance between the liners. If it matches, then there is no need to modify the water supply system to the device, and this is the most difficult and costly part of the work when replacing a heated towel rail. All manufactured varieties fit into a standard range of sizes between the supply pipes: 400, 500, 600, 700 and 800 mm. Having carefully measured the distance between the liners of the old heated towel rail, you can go to the store to buy a new one.
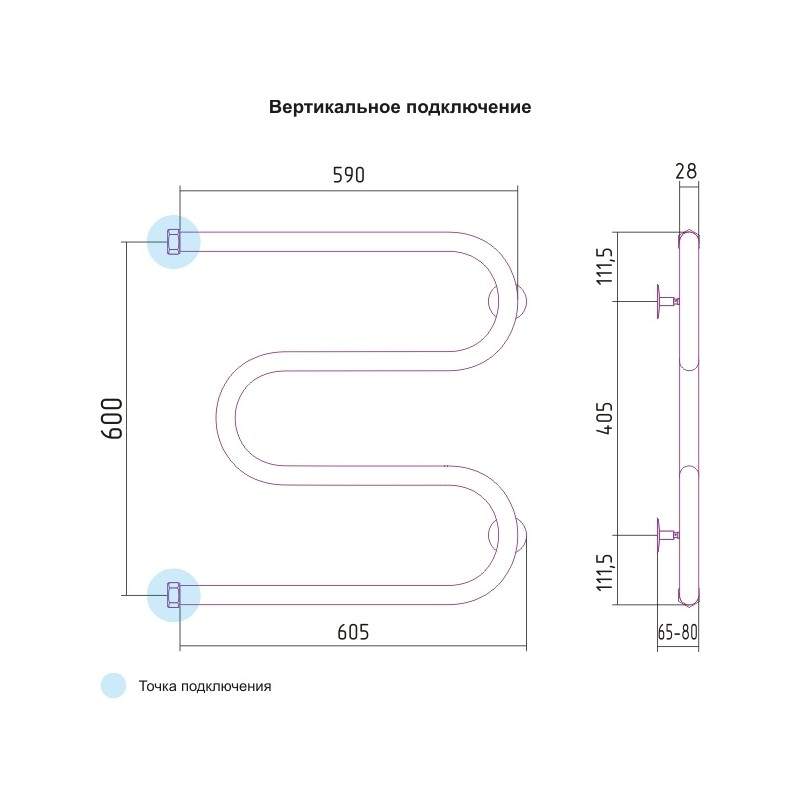
Another important point. There are two types of heated towel rails: the heating element can be in the form of a ladder or a coil. Changing one view to another is problematic: hot water is supplied to the coil from the side, and in the model by a ladder - from above or below.
The dimensions of the heated towel rail and the attachment points are not decisive. Even a mismatch in the diameter of the supply pipes can be easily eliminated using adapters.
USEFUL INFORMATION: In-line water filter for washing machine: cleaning the water supply for household appliances

Why change heated towel rails
Any renovation work in the bathroom is an update. Renovation of old finishes, replacement of tiles, change of plumbing fixtures. A plumbing fixture called a heated towel rail is no exception.
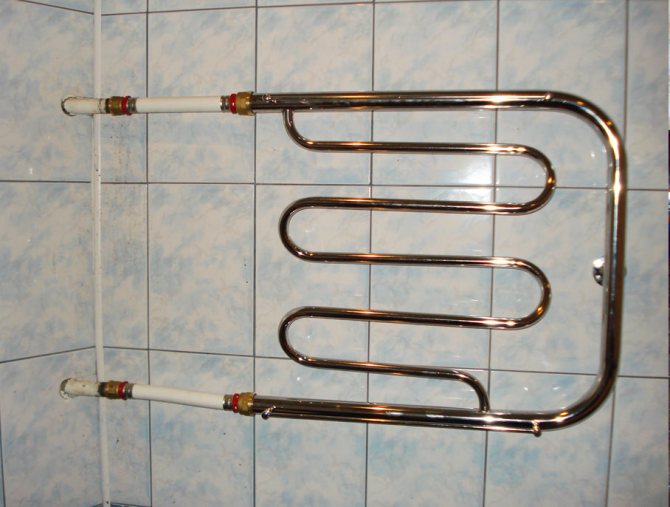
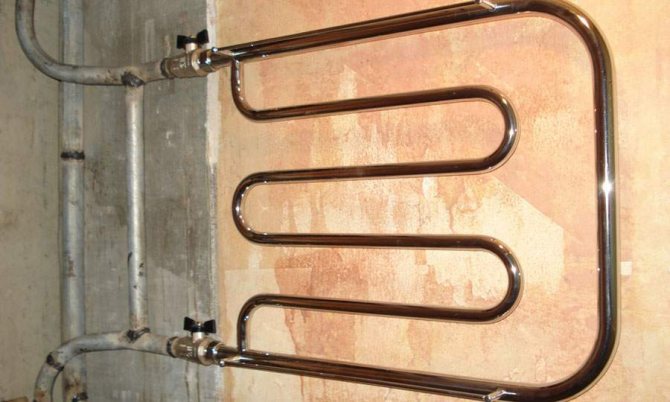
In fact, a heated towel rail is a heating battery made of plumbing water pipes, welded or simply bent in various designs. For connection, the device is equipped with ¾ "(G 3/4") union nuts.
When choosing and buying a multi-pipe towel rail, it is important to pay attention to the location of the connection nuts. If the nuts are located at the bottom, such a device is considered a bottom connection device, if on the side it is a side connection device. The location of the connection nuts determines the choice of the connection scheme, the piping to the heated towel rail and, as a result, its normal operation.
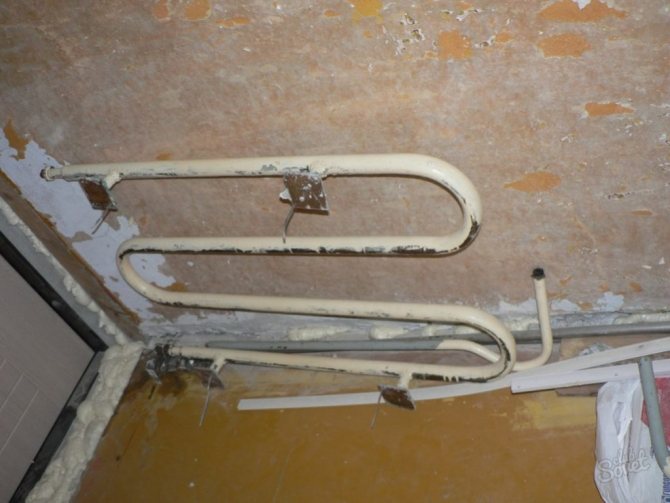
Removing an old heated towel rail
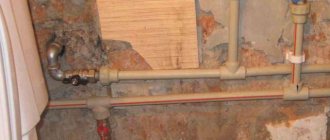
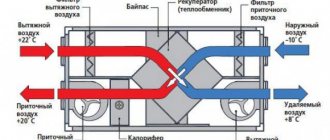
The heated towel rail can be connected to heating or hot water pipes. The second option is preferable - then the bathroom will be warm and dry all year round.
In any case, you will have to contact the housing office or a local service company. Only their locksmith can shut off the hot water in the riser. Of course, no one will allow you to turn off the heating in winter.In this case, the replacement of the heated towel rail in the bathroom is carried out in summer. But you still need to check if the water is drained from the heating system. We open the tap on any radiator, substituting a convenient container under it. After checking, you can proceed to dismantling.
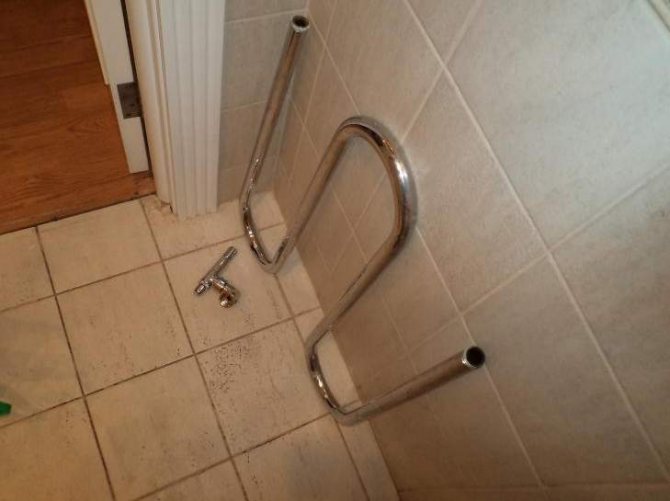
It is good if the old structure was attached to the pipes using threaded connections. Then they can simply be unscrewed after draining the water from the system. But what if it is no longer possible to unscrew the thread or the old heated towel rail was simply welded on? We'll have to cut pipes with a grinder. It is important not to forget that these pipes will then have to be threaded. To do this, leave a piece of sufficient length.
It is better if the cuts on both pipes of the heated towel rail are located strictly vertically. To do this, we first outline the cutting line using a level. The cut itself must be perpendicular to the pipe. Having cut off, we make small chamfers at the ends at an angle of 45˚, they will be needed for free entry of the cutter when cutting threads.
It is necessary to dismantle at least two people: one works as a grinder, and the other supports a heated towel rail. Otherwise, it may fall or pinch the disc in the grinder, which can lead to very sad consequences.
After disconnecting from the pipes, dismantle the fasteners and remove the old heated towel rail.

Heated towel rail from heating: what you need to know when replacing
Starting to replace a heated towel rail, you should figure out where it gets its heat from. This can be electricity or water units that are heated by hot water entering them. There are also combined models that combine both of these types.
The most common are water heated towel rails, which can be connected:
- To the heating system;
- Hot water supply.
Experts strongly recommend choosing the second method, since dependence on heating involves cooling the device in the summer, when the heating is turned off. Unlike a heating system, hot water is supplied all year round, with the exception of planned works or repairs.
But if the heated towel rail is still powered by heating, then you only need to install a new device with the installation of a bypass bypass. Otherwise, it will be simply impossible to repair the structure in winter, because the release of water at sub-zero temperatures can lead to freezing of the entire system.
By the way, it is advisable to put a bypass in any case. This will allow you to disconnect the device from the system and carry out repair work without the consent of utility workers.
You can also replace the Soviet (for example, cast iron), a heated towel rail with a model with the same diameter and designed specifically for the bottom connection.
If pipes are found in the wall with outlets brought out, the connection can be moved to the side, although this is a more time-consuming option.
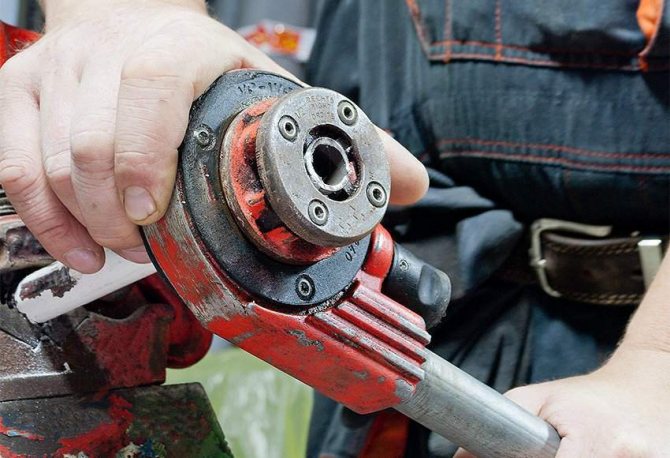
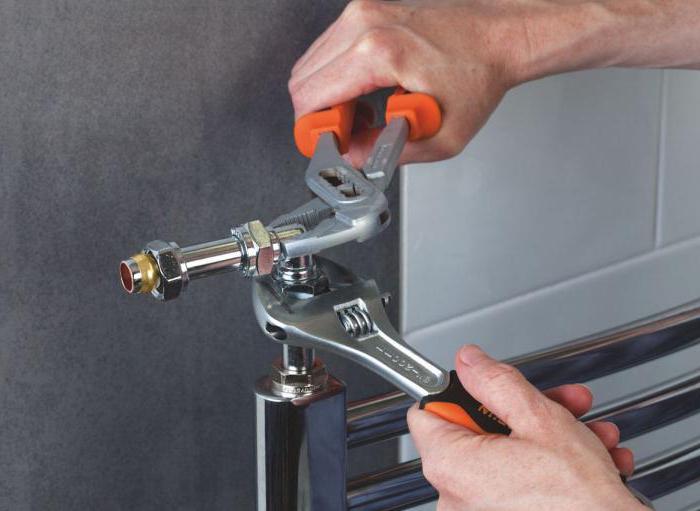
Thread cutting and pipe fastening
To connect to the riser, the remaining parts of the pipe must be threaded. It is most convenient to use a ratchet with a long handle. Any lubricant must first be applied to the pipe. It is important to make sure that the lerka runs smoothly.
The thread is cut as follows: half a turn of the scraper forward - a quarter turn back. There is no need to rush this operation.
Which pipes are best to use?
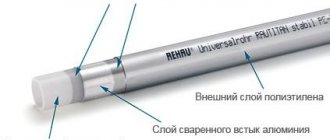
- To supply water to the heated towel rail, it is more convenient to use reinforced plastic pipes. It is not necessary to buy a soldering iron for their welding, you can take it from friends or rent
- Steel pipes can be used, but their connection will require rather complicated welding work. They weigh a lot and are prone to corrosion.
- Copper pipes do not rust, but they will have to be connected by soldering, and they cost a lot.
USEFUL INFORMATION: How to hide heating pipes in an apartment
Fittings are screwed onto the resulting thread on the pipes. Linseed tow and Unipak paste are used for compaction. There are recommendations to use waterproof sealants, but then the connection will turn out to be non-separable.
Installation of polypropylene pipes is simple. Various fittings, angles and couplings are used to connect them. An instruction is attached to the welding soldering iron, where the entire process of pipe soldering is described in detail. There are several important points:
- When soldering plastic pipes, it is strictly forbidden to turn them.
- It is not recommended to use tow to seal polypropylene pipes.
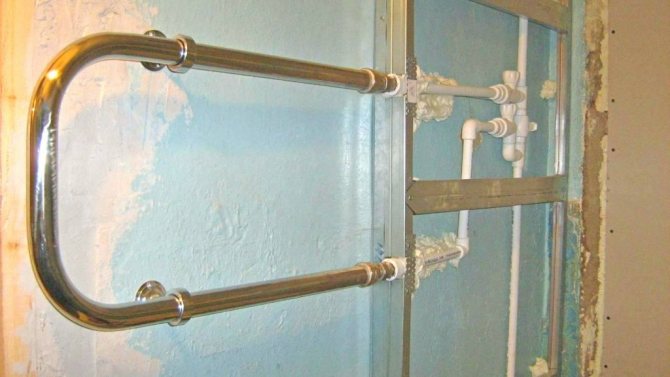
- The liner must be mounted in such a way as to provide the heated towel rail with a distance of at least 35 mm from the wall. With a coil diameter exceeding 23 mm, the indent increases to 50 mm.
- Tightening of plastic fittings should be done with special strap wrenches, the use of gas can lead to damage to the connecting element.
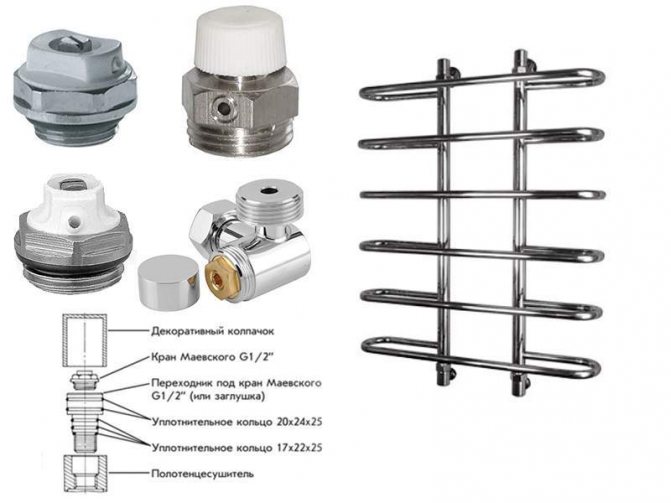
- It is imperative to install a Mayevsky valve to bleed air into the system.
- The shut-off valves on the pipes must be reliable.
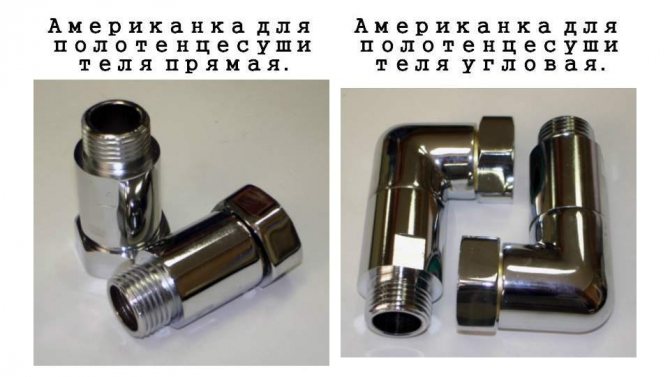
- When installing, it is better to use "American" (fittings that allow you to connect the elements of the system by tightening the union nut), so that later you can easily disassemble the entire system if necessary.
How to hide pipes in the wall
How to hide pipes in the bathroom so that they cannot be seen at all?
If a decision is made to brick up the communications in the wall, you must first of all make sure of the quality of the connections, clarify the service life if the wiring is already in use, and, if necessary, replace everything with a new one.
Then a channel is made in the wall - a depression in which communications will be located. Its width should allow the pipes to be freely positioned with the required distance between them, and the depth should be approximately twice the diameter.
If the channel width is not very large, then it can simply be covered with tiles. If the channel is too wide, then you will first have to plaster it, having previously insulated the pipes from contact with concrete.
For cold water pipes, a waterproofing cut-off should be made so that condensed moisture does not penetrate the concrete. It is best to put a special foam shell on the pipe, which will prevent fogging. The DHW pipes must be insulated from contact with the wall so that they do not cool down. For this, the same tubular sheath can be used.
How to close the pipes in the bathroom with a box
This option is much easier to perform, since only the installation of the box is required, no action is required with the pipes themselves. In addition, this is the only possible way to disguise the sewer riser and the risers of hot water supply and cold water supply. The material for the box can be any sheet material, from drywall to plywood or chipboard.
First, you should mark the location of the supporting elements of the future box on the wall. They can be wooden blocks, a metal profile for drywall, a mounting corner, etc. When marking, it is necessary to take into account the thickness of the material and the finishing layer (if you plan to glue the tiles, this will add at least 1 cm of thickness).
The points of attachment of the support bar are outlined, with the help of a perforator, holes are made for dowels or anchors.
A support bar is installed, to which the entire frame of the box is attached. During the construction of the frame, it is necessary to provide an inspection hatch for taking readings of water meters and for the possibility of using shut-off valves.
The frame is sheathed with sheet material. Finished with tiles, wall panels, paint - the choice of finishing options is wide enough, the main thing is that the properties of the finishing material make it possible to use it in a bathroom.
Installing a bypass on a heated towel rail
This is a kind of jumper that will allow you not to block the water in the entire riser, if, for example, you notice that a heated towel rail is leaking. Stopping the water supply to the coil without bypass can take a long time. There is no need to specify at whose expense the flooded apartments will be repaired in this case.
Installing a bypass allows you to quickly shut off the water supply to a damaged heated towel rail without disrupting its general circulation in the house. It is a bypass pipe that is installed at the junction of the coil and the riser, but before the ball valves that regulate the water supply.
It is not recommended to install a crane on this pipe. It can impair the circulation of water in the entire riser, so a representative of the housing office may require it to be removed.
USEFUL INFORMATION: Design of a small bathtub in Khrushchev (16 photos)
The main list of materials for replacement and stages of work
In order to replace the heated towel rail in the bathroom, you will need:
- the product itself;
- brackets;
- PVC pipes;
- apparatus for welding and soldering PVC pipes;
- puncher, wrenches, building level, tape measure and marker;
- scissors for cutting PVC pipes;
- connecting PVC - fittings and couplings;
- ball valves (2-3 pieces), including the Mayevsky valve.
The very same replacement of a heated towel rail with your own hands is, the implementation of the following work plan:
- Purchase of the structure itself and all the necessary materials.
- Preparatory work.
- Dismantling the used heated towel rail.
- Installation of bypass bulkhead and ball valves, as well as welding of PVC pipes.
- Mounting a heated towel rail in the bathroom and connecting the structure to the system.
Attaching a new heated towel rail
Installation of a heated towel rail is carried out as follows:
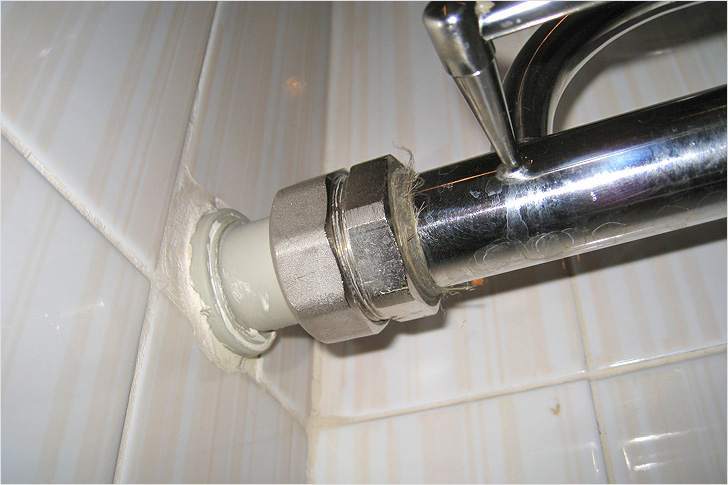
- The mating parts of the American are screwed into the purchased heated towel rail. All joints are sealed.
- The coil is attached to the wall, the attachment points are outlined.
- Holes are drilled in the wall for attaching brackets, which are usually mounted on dowels.
- The heated towel rail is connected to the riser, after which the fasteners are fixed to the wall. It is recommended to first level the coil. The connections must be tightened carefully so as not to damage the threads. But their insufficient sealing can lead to the fact that the system will leak.
- To check the tightness, we fill the coil with water. Cranes must be opened smoothly to avoid water hammer.
- If leaks are detected in the pipes, we shut off the shut-off valves and eliminate the imperfections.
Thus, knowing how to replace a heated towel rail, you can do the work yourself or supervise the work of professionals.