The main purpose of the ventilation system is to ensure the flow of fresh air into the room, while simultaneously removing the spent air masses. However, it often happens that the ventilation system does not cope with its direct duty, which is why, instead of clean air, odors from neighboring apartments and the entrance penetrate into the house.
The only solution is to install a non-return valve to ensure proper ventilation. Agree, it is somewhat inappropriate to spend money on the purchase of a structure that you can build yourself. Based on the step-by-step instructions, you can make a check valve for ventilation with your own hands using available tools.
Further in the article, the most common types of check valves will be presented, the features of their installation and the choice of a suitable design for an apartment. Having understood the principle of operation and design features of the check valve, you will be able to independently build a structure and install it.
Check valve working principle
The design of the damper is a protective device to prevent the appearance of a reverse draft of ventilation in the apartment. By allowing the flow of fresh air to flow in the desired direction, the valve inhibits the reverse flow.
The main advantage of the design is its automatic triggering.
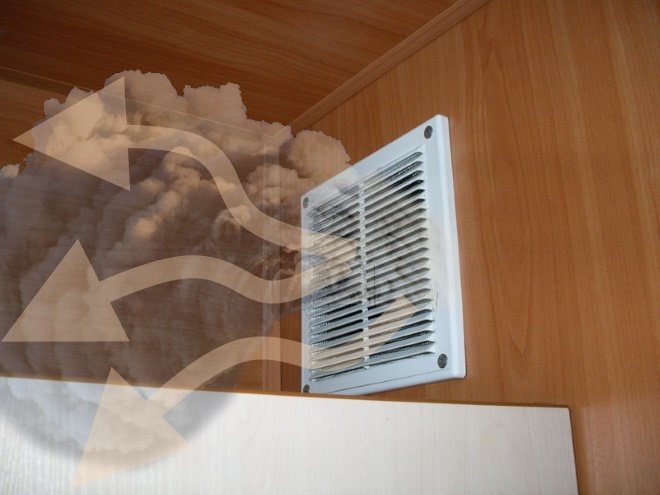
The absence of a check valve will not only lead to contamination of the room with exhaust air, dust and insects getting inside, but also lead to drafts.
In ventilation systems, the valve prevents air from entering the common ventilation duct into individual rooms. Such designs work in systems with both natural and mechanical traction.
Such situations may arise due to the appearance of the following problems:
- incorrect installation of the chimney;
- insufficient supply of fresh air to the system;
- installation of forced ventilation in one of the apartments;
- check valve malfunction.
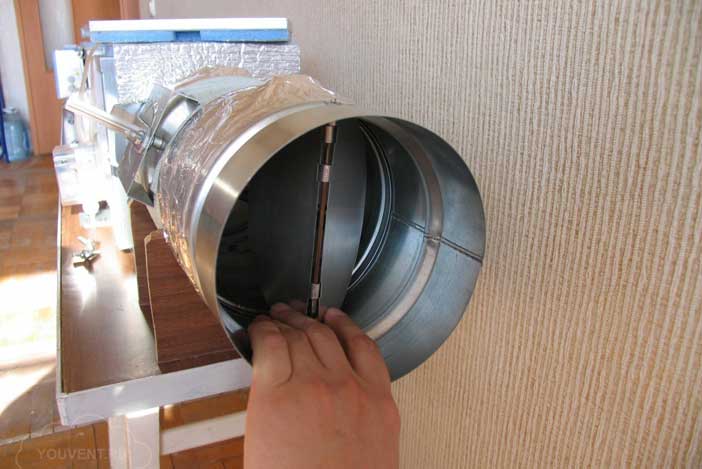
The main structural element of the check valve is the gate. When the valve is correctly installed, the valve should open under air pressure in one direction only.
When air moves not from the room, but into it, the shutter automatically closes.

Purpose and scope
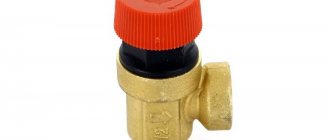
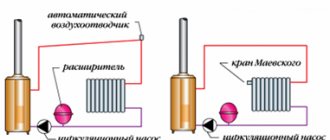
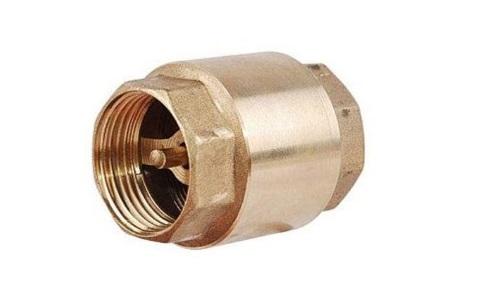
The main purpose of this device is to protect the water supply system from changes in the parameters of the water flow to critical values. The water pressure when the pumping equipment is stopped can lead to its breakdown. The operating mechanism of the valve prevents water from flowing in the opposite direction and protects piping systems and plumbing fixtures from water hammer.
It is recommended to install a check valve:
- after a submersible pump in a well or well,
- on the water supply
- after the water meter,
- in front of the water heater,
- to the main sewer line,
- in front of every plumbing fixture,
- in autonomous heating systems with several separate circuits, inside which the coolant has different pressures.
If the utilities are equipped with a pumping station, then the place of installation of the return valve can be a section of the pipeline located directly in front of this equipment, or behind the ratchet on the suction line.
When equipping the water supply network with a vibration pump, the valve is installed before the receiver on the delivery pipeline.
The device can also be installed on the water supply of country buildings, where it is used only in the warm season. In this case, a tee must be inserted at the lowest point of the system and a valve must be connected to it to drain water for the winter in order to prevent pipes from thawing and failure of the check valve.
https://youtu.be/RQfNEtJXVmw
Check valve design features
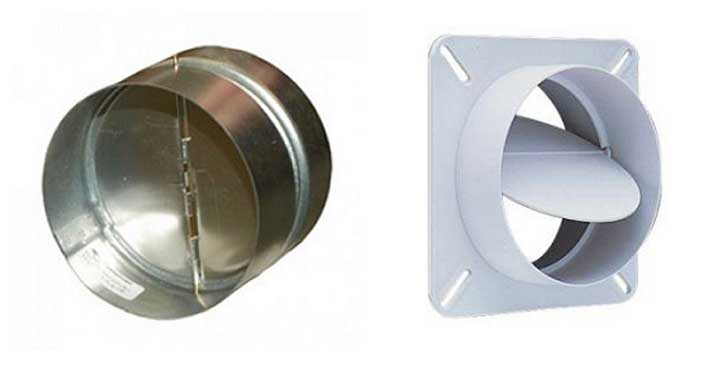
Check valves are often made in the form of a disc, and they can be of different sizes and cross-sectional configurations.
If necessary, the device can be equipped with heating, but it is only suitable for an electrically driven ventilation system. The main advantage of the heated valve is the prevention of condensation in the system, and therefore ice build-up in the cold season.
A plastic valve is considered an ideal option for a living space, since, unlike metal, it does not rust under the influence of moisture and does not emit harsh sounds during operation
There are only four main types of check valve designs on the market today. Each of them has its own pros and cons, which should be taken into account when choosing a particular design for your ventilation system.
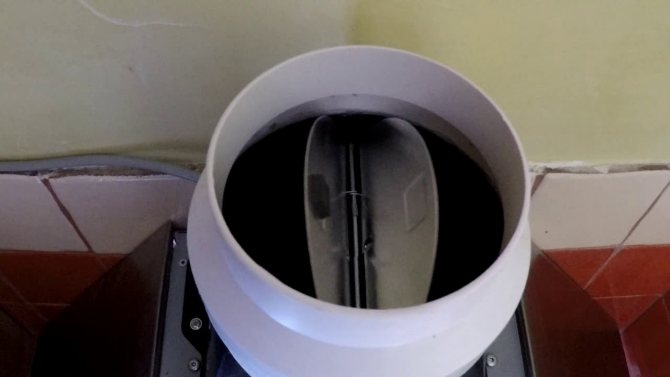
Option number 1 - single-leaf design
The design is a damper fixed on a horizontal axis, which, under the influence of the air flow, opens and closes the passage. Thus, the exhaust air is removed to the exhaust part of the system.
In the absence of air movement inside the room or with reverse draft, the valve flap will not open.
The single-leaf valve is most appropriate for natural ventilation of the room, since even a minimal air flow is sufficient to open the valve.
This design, in turn, can be of two types. In the first case, the axis on which the shutter is fixed is mounted with an offset relative to the center of the air channel, and in the other, a counterweight is placed inside and outside.
Since the check valve closes by gravity, its efficient operation is directly dependent on perfectly level installation in the system.
When installing vertically or horizontally, it is recommended to use a level. If installed incorrectly, the valve will not close tightly, which is why it will not be able to protect the room from backdraft.
If you install a one-leaf valve near the heating battery, the air coming from the street will immediately heat up. This will significantly increase the temperature level in the room, and therefore, reduce heating costs.
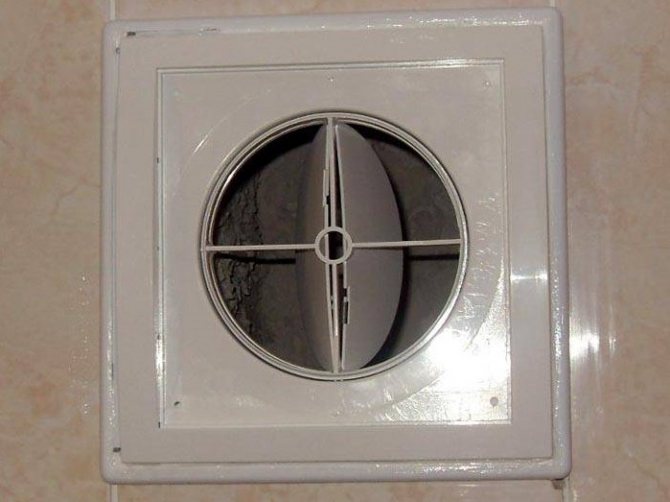
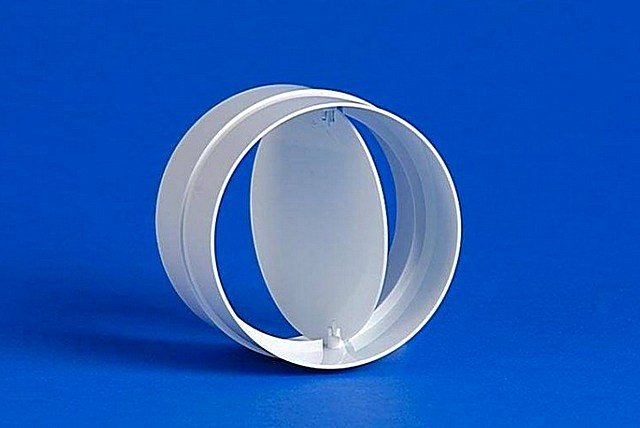
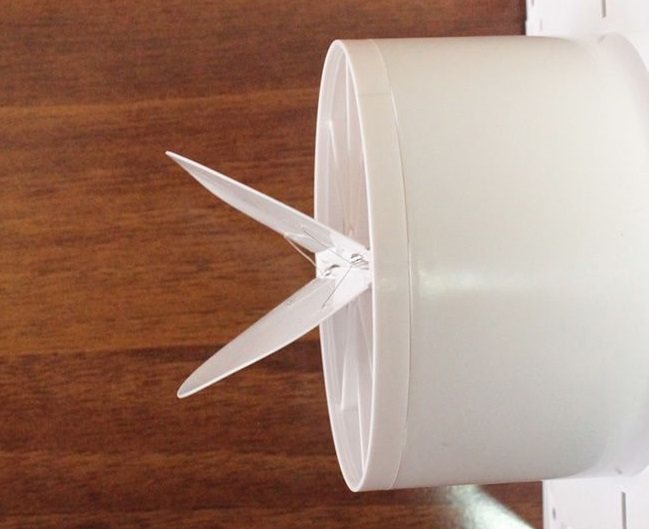
Option number 2 - bivalve valve
Due to its principle of operation, such a valve is called “butterfly”. In the center of the round hole there is an axle with two flaps, which are returned to their original position by means of small springs.
Mounting the butterfly does not require any special preparations, since such a structure can be installed at any angle.
Often, such devices are used in a forced ventilation system with an exhaust hood. When the mechanical hood is turned off, the sashes equipped with springs return to their original position, tightly blocking the entire section of the channel.
Many modern models of two-leaf structures are equipped with springs that can be independently adjusted depending on the traction force in the system.
The only thing that needs to be done before installing the butterfly valve is to check the sensitivity of the shutters. If the air pressure in the ventilation duct is not enough for such a design, then it is better to choose a different type of valve.
This type of check valve is often installed in buildings with a large ventilation system.
Option number 3 - inertial valve
This type of valve is a special louver that is placed on the ventilation grill. Like the one-leaf valve, the inertial design works on a gravity basis. The difference between these two designs is only in the number and size of the shutters.
They rise freely, and change their angle depending on the force of air pressure. The blinds are lowered only under their own weight, which is possible only if the fan stops working.
Such a gravity grid is installed with horizontal air movement. Like the butterfly, the inertial valve is mounted only in a forced-type ventilation system.
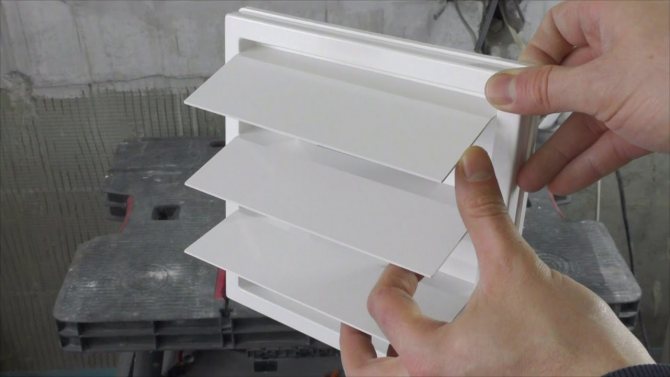
Due to the large number of flaps, inertial valves can be used both inside the dwelling and on the outside of the building.
Basically, there are blinds on the market in standard sizes, which fully correspond to the size of the hood and openings for natural ventilation.
If necessary, such an exhaust valve can be built with your own hands, improving the functionality of the device using a spring or membrane.
Option No. 4 - diaphragm valve type
The device is a flexible plate that bends under the influence of air flow. Even a small inflow is enough to open and close the valve, but in this case, much also depends on the correct installation of the structure.
By its principle of operation, the diaphragm valve resembles a "butterfly", but with more modest characteristics.
Before installing the flexible diaphragm, take into account the amount of backdraft in the ventilation duct, since there is a high probability of deformation of the valve.
In the presence of strong traction, it is better to choose any other type of structure in order to save yourself from additional costs of effort and money. In this case, it all depends on the size of the room and the strength of the air flow.
Before purchasing a diaphragm valve, it is important to measure the amount of draft inside the ventilation duct, which can be done by observing the direction of the match flame.
The diaphragm type check valve is ideal for small houses and porches. Unlike the three previous valves, the diaphragm type can be built independently, without the help of a master.
The next section will provide detailed instructions that will help you make a check valve with your own hands.
Why is it needed, what happens?
When there is a problem of clogging of sewer pipes and networks, residents of apartment buildings promptly contact a specialized service. But no matter how quickly they arrived, it is necessary to shut off the source and water as soon as possible so that all this "good" does not rush into the apartment, and the property is not hopelessly damaged. It is in such cases that the sewer valve helps.
Installation of a non-return valve in the sewer is recommended for residents of the first floors. Mostly above the 1st or 2nd floors, sewage sewage does not rise.
The valve operation scheme is akin to a nipple. That is, the drains go in one direction, but they cannot return back. And it is this pattern that helps to stop them on their way to the apartment. The diameter of the valve depends on which pipes are installed in the house. This is predominantly the standard 110mm for the riser; elsewhere a smaller size may be needed.
place for installing a sewage check valve
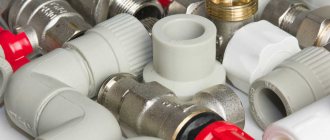
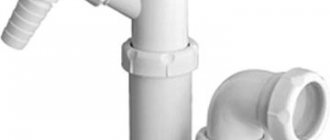
The valve is made of different materials: metal, polyvinyl chloride, polypropylene. Today, metal valves, like pipes, are rarely used. In addition, metal valves are short-lived and expensive. For indoor installation, polypropylene pipes are used, outside - polyvinyl chloride pipes.
Installation locations
Valves can be installed in one or more locations, depending on the tasks they are to perform. One valve can be mounted on a common sewer pipe, but it must have a large flow capacity. Many small ones are worth installing on every plumbing fixture.
Installation of the first type is possible only in private or small houses. In multi-apartment, such valves will not have the desired effect. Since the installation of a common valve is possible only in the basement, the residents of the first floors remain defenseless in the event of problems with the sewerage system. In such cases, it is better to provide a valve for each device or in front of the riser.
Recommended reading: How to connect the toilet to the sewer?
You also need to install such a device in sewers with a reverse slope, since such an incorrectness of the system can be eliminated only by its complete alteration.
Instructions on self-construction of the valve
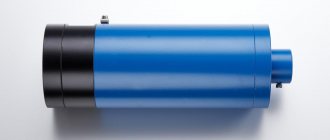
As you already understood, it is not at all necessary to buy a ready-made structure to create a ventilation system with reverse draft protection. Of course, you can't do without the cost entirely, since you have to buy an exhaust fan. It is he who will become the basis for the check valve.
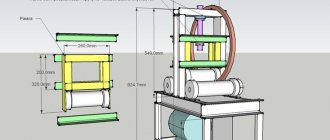
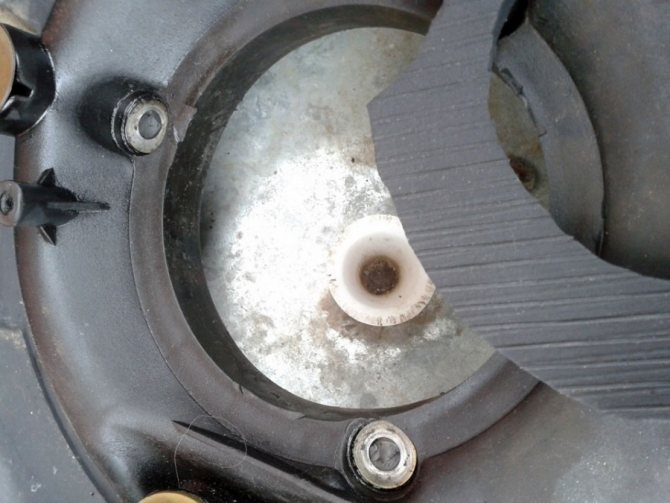
Before starting work, you should prepare all the necessary tools and materials. So, to build a diaphragm valve, you need a piece of plastic and a thick plastic wrap. It is also important to immediately prepare the drill, self-tapping screws, rubber gaskets and glue.
To understand how to properly make a check valve for ventilation with your own hands, it is important to read the following instructions.
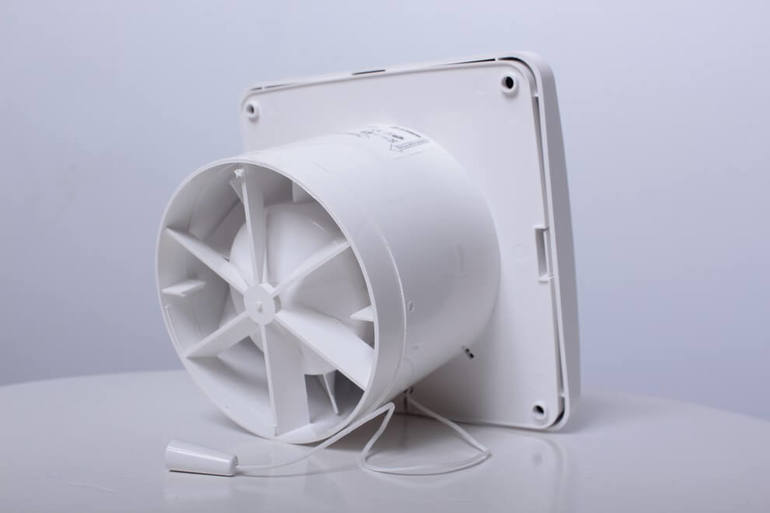
All exhaust fans are manufactured according to already established standards, corresponding to the ventilation duct openings in private and apartment buildings
We cut a plate out of dense plastic strictly according to the shape of the ventilation duct hole. Actually, this will be the basis of the future valve.
Further along the edges we drill several holes for fixing the panel to the wall and fixing the fan. The number of holes can be adjusted independently.
In the center of the plate, we also drill several holes through which the exhaust air will be discharged. You will also have to determine their number yourself, based on your personal needs. The more holes there are in the center of the plate, the greater the flow capacity of the valve will be.
Next, we fix the hood to the finished base. To begin with, you will need to install a rubber gasket at the connection point, and only after that it will be possible to fix the fan. This will provide the necessary tightness, and therefore improve the quality of the valve.
To avoid annoying noise from the fan during operation, it is recommended to place small pieces of rubber under the device mountings.
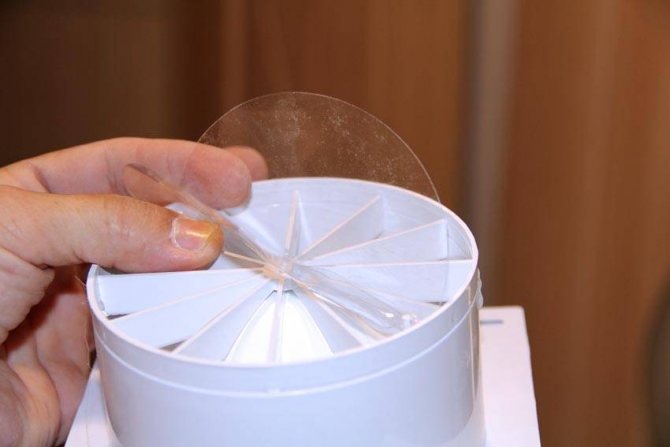
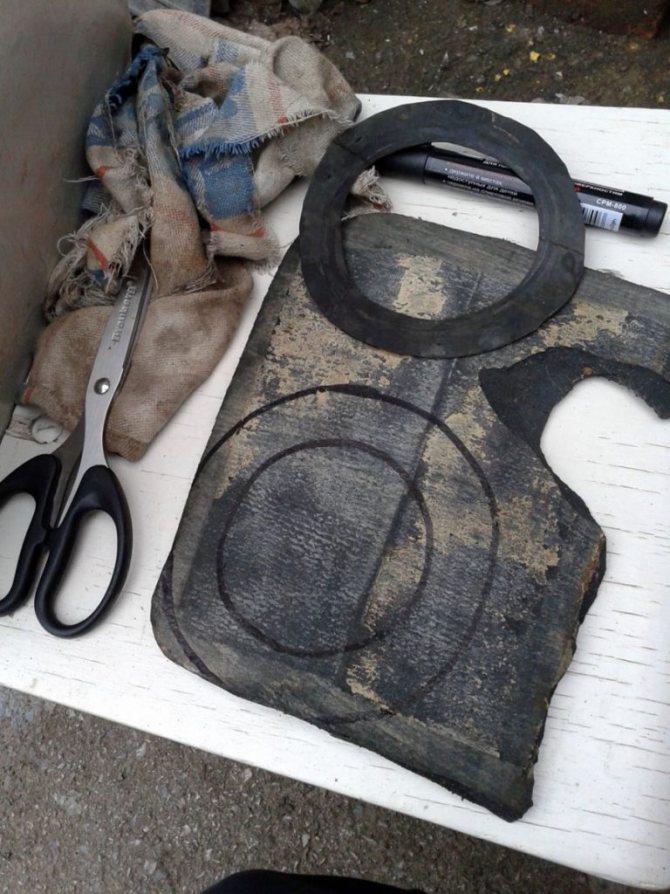
The thickness of the plastic for the construction of the membrane valve should be at least 4-5 mm, so that under the pressure of even a small air flow, the flexible membranes can bend easily
We make flaps for the valve from a thick plastic film. First of all, you need to cut the film to the size of the base, and only then glue it to the base of the valve. Please note that the flaps must completely cover the ventilation openings.
The next step is to cut the sash into two identical parts, while it is important that the cut is as even as possible. In this case, it is recommended to use a utility knife with a sharp blade.
We install the finished valve in the ventilation duct, fixing it on the wall with several self-tapping screws. Since there are gaps between the wall and the valve, it is advisable to get rid of them immediately with the help of a sealant.
This completes the process of creating and installing the diaphragm valve.With the sequential implementation of all of the above actions, you should get a reliable device that protects the room from reverse draft.
Installation procedure
If we are talking about an apartment building, the aerator in it can only be an auxiliary element for the fan pipe. In an individual house, you can do without it, then the valve will take over the function of normalizing the pressure in the system in full.
There are several rules to be learned before starting work:
- The device does not work at negative temperatures. Therefore, in the room where the aerator is located, the temperature should not fall below 0C.
- It is advisable to mount the unit so that it is easy to get to it for repairs or checking its operation.
- The installation height in rooms where there is a drain for the drain, the aerator must be installed at least 35 cm from the floor, in rooms without such a drain (for example, shower cabins) the pressure correction device is set at least 10 cm from the uppermost branch from the sewer riser.
If the aerator is installed too low, there is an increased risk that it will become contaminated with sewage and fail.
After installing the aerator, all joints must be carefully sealed to ensure tightness. Otherwise, the valve will not work efficiently.
Conclusions and useful video on the topic
This video provides step-by-step instructions for self-construction of a membrane valve for ventilation in an apartment:
It is now quite possible to independently build a check valve for ventilation and save on buying a finished product. In this case, it is important to decide in advance on the choice of the type of valve, purchase an exhaust fan and start making a homemade design.
A prerequisite is the preservation of the sequence of steps presented in the instructions above.
If you are already familiar with the process of constructing a check valve, or know an easier way to make a design with minimal financial costs, then please share your experience with our readers.
Leave your comment in the special field under the article, and, if you wish, ask questions to our experts.
Materials and sizes of products
The dimensions (installation diameter) of the sewage check valve in the apartment depends on the section of the pipeline for which it is intended:
- for toilets, check valves DN110 mm are chosen,
- for main pipelines of internal systems DN50 mm,
- for external sewerage systems - DN150-DN200 mm and more, if necessary.
Products of 32 mm and 40 mm are also used.
Plastic models are often installed in internal systems from suitable pipes with a small diameter.
Cast iron pipes and, accordingly, cast iron check valves are recommended for powerful (mainly external) pipelines with a large cross-sectional area, experiencing high loads.
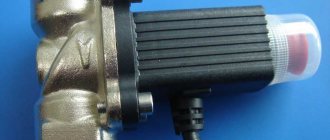
Management and specifications
Check valves are automatically controlled by the energy of the working medium. When buying a device, you need to pay attention to the following technical characteristics:
- Nominal diameter (DN) - nominal diameter of the connecting pipe. This value applies when mounting the valve to the pipeline.
- Nominal pressure (PN) is a value that indicates the highest pressure of the working medium at a temperature of 20 ° C, under which the device can function without interruption.
- The Kvs value is a value equal to the volumetric quantity of water passing through a fully open valve at a pressure difference of 1 bar. The flow factor is measured in cubic meters and is used to calculate the head loss.
- The valve opening pressure is a value numerically equal to the difference in fluid pressure before and after the device, at which the valve is fully opened.
Possible difficulties
In the process of self-production, home craftsmen face a number of difficulties:
- Incorrect tracking force calculation. The spring has to be shortened or, more unpleasant, rewound. This problem is usually solved by selection.
- Poor surface finish of the seat. The valve does not fully press against it and allows water to pass through. Solved by surface grinding.
- The flow resistance is too high for the specific system. It is not decided in any way whether you will have to choose a different type of valve or buy an industrial one.
Making a check valve yourself is a good test of your engineering and locksmith skills.
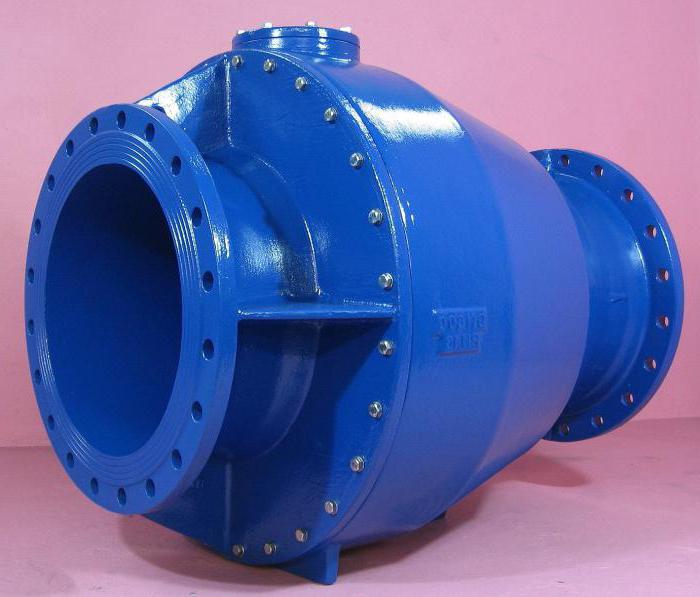
In a water supply or heating system, it is necessary to maintain a given direction of fluid flow. If you allow the outflow of fluid in the opposite direction, then a difference in pressure may occur, which leads to water hammer and disables the devices connected to the pipeline. Also, the liquid must not return through the pump back to the well. To ensure all this, a check valve must be installed in the system.
A check valve is required in the water supply and heating systems.
Types and designs
In addition to the difference in the material of manufacture, water check valves have special design features.
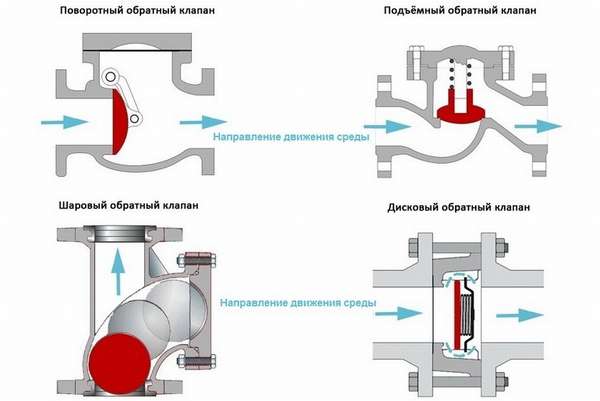
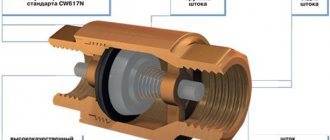
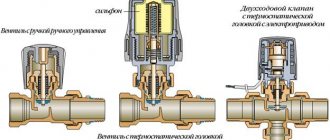
Spring clutch
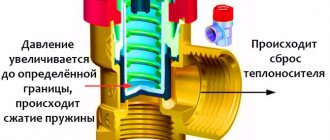
The valve body of this type forms two cylindrical elements connected by a threaded method. The locking mechanism consists of a plastic / metal stem, an upper and lower spool plate, a sealed disk spacer. The opening of the lock when the water flow pressure reaches the required value is due to the weakening of the spring. When the pressure drops, the spring presses the poppet against the seat, blocking the passage.
The tightness of the body parts is ensured by the gaskets installed at their joints.
Rotary petal
The device is equipped with a special locking element - a spring-loaded petal-shaped plate. Its pivot axis is located above the through hole. Under the influence of the flow of water, the petal folds back and opens the passage channel. If the pressure drops below the permissible level, the plate falls and closes the hole. This method of actuation leads to a water hammer, therefore, products with a diameter of more than 400 mm are equipped with a soft closing mechanism.
In the absence of this device, a large-sized valve petal will slap strongly against the seat, which will lead to its rapid wear.
Ball model
In it, the sealing element has the shape of a ball, which, with a decrease in the water pressure, drops, blocking the passage opening. It is also set in motion by the force of compression of the spring when opening the passage or unclamping - when the gate is returned to the closed state.
Ball valves have a removable cover that allows maintenance without dismantling.
Lifting type product
In a lift-type valve, the shut-off element is a spool, which, under the action of the pressure, rises and does not impede the flow of water. When pressure drops, the spool is lowered onto the seat, preventing flow backward. Such devices are intended for installation only on horizontal pipelines, since their axis must always be located strictly vertically.
The presence of a removable cover for such a valve allows it to be repaired and cleaned without dismantling from the pipeline system.
Expert advice
To avoid mistakes during installation and further troubles, it is recommended to read the advice of experts:
- Pay attention to the arrow on the valve body. The direction of this arrow must match the direction of fluid flow in the pipeline.
- The device must be installed in a location where there is easy access. This is done so that technical inspections of the product or repair work can be carried out in the future.
- Before proceeding with the installation, it is necessary to check the device for leaks.
- Steel and brass instruments have a long service life as they are highly resistant to high pressures and corrosion. Therefore, it is recommended to purchase devices from these materials for water pipes.
- If the house uses autonomous heating, then the valve should be installed in the return pipe at the outlet of the heater.
- The valve should be installed after metering devices so that the backflow of water does not distort their readings.
- If the plastic device is intended for installation in a cast iron pipe system, then a cast iron to plastic adapter must be installed.
A valve, correctly installed in the water supply or heating system, will help to avoid many troubles. In order for it to function for a long time and correctly, it is necessary to follow the advice of specialists and follow the installation rules specified in the instructions.