To create reliable sealed joints between sections of heating radiators, various types of gaskets are used. The element must have a number of specific properties that ensure a secure service for a certain period of time.
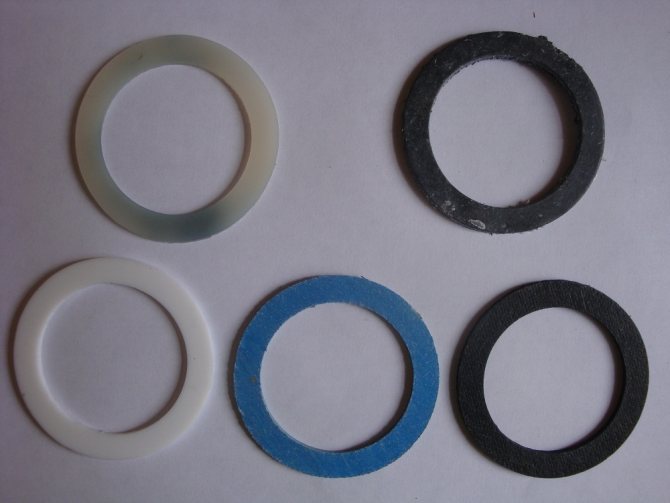
Battery split seals are available in different materials.
Varieties of gaskets
On the modern market, you can buy a gasket for a heating radiator of absolutely any kind - made of cast iron, aluminum or bimetal.
Depending on the material of manufacture, the following types of products are distinguished:
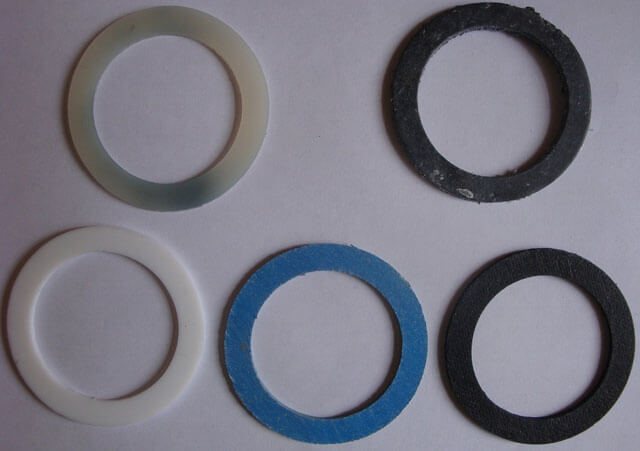
- Silicone gaskets
... Such products are resistant to high temperatures of the coolant and well compensate for the thermal expansion of the metal. Such gaskets are used, as a rule, in autonomous heating systems with low operating pressure. - Paronite products
... They are made of pressed rubber with the inclusion of asbestos and a special powder. Such gaskets are used in radiators connected to a centralized heating system, where the temperature of the coolant can rise to 90-100 ℃. Paronite gaskets are suitable for cast iron heating radiators, as well as for aluminum and bimetallic products. - PTFE gaskets
... This type of products is made from heat-resistant plastic. They are intended for installation on bimetallic and aluminum radiators, and without preliminary lubrication. They are characterized by high temperature resistance, resistance to aggressive factors and pressure drops. - Cardboard spacers
impregnated with oil paint for durability are used for aluminum and bimetallic radiators in autonomous heating systems. The manufacture of products is regulated by GOST No. 9347-74.
Output
It is impossible to operate heating radiators without high-quality intersection gaskets. They are divided into several varieties and this must be taken into account when installing gaskets. The video in this article expands on her theme.
Why are gaskets used when installing heating devices? Which gaskets sold in plumbing stores are the best? Can you make them from scrap materials yourself? Finally, how do you install or replace them correctly? Let's figure it out.
Application
The products of interest to us are used in two ways:
- Radiator cross-section gasket
ensures tightness of connection of sections It is pulled together by a nipple — a short, counter-threaded tube — and is clamped between the cut planes of the upper and lower manifolds. - In addition, gaskets are used when installing radiator plugs on aluminum and bimetallic heaters.
But:
in the latter case, they can be replaced by a reel. It can be used as sanitary flax impregnated with silicone or paint, FUM tape or polymer thread sealant.
Varieties
Material
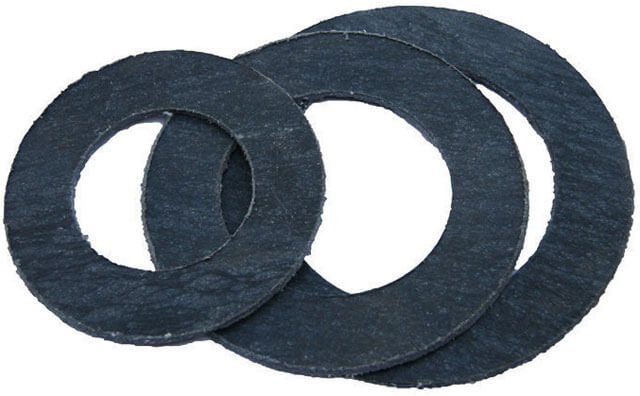
Gaskets for cast-iron heating radiators are made of paronite (heat-resistant hard rubber) in accordance with the requirements of GOST 15180-86. The standard regulates the main dimensions of products (by the way, not only paronite ones) and their mass in batches of 1000 units.
Paronite gasket for cast iron sections.
Gaskets for bimetallic radiators and aluminum batteries can be made from both paronite and heat-resistant silicone.
Which of the two materials is more preferable?
It is difficult to give a definite answer.
- paronite
due to its rigidity, it more effectively resists the internal pressure of the coolant; - silicone
on the other hand, it does not lose its elasticity over time and requires less pulling force to reliably seal the joint.
The photo shows a silicone product.
Dimensions and shape
A paronite gasket for a cast iron radiator is always in the form of a flat ring.
Products intended for aluminum and bimetallic batteries can be in the form of both a flat ring and a toroid (donut).
Observe:
toroidal silicone gaskets are used to seal annular groove sections. If you try to squeeze them between sections or between a plug and a flat section, you will find that the silicone will squeeze out.
The donut-shaped silicone gasket is installed only in radiators with an annular groove on the sections.
The diameter of the hole in the flat gasket is determined by the type of radiator and the diameter of the nipple. The nipple is supplied with the following thread sizes:
Self-production
The intersection gasket for any type of radiator can be made by yourself. Yes, the price of these products is not high; however, sometimes a long distance to a store, a weekend or a holiday can make you bother looking for alternatives.
The material will serve as a conventional tube for a pneumatic tire:
- automobile - for a cast iron battery;
- bicycle - for aluminum / bimetallic.
For cutting, ordinary scissors are used; the contour is preliminarily transferred to the camera cut along and laid out on a flat table with a ballpoint pen.
If you have an old camera and sharp scissors, you don't have to go to the store.
But:
if you need to make a large number of gaskets, it makes sense to speed up the procedure for their manufacture by making a punch from a section of the heating pipe of the appropriate size (DU32 or DU25) sharpened on one side.
Problems
The list of common problems with radiator gaskets is small:
- when installed under a plug, one-sided squeezing of paronite or silicone is possible. this happens especially often in cases where the thread axis of the plug or section has deviations from the perpendicular to the plane of the end of the manifold.
- Paronite, during long-term operation under conditions of strong heating, somewhat loses its elasticity. as a result, the intersection gaskets after several tens of heating-cooling cycles of the sections with the next cooling of the batteries are able to leak: a decrease in temperature leads to a slight change in the linear dimensions of the sections.
Leaking cast iron battery between sections.
Installation and replacement
Under the cork
How to install a gasket under the radiator plug of an aluminum battery with your own hands?
- Lubricate the end of the section manifold and the plane of the plug with any neutral grease. Silicone plumbing grease, grease and even liquid soap are suitable.
- Place the gasket over the plug thread.
- Tighten the plug with an open-end wrench or adjustable wrench. Paronite shrinks until the force becomes noticeable (but by no means insurmountable: you run the risk of stripping the pipe thread in the section header). The silicone is pulled together until the edges are visibly squeezed out from under the cork.
Intersectional
Instructions for eliminating intersectional leaks are somewhat more complicated.
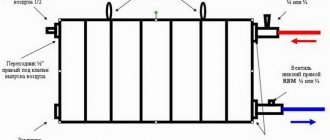
The diagram will make it clear how the sections are connected.
- Close the heating riser and unscrew the plugs or open the vent valves. If there are valves on the connections to the battery, simply close them.
- Substituting a basin or other container with low walls under the lower blind radiator plug, unscrew the plug a few turns and let the remaining water drain off.Unscrew the plug completely; if necessary, use a stick or any other handy tool to free the lower manifold from dirt.
Attention:
on blind plugs, in most cases, left-hand thread; they unscrew clockwise.
- Repeat the operation with the upper plug.
- Mark the distance from the edge of the battery to the nipple you need on the radiator key.
- Insert the key into any of the manifolds and, turning, push it into the radiator until it engages with the desired nipple.
- Unscrew one turn. The direction of rotation is the same as that of the plug.
- Repeat the operation with the nipple on the second manifold.
- Unscrew the nipples one turn at a time, one at a time. A misalignment caused by uneven unscrewing will jam or break the nipple.
- Remove the outer sections; Place new gaskets on the nipples and thread the nipples onto one thread.
- Install the end sections, press them against the nipples and screw them with a wrench until they engage securely.
- Reassemble the heater upside-down.
Bulkhead cast iron battery.
Based on materials from "On Trubakh.ru".
Heating radiator gaskets provide a hermetic connection of heating system elements. They are resistant to aggressive environments, withstand high temperatures of the working environment. These products are indispensable for aluminum, cast iron and steel radiators for reliable protection against accidents and leaks.
Radiator Gasket Selection Process
When deciding which gaskets to use for heating, you need to take into account not only the material from which they are made, but also the size.
The size of the product is determined by the following indicators:
- inner section of the gasket (d);
- outer diameter (D);
- product thickness (s).
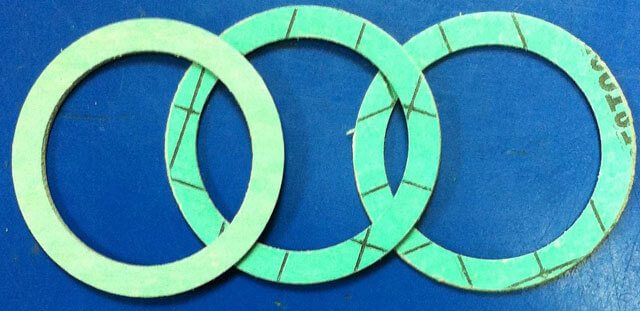
It is worth noting that the internal cross-section of the radiator intersection gasket must completely match the size of the inlet on the radiator section. It is also desirable that the edges of the gaskets do not go beyond the section - otherwise, in these places, the coolant may leak.
Independent assembly of sections
It is often necessary to add or replace part of the sections in the battery. Mark in advance which specific segments are to be replaced and prepare the instruments.
You will need a radiator wrench, and nipples and gaskets (hollow elements with left or right double-sided threads).
- Lay out the sections on a flat surface (preferably on the floor) with the right side to your side.
- Remove the end holes from the plugs.
- Place the gasket over the non-threaded part of the nipple.
- Gently screw the nipple two to three turns into the manifold.
- Using light pressure, align the nut with the hole of the segment to be connected.
- Tighten the nipple with a wrench. The multidirectional threads will pull both battery sections together. With correct tightening, the gasket will reliably compress at the joint to the desired limit.
- The lower and upper nuts must be tightened by the same number of turns in turn. Then you will avoid distortions.
- Before installing the radiator in the heating system, make sure the tightness of the joints by letting water through the hose into the radiator. The joints must be dry.
Manufacturing methods
By their shape, gaskets for cast iron batteries can be flat or convex. They are used for different types of structures.
In particular, flat sealing elements are made from sheet materials such as plastic, rubber, paronite or leather. In their production, methods such as punching or cutting with punching knives, as well as cutting with a laser or circular knives are used.

A convex gasket for a cast iron radiator and any other metal variety of batteries is produced by thermoforming from polyvinyl chloride, as well as by vulcanizing raw silicone or rubber.
How to achieve the aesthetic appearance of old batteries
With the inside of the batteries cleaned and any worn gaskets replaced, the feature upgrade is complete. It's time to take care of the exterior so that the heating devices fit well into the interior. To do this, it is enough to paint them. If desired, the batteries are decorated with original painting, decoupage images, or simply covered with special screens. But you will have to paint in any case. It is important to choose the right paint composition and follow the application technology.
The subtleties of choosing radiator paints
Increased demands are placed on radiator paints. They must be resistant to high temperatures, wear-resistant, safe. It is also important that the coating does not compromise thermal conductivity. Manufacturers offer the following formulations:
- Acrylic enamels
These are organic paints. With their help, it is easy to create a beautiful glossy finish. The disadvantage is a pungent smell. Until the paint dries, a specific aroma will be felt in the room.
- Alkyd enamels
Advantages - a large selection of shades, good performance, durability. The disadvantage is the same - the smell. Moreover, it can appear with strong heating of the batteries during the heating season.
- Water-dispersive compositions
They are often chosen for their lack of odor and quick drying. When buying, pay attention to the manufacturer. There must be a note on the bank that the paint is intended specifically for heating radiators.
- Oil paints
They are sometimes bought for batteries, but this is the worst choice. Oil formulations have many disadvantages. They dry for a long time, smell strong, change color, reduce heat transfer from radiators.
Make sure that the selected paint is marked "For radiators" and "Heat resistant"
Radiator paint technology
Remove the coating before painting. Special paint removers are sold in stores, you can use them. In theory, washes help clean batteries, but in practice their effectiveness leaves much to be desired, as paint literally sticks to surfaces when exposed to high temperatures. It is better to warm up the coating with a blowtorch or a hair dryer, clean it with a spatula and a metal bristle brush. After that, grind the surface with sandpaper and degrease.
You need to paint like this:
- First, paint the inner surfaces so that drips do not appear on the front of the battery.
- The brush or roller is driven from the bottom up.
- Runs are removed immediately before the paint has thickened.
- The coating is applied to the entire surface of the radiator; there is no need to leave unpainted areas.
- It is possible to make a single coat, but it is better to paint in two coats to achieve greater strength.
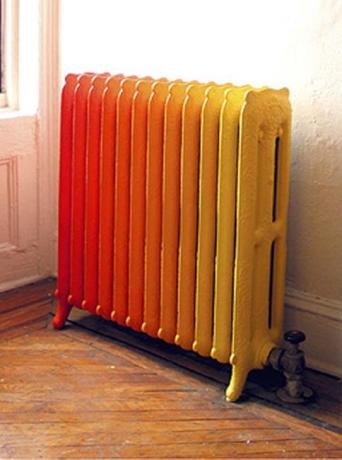

Floor-standing cast iron battery, painted in ombre style
An old cast-iron radiator is capable of creating comfort in the house for several decades. Do not throw away the appliance if it loses its presentable appearance and becomes less warm. All problems are solvable. Restore the battery, show your imagination - and the heater will work and look no worse than a new one.
Cutting out blanks by stamping
In the process of work, special stamps are used, that is, special devices, precisely adjusted to the desired size and consisting of several elements. In addition, a press is used for cutting blanks, on which a stamp is installed.
Before starting production, it is necessary to take into account the dimensions of future gaskets - for large products you will need a more massive stamp and a powerful press.
It is worth noting that this method of manufacturing gaskets is considered cheap and highly productive. Due to this, it is used for mass production.
Installation and replacement
Under the cork
How to install a gasket under the radiator plug of an aluminum battery with your own hands?
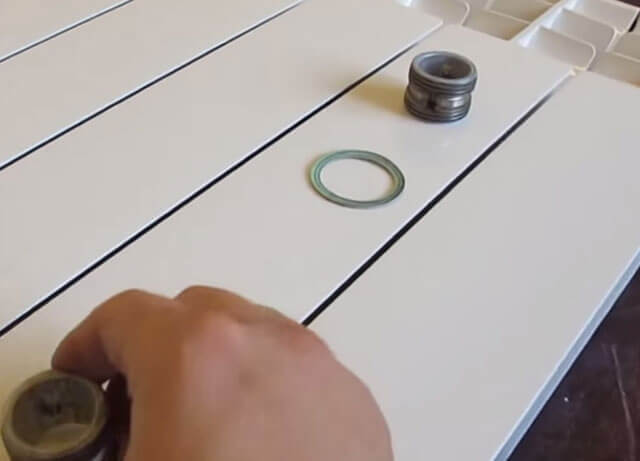
- Lubricate the end of the section manifold and the plane of the plug with any neutral grease. Silicone plumbing grease, grease and even liquid soap are suitable.
- Place the gasket over the plug threads.
- Tighten the plug with an open-end wrench or adjustable wrench. The paronite shrinks until the force becomes noticeable (but by no means insurmountable: you risk ripping off the sections). The silicone is pulled together until the edges are visibly squeezed out from under the cork.
Intersectional
Instructions for eliminating intersectional leaks are somewhat more complicated.
- Close the heating riser and unscrew the plugs or open the vent valves. If there are valves on the connections to the battery, simply close them.
- Substituting a basin or other container with low walls under the lower blind radiator plug, unscrew the plug a few turns and let the remaining water drain off. Unscrew the plug completely; if necessary, use a stick or any other handy tool to free the lower manifold from dirt.
Attention: on blind plugs, in most cases, left-hand thread; they unscrew clockwise.
- Repeat the operation with the upper plug.
- Mark the distance from the edge of the battery to the nipple you need on the radiator key.
- Insert the key into any of the manifolds and, turning, push it into the radiator until it engages with the desired nipple.
- Unscrew one turn. The direction of rotation is the same as that of the plug.
- Repeat the operation with the nipple on the second manifold.
- Unscrew the nipples one turn at a time, one at a time. A misalignment caused by uneven unscrewing will jam or break the nipple.
- Remove the outer sections; Place new gaskets on the nipples and thread the nipples onto one thread.
- Install the end sections, press them against the nipples and screw them with a wrench until they engage securely.
- Reassemble the heater upside-down.
Application of punching knives
The principle of operation of this method is similar to cutting with a stamp, but in this case, a simpler and not expensive tool is used. The production of seals in this way is inexpensive and fast enough. However, the dies are rather short-lived, so this technique is used for the production of small and medium-sized batches of pads.

Cutting with circular knives
Only large round seals can be produced in this way. In the process of work, you will need rather cheap and high-performance equipment. Cutting is done with standard blades. Therefore, the production of gaskets of this type can be carried out independently and in any volume. Often the cause of radiator leaks is a damaged gasket. And if you do not know what to do if the heating battery leaks, first of all you should pay attention to the gaskets.
Competent selection of seals
For installing batteries in a private house or apartment, experts advise purchasing silicone or paronite seals. It is undesirable to make gaskets with your own hands, especially from scrap materials.
This can lead to an early depressurization of the joints. Spend a meager amount on finished products, especially since the price will definitely not hit your wallet.
Products have certain sizes. This is both the thickness and the diameter of the outer and inner circles. Make sure that the diameters of the rings and pipe outlets match.
Note! The “oversized” seal, in which the edges protrude too much, will soon become unusable. Therefore, take it strictly by size. The thickness of inserts for cast iron batteries is 1.5-2 mm, for bimetallic and aluminum - from 1 to 2 mm.
Thermal forming
In this case, you will need an injection molding machine with a mold for casting products.The cost of the molding press is quite high, therefore, to make production economically feasible, the manufacture of gaskets in this way must be large-scale or even mass.

The production of products in small batches using this technology is relevant only if they cannot be manufactured in any other way. It is noteworthy that only PVC seals are produced by thermoforming.

