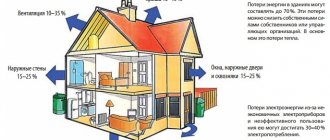
Here you will learn how to disassemble an aluminum heating radiator with your own hands: the pros and cons of aluminum heaters, as well as the sequence of actions when assembling and disassembling battery sections.
For the first time, aluminum radiators appeared on the world markets for heating equipment in the 80s of the 20th century. Next to the heavy ribbed "monsters" of cast iron, they looked elegant and stylish.
Naturally, the demand for them was huge, but only a decade later, the first aluminum batteries showed their shortcomings.
To date, manufacturers have significantly improved the performance of aluminum batteries, so they now have much more positive qualities than before. The assembly of aluminum heating radiators has also been simplified and now they can be installed or disassembled without the involvement of specialists.
Pros and cons of aluminum heaters
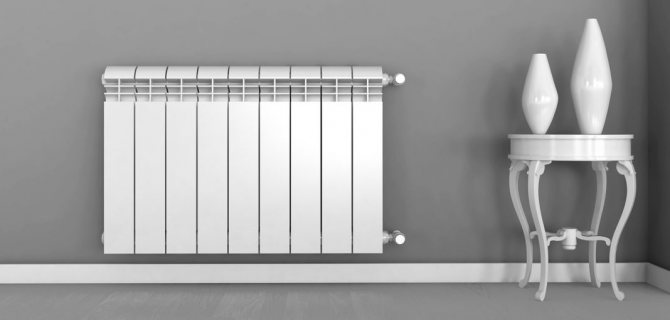
Aluminum radiators have become frequent "guests" of private houses and apartments in houses with centralized heating.
This became possible thanks to the qualities that have won the hearts of consumers around the world:
- Aluminum is one of the best heat conductors, giving it to the surrounding space in two ways: radiation and thermal convection. This feature is especially in demand in heating systems with unstable carrier pressure.
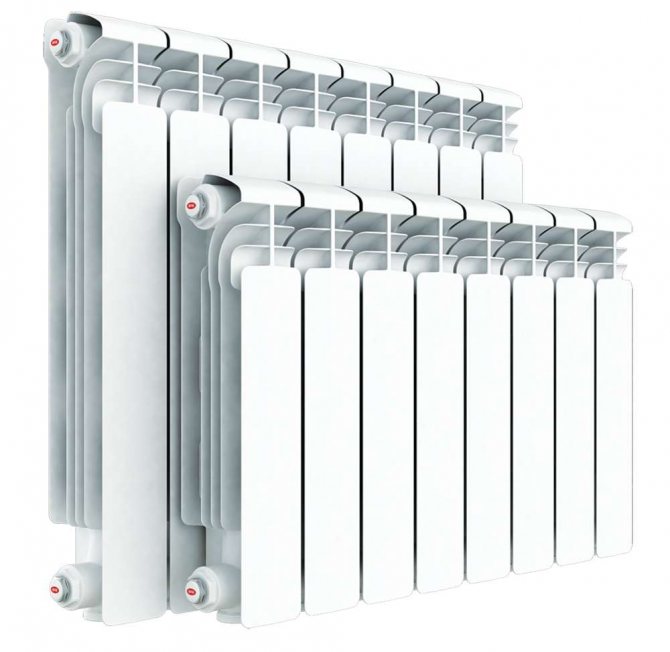
- Assembly of sections of aluminum radiators is possible without the involvement of additional forces. Since their low weight allows you to do everything yourself. They are easy to transport and install.
- These batteries are capable of withstanding pressures from 16 to 25 atmospheres, which makes them desirable in places that were occupied by cast-iron "accordions". There are 2 types of aluminum radiators. One of them is suitable for autonomous heating systems, where the load rarely exceeds 10 atmospheres. The second is for batteries connected to centralized heating, where drops of up to 15 atmospheres occur.
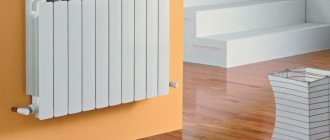
- Aluminum radiators are much lower than steel or bimetallic counterparts. This is one of the most important factors that attracts consumers.
- They are easily adjustable, which allows you to create the necessary microclimate in the room and save money on heating.
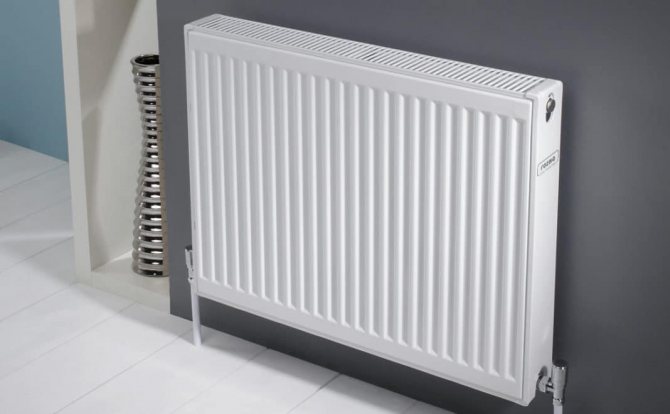
- They have an attractive designthat fits easily into any interior.
These qualities have made aluminum batteries in demand all over the world, despite the fact that they have minor disadvantages:
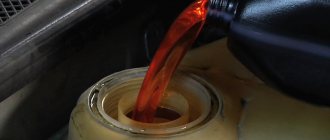
- Aluminum is not resistant to corrosion, but modern radiators are treated with special agents that prevent corrosion. But even after processing, it is better to keep such heaters filled with a coolant, which is difficult to do in a centralized heating system, where water is discharged after each end of the season. That is why aluminum batteries are more in demand in autonomous systems where there are no such discharges.
- Batteries of this type are prone to air bubbles, therefore, at the beginning of the heating season, excess air must be vented from them.
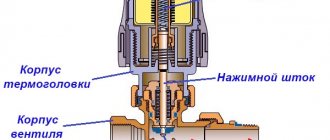
- The threaded connection in aluminum models is weak and with a strong water hammer, leakage may appear at the joints. This defect can be eliminated only by knowing how to assemble an aluminum heating radiator using additional gaskets.
This type of radiator is available in two types: one-piece and sectional. The second is most common in private homes and apartments.
How to mark and install brackets for a new radiator correctly?
A few days ago, I received a call from my old client, let's call him Andrey, to whom I recently changed batteries, with an unusual question.
The crux of the matter was this: he and his friend decided to replace the old batteries on their own. They knew in a nutshell how and what was needed for this, and Andrey, in general, watched my actions when I worked. If there was something incomprehensible, he always asked, and I did not hide much, I told him in detail about the features of the work. But, here's how to correctly make the markup and make sure that the centers of the axes of the radiator and the pipe coincide - they did not overlook. Therefore, they turned to me.
Honestly, I never expected this. I did not expect that someday someone would need it and would have to explain by phone how to make the markup. I never thought it was so difficult. Of course, everything looks simple to me: I removed the old battery, marked out, drilled the holes, hammered the brackets into them and hung the radiator. But everything is simple only for me, a person who changes batteries almost every day, like, for example, for each of us to wash in the morning
In the evening, Andrey sent a letter of gratitude and photographs of the work done. It turned out great, no worse than mine.
This life episode is firmly embedded in my memory. Probably, Andrey is not the only person who faced such a problem. Therefore, I decided to tell in more detail how I mark and install brackets for aluminum or bimetal radiators.
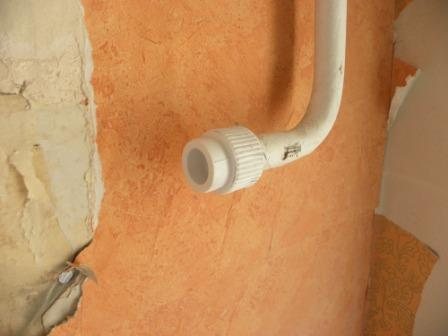
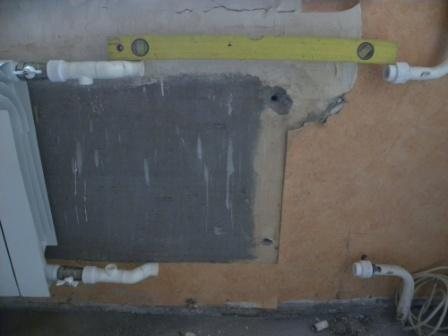
How to prepare for replacing a radiator, what is needed for replacement and what tool is needed I wrote here. I will not repeat myself, but get down to business right away. Having dismantled the old battery, we will see the following picture:
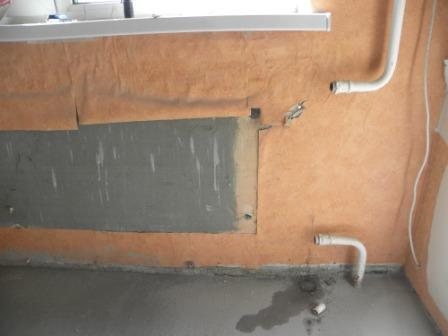
On a horizontal pipe we unscrew the couplings, if there are no couplings, we cut the threads and install the transition joints. In this case, the replacement is made with polypropylene pipes. I use flax and Unipak paste as a sealing material for the thread.
Now we substitute the radiator to the window. Someone likes it when the radiator hangs in the center of the window, someone moves it closer to the edge. How to bet - the choice is yours.
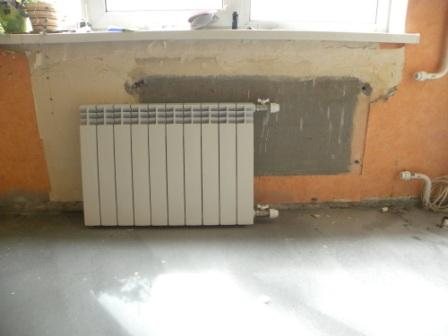
Personally, I like it when the radiator hangs in the center.
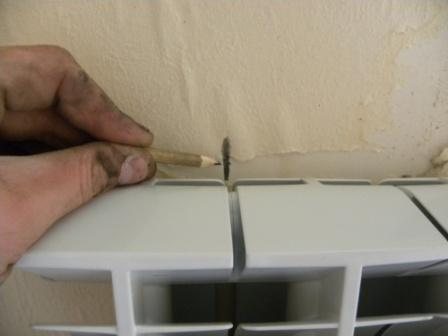
Further, on the wall between the sections, we make marks for installing the brackets. There are three of them: the center and between the two extreme sections.
By the way, the question is often asked: how many brackets are needed for a radiator? Practice has shown that for an aluminum radiator up to 12 sections, three attachment points are sufficient: two on top and one on the bottom. And if there are more than twelve sections, then four attachment points will be needed. And yet, bimetal radiators are heavier, so such radiators with up to 10 sections are installed on three brackets. Well, if there are more than 10 sections, then four.
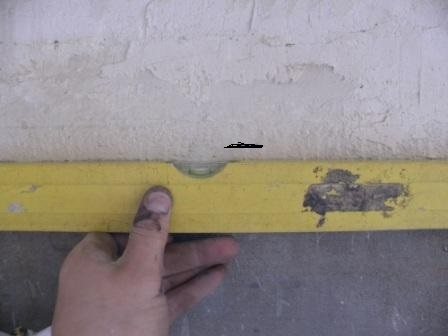
We remove the radiator aside, we will not need it yet. We take the building level, substitute it to the center of the horizontal pipe, on which the adapter was previously installed, and make a mark on the wall. It is not necessary to calculate the center with a ruler; it is enough to determine by eye.
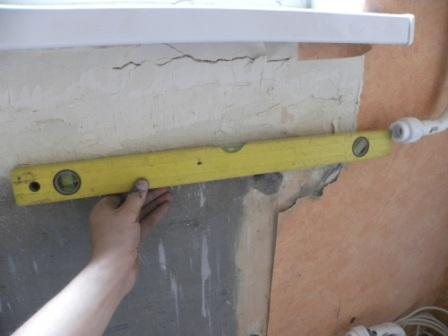
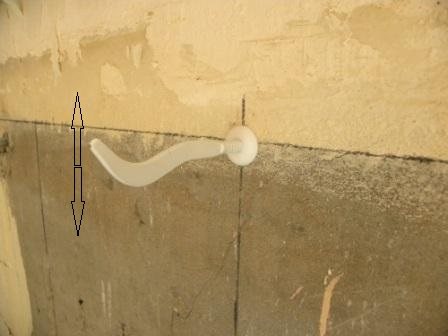
Draw a horizontal line approximately one centimeter below our mark. Brackets will be installed on this line. Why below? So that the centers of the axes of the radiator and pipe coincide.
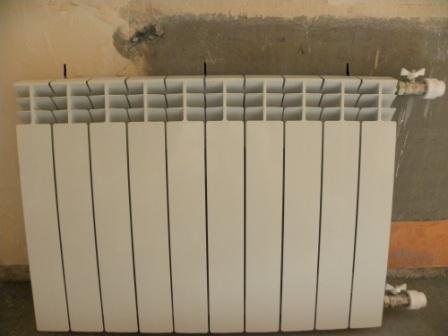
Now we draw vertical lines up to this line. It will turn out like this:
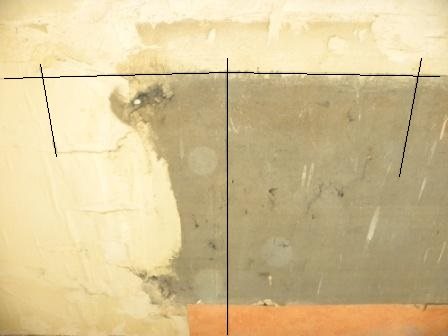
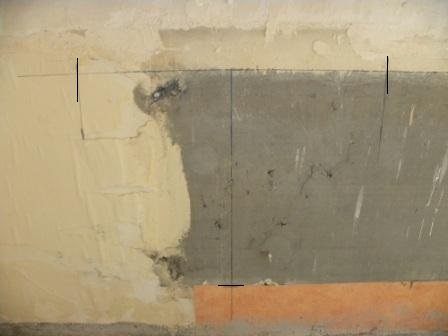
It remains to note the location of the lower center bracket. Mark 50 cm from the top line and make a mark.
We drill holes, insert dowels and screw brackets into them. Of course, the brackets can simply be hammered in with a hammer, because as folk wisdom says: "A hammered self-tapping screw holds better than a twisted nail."

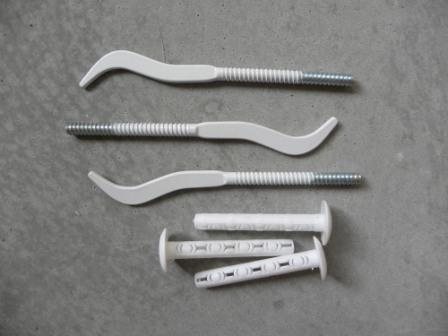
It is best to choose a bracket for a radiator flat, with a dowel.Unlike other brackets, these brackets allow you to adjust the distance of the radiator from the wall and align it in planes without any problems.
Next, install the radiator
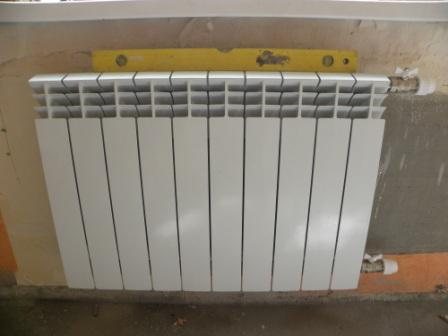
If necessary, align the radiator by bending the bracket up or down.
When adjusting the radiator, do not forget to follow the axes of the radiator and pipe, they should be at the same level.
Of course, before you can hang the radiator on the brackets, you need to “assemble” it, ie. install fittings, taps and transition couplings.
After all the manipulations, you will get a radiator correctly installed along the axes. Ready for connection and further operation, but that's a completely different story
P.S. All the same, replacing heating radiators requires certain knowledge and skills, as well as a set of necessary tools. If you do not have either one or the other, but there is a desire to replace the radiators, you can contact me for help. To do this, just call 903-36-05, send a letter to the post office or leave a request on the Golden Hands website and I will call you back.
Battery assembly
In principle, having the necessary tools at hand, even a beginner will be able to assemble or disassemble an aluminum radiator with his own hands.
To install an aluminum radiator heater with your own hands, you must:
- Place the battery on a flat surface. This is necessary in order to inspect the device before installation and check all the joints for possible cracks or chips.
- Before connecting the elements of the heater, the threads at the joints are cleaned not only of debris, but also of factory paint. This is done using fine-grained sandpaper. This is important, as the paint layer can crack in the future, leading to a leak. For the sake of presentation, manufacturers paint not only sections of radiators, but also their joints.
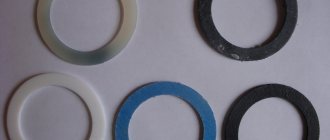
When cleaning the battery from paint, you need to make sure that the sandpaper does not leave scratches on it, which can also cause leaks in the future. - All gaskets should be washed in soapy water, and if antifreeze is supposed to be used in the heating system, then they need to be degreased, since this carrier is able to penetrate into any, even the smallest, irregularities.
- Before connecting the sections, it is advisable to study the drawing of the key for assembling an aluminum radiator in order to know how to use it. This metal is very soft, so any too much force can damage the threads and then you will have to buy a new section.
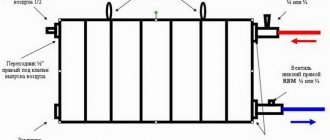
- A paronite seal is put on the nipple nut on both sides. The key is placed on top and can be easily turned a couple of times, the same is done with the bottom hole. Only after the joints have been tacked can you tighten them with a lever more tightly.
- The hole that will not be used is closed with a plug, and a Mayevsky crane is attached to the other and the assembly of the aluminum radiator is ready.
After all sections of the radiator have been assembled, it can be connected to the heating system and checked for possible leaks. Since aluminum batteries are quite lightweight, they can be easily connected by hand, even without the appropriate skills.
Battery replacement technology
Quite often, the owners decide to replace the old cast-iron battery with a new, more modern and efficient model. Quite often, specialists are called for this, who quickly cope with the task. But since the process of dismantling and installing the radiator itself is not particularly difficult, all the work can be done independently.
Tools and materials
To replace the battery, you need the following tools:
- special lever pipe wrench;
- pencil;
- Bulgarian;
- level;
- a hammer.
Do not forget the grinder to replace the cast iron batteries.
Also, materials are used to install a new device;
- brackets;
- battery;
- cranes;
- dowels.
How to disassemble an aluminum heating radiator with your own hands?
Removal of the aluminum battery occurs in the following cases:
- When the system changes completely.
- It is necessary to increase or remove the extra section.
- Eliminate the leak.
Before disassembling the aluminum radiator, you need to prepare a set of wrenches and a screwdriver.
Further actions are performed in the following sequence:
- The coolant is discharged from the system. If disassembly takes place during the heating season, then you should wait until the battery cools down.
- Using a wrench, unscrew the clutch, which connects the hose from the battery to the heating pipe.
- The disconnected radiator must be freed of water residues and put on a flat surface with the right side up.
- Remove the filter from the battery and rinse thoroughly. This must be done immediately, since the dirt accumulated in it can harden and then it will be extremely difficult to remove it.
- Further work is the analysis of the battery into sections. They are interconnected with special nipple nuts. To remove them, you need a key for disassembling aluminum radiators, turning it counterclockwise, they can be easily removed from the radiator. This must be done with extreme caution to avoid skewing.
After disassembly, the battery cells are washed and reassembled in the same sequence.
If it is necessary to eliminate the leak, then a special solution of epoxy resin with the addition of bronze powder is suitable for aluminum radiators. You need to work with this composition quickly, as it dries up in a matter of minutes, so the leakage site must be cleaned up and prepared in advance.
Wrench for twisting radiator sections
It just so happened that such a key is quite difficult to find in stores, so it can be made independently from twentieth reinforcement and an iron sheet 4-5 mm thick. A plate is welded to the main reinforcement on one side and a transverse handle on the other. Then, using the nipple as a sample, the plate is sharpened with a grinder so that it freely enters the nipple but does not scroll but clings to the recesses. As a result, you should get something similar to the photo.
Such a key is enough for several radiators, you should not count on a long service, because the metal is soft and not hardened, the plate will quickly bend and break. But to untwist - to twist several radiators it is quite enough.
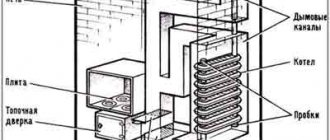
How to disconnect cast iron sections
Now about how to disassemble a cast iron heating radiator. The most common of them are in old houses and apartments MC-140. Their sections are also assembled using nipple nuts and gaskets.
If, it will be difficult to disassemble it:
- over time, the interface between the sections "boils" due to rust;
- key slots are corroded by water.
Note! It is worth remembering that cast iron is very massive. For example, a 12-section radiator weighs 90 kg. Therefore, it is better to work with a partner.
Prepare these tools:
- radiator key (nipple);
- plumbing analogs (No. 3 and 2) for twisting the sleeves (side plugs) and plugs;
- small sledgehammer and chisel;
- a blowtorch or a hair dryer and a metal brush.
- several bars to raise the battery off the floor.
The radiator wrench, the price of which is not very high, is a round rod with a section of 1.8-2 cm. The metal is flattened at one end. The width of this scapula is 2.8 × 4 cm, the thickness is 0.6 cm.
A ring is welded to the rod from the opposite end. A lever is inserted into it to facilitate work.
The length of the tool is half the length of the largest battery (12 sections), and about 30 cm is added to this value.
- It is difficult to work with stuck intersection joints. Sometimes they are so firmly "fused" that even great physical efforts do not separate them.In this case, the instruction recommends that before disassembling the joint, heat it up with a blowtorch or hairdryer.
- Heat the cast iron to a crimson glow, then try to disassemble the joint.
- Unscrew the plugs first.
- Place the wrench on top of the battery, aligning its head with the nipple-nut twisting area. Along the sectional end, draw a circle mark with chalk on the tool shaft.
- Snap the paddle into the lower inner groove. Turn the tool slightly along the left-right axis until it reaches the mark.
Note! Remember to determine where to roll the section. When there is a nipple nut, thread it in, taking turns with the right and left sides. This will determine in which direction the nipple should be twisted.
When the thread succumbs to your efforts, do not unscrew it immediately. Twist the nipple one full turn, then repeat the operation with the top nut. Thus, proceed until you unscrew the section. Such caution is needed due to the fact that cast iron may burst due to skewing.
Disassembly of bimetallic and aluminum batteries
Before disassembling an aluminum heating radiator or a bimetallic analogue, prepare the necessary tools.
Basic fixture
A nipple wrench is used as the main device for work.
- It is a steel bar approximately 70 cm long.
- The working part of the key 24 × 40 mm is welded from its one end. A through hole is located on the opposite side.
- A metal rod is inserted into it for more convenient rotation of the nut.
- There are several notches on the key. The step between them is equal to the width of the radiator section.
Note! Insert the tool into the battery. Count the number of notches. This way you just find the nut of the section you need.
Necessary actions
In the photo - unscrewing the sections of the aluminum radiator.
- Before disassembling the radiator, determine which way to turn the key. Place the battery face up on the floor. Accordingly, the right-hand thread will be on the right, and the left-hand thread will be.
- There is an opportunity to do it even easier. Take the nipple and thread it alternately on the left and right. This will tell you where to turn the key. Otherwise, acting incorrectly can strip the threads and ruin the sections.
- Imported radiators on the skirts and plugs of the "face" of the sections have the following thread markings: left - S, right - D.
For example, you need to twist the section to the right.
- Insert the tool with the “spatula” up to the required area in the upper hole. Fix it in the groove of the nipple, apply force and, turning the key against the movement of the clock hand, remove the nut from its place.
- Here, before disassembling the bimetallic radiator, you will need a rod. By inserting it into the ring on the tool, you create a lever. It will be difficult to work without it, because will have to make significant efforts.
- After a couple of full turns, move the key to the bottom of the battery. Repeat the procedure there.
- Then again, move the tool up and make the next two turns.
- Repeating the steps one by one, twist the section completely. This is necessary so that there are no distortions.