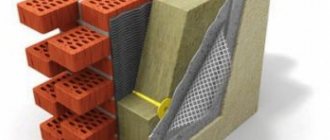
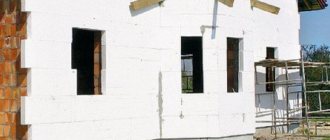
Having insulated the facade of the house, the owner is always faced with an unpresentable appearance of the insulation itself.
Since most often it is used as thermal insulation Styrofoam or penoplex, that is, a good way that will help get rid of this problem is facade plaster on foam plastic. The application of any decorative layer will protect the insulating layer from the negative effects of the external environment.
Protective functions of plaster
If polystyrene or penoplex is chosen as insulation, then with constant exposure to moisture and the sun, the material will eventually become very fragile and become unusable. Also, everyone knows that this material can be easily damaged mechanically, that is, broken, scratched or punctured.
It is almost impossible to somehow fix these damages, you need to replace the whole area. If foam plaster is used, then it performs a number of protective functions, due to which the insulation will last a very long time. A properly finished facade with plaster serves as a barrier against:
- The appearance of holes and dents with mechanical damage.
- Exposure to high humidity.
- Sudden changes in temperature, as well as from prolonged exposure to heating or freezing.
- Combustion. Styrofoam is highly flammable, but plaster will increase the level of fire safety.
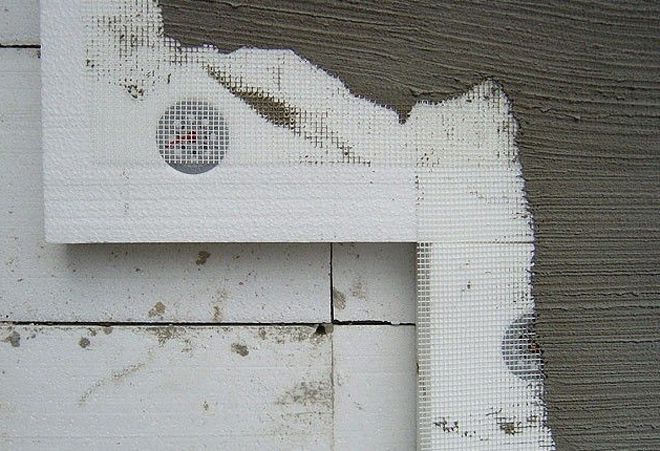
Reinforcement of the surface of the facade and walls
The plaster reinforcing mesh is necessary in order for the applied mixture to be fixed to the heat insulator.
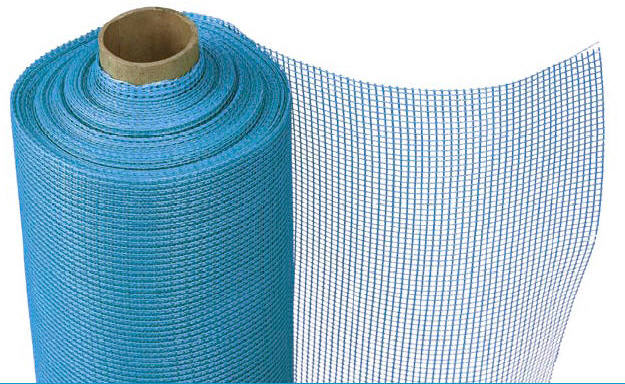
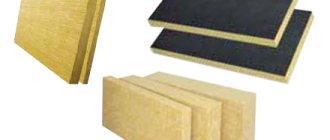
Alkaline mesh for reinforcing the facade surface with a density of 160 g / m2.
For materials such as penoplex and expanded polystyrene, it is recommended to use an alkaline mesh. It has a higher cost, but it certainly will not cause the plaster to collapse before the time allotted to it.
In the case of facade work, the mesh is usually applied with a density of 140 to 160 g / m2. You can choose a higher density, in this case the plaster layer will only turn out smoother. There is only one limitation in this case - a dense mesh is inconvenient for pasting corners.
If on planes the sticker of the grid does not raise any questions, then when working on the corners everything is a little more complicated. In addition, you should start from the corners.
Metal corners can be used to reinforce corners.
First of all, you need to separate the strip with a long side of a meter and a wide side of 0.3 m. In the center, this strip is bent - after bending, there should still be a residual edge on its surface.
Then, using a suitable trowel, the plaster is applied to the corners of the building - the thickness of the application layer (excluding the mesh) should be about two to three millimeters. As the described process is completed, a mesh is attached to our wall, which is pressed with a spatula, and then carefully smoothed with gestures down, left and right from the corner being processed.
After gluing the corners, they move to the planes of the walls. A roll of mesh is cut into pieces of 1 meter - this size is due to the fact that larger pieces are simply not very easy to glue - the plaster can dry out before you finish distributing it.
A 35 cm trowel should be used to apply the facade plaster mix. The thickness (excluding the dried layers) of the plaster is 3 mm, the width of the strip is 90 cm, the length is 1 m. At the edges, you need to leave gaps of five centimeters for gluing the borders.
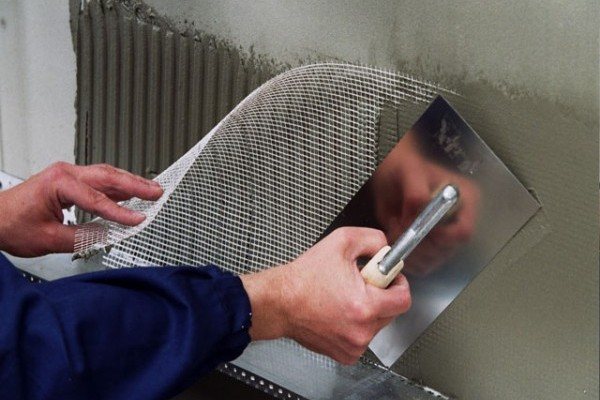
When applying the mesh to penoplex or expanded polystyrene, it is most convenient to use a wide spatula
After the above steps, the mesh is applied and smoothed from top to bottom, starting from the center.It is important that the mesh is pressed into the grout and not overlaid. For this, you can use a little additional mixture.
After they have finished with one vertically oriented strip, without waiting for drying, they proceed to the next one, mounting the mesh elements with an overlap. Otherwise, the joints may not stick. Near the corners, the joints are also glued one on top of the other.
After that, as the mesh is completely glued in, it is necessary to wipe it in an undeniable manner. A similar method is used in the technology of a wet facade on polystyrene, when the reinforcing mesh is rubbed with building mixtures and plaster.
This process is done using sandpaper and a plastic float. And do not forget that grouting is done on already dried material. Grouting is done in a circular motion with a slight pressure on the surface. The direction of movement is counterclockwise. Do not use the emery cloth further if wet plaster has got into it.
How to choose plaster
In order to protect the insulation material, manufacturers suggest using special formulations designed for application to foam.
There are only two types of them - acrylic and cement-sand. What is the best first or second facade plaster for expanded polystyrene now we will figure it out.
Cement-sand
If we talk about the price, then cement-sand mixtures are much cheaper. And, of course, the most popular ones. But the attractive price does not give a long-term result.
Such a coating will last only 2-3 years and then the integrity of the layer will begin to crumble, as a result of which the insulation will suffer from the external environment.
So that you do not have to re-install the heat-insulating layer, you should re-plaster beforehand, removing the unusable coating. It must also be said that cement-sand mixtures are gray in color. To give a more presentable look to the coating, you need to use staining.
Acrylic
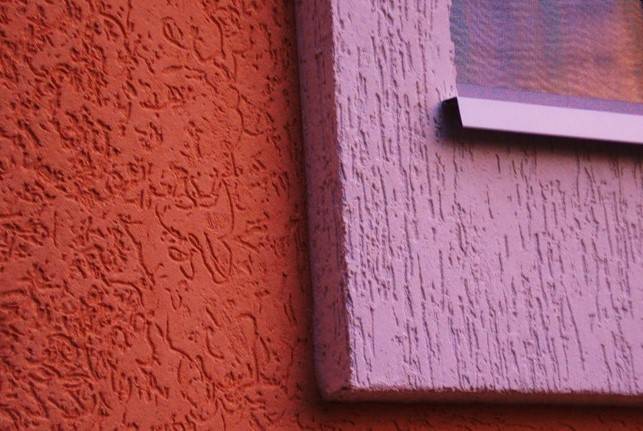
Acrylic mixtures are an order of magnitude more expensive, but they will last much longer. In addition, they fit well on the base, you can choose mixtures that are already painted and at the same time you can make not only a smooth coating, but give it an interesting texture, for example, a bark beetle, a lamb or rain.
Apart from the high cost, the only drawback of acrylic mixtures can be considered color instability. Bright colors fade quickly when exposed to sunlight.
Considering all the advantages and disadvantages of plaster mixes, it should be said that it is better to choose acrylic as a decorative finish. They will last much longer and look much more attractive.
Varieties of styrofoam plasters
In order to finish a material such as expanded polystyrene, in the common people referred to as
foam, special plaster mixes have long been created. Plastering can be done with your own hands.
It is important to consider that a mixture of the same manufacturer must be used to obtain a high quality result.
Intending to plaster the facade, where the foam is used in the form of insulation, it must be borne in mind that the result obtained is by no means eternal.
After a certain time, everything will need to be repeated. And it depends on the selected mixture how soon such a moment will come again.
There are various compositions, but the most common are mineral and acrylic facade plaster.
- Mineral is made on the basis of cement and sand. This is not the most durable option, which attracts many with its own inexpensive cost than other methods. The period of operation of such a layer of plaster is several years (two, three or five years - in general, whoever is lucky).Cracks often appear on such a surface. And even more so, you do not need to use homemade mixtures for such work.
- Acrylic plaster on the facade is made on the basis of acrylic resin. Such a surface can be retained for several decades. In addition to the delightful protective and adhesive properties, it is decorative, has many colors and tones, allows you to make the facade of a two-story cottage or other structure textured (lamb, rain, bark beetle). Its negative trait is that over time it undergoes fading under the influence of ultraviolet rays. Although the facade painting makes up for this shortcoming.
Preparation
After insulating the facade with foam, you need to carefully examine all the joints. If there are gaps somewhere, they need to be closed with polyurethane foam or sealant. This will protect against cold penetration. In addition, you should pay attention to how even the coating turned out.
How to properly plaster the facade using foam plastic? To check this, you should apply a building level or rule. If there are irregularities, they must be eliminated.
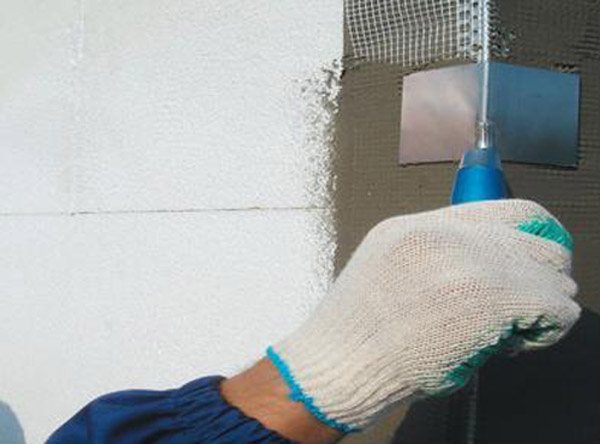
The foam itself is a very smooth material and any mixtures or adhesives do not fit well on it. In order to increase the adhesion properties, you can use special primers or a regular needle roller. The tool will make small holes in the base, and the applied solution will penetrate into them and securely fix.
If a primer is used, then before applying it, you need to clean the base from dust and dirt that may settle during installation.
Do you need a reinforcing mesh
Even if the foam is prepared for applying the mortar using a primer, the plaster mixture is still not applied directly to it. In order to get a more reliable coating, a fiberglass reinforcing mesh is used.
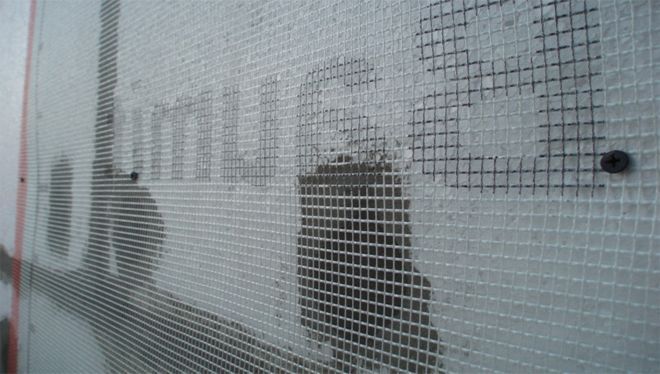
It is best to choose a mesh with a density of 130/160 g / m2. On such a reinforcing canvas, plaster on polystyrene will fit well, but it is difficult to work with it when finishing corners.
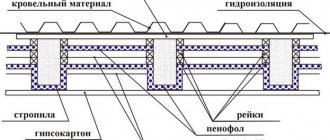
Facade finishing technology with foam plaster
The last stage of finishing is the application of a leveling layer.
Here the performer should be as responsible and attentive as possible, because the leveling layer must hide all defects of the reinforcing coating and prepare the basis for the final wall decoration - painting or covering with decorative putty.
In fact, this work is not particularly different from plastering walls made of concrete or brick.
Use a standard trowel and apply a thin layer of plaster.
Finishing should be especially careful and neat when it comes to subsequent painting, since all the irregularities in the future, the paint will only be emphasized and the walls will acquire a not very aesthetic appearance.
In order for the surface to be perfectly flat, after the coating has dried, it is recommended to grind it with sandpaper or a special mesh. It is important to grout in the first 3-4 days, otherwise in the future, the composition will harden strongly and it will be extremely difficult to grind it.
The exception in this case is textured finishing plaster, however, it all depends on the grain size.
How to plaster correctly
All work begins with cutting the mesh for the corners. If slopes are to be processed, the length of the mesh should correspond to the length of the slope, while the width is 30 cm. For the corners of the house, 1 meter will be measured.
This length is much easier to work with. The width is the same as for the slopes.
Having prepared the solution according to the recipe, which is indicated on the package, you can start plastering.
Do-it-yourself styrofoam plastering starts from the corner, and so let's get started:
- With a small spatula, apply the mortar to a large spatula. Then the solution is applied to the wall. The length of the strip should correspond to the length of the reinforcing mesh.How to properly plaster a wall on foam plastic video? In this case, the width on one wall will be exactly half the width of the grid plus 5-10 cm.
- The reinforcing mesh is folded in half across the width and applied to the mortar.
- We take a wide spatula and, smoothing the mesh, immerse it in the solution. The reinforcing element must completely penetrate into the plaster solution. If the previously applied layer is not enough, then it is applied additionally over the mesh. The spatula must be moved from top to bottom and from the corner. This will create a smoother surface.
- Further on the wall, applying another solution, which will be slightly larger in size than the next piece of mesh.
- Each subsequent piece of the reinforcing mesh is superimposed on the previous one, by 5 cm.
- Everything is leveled and smoothed with a wide spatula. This is done throughout the area.
Useful Tips
- To make the wall look even and harmonious, metal corners need to be installed at the corners. They will close absolutely all corners on the wall, on window and door openings (how to plaster openings?). Installation is not much different from installing a reinforcing mesh on the plane of the wall - the profile is simply glued to the primer layer of plaster. Then they hide under the topcoat, but at the same time they make all the corners perfectly even. Find out how to properly plaster the inner and outer corners of the walls here.
- Another advice from the masters - when purchasing a dry mix for plastering walls, you need to calculate 5 kg per 1 m2, although manufacturers indicate 3 or 4 kg (how to calculate plaster for different types of mixes?). Experience suggests that there are no perfectly flat walls, even foam and plaster are consumed more than calculated. And since you cannot use two different brands of the mixture, it is best to buy it with a margin.
- Before starting work on the insulation of the house, you need to know the weather forecast in advance, because you will have to calculate the fine days not only for work, but also for the complete drying of the plaster layer. The rain will very quickly wash away the damp plaster from the wall, and you have to start all over again.
- It is not necessary to use a plastering grid for interior work. There, the layer of plaster may not be as thick as the outside, but consist, for example, of one layer of plaster and topcoat.
- Before starting work, you need to prepare the necessary materials - plaster, net, paint - and all the tools: then there will be no time to run after them, especially if the facade of the house is being plastered at a height. For these works, a set of spatulas of different widths, a half-trowel for foam walls, a bucket for preparing a mixture, metal scissors for cutting wall corners, a set of brushes and rollers are required.
- Insulation with foam plates is necessary not only for warmth, but also for health. It is possible to do this with your own hands, and even for inexperienced builders-finishers.
- In modern stores of building materials, a huge number of various dry mixes and types of finishing materials are presented, the main thing is to read the instructions for their preparation and use on the packaging.
- Construction and finishing work must be carried out in the warm season, since all materials and mixtures are diluted with water, and when it freezes, it expands and destroys the structure of the hardened material (read about how to work with plaster here).
- It is necessary to familiarize yourself with all the intricacies of insulation, even if the owner himself does not do all the work with his own hands. Workers need to be monitored, the quality of work checked. Knowledge of consumption rates will not allow dishonest contractors to appropriate material resources.