


Devices and methods for cutting foam
Polyfoam used to insulate various structures of a building has a rather loose structure. The cellular material easily crumbles and breaks under mechanical stress. To ensure the smooth edges of the cut of the heat-insulating product, special devices are used:
- Stationery knife. This method is the most affordable and simplest and is most often used when working with foam at home. The tool is effective only for cutting small-sized cellular products with a thickness of no more than 5 centimeters. The main condition for high-quality cutting with a clerical knife is a new and sharp blade.
- Thermal knife. This tool is specially designed for processing foam. The knife is capable of instantly heating up to 600 degrees. It is used for products of small thickness. In order to cut the foam sheet, you should smoothly move the tool along the marked line. In the process of melting the material, fairly smooth edges are formed.
- Hacksaw for wood. Such a device is used if it is necessary to cut cellular heat-insulating material, the thickness of which exceeds 80 centimeters. For work, a saw is used only with fine teeth. With the help of such a tool, you can provide the product with even edges only with a straight cut.
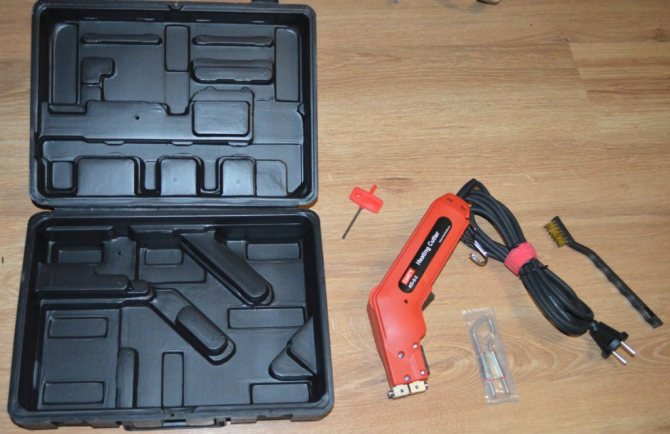
Thermal knife - foam cutter
Builders sometimes separate the foam and the necessary parts with a grinder. In this case, a disc with a minimum thickness is used.
On an industrial scale, cutting of porous material is carried out using special CNC machines. The cutting process on machines is carried out using various types of cutting tools:
- cutter;
- sharpened hacksaw blades;
- carbide discs;
- laser radiation;
- thin nichrome strings.
Most often, the industry uses the option of cutting by means of strings fixed in the required position. Many CNC machines are equipped with a computer program, and the process is controlled remotely.

Cutting with a stationery knife
Even at home with a real master, cutting styrofoam will not be able to cause problems. To do this, it is quite enough to have a clerical knife with you. It is important that the blade is sharp enough. This minimizes the likelihood of waste.
In the absence of a sharp knife, a regular saw or hacksaw can easily replace it. Choose a tool with a short tooth. Thanks to this, the final surface will not be rough.
Today, in any hardware store you can find a special blade for cutting foam. When exposed to it, only fine dust will be formed.
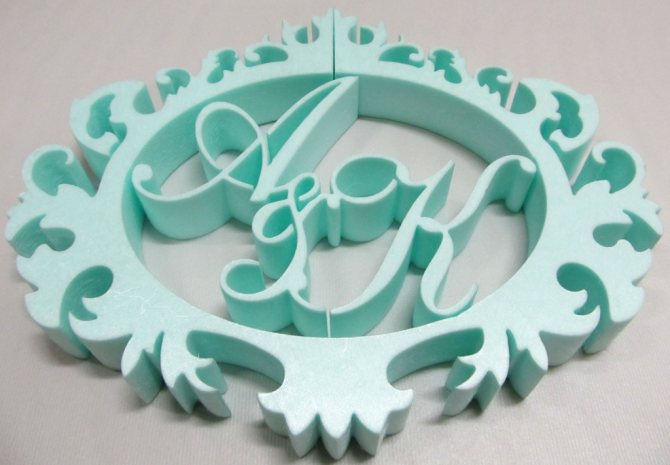
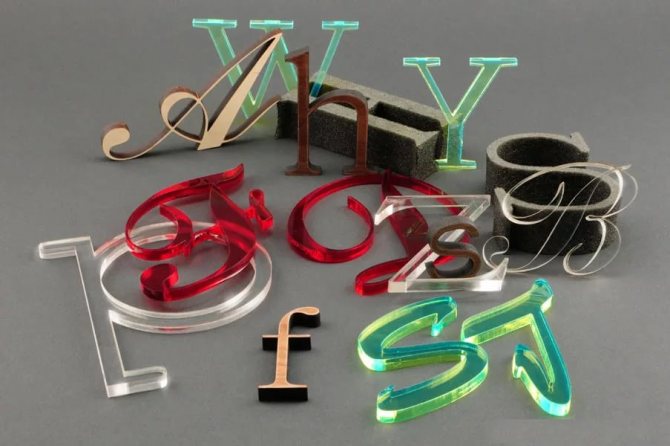
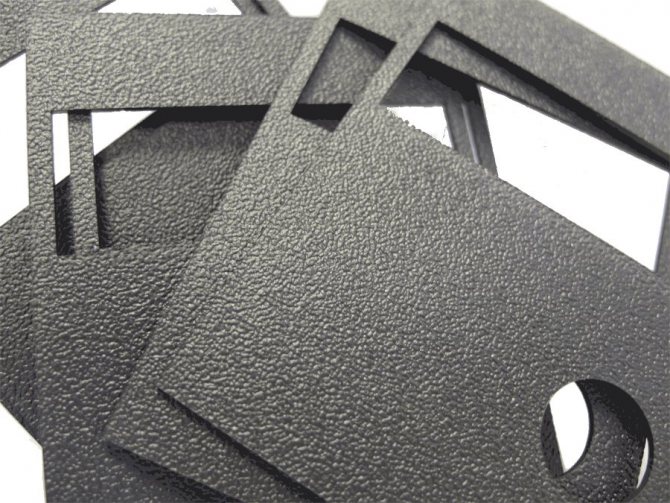
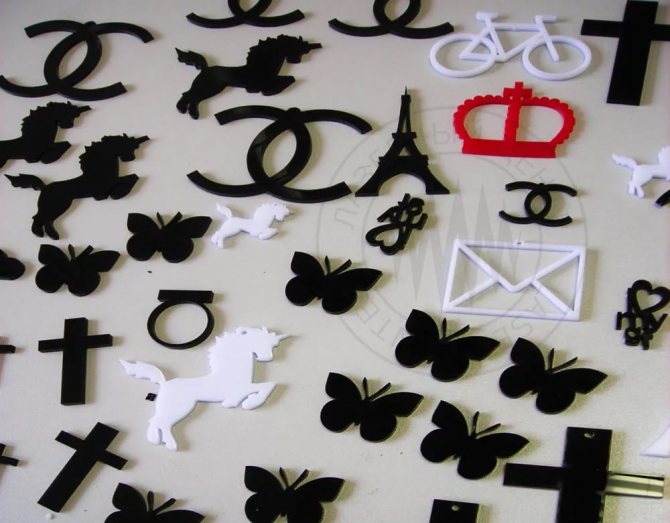
Shaped cutting of foam
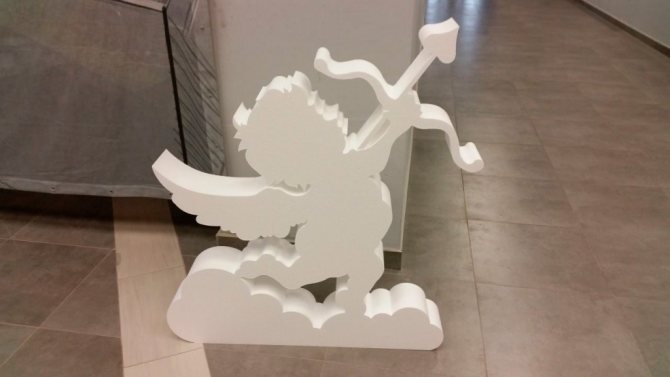
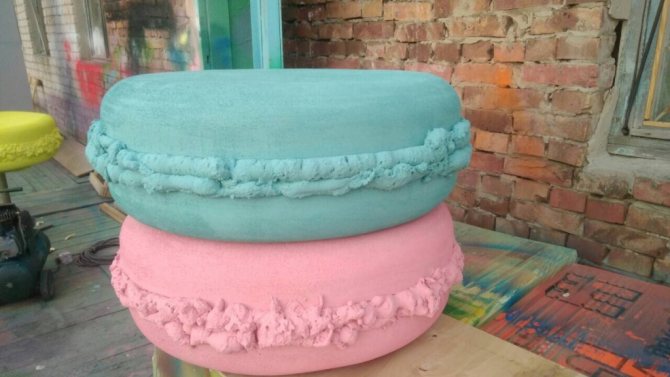
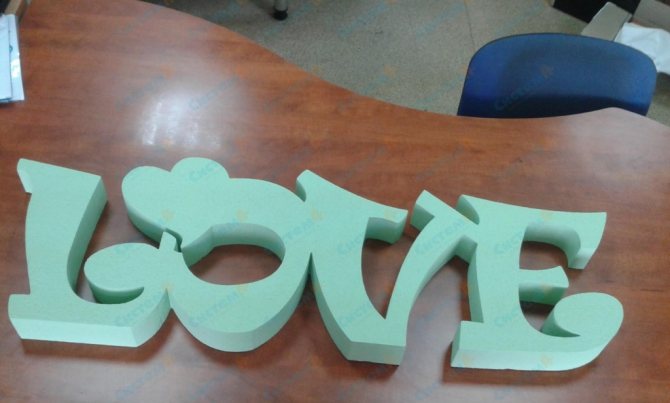
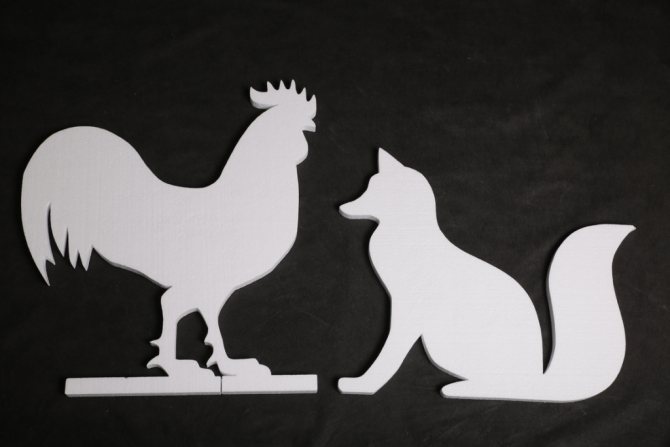
Polyfoam is quite one of the most popular finishing products. Various figures cut from such material are especially popular. Volumetric foam compositions are used as an architectural decoration, to create advertising elements, various design structures for interior decoration.
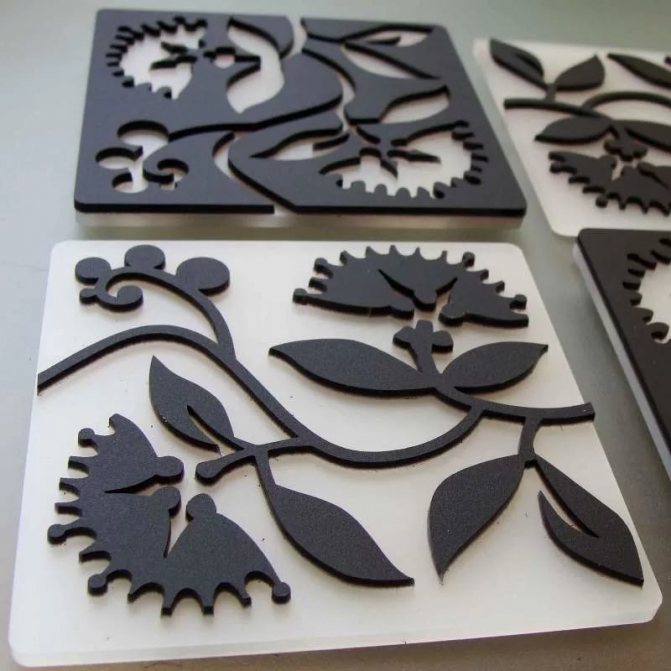
Shape cutting is carried out using laser systems and special CNC machines. Each device has its own advantages and features of use:
- Laser cutting.The processing of foam by means of radiation allows the creation of 2D and 3D shapes of various shapes. This method of cutting provides the smallest cut thickness, contributing to an increase in the detail of products. The whole process on laser CNC equipment is fully automated. Therefore, in the process of cutting the material, defects and errors are excluded.
- String processing. The formation of bulky products occurs with the help of thermal effect of strings made of nickel-chromium. This method of cutting the foam ensures the accuracy of the cuts according to the given sketches. The cost of stringing cellular material is much cheaper than laser cutting. All actions on the machines are controlled by a special computer program.
With the help of modern 3D foam cutting equipment, you can make shapes of varying complexity in a short time.
Elementary carver - half an hour and ready!
The simplest tool for cutting foam sheets (expanded polystyrene) is made without the slightest difficulty using 4-5 flashlight batteries and a regular guitar string. The process for creating a carver will be as follows:
- batteries are connected in series with each other in one block;
- a guitar string is fixed to the ends of the resulting module.
As a result of these actions, a tool with an electric closed arc is obtained. The current passing through it will heat up the string. At the site of its contact with the material to be cut, the process of melting and cutting of the expanded polystyrene sheet into two parts will be observed.
For the operation of the described homemade thermal knife, the string must be heated to 130–150 ° С. With this simple tool, you can cut 1-3 blocks of foam.
It is impractical to use it for cutting a large number of sheets due to the fact that the batteries will drain very quickly.
Ways to cut styrofoam at home
For self-processing of foam plates, various improvised tools and devices are often used. The most common home cutting methods are:
- Open with a boot knife. The blade of the tool must have a special sharpening - the tip is blunt, and the wide part is perfectly sharp. When cutting with such a knife, unpleasant sounds are created.
- Soldering iron material processing. It is recommended to flatten the end of the working part of the soldering iron to increase its thickness. The tool allows you to quickly and smoothly cut small pieces of foam. You can also create rounded shapes using a soldering iron.
- Nichrome wire cutting. This option is considered the most popular when cutting foam at home. Its main advantage is the accuracy and speed of product processing. For cutting the material with a string, a stationary installation is made, which significantly increases the productivity of the process.
A boot knife - a device for cutting foam at home
If necessary, a nichrome device for cutting foam can be made by hand.
Application
If you are renovating or cutting wood, or need to cut a piece of plywood, then an electric cutter is very useful for you, which can also be used even for cutting thick fabric.
If you think that for all the above actions it will be enough for you to use a thermal knife, or a hacksaw is enough, then you are mistaken.
After all, a hacksaw will not make the edges even and not torn, as happens in the case of a cutter.
Typical construction has long since sunk into oblivion. This is noticeable when visiting areas of low-rise construction. Each house is individual, unique. But every household requires insulation, if it was not provided during the construction process.It is unlikely that foam manufacturers will produce custom-sized slabs with a small order volume. We'll have to cut. But how to cut the foam when you insulate a building with your own hands?
Expanded polystyrene foam is easy to cut. Before cutting the foam at home, you need to decide on the required accuracy and cleanliness of the cut. After that, select the required device for cutting the foam from the following:
- saw (hacksaw);
- string;
- thermal cutter;
There is no unambiguous answer to the question: "What is better to cut?" until there is no certainty about the volume and linear dimensions of the processed parts.
Foam milling is not performed due to the extremely low mechanical stability of the material.
Self-made cutter technology
There are many options for constructing effective foam cutters from improvised means. Two of them are especially popular - a cutter and a machine with nichrome thread. Each tool is quite simple to use and is able to provide an even and high-quality cutting of cellular material.
DIY Styrofoam Cutter
In the process of manufacturing a cutting device, it is necessary to use the following materials and tools:
- screwdriver or hammer drill with a drill;
- soldering device;
- two identical pencils;
- pliers with a rounded section at the ends;
- PVA glue or other heat-resistant adhesive;
- nichrome thread;
- two copper wires;
- a wooden block 10 centimeters long;
- insulating tape;
- double battery box;
- wires - one meter;
- switch.
To power such a portable cutter, two conventional AA batteries are used.
Manufacturing process
Having collected all the necessary parts, you can start assembling the cutter structure:
- At each end of the wooden block, make one hole corresponding to the diameter of the matched pencil. Its depth should reach half of the wooden plank. From the edge of the plank, you need to indent 1.5 centimeters.
- In the lower part of the pencils, form a hole for installing a copper wire, the ends of which should be rolled up in a ring.
- Place the plastic battery box on top of the bar with glue. Fix the pencils with the same composition in the previously made holes.
- To adjust the current to the string, install a switch on a wooden plank.
- The two wires should be soldered to the connector located in the battery container. From there, bring the current conductor to the switch, and then strip the ends from the braid and use a soldering iron to fix it to the copper wire on each separate pencil. Insulate the connection points.
- Pull the nichrome string tight, threading it and fixing it well between the copper rings.
Batteries should be inserted into the finished cutter and you can start working. Such a tool is capable of cutting styrofoam up to 4 centimeters thick. Moreover, with its help, you can cut out simple shapes.
Homemade machine
A stationary installation for cutting foam plastic allows you to more accurately cut the cellular product along the outlined lines. In the process of processing, you do not need to make movements with the tool, but simply move the material itself. You can make a machine with your own hands.
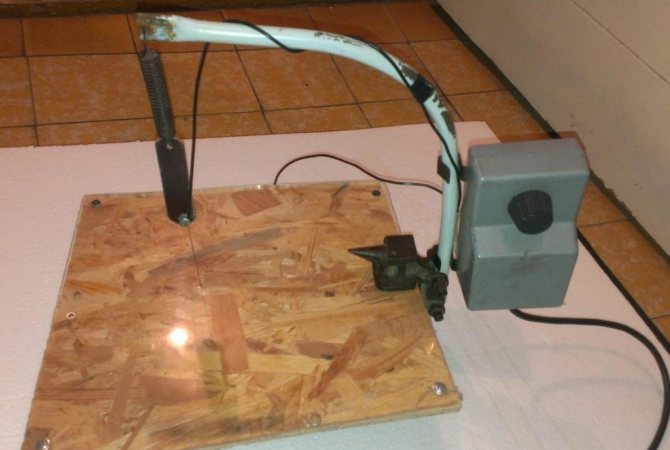
Homemade foam cutting machine
For the manufacture of a stationary cutter, it is necessary to prepare the following devices:
- two long self-tapping screws with wide heads.
- nichrome string;
- wires for connecting current;
- rheostat for adjusting the charge strength;
- step-down transformer with a voltage of 12 volts.
A table is used as a basis. The supporting part can be made by yourself. The main condition for its manufacture is the presence of a flat, smooth surface. The dimensions of the table are selected arbitrarily.
Manufacturing technique
It is not particularly difficult to assemble a homemade machine:
- A longitudinal line is indicated in the center of the table. Self-tapping screws are fixed at its ends on both sides of the support plane;
- The nichrome thread is pulled between the installed screws. At one end, it is simply fixed, and at the other, it is guided through a spring. The string should be located at a height of 10-15 centimeters from the level of the table surface.
- The wires coming from the transformer are connected to both ends of the stretched nichrome thread. On one side of the self-tapping screw, on which the wire is fixed, a load is suspended. It provides good tension on the cutting element.
To cut the foam, stretch it through a hot thread. The cellular structure of the material allows for quick and accurate thermal cutting. The edges of the product are sealed from the high temperature, ensuring an even cut.
We make and use a thermal cutter
For cutting foam with your own hands, devices that have a thin hot element are most often used. The general principle of operation of any thermal cutter for polystyrene is one.
The heated element separates the material with subsequent sealing of the opened volumes. Using thermal cutters for foam plastic, we get a perfectly smooth cut, which is very important for high-quality insulation work.
The purchase of a factory-made foam cutting machine is not economically feasible.
Only if it is not decided to do it professionally and constantly. In most cases, when cutting out curly elements is not required, you can use a homemade foam cutter.
Making a foam cutter with your own hands is quite simple and very inexpensive. After the end of the work, he will not lie as a dead weight, take up space. It can be assembled and disassembled as needed. If not needed, its components can be used for other purposes.
Before making a foam cutter, you need to prepare everything you need:
- work surface blank;
- nichrome wire;
- laboratory controlled transformer (LATR);
Chrome-plated nichrome wire can be used without a step-down transformer, but there is an increased risk of electric shock.
- electric wire, mount for it,
- springs for thread tension;
- adjusting mechanism.
When manufacturing and using the device, observe the rules for the design and operation of electrical installations.
To make equipment for cutting foam, start by marking and trimming the work surface. Determine its geometric dimensions in accordance with the dimensions of the slabs to be cut. It is better if the table surface is larger than the sheet area.
We install racks (supports) with the ability to adjust. This may require a small tool in the form of internally threaded hex bushings. They will make it easier to adjust the cutting height. The cutting wire is tensioned with springs. We lay and fix the electric wire on different sides of the thread. We connect the other end of the cable to LATR (in the absence of LATR, it can be replaced using an autotransformer to charge the car batteries). The device is now ready for use.
Cutting foam at home must be carried out in a safe manner. Heat treatment produces toxic fumes. Therefore, we cut out parts from polystyrene either outdoors, or we use respiratory protection in a workplace equipped with exhaust ventilation.
The use of such a device for cutting foam plastic allows you to maximize the process of preparing insulation fragments.
What is Styrofoam and what is it used for
Styrofoam is a white material that is made up almost entirely of air. It is used for packaging equipment, food, as a heat-insulating and sound-insulating material, as a basis for making household items, logos and many other things.One of the main advantages of polystyrene is its cheapness... Many people buy it in order to make some kind of product from this material and sell it profitably. But even for an ordinary person, polystyrene will be very useful, because a lot of things for the house can be made from it. The main thing is to be able to work correctly with the material, as well as to choose it for specific purposes.
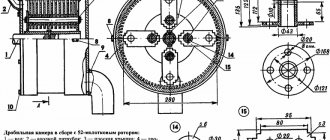
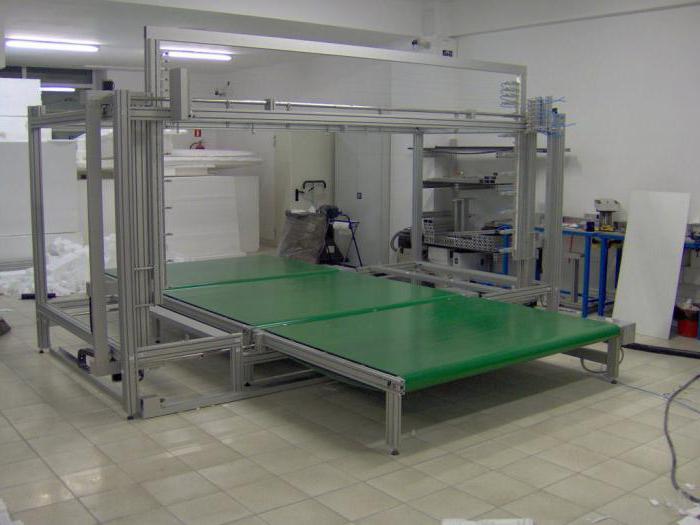
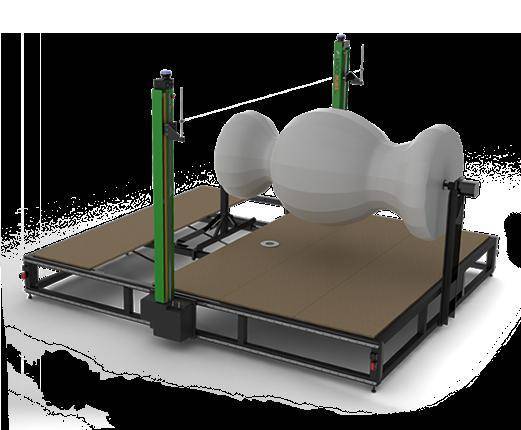
Description of the machine ChSFR-12.20.35-P
If you are looking for a 4-axis CNC foam cutting machine, then you can pay attention to the above model, which has a turntable and 4 action coordinates. The sliding frames are compact enough that the operator can adjust the length of the strings up to 3500 mm. This machine is supplied with components of high quality and reliability, they are supplied by firms from Italy, Japan and Germany. The design has increased rigidity as well as strength. Additionally, the system is equipped with a milling beam. The milling function is characterized by low dynamics due to its design.
What material to choose for cutting
Before we start working with the material, we need to find out what kind of foam is, what kind of it is best used for cutting at home.
Unpressed polystyrene
This is the most common and familiar to everyone polystyrene, which is familiar to us from packaging from technology. The material is a set of small white balls that are tightly attached to each other, but can be disconnected from mechanical stress. It is he who is very widespread and is most often used in the manufacture of products at home.
Pressed polystyrene
This is a similar type of foam that is simply additionally pressed. Because of this, it has a much denser structure, it is more difficult to crush it, but this material also costs much more than its unpressed counterpart. Due to the high price, polystyrene extruded foam is not widely used, but for some products it can definitely be used, since its structure is quite smooth.
PVC foam
The rarest and most unused type of this material, which has one interesting property - the ability to self-extinguish when ignited. It does not emit hazardous substances, but if it does catch fire, then the smoke from it is very dangerous and can threaten health.
Styrofoam prices
Nichrome wire cutting
To use this tool, you will need to additionally assemble the device. It will include not only a nichrome thread, but also a 12 or 24 volt transformer. In advance, you must also take a piece of a small pipe and a table. The string will be tensioned by a spring. Nichrome is a material that is part of any hair dryer. The apparatus must function in such a way that the thread heats up and can melt the foam. Thanks to this, it is possible to obtain various complex shapes from the material.
How to cut foam without special equipment
The first common question is what to do if you need to cut the foam, but constructing a special cutter is too difficult, expensive and useless. There is a way out, even several.
Hacksaw for wood
The large teeth of the hacksaw allow it to cling to the foam granules and cut it quite efficiently. To implement this method, you do not need to modify anything on your own, you just need to purchase or take a ready-made hacksaw for wood. In the same way, cutting can be done with a jigsaw, in which case it will be important to choose the right file for it.
But this method has not received wide distribution, since when using it, the foam will crumble in any case, and it will not be possible to achieve a perfectly even cut. Also, if the tool is used carelessly, the stove can crack and all the work will go down the drain. Therefore, the following methods are almost always used to cut such a capricious material.

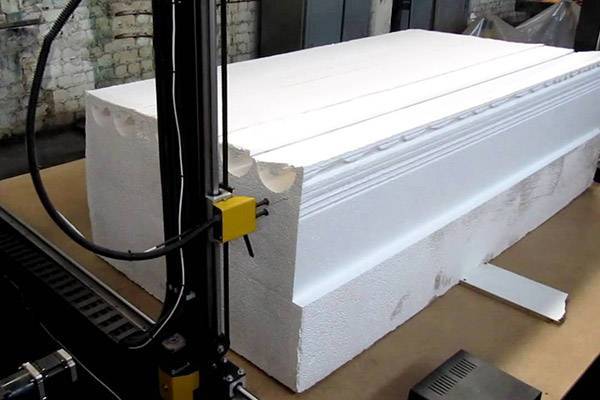
Principle of operation
The machines for cutting polystyrene offered for sale are produced in many modifications, but the principle of their operation remains the same. As mentioned above, the edge goes through the foam in a specific direction. If you plan to cut moldings into elements, then it is important to pay attention to how long the machine will be able to overcome. As an example, consider the PSR machine, which uses strings longer than 2 m for cutting. In one pass, the equipment will be able to cut about 15 running meters.
Cutting material with a hot tool
For cutting a sheet of foam, you can use the most ordinary knife, if you first prepare it for this procedure:
- You need to make sure that the length of the knife is more than the thickness of the sheet to be cut with a margin.
- Next, you need to mark the lines on the sheet along which it will have to be cut.
- The next step is to heat the knife with a gas stove or a special gas burner. With a red-hot knife, you need to carefully draw along the marked line, the foam will begin to melt and cut clearly along the line.
It is important to take into account that this method will not work to achieve a perfectly flat cut, and it is also suitable only for cutting small pieces of material. The fact is that even a little shaking hands will not allow you to achieve a straight line, and a constantly cooling knife will not allow you to make a neat and long cut.
But if your goal is to cut a small piece, then a red-hot knife will allow you to do this very quickly and without wasting money and time. Please note that after cutting, the knife should never be used in the kitchen or at home, as the foam contains toxic substances.
Simple soldering iron cutter
If you need to make a lot of foam blanks, but you don't want to make a too complicated cutter, then you can use its simple analogue, which works on the basis of a conventional soldering iron.
It is important to choose a soldering iron that is not too powerful, as its temperature is excessive for normal sheet cutting. If the power is too high, then the foam will smoke, smoke, and cut badly.
The next step will be the selection and installation of the nozzle on the tip of the soldering iron, since the standard tip is not intended for these purposes in any way. We need to find or make our own a long and flat tip that looks like a small knife blade, but less sharp. Copper wire folded several times is good for making such an item. Another option is to simply take out the tip of the soldering iron and give it the desired look.
Next, the tip is firmly attached to the tip of the soldering iron and you can start cutting.
The soldering iron is inserted into an outlet, heats up and cuts the foam in a similar way to a red-hot knife. The main advantage of this method is that there is no need to constantly warm up the knife, cutting can go on continuously.
Changing machine parameters
When making machines for cutting foam, it is necessary to take into account the fact that in the future there will be a need to cut thicker sheets of materials, while the short screws can be unscrewed and replaced with longer ones. In order to make a press fit, a hole must be made in the base. Its diameter should be less than this indicator inherent in the rack, the difference should be 0.5 millimeters. When making machines for cutting foam, the racks need to be hammered into the holes with a hammer, but to facilitate the procedure, it is necessary to process the sharp edges of the ends with sandpaper. Before you start screwing the screw into the rack, you need to cut a groove under its head. In order to do this, it is necessary to clamp its end with a screwdriver, while a thin file should be laid under the head, and then rotation should be activated.The groove is necessary in order to strengthen the wire in one position, which can move when correcting. In order for the wire not to sag, lengthening after heating, it must be fixed to the springs, and then to the screws. When performing machines for cutting foam, you need to prepare all the fasteners, and then strengthen the nichrome wire. In order to ensure reliable contact between it and the conductive wire, you need to apply a technology called "spinning with compression". The copper wire must have a cross section of at least 1.45 sq. Mm.
Special cutter for cutting foam
If you want to make foam products on a regular basis, and so that they turn out really smooth and well, then you will have to make a special cutting machine that will allow you to do all this.
Special Foam Cutter Prices
On the Internet, you can find many options for this design, which differ in size, appearance, but they have the same essence. We will analyze one of the most popular and simple designs, which has proven itself well.
Table 1. Basic methods of cutting foam:
| Cutting methods | Benefits | disadvantages |
| Wood saw | Simplicity and availability | Cannot achieve a perfect cut |
| With a hot knife | Availability | The knife cools down quickly |
| Soldering iron cutter | Will not cool down, so long cuts can be made | It takes time to create |
| Homemade machine | Allows for perfectly straight cuts | Complexity |
Homemade electric foam cutters
If such devices are divided into groups, they should be classified as follows:
- device for linear cutting;
- thermal cutter, with the help of which figured cutting is performed;
- device with a metal plate.
However, despite this classification, each device has one common element in its design. To create foam cutters, you will need to find a step-down transformer. This cell needs to be able to handle 100 watts.
Step-by-step instructions for making a cutter
First you need to decide on the tools and materials that we need to create a cutter. The list of required materials includes:
- Chipboard or other solid base, approximately 600 by 400 mm... The size can be changed, it will depend on the size of the sheets you are going to work with.
- Smooth wooden lath, about a meter long.
- Legs material: 4 plastic bottle caps, a piece of rail or other material.
- Nichrome wire, approx. 0.4 mm... You need about half a meter, but it is better to buy with a margin.
- Tensile spring. It is in tension, not in compression. Such a spring cannot be found everywhere.
- 10-15 screws.
- Wires, crocodiles for fastening them.
- Power supplies from a computer and a cable for it.
Homemade curved machine
homemade machine diagram
Drawings for making a machine with your own hands are not needed, this is so simple a device. On such a machine, you can make small parts for fishing or household use.
- We select a suitable table covered with an electrical and thermal insulator (for example, polyamide film).
- At the centers of the long sides of the table, we fix one glass or ceramic insulator. Then a filament will be drawn between the insulators.
- We select the right fishing line. You can use nichrome thread from an old iron, soldering iron or electric stove. The spiral should be straightened into a straight thread. The line thickness should not exceed 0.5 mm.
- So that the thread does not burn out, we connect it to the network through a step-down transformer or rheostat.
- A fishing line is connected to the coil on the insulator with your own hands, an electrical installation cable to it, which will go further into the network. Ensure maximum contact between the line and the cable.
- Under the table, the fishing line is pulled to the second insulator, passed through it. The end of the line hangs freely from the insulator, a weight is screwed to it. The weight of the weight regulates the tension of the heated fishing line during operation; it must be selected by the method of tests. Thus, we make a sliding mount that provides a better clean cut.
- Near the second insulating coil, another electrical cable is attached to the line, directed to the rheostat (slider terminal).
The performance of a hand-made machine will depend on the heating temperature of the line, that is, its thickness and current voltage. It is not recommended to apply high voltage in order to speed up the process. Because the thread will burn out faster. It is necessary to monitor the condition of the thread, it should heat up to a bright red color, but not white. White color indicates overheating. That is, the voltage must be reduced to make it workable.
Video- How to make a machine for cutting foam with your own hands
Where to get nichrome wire
Nichrome wire - an integral part of the cutter, but not everyone knows what it is, and most importantly - where to get it. Nichrome wire differs from ordinary wire in its strength and very high melting point. This is why it is best used to create a Styrofoam cutter.
This wire is used in irons, boilers and some other heating devices. In addition, it can be bought in electronics stores, markets.
Prices for nichrome wire
Power supply, its connection and configuration
Our cutter will work from a regular computer power supply, which almost everyone has, but if it was not found, then it can be bought at any computer store, it is inexpensive.
Plug the power cord into a power outlet and turn on the device. But the power supply will not turn on due to the peculiarities of its operation. In order for it to turn on you need:
- Find the largest connector that fits the motherboard.
- Prepare a small piece of regular wire or find a hairpin.
- Find a green wire there, it will be one.
- Now, with the help of a hairpin, you need to close the green wire with one of the black wires, and it does not matter which one.
After these simple manipulations, the power supply will work.
It remains only to get the voltage we need in some way using the power supply. To do this, you need to find a Molex connector, which is a connector with four holes, to which wires of different colors go.
In the holes with the yellow and black wires, you need to connect the wires of the wiring, which will power the entire cutter. This completes all the manipulations with the power supply, you can proceed to building the cutter itself.
Choice of wire length
Before starting the manufacture of the foam cutting machine itself, you need to calculate the length of the nichrome wire, which will be enough for normal cutting of the material. For this you need:
- Take a long rail, screw it on both sides with a screw.
- A tension spring must be attached to one of the screws, which will also be used by us in the future.
- Pull the nichrome wire to the maximum possible length. One end will be connected through a spring.
- Now you need to connect one wire from the power supply to the very end of the wire, which does not have a spring.
- It is not necessary to fasten the second wire tightly, we will move it. Depending on the position of the wire, the temperature of the wire will increase. The closer the two ends, the hotter it is. Thus, you need to find a position at which the temperature of the wire will be sufficient to cut the foam. Please note that if the wires are placed too close, the foam will burn, which will negatively affect the final quality of the product.
Next, you need to measure the distance between the wires and remember it. This is how much wire will be used to cut the foam.
Now the entire structure needs to be disassembled and proceeded to manufacture the main part of the cutter.
Base
First of all, you need to take a board for the base and screw 4 legs prepared in advance to it. The easiest way to do this is to take 4 plastic bottle caps and fix them on the back of the board using ordinary screws. It is important that the screws do not come out from the back of the board. This can happen if the fastener is too long.
Next, you need to find the flattest side of the base and attach a structure there, to which the wire will be screwed.
Fastening for wire
The wire fixture in our design consists of two twisted pieces of rail that are tightly attached to the base. It is important to collect everything so that an angle of 90 degrees is formed and nothing wobbles.
The first step is to fasten the two slats together. The length of the first should be equal to the length of the wire that is suitable for cutting. The length of the second rod will be the distance from the tip of the torch to the wire. It must be selected based on the size of the workpiece that you are going to process.
Now the resulting corner from the rails must be screwed to the base using the corners. It is important to do this so that the structure does not wobble.
Now at the base you need to drill a through hole where the line will go. To do this, you need to screw a screw to the center of the rail, and tie a thread to it. When the thread comes down, you need to put a point at the place with which it comes into contact. This is where you need to drill.
On the back of the base, next to the hole, you need to screw a small screw. It should be as close to the hole as possible.
Fastening the wire
Now you need to start attaching the wire. The first step is to secure the spring to the screw that is on the rail. A nichrome wire is attached to the end of the spring, and the spring must be stretched by about half.
The other end of the wire must be tightly wound around the screw that was screwed on the back of the base. The wire should be well taut and the spring should not be in its original position. Nichrome wire can be quite uneven due to the fact that it very willingly assumes the shape that it has been given. To make it as flat as possible, you need to stretch it and move it with a piece of wood until it visually becomes smooth. It is unlikely that it will be possible to make the wire perfect, but minor irregularities will not greatly interfere with cutting.
The last step is to set up the cutter. This is because a screwed-in rail does not create a right angle to the base of the cutter. To fix this, you need to take a square and attach it to the rail. Now, using a screwdriver or screwdriver, you need to turn the screw a little until an even corner is formed.
This completes the process of creating a homemade foam cutter. It remains only to connect the power supply.
Power connection
In order for the cutter to start working, it is necessary to connect power to it from the block that we did in the previous steps. For the convenience of fastening, you can buy special crocodiles that will help secure the wire in a couple of movements. If there are no crocodiles, then the wire can simply be wound in the right places.
Step-by-step production of a thermoswitch
You can make a thermal cutter using a burner or a soldering iron and an old jigsaw. Consider the manufacture of such a device step by step:
- Sleeve.
Initially, you need to make the main and most difficult thing - the sleeve. So, for this, the plate must be bent, carved. Further, a hole must be made in the sleeve, a thread will be inserted there in the future. - Scorcher.
You need to cut the wire that leads to the hole and take the appropriate connectors, then solder to the break.
Note:
such areas must be isolated without fail.
- After everything is done, you can connect the thermal cutter.
Saw the old jigsaw in half. In the upper part it is necessary to attach the pre-prepared plate-foot on the screws. But we attach the bottom to the base using self-tapping screws. - Insert the sleeve into the foot.
Now, with special attention, it is necessary from the hole along a plumb line, or a square, to mark a point under the hole of the sleeve. Next, we drill a hole in the base. The hole in the base should be about 5 mm in diameter. - Thermal cutting.
So, when everything is ready, you need to straighten the nichrome wire. To do this, you should turn on the burner at full power and touch the nichrome with wires from it. Everything must be done in such a way that a distance equal to the height of the device remains between the wiring. If the filament does not heat up, but the burner begins to hum, find a thinner wire. This is necessary because the one you have chosen has insufficient resistance.
Take a note:
The nichrome should be hot, but should not be reddened. If the string turns red, it is necessary to reduce its heating by means of the regulator. In the event that nichrome is red even at a minimum, then a compensator should be left 5-10-15 cm higher than the spring of nichrome wire. And only then can the contact be hooked up.
- Operation of the device.
With a pre-installed guide, you need to cut the foam dies of a given thickness, you can also make a curly shape.
Video - DIY Styrofoam Cutting Machine
The first end of the wire must be connected to the back of the base, to the screw that we screwed there. The second end must be placed on the nichrome wire itself, under the spring. Lowering the wire slightly increases the temperature and makes the torch more powerful.
If you need a full-fledged power regulator, then here is a quick guide on how to make it:
- You need to take a piece of nichrome wire that remains and wind it on a regular ballpoint pen so that you get something that looks like a spring.
- Bend hooks at the ends of the spring.
- Now, in an arbitrary place on the cutter frame, you need to screw in two screws at a distance approximately equal to the length of the resulting spring. The wire must be secured to these screws.
- Next, you need to connect the end of the spring to the beginning of the nichrome wire of the cutter itself.
- The first wire from the power supply must be connected to the same screw that is under the base, and the second wire must be fixed on one of the turns of the wire. Depending on the selected turn, the resistance in the circuit will change, and therefore the power of our device.
Varieties of electric thermal knives and their features
If the master uses polystyrene regularly and performs large volumes of work, it is advisable for him to make a tool with his own hands that functions from a household electrical network. These homemade thermal knives, which do not require separate chargers, are used to:
- linear cutting;
- true shape cutting.
They use a nichrome thread or a metal plate as a working thermoelement. A mandatory block of such devices is a voltage-reducing transformer (Figure 1). Its windings must meet the following requirements:
- section of cables - from 1.5 mm;
- voltage - from 100 V (primary winding), 15 V (secondary).
Experts recommend connecting the step-down device to an autotransformer (LATR), which allows you to smoothly adjust the output voltage. If you don't want to buy such an expensive device, you can do it differently:
- put a switch on the secondary winding taps;
- equip the step-down transformer with a rheostat.
Styrofoam cutting process
In order to cut styrofoam, you need:
- Switch on the power supply.
- Make high-quality markings on the foam sheet so that you can see where the cutting line should be.
- Take a metal ruler and attach it to the cut line. Cutting will be very difficult without a ruler.
- Cutting out complex geometric shapes on such a machine is also possible, but for this you definitely need to practice on simple products.
Guide board
In order to make it easier to cut simple products and shapes, you can screw any flat board to the base of the cutter and use it as a guide. For this you need:
- Find a flat plank and place it on the base of the foam cutter.
- Drill a through hole at one end of the board. At the other end, you need to make a slot in which the screw should move freely.
- Now all that remains is to set the desired size and screw both screws to the cutter itself. Thus, the board will serve as a guide to which you need to press the workpiece. With its help, you can cut products with a perfectly straight edge.
Getting 2d figures
When manufacturing two-dimensional parts on the SFR-Standard unit, files in the PLT format are in demand. To open the required file, you need to select the item "processing figure 2d" in the menu.
After the file is loaded into a separate program window, you can use the "edit" button for more productive configuration and management. With its help, missing details are adjusted, corners are smoothed, the scale of the figure is changed. After loading the created files and configuring certain parameters to the machine, further control is carried out using three buttons:
- software launch;
- pause;
- Stop.
Features of the process of cutting foam
Styrofoam is a foam material and is mostly air, so it is very lightweight and easy to work with. However, you should not think that no problems arise, because in addition to everything, foam is a rather fragile material. Therefore, if you use an electric grinder, then you should not rely on even edges, besides, the entire room and site will be strewn with crumbled foam.
No matter how sharp the knife is, the material will still crumble. Of course, this is a minor defect and the sheets will be usable, but cleaning will turn into a troublesome event. There is a way out of this situation, you can use a thermal knife. In this case, the edges of the material are melted and it does not crumble. But bad luck, such a device costs a lot, but in principle you can also heat an ordinary knife. However, in this case, you need to be very careful not to get burned, and the work will be significantly delayed.
Methods for cutting sheets
For this purpose, you can use a different cutting tool, for example, a grinder, only then you should use the thinnest disc. Very often builders also use a simple sharp knife. Sometimes it is advised to take a hacksaw with very fine teeth, but the latter method is very dubious. In addition, the stores sell special thermal knives designed for working with foam.
The thermal knife heats up to 600 ° C in just 10 seconds. However, this tool is quite expensive, so it doesn't always make sense to buy it.
The way out of the situation in many cases will be a device for cutting foam sheets, made by yourself. It is probably somewhat cumbersome, but with the necessary components, it is absolutely free and always available. And if you have to do large-scale work, for example, you have ahead of you the insulation of a huge house that you erected for your large family, then the question of how convenient it is to cut the foam, and even a lot and quickly, will not come up throughout the event, no matter how dragged on.
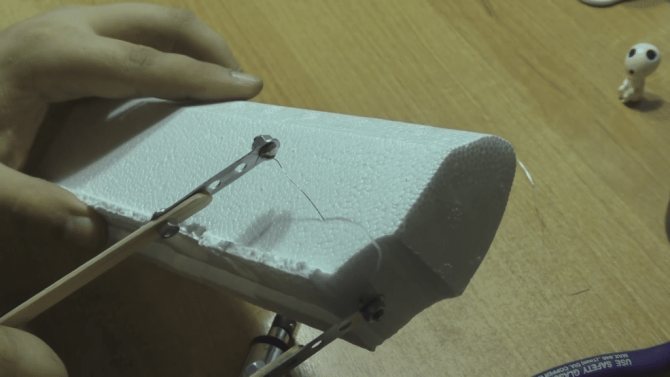
In order to assemble a foam cutter, you will need a tabletop, each with a pair of springs, M4 screws and 28 mm long struts, as well as a nichrome thread, which will act as a cutting tool.First, we make two holes at the base, press the racks into them, and at the base of the screw head we cut a small groove, thanks to which the thread will be securely fixed in a given position.
When everything is assembled, we attach the string to the screws, but since it can sag during heating, it should be connected through springs, then the thread will always be in a taut position. The power source is connected to such a device by means of ordinary twists. So you can make a homemade and very effective foam cutter, while spending a minimum of effort, time and money.
Professional advice
To cut foam quickly and efficiently, it is recommended that you follow the following professional tips:
- It is not very convenient to cut with an ordinary knife. It is best to use a soldering iron instead. It will be possible to cut the foam quickly and efficiently if the round side can be easily flattened with a hammer. Additionally, you will need to put on a metal cap on the electrical appliance. The blade must be secured well. Only then should the soldering iron be plugged into the network. Operate the instrument only in a well-ventilated area. It is best to open the windows additionally. When heated, a gas is released from a soldering iron, which has a toxic effect on the respiratory system.
- It is most convenient to cut the foam with a nichrome thread. Thanks to her, the process will take place quickly, and the edges will be even.
- Nichrome material is found in hair styling devices, hair dryers, irons, and boilers. If there is no way to get such a thread, then you can use steel wire. It should be stretched across the table. One side is fixed rigidly, and the other only with a spring. A transformer is connected to both of them. It must first be connected to the electrical network.
- The foam sheet must be placed over the wire. The current charge directly depends on the thickness of the working material. It is necessary to ensure that the wire turns red. You should not allow incandescence, because in this case, the cut may turn out to be too wide.
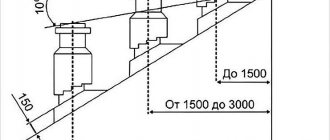
- All manipulations are most conveniently done if the table is at an angle of 20-60 degrees to the floor. Thanks to this, the very feeding of the foam will take place under its own weight. However, for this there must be a sufficient level of slip.
- The nichrome wire will become larger during operation. That is why it is important to secure it to one side with a spring. Thanks to her, length regulation will occur.
- To cut the foam, it is allowed to use a grinder or a jigsaw. It is also recommended to use a file with a wavy blade.
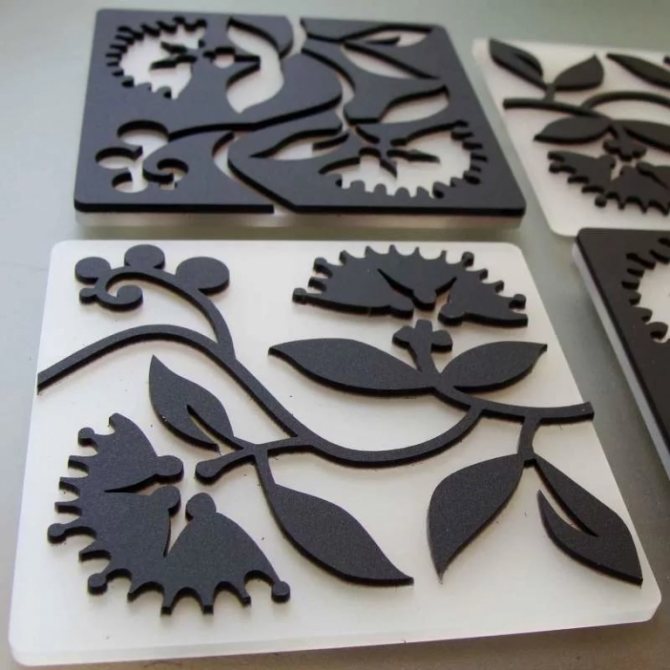
- If you need to create figures from foam, then molds for dough are quite suitable for cutting them. However, in this case, you can take only that foam, the thickness of which does not exceed 1.27 cm.
- To quickly smooth out the protrusions, you just need to rub the foam together.
- In the process of working with foam, it is recommended that all manipulations be performed on a cutting board. In this case, the probability of damage to the table is minimized.
Today, styrofoam figures are very popular in interior design. To create them, it is advisable to use a special knife or an automatic device. To obtain even edges, it is advisable to perform all manipulations with a preheated object. You can make a knife yourself from an old soldering iron. This tool is very popular with interior designers.
How to cut polystyrene yourself - step by step scheme
Step 1: preparatory work
It doesn't matter what kind of tool you are going to use - a knife, nichrome thread or other cutting devices, you still need to start with the marking.So we take a ruler, square, tape measure, pencil and put marks on the surface of the sheet, then connect them in lines. In general, we draw the outlines of the future cut.
Step 2: Directly cutting
It all depends on the chosen method and, of course, the tool. So, if there is no desire to tinker with different settings, then it is quite possible to use a simple construction knife, the main thing is that it is well sharpened. In this case, we apply a ruler to the marked line, clamp it and make a cut with a knife. But just do not overdo it, the cut should be shallow, then the sheet will not crumble. Then we turn the panel over and make a similar cut on the other side. All movements are made "from yourself"... After that, we just break the sheet in the right place.
There are other ways how you can cut the foam. For example, using nichrome thread. In this case, a small current is supplied to it, which is capable of heating the string to the desired temperature, and the cutting is accurately performed along a given contour. Of course, the quality of the cut in this case will be much better, but you have to work a little to make the machine. Therefore, this method is not always justified if you need to process only a few sheets, there is simply no point in wasting time on designing the fixture. As you can see, it is impossible to give an unambiguous answer, what is the best way to cut polystyrene, it all depends on the volume and skills.
Stages of creation
Since linear cutting is the most common, let's take a closer look at this particular option:
- Cutting part.
To do this, you need a nichrome wire, approximately a spiral with a diameter of 0.6 mm. It can be taken from old electric stoves or other heating electrical appliances. The length of such a wire should be 14 cm (its resistance will be 2 ohms). - Application of a transformer.
For everything to be correct, the first step is to calculate the voltage and current for heating the cutting part. This can be done using the formula - Ohm's law I = U / R. Thus, you can determine the power of the power transformer. - Making a cutter.
The base can be made of any metal, but its length must be at least 11 cm. Further, an insulator must be attached to the end - a PCB plate. And now, at the edges of the plate, fix the contact groups, they can be removed from the electrical outlet. It is in these contacts that spirals with different shapes can be fixed. - How the cutter works.
After the cutter is plugged in, its coil will heat up and turn slightly reddish. This is what matters, since the heated cutter will make it possible to easily and quickly cut the foam, which will not flake off.
It's important to know:
having received such a device, in three minutes it will be possible to cut the required shape from a sheet of foam.
Be sure to follow all safety rules so as not to injure yourself and others. After all, the power of the cutter is sufficient to damage any part of the body during operation. Connecting to electricity further increases the risk of injury.