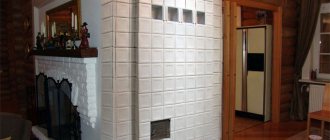
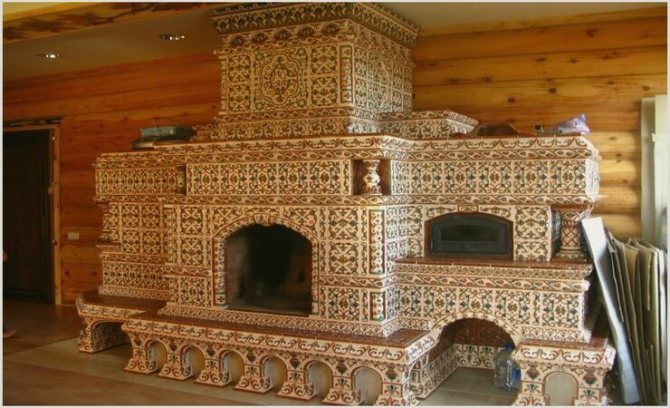
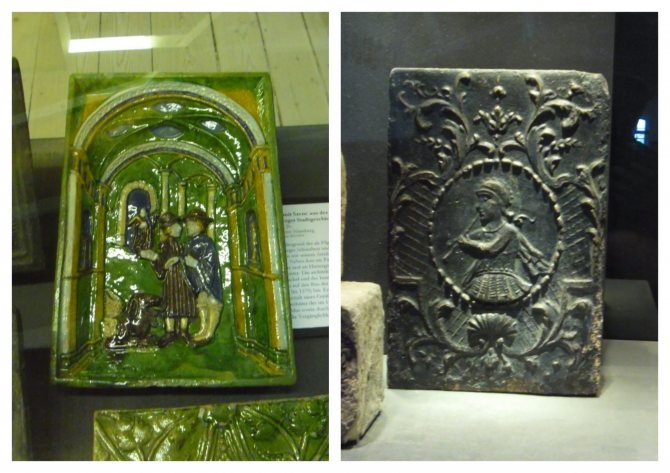
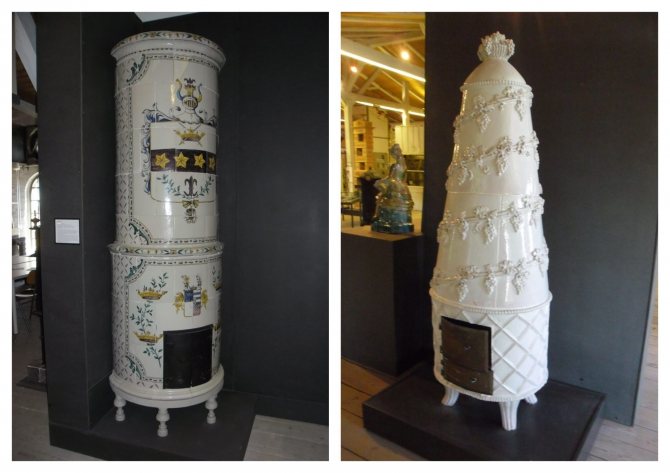
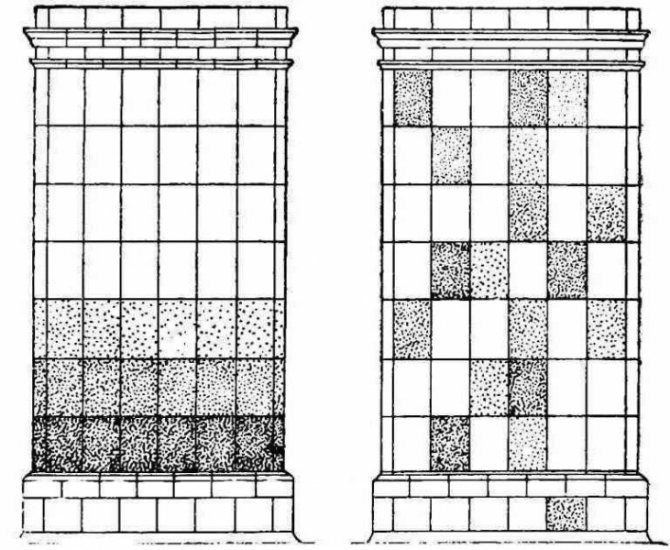
Everyone who has ever seen a stove lined with tiles must have admired its incredible beauty. Tiles with a convex surface and original painting, laid in a certain order, look very aesthetically pleasing and rightfully compete with other well-known examples of folk art.
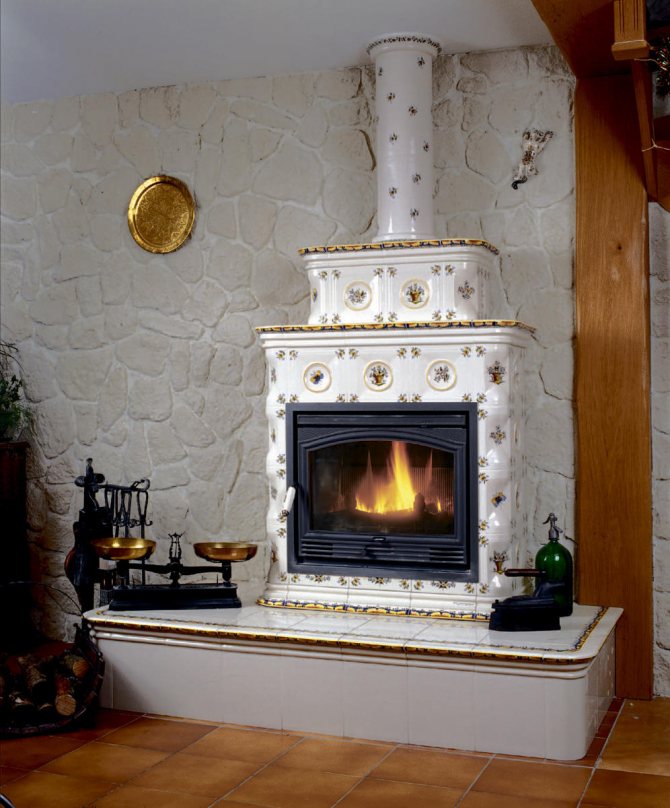
Use tiles to create decorative elements in your home
Tile construction
Tiles are ceramic tiles of an original design. The slabs can have different textures - smooth, rough, structural. But the essence of the products is the box format.
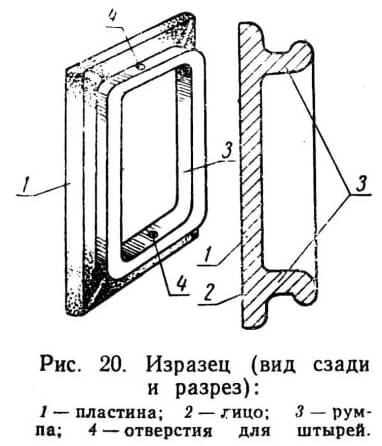
The tile consists of:
- front part;
- plates - the topmost layer;
- rumpy - the element that distinguishes this ceramics from all other types;
- holes for pins located in the tiller.
Tile construction
The volumetric shape, formed by the tiller, makes the cladding thermo-inert - the heat transfer of the furnace coating is felt for several days. Thanks to the boxes, a space is created between the tiles and the surface of the fireplace. We owe it to him for the accumulation of heat and such a prolonged release of heat to the room.
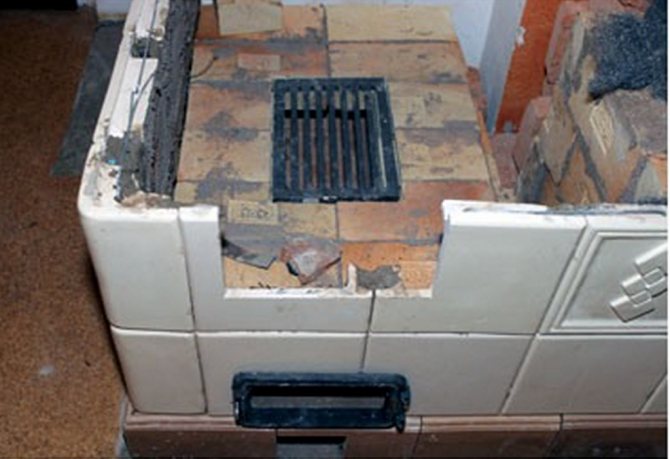
Holes in the tiller are needed for pins or wires that are embedded in brick joints - this makes the finish more durable and reliable. The classic cladding scheme involves the rejection of glue or other similar binders. For this reason, the heat transfer increases even more.
Despite the inertness of the heat carrier, the heat of the stove covered with tiles is very soft. While heating the room well, the stove is not capable of burning.
The main functional plus of such a tile is the heat transfer of the stove for several days.

What tools do we need?
For facing a tiled stove or fireplace, you will need not only the tiles themselves, but also a number of tools:
- building level;
- plumb line;
- grinder to trim tiles;
- putty knife;
- drill (in case you are tiling with tiles on an already finished oven).
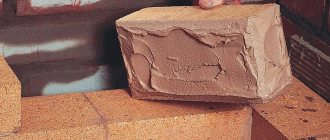
From the materials it is necessary to prepare clay and gravel (pebbles, chamotte, broken brick) to fill the tile. You will also need steel staples, 5mm rebar, soft wire, and tile grout to give the tiled stove cladding a finished look.
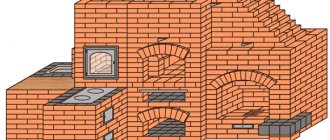
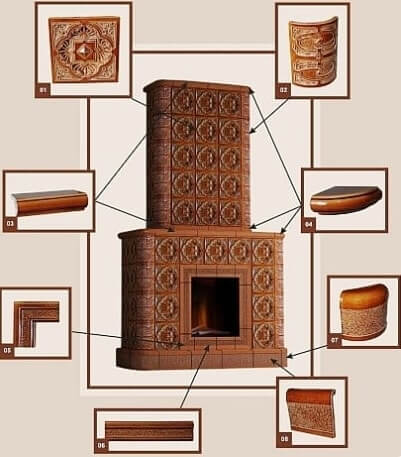
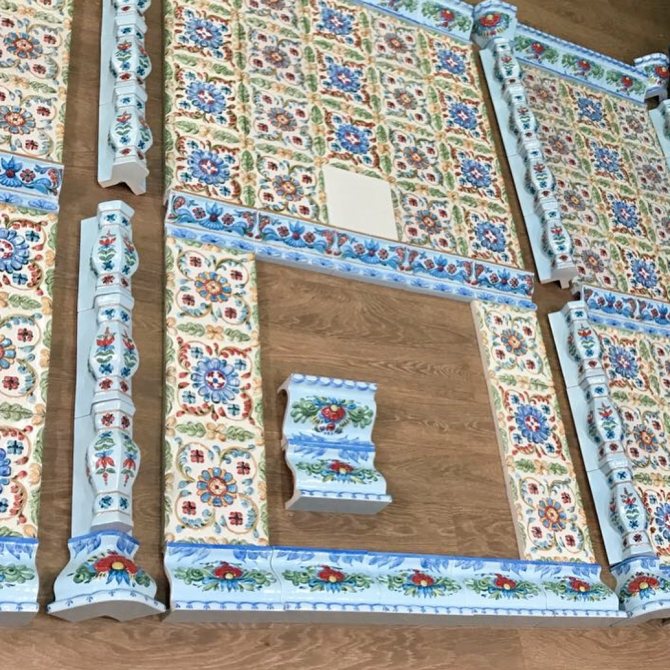
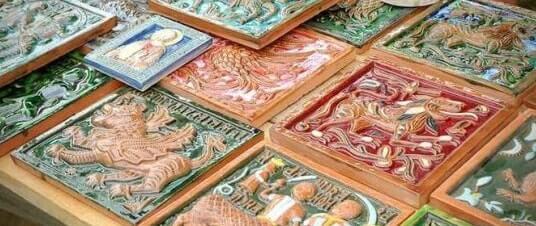
Types of tiles
In terms of shape and purpose, tiled ceramics are divided into several main types. Among them:
- flat slabs - elements that cover the main area of the fireplace;
- corner - designed for decorating corners;
- basement and cornice - designed for finishing the lower and upper zones of the furnace, respectively;
- shaped - corner tiles, which are necessary for the decoration of corners of complex shapes.
Tiled tile options
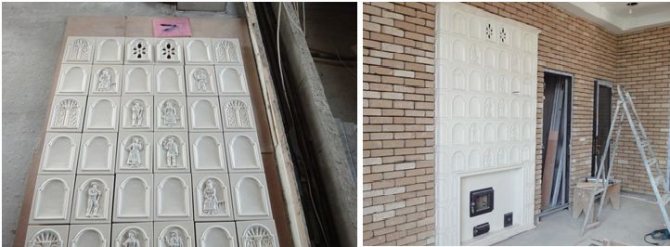
Surface preparation
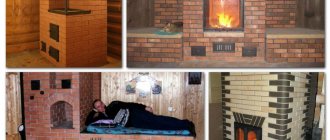
Tiled stoves, like tiled fireplaces, are performed in two ways. You can decorate a ready-made, long-operating stove with cladding, or install tiles during construction. In the first case, the surface of the future tiled fireplace will need some preparation.
- Clean the tile walls from old finishes to brick with a wire brush.
- Using a hammer and chisel, increase the depth of the joints in the stove masonry by about 1 cm so that the fireplace tiles fit better when facing.
- Hang a building mesh on the plane of your future tiled fireplace, securing it with studs in the seams of the masonry.
- Prime the stove surface to match the tiles.
- Using a level, check the vertical of the finish and apply beacons along which you will navigate during tiling.
How are tiles made industrially?
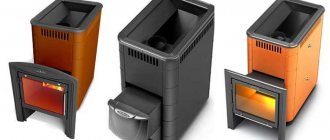
The original veneering ceramic format emerged as a response to the need for good room heating and long-term retention of heat. Some modern furnace models are characterized by a noticeable temperature difference between the inner and outer zones of the furnace surface. Thanks to this, the usual ceramic tiles are quite enough for their facing. In other cases, it is much more expedient to use box-shaped plates.
In the past, rump ceramics were cast in wooden molds, after which the box was assembled and painted in a certain way. Today, in the production of boards, both traditional technologies and modern developments are combined.
Stages of modern tile production:
- make a plaster mold; based on the estimated dimensions of the plates, the workpiece is cast; having assembled the base from several parts, it is covered with a special composition, after which the formwork is mounted and the model is poured with a plaster mixture; the form is brought to mind, cleaned and dried;
- prepare raw materials - clay; raw materials must be cleaned of impurities and made plastic; to give the required degree of viscosity, the clay is allowed to lie down, and then it is mixed for a long time and very qualitatively - air is removed from the mixture;
- the ready-made raw material is filled in the form, carefully rolling it in the direction from the center to the periphery; after that, the clay is left to dry - the form absorbs moisture from the raw material; as a result, the clay mass shrinks and moves away from the walls of the mold without effort; at this stage, semi-finished products are removed from the molds and sent for drying to a special chamber, characterized by the required temperature and degree of humidity;
- future tiles are sent to the kiln for firing; here the tile gains strength, acquires color and the necessary coefficient of moisture resistance;
- the canvas of elements is decorated with clay or glaze, after which they are painted in a certain way;
- at the final stage, the slabs are fired again - this is necessary for the formation of a monolith of the base and glaze and for the formation of the final shade; sometimes, after the final firing, another layer of decorative composition is applied to the tile, for example, paint.
All this is curious, but many people have a natural question - is it possible to make high-quality tiles for stoves with their own hands? It is not easy, but the answer is yes - you can make the ceramics that have been tested for centuries on your own.
How to make tiles yourself?
The process of making ceramics is divided into stages. You need to start with the preparation of raw materials.
Clay harvesting
Clay is commercially available, but you can prepare it yourself. If you intend to work independently, then it is recommended to attend to stocks in the warm season. Clay lumps should be dried well in direct sunlight.
The dried clay is broken with a rammer and sieved, removing impurities. Crumbled raw materials are poured with water and mixed thoroughly. During this procedure, all the slag is on the surface - it is removed. The manipulation is repeated until the debris stops floating up.
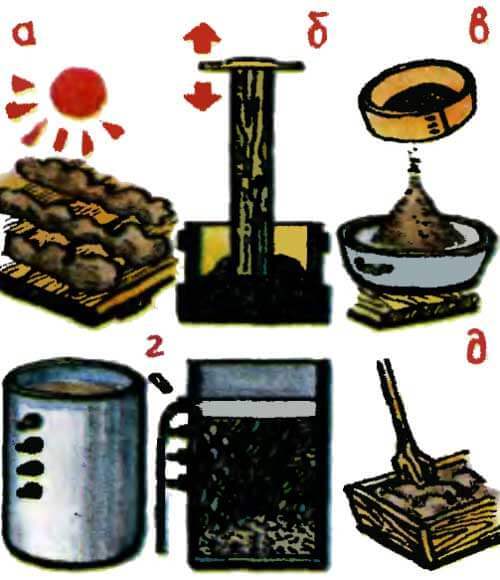
Clay harvesting
For work, it is advisable to use a special container in which holes of different heights are made. The latter are initially sealed, but gradually opened as they rinse. Thanks to this, the liquid is drained - the liquid raw material remains in the container. The clay is moved into a wide, low basin and again dried in the sun. During the evaporation process, the source is constantly mixed. A doughy plastic material is considered ready.
It is important to achieve the purity and plasticity of the clay. This will allow you to work with comfort and not worry about the strength of the product.
Form making
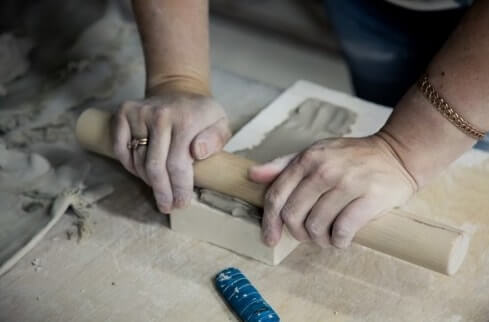
Unrolling the workpiece
Facing materials can be made of any geometry. Based on the desired, prepare a form of plaster. Clay blank manufacturing scheme:
- roll out a cake from a piece of clay;
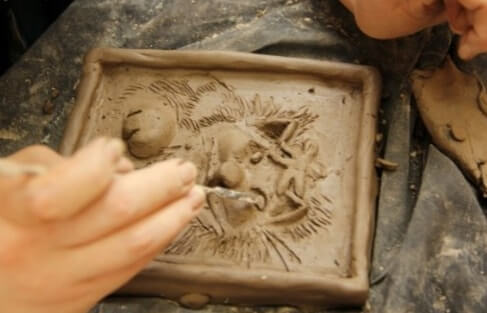
- cut out the required shape with a sharp tool and align the edges;
- sculpt a structural illustration and apply a patterned sketch using a stack; the outline of the workpiece is drawn with clay rollers.
Next, a frame is made from the bars, into which the workpiece is placed. After that, gypsum is diluted in water - from a ratio of 7:10 (gypsum: water). The clay model is moistened and then poured with a plaster mixture.
Important! Plaster must be used immediately. It hardens very quickly and after a few minutes it loses its plasticity.
First, a model pattern is covered with a mixture, thinly. After that, the composition is filled in the frame to the very edge. It takes 15 minutes for the plaster to set. After a quarter of an hour, the frame is removed, and the mold is cleaned, washed and dried. At this stage, it can already be used to make tiles.
Shaping and firing tiles
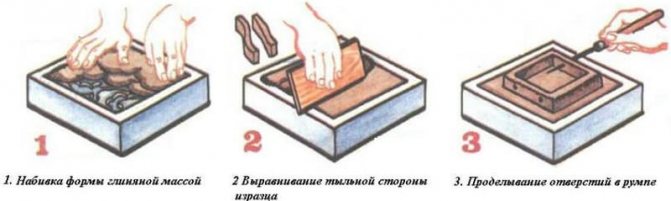
Tile shaping
The plaster model is ready - it is filled with flexible material. Pressing clay into the structural surface of the mold, make sure that the raw material fills all the details. Next is the turn of the rump. The box is made of four rollers, which are placed on the workpiece. Remember about wire holes. After the semi-finished tile hardens slightly, it is removed from the base.
Clay is polished using any smooth element. The result should be a slight sheen on the surface. The decorative element is left for a while - it needs to dry.
Product molding process
The dried tiles are placed in a muffle furnace (heating device, which is characterized by the presence of protection from fuel and combustion products). There should be a small space between the tiles, otherwise the elements will be baked together. The firing temperature is about 900 degrees. The firing time is approximately 4 hours. After heat treatment, remove the tiles from the oven only when they have completely cooled down.
Painting tiles
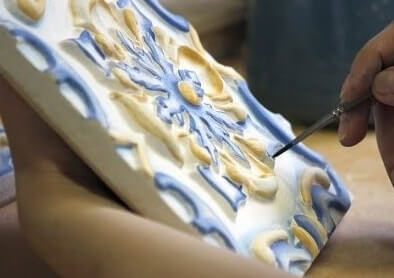
Tile painting
At this stage of production, the tiles are functional, but not effective enough. The minus is eliminated by painting. There are two options for decorating:
- cold method; oil paints are used - linseed tiles, dried during the day, decorated, dried and varnished again; re-firing is not necessary;
- painting with engobes (coated with liquid clay); requires a variety of clay and a second firing; There are two sub-variants of this method: the tiles are moistened in water, after which they are treated with a thin layer of light engobe; letting the tile dry a little, it is painted with heat-resistant gouache; if you refuse to enamel the tiles, crushed glass is added to engobe - for hardening; after painting, the parts are sent back to the oven;
- the tile is covered with creamy clay; it should be borne in mind that during heat treatment, painted tiled ceramics can change color.
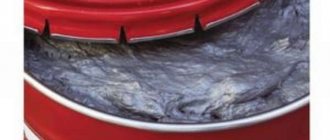
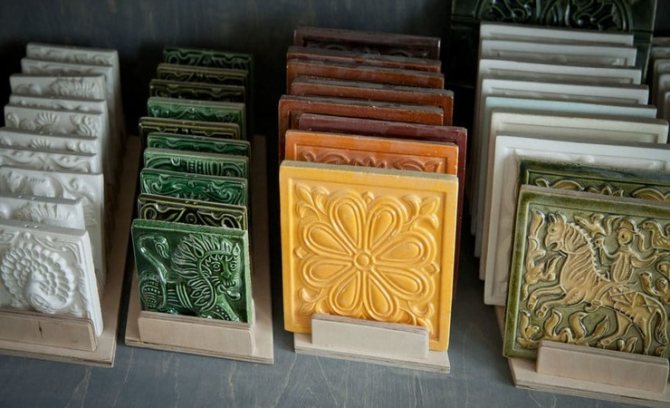
Glazing process
Ready glazed tiles
Glaze is needed to enhance the effect and increase the strength of the tile. Enameling scheme:
- prepare a paste and mix it with crushed glass; the mixture should be creamy;
- tiles are dipped into the finished composition - either painted or without additional artistic processing;
- dry the ceramics;
- re-fired.
When heated, the paste with glass is sintered with the tiles and form one whole.
To simplify the production of tiles, gypsum putty can be used instead of clay, and the purchase of ready-made silicone ones can be preferred to the difficult process of making molds. In this case, firing is not necessary, and the casting procedure is noticeably easier. But with this approach, there is a departure from tradition.
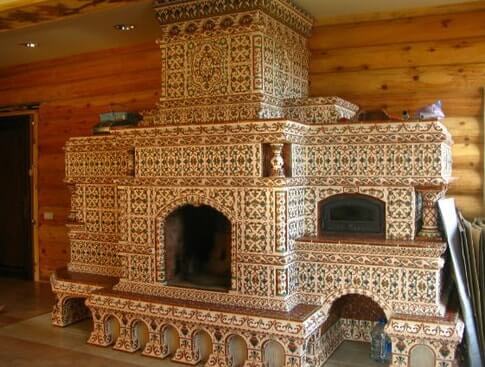
Stove lined with thermo-inert ceramics
Advantages and disadvantages
The first thing that catches your eye when you look at tiles for stoves and fireplaces is their brightness and beauty, glossy finish and attractive relief. The pattern shown on the product is emphasized by a light relief.It noticeably enhances the depth of the picture and its expressiveness. But these are not all the benefits that can be said. The facing material has the following advantages:
- high heat capacity;
- strength and reliability;
- resistance to high temperatures and their drops;
- accumulation of thermal energy;
Tile is the best material for cladding a stove
- low moisture absorption;
- environmental friendliness;
- high aesthetics;
- safety (the outer surface does not heat up);
- duration of operation;
- saving fuel (due to long-term heat storage).
This is useful: the best refractory materials to protect the walls around the ovens.
There are practically no drawbacks to this material, except that its weight is almost twice as much as that of ordinary tiles. But this disadvantage is noticeable only during transportation.
The high price of the product can be attributed to the disadvantages. This type of tile is made almost entirely by hand and the process is quite laborious... High quality terracotta clay is used to create the tiles. The process requires skills and high qualifications. There are not so many experienced craftsmen who know how to create a good product. All this affects the price of the product. Such a tile cannot be called a budget tile.