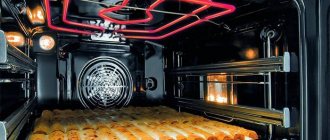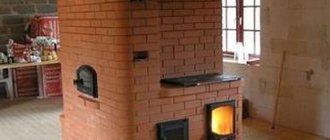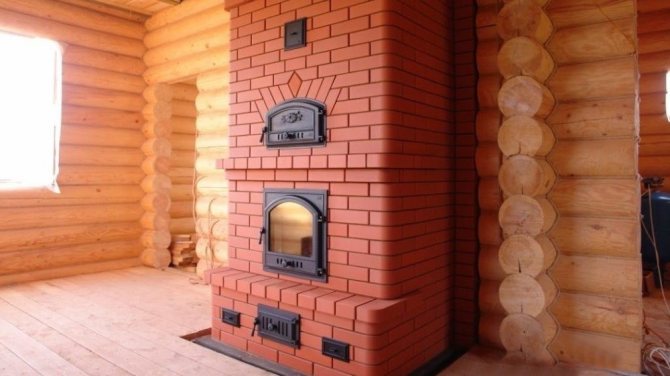
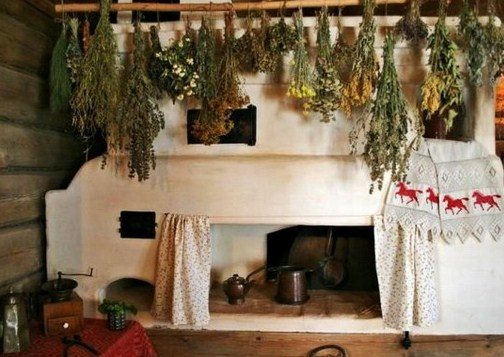
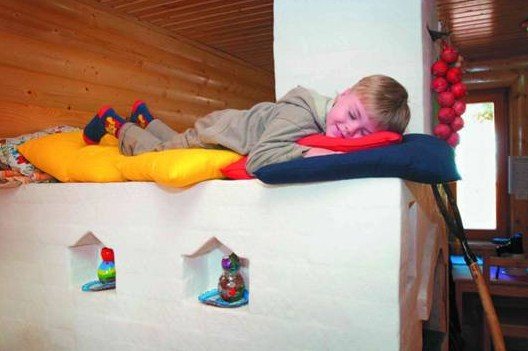
The oven is a source of warmth and comfort, a means for cooking food, drying fruits and mushrooms. It was used to bake bread. The Russian stove was also a place to sleep. She was able to heal a patient with colds. The device ventilated and dried the dwelling, creating a favorable atmosphere. This unit was even used for purification purposes: they steamed in it with brooms.
As a rule, it was massive heating devices that were built in Russia, because at that time people were subsistence farming. Their height was up to 2 m, length - more than 2 m, and width - about 1.5 m. The main task of such a structure is to keep warm as long as possible. For this, during construction, the cooking chamber was located deep in the furnace, and a damper was installed between this structure and the mouth.
How and how to heat a Russian stove
Coal or wood was usually used as fuel. Logs were selected from pine, fruit or birch species. They are distinguished by a longer burnout and preservation of heat, which is required for the oven to perform its functions.
To get good coal, firewood for heating was selected of the same size, getting rid of knots as much as possible. Then they were folded in a well, and chips were placed on top for faster ignition. In order to obtain a uniform coal, it was important to be able to melt it so that the heat was maintained for a long time. For this, the device was heated with a large batch of firewood.

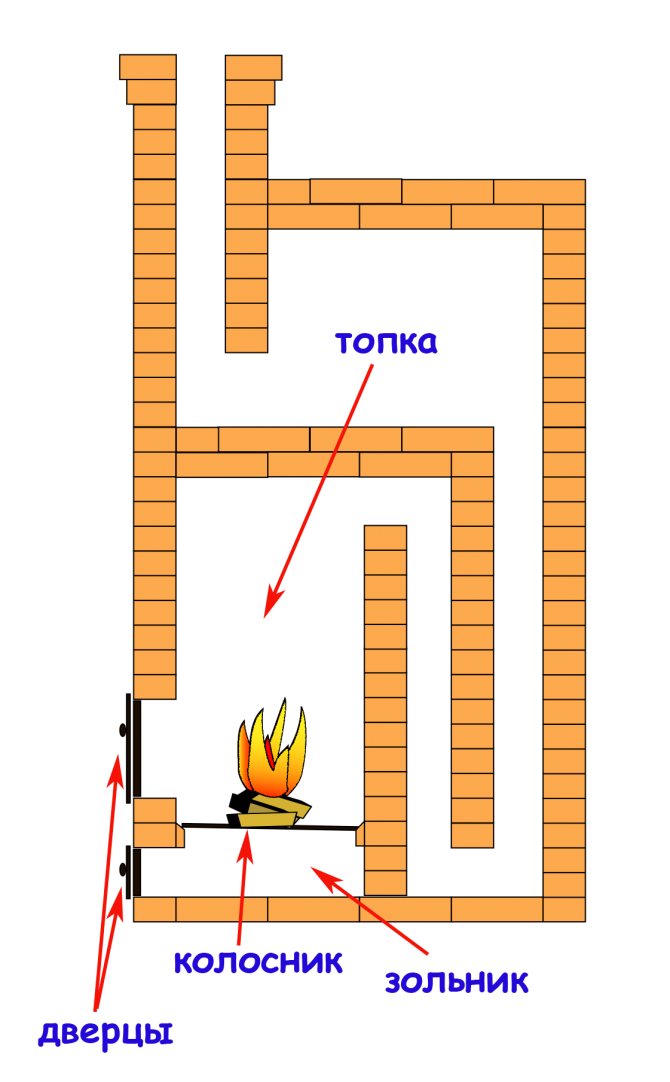
The structure of the Russian stove
The main components of the unit:
- a crucible or firebox is the basis of any heating structure used for cooking;
- vault - a part located at the top of the furnace, on which an array is laid, capable of retaining heat;
- under - the lower element of the firebox, designed to increase the strength of the combustion chamber;
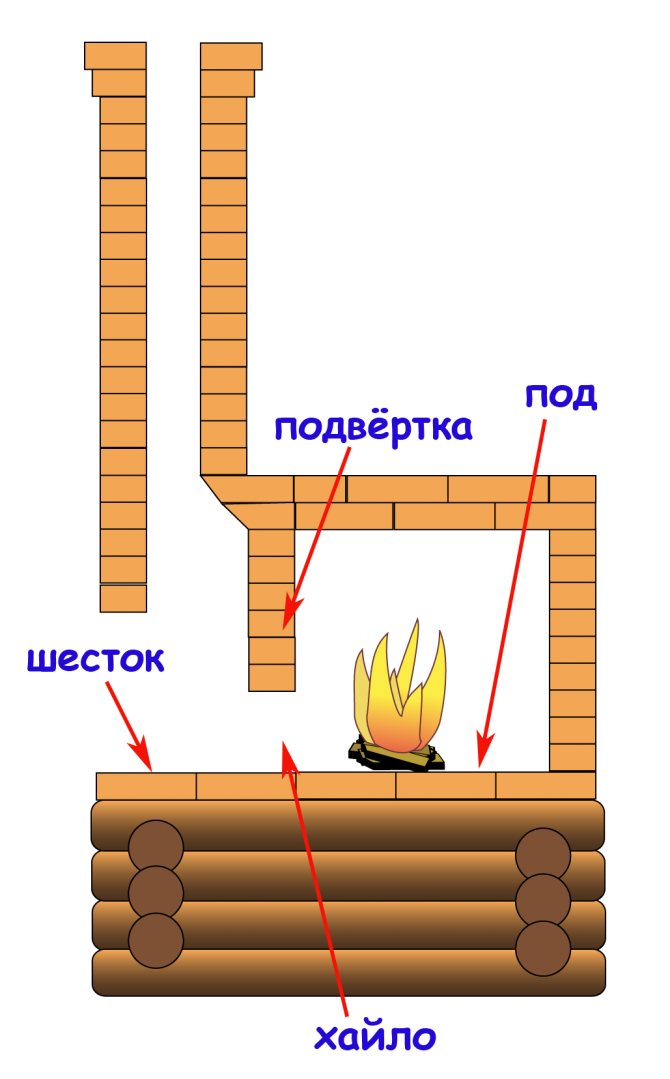
- cheek - front wall of the furnace;
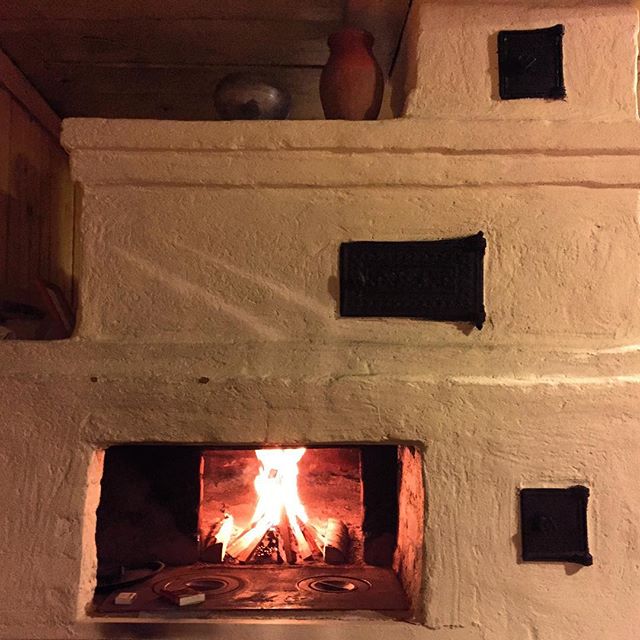
- mouth - a hole in front of the crucible through which fuel is put in and dishes are loaded; this is the part connecting the firebox with the room and the chimney;
- six - the area on which the household utensils are located before being placed in the firebox or after being removed from it;
- sub-six - an unheated compartment under the six, designed for storing dishes or other things;
- baking - the area under the hearth of the unit, where firewood is placed for heating;
- hailo - a device for blowing smoke into a chimney;
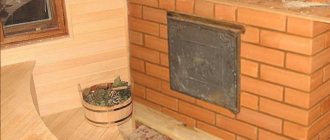
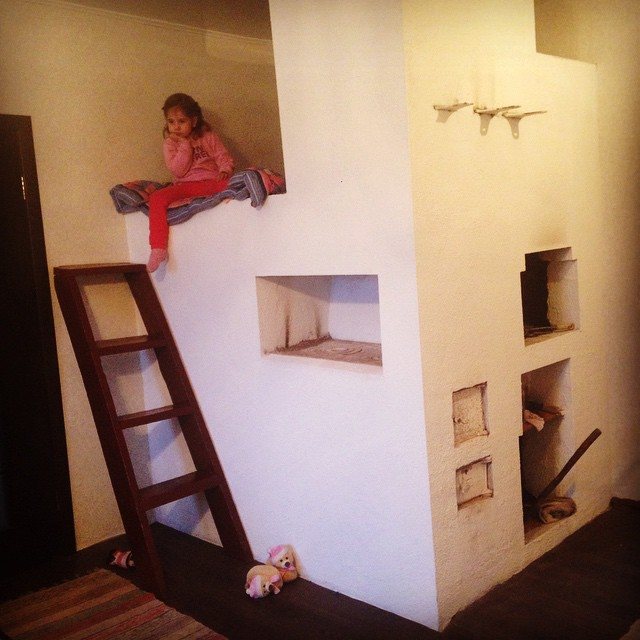
- stoves - niches for increasing the heating area and improving heat transfer; they were used to dry herbs, berries, mushrooms and to store dishes or shoes;
- sill - part of the mouth up to the roof, designed to increase efficiency by keeping flue gases under an arched ceiling;
- overlap - the upper part on which the stove bench was installed.
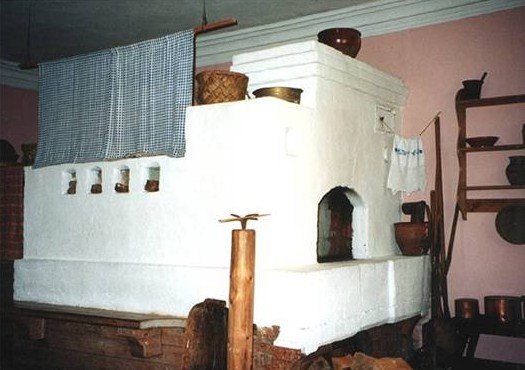
Characteristics of ovens "in white"
Over time, the “black” devices were replaced by “gray” units. Chilled smoke escaped either through a hole in the ceiling or through a wooden pipe. Hot smoke and sparks came out of the firebox through the channel, capable of causing a fire on the roof, especially in the summer season, since the roofs at that time were lined with combustible material - straw. Therefore, the long-term use of stoves "in black" did not mean the presence of difficulties in the manufacture of a chimney for smoke outlet, but rather this was how our ancestors took care of the warmth in their home and its safety.
However, the Russian people understood the need for an urgent alternative to such unreliable furnaces, and it was found in the form of new, fireproof, simple, economical and multifunctional structures - “white” stoves.
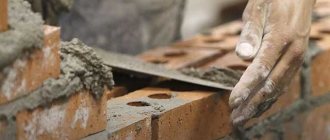
They were no longer built of clay, but of pre-fired bricks. At that time, people learned the skill of burning bars, realized their importance in the construction of furnaces and began to build brick structures.
The material for the roof has also changed. The roofs were lined with shingles or boards, which excluded the likelihood of a fire.
Soon the problem of fire risk returned. The new chimney increased draft, but at the same time increased the amount of hot air emitted with sparks.
In order to increase efficiency and eliminate the risk of fire, the chimney began to be bent and turned into a casing in turns. Thus, the hot smoke, moving in zigzags along the stove, gave off heat to the bricks, while the sparks also extinguished. At the end of its path, the combustion products passed through a special horizontal section of the pipe, from which they fell outside, already cooled.
Another difference between "white" stoves and "black" ones is the foundation. The first type of device weighs 2-3 times more than its predecessor, so a strong foundation was built so that the floor would withstand and not fall through.
Although the "white" ovens were perfect, they were used for a long time only in the homes of boyars, princes and wealthy gentlemen. The reason for this was the high cost of bricks: ordinary villagers could not afford the luxury of purchasing this material and continued to use old-style stoves. Some found an alternative in the construction of such a unit from adobe brick - raw, and the fired one was used on the hearth and roof of the furnace.
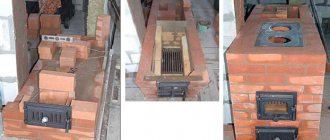
How to build a Russian stove yourself
Classic stoves were approximately 2000x3000 mm in size. Modern designs are considered oversized if they reach a size of 1500x2300 mm. Small structures include structures up to 1800 mm long and wide.
There are several types of similar designs. But they all consist of a number of common elements:
- heating stove;
- bed;
- oven;
- hob;
- ash pan.
There may also be a place for utensils and a wood log. To build a structure, you must have an ordering scheme. The article discusses in detail the order of masonry. But first you need to take care of the base.
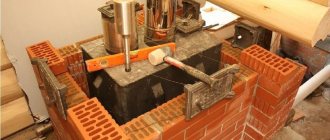
Furnace construction workflow
Foundation device
The total weight of the structure will be several tons. Such a mass requires the creation of a solid foundation. The base area should be approximately 10-15% larger than the furnace base.
The depth of the pit for filling is determined at the rate of 50 mm for every 1000 kg of weight. In our case, you will need an impressive foundation pit.
Remember! The minimum distance of brickwork from the wall is 15 cm
Having retreated the required distance from the wall, they dig a hole, the bottom of which is covered with sand and rubble. Bulk materials are carefully tamped. The main depth of the pit is reinforced with steel and poured with concrete. The top of the foundation should be several centimeters below floor level.
The foundation is allowed to stand for about a month. Cement-sand mixtures crystallize within 4 weeks. The minimum "curing" period for concrete is 2 weeks. But it's better not to rush things.
After the composition has completely set, the base is waterproofed. This builds a protection against possible penetration of groundwater into the thickness of the furnace. Now you can start laying.
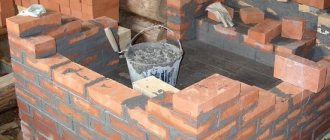
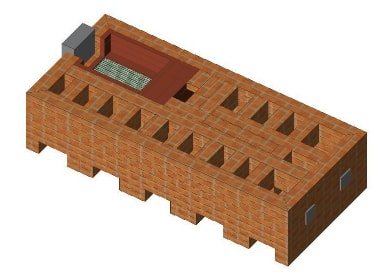
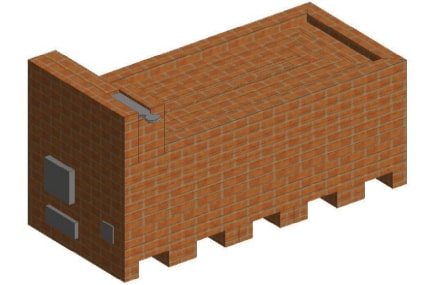
The order of laying the stove with a comfortable stove bench
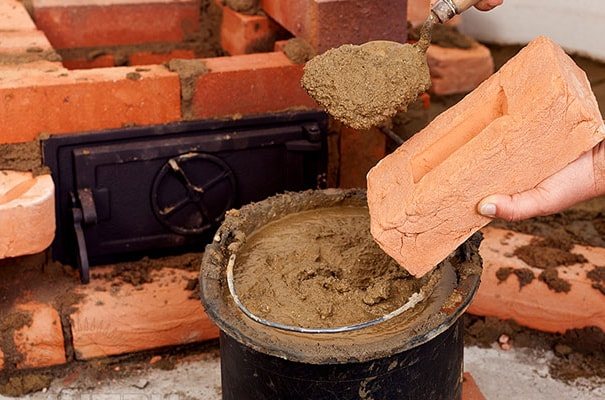
For the construction of the furnace structure, heat-resistant fireclay and / or red bricks, clay and metal fittings (doors, latches) are used.
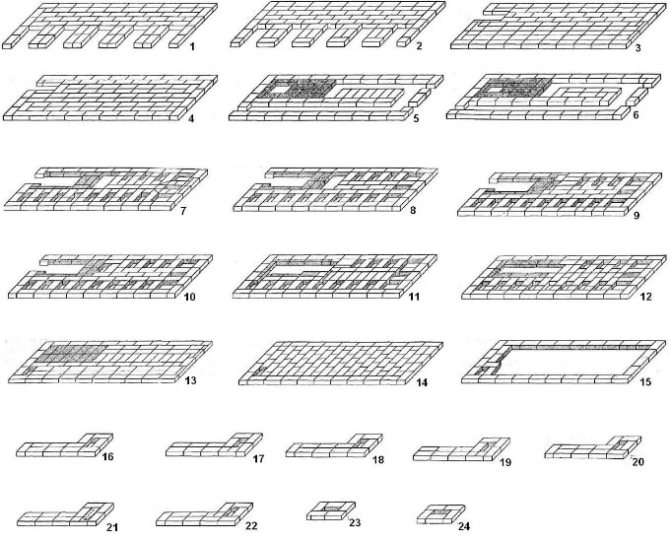
Ordering the oven masonry
When laying a stove with a comfortable stove, it is necessary to be guided by the order.It will be difficult for a layman to understand the wilds of the diagram, so each row is illustrated separately.
Recommendation! If you don't have a professional stove or bricklayer baggage, use the level often. Strive for strict horizontal and vertical masonry.
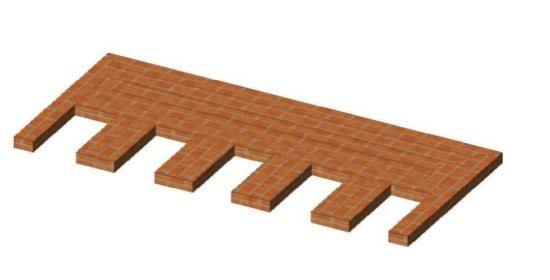
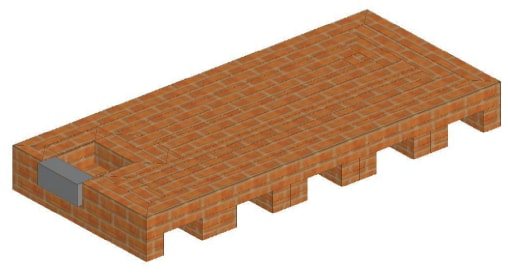
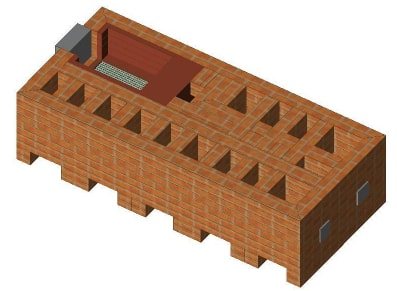
- Lay out the first row. This is the most critical stage on which the quality of the rest of the masonry depends.

- It is done in a similar way.
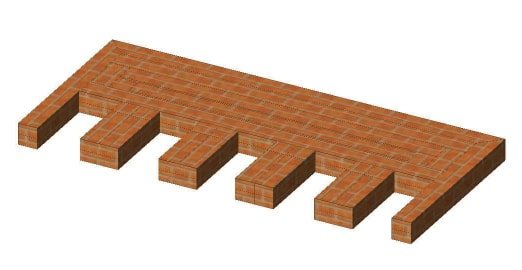
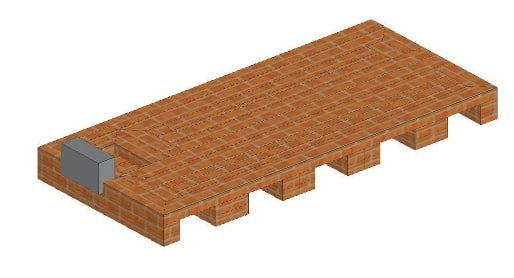
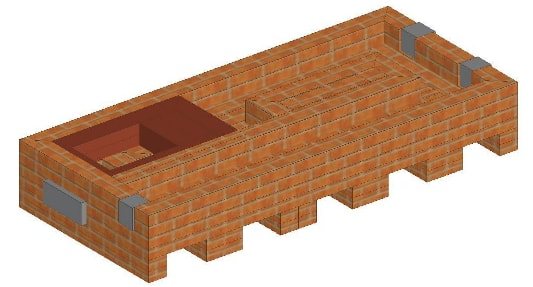
- On this row, a blower door is mounted. It should be borne in mind that when heated, metal fittings will increase in volume. Therefore, it is necessary to install the door, avoiding contact end-to-end. Usually, strips of asbestos are placed between the stove dampers and the masonry to compensate for the expansion.
- Here, the schematic styling continues in the same vein as on the previous row. The brick turns out to be "flush" with the fittings.
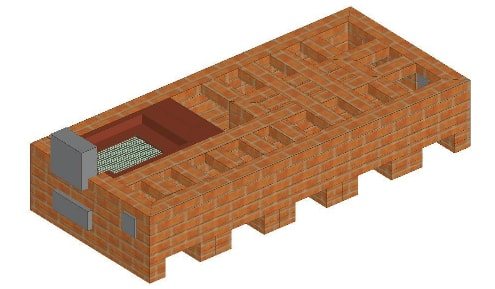
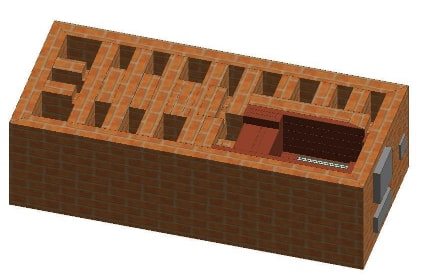
- Here the laying of the firebox is started. For this reason, the camera is reinforced with a lining - in the illustration, it can be seen by its different shade. The device of channels starts. Install 3 doors for cleaning chambers. The blower flap is completely covered with bricks.
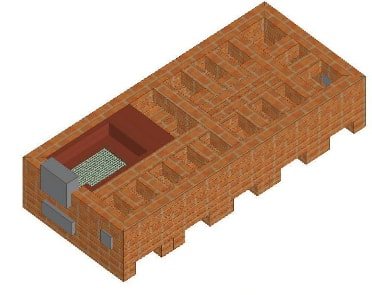
- The row duplicates the previous one. The fittings are completely covered with refractory ceramics. The grate is also laid here. It is imperative to keep an eye on the brick dressing.
- Arrange caps (vertical channels). The firebox is reinforced with heat-resistant material. Mount the firebox door.
- The construction of the caps and lining is continued. The lifting and lowering "passages" are formed.
- The row duplicates the previous one.
- The row duplicates the previous ones. Here, almost 100% of the caps are already laid out. The lining is still forming.
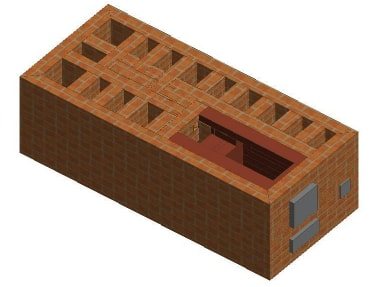
- The firebox flap is completely covered with masonry. Arrange 4 suction channels. The first one is carried out from the firebox - into the lifting one, a pair - between the caps. Since the formation of the border between the furnace chamber and the chimney (high) starts here, the fourth channel is made from it - into the side cap.
- In general, there is a duplication of the 11th row. The caps are already completely made. Other elements in the process of formation. The lining at this stage tapers to a domed structure.
- The fireproof reinforcement of the firebox is completed. The firebox with caps is also completed.
- The overlap continues to form. At this stage, it is especially important to control the vertical with the horizontal, while not forgetting to correctly bandage the masonry.
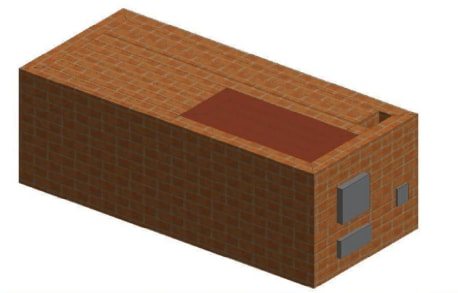
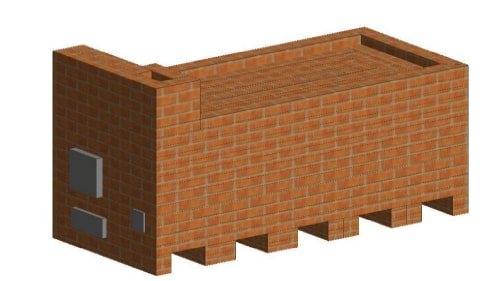
- The channel continues to form, which is clearly seen in the illustration. One of the features of this wood-burning structure is the presence of an original side designed for backfilling with sand. It is not necessary to do this, but the warm sand multiplies the healing properties of the bed. The board device does not require much effort, so it is recommended not to abandon it - during the operation of the stove, it will most likely come in handy.
- From this to the twentieth rows, they form the chimney duct and the protective wall. Despite the lightness of the "extension", you should carefully monitor the quality of the dressing.
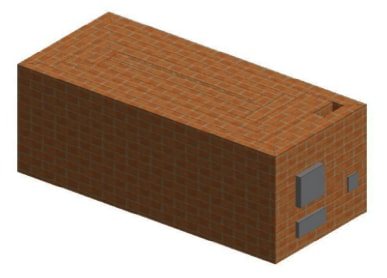
- It is the turn of the installation of the stove damper on the flue duct.
- On this row, the masonry of the protective wall ends. The chimney flap is completely closed.
- From this row to the end, lay out the chimney. After that, the stove is ready. Despite the intricacy of the design, such a stove with a stove bench with your own hands is quite capable of making even a person far from stove business.

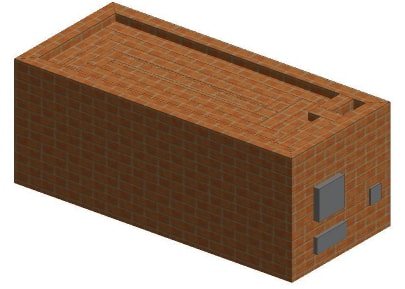
Recommendation! However, despite the step-by-step instructions, it is best to consult a professional. An experienced stove-maker will be able to take into account the individual characteristics of the house and advise on the optimal design of the structure.
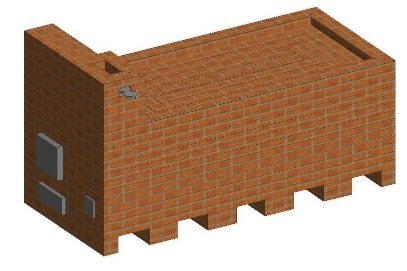
Another ordering option
We will not dwell on this option in detail. From the previous diagram, it is easy to understand what each element in the illustration represents.
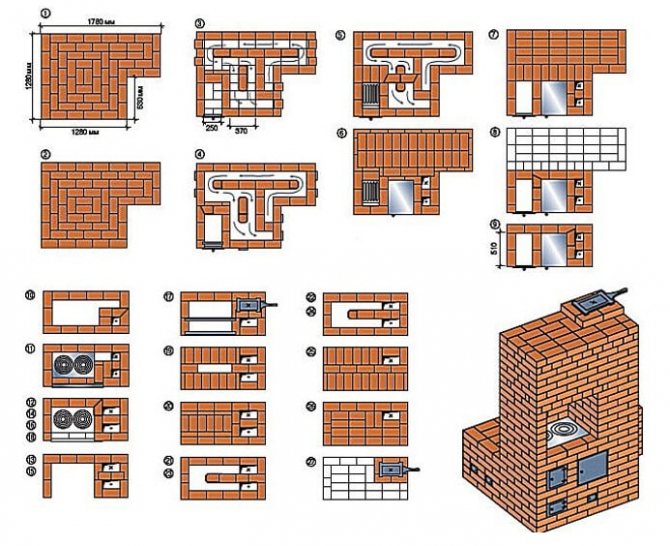
Figure 5. Layout of another variant of the furnace
This model is one of the simplest. However, it is effective and effective.Unlike more complex structures, the execution of this one can also be entrusted even to a relatively untrained homeowner.
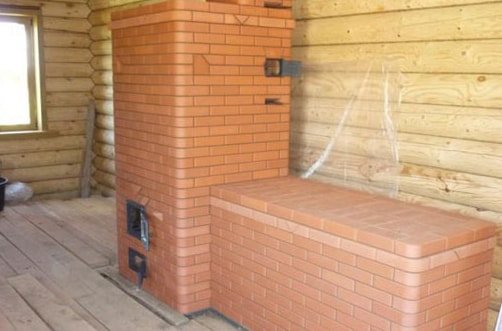
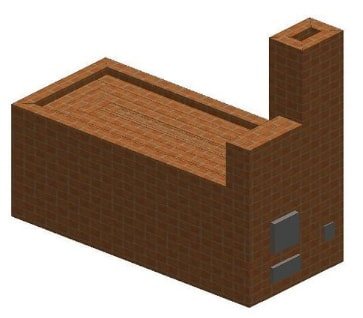
Figure 6. Alternative design with a bench
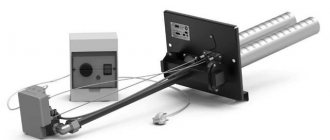
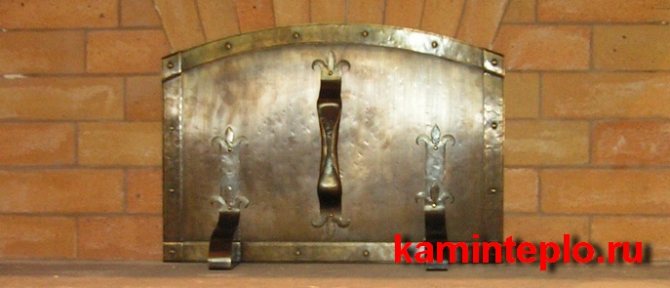
Damper design
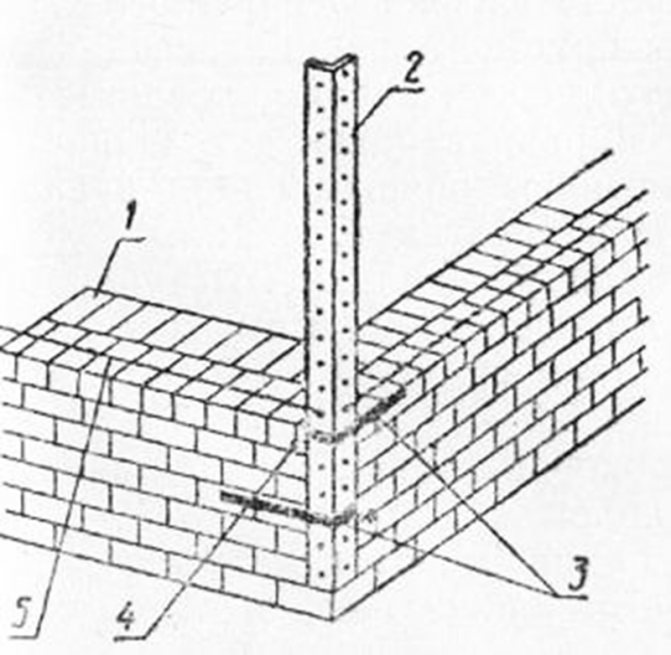
The design of the damper is shown in the figure below, where 1 - a sheet of roofing steel, 2 - a handle made of strip steel, 3 - legs of strip steel for the stability of the damper, 4 - a frame made of angle steel 25x25x3 mm.
It is recommended to make a frame of strip or angle steel and insert it into the masonry of the mouth with subsequent fastening. In this case, it will serve as a formwork when making an arch.
1 - sheet of roofing steel; 2 - strip steel handle; 3 - legs made of strip steel for the stability of the damper; 4 - corner steel frame.
Types of Russian stoves
Such a unit can be converted or built to suit any customer's wishes.
Main types:
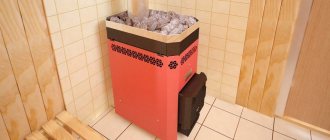
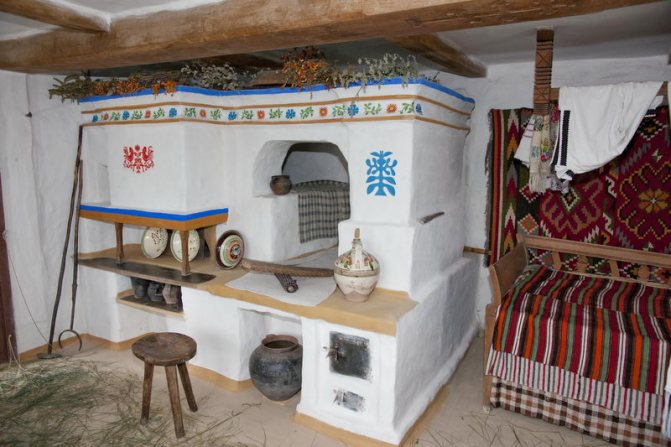
- Classic (read more) - a standard version of a heating device with a stove bench.
- Russian stove with stove (read more) - a more advanced and convenient model of the unit: in summer it performs the function of cooking, and in winter - heating.
- Russian mini oven (read more). Another name for this design without a bed is "housekeeper". The device is designed for cooking.
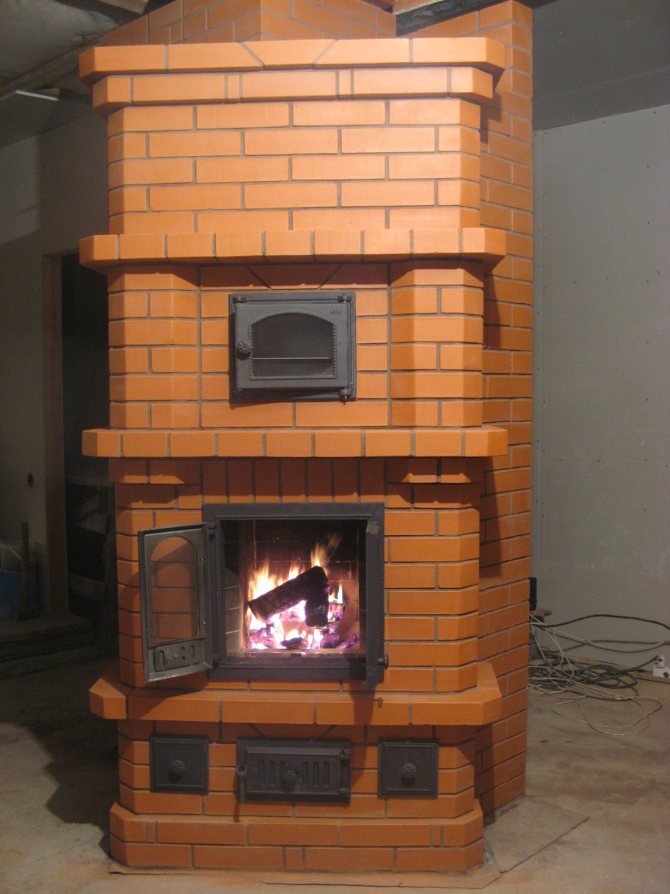
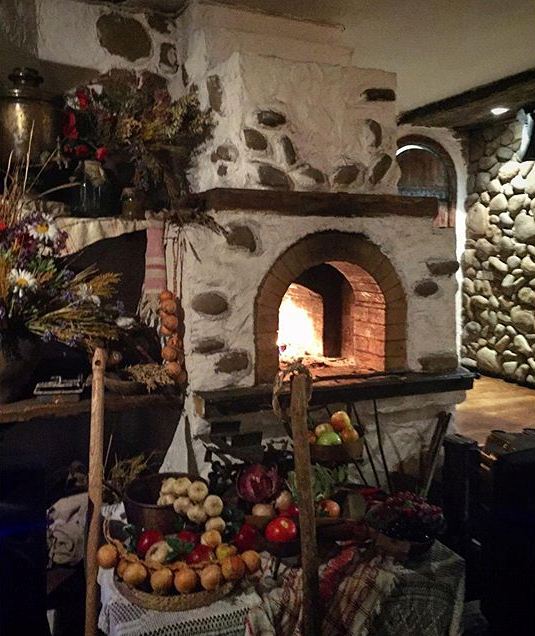
- Russian heating unit with fireplacem (read more). The combination of a modern open hearth and the capabilities of a stove is both beautiful and comfortable.


Pros and cons
Disadvantages of using such equipment:
- high consumption of firewood;
- heating the upper and middle parts of the structure;
- may not fit into the interior.
Advantages of a modern heating unit:
- long-term maintenance of heat;
- service life - more than 30 years;
- safety and reliability;
- health-improving effect on the entire body;
- the possibility of heating a large area;
- high heat transfer;
- cooking food;
- drying of things, as well as herbs, mushrooms, berries.
They got rid of colds on the stove, warmed up a chilled back. They were treated not only with heat, but also with stove ash mixed with salt.
Oven advantages and disadvantages
Among the positive qualities of the heating device, the following are noted:
- The cheapness of the design. For the construction of the unit, a minimum of materials are required: red brick, clay and sand.
- Profitability. The efficiency of the simplest device exceeds 60%, and the efficiency of a complicated design is more than 80%.
- Works equally well on various types of solid fuels.
- Functionality (cooking, heating, warm sleeping place).
- The long operating time of the stove allows it to be heated once a day.
- Possesses therapeutic properties. Food is cooked in it without direct contact with fire and superheated gases. This maintains the optimum temperature for cooking. Due to the listed features, carcinogens with toxins are not formed in food. As for resting on the couch, six hours of sleep is enough to feel refreshed and collected in the morning.
- Safety of use. The flame burns deep in the oven. Sparks can appear only in severe frost.
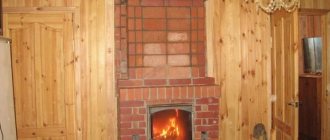
- Durability. Service life exceeds 30 years.
- The interior of the room with the Russian stove is original, unlike any other.
The disadvantages of a heating unit include the following:
- The ability to use only solid fuel that burns slowly. A rapidly burning one requires a lot of air, which is fraught with a fire hazard.
- The need for fuel procurement.
- Low heat dissipation.
- Not suitable for apartment buildings due to poor smoke flow. If there is only one channel, the combustion products will be removed from the furnace, which is heated stronger than the others, while other units will begin to smoke.
- It will take a day to completely heat the device when cold weather sets in.
- The slightest flaws made during the construction of the unit can manifest themselves during operation.
- Takes up a lot of space in the house.
- The need to get rid of waste.
- The air below does not warm up. However, today it is possible to create equipment with bottom heating.
How to buy a Russian stove
A similar unit can be made to order or built on your own.
There are special organizations that manufacture heating devices, taking into account the wishes of the customer. The price of a Russian stove varies depending on the size, appearance, heated area, the planned volume of food to be cooked, and the material used.
If you nevertheless decide to build a Russian stove yourself, this can be done using the step-by-step instructions described in other articles on our site. Choose the type of Russian stove by function and appearance, study the stages of masonry, stock up on the necessary materials, tools for work and get down to business.
Such a heating unit is popular not only in Russia, Ukraine and Belarus, but also abroad. Thanks to their convenience, usefulness and attractive appearance, these structures are increasingly becoming a luxury and pride for wealthy people abroad. For example, in the dining room at Bill Gates' house, there is a working Russian oven that bakes pies for the richest man in the world.
Plaster oven with heat transfer capacity of 1760 kcal / h
This is one of the most common do-it-yourself stoves. It was described in great detail in the book by A. M. Shepelev, which has been reprinted several times since the early 80s of the last century and, in fact, is the "bible" of stove-makers in the CIS.
Although I note that this book sometimes contains controversial points (especially from the point of view of the modern development of construction science and technology), it can still be recommended.
Book by A. M. Shepelev "Laying stoves with your own hands", main, desktop for several generations of stove-makers, cover of one of the editions
Furnace design
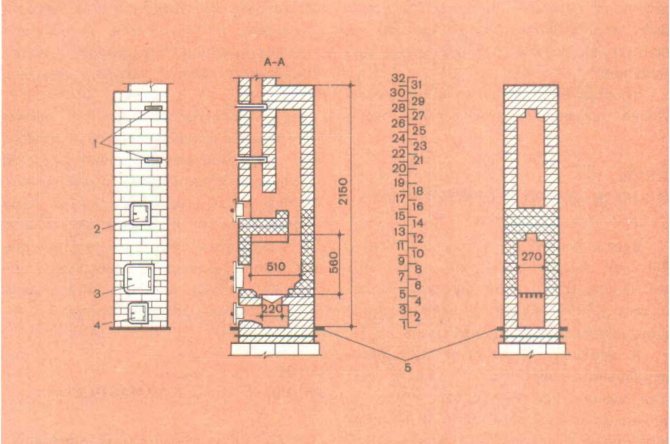
Drawing of a plastered furnace with a heat transfer rate of 1760 kcal / h
In the figure, the numbers indicate the parts of the furnace:
- smoke dampers;
- cleaning;
- firebox;
- ash pan;
- waterproofing layer.
The scale that is located between the first and second figure indicates the numbering of the rows of the masonry (as in all other schemes, which we will consider below). As you can see, the given heating brick oven starts the ordering from the bottom, and it is understandable that the numbering corresponds to the order of masonry.
This is the simplest oven with no complicated smoke channels. The gases from the firebox rise up to the overlap, then go down and again through the last smoke channel go up into the chimney. For masonry, you will need 110 pieces of refractory bricks and 250 regular solid bricks (not counting the chimney).
Now let's take a closer look at its order.
Furnace ordering with heat transfer at 1760 kcal / h
For the first oven, we will describe the order carefully, this will be a detailed instruction on how to make the oven. Although the design is not very complex, simple examples are easy to learn. When you understand this description, then in the future it will be easier to understand how to masonry, even without explanations, focusing only on the picture.
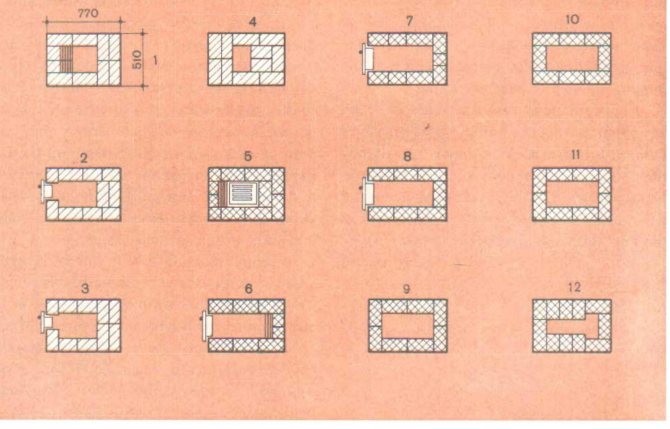
Rows one to twelve
Now, in order, more precisely along the rows of masonry (correspond to the items on the list), the brick heating order is done as follows.
Attention. Do not forget to lay waterproofing before the first row, of at least three layers of roofing material, or even better of another sheet material ("technoelast", etc.). We put each layer on mastic or, in extreme cases, on molten bitumen; modern waterproofing can also be melted by heating the surface with a burner or industrial hair dryer.
Remember, armored surface sheets (coated with grit) can only be used for the top layer:
- The first row is made of ordinary brick - use three quarters. Its location can be seen in the figure. Moreover, pay attention from the side where the ash pan door will be, towards its chamber part of the brick is chipped off, this is shown by parallel lines (vertical relative to the location in the figure). This is done so that the ash does not spill out of the oven and to conveniently rake it out.
The shape of the brick after this treatment can be seen in section A-A of the first drawing illustrating the brickwork of this oven. It is possible not to grind the brick, but then it will be more difficult to choose ash. After laying the first row, we additionally lay a row of clay mortar on the bottom of the blower to protect the waterproofing from hot coals.
Attention. The stove will be plastered, so the brick lays down in a washer.
- Starting to lay the second row, at the same time we begin to install the ash pan door. To do this, we tie to it pieces of wire about a meter long, which we start in a horizontal seam.
For a stronger connection, we additionally wrap the wire around the pins (nails) stuck into the vertical seams. You can also knit the door to the scraps of the mesh, which we put in the solution between the rows of masonry. We wrap the door along the contour with an asbestos cord.
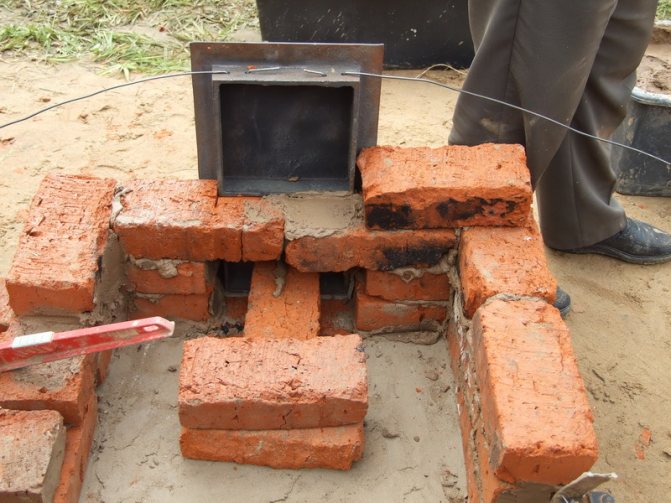
Installing the oven door
- The third row lays down, as does the second, but the order of the bricks changes (this can be seen in the ordering figure) to ensure dressing.
- The fourth row overlaps the door and reduces the opening above the blower for installing the grate.
- Before laying the fifth row, a grate is placed. The row in front of her is also constrained so that the ash would fall down to the grate, and not to the door of the firebox. This row is made of refractory bricks (this can be seen by cross hatching, this is how refractory is denoted in order).
Advice. In the absence of refractory bricks, it can, in extreme cases, be replaced with ordinary ones, but carefully selected for quality. The service life of the stove will decrease slightly, but this is a way out.
- The sixth row begins to form a firebox. In it, just like in the second, we fix the firebox door. On the back side, the brick is chipped.
- The seventh and eighth rows are similar, except for the order in which the bricks are laid for dressing. The rear wall of the firebox in these rows no longer lies in three quarters, but in half a brick, this is also clearly visible in the order. We also continue to fix the firebox door in them.
- The ninth, tenth and eleventh rows differ only in dressing, and the ninth overlaps the opening under the firebox door.
- The twelfth row is more complicated, it begins the arch of the firebox and makes an opening for it in the "T" -shaped plan. It uses 8 three-quarters and one half.
The next figure shows the continuation of the order.
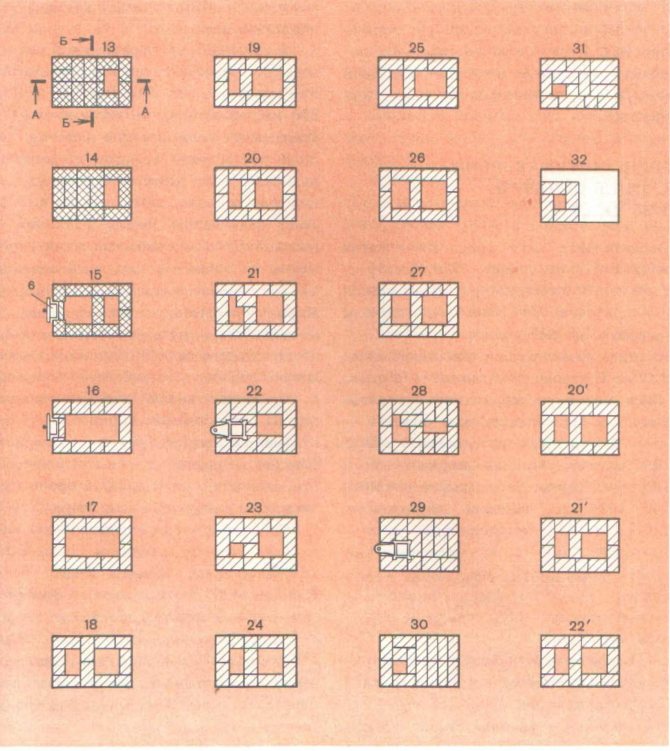
Continuation of the order of the furnace with heat transfer at 1760 kcal / h, from the 13th to the last row
- The thirteenth row continues to form the arch of the firebox, the opening narrows even more.
- The fourteenth row covers the firebox completely, with the exception of the hole for the smoke channel.
- The fifteenth row is similar, with the exception of the dressing, to the fourteenth, it serves to give the arch of the firebox the required thickness.
- From the sixteenth row, we go to regular brick instead of refractory brick. In it, we begin to mount the cleaning door. The seventeenth row is similar to the sixteenth (also with the exception of the dressing).
- The eighteenth row closes the cleaning opening and begins to divide the furnace volume into two smoke channels.
- The nineteenth and twentieth channels, with the exception of the ligation, are similar to the eighteenth.
- The twenty-first row reduces the size of the left (according to the dressing pattern) channel by a quarter of a brick, for this, a three-quarter is used. This is due to the fact that in the future it will be necessary to support the brick covering half of the channel.
- The twenty-second row covers half of the channel on the left side, a view (smoke damper) is placed on the remaining part.We fasten it in the same way as the doors were fastened, we put an asbestos cord in the places where it exits the masonry. The brick in the place where the gases pass after the damper must be carefully chopped off.
- The twenty-third row in order continues the channel to the right of the section that it was, and to the left it forms a channel above the view with dimensions of 130 by 130 millimeters.
- Rows twenty-four to twenty-seven are practically the same without taking into account the dressings. The only difference is that the left channel gradually increases to a size of 130 by 260 millimeters.
- The twenty-eighth row is similar to the twenty-first, except that the right channel is already 130 millimeters in size.
- The twenty-ninth row completely covers the top of the stove, with the exception of the channel for the transition to the chimney, another valve (view) is mounted on it.
- The thirtieth and thirty-second rows differ only in dressing and are completely similar to the twenty-ninth, but without a latch. They form the furnace roof.
- How to put the thirty-second row of masonry, the beginning of the stove chimney is shown.
Next is the laying of the chimney, the order for it is usually not indicated, since everything depends on the structure of the building, the height and the material of the floors and coverings. The main thing when laying the chimney is to ensure reliable dressing and not to forget about fire-prevention cuts in the places of passage through the building structure, especially from combustible materials. The chimney after the passage of the roof is no longer placed on clay mortar, but on cement, not afraid of moisture.
Next, we will consider a more complex combination oven.