DIY heating stove: masonry
To ensure the correctness of the masonry, drawings of heating and cooking stoves with orders are used.
From the very first row in such a model, the furnaces provide for laying a blower.
When laying out the second row, a blower door is installed, pre-wrapped with an asbestos cord.
In the fourth row, holes for the circulation of heated air are designated, and on the fifth, a grate is laid. For the walls of the firebox and the threshold, silicate bricks are used.
In the sixth row, a furnace door is mounted, wrapped with an asbestos cord.
From 6 to 10 rows, laying is performed according to the scheme. It is advisable to fasten the tenth row with a frame welded from a corner.
In the eleventh row, a hob is placed on an asbestos gasket.
From 12 to 16 rows, brick laying is done according to the scheme.
Above the hob in the 17th row, a corner is laid to accommodate the 18th row, on which the framing of the chamber above the stove is closed.
Rows 19 to 23 form the drying chamber. On the nineteenth row, a drying door is mounted.
On the twenty-fourth row, a metal corner is placed for laying the ceiling of the dryer, and the next row is placed on it. On the 25th row, there is a cleaning door.
From row 26 to row 29, laying is done according to the scheme.
On the 30th row, 2 valves are mounted.
For row 38, laying continues according to the scheme.
The subsequent rows refer to the part of the heating stove that goes to the second floor of the house. The order for it has its own numbering (1-32 rows).
In rows 2-3, a door is placed on the opening for cleaning, and in the twenty-seventh - a chimney valve.
Part of the stove, located on the second floor, is laid out in the form of a wide chimney. And it acquires the form of a narrow pipe under the very ceiling of the second floor. Further, the pipe goes through the attic to the roof. Its head is covered with a special umbrella, which protects it from precipitation, debris and dust.
Fireplace and BBQ stove orders
By purchasing the order you get:
Savings on materials.
As practice shows, a correctly calculated material allows you to save significant money on the purchase and delivery of material.
Savings at work.
According to our procedures, even an inexperienced stove-maker who takes less pay for his work can fold the stove.
Assistance in the performance of work.
We give a free consultation by phone or email.
Didn't find a suitable project?
- Order an individual project according to the required parameters (cost from 3 thousand rubles).
A small part of the projects is published on the site. Send us a letter with a description of the required furnace, and we will send you the options in a reply letter.
| No. 2800 Stove "Shvedka" No. 14 Description: Cooking oven designed to heat a room up to 20m2. Furnace dimensions: 1145 x 640 x 1960 mm Project composition: 3D view of the furnace, 3D ordering of the furnace, sections, consumables, explanations and diagrams. Cost: 2800 rubles |
| No. 2600 Stove "Shvedka" No. 5 Description: Cooking oven designed to heat a room up to 60m2. Furnace dimensions: 1020 x 1020 x 2300 mm Project composition: 3D view of the furnace, 3D ordering of the furnace, sections, consumables, explanations and diagrams. Cost: 2800 rubles |
| No. 2610 Stove "Shvedka" No. 6 Description: Cooking oven designed to heat a room up to 50m2. Furnace dimensions: 890 x 890 x 2170 mm Project composition: 3D view of the furnace, 3D ordering of the furnace, sections, consumables, explanations and diagrams. Cost: 2500 rubles |
| No. 2620 Stove "Shvedka" No. 5 Description: Cooking oven designed to heat a room up to 55m2. Furnace dimensions: 1020 x 890 x 2170 mm Project composition: 3D view of the furnace, 3D ordering of the furnace, sections, consumables, explanations and diagrams. Cost: 2500 rubles |
| No. 2810 Stove "Shvedka" No. 15 Description: Cooking oven designed to heat a room up to 25m2. Furnace dimensions: 750 x 750 x 2240 mm Project composition: 3D view of the furnace, 3D ordering of the furnace, sections, consumables, explanations and diagrams. Cost: 2200 rubles |
| No. 2310 Stove "Shvedka" No. 7 Description: Heating and cooking stove for heating a room up to 55 m2. Furnace dimensions: 1020 x 890 x 1890 mm Project composition: 3D view of the furnace, 3D ordering of the furnace, 3D sections, consumables, explanations, diagrams. Cost: 2800 rubles |
| No. 2780 Cooking double-deck oven Description: Heating and cooking stove for heating a room up to 75 m2. Furnace dimensions: 1020 x 1270 x 2170 mm Project composition: 3D view of the furnace, 3D ordering of the furnace, 3D sections, consumables, explanations, diagrams. Cost: 3800 rubles |
| No. 2330 Stove "Shvedka" No. 8 Description: Heating and cooking stove for heating a room up to 55 m2 Furnace dimensions: 1020 x 890 mm Project composition: 3D view of the furnace, 3D ordering of the furnace, 3D sections, consumables, explanations, diagrams. Cost: 3200 rubles |
| No. 2650 Stove "Shvedka" No. 9 Description: Cooking oven designed to heat a room up to 50m2. Furnace dimensions: 890 x 890 x 2170 mm Project composition: 3D view of the furnace, 3D ordering of the furnace, sections, consumables, explanations and diagrams. Cost: 2600 rubles |
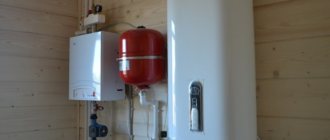
| No. 2700 Heating and cooking stove with heat exchanger Description: Heating and cooking stove for heating a room up to 50-200 m2. Furnace dimensions: 1020 x 1020 x 2100 mm Project composition: 3D view of the furnace, 3D ordering of the furnace, 3D sections, consumables, explanations, diagrams. Cost: 2600 rubles |
| No. 2710 Heating and cooking stove with heat exchanger Description: Heating and cooking stove for heating a room up to 50-200 m2. Furnace dimensions: 1020 x 1020 x 2240 mm Project composition: 3D view of the furnace, 3D ordering of the furnace, 3D sections, consumables, explanations, diagrams. Cost: 2600 rubles |
| No. 2720 Swede with wide hob Description: Heating and cooking stove for heating a room up to 60 m2. Furnace dimensions: 1270 x 1020 x 2240 mm Project composition: 3D view of the furnace, 3D ordering of the furnace, 3D sections, consumables, explanations, diagrams. Cost: 2500 rubles |
| No. 2730 "Shvedka" No. 10 Description: Heating and cooking stove for heating a room up to 55 m2. Furnace dimensions: 770 x 1270 x 2170 mm Project composition: 3D view of the furnace, 3D ordering of the furnace, 3D sections, consumables, explanations, diagrams. Cost: 3000 rubles |
| No. 2740 "Shvedka" No. 11 Description: Heating and cooking stove for heating a room up to 55 m2. Furnace dimensions: 770 x 1270 x 2170 mm Project composition: 3D view of the furnace, 3D ordering of the furnace, 3D sections, consumables, explanations, diagrams. Cost: 3000 rubles |
| No. 2750 "Shvedka" No. 12 Description: Heating and cooking stove for heating a room up to 50 m2. Furnace dimensions: 770 x 1270 x 2170 mm Project composition: 3D view of the furnace, 3D ordering of the furnace, 3D sections, consumables, explanations, diagrams. Cost: 3000 rubles |
| No. 2760 Cooking oven with 2 shields and drying chamber Description: Heating and cooking stove for heating a room up to 75 m2. Furnace dimensions: 1270 x 1020 x 2240 mm Project composition: 3D view of the furnace, 3D ordering of the furnace, 3D sections, consumables, explanations, diagrams. Cost: 4200 rubles |
| No. 2770 Cooking oven with stove bench Description: Heating and cooking stove for heating a room up to 75 m2. Furnace dimensions: 1020 x 1790 x 1790 x 2240 mm Project composition: 3D view of the furnace, 3D ordering of the furnace, 3D sections, consumables, explanations, diagrams. Cost: 3200 rubles |
| No. 2790 Double deck oven Description: Heating and cooking stove for heating a room up to 60 m2. Furnace dimensions: 1145 x 890 x 1750 mm Project composition: 3D view of the furnace, 3D ordering of the furnace, 3D sections, consumables, explanations, diagrams. Cost: 4800 rubles |
| No. 2510 Compact cooking oven Description: Heating and cooking stove for heating a room up to 40 m2. Furnace dimensions: 1140 x 640 mm Project composition: 3D view of the furnace, 3D ordering of the furnace, 3D sections, consumables, explanations, diagrams. Cost: 2400 rubles |
| No. 2010 Cooking oven No. 1 Description: The multifunctional inexpensive heating and cooking stove is designed for heating a room with an area of 40 m2. Fast heating due to the hob. Furnace dimensions: 1130 x 640 x 2100 mm Project composition: 3D view of the furnace, furnace ordering, section, consumables, explanations and diagrams. Cost: 1000 rubles |
| No. 2020 Cooking oven No. 2 Description: An inexpensive heating and cooking stove is designed for heating a room with an area of 40 m2. Furnace dimensions: 1130 x 640 x 2100 mm Project composition: 3D view of the furnace, furnace ordering, section, consumables, explanations and diagrams. Cost: 1000 rubles |
| No. 2030 Swedish stove Description: The heating and cooking stove is designed for heating a room up to sixty square meters, as well as for cooking. A lined firebox and an oven located at a distance from the firebox allows the stove to be used for an unlimited period. Furnace dimensions: 1020 x 890 x 1800 mm Project composition: 3D view of the furnace, furnace ordering, section, consumables, explanations and diagrams. Cost: 1000 rubles |
| No. 2630 Two-panel cooking oven (pipe on the right) Description: A powerful cooking stove designed to heat a room up to 75m2. Furnace dimensions: 1020 x 1270 x 2240 mm Project composition: 3D view of the furnace, 3D ordering of the furnace, sections, consumables, explanations and diagrams. Cost: 3700 rubles |
| No. 2660 Two-panel cooking oven (pipe on the left) Description: A powerful cooking stove designed to heat a room up to 75m2. Furnace dimensions: 1020 x 1270 x 2240 mm Project composition: 3D view of the furnace, 3D ordering of the furnace, sections, consumables, explanations and diagrams. Cost: 3700 rubles |
| No. 2470 Heating plate No. 1 Description: Compact heating plate designed for heating a room up to 50m2. Furnace dimensions: 1020 x 890 x 2170 mm Project composition: 3D view of the furnace, 3D ordering of the furnace, sections, consumables, explanations and diagrams. Cost: 2200 rubles |
| No. 2480 Heating plate No. 2 Description: Compact heating plate (with a pipe - on the right), designed for heating a room up to 50m2 Furnace dimensions: 1020 x 890 x 2170 mm Project composition: 3D view of the furnace, 3D ordering of the furnace, sections, consumables, explanations and diagrams. Cost: 2200 rubles |
| No. 2490 Heating plate No. 3 Description: Compact heating plate designed for heating a room up to 45m2 Furnace dimensions: 890 x 890 x 2170 mm Project composition: 3D view of the furnace, 3D ordering of the furnace, sections, consumables, explanations and diagrams. Cost: 2200 rubles |
| No. 2380 Heating plate No. 4 Description: A heating plate with an oven designed to heat a room up to 60m2. Furnace dimensions: 1270 x 1020 x 2030 mm Project composition: 3D view of the furnace, 3D ordering of the furnace, sections, consumables, explanations and diagrams. Cost: 2600 rubles |
| No. 2160 Heating plate No. 5 Description: The heating plate is designed for heating a room up to 50 m2. Furnace dimensions: 1020 x 1020 x 2030 mm Project composition: 3D view of the furnace, ordering the furnace, the furnace in sections, consumables, a brief explanation, fire cut-out schemes, options for fixing fittings Cost: 1000 rubles |
| No. 2400 Cooking oven with two shields and an oven Description: Heating and cooking stove for heating a room up to 80 m2. Furnace dimensions: 1275 x 1020 mm Project composition: 3D view of the furnace, 3D ordering of the furnace, 3D sections, consumables, explanations, diagrams. Cost: 4800 rubles |
| No. 2410 Compact "Shvedka" without lining. Description: Heating and cooking stove for heating a room up to 40 m2. Furnace dimensions: 1140 x 770 mm Project composition: 3D view of the furnace, 3D ordering of the furnace, 3D sections, consumables, explanations, diagrams. Cost: 2800 rubles |
| No. 2420 Cooking oven with barbecue. Description: Heating and cooking stove for heating a room up to 65 m2. The barbecue is located on the back. Furnace dimensions: 1410 x 1790 mm Project composition: 3D view of the furnace, 3D ordering of the furnace, 3D sections, consumables, explanations, diagrams. Cost: 4500 rubles |
| No. 2430 Cooking oven with heat exchanger, oven and stove bench. Description: Heating and cooking stove for heating a room up to 200 m2. Furnace dimensions: 1410 x 1910 mm Project composition: 3D view of the furnace, 3D ordering of the furnace, 3D sections, consumables, explanations, diagrams. Cost: 4500 rubles |
| No. 2440 Cooking oven with closed hob. Description: Heating and cooking stove for heating a room up to 35 m2. Furnace dimensions: 1020 x 770 mm Project composition: 3D view of the furnace, 3D ordering of the furnace, 3D sections, consumables, explanations, diagrams. Cost: 2800 rubles |
| No. 2640 Fireplace stove with cooking oven Description: Heating stove for heating rooms up to 120 m2. Furnace dimensions: 1270 x 2170 x 2450 mm Project composition: 3D view of the furnace, furnace ordering, section, consumables, explanations and diagrams. Cost: 7000 rubles |
| No. 2450 Cooking oven with closed hob and heat exchanger. Description: Heating and cooking stove for heating a room up to 250 m2. Furnace dimensions: 1020 x 1140 mm Project composition: 3D view of the furnace, 3D ordering of the furnace, 3D sections, consumables, explanations, diagrams. Cost: 4800 rubles |
| No. 2320 Swedish # 6. Description: Heating and cooking stove with oven Furnace dimensions: 1270 x 1020 mm Project composition: 3D view of the furnace, 3D ordering of the furnace, 3D sections, consumables, explanations, diagrams. Cost: 4800 rubles |
| No. 2340 Heating and cooking stove on 2 floors Description: Heating and cooking stove on 2 floors Furnace dimensions: 1020 x 1020 mm Project composition: 3D view of the furnace, 3D ordering of the furnace, 3D sections, consumables, explanations, diagrams. Cost: 3800 rubles |
| No. 2350 Bell-type cooking oven Description: Heating and cooking room with a remote firebox Furnace dimensions: 1140 x 890 mm Project composition: 3D view of the furnace, 3D ordering of the furnace, 3D sections, consumables, explanations, diagrams. Cost: 4800 rubles |
| No. 2360 Compact oven with oven Description: Heating and cooking room with a remote firebox Furnace dimensions: 1020 x 890 mm Project composition: 3D view of the furnace, 3D ordering of the furnace, 3D sections, consumables, explanations, diagrams. Cost: 3800 rubles |
| No. 2370 Cooking oven with oven Description: Compact Swede, for heating a room up to 30 m2. Furnace dimensions: 1140 x 640 mm Project composition: 3D view of the furnace, 3D ordering of the furnace, 3D sections, consumables, explanations, diagrams. Cost: 1800 rubles |
| No. 2550 Cooking oven with oven Description: Compact Swede, for heating a room up to 30 m2. Furnace dimensions: 1140 x 640 x 840 mm Project composition: 3D view of the furnace, 3D ordering of the furnace, 3D sections, consumables, explanations, diagrams. Cost: 500 rubles |
| No. 2500 Heating and cooking stove with heat exchanger. Description: Heating and cooking stove for heating a room up to 210 m2. Furnace dimensions: 1140 x 770 mm Project composition: 3D view of the furnace, 3D ordering of the furnace, 3D sections, consumables, explanations, diagrams. Cost: 2300 rubles |
| No. 2520 Corner cooking oven Description: Heating and cooking stove for heating a room up to 45 m2. Furnace dimensions: 1140 x 1140 mm Project composition: 3D view of the furnace, 3D ordering of the furnace, 3D sections, consumables, explanations, diagrams. Cost: 2800 rubles |
| No. 2300 Cooking oven Description: Heating and cooking stove for heating a room up to 30 m2. Furnace dimensions: 1140 x 640 mm Project composition: 3D view of the furnace, 3D ordering of the furnace, 3D sections, consumables, explanations, diagrams. Cost: 1800 rubles |
| No. 2040 Heating and cooking oven with dryer Furnace dimensions: 1000 x 1000 x 2000 mm Project composition: 3D view of the furnace, furnace ordering, section, consumables, explanations and diagrams. Cost: 1000 rubles |
| No. 2400 Russian stove Description: Russian stove with stove and shield Project composition: 3D view of the furnace, 3D ordering of the furnace, 3D sections, consumables, explanations, diagrams. Cost: 6800 rubles |
| No. 2050 Heating and cooking stove with a stove bench Description: A heating and cooking stove with a stove bench serves both for heating a room with a total area of up to 80 square meters, and for relaxation. Possibility of heating the entire array of the stove, as well as separately the stove and separate stove benches. Easy to manufacture, the service life is calculated for fifty years, the possibility of execution in several versions with a bed width from 50 cm to 80 cm. Furnace dimensions: 1800 x 1520 x 2000 mm Project composition: 3D view of the furnace, furnace ordering, section, consumables, explanations and diagrams. Cost: 2800 rubles |
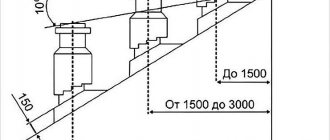
| No. 2060 Heating and cooking stove partition Description: The heating and cooking stove is used to heat a room with a total area of 25 square meters. Very easy to manufacture. Due to the parallel arrangement of chimneys, uniform heating of the entire mass of the furnace is ensured. Furnace dimensions: 1250 - 2400 x 750 x 2000 - 3000 mm Project composition: 3D view of the furnace, furnace ordering, section, consumables, explanations and diagrams. Cost: 1800 rubles |
| No. 2070 Heating and cooking stove Description: Heating and cooking stove with a single-burner stove, for heating a room up to 30 m2. Furnace dimensions: 890 x 640 x 1930 mm Project composition: 3D view of the furnace, furnace ordering, section, consumables, explanations and diagrams. Cost: 1000 rubles |
| No. 2080 Heating and cooking stove 2 Description: Heating and cooking stove with a single-burner stove, for heating a room up to 30 m2. Furnace dimensions: 750 x 630 x 1930 mm Project composition: 3D view of the furnace, furnace ordering, section, consumables, explanations and diagrams. Cost: 1000 rubles |
| No. 2090 Heating and cooking stove 3 Description: Heating and cooking stove with a single-burner stove, for heating a room up to 30 m2. Furnace dimensions: 890 x 640 x 2000 mm Project composition: 3D view of the furnace, furnace ordering, section, consumables, explanations and diagrams. Cost: 1000 rubles |
| No. 2100 Heating and cooking oven 890 x 640 mm on 2 floors Description: Heating and cooking stove on 2 floors, designed to heat a room with a total area of up to 70 m2. Furnace dimensions: 890 x 640 x 3600 mm Project composition: 3D view of the furnace, furnace ordering, section, consumables, explanations and diagrams. Cost: 1800 rubles |
| No. 2110 Heating and cooking stove on 2 floors Description: Heating and cooking stove on 2 floors with one firebox, with the possibility of heating two floors simultaneously or separately. Furnace dimensions: 1010 x 1010 x 4060 mm Project composition: 3D view of the furnace, furnace ordering, section, consumables, explanations and diagrams. Cost: 2800 rubles |
| No. 2120 Cooking oven 1270 x 760 mm Description: Heating and cooking stove. Designed for heating a room with an area of 70 m2. Furnace dimensions: 1270 x 760 x 2100 mm Project composition: 3D view of the furnace, furnace ordering, section, consumables, explanations and diagrams. Cost: 1250 rubles |
| No. 2130 Furnace 1010x1270 mm with heat exchanger and oven Description: Heating and cooking stove. Designed for heating a room with an area of 150 m2. Furnace dimensions: 1270 x 1010 x 2200 mm Project composition: 3D view of the furnace, ordering the furnace, the furnace in sections, consumables, drawing of the heat exchanger, a brief explanation, schemes of fire cuts, options for fixing fittings Cost: 2500 rubles |
| No. 2140 Heating and cooking stove 1270x1010 Description: Heating and cooking stove for heating a room up to 60 m2. Furnace dimensions: 1270 x 1010 x 2100 mm Project composition: 3D view of the furnace, ordering the furnace, the furnace in sections, consumables, a brief explanation, fire cut-out schemes, options for fixing fittings Cost: 1800 rubles |
| No. 2150 Heating and cooking stove Description: Heating and cooking stove with a single-burner stove, for heating a room up to 30 m2. Furnace dimensions: 890 x 750 x 2100 mm Project composition: 3D view of the furnace, ordering the furnace, the furnace in sections, consumables, a brief explanation, fire cut-out schemes, options for fixing fittings Cost: 1000 rubles |
| No. 2170 Heating and cooking furnace 1270 x 1010 Description: Heating and cooking stove for heating a room up to 80 m2. Furnace dimensions: 1270 x 1010 x 2200 mm Project composition: 3D view of the furnace, ordering the furnace, the furnace in sections, consumables, a brief explanation, fire cut-out schemes, options for fixing fittings Cost: 2800 rubles |
| No. 2180 Heating and cooking room on two floors 1010 x 1010 Description: Heating and cooking stove on two floors for heating a room up to 100 m2. Furnace dimensions: 1010 x 1010 x 3800 mm Project composition: 3D view of the furnace, ordering the furnace, the furnace in sections, consumables, a brief explanation, fire cut-out schemes, options for fixing fittings Cost: 2800 rubles |
| No. 2190 Angular heating and cooking stove Description: Corner heating and cooking stove, serves for cooking and for heating a room with an area of up to 30 m2. Furnace dimensions: 1135 x 1135 x 1750 mm Project composition: 3D view of the furnace, ordering of the furnace, 3D ordering of the furnace, the furnace in sections, consumables, a brief explanation, schemes of fire-fighting cuts, options for fastening fittings Cost: 2800 rubles |
| No. 2200 Heating and cooking 1115 x 750 mm Description: The heating and cooking stove is used for cooking and for heating a room up to 50 m2. Furnace dimensions: 1115 x 750 x 2050 mm Project composition: 3D view of the furnace, ordering of the furnace, 3D ordering of the furnace, the furnace in sections, consumables, a brief explanation, schemes of fire cuts, options for fastening fittings Cost: 1000 rubles |
| No. 2210 Stove with stove bench and heat exchanger Description: A stove with a stove bench, serves for cooking and for heating a room up to 80 m2. Furnace dimensions: 1270 x 1010 x 1750 mm Project composition: 3D view of the furnace, ordering of the furnace, 3D ordering of the furnace, the furnace in sections, consumables, a brief explanation, schemes of fire-fighting cuts, options for fastening fittings Cost: 3000 rubles |
| No. 2230 Stove "Shvedka-2" 890 x 890 mm Description: The stove is used for cooking and for heating a room up to 40 m2. Furnace dimensions: 890 x 890 x 1750 mm Project composition: 3D view of the furnace, ordering of the furnace, 3D ordering of the furnace, the furnace in sections, consumables, a brief explanation, schemes of fire cuts, options for fixing fittings Cost: 1000 rubles |
| No. 2240 Stove "Shvedka-3" 890 x 890 mm Description: The oven serves for cooking and for heating a room up to 45 m2. Furnace dimensions: 890 x 890 x 1900 mm Project composition: 3D view of the furnace, ordering of the furnace, 3D ordering of the furnace, the furnace in sections, consumables, a brief explanation, schemes of fire cuts, options for fastening fittings Cost: 1000 rubles |
| No. 2250 Stove "Shvedka-4" 890 x 890 mm Description: The oven serves for cooking and for heating a room up to 45 m2. Furnace dimensions: 890 x 890 x 2000 mm Project composition: 3D view of the furnace, ordering the furnace, ordering the furnace, the furnace in sections, consumables, a brief explanation, fire cut-out diagrams, options for fixing fittings Cost: 1800 rubles |
| No. 2520 Heating stove Description: A heating stove with a single-burner hob, which can be combined with a metal stove, is designed for heating a room up to 50 m2. Furnace dimensions: 890 x 1010 x 2240 mm Project composition: 3D view of the furnace, furnace ordering, section, consumables, explanations and diagrams. Cost: 1000 rubles |
| No. 2460 Heating furnace 890 х 750 mm Description: Heating stove for space heating with an area of 30 m2. Furnace dimensions: 890 x 750 x 2100 mm Project composition: 3D view of the furnace, ordering the furnace, brief explanation of consumables, explanations and diagrams. Cost: 1000 rubles |
| No. 2270 Cooking oven with 2 heating plates Description: The heating and cooking stove is used for cooking and for heating a room up to 80 m2. Furnace dimensions: 1000 x 1250 x 1820 mm Project composition: 3D view of the furnace, 3D ordering of the furnace, 3D sections, consumables, explanations, diagrams. Cost: 4800 rubles |
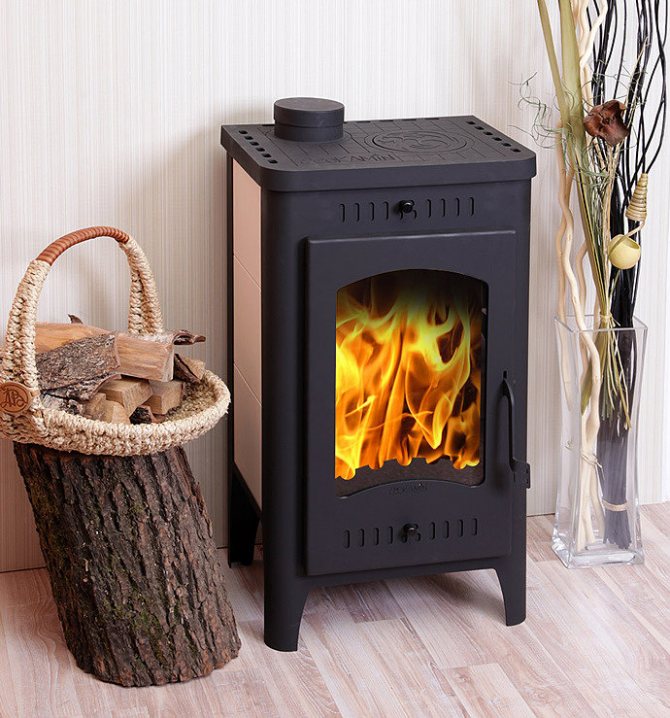
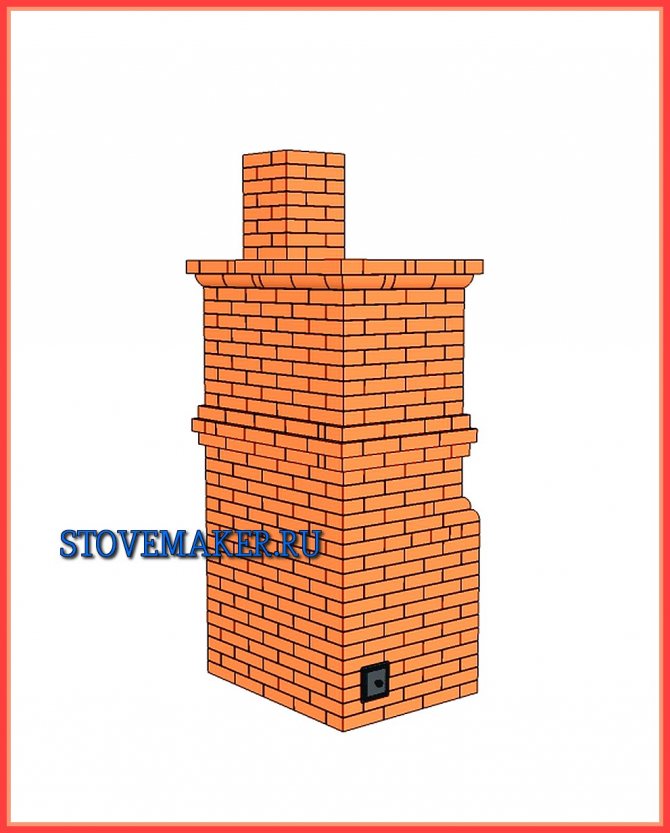
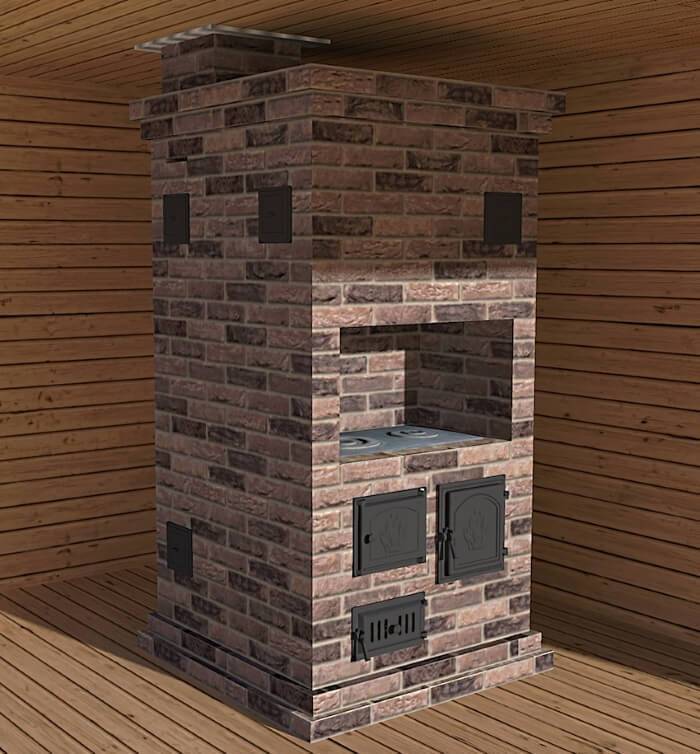
Dutch oven
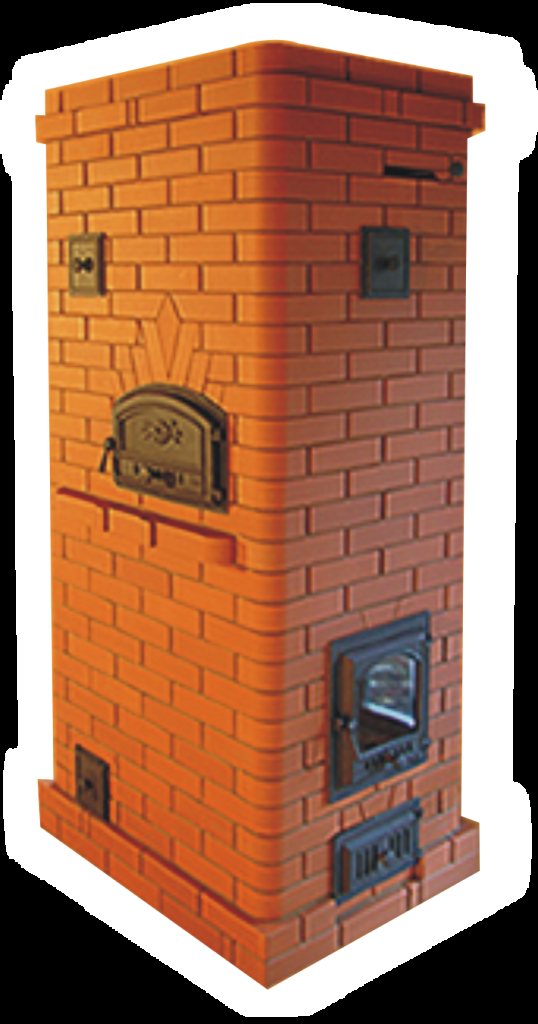
Dutch oven
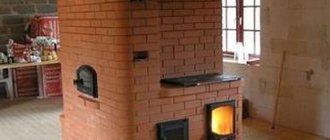
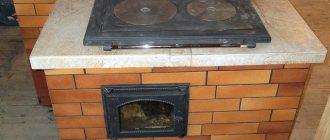
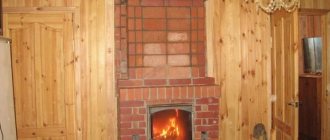
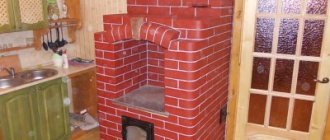
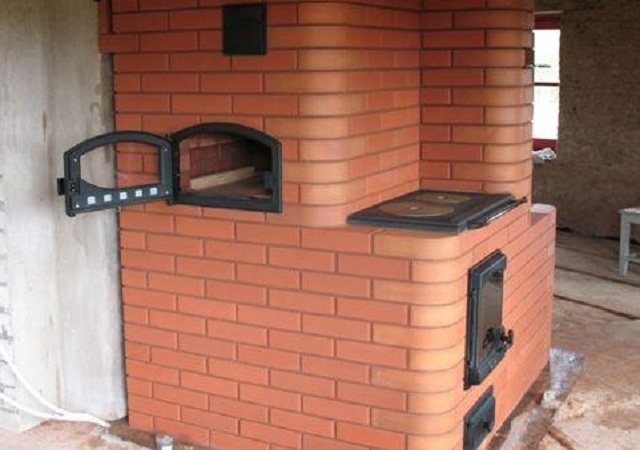
Such a stove unit is perfect for small private houses, country houses and even apartments. The stove will be very useful in the absence of a centralized heating system. In addition, such a stove can be equipped with a hob and used for cooking.
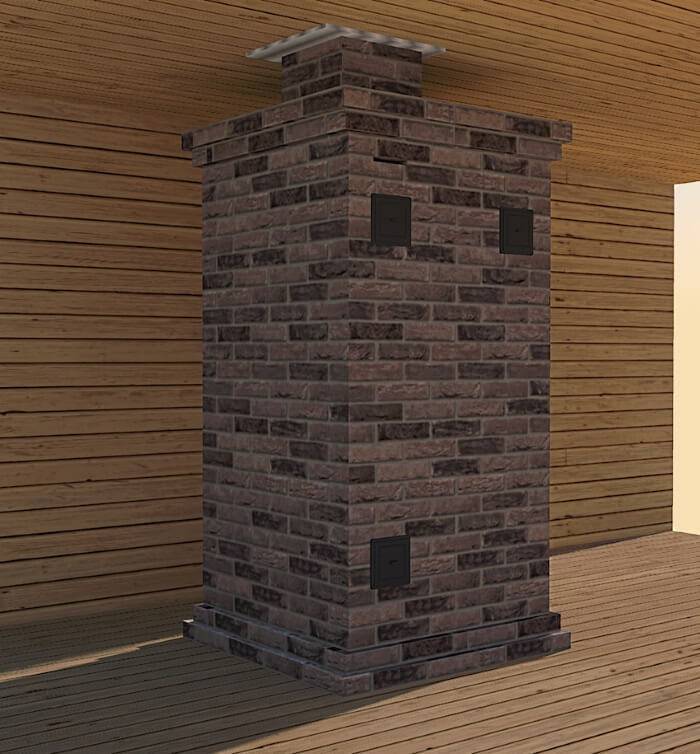
It is recommended to choose a place for placing the stove at the stage of planning the house. But even if your house has already been built, there will be no problems with the construction of the "Dutch".
Dutch woman - home decoration
The stove can be built both on a foundation or without it, but in the first case, the stove will last a little longer.
The Dutch oven has a very spacious firebox. At the same time, the structure is not equipped with a blower, which additionally distinguishes the considered furnace against the background of analogues.
Among the important advantages of the "Dutch" it is necessary to include the efficiency and rationality of fuel use - in such a furnace, firewood burns out much more slowly than in most other existing units.
Video - Glass door oven
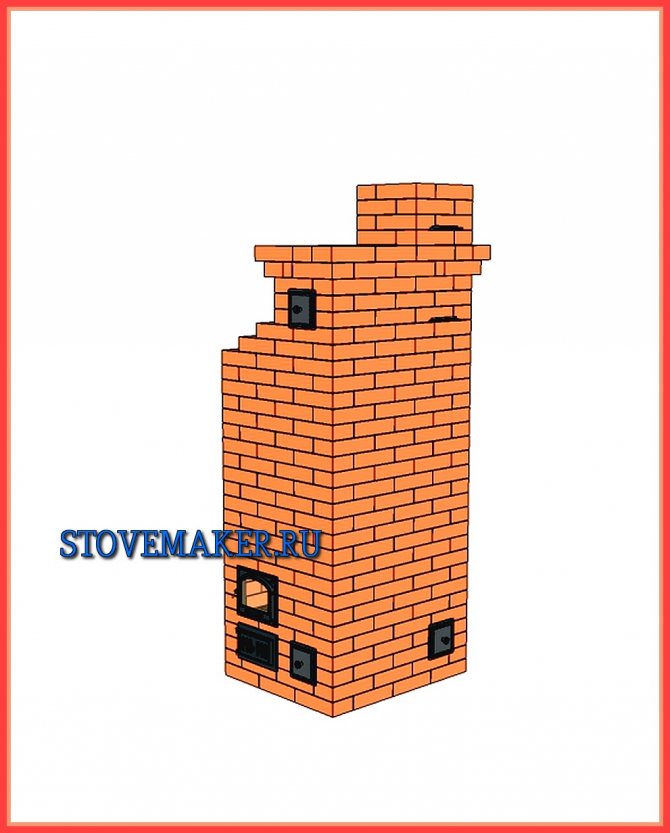
1-9 rows
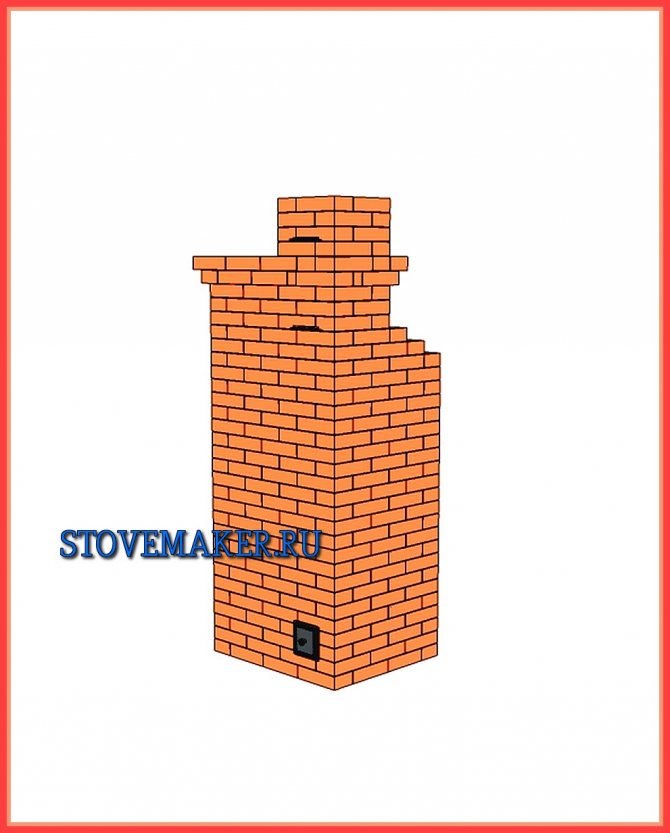
10-18 rows
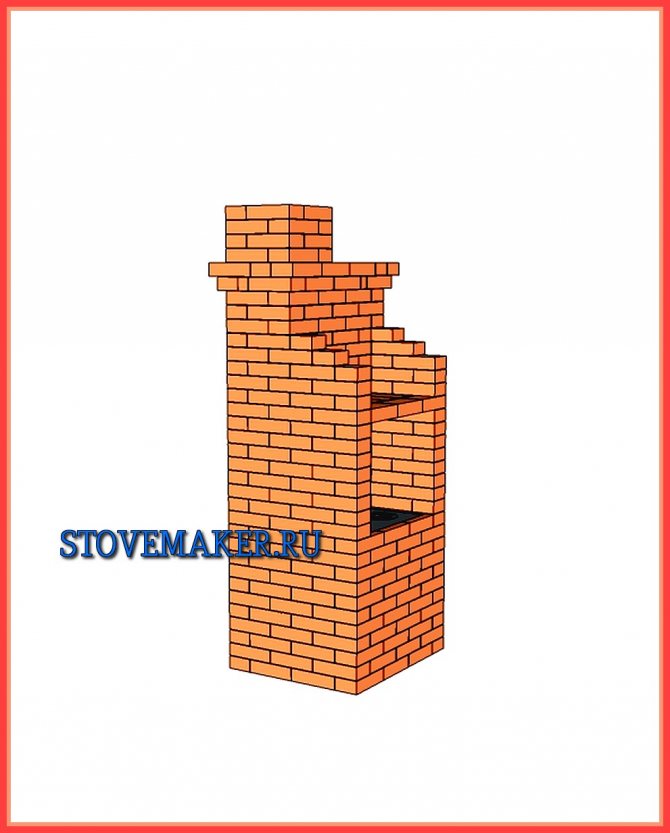
18-26 rows
Chimney
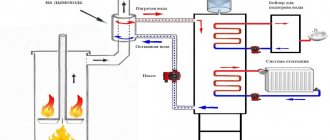
First step. Prepare a mortar with clay, water, and sand.Soak the clay in water, and sift the sand. Mix the components in such a ratio to obtain a homogeneous mass with the consistency of sour cream. Usually sand and clay are mixed in different quantities, and water is added about 25% of the total dry components. For the rest, be guided by the characteristics of your clay.
The brick also requires preliminary preparation - it needs to be dipped in water for about a day.
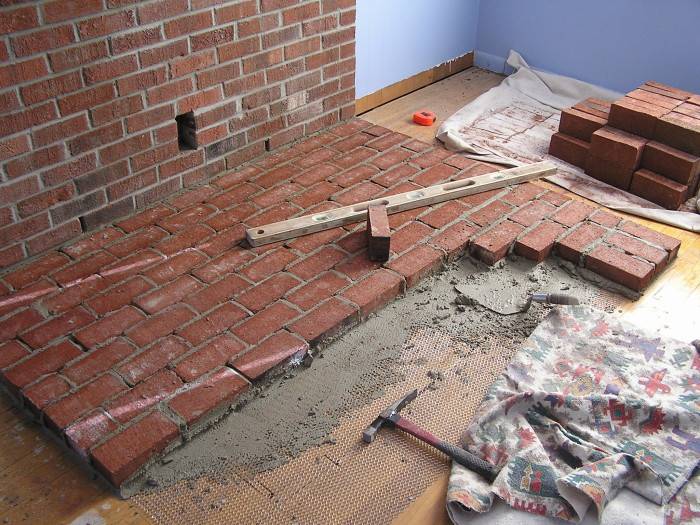
Start laying the stove. Every 2-3 rows, check the evenness of the masonry with a building level.
Second step. Lay roofing material or polyethylene on the floor. For the furnace in question, you will need insulation with dimensions of 530x780 mm. Spread a 1 cm layer of sifted sand over the waterproofing and carefully level the backfill.
Step three. Place the first row on top of the sand cushion. Check the evenness of the brick laying and carefully fill the entire surface with mortar.
Install the blower door. Use steel wire for fastening.
Fourth step. Lay out the second row of Dutch women according to the order. In general, this row will not differ from the initial row.
Fifth step. Lay out the third row. Starting from it, fire-resistant bricks must be used for masonry. Place the grate on the third row.
Sixth step. Lay out the fourth row. At this stage, the bricks should be placed on the edge.
At the same stage, you need to mount the door for the combustion chamber. Use steel wire to secure the doors.
Seventh step. Lay out the fifth row by analogy with the fourth, only lay the brick in the usual way, that is, flat.
Eighth step. Lay out the sixth row. Put the brick on the edge again. Check the corners and in general the evenness of the masonry.
Ninth step. Lay out the seventh row. Place the bricks flat. Place only the back wall on the edge. Lay all subsequent rows of bricks flat.
Tenth step. Start laying the eighth row. At this stage, the combustion door is completely closed. The inner brick (it must be fireproof) above the combustion chamber should be mowed.
Eleventh step. Lay out the ninth row offset to the back. Lay a damp asbestos cord on top of this row, and then a hob. Seal the joints between brick and slab carefully. The hob can be made square or round - as you like.
Twelfth step. Start laying the tenth row. At this point, you need to lay out the base of the chimney. "Holland" has compact dimensions, therefore, the arrangement of a capital brick chimney should be abandoned, opting for a metal structure.
Thirteenth step. Lay out the eleventh row and install the smoke damper. Pre-wrap the valve with an asbestos cord.
Fourteenth step. Lay out the twelfth row. At this point, form a joint between the chimney and the metal pipe.
The oven is finished.
Detailed diagram of the furnace device
In conclusion, you will have to do the following:
- bring the chimney to the required height;
- seal the joints between the floor and the furnace unit with a plinth;
- plaster the "Dutch". You can also use whitewash, paint and even ceramic tiles for decoration.
Thus, self-laying of a heating and cooking stove is not such a difficult undertaking. All you need to do is follow the instructions in everything.
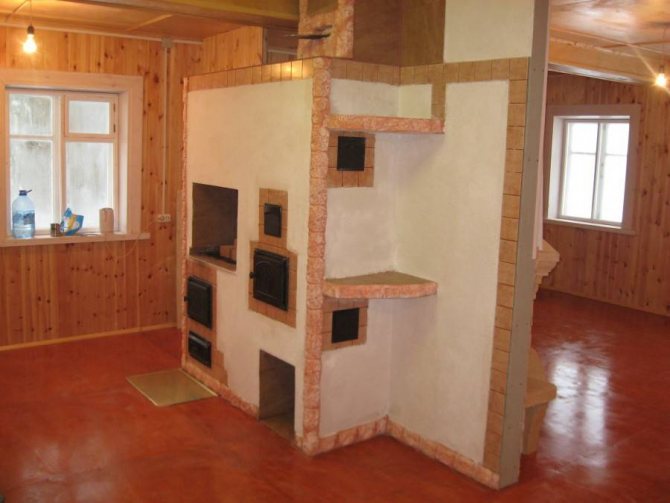
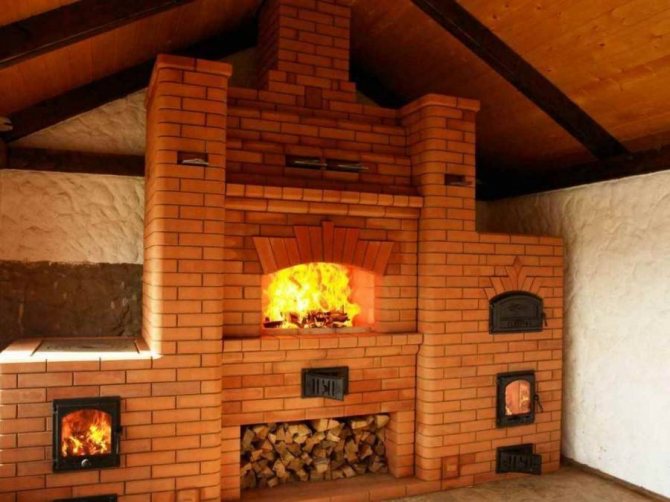
Heating and cooking room with fireplace
Happy work!
Read an article on our website - do-it-yourself Dutch oven.
The first five ovens with a hob
Stoves and fireplaces with a hob are multifunctional heating units, the first 5 different models with characteristics and descriptions are presented in the table:
| Photo of the oven | Model | Description |
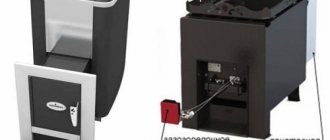
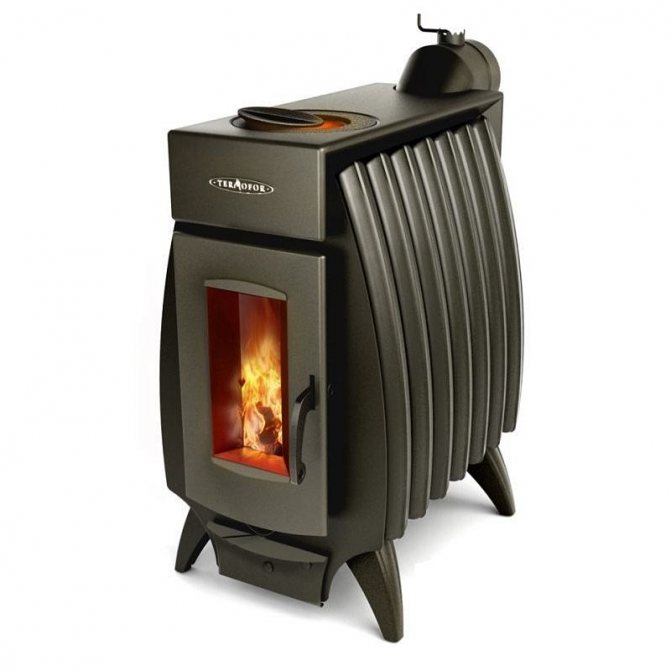
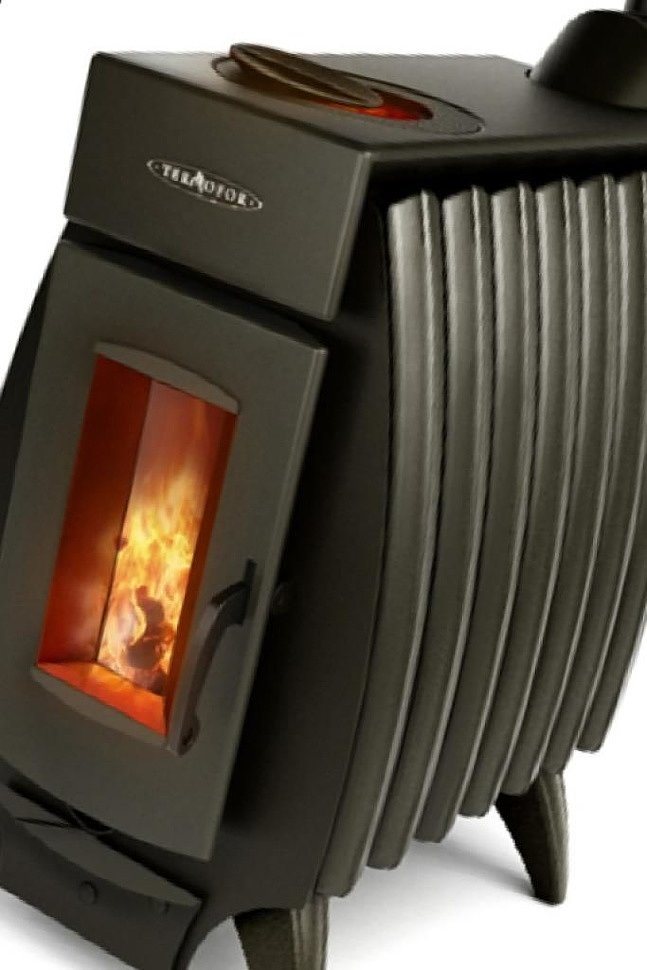
| Fire-battery 7 | The oven is wall-mounted, has miniature dimensions and is designed to heat 150 cubic meters of living space. The power of the furnace is 10 kW, for proper operation a chimney is required, for kindling dried firewood of a suitable size. The firebox has a fairly acceptable cost ranging from 15,000 to 17,000 rubles. Among the reviews you can find such laudatory ones that indicate the simple use and management of the fireplace, the fireplace is able to store and distribute the accumulated thermal energy for a long time. The model is equipped with a heat exchanger with which you can heat the water, and heating occurs quickly enough, within 1 hour fully. Among the shortcomings, it is noted that such a unit heats up very much, this also applies to the handle itself, therefore, in order to open the door, you must wear gloves. Able to work from one bookmark of firewood for 9-11 hours continuously, which is very convenient. |
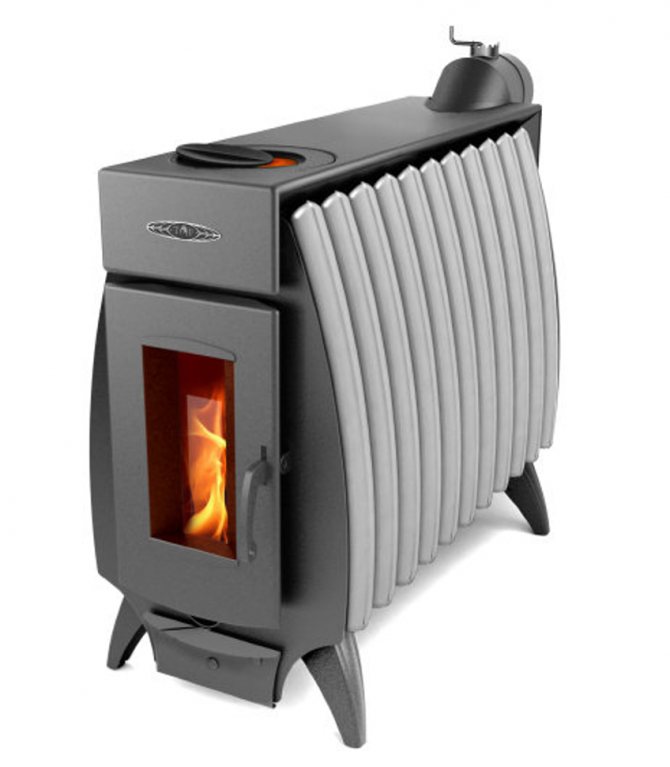
| Fire-battery-5 | The Termofor ovens of this brand belong to the wall variations, they are suitable for heating rooms with a total living area of up to 100 square meters. The power of the hearth will be 6 kilowatts; for work, wood fuel with a suitable moisture content is needed. For full and correct operation, you need to connect the chimney to the firebox. The cost of the variation will be from 11,000 to 15,000 rubles. |
| Fire-battery-11 | Furnaces Termofor Fire-battery 11 are hearths with a power of 16 kW. Such a hearth is one of the most powerful, with its help an area of up to 250 cubic meters is fully heated. The fire-battery model is installed near the wall and requires connection and the presence of a chimney hood. The average cost for this modification will be about 17,000-20,000 rubles. The sides of the structure, as in other models, are made in the shape of an accordion, with characteristic ribs that make the hearth even more powerful and allow a good accumulation of thermal energy. The door is a small panoramic glass-ceramic glass, with the help of which you can observe the burning fire and simply control all the processes taking place inside, the amount of fuel. |
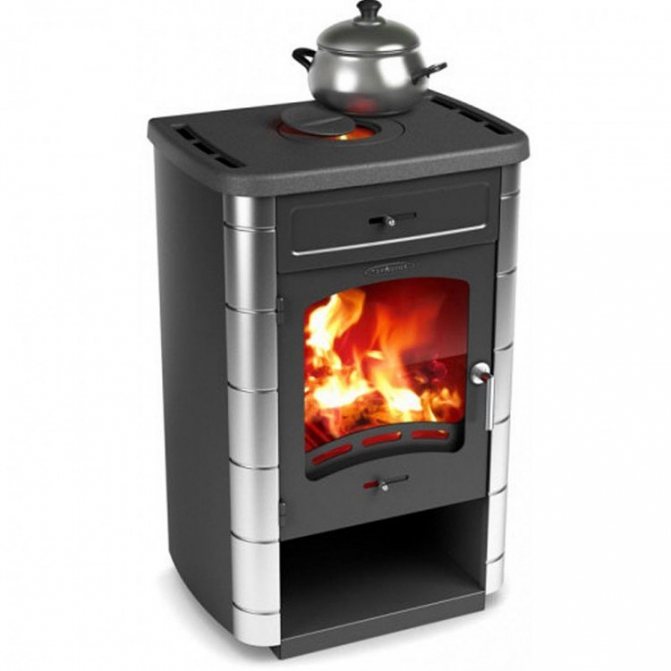
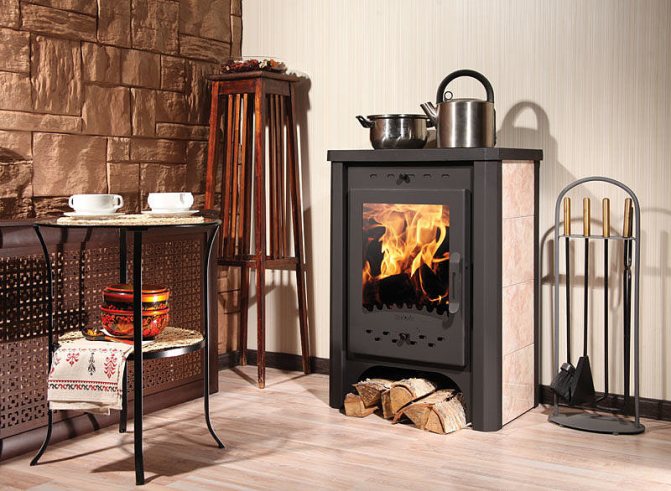
| Bavaria | Bavaria fireplace is a very popular model, this modification is produced by the manufacturer Termofor. The model belongs to the wall type, the rated power is 9 kilowatts, the product is made of steel, there is a ceramic lining of the sidewalls. For kindling, wood or briquettes are used, which can be bought in the store. For proper functioning, a chimney with a suitable cross-section and diameter is required. For convenient and easy maintenance, the modification is complemented by a special drawer ash drawer, in which all the products of combustion and decay are accumulated. The firebox is equipped with a small transparent glass-ceramic insert and handle. |
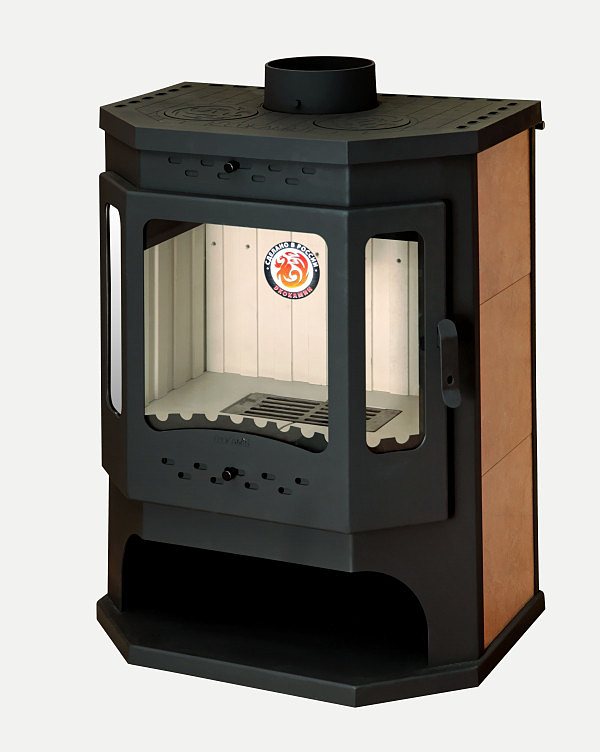
| Yauza | Yauza fireplace is an original stove combined with a fireplace, made in a modern style, but with the right choice of decor, this option will go well with a classic interior. The stove belongs to the floor type and can be placed both near the wall and in the center of the room. Suitable for heating an area within 150 cubic meters, in the lower part under the firebox there is a spacious and deep enough firebox. The door is equipped with straight transparent glass-ceramic glass. The power of the model will be 8 kilowatts, since a solid fuel hearth requires a chimney, wood fuel is used for kindling. The cost of the hearth will be about 30,000 rubles. |

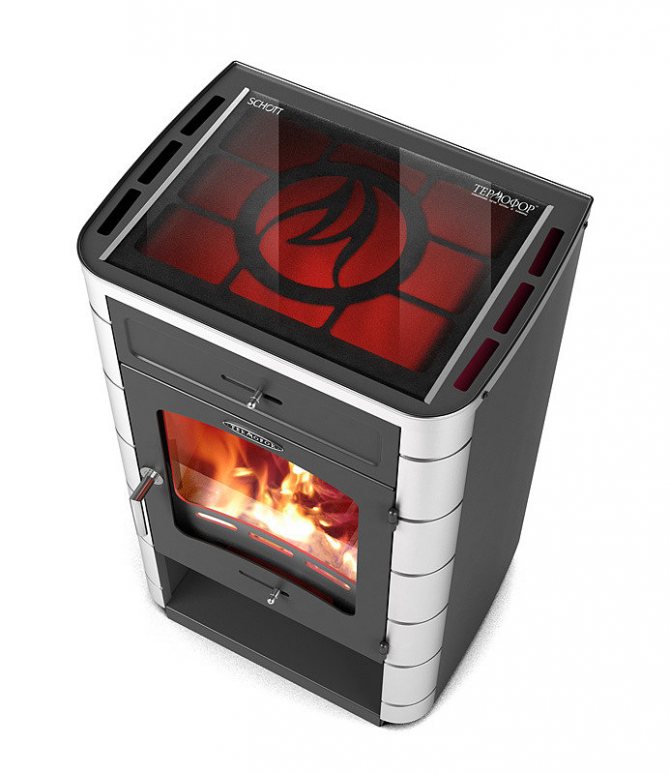
Choose the appropriate model according to the required power and area of the premises, also pay special attention to the design of the heating unit, the method of its placement, cost, additional functionality, the number and size of hobs.
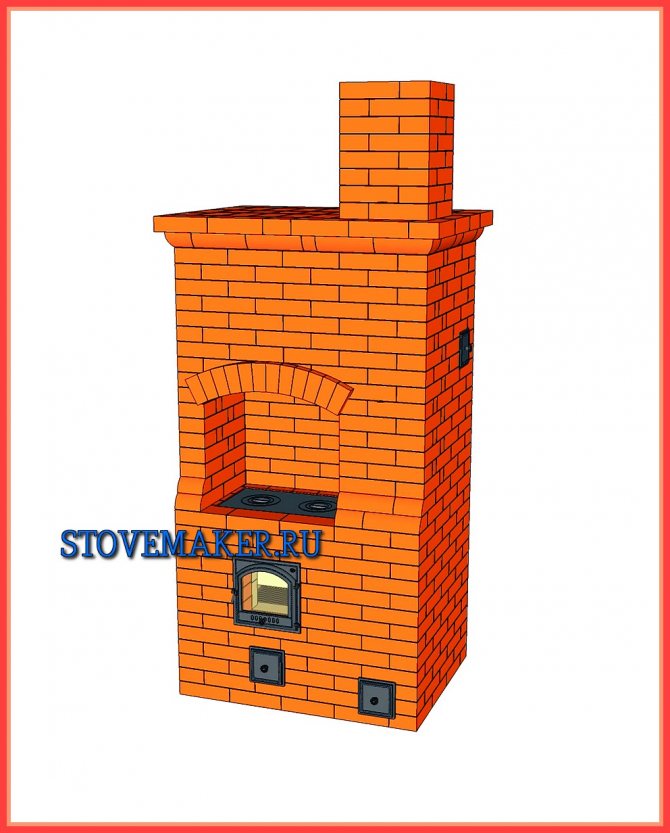
Small but smart a simple cooking oven
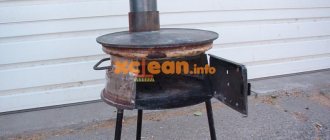
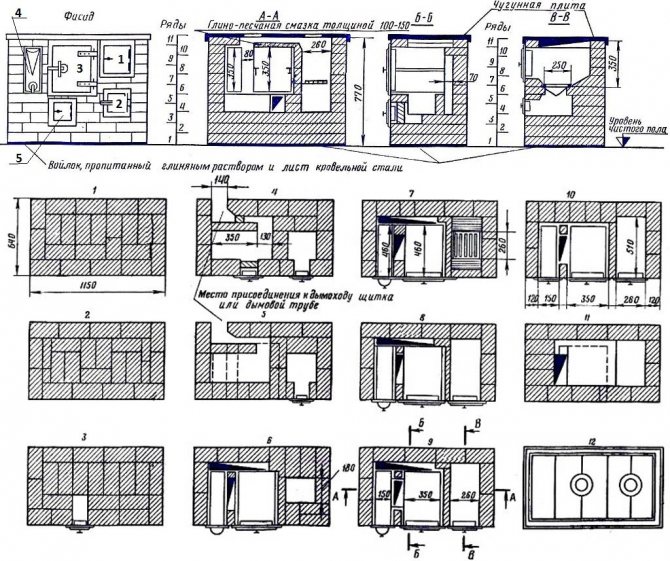
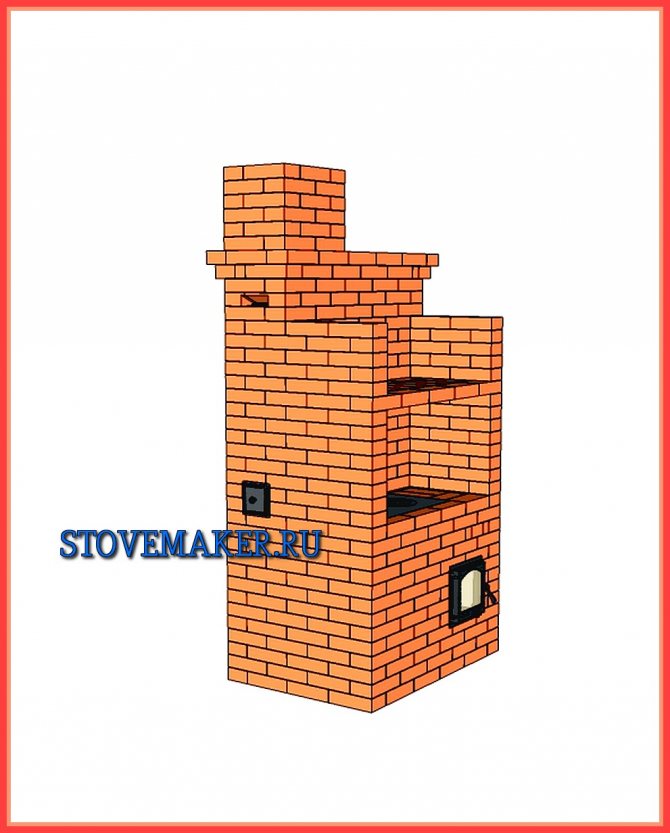
Exclusively for culinary purposes, also in the country or in the summer kitchen, the following construction is intended, see fig. below, a simple cooking oven:
- firebox door;
- blower door;
- oven door;
- water tank;
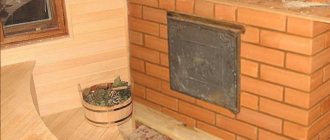
- cleaning.
Simple cooking oven
In appearance - nothing more than a well-known stove, but made according to the Swedish principle, only without a labyrinth of canals; in the summer they are still inactive. Constructing "rough" in Swedish, we get:
- Although this is a brick oven, less than 250 bricks themselves will be needed for it, taking into account amateur combat, and the load on the floor will not reach 250 kg / sq. m. That is, this stove can be built directly in the existing living space. Only the refractory mat will have to be turned over: put felt on the floor, steel on it and build on the steel sheet. Asbestos or basalt cardboard are not suitable, they will not have adhesion to the floor and steel, and the stove can "go"!
- The oven heats up no worse than in a Swedish oven and you can bake bread in it.
- Instead of a water tank, you can put the same U- or W-heat exchange register, and in the attic - a DHW storage tank with thermal insulation. Then there is enough hot water not only for washing dishes and hands, but also for a shower.
- The Swede got a side outlet into the chimney, i.e. no need to beat the overlap under the pipe.
- The top part of the stove is completely Swedish and can withstand a fairly intense firebox. In a small house or in a dacha for economic and commercial purposes, inhabited from spring to autumn, a heating shield can be attached to the stove.
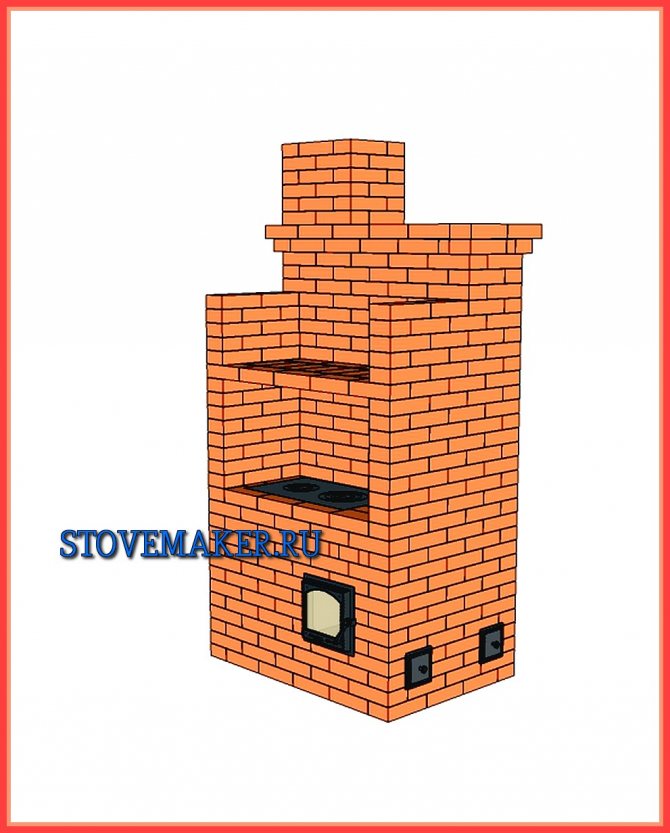
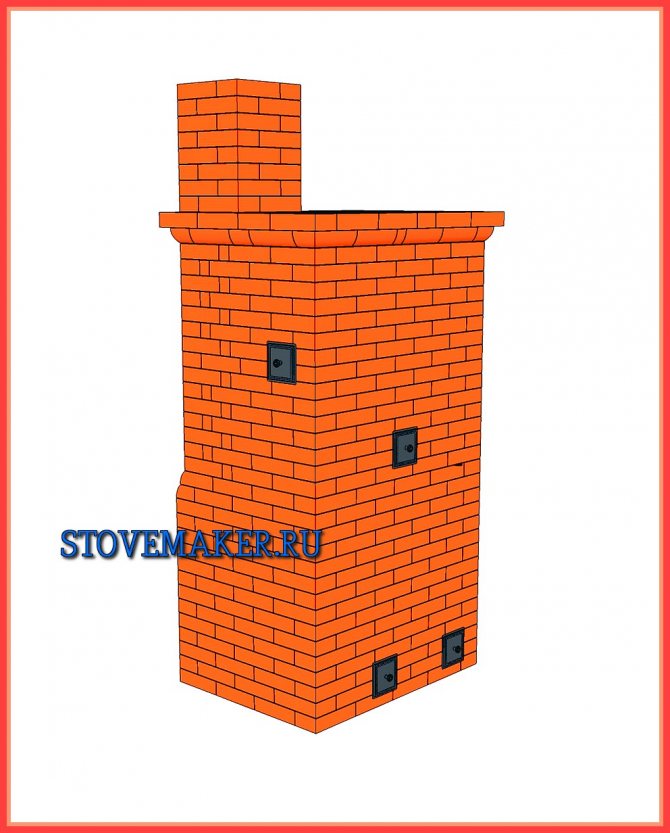
Step-by-step instructions: design with a bench
The model of this design is very bulky due to the sunbed attached to the back. But this is a great idea for replacing a bed in a country house. A dwelling of 30 squares will be perfectly heated by a stove measuring 1781x1280 millimeters, where the length of the lounger itself will be 1781 millimeters, and in width it will be 630 millimeters.
Required materials (table)
| Material / element | Amount) | Size (millimeters) |
| Red brick M-200 | 900–920 | |
| Fireclay brick Ш-8 | 200–215 | |
| Firebox door | 1 | 210x250 |
| Cleaning channel doors | 3 | 70x130 |
| Blower door | 1 | 140x250 |
| Chimney valves | 2 | 130x260 |
| Grate | 1 | 250x400 |
| Hob | 1 | 310x610 |
| Steel strip | 5m | 50x5 |
| Steel corner | 80 cm | 60x60x5 |
| Clay, sand | ||
| Chamotte mortar | 160 kg | |
| Oven | 1 | 450x360x300 |
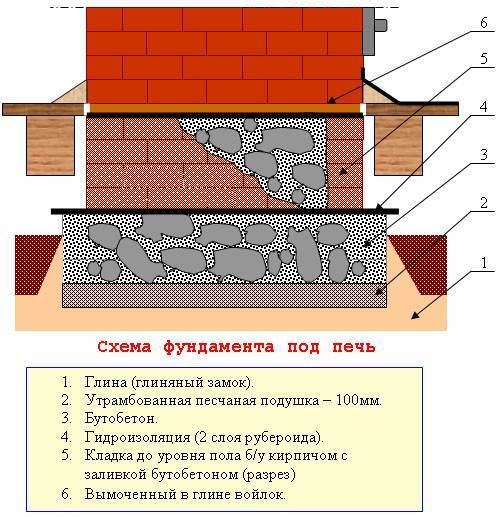
Foundation
It is recommended to do it even at the stage of laying the foundation of the house itself, where the stove will be located. But the oven is not always planned at the stage of building a house, so you often have to make holes in the finished floor. But in any case, the foundation of the stove and the base of the concrete building must be separated from each other. Otherwise, in case of unsuccessful shrinkage of one side, the other may also be skewed, thereby deforming the entire masonry.
To erect such a powerful unit, an appropriate foundation is needed, which will go into the depth of the soil by almost a meter, or rather 70 centimeters. If the soil freezes deeper, then the hole, respectively, should be dug deeper. This information should be taken care of in advance.
If the construction of the stove takes place in an already finished house, and not at the construction stage, then the markup of the future Swede is right on the floor with the condition that the hole in it must be 10-15 centimeters larger than the foundation size in all directions.
After the markings and the hole in the floor are made, you need to mark the ground and dig a pit. Cover the bottom with sand moistened with water. Tamp it down too. The thickness of the compacted sand layer should be 10–20 centimeters. Specific data depend on the depth of the excavated pit. Then comes a layer of rubble of 15-15 centimeters, also well compacted. Next, install the formwork, fix roofing material on its walls for waterproofing. The formwork should rise above the soil layer to the entire height of the foundation, which either does not reach the floor by 1 layer of brick, or rises 8-10 centimeters above it.
Coarse crushed stone + cement + sand = concrete for filling the pit. This layer should be about 15 centimeters thick. Install the mesh reinforcement and press it into the concrete mortar.
The next layer is a thinner cement mortar. It is poured into the height of the soil, leveled and left to solidify. On the slightly hardened surface, the reinforcement structure is again laid and poured with concrete to the height of the entire formwork. Smooth out this layer and leave to harden completely, for about a month.
When everything is ready, it is necessary to remove the upper part of the formwork and lay waterproofing on the foundation (2-3 layers of roofing material, which must first be glued in thickness).
Another option for the foundation for the furnace
The foundation is done. Now you can proceed directly to the laying of the oven itself.
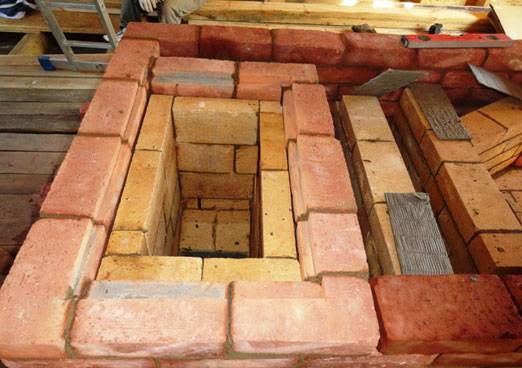
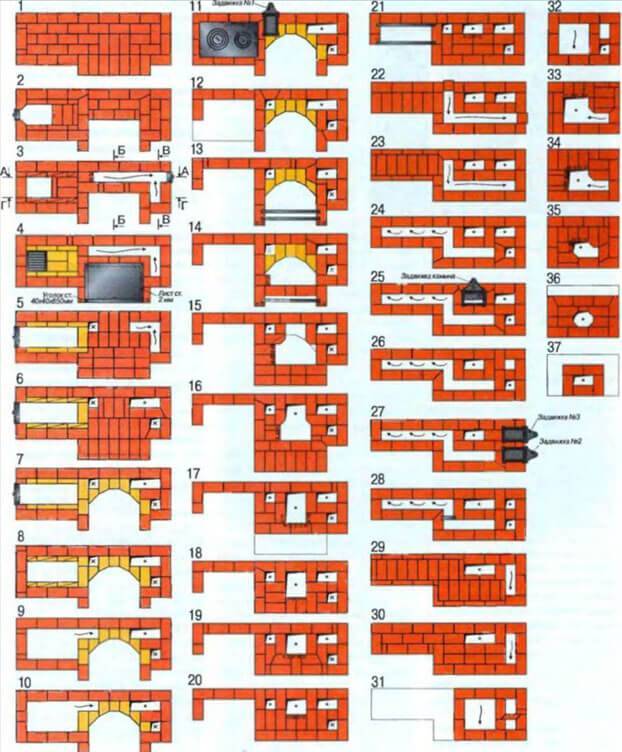
Furnace masonry
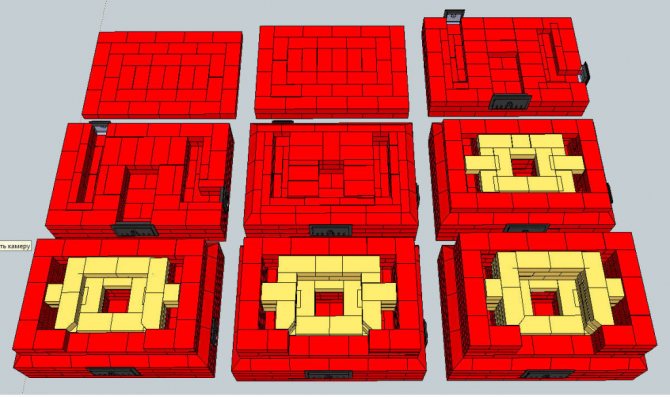
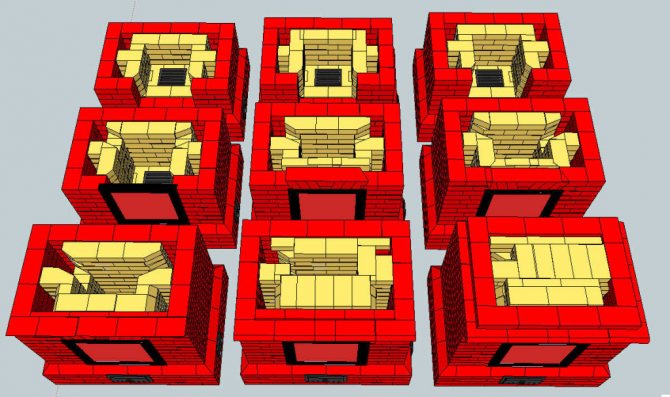
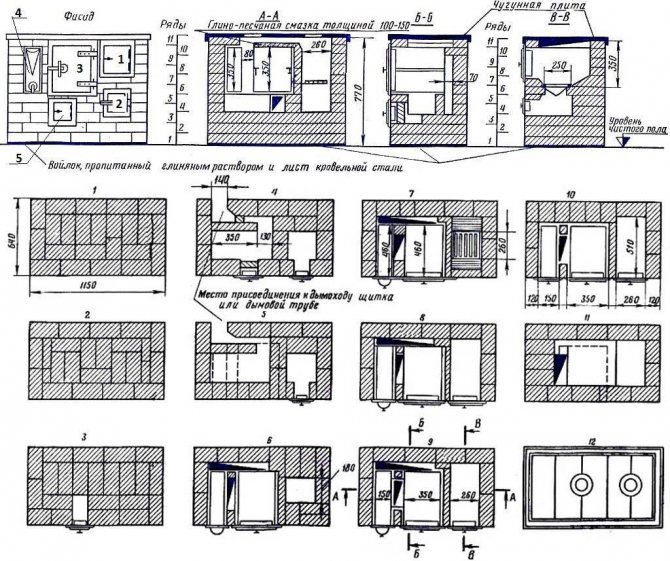
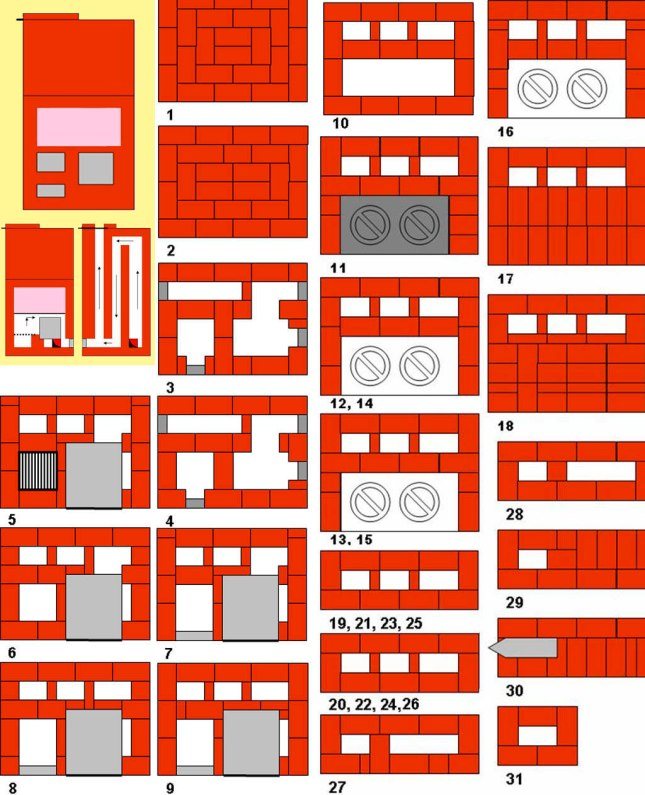
The laying is carried out according to the ordering scheme.
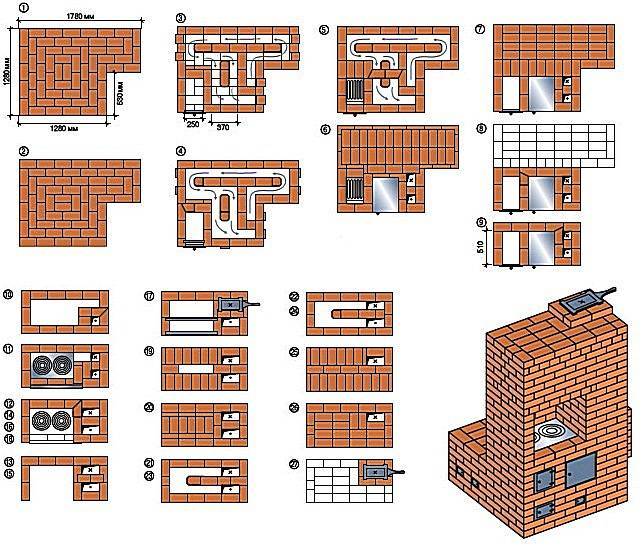
Scheme-ordering of a stove with a stove bench
If you follow this scheme, then the work will take place as follows:
- The first two rows set the direction of laying the entire structure. They are laid out in full.
- On the third row, gas ducts, a blower chamber begin to form and the door is installed.
- The fourth row provides for the installation of doors for the cleaning chamber and preparation of a place for the grate.
- 5th row - installation of firebox doors and laying of a grate.
- 6th row - the oven is mounted.
- The 7th row ends the laying of the lounger and the laying of the stove hob begins.
- The 8th, 9th and 10th rows are laid according to the scheme. The walls of the firebox are erected in them, and a chamber is built around the oven.
- The 11th row provides for the installation of a hob. It is necessary to lay pieces of asbestos under its edges, and fix its front part with a steel corner.
- 12-16th rows - the wall is built around the hob.
- On the seventeenth row, the niche needs to be covered with metal strips and reinforced with a corner. At the same stage, the first chimney valve is installed. First, the valve frame is mounted on the mortar, then the movable part is mounted on it.
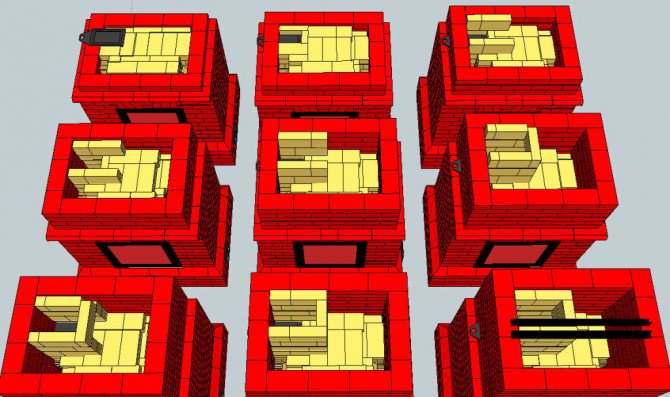
- The 18-26th rows are laid out strictly according to the scheme.
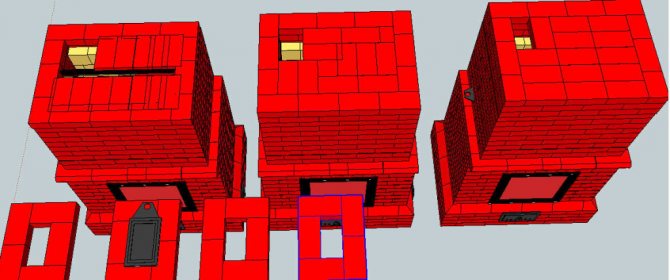
- A second chimney valve should be installed on the 27th row.
- The last stage is the construction of a chimney pipe.
Installation of the structure
When forming the order, it is important to strictly adhere to the working scheme, otherwise the oven will not fully function and you will have to shift everything all over again.
A waterproofing material is laid on the arranged foundation. It is important that the masonry is perfectly flat, otherwise the structure will be unstable. Ordinary masonry is presented in the table:
| Row | Performed work |
| 1 | A brick is laid, which should cover the entire surface of the row |
| 2 | Solid, from the side of the location of the fireplace, metal fittings are attached to which the fireplace grate is welded |
| 3 | Place for the blower |
| 4 | The blower door is installed |
| 5 | The oven is being installed in a brick oven, the grate of the grate is laid |
| 6 | The furnace part is formed with fireclay bricks |
| 7 | The firebox door is installed, after which the first channel is blocked so that it becomes 3 times smaller |
| 8—9 | Lay in the same way as the seventh |
| 10 | Refractory bricks are carefully laid out |
| To form the hob, the fire compartment door is closed | |
| 11 | Stows in the hob and frame for the brew compartment flap |
In total, 33 rows are formed, after installing the hob, they begin to overlap the fire door so that gases do not penetrate into the room. Further, a chimney is built, the structure is brought out between the beams to the roof, and then to the street. When the oven with the hob is completely ready, if you wish, you can cover it with a special heat-resistant paint or varnish. If the structure is laid out strictly according to the scheme, in compliance with all the rules and stages, you will get a reliable, multifunctional cooking and heating system.
Advantages and disadvantages
Before deciding on the question of how to properly lay a Swedish woman out of bricks, it is necessary to evaluate all its advantages and problem areas.
Experts highlight the following advantages:
- compactness - base area up to 1 sq. m and a height of no more than 2 m;
- the ability to use both for heating and for cooking, rest, for drying things;
- excellent performance indicators - high efficiency and heat transfer;
- simplicity of design;
- decorative function of decorating the room;
- the ability to regulate heating modes;
- efficiency of warming up;
- ease of maintenance and infrequent stowage of fuel.
The effective use of the Swede is possible only with a regular combustion process. If the room is not heated too often, then it is necessary to dry it.
The optimal area of the heated room is 40 sq. m. When laying the stove, it is necessary to use high-quality raw materials, and the door of the chamber for the furnace must be cast.
Choosing a furnace model
If there is a sufficient amount of theoretical and practical material on a narrow topic in the field of construction, few will miss the opportunity to save a certain amount of money and do the work on their own, because a brick-built cooking stove with their own hands eliminates the payment for the work of the master.
The construction of a furnace is a time-consuming and energy-consuming process. Everything is complicated by the preparatory stage, at which it is necessary to make calculations of the main parameters, determine the choice of the furnace model, and get acquainted with the project of this model.
Undoubtedly, the best practices from professional craftsmen make the tasks of self-construction much easier. All parameters, drawings, diagrams of various models are collected in a single document called a project. The novice wizard can only choose the most suitable projects for their tasks and use ready-made standard calculations. But even the choice of a finished model should be made on the basis of some criteria, and not spontaneously, as many people who have never come across such a question as heating stoves think.
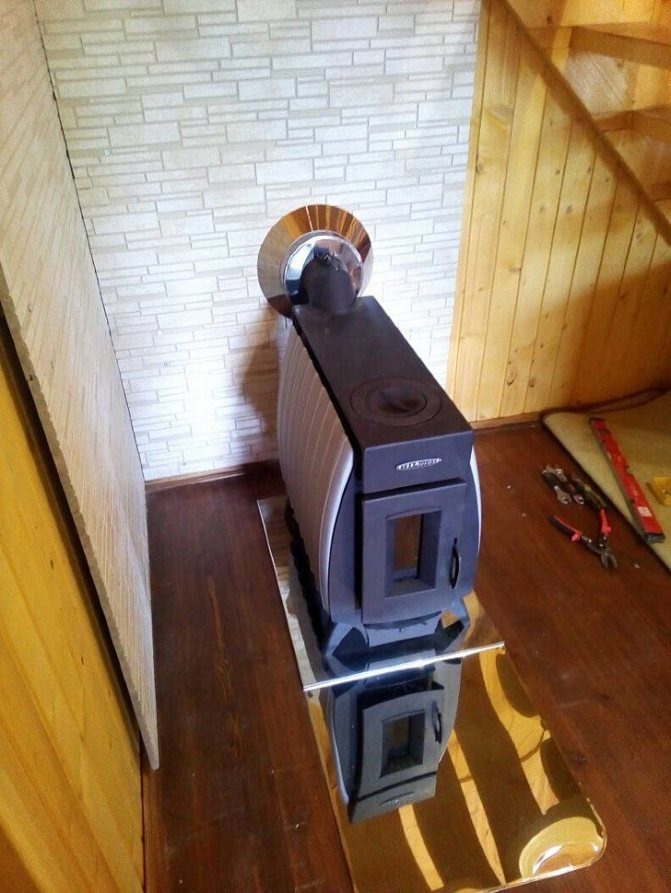
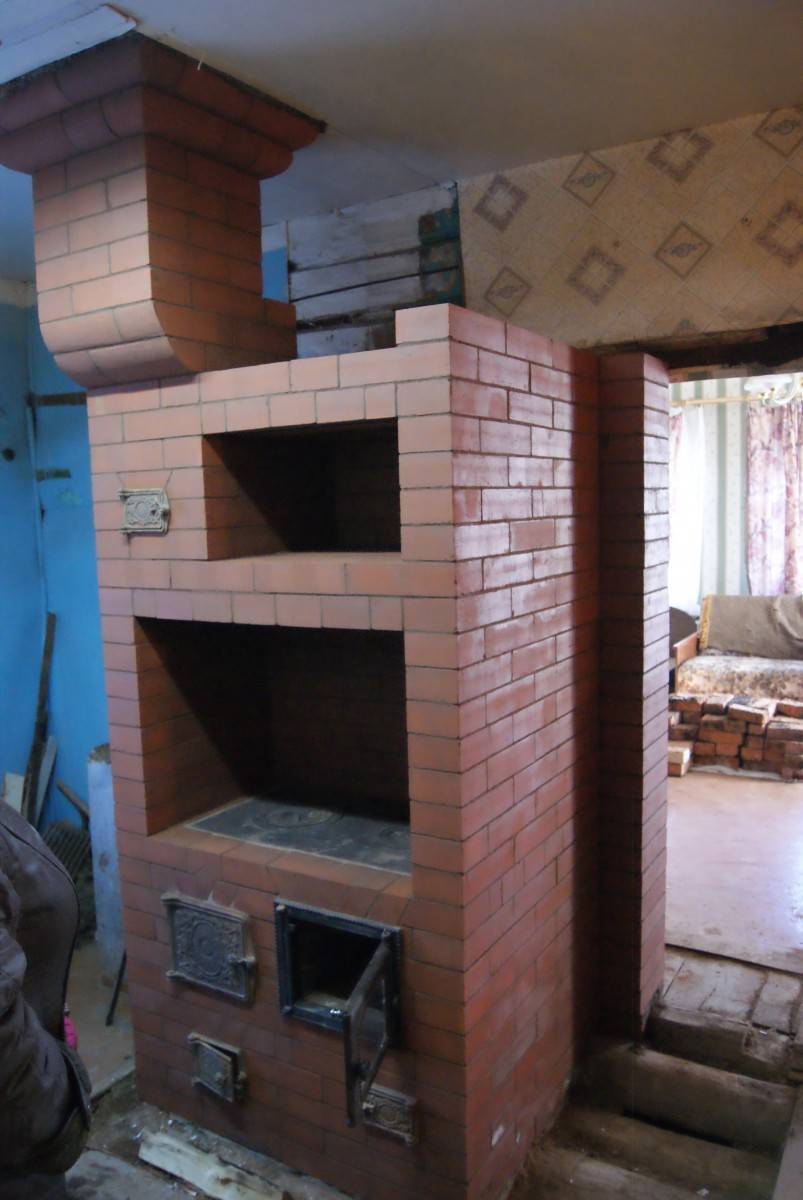
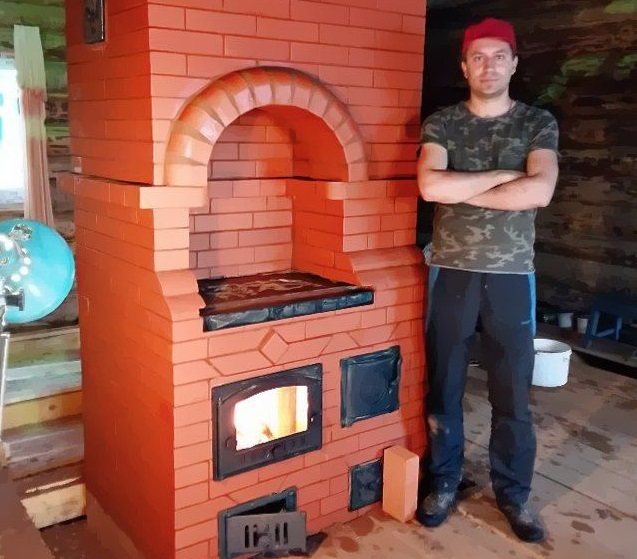
Stove ready to start
Despite the fact that technical calculations are more related to the firebox and chimney, it is necessary to assess the dimensions of the furnace itself and the dimensions of the room in which it is planned to be installed. Bulky brick ovens for a home with a hob in a small room will look ridiculous. And the heating process will not become more efficient from this, because in order to heat a large structure, it will have to be heated longer. The size ratio can be found in Runet along with the project.
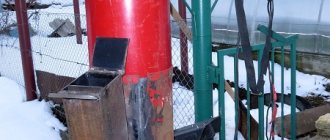
Good to know: How to make a garbage incinerator in the country, ready-made options
The location of the stove will influence the choice of model. Ovens with a hob should be oriented so that cooking units open into the kitchen and the back and side walls heat adjacent rooms. But this is just practical advice and the owner has the right to choose where to fold the stove.
The ordinal masonry scheme presented in the project will allow the construction of one of three options for stoves: T-shaped, square or rectangular. The T-shaped device is installed in the center of the room, partially producing its zoning. It efficiently heats several rooms at once. This principle was implemented in peasant huts. First, a stove for the house was built, and then the frame itself was erected.
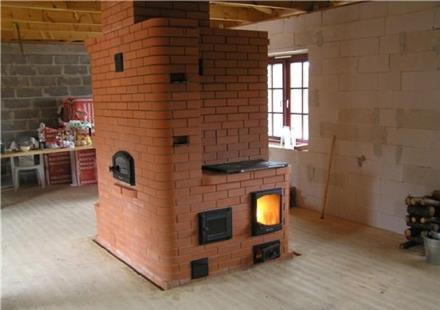
T-shaped version
The other two types can serve as island or wall models.
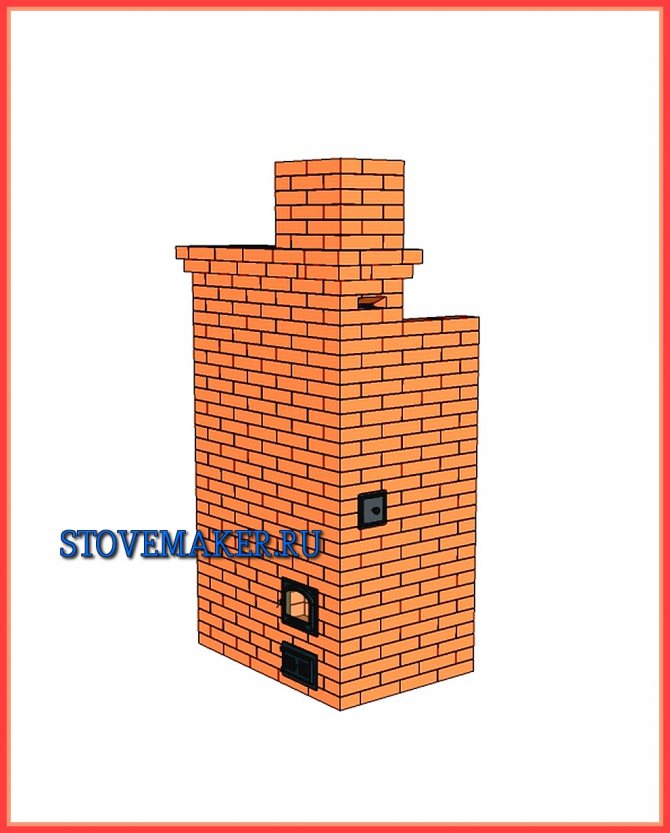
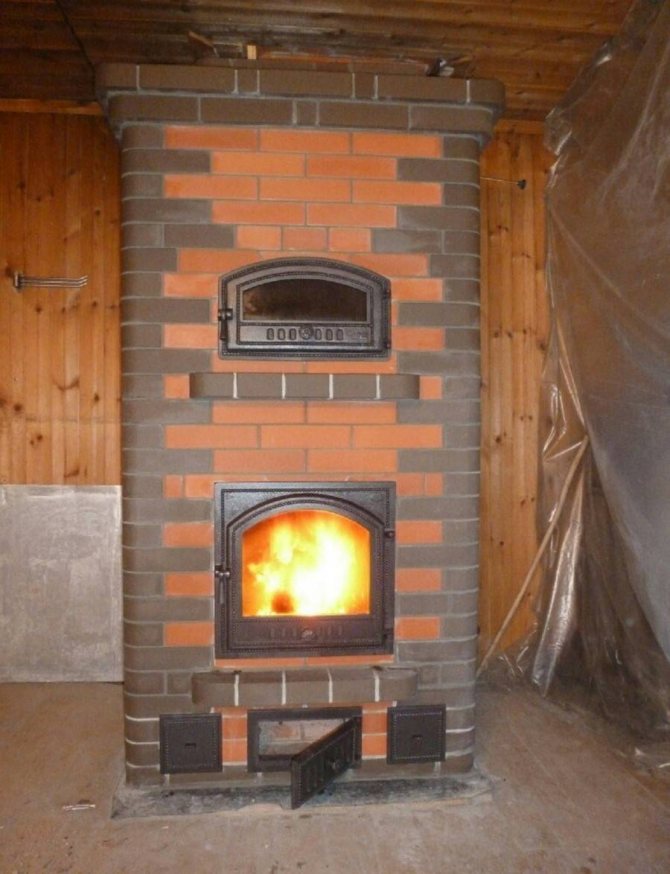
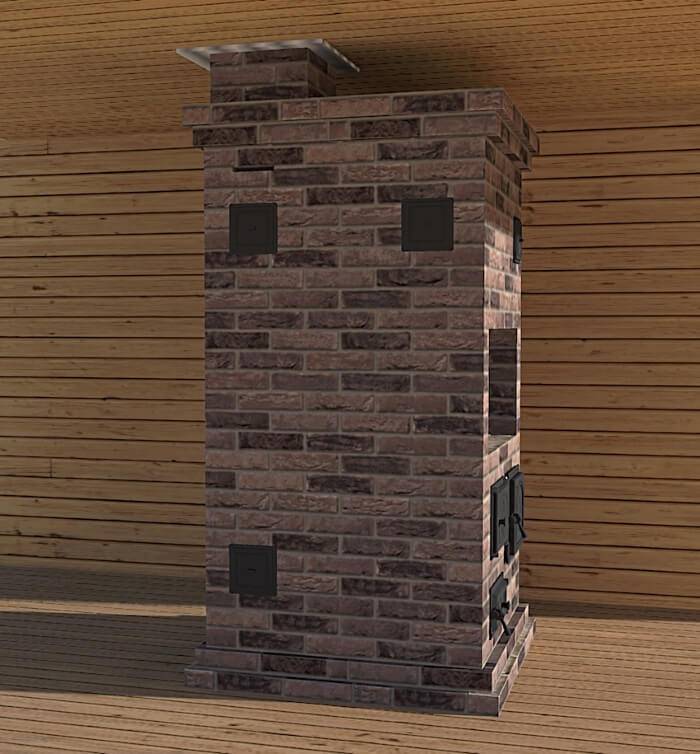
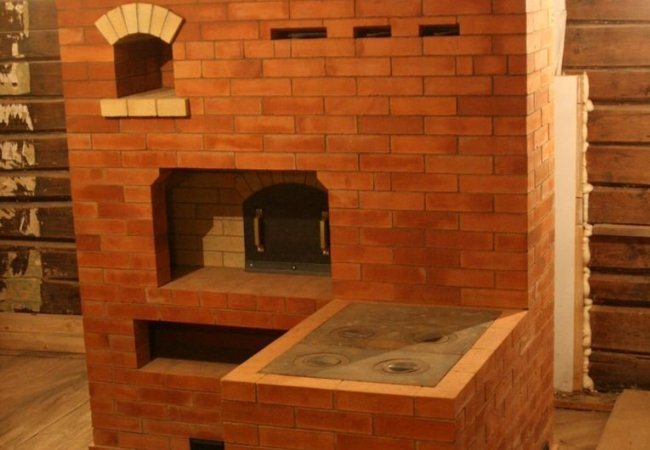
Stove ready for use
The compact oven does not take up much space while being an efficient heat source. This model is designed specifically for summer cottages and small country houses. It allows you to warm up the room, adapting it for long-term living in the winter.
Varieties
It is important to understand what kind of Swedish stoves are, since the layout of the masonry and the location in the house will depend on this. Such models are popular:
- with a fireplace, when the cooking stove is turned towards the kitchen, and the fireplace is directed to the living room;
- Swedish stove with stove and oven - used to heat the entire room;
- with a couch for a comfortable stay with simultaneous heating of the house.
Regardless of the type of construction chosen, it is required to correctly determine the parameter of the pipe section. To do this, you need to find out:
- dimensions of the combustion chamber by multiplying the length of the combustion chamber by its width and height;
- specific calorific value of fuel - tabular data are used.

When calculating heat transfer, the calorific value in specific units is multiplied by the volumetric characteristics of the furnace. The resulting value is multiplied by:
- Efficiency - 40%;
- combustion rate - 80%;
- fuel loading rate - 63%.
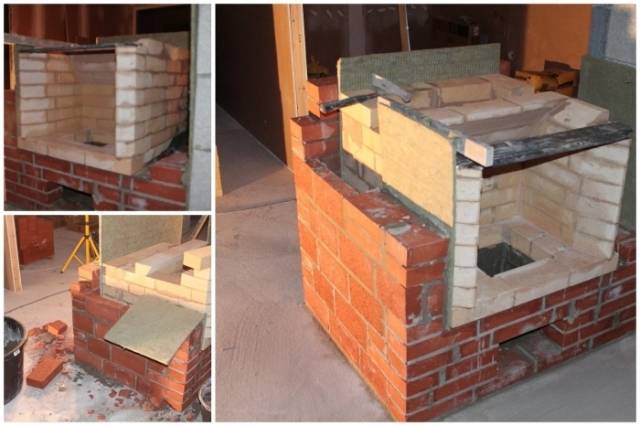
The construction process of the Swede
The process of erecting a Swedish stove. For the construction of the furnace, calculations are taken: for the stove - 71 by 41 centimeters; for the furnace (height, width, depth) 30 by 35 and 45 centimeters; for the oven 30 by 35 and 50 centimeters. These dimensions may vary depending on the oven version. The walls of the metal for the oven must be at least 4 millimeters. From the edge of the grate to the oven, the distance should be about one brick. There should be a quarter-brick gap from the back of the oven to the firebox. The oven is made of dense cast metal.
Stove orders Shvedka
When the oven approaches the firebox, the walls are additionally protected with vermiculite. The door must be cast iron. It is attached to the masonry, which guarantees a secure fixation.
Before laying the stove, the floor is thermally insulated from bricks. Insulation can be made from basalt cardboard. The insulation is laid so that a 1.5 cm layer is formed at the end. The middle layer is made of foil sheet. The foot of the oven (the first 2 rows) is laid out with widened centimeter seams, this is how a ledge is obtained. The brick is moistened before laying. Two subsequent rows form an ash pan and three doors are installed for cleaning the oven. The doors are mounted with a gap. An asbestos cord is inserted into the gaps.
| ORP Shvedka (Swedish stove) No. 3 |
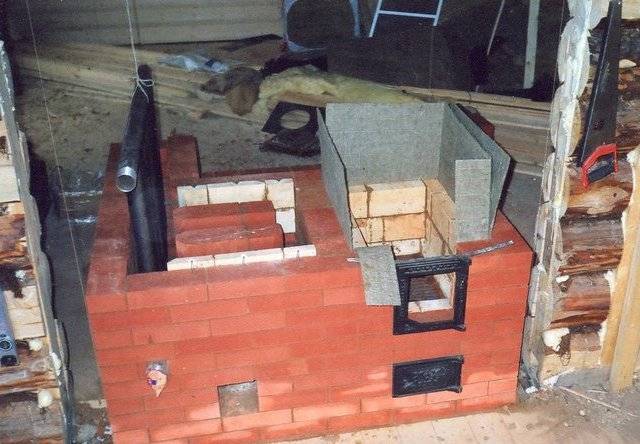
With a two-layer oven made of red and fireclay bricks, a distance of 6 millimeters is made between them. The inner lining of the furnace is lined with fireclay bricks. The grates are inserted. And the oven is inserted into the same row. From the sixth to the ninth, a combustion chamber is formed. The door is inserted. The tenth row covers the oven.
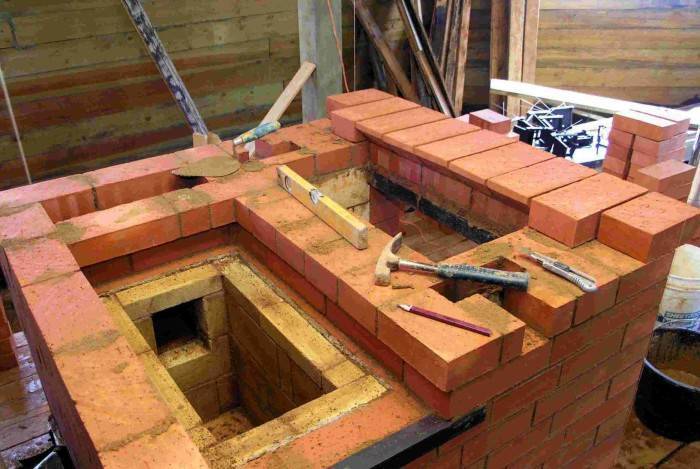
Next, the plate is laid and the smoke channels are made. When laying the slab, quarters are cut in the bricks. From the twelfth to the sixteenth, the cooking chamber is laid out, channels for the smoke outlet. The next two are overlaid with cut bricks. From the twenty-first to the twenty-eighth there is a chimney. In the twenty-seventh, a valve is inserted with a gasket of basalt cord in the gap. From the twenty-ninth row, there is an extension for the cornice of 5 centimeters. The channels (except for the pipe) are closed.
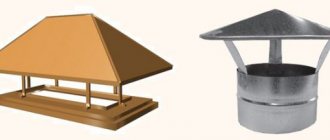
The next row is made even wider by 5 centimeters. Then the size is reduced to the original size. The pipe is laid out in 5 bricks. In front of the ceiling, a pipe fluff is made in 3 rows. The pipe is one and a half bricks thick. An iron chimney cap is placed on top of the chimney. The pipe going outside the house is laid out with cement mortar.
What to pay attention to when choosing?
In order for the brick cooking and heating stove to function fully, it is important to pay attention to the following details before construction:
- The size of the structure. If the dwelling is small, a simple stove is suitable for heating, which is placed on the side inside the main room, and the cooking chamber is placed towards the kitchen.
- The form. For a large house, corner options are suitable, because such a structure, when properly installed, heats 2-4 rooms at the same time.
- Heat transfer. It is important that the design of the stove gives off heat to the interior as much as possible.
For small houses and summer cottages, it is not worth building massive heating and cooking structures, because in this case the consumption of fuel materials is large, and this is not required for such an area. In addition to installing a brick stove, for a greater effect and thermal insulation, it is recommended to take a responsible attitude to the insulation of the entire home, because otherwise, all the heat will go out through the cracks in the walls, windows, ceiling.
Preparatory work before assembling the oven
An important part of the preparatory stage is the choice of the location of the stove in the overall layout of the house.Since the main task of the stove is heating, the center of the room is considered the optimal location.
But usually, for practical reasons, the location is shifted closer to the front door. As a rule, the stove is folded at the same time as the walls and roof are erected. For this, the foundation is prepared in advance, because the furnace weighs about 3 tons. Only a well-poured, well-established foundation will withstand such a load per 1 m2.
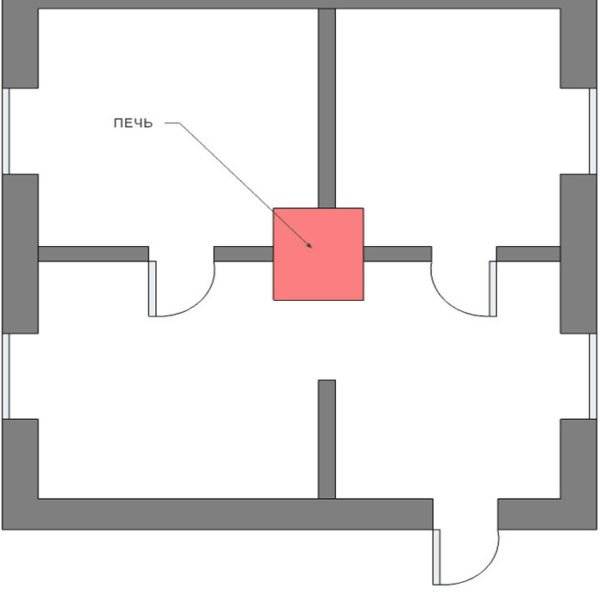
The optimal location of the stove in a residential building is at the intersection of interior partitions near the entrance doors
If the stove is being built in a house that has already been built, it is necessary to take into account the outlet of the chimney above the roof
When installing the pipe, it is important not to violate the rigidity of the roof frame and not get on the rafter, as this will significantly complicate the task of building a chimney
The summer-autumn period is considered a favorable time for carrying out preparatory work. It is best to give the foundation time to dry for at least 1 month, but ideally - six months, filling it in advance in the fall.
Holes in attic or interfloor ceilings are made immediately before laying the stove.
The roof covering is dismantled last when the stacking of the chimney is completed.
Pouring the foundation
Let us dwell in more detail on the manufacture of the foundation for the Swedish stove, since this is a very important moment for its further operation.
- The depth of the foundation is determined by region. The starting point is the depth of soil freezing in winter. If you make the foundation above this layer, displacements in the horizontal plane are possible. Therefore, on average, a depth of 0.8 to 1.0 m is chosen.
- The linear dimensions are calculated according to the dimensions of the furnace itself. The foundation is laid 10-15 cm wider and longer than the dimensions of the furnace. This is a generally accepted standard for the construction of soil supports.
- A sand cushion 15–20 cm high is poured between the soil and the concrete. With its help, the base of the future foundation is leveled and the pressure on the soil is evenly distributed. In addition, the sand perfectly permeates water through itself. In the future, it will remove moisture from the foundation when groundwater enters.
- After the sand, it is allowed to use a large fraction of crushed stone, broken brick, slate, tiles and other construction waste. They are tied with cement mortar. If possible, use natural stone with high strength.
- The reinforcement is placed closer to the upper layers. Its purpose is to strengthen the concrete mass and evenly distribute temperature changes over the entire area. Therefore, the metal mesh is laid in a horizontal plane 10-15 cm from the surface of the concrete screed.
- Immediately after pouring, the upper plane is leveled with a rule (or a wide trowel). And after setting and drying, several layers of roofing material are laid on it, which will play the role of waterproofing. Some masters prefer roofing material to roofing material. Others are synthetic materials with metal foil on one side. In any case, waterproofing is necessary, and you should not forget about it.
- A hole in the floor is cut in such a way that it is convenient to make oven masonry. And after the completion of the work - build up the flooring directly to the furnace body and install the skirting boards. To do this, add at least two additional logs, on which the edges of the floors rest. Usually they are made from a construction beam (50x75 mm and above) and fastened to uncut floorboards with self-tapping screws. Lags are placed along the walls of the furnace after work on the foundation is completed.
Practice has shown that a feature of the Swedish stove, like that of the Dutch stove, is a powerful downward flow of heat energy. Therefore, before starting the laying, several layers of heat-insulating material are laid under the base of the furnace. Usually it is basalt cardboard - an inexpensive and durable heat insulator with a thickness of 5 mm or more.A more expensive, but also practiced method is laying the first row of the base of the furnace with fireclay bricks. The low thermal conductivity of the brick prevents heating of the foundation.
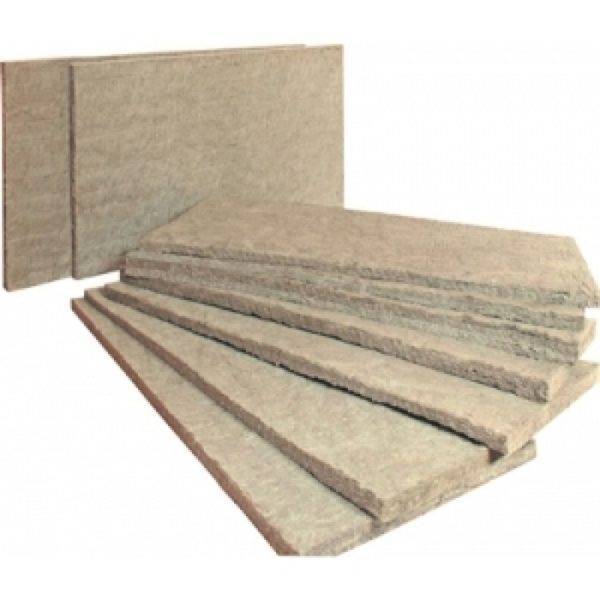
Basalt cardboard is an inexpensive and reliable heat-insulating material for furnaces.
Ordering example
The current scheme of the brickwork of the furnace contains drawings so that the user can imagine what he is trying to build, as well as an order that clearly shows the location of each brick. These project instructions must be followed with strict precision. Even a slight discrepancy can lead to inconsistency of components or incorrect operation of the device as a whole. The order allows you to calculate the required amount of material for construction. As in other stoves, the laying of a stove with a hob is made on clay mortar, since cement mortar can collapse at high temperatures.
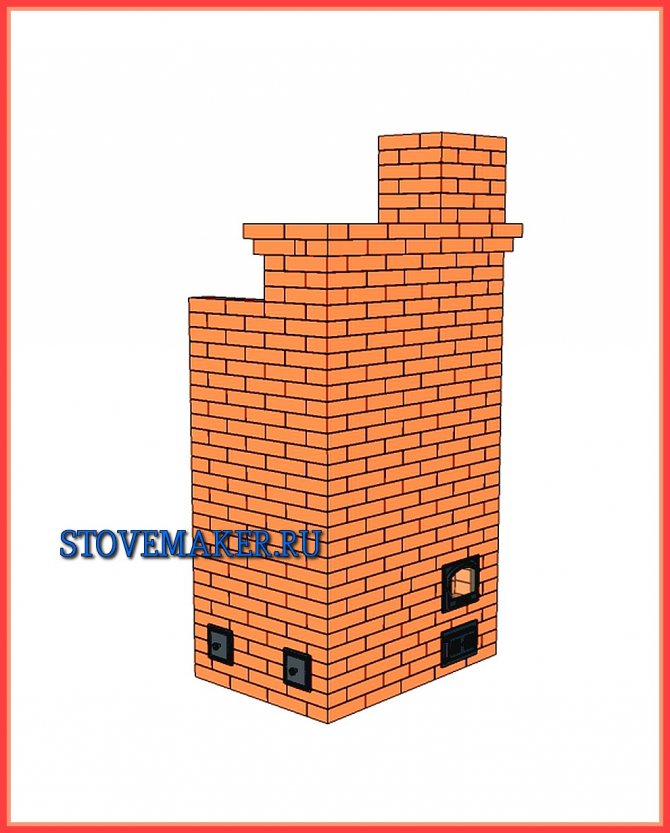
The most popular model was the Swedish stove, or, as the common people call it, "Swede". It is quite small, but at the same time it uses energy efficiently, converting it into useful heat. The pyrolysis technology is used in the furnace firebox, so such models are quite economical, because with the same fuel consumption, the Shvedka reaches 85% efficiency.
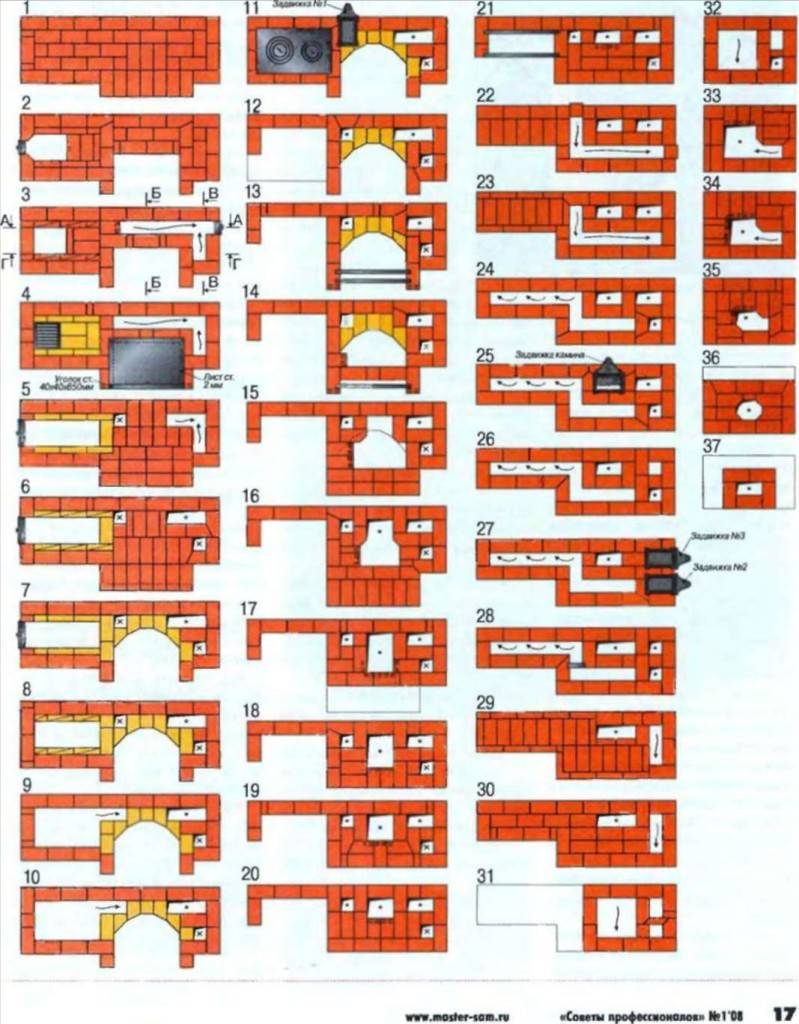
The order for the construction of the Swedes
The presented order is exhaustive in order to lay out a functional oven on your own, even without some experience in this matter. In the first and second steps, the base is formed. It is laid on a specially prepared foundation. Moreover, it is important to remember that a home building and a stove are two separate buildings and their foundations must be separate. Next, the formation of the ash pan, firebox and oven begins. The ash pan in the 5th row is covered by a grate and gives way to the main firebox.
The oven is heated not by a flame, but by warm air, but this temperature is enough to cook some dishes in it. The oven body is made metal and inserted into the formed niche. In the central part between the firebox and the oven, you can see the barrier, which was mentioned above. In the 10th row, this barrier ends, allowing the entire slab to be heated. But it can be seen from the diagram that one part of the stove is heated by a flame, and the other by hot air. This fact is taken into account when cooking, when you need to quickly lower the temperature. The pan is simply moved along the stove to the opposite edge.
Good to know: Combined wood and electricity ovens
In the next series, all attention is focused on the formation of channels. At the beginning of the diagram, the movement of warm air in winter and summer is shown. It can be seen that heat is given off in vertical channels, which are equipped practically along the entire height of the furnace. This is one of the features of the Swedish. In order to overlap in row 17, a sheet of slate is laid. In row 30, a damper is installed, and the chimney goes into a regular pipe.
Brickwork
By following this construction scheme, you will have an excellent DIY heating and cooking installation.
The first row should be perfectly even, because the whole harmony of the future heating installation depends on it. As in other models of stoves, solid masonry is made here, without gaps and holes.
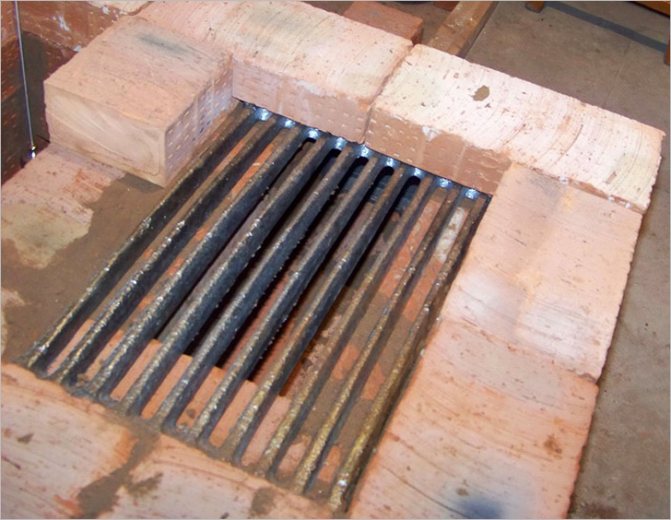
In the second row, everything is repeated, and it is also completely filled with ceramic material. The place of the fireplace insert is laid out with silicate bricks, and after the installation of this row is completed, the holders are attached and the fireplace grate is welded in.
Blowing chamber
In the 3rd row, they make out a blower chamber, cleaning channels and a place for an oven (if the Swede will be with an oven). Here they begin to form a vertical chimney. On the reverse side of the structure, a fireplace fuel chamber is mounted.Also, simultaneously with the masonry, the doors, tied with wire, are fixed.
At the back of the oven installation site, a corner of the brick is cut off to ensure communication with the cleaning chamber. The 4th row completely repeats the previous one, but lies in the dressing.
In the 5th row above the blower, a place for the grate is formed, but otherwise there are no differences from the previous stages. In the area of contact with an open fire (grate), silicate material is used. An oven, rewound with an asbestos rope, and a grate are also installed here.
At the next stage, the firebox door is installed. The sand-lime brick between the firebox and the oven must be placed on the ribbed part, which will contribute to better heating of the oven (the channel between it and the vertical one must be closed here).
The 7th row is no different from the previous one, and two strips of metal are laid on top of it, which will serve as a support for further masonry.
Steps 8 and 9 are performed according to a predetermined pattern, however, in the latter, two metal strips are laid above the oven. This will help relieve stress on the support areas of the camera.
Hob
The 10th row is distinguished by the formation of a place for the hob, under which the asbestos strips are laid. We reinforce the place above the oven and the firebox door with a corner. On the left, you need to provide a gap for the wiper door, in which you immediately install it.
Stage 11 provides for the brewing niche. The bricks to the right of the stove should cover the gap between it and the wall of the stove. At level 12, the bricks that cover the firebox are cut obliquely, which helps to direct the smoke in the right direction. 13 row - according to the scheme.
Levels 14 and 15 involve the installation of a mantel. The sixteenth is the overlap of the cooking niche with strips of steel with the corner laying at the front edge.
Until stage 19, everything is performed according to the scheme, and then chimney holes are formed. Doors are also placed on the cleaning channels. Further, everything is according to the scheme, and in the 21st and 22nd rows, the doors are mounted on the cleaners.
23 - according to the scheme, 24 and 25 - installation of valves on the fireplace chimney. The 26th row provides for the installation of the last door on the purifier and the combination of the gas outlet with a vertical channel. Further, the next two rows - according to the scheme.
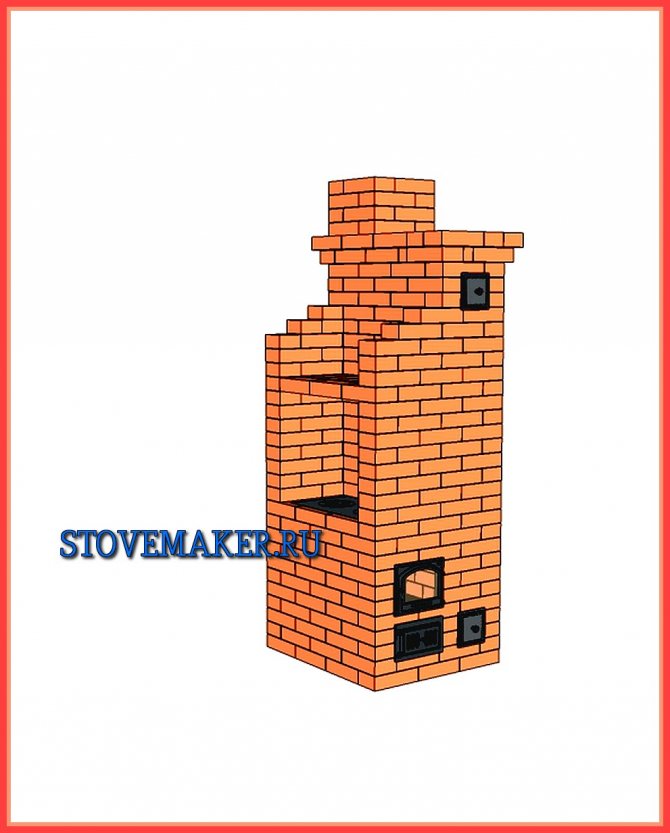
Level 29 and 30 - solid masonry with overlap of all channels, excluding the chimney, on which a valve is placed in the next row. A chimney is formed from the 32nd row, the height of which depends on the height of the ceiling, and the thickness should be at least half a brick.
Design features and principle of operation
The oven that provides cooking is somewhat different from the oven that provides extremely warmth in the home. In the summertime, the stove with the stove will have to be melted, but all the heat generated must go to heating the stove and be immediately removed. This is achieved by installing a special damper that redirects the heated air through channels inside the housing.
The basic structure of all wood-burning stoves is the same. You can highlight common elements that perform specific functions.
- The ash pan serves as a container for collecting ash. It is located at the bottom of the furnace and is a chamber with a door for ash removal. But this door is also a blower. Through it, air enters the firebox. The position of the door sets the intensity of fuel combustion.
- Fuel combustion takes place in the firebox. In different models of stoves, designers have tried in various ways to increase the proportion of energy converted into usable. Therefore, the furnaces are equipped with various screens that focus the radiation. The efficiency of the furnace depends on the size of the furnace, therefore, there should be no self-activity in self-construction. It is necessary to adhere to strictly established dimensions.
- The chimney ensures the removal of combustion products from the room. But, before the smoke gets into the chimney, it passes through the labyrinth of channels inside the stove, giving off its heat to the masonry.When the stove is switched to summer mode, the smoke after the furnace immediately enters the chimney.
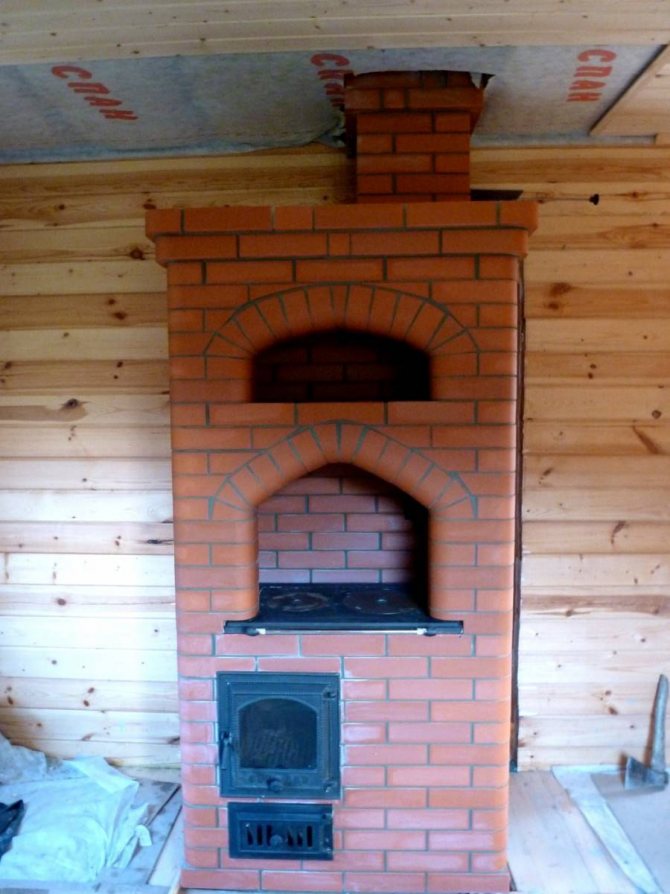
Construction is coming to an end
- The gate damper closes the chimney, increasing or decreasing draft. But its main purpose is to prevent heat leakage into the atmosphere. After the oven has completely burned out, the damper is completely closed.
- The hob, usually made of cast iron, is heated directly by the flame. But contact with an open fire is harmful to any material, including dishes, therefore, a barrier is built in the firebox to cut off the flame, and after this barrier, a hob is installed.
- Other elements due to the technical features of a particular model can be represented by cleaning doors, additional channels, parts for arranging an oven and a frypot.
Good to know: Electric pizza oven at home