Introduction
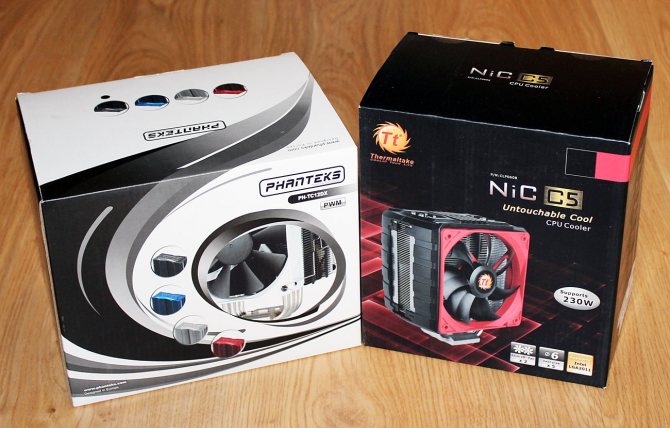
For a long time, we have not seen any innovations or truly interesting solutions in the field of air cooling systems for central processors to increase efficiency while reducing noise levels. So manufacturers have to update their lines of coolers and attract potential buyers in other ways, in particular by equipping devices with two fans at once. This trend has indeed been observed recently, since this is the simplest and, as you probably understand, the most inexpensive way to increase efficiency without significantly affecting the final price of the product. In particular, Thermaltake, having previously shown at CES 2013, in March this year announced four new coolers of the NiC (Non-interference Cooler) series, three of which are equipped with two fans. Less "prolific" in this regard, Phanteks has also released a novelty, which also has a pair of fans in its arsenal. There are other companies that have recently added coolers with two "turntables" to their assortment. That is, it is quite possible to speak about a kind of fashion for two fans in processor coolers. We will find out how all this turned out on the example of Phanteks PH-TC12DX and Thermaltake NiC C5 coolers.
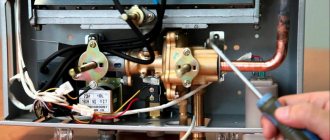
DIY assembly
So, all the starting materials have been prepared. In addition to them, you will need some locksmith tools and equipment, which will not be difficult to find. For example, in the absence of your own, you can borrow a welding machine from a neighbor in the garage (you still don't plan to assemble and test the product in an apartment, do you?).
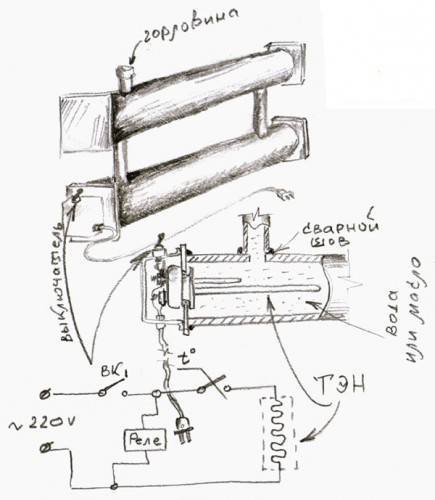
Diagram of a homemade heater
Do-it-yourself assembly will be carried out mainly in place, you just need to pay attention to such individual points:
- for better oil circulation, the heating elements are placed in the lower part and on the sides, they should not come into contact with each other and with the body;
- if the shape and volume of the body do not sufficiently ensure the natural convection of the liquid, one should resort to equipping the structure with a pump and an electric drive;
- for emergency drainage of oil and relief of pressure, it is recommended to provide appropriate holes with valves;
- the case must be grounded;
- it is recommended to thoroughly test the device for functionality before use.
As you can see, it is not so difficult to design an oil heater yourself. If you take great care in design and manufacture, it will respond to you with all its warmth in inclement weather. If assembling the device seems too complicated, you can always choose an oil cooler in the store.
Models and their differences
The models of such devices differ from each other mainly only in the size and power of both the heating element and the fan. The power range is very wide and can vary from 2 to 90 kW, when creating an air flow with an intensity of one to several tens of thousands of cubic meters per hour. Thanks to this variety, many low-power models are quite suitable for use at home, since in any case they provide significant savings, because electricity is consumed only to ensure the operation of the fan.
Therefore, a small fan heater with a water source of heat is best suited if standard devices are not enough to heat an apartment or office in winter, since even a large number of such devices will not create a high level of electricity consumption.Moreover, it is thanks to the saving of resources that, if necessary, you can buy a larger number of devices in case of a breakdown of some part or other unforeseen situation.
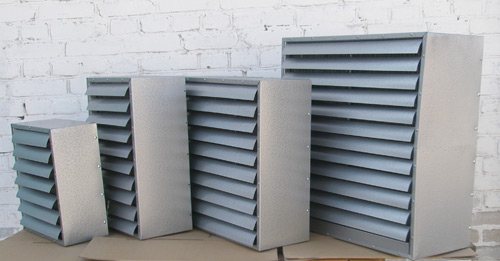
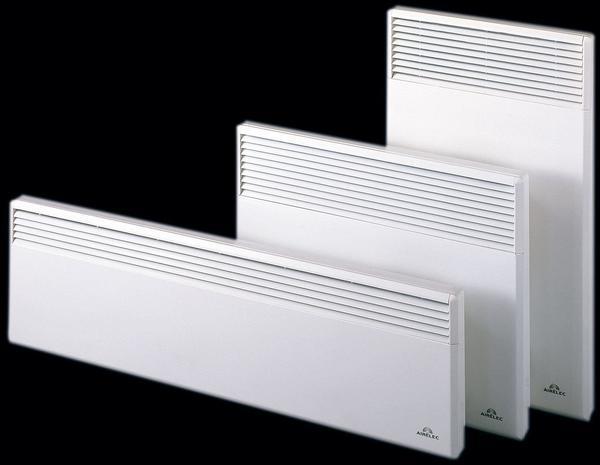
According to the design of the case, fan heaters are divided into two types:
- floor;
- wall.
Wall-mounted models are equipped with a special mounting console, which allows you to adjust the vertical position of the device and direct the stream of hot air in the desired direction. There is nothing difficult in the installation of such fans, it is enough to fix the console on the wall with anchor bolts and connect the water circuit to the device itself.
With minimal technical knowledge, this can be done by hand, without calling a specialist. Floor-standing options do not require fixation and fasteners, for them, a connection to the water supply is enough, so they can be installed in any part of the room and, if necessary, can be easily moved to another place. The price of wall and floor models practically does not differ and is mainly determined by the power, and not by the design feature.
Some industrial models can be connected to both hot and cold circuits at the same time. A water heater with two circuits can work both for heating and for cooling the room or a separate part of it. The cold circuit is connected in the same way as the hot one, from the central water supply. The price for such models is slightly higher, but it is better to buy just such a device than separate heating and cooling systems.


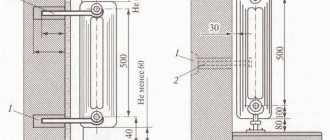
How to sink heating pipes into the wall
Many people think that sinking pipes into a wall is too dangerous. But if everything is done correctly, then problems can be avoided.
Use only high-quality and durable materials, and do not trust anyone else with installation. If the highway is located inside a wall, it is not easy to get to it.
All materials tend to expand and contract with temperature fluctuations. Therefore, heating pipes cannot be cemented or covered with plaster - they will wear out quickly, and joints and connections will break off.
The pipes must be covered with good quality thermal insulation to avoid heat loss. It is preferable to use materials with an upper heat-reflecting metal foil shield.
It is best to close the strobe with plasterboard, so that, if necessary, you can easily get to the highway.
Water heaters with fan
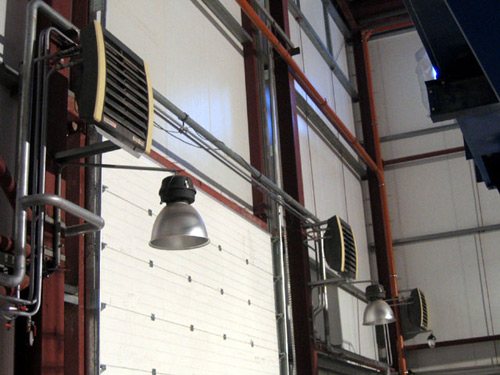
Asama Trade LLC supplies climatic equipment manufactured in accordance with modern energy efficiency requirements. We offer water heaters with a fan (water heat guns), which are designed to maintain the required temperature conditions in industrial, warehouse, agricultural and administrative premises, sales areas, offices and residential buildings. A special feature of water heaters with a fan is that they can quickly and evenly heat a large volume of air, even in buildings with high ceilings.
Show by: products
Add to cart In cart (open) Buy in one click Compare product Compare (open)
Type: Wall-mounted room thermostat with fan speed controller
Temperature setting range: +10 to +30 ° C
Operating temperature range of the device: from 0 to +40 ° C
Speed regulation: Yes, three-stage
Country of manufacture: Poland
Warranty period: 1 year
Add to cart In cart (open) Buy in one click Compare product Compare (open)
Heating power: 9.6 kW
Air exchange: 1200 m³ / hour
Maximum throw length: 8.5 m
Homemade heaters pros and cons
As a rule, homemade heat generators are copies of industrially manufactured devices.These copies, with rare exceptions, are inferior to the originals in many respects, but due to certain circumstances, the consumer often chooses a home-made unit.
"Pros" of using handicraft devices:
- relatively low cost (when making with your own hands and using improvised means);
- the possibility of assembling a unit of the required dimensions and manufacturing a body with the desired strength characteristics, up to vandal-proof performance.
The main argument "against" is the undefined degree of safety of home-made heating devices during operation, fraught with unpredictable negative consequences not only for the owner of the unit, but also for those around them.
This argument is due to many factors, and its validity is annually confirmed by numerous fires caused by handicraft heaters used in violation of the Decree of the Government of R.F. "On fire regime" No. 390 of April 25, 2012 (as amended on November 18, 2017)

Excerpt from the Decree on the fire regime in R.F. on the prohibition of the use of homemade heaters
As for the secondary arguments against, they are as follows:
- lack of legitimate guarantees from the manufacturer;
- uncertainty of some characteristics of homemade devices;
- low aesthetics and the degree of automation of handicraft units.
If acquaintance with these arguments still did not push you to buy a factory-made heater in the store, we will consider how to make the heater yourself so that the likelihood of an accident when using it is as small as possible.
Blowing the batteries with a fan
I am doing repairs, I am going to sew up the batteries (by adding ventilation grilles), naturally, the heat transfer will deteriorate. To improve heat transfer, I plan to blow off the batteries (if necessary) with built-in fans. Are there any prohibitions on this? Indeed, with effective airflow, I can take more than calculated for the project. I cry warmly according to the norms, there is no separate meter, apartment 15.
especially more on take away - in the room the estimated 20 * C - you will not heat it up to 40.
20 is not always the case. I plan to tie the fans to the sensor, set the system to 22 degrees. Another sensor for the battery, so that it does not thresh in vain when the heating is turned off. Although. What prevents to use it as a fan in summer, if necessary. Plus, of course, dust filters.
They will make noise, they will interfere with sleep.
Plumbing works Moscow and the region
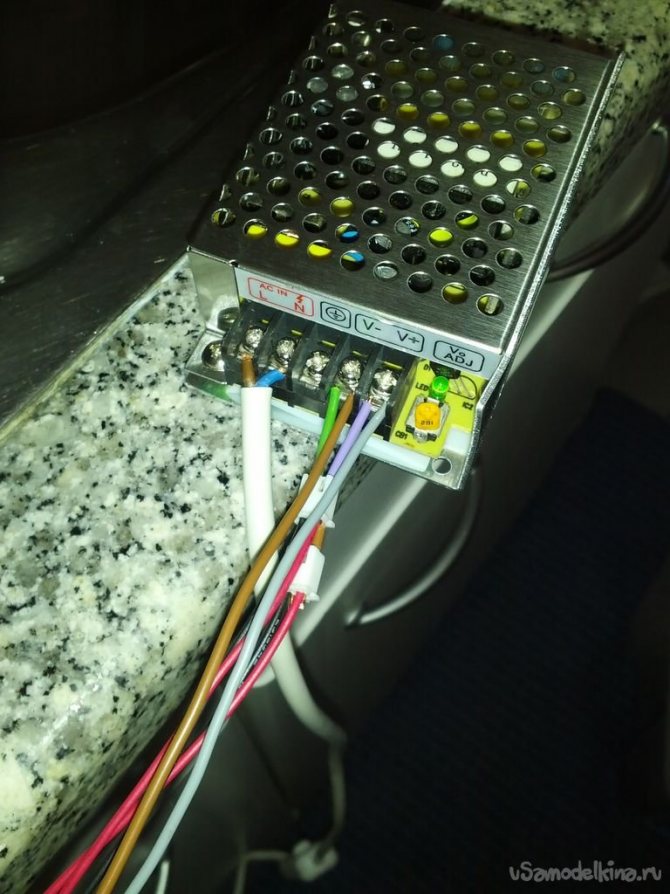
3-4, from the length of the batteries, computer. I have them in bulk. Plus understated power supply, volt 9, to reduce the speed. In this case, a jet stream is not needed; we get a stream of warm air, something like a fan heater. Maybe add some comfort? Then, the distribution of heat around the room is more even. The cost of electricity for the battery is 20 watts, a little. It will not work all the time, but when the temperature in the room drops. The fans themselves have a large gap between the blades, which will provide natural air convection when off. fans.
Place it boldly. The PTE states that the return line can be lowered as much as necessary. The heat workers will only thank you, especially if the heating is steam. When you create a story, plz, pictures. I really want to look, can we take it into service.
yes, but here just do not forget that if the supply of coolant to the radiators at some point becomes lower than planned and the fans will work at the same time, I think this will not add heat, since the cumulative effect will be blown out ahead of time
you need to think with which radiators it is more correct to use cast iron or aluminum with which radiators, for example, the rate of heat transfer and cooling is different for them
Regarding the fans, I have not met any prohibitions. Convectors with fans are produced.
2sansei I will put the sensor on the air temperature and the temperature in the battery (a cheap option - some diodes are switched on in reverse), I will make a circuit so that the fans spin when the air temperature is below 22 degrees, plus the temperature in the battery is higher than the air temperature, for me it is not difficult. I have cast iron batteries. About the air flow. I think it's better sideways, i.e. above and so warm.
2a-x-e-l-1 I will definitely take the photos, here the results may not be in time, it is not known when it will get warm and the batteries will be disconnected, but first I have ceilings, then the paneling of the batteries.
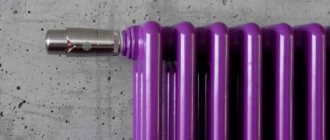
Yesterday I put 4 fans on 2 slats, on top of the battery, connected it (however, I did not find a powerful power supply unit, due to the repair somewhere in the boxes, which is weak in stock, it got hooked up to 8V). I liked the effect, there is warm air, something like a heater. True, all this is still purely for testing, after sewing, a full blowing will be formed. Sound at 8V is not audible. The power consumption of one fan is 1.5 W, of four - 6 W. You can leave it on without problems, without fear of electricity bills, even electronics should not be fenced, just a switch. If someone wants to repeat, work carefully with 220V, after all, the battery is grounded, it is better to put the trance in a separate box, farther from the battery, lead only 12V to the battery. My 12V wiring will be done from the ceiling. I plan to fix the fans from above, right on the narrow grate, through the foam polyethylene gaskets, so that you can get a filter together with the grate, between the fans and the grate, as which I will use a non-woven material (I do not know what it is called, it is available), on the bottom of the box there is also a narrow grill with a filter. I will glue the wall behind the battery with a heat insulator with foil, why heat the street. It is better to use acrylic putty on the seams of the structure, it will not dust on the back of the plasterboard structure, treat the sections with a primer.
Photos to the studio. So is the air flow going down?
Heat insulating screen
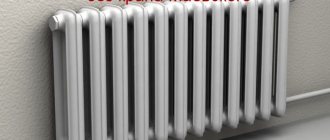
The best option to improve battery efficiency is to install a foil-coated heat shield behind the radiator. It should be 5-10 cm larger than the battery perimeter. The screen is white (aluminum) and black. The first reflects heat radiation towards the room, the second heats up by itself and transfers heat to the room, plus does not allow the radiator to heat the wall.
Be sure to install the screen with a heat-insulating layer against the wall. The best option for attaching liquid nails. Cut the screen to size, apply a drop of liquid nails to the back, and attach the reflector to the wall. Temperature increase by 2-4 degrees, depending on the number of sections and the level of coolant supply.
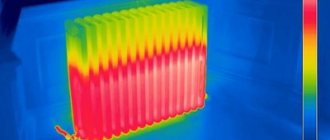
Acceleration of the heating battery
Off-season. It's cold outside. Utility workers, fagots, they waste heating. The batteries heat at half power. Dubak houses. The bald cat freezes and suffers. How long ?! Do you think I ran for an electric heater? Yes, hell, two! Our method is to overclock the heating battery.
So, according to the standards, there must be a certain number of sections of the heating battery for each room. The quantity depends on the footage. The average power of one section of a cast iron or aluminum radiator is about 200W. But this is passive heat transfer, and heat can be removed forcibly! This is what we will do
▌Steal the loot!
If the battery is warm at the output, then there is where to grab more energy. There is potential for overclocking! And good overclocking is unthinkable without good cooling! Therefore, we move after coolers.
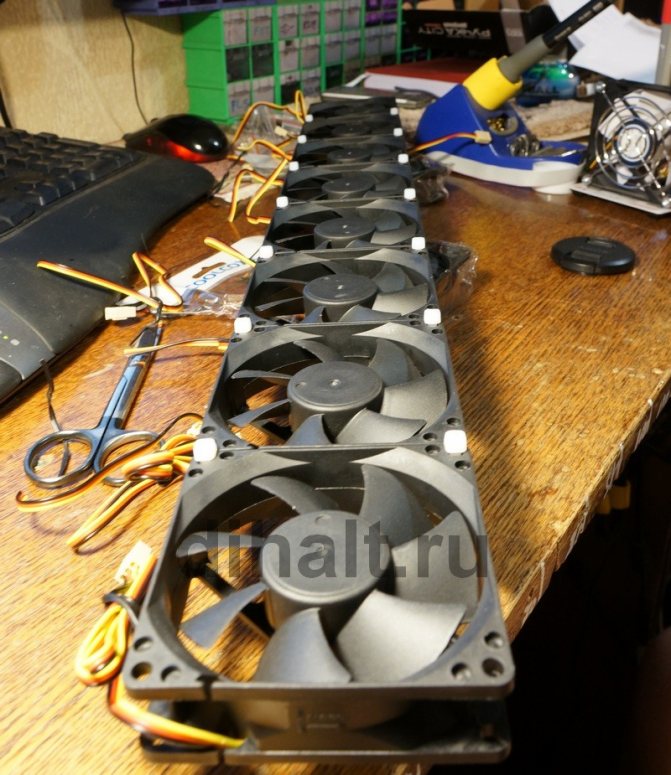
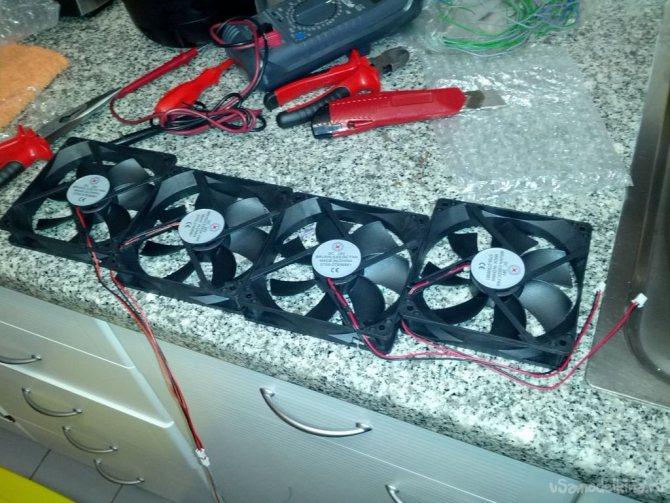
I decided not to bother and bought the most deshman coolers. 40r each. Normalx 80x80x25. They are exactly the width of the radiator section. I took a dozen at once:

Then he connected them with ties into a mighty battery:
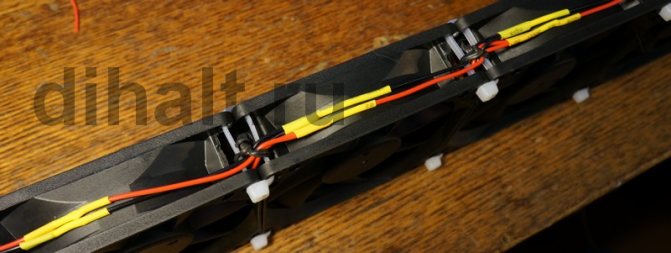
I used plastic ties for the connection:

It's fast, simple and reliable. If tightened well, it will be like a cast.
Then we connect all the propellers in parallel. We bite off the yellow wire, if any, and discard it. This is a speed sensor, we don't need it. And we connect all the red ones together with the red ones. Black with black.
It remains to pick up the connector:

If there is no connector, then it doesn't matter. You can stupidly twist the wires with the power supply.
And take the power supply from the router. You can take absolutely any block. If only he gave a current of 1A and the output voltage was constant, i.e. DC. The voltage itself can be from 5 to 15 volts. The higher the voltage, the more efficient, but the noisier. At 15 volts, the battery turns into a powerful fan heater that pumps the room in a matter of minutes.
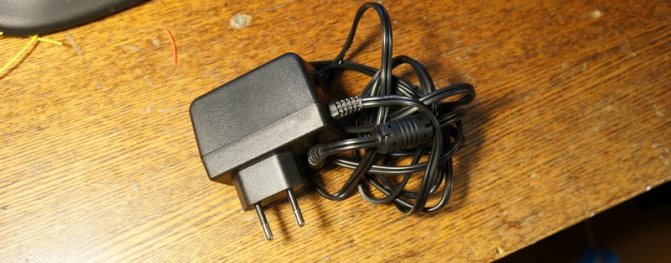
I took 5 volts. He was just at hand. With it, the coolers barely rotate, they are practically inaudible, and the battery is enough for that.
With plastic ties, I put everything on the battery
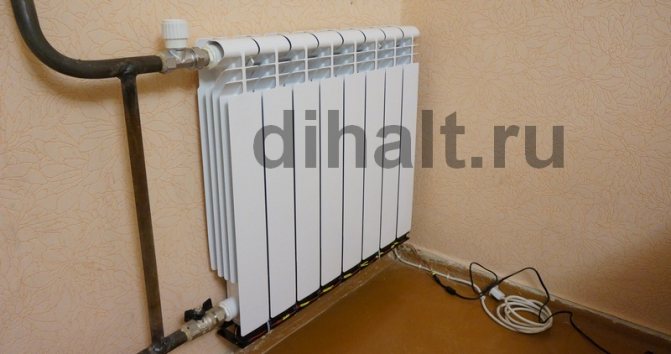
Connect the power ... Let's go!
Yes, you need to hang them in such a way as to blow out the radiator as efficiently as possible. My radiator has parallel fins inside. Through them, air moves from bottom to top by convection. Therefore, I set the fans so that they accelerate this convection, blowing from the bottom up.
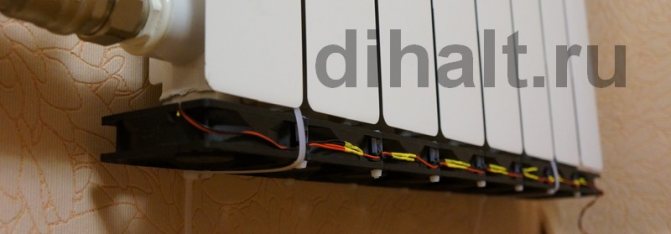
On a cast iron battery, there may be another optimal location. For example, blowing from the side or from the front. In general, take a look and decide for yourself. The ideal option should be to completely cool the battery to room temperature.
And, of course, you can not fence the battery out of coolers, but take an ordinary household fan and direct it to the radiator. The effect will not be worse.
This battery also has a nice bonus. If you are not the last member of the heat chain, then your disgusting neighbors who are listening to music loudly or stomping over your head will freeze to death along with cockroaches!
The power of electric radiators can also be increased by the same method. Of course, they will not eat less electricity - the law of conservation of energy is unshakable. With forced pumping, they just stop turning off. But there is also a plus in this, firstly, the radiator will not be so hot, it is more difficult to get burned. And secondly, the load on the power grid will be much lower, the machines will not be kicked out for nothing. After all, a constantly working 800W radiator is much less hardcore for wiring than a 3KW monster clicking back and forth like an iron. And in terms of power output, they will be approximately equal.
ZY
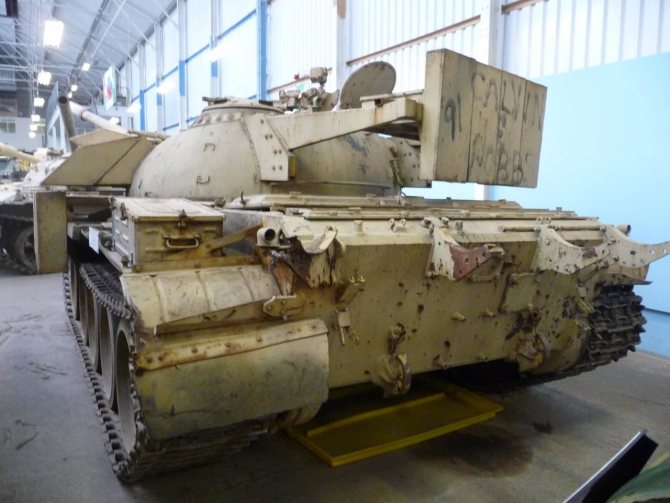
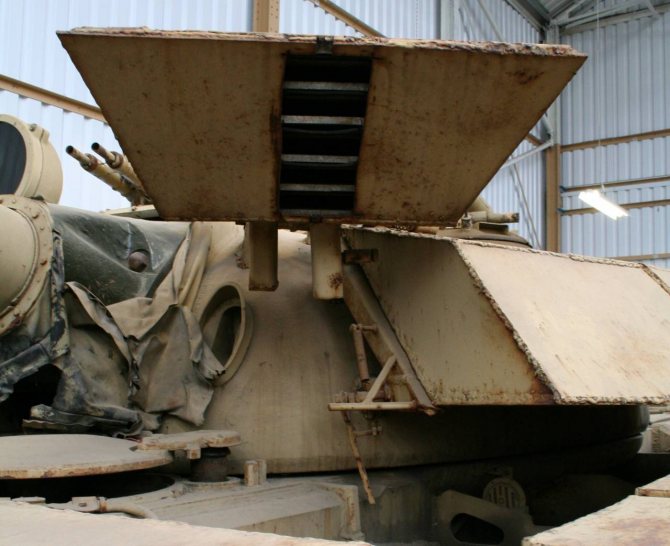
This creature was born when the CA, complained to me in ICQ, he says his ass is freezing. To which he was sent for coolers, and after a small upgrade of the radiator, Africa still came to his apartment. Here are his photos.

Here is such a garbage, little kids. Cold batteries and warm apartments
Dark color
If you paint the radiator in a dark color, then the heat transfer efficiency will increase - this is the law of physics. It will not give a large increase in heat, but it will raise the room temperature by 1-2 degrees. It is necessary to paint not only the outer edges of the battery, but the entire radiator, it is advisable to select heat-resistant paint.
There is only one drawback - a dark radiator spoils the look of the room, and you can only paint the old cast iron structure - painting a new bimetal is not the case. The method has been tested and works, so do not look for extreme in it.
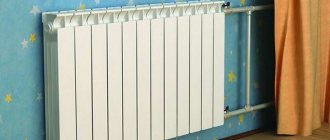
We make a convector out of an ordinary battery
Hot water radiators, or simply batteries used in centralized heating systems, distribute heat through rooms using the principle of passive convection, which is very inefficient in terms of heat loss, especially if the battery is in the corner of the room.
For this reason, there are convection radiators equipped with a fan, which improves heat distribution throughout the room, accelerating the circulation of air between the battery sections.
In this master class, I will show you how to pump a conventional battery to a convector battery with your own hands.
Step 1: Assembling the fans
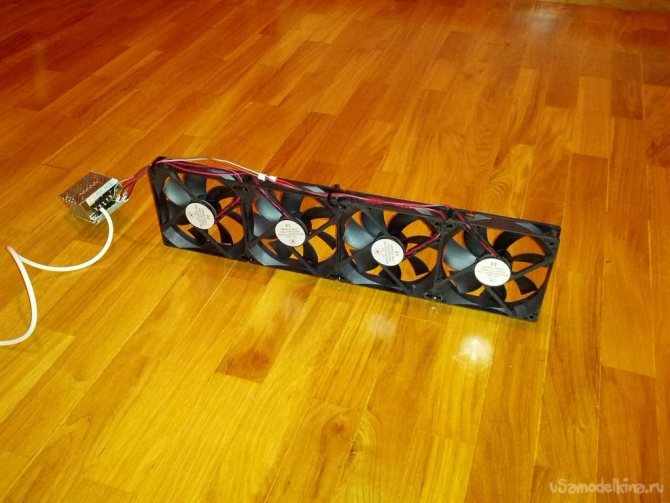
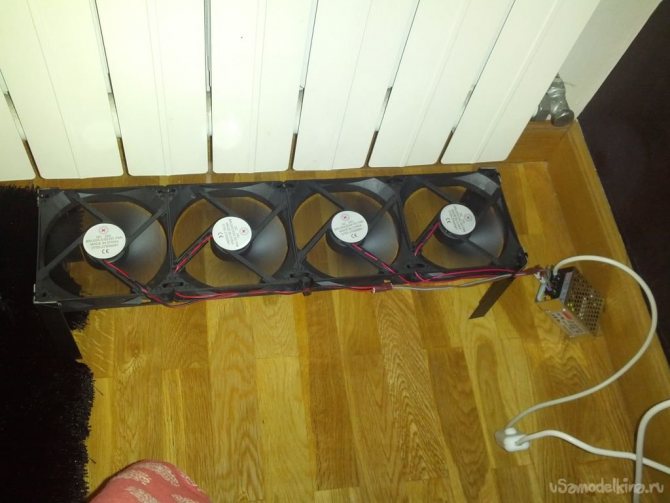
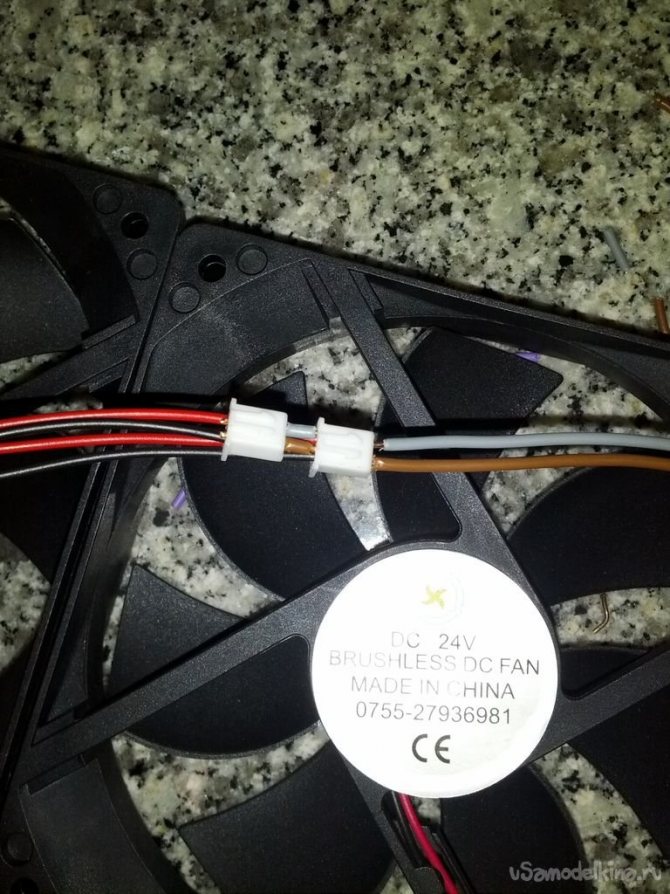
I took 4 fans Brushless DC Cooling Fan 7 Blade 24V 120mmx120mx25mm
.
This type of fan is very quiet and fits well with my battery. A connection of 4 such fans will be enough for my pipe in length.
Fan characteristics: - 7 plastic blades - speed of 1600 rotations per minute - air flow 58 cu. ft / min. - 38 dB noise. - Power supply: DC 24V, 0.20A
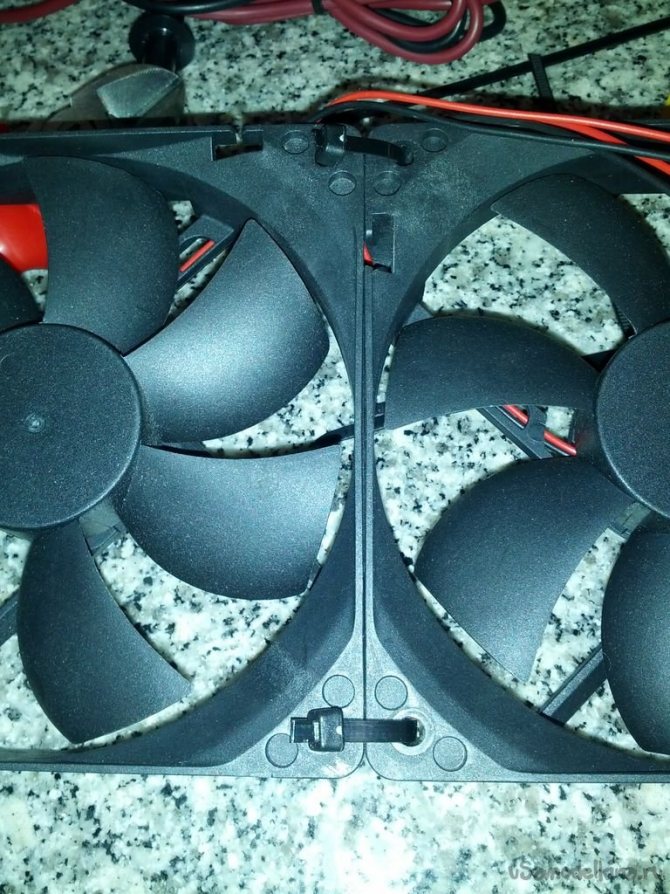
These fans cost me 1200 rubles with delivery. Structural strength is provided by cable ties that pass through the holes in the corner of each fan and tie them together.
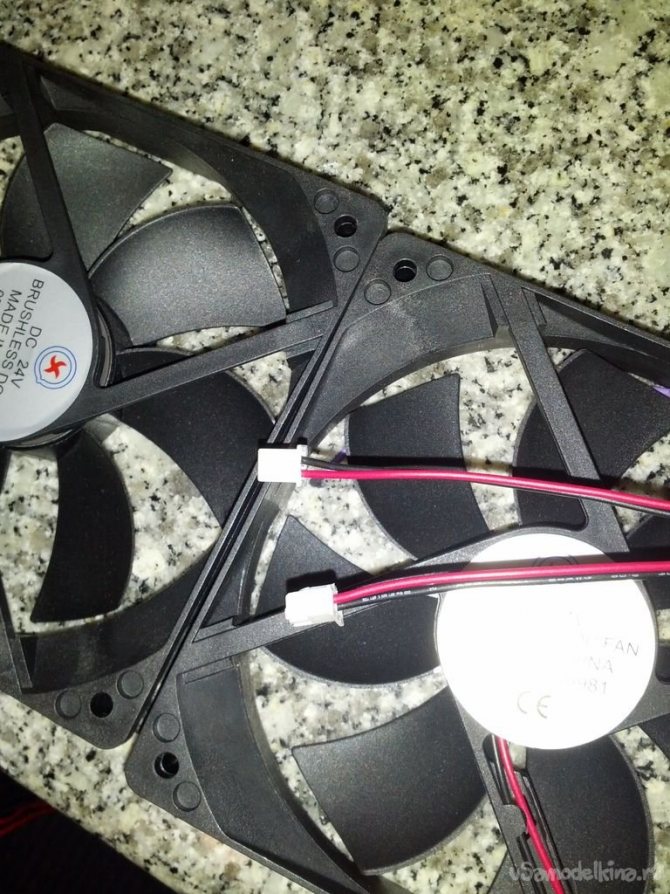
Step 2: Connect the wires
The fans use standard 2-pin connectors like motherboards. They hold copper cables well. You can also connect the 2 connectors with a small piece of cable by inserting one into the back of the other.
This will help reduce the number of cables connecting the fans to the power supply. The power supply is connected by a 2-wire AC cable on one side and DC cables from the fans on the other.
The photo does not show the switch and the standard plug at the end of the AC cable. I took the power supply unit like this - 24V Universal Regulated Switching 25W Power Supply
.
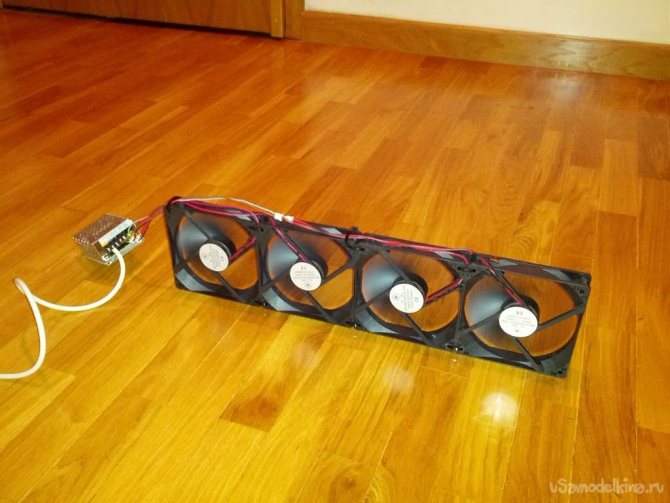
Step 3: Checking the fan operation
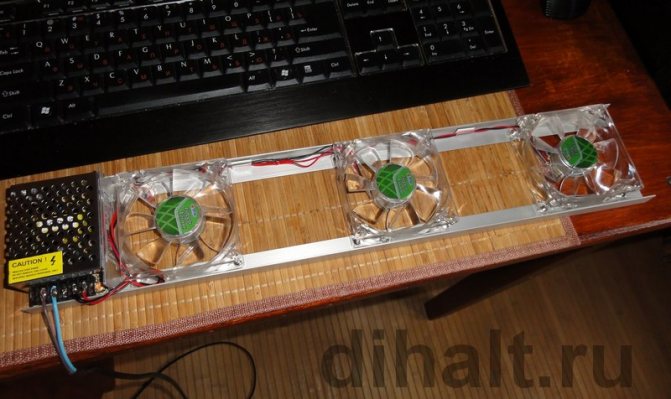
I connected the fans and tested them before installing them under the battery.
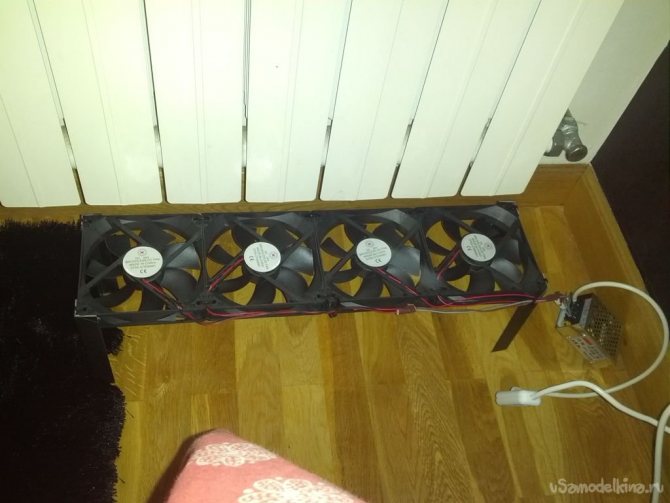
Step 4: legs and other tweaks
I fitted my fans with 4 legs from a corner cut into 15cm pieces. Then I just put a section under the battery. As a result, I got excellent heat distribution throughout the room, using almost silent fans consuming a total of 24 watts:
- fans: 4 * 0.2A * 24V = 19.2 W - power consumption: 80% of the total supply - total power: 19.2 / 80% = 24W
This is how I pumped my standard hot water heater to a convection radiator.

Assembling the structure
It is not difficult to assemble radiators together, but first you should purchase new intersectional gaskets or use an asbestos cord impregnated with graphite powder previously diluted in drying oil instead.
Since the temperature inside the boiler can exceed +600 degrees, it is worth taking care of the gaskets in advance. The tightness of the entire structure depends on their quality and strength.
The sequence for assembling radiators is as follows:
Nipples equipped with right-hand and left-hand threads are screwed into each section. Asbestos cords are wound around them.
The sections are connected in pairs by alternately tightening the nipples
It is important to make the same number of turns with the wrench, so as not to cause distortion. All sections of the cast iron radiator are connected in the same way. The return and supply pipe should be connected diagonally, closing the unused openings with plugs .. On one side of the riser there should be a right-hand thread, and on the other - a left-hand thread
If this does not work, then you need to screw on the nipple, and on it a coupling with a drive
There should be a right-hand thread on one side of the riser, and a left-hand thread on the other. If this does not work out, then you need to screw on the nipple, and on it a coupling with a drive.
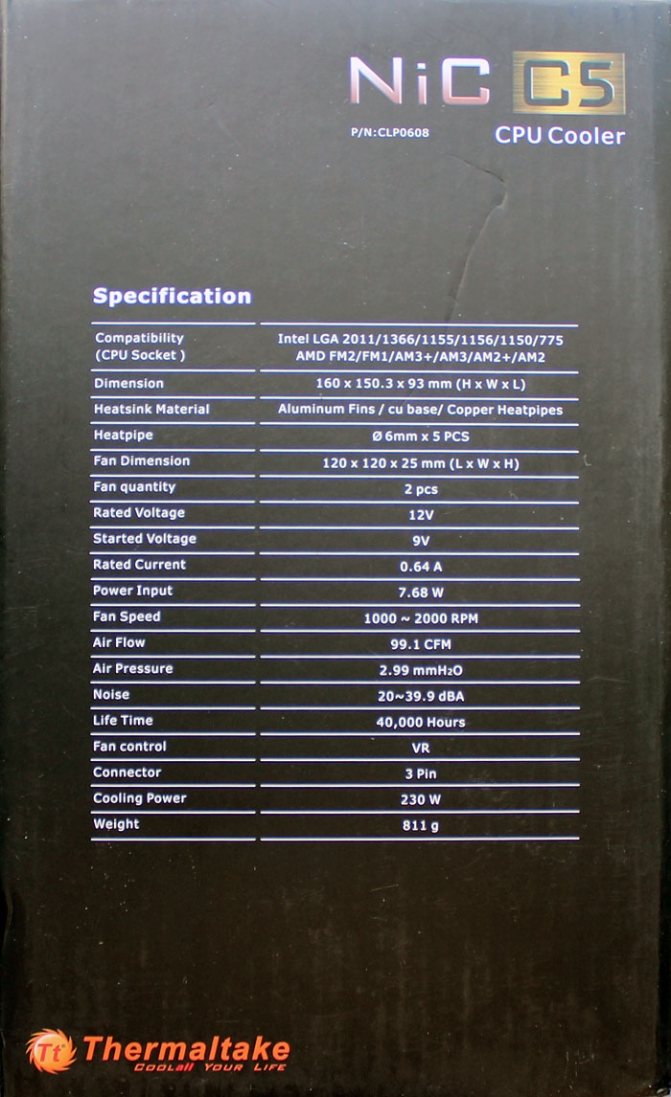
Thermaltake NiC C5 CLP0608
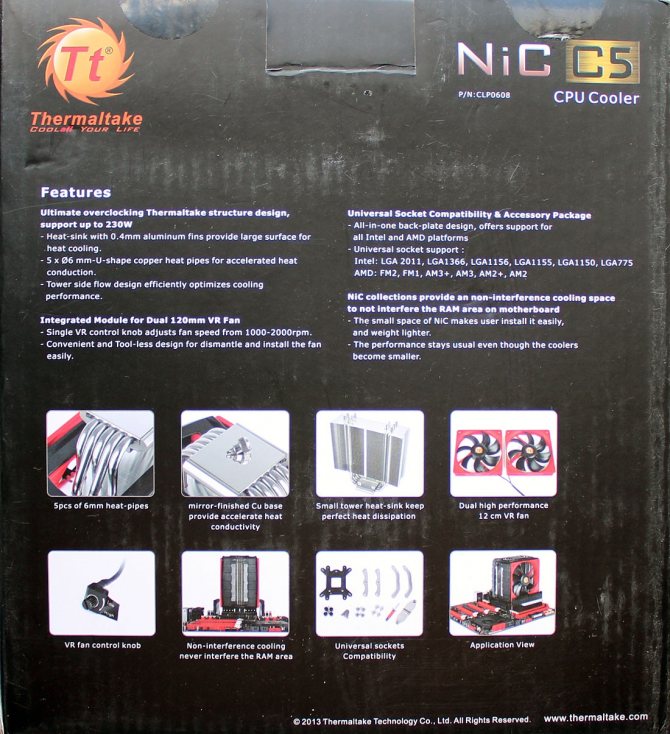
As we already mentioned in the introduction of today's article, Thermaltake has released four coolers of the new NiC line at once. Model C5 (CLP0608) is the oldest and most expensive of them. The NiC (Non-interference Cooler) series of coolers is specially designed for systems with memory modules equipped with high heat sinks, which have become very popular lately.
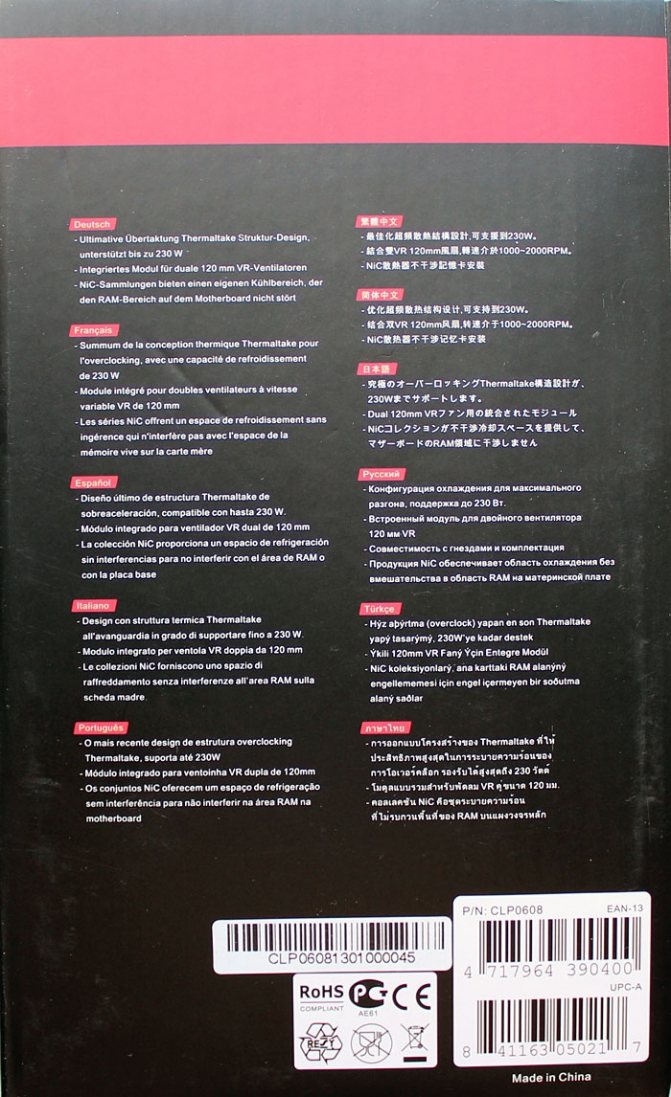
The box, made of thick cardboard, is no less informative than that of Phanteks. Here you can find technical specifications, a description of key features with photos, and a list of supported platforms.
|
|
|
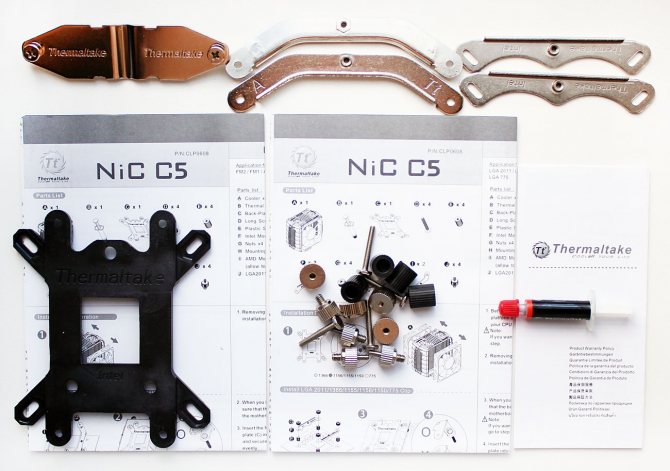
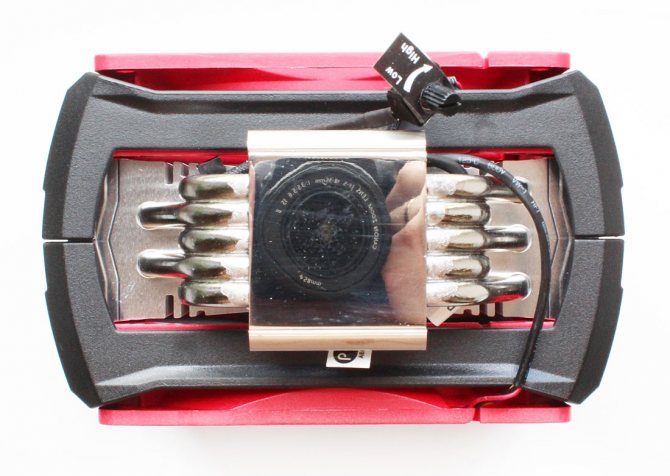
Inside the cardboard box there are soft polyurethane inserts in the shape of the cooler, in which it is fixed. Accessories are sealed in a separate box. These include steel rails and mounting kits, a plastic reinforcement plate, and instructions and thermal grease.
Thermaltake NiC C5 costs $ 5 more than Phanteks, which is $ 55. The cooling system comes with a three-year warranty. Country of origin - China.
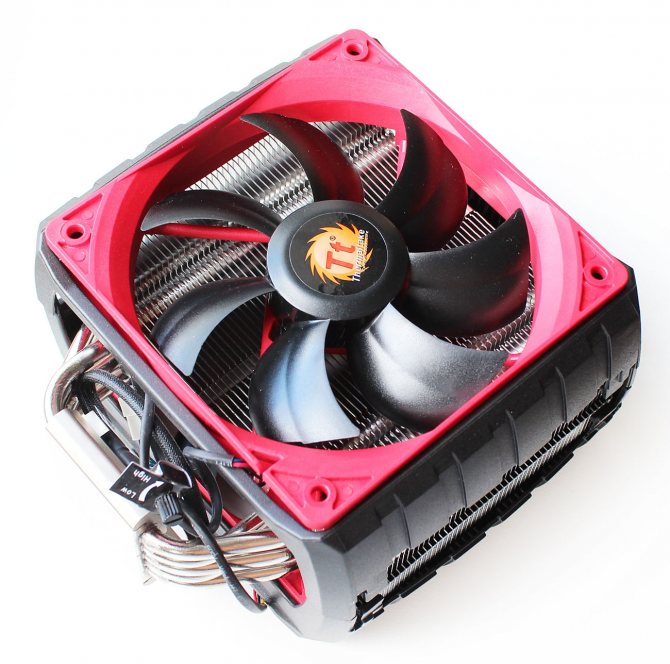
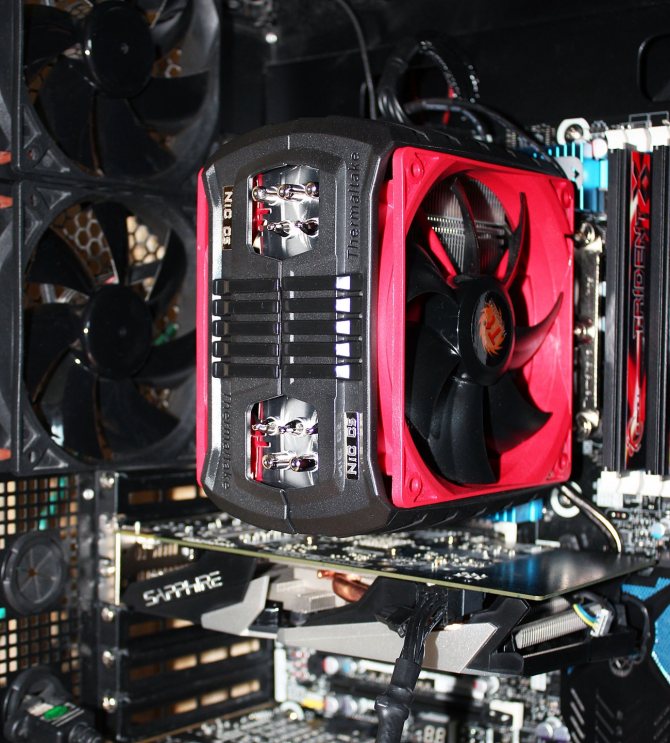
Thermaltake NiC C5 is a bright and catchy mid-sized cooler. The red fan frames contrast with the black impellers and black plastic "shells" that cover the radiator.
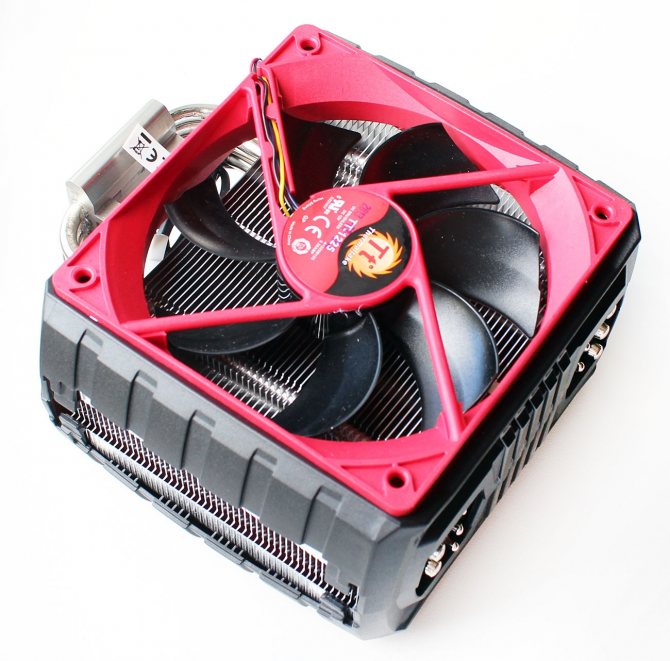
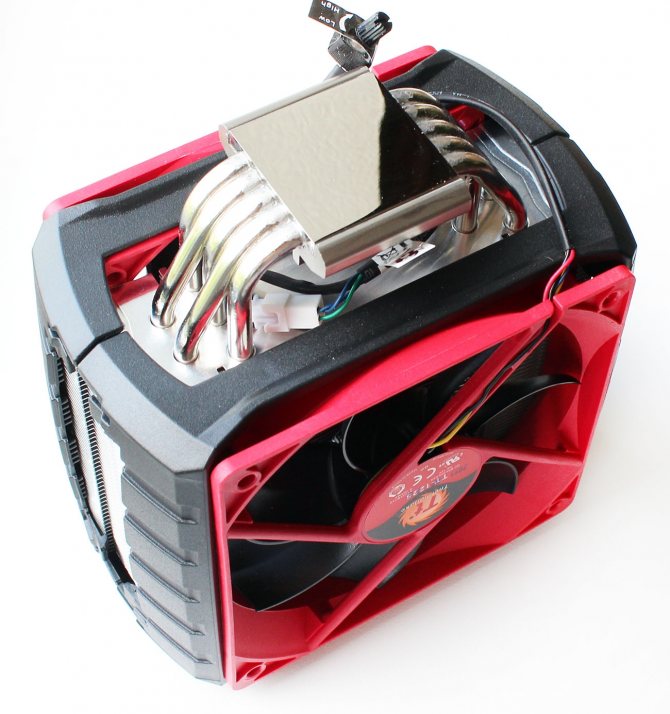
One cannot but pay attention to such a cooler. Its height is 160 mm, width - 148 mm, and its thickness is only 93 mm, which is really a bit for a cooler with two fans.
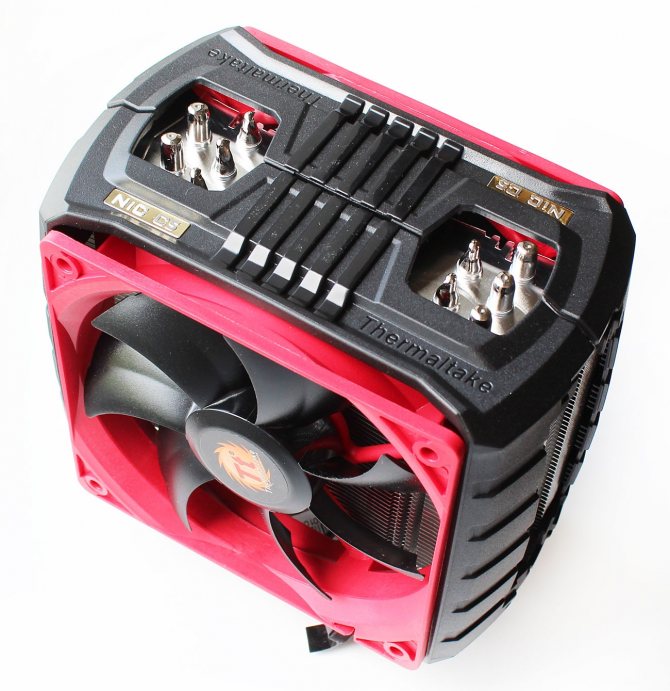
The fans are installed for blow-in and blow-out and are fixed in plastic casings that leave open the sides of the radiator ...
|
|
|
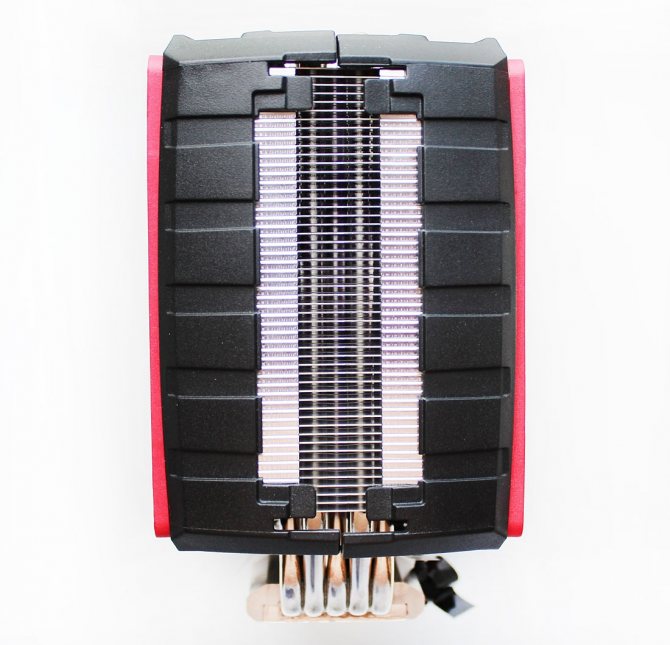
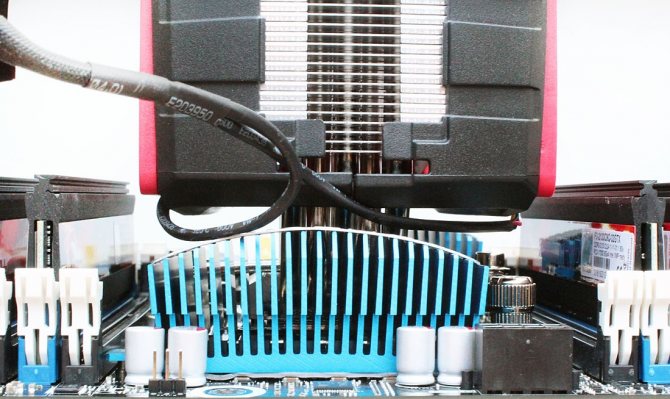
... as well as its top and bottom in the heat pipe zones.
The radiator itself is assembled with 52 aluminum plates 0.4 mm thick, pressed onto heat pipes with an intercostal distance of 1.7 mm.
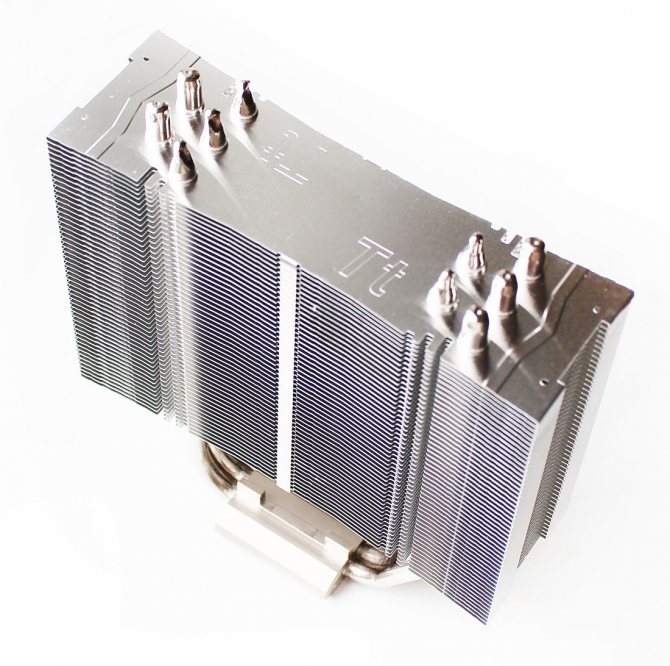
The area of such a radiator is slightly larger than that of Phanteks PH-TC12DX - it is 5780 cm2.
Five 6mm nickel-plated heatpipes are soldered to the base in grooves, in which they are laid without gaps.
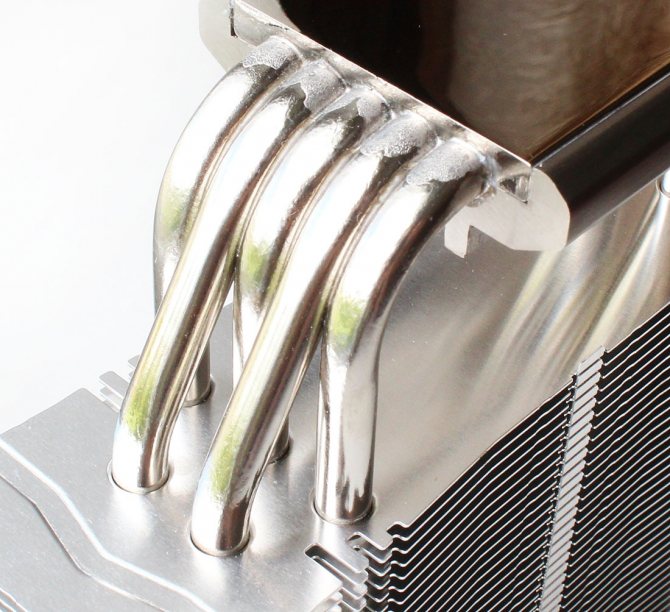
A nickel-plated copper plate with dimensions of 40x40 mm and a minimum thickness of 1.5 mm (under the tubes) is perfectly polished.

However, unlike the Phanteks base, its evenness leaves a lot to be desired. The bulge in the center of the base did not fail to affect the usefulness of the contact between the heatsink of the cooler and the heat spreader of the processor.

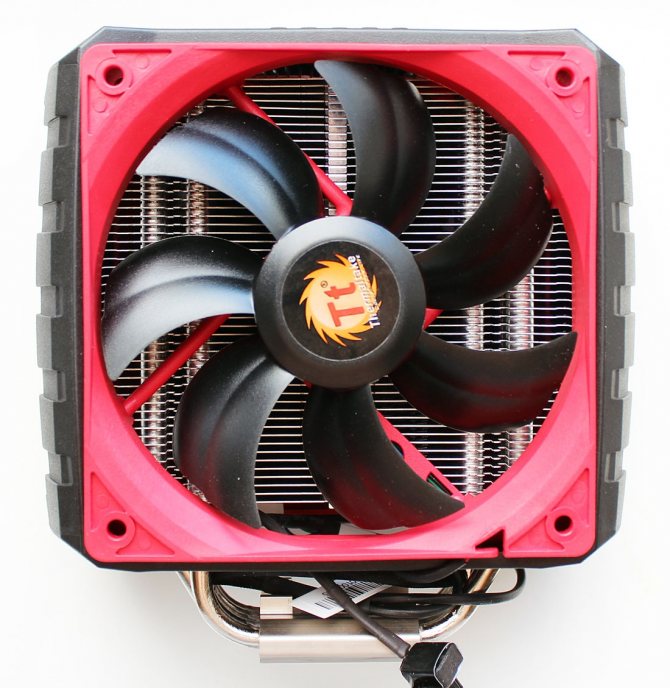
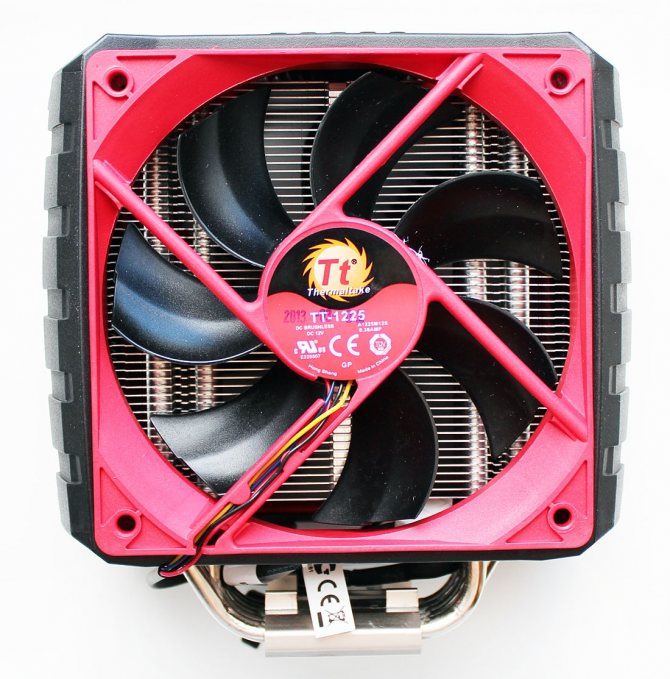
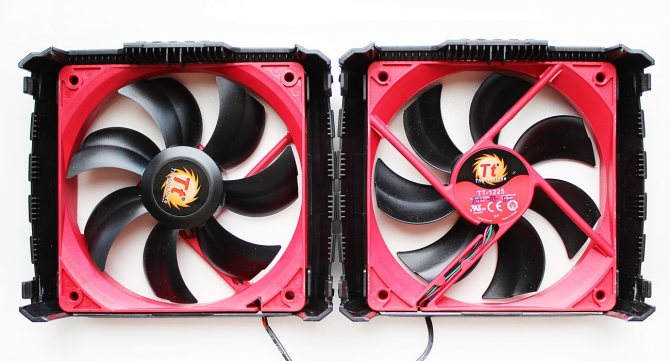
Two fans of standard size 120x120x25 mm rotate synchronously and are equipped with a speed controller.
It is installed on a short cable from the 3-pin header for connecting the fans to the motherboard.
In our opinion, this method of adjustment is inconvenient, since each time you have to open the case of the system unit to change the fan speed. As for the fans themselves, they are interesting in the shape of the blades, consisting of two sail-shaped halves.
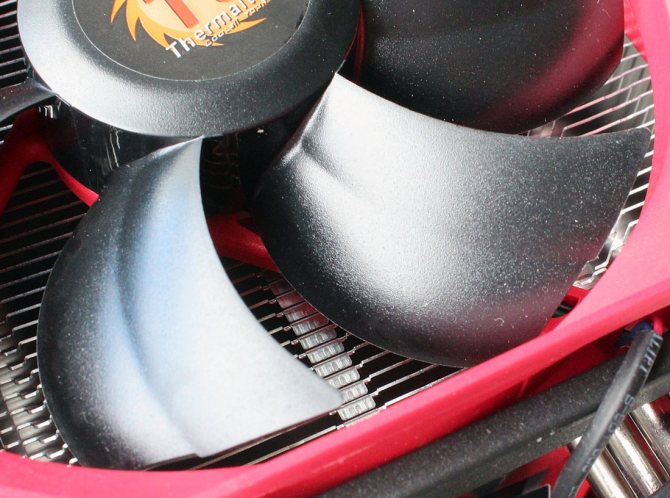
The description of Thermaltake NiC C5 does not explain this solution in any way, which is strange, because marketers are so fond of such "features". In our opinion, such blades are made to increase the pressure of the air flow pumped between the fins of the radiator, because it turned out to be relatively dense in the NiC C5.
The fan speed can be adjusted from 1000 to 2000 rpm. The maximum airflow is declared at 99.1 CFM, the static pressure is 2.99 mm H2O, and the noise level should vary from 20 to 39.9 dBA.
The 40 mm stator sticker shows the fan model name and electrical specifications.
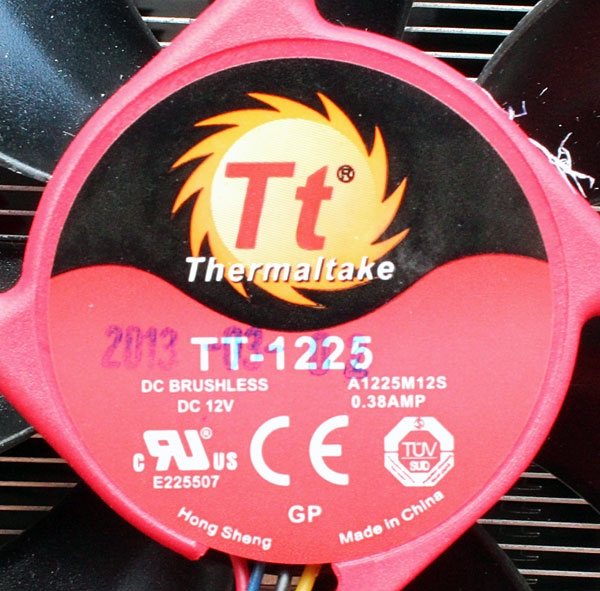
With the declared 3.8 W specifications for each "turntable", one fan consumed a little more than 4 W, which is twice as much as that of the Phanteks. But the starting voltage turned out to be slightly lower - 3.8 V. The cable length is 300 mm. The bearing is ordinary - sliding, with a standard service life of 40,000 hours, or more than 4.6 years of continuous operation.
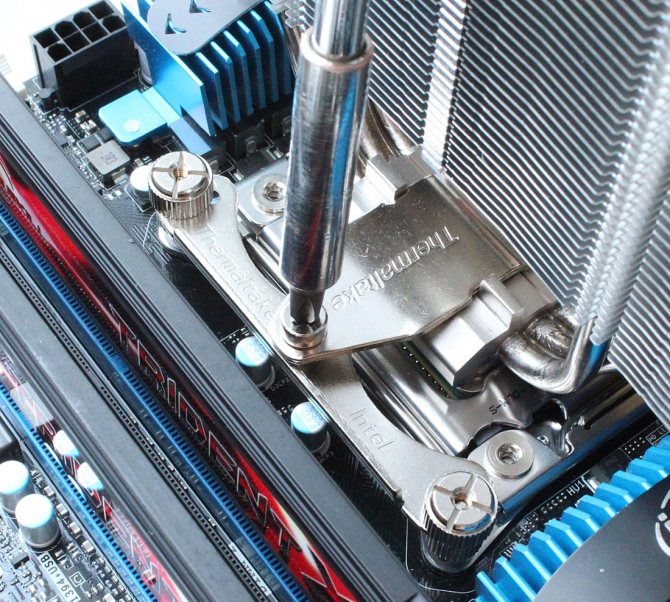
The NiC C5 installation procedure is detailed in the instructions, but in our case - for a platform with an LGA2011 connector - it is no different from the Phanteks PH-TC12DX installation.

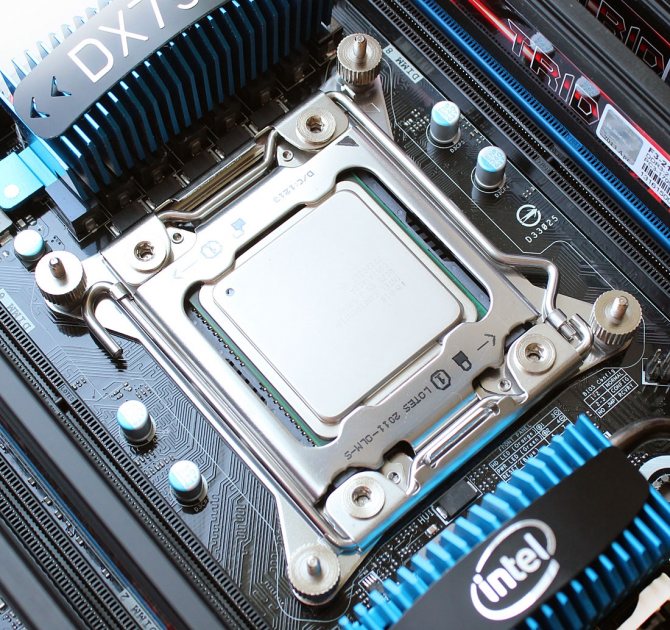

Once installed on the board, the distance to the lower border of Thermaltake NiC C5 is only 36 mm.
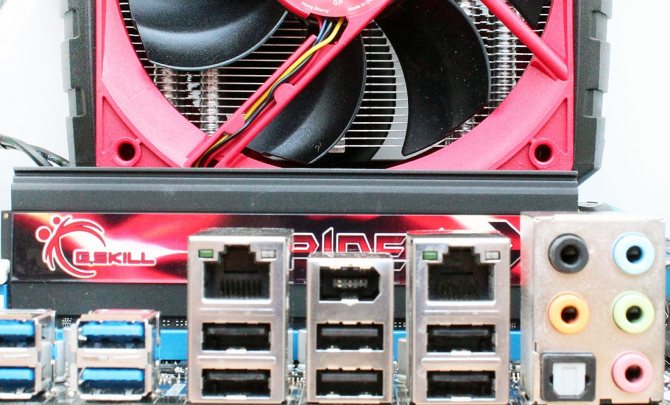
However, as we mentioned above, it is narrower than most other dual-fan coolers, so it is unlikely to interfere with installing RAM modules with high heatsinks.
Thermaltake is only 3 mm higher in height than Phanteks, therefore, most likely, it will also fit into narrow case of system units without any problems.
Well, he looks, in our opinion, more attractive. However, the taste and color, as they say ...
How the choice of a convector depends on the size of the room
The choice of suitable convectors for heating begins even when designing a heating system, at the time of building or renovating a house. If you are planning a modern renovation, and you will have panoramic windows, then you need to take a closer look at the floor convectors, and foresee niches for embedding them earlier. In all other cases, it is quite possible to get by with conventional wall models, placing them under windows and on blank walls. If you have a practically open space, then skirting convectors are your option. They have minimal dimensions.
First of all.When choosing a convector, you need to pay special attention to the power of the device. They are the same for almost all options, and usually equals 1 kW per 10 sq. m of usable area of the premises. In this case, the height of the room should be no more than 3 meters. For each window opening in the room, add 0.2 kW. This rule does not apply for solid glazing.
Special attention should be paid to the height of the device. When installing the device in a floor niche, before starting work, you need to first estimate its dimensions with the dimensions of the opening. The average parameter is approximately 30 cm. In this case, the material used in the manufacture of the box also plays a role. It must be made of high quality anti-corrosion alloys.
The ratio of the power of the device to the area of \ u200b \ u200bheated room:
- 5-6 m2 - 500W;
- 7-9 m2 - 750W;
- 10-12 m2 - 1000 W;
- 12-14 m2 - 1250 W;
- 15-17 m2 - 1500 W;
- 18-19 m2 - 1750 W;
- 20-23 m2 - 2000 W;
- 24-27 m2 - 2500 W.
When choosing a unit for your room, you must use this particular scale. The required heat output is calculated in the same way as in the case of conventional heating radiators, based on 100 W for every 1 sq. m. If we talk about choosing a device manufacturer, then there are some nuances - devices manufactured in Russia are very different with a good combination of price and quality. The imported equipment is of higher quality, but it is also expensive. As for China, it is not recommended to buy cheap models from manufacturers from this country.