Floor heating device methods
In wooden buildings, warm floors with a coolant can be mounted in 2 ways:
- Traditional, under the screed made of cement-sand mortar.
- "Dry" method, on wooden logs or beams
Since in houses made of wooden beams, the floors of the first floor or the ceiling above the basement are often concrete, the traditional method of installing floor water systems cannot be completely swept away. Moreover, you should not be smart on such bases with a warm floor on wooden logs, this will lead to unnecessary costs, and the result may not meet your expectations. It is better to arrange a heating system under the screed on rough concrete floors, and only then lay the flooring made of wood.
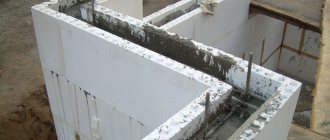
The situation is completely different when the house is with wooden beams. Screed with a heating circuit should not be performed on them, and here's why:
- A cement-sand screed has an additional load, for which the overlap is not always designed.
- A good wooden house is constantly "breathing", as a result of which the layer of mortar can crack, since the amplitude of its expansion does not coincide with the processes in wooden structures. It will be necessary to compensate for the expansion of the heating circuit, which is quite difficult and costly.
For reference. Sometimes wooden houses are often built from insufficiently dried profiled timber, which is why, at first, changes occur in the thickness of the structures, leading to cracks in the material. In such conditions, the screed will certainly suffer.
The use of various electric underfloor heating systems is not excluded, of which the most acceptable option is the use of infrared underfloor heating for heating a wooden house. A thin polymer film with heating elements applied on it is laid directly under the floor covering, no screed is required, which greatly simplifies installation work. However, in this case, the choice of energy resources for heating a dwelling is limited to electricity, while the coolant of water-heated floors can be heated from a gas, solid fuel or diesel boiler.
Some homeowners, in a tribute to tradition, have built brick ovens in wooden houses with a heating circuit for water. In this situation, there is simply no alternative to floor heating circuits with a coolant.
What it is?
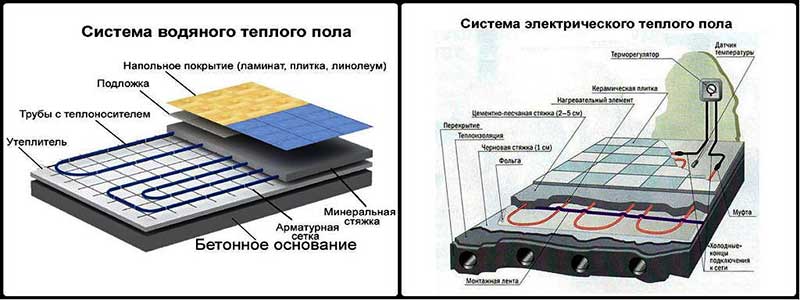
The water floor system is a network of pipes (usually metal-plastic) that are installed under the floor covering. These pipes are connected to the heating system, and hot water will be supplied through them, which heats the floor. They are laid on floor joists or on a rough surface.

In a house made of wood, it is impractical to use a cement screed due to its heavy weight. The following systems for laying a warm floor are better for these cases:
- Modular... Consists of composite wooden parts. Its design feature is that the modules are provided with the necessary grooves. Heating pipes will be subsequently laid there.
- Rack... The peculiarity of this system is that the heating elements will pass between two sheets of chipboard or boards.
When using a modular system, it will also be the subfloor. The floor covering is laid on top. Wooden materials (parquet, parquet board, laminate) are laid on the aluminum plates of the floor system. If you plan to use tiles, linoleum or carpet as a covering, you need to create an additional layer.The optimal material for this will be a cement-bonded particle board (DSP). It is necessary to closely monitor the correct laying of the elements of the rack system, since the quality of the work done depends on this. Aluminum foil is used to properly distribute heat over the floor surface. When laying, it is important to observe all the nuances and make sure that the foil fits snugly against the pipes.
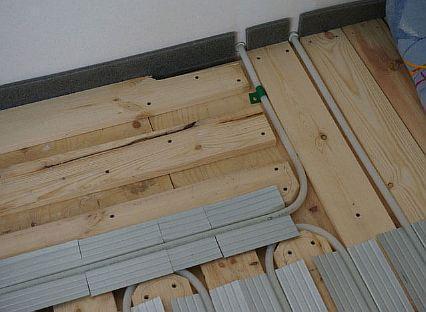
Installation of water heated floors "dry"
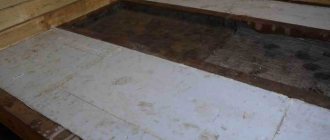
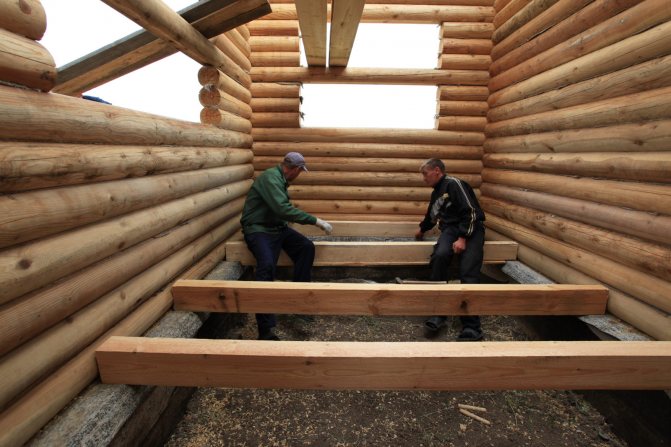
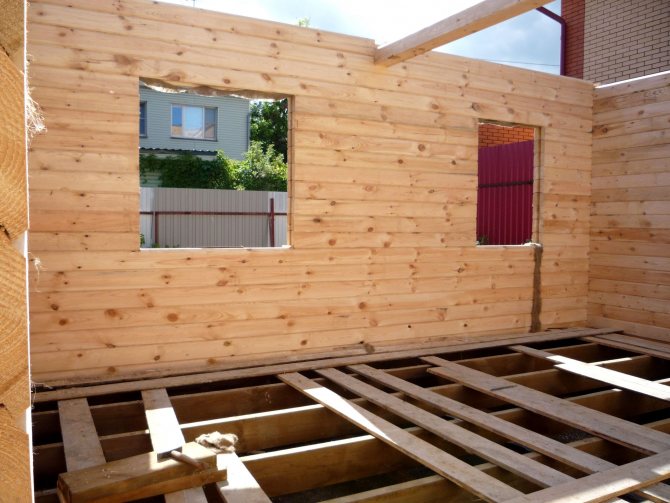
Logs and wooden floor beams are used as load-bearing structural elements of the floor in houses. The logs are installed on a solid base or on a set of point supports, while the beams have 2 support points at the edges and in some cases additionally rest on partitions. Since the beam is a supporting structure of the floor, it is not allowed to make any grooves or cuts in it, this is the main difficulty when installing a warm floor in a wooden house. The only way out is to lay a subfloor made of boards or chipboard sheets, and from it to start the construction of the "pie" of floor heating.
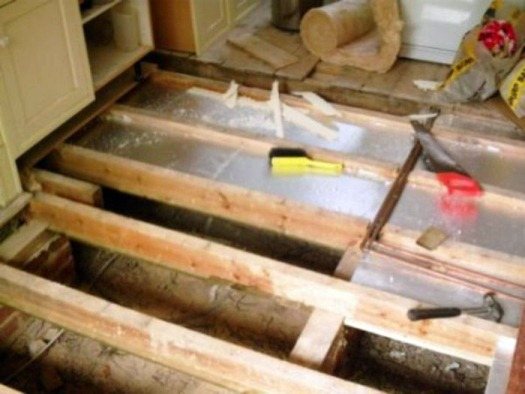
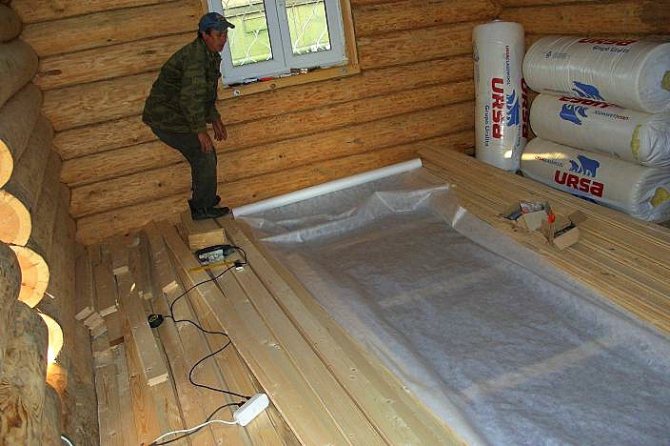
The situation with lags is somewhat different. When the timber is laid on a solid solid base, then there is the possibility of sawing the grooves for the pipes of the water circuit in it and there is no need to make a subfloor. If the logs rest at several points, then it is extremely undesirable to make cuts in them, as in the supporting beams. But in any case, before arranging a rough floor over the beams or logs, a layer of heat-insulating material is laid between them. To lay underfloor heating on wooden logs of the first floor, the thickness of the insulation should be at least 80 mm, and for overlapping, 20-30 mm is enough. In this case, a waterproofing layer of polyethylene film should be laid under the thermal insulation material on the first floor.
Under the pretext that all floors of a private house constitute a single space, many installation manuals for underfloor heating indicate that the floors do not need to be insulated. Like, there is nothing wrong with the fact that part of the heat of the heating circuit goes down. In fact, this violates the very principle of operation of underfloor heating, since the heat coming from the ceilings of the room will remain in the upper zone, and in the room where the underfloor heating system is located, it may not be enough. In order for the heat to spread evenly over the rooms for which it is intended, lay a small layer of insulating material, arranging a warm dry floor in the ceiling.
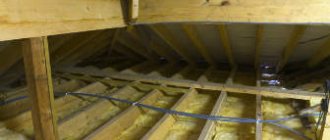
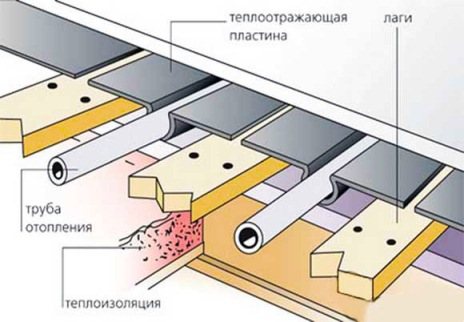
After the heat-insulating material has been laid and the rough base made of boards or chipboard has been mounted, it is necessary to ensure that all the heat of the heating circuit is reflected upwards. This is done in 2 ways:
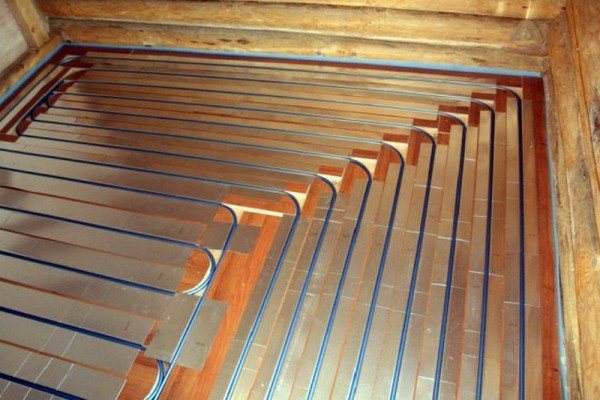
- It is necessary to start the installation of warm wooden floors by laying a foil-clad reflective layer over the entire surface. In the case when the pipes of the circuit are planned to be laid directly on the insulation and through the cuts in the logs, then the foil is laid only between them.
- A more expensive method is with the help of wood-based panel materials and profiled sheets of galvanized metal. Having drawn a diagram of the layout of the contours of underfloor heating on a wooden base, parts from chipboard are attached to it with self-tapping screws in the intervals between the pipe routes. Galvanized steel sheets are inserted into the resulting grooves.
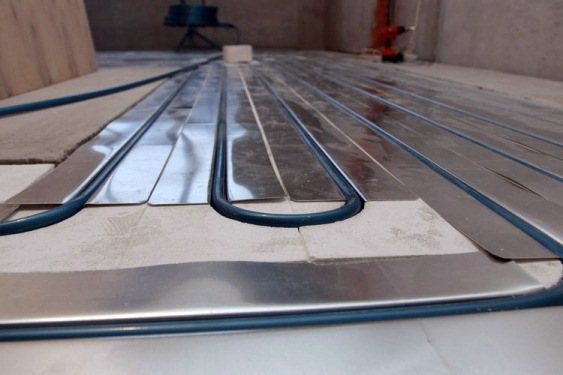
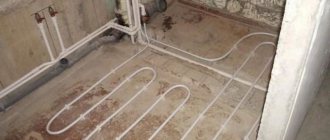
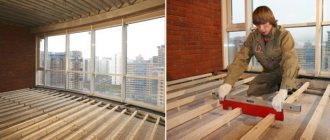
Installation of underfloor heating water continues by laying out the heating circuit pipes. For this purpose, pipes made of metal-plastic with a diameter of 16 mm (DU10) are most often used. The laying step here must be observed less than in warm floors under a screed, since heat transfer in our case will not be so effective. The pipe with the coolant transfers heat to the coating not directly, but through the air gap, hence the decrease in heat transfer. Accordingly, the pipe laying pitch should be 150 mm on average, with a maximum of 200 mm.After that, the circuit is connected to the manifold, it is checked for leaks and you can lay the topcoat for the wooden floor.
Active underfloor heating in a house from a bar
The water system consists of pipes through which the coolant circulates. Electric underfloor heating is made of an electrically conductive material connected to a voltage source. In both cases, thermal energy is released into the floor covering, under which such heating systems are located. It is this placement that is the advantage of the warm floor, providing invisibility of communications and saving space due to the absence of radiators.
The placement of an electric underfloor heating is carried out taking into account a number of requirements:
- thermoelements should be laid evenly to ensure equal heating of each floor area,
- the upper limit of the heating temperature of the thermoelement should not exceed + 40 ° C (to exclude the ignition of wooden elements as a result of overheating),
- reliable waterproofing is required to prevent moisture penetration from below (from the ground),
- if it is planned to install a heavy piece of furniture in a room, then it is necessary to take into account its location and not to put thermoelectric elements there to exclude their mechanical damage,
- the thickness of the wood flooring should not exceed 2.5 cm and it should not be covered with carpets - otherwise, its heat transfer coefficient decreases sharply.
The advantage of electric heating systems is the simplicity and efficiency of changing their operating temperature. For this, load current regulators are used, which, when equipped with a microprocessor unit and sensors, are able to make the temperature control fully automatic.
For example, temperature sensors located under the floor covering can be used to detect overheating and fire hazards. A current sensor included in the load circuit can be an indicator of a short circuit or an open circuit in the thermoelement.
Underfloor heating "under the screed"
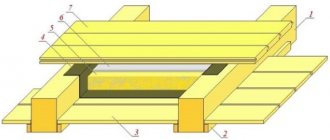
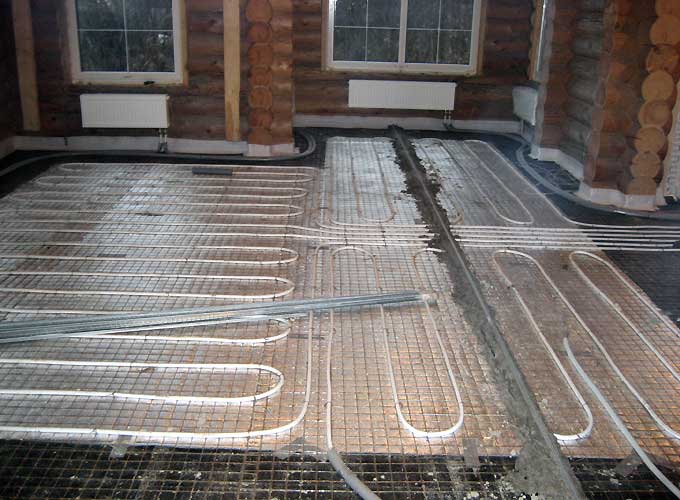
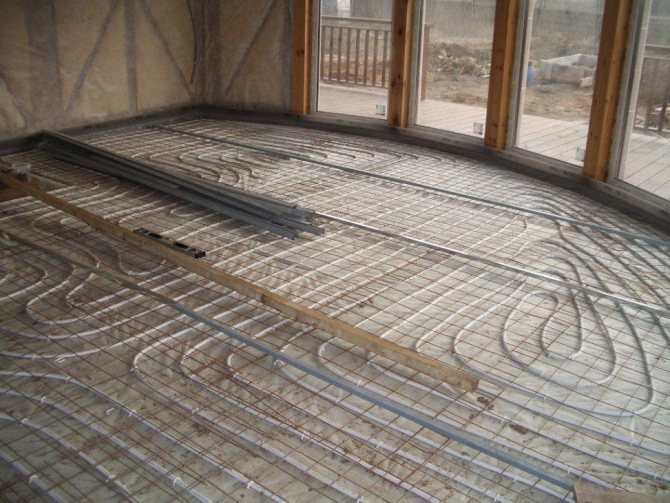
The technology for installing underfloor heating, providing for the monolithing of the contours into a screed from a cement-sand mortar, is widespread and well-known, the floor cake is shown in the figure:
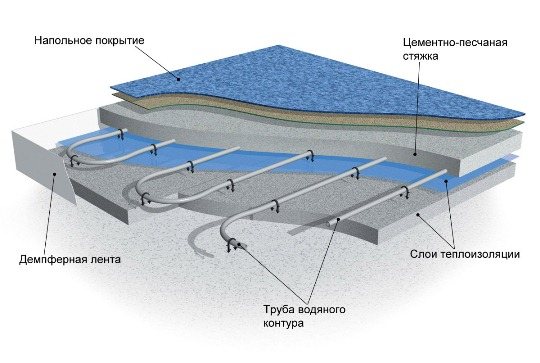
First, you need to ensure the waterproofing of the future slab by laying a plastic wrap over the concrete preparation. Then, in order to compensate for the thermal expansion of the screed, a damper tape is attached along the entire perimeter of the room along the walls, after which insulation is laid over the entire surface of the base.
In order for the water-heated floors to have good heat transfer, a foil film with markings is laid on top of the thermal insulation, along which the pipes are laid out. The laying spacing here varies from 150 mm (for parquet with carpet) to 350 mm (for tiles). It is necessary to ensure that the length of each circuit does not exceed 100 m. The pipes are fastened using special strips or plastic. At the end, the circuit is connected to the distributor and checked for leaks.
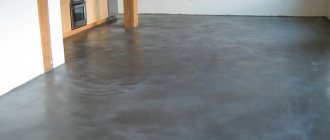
The last stage is the filling of the screed. The optimum thickness of the mortar layer is 3-5 cm above the top of the pipe, the time for complete solidification is 3 weeks. After that, you can finally make a warm floor in a wooden house by laying a topcoat over the screed.
What a boiler room looks like in a wooden house with warm floors
So, the pipes were started, it's time to mount the collector. What kind of collector it will be - decide for yourself. The main thing is that the number of its leads corresponds to the contours of the water-heated floor of your wooden house. The collector is wall-mounted in a special box or without it. Then, using a flare for underfloor heating pipes, a connection is made to the supply and return circuits.
The manifold necessarily includes air vents, a bypass in case of need to loop the system, a circulation pump and a mixture.The latter will allow you to adjust the temperature of only the contours of the warm floor, and the temperature of the radiators, if any in the house, will remain unchanged. Taps are required in front of each branch.
Mixed method of installing a wooden underfloor heating
Some technicians prefer to use another installation method, which is a cross between a rack and a modular option. In this way, floor heating can be done easily, quickly and without spending a significant amount.
They begin by choosing quarters in the edged board with the dimensions of the channel. Having measured at least seven centimeters from the wall, use a cutter to make a strip or recess so that the pipe is brought to the next row. The thickness of the board should exceed the parameters of the selection, and the width should be equal to the step during installation. You do not need to lay the rough base, and the strips are attached to the logs with the help of self-tapping screws.