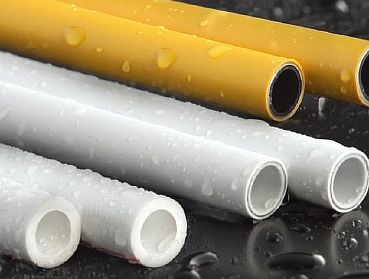
Varieties and characteristics of polypropylene pipes
Polypropylene pipes are widely used in the construction industry, as they are not expensive and strong enough.
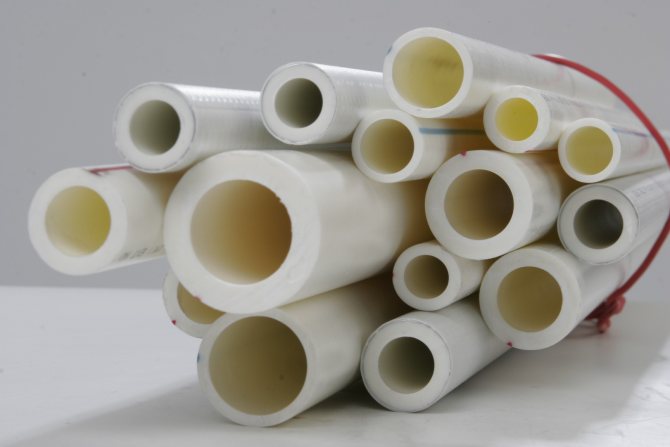
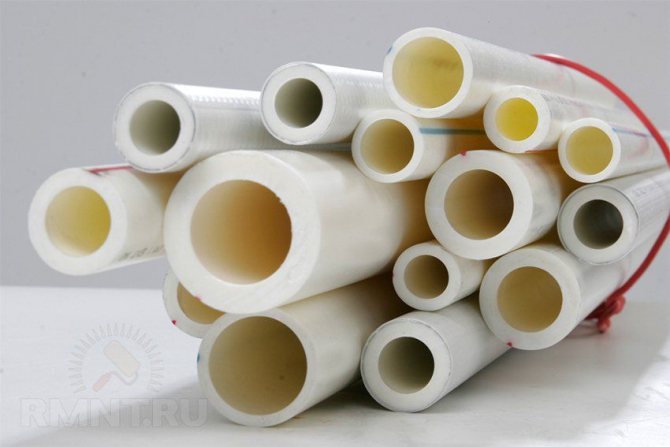
They are available in two types: single-layer and multi-layer. Each type with its positive and negative sides. Let's take a look at them.
Single layer
Single-layer polypropylene circuits come in several varieties:
- PPH - made of homopropylene. They are not intended for underfloor heating, but they are widely used in water supply, sewerage and ventilation systems.
- PPB - made from polypropylene block copolymer. Products of this type are durable and resistant.
- PPR - used in the manufacture of random copolymer polypropylene. The contour from it evenly distributes the load along its walls.
- PPs is a flame retardant product. The pipes are able to work effectively even when heated to +95 degrees.
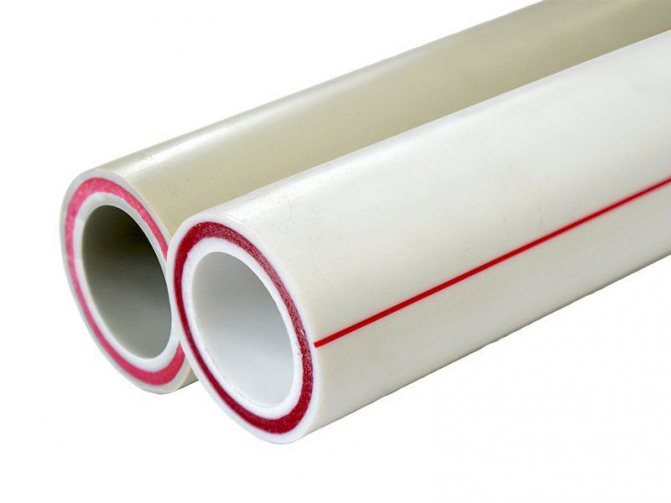
Multilayer
Multilayer polypropylene pipes are also available in several types, and have the following technical characteristics:
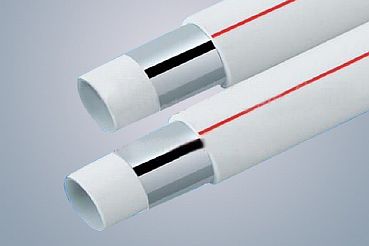
- Aluminum - the pipeline has a thin reinforcing layer on the outside. In the process of joining such elements, the aluminum layer is cut by 1 mm. There are products where the reinforcement is located between the walls. Polypropylene pipes with a reinforcing layer function effectively even at + 95 degrees.
- Fiberglass - the reinforcement is located between the polypropylene sheets. This type works great in the construction of underfloor heating.
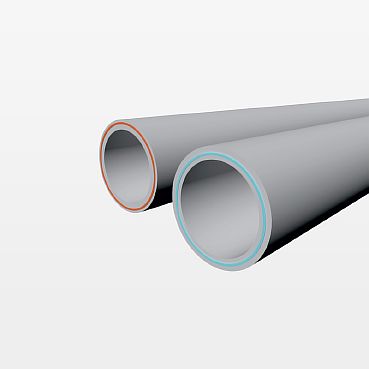
- Composite - between two layers of polypropylene there is an interlayer that combines fiberglass and aluminum fibers.
Advantages and disadvantages of polypropylene
The main reason for the popularity of PPR pipes in the construction of underfloor heating is cost-effectiveness. Their cost is affordable, and this is especially important when installing a pipeline over a large area.
In addition, polypropylene circuits:
- have increased mechanical strength and elasticity;
- have an excellent level of tightness - this is ensured by the method of special soldering, the product is monolithic, almost seamless, which allows placing pipes under the screed;
- durable - subject to the rules of installation, they will last several decades without an accident;
- are lightweight - this makes the installation process simple;
- inert - do not lend themselves to aggressive substances;
- are not subject to corrosion - thus, deposits do not accumulate inside the pipe;
- have good sound insulation;
- environmentally friendly - no harmful substances are emitted when heated.
For your information! Polypropylene is highly resistant to low temperatures, which protects the coolant from freezing.
But even in cases of its freezing, the walls of the pipes do not collapse, since the polymer is capable of expanding, and when heated, it returns to its original form. Therefore, polypropylene pipes are ideal for laying in country cottages, where the owners do not live permanently, and the floor works from time to time.
However, this type of pipe-rolling materials has its drawbacks. Polypropylene is highly flammable and must not be installed in rooms with a high level of fire hazard (wood). In addition, the optimal operating temperature limit is + 75 degrees. It should be said that the PP has poor flexibility, and it will not work to make turns under a small radius.
In addition, ordinary PVC pipes are intended for use in the water supply and sewerage system, but they cannot be placed in warm floors, since they will not withstand thermal and hydraulic stress.Therefore, it is necessary to lay a reinforced contour in heated floors.


Why is polypropylene good for floor heating pipes?
In consumables, manufacturers are superior to themselves, offering the buyer a variety of options for every taste. The owner has to limit himself with his financial capabilities. In practice, a warm floor can be made of the following materials:
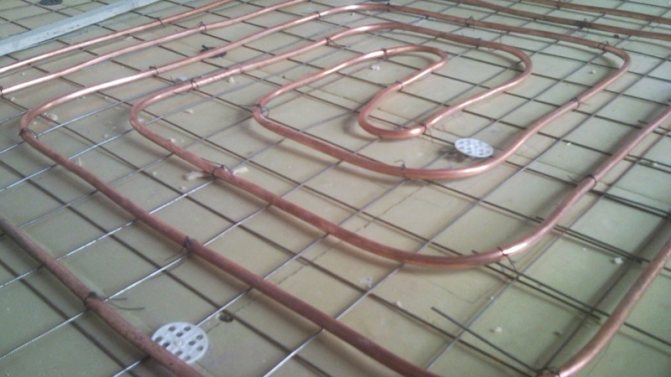
- copper;
- polypropylene;
- corrugated metal;
- metal-plastic;
- cross-linked polyethylene.
Each of the options is feasible and feasible, but cost-effectiveness and technological benefits must be taken into account. The popularity is also explained by the affordability - the installation of a water circuit with a long length (several hundred meters) is very expensive for the owner, so in the case of polypropylene, you can save money without losing the quality of heating.
The warm floor made of polypropylene has a lot of advantages:
- Sufficient elasticity of the pipe with high mechanical strength;
- The connections are tight and reliable;
- Long service life;
- The quality of technological workmanship, due to which the installation of the polypropylene circuit will be very simple;
- Inexpensive cost.
Opinion of experts about polypropylene in warm floors
Polypropylene is a material that withstands very low temperatures. When the coolant freezes inside the circuit, there will be no mechanical damage to the pipeline, even if it is made by hand.
Polypropylene pipes are especially recommended for owners of country houses and summer cottages, in which heating only works periodically.
Welding of pipes on a polypropylene base ensures the quality and tightness of all joints. By pouring the floor heating circuit into the screed, you can count on several decades of trouble-free operation.
According to the instructions that the manufacturer accompanies each polyethylene pipe, the operating temperature is 75 degrees Celsius at a pressure of 7.5 atmospheres. Under such conditions, the service life of the structure will be about 30 years.
There are also some disadvantages of polypropylene in warm floors - the material has a high coefficient of thermal expansion, so when pouring a screed with concrete, you should choose reinforced polypropylene pipes. Bends in the pipeline are also sometimes assembled incorrectly due to miscalculations with the coefficients of thermal expansion of polypropylene.
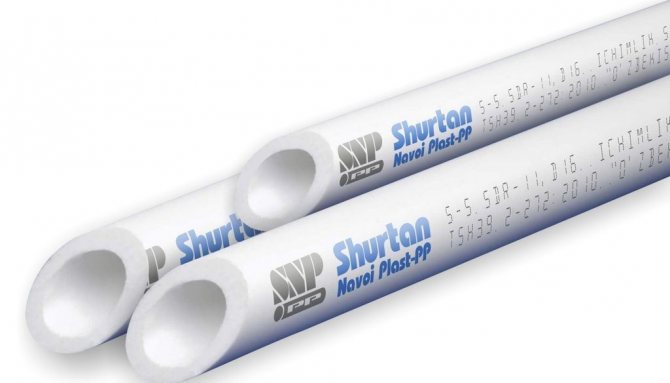
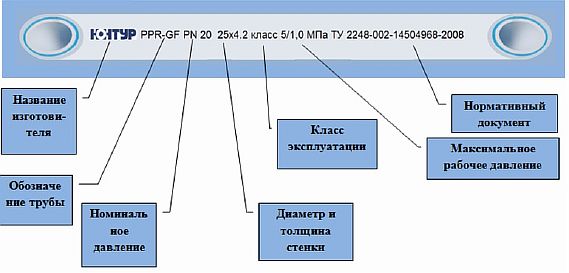
Polypropylene pipe marking
Currently, there is a wide variety of products in this segment on the market, which have the following markings:
- PN 10 - is placed on ordinary polypropylene pipes with a homogeneous structure. They are recommended for use in water supply systems with water temperatures up to 20 degrees and pressures up to 10 atm. Pipes with this marking usually have a diameter of 20 to 110 mm.
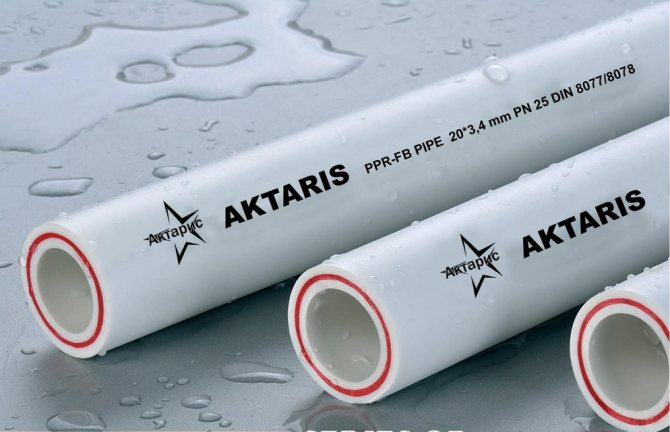
- PN 16 - denotes a single-layer product that is suitable for installation in warm water floors. Let the heating agent heat up to 80 degrees and the pressure up to 10 atm. The diameter of the contours is the same as PN 10, but the thickness of the walls is much greater.
- PN 20 - marking of homogeneous pipes, they have a permitted heating level of the circulating heat carrier up to + 95 degrees. The working pressure in this case is not more than 6 atm, and the diameter is from 20 to 110 mm.
- PN20 AL (PN20 GF) - installed on polymers with an aluminum reinforcing layer or fiberglass. The rest of the indicators coincide with PN 20. This type differs from other consumables in the coefficient of thermal expansion - it is less.
It is very important to take this marking into account when choosing a product for certain operating conditions, the effectiveness of the warm floor depends on it.
The nuances of installing underfloor heating made of polypropylene
Propylene pipes are ideal for water supply or sewage.It is dangerous to use heating made of ordinary polypropylene inside a screed for heating floors, since the material is not suitable for hydraulic loads and degrees of heating.
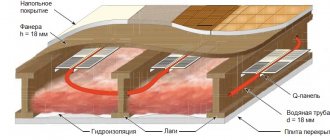
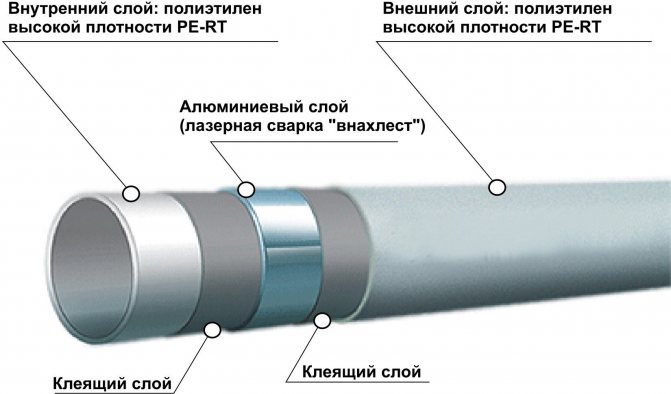
It is better to make a warm floor with your own hands from pipes with reinforcement - such materials meet all the requirements for heating equipment. The channels are distinguished by three layers in the structure, between which there is a layer of reinforcement made of foil with synthetic fiber (weaving of synthetic fibers).
The reinforcing layer in the composition of the pipe allows the water circuit in the screed to operate at temperatures of 95 degrees Celsius and at 10 atmospheres of working pressure.
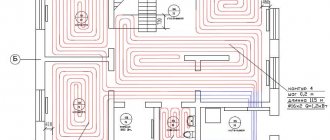
Creating a diagram and calculating the number of pipes
Before starting work on the installation of a water-heated floor made of polypropylene, you need to prepare a project and calculate everything.
The drawing is done on graph paper, it reflects the scheme and the laying step.
Project preparation
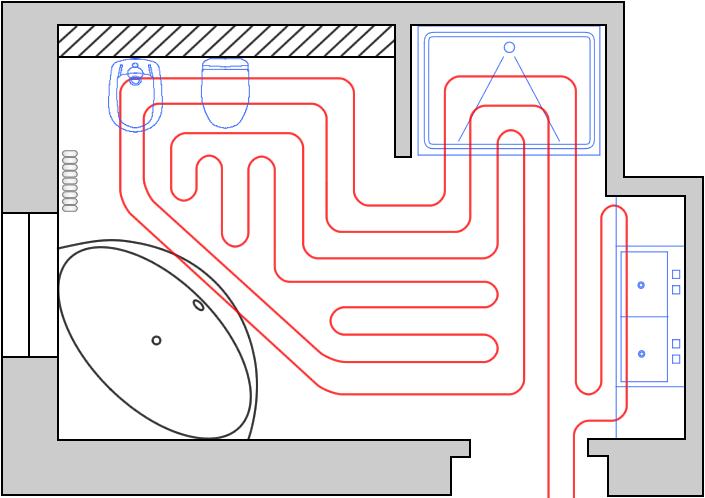
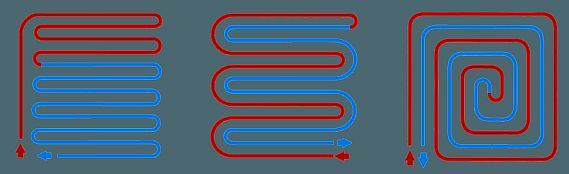
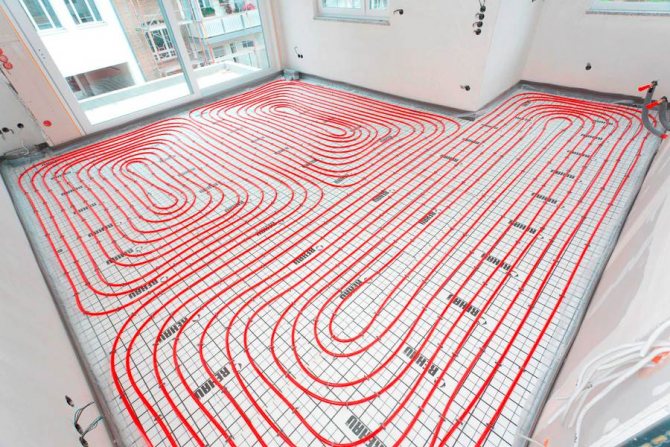
The water underfloor heating pipeline can be laid according to the following schemes:
- "Snake" is a simple option, but it has a drawback - the coolant cools down when passing through the pipe, and at the end it will be colder.
- "Spiral" - with this method the heating is uniform, therefore it is more popular.
- "Double snake" - in this case, the heat is distributed evenly over the floor surface.
When choosing a scheme, the degree of heat transfer of the structure is taken into account, since the efficiency of the floor will depend on this. To do this, you need to know: the area of the room, the material from which the walls, ceilings and thermal insulation are made, the type of flooring, the diameter of the contour and its material, the temperature of the coolant.
After choosing a laying scheme, it must be applied to paper. It is recommended to make the step between the pipes from 10 to 30 cm, and the loop length is not more than 80 meters. From the walls, the contour is laid at a distance of 20 cm. On the drawing, the place of installation of the manifold cabinet should be noted.
For your information! If warm water floors are used as the main heating, then the pipeline should be laid with a step of 12-15 cm.
Calculating the size of the pipeline
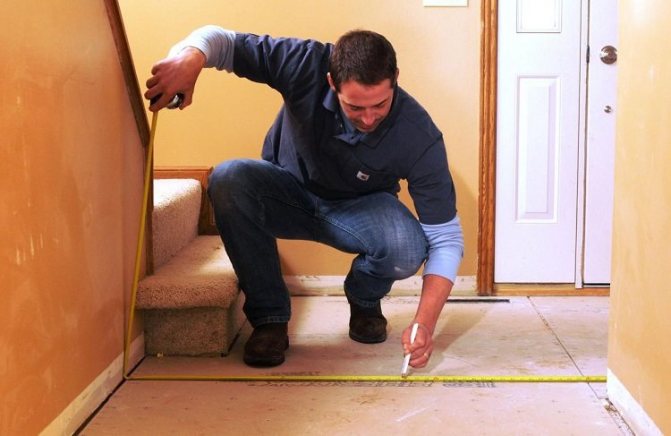
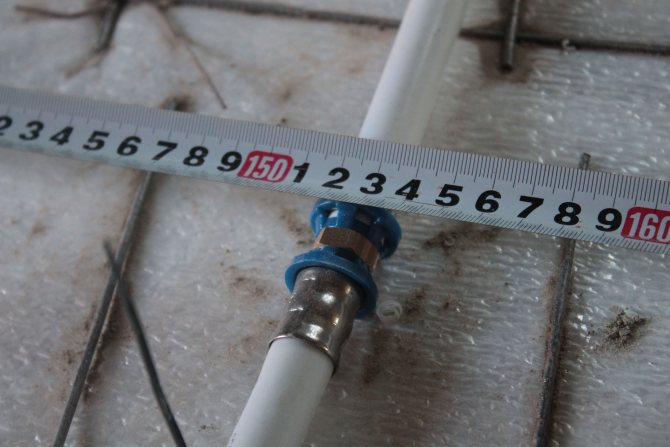
To determine the footage of polypropylene pipes for underfloor heating, two methods are used. One is to measure the size of the pipeline on the drawing with a ruler, and then multiply this indicator by the appropriate scale. A margin of 10% for trimming is added to the result.
The second way is with a thread. A thread is placed on the floor, according to the contour laying pattern. Then, it just needs to be measured - this will be the size of the pipeline. Just as in the first case, you need to add 10% of the stock.
Important! For each room, the length of the pipes must be calculated separately.
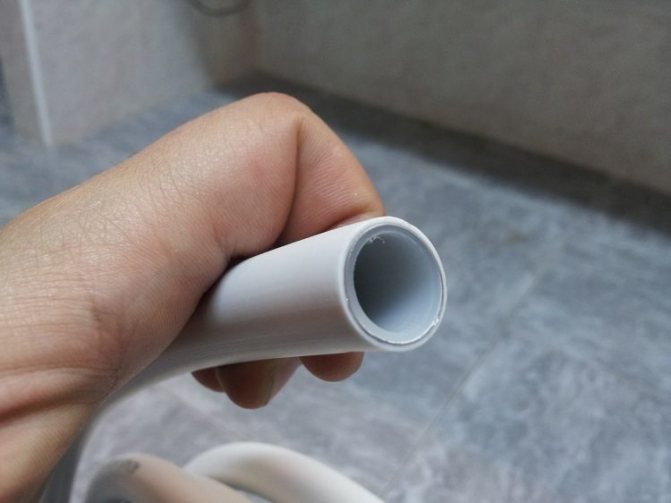
Polyethylene pipes
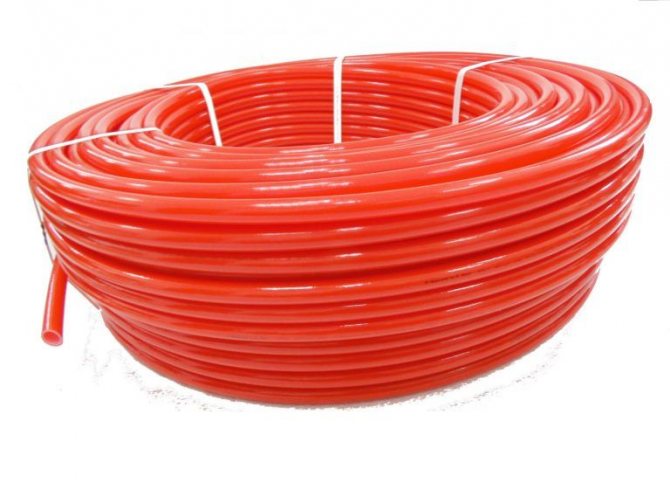
For the installation of underfloor heating, it is worth choosing pipes made of cross-linked polyethylene. The advantages of this type of pipe when laying in a screed are reliability, strength and resistance to high temperatures.
Cross-linked polyethylene is obtained in the process of polymerization, as a result of which the ethylene molecules seem to be cross-linked together, providing the material with maximum density (for more details: "Advantages of cross-linked polyethylene pipes for underfloor heating, installation rules"). 4 methods of polyethylene crosslinking have been developed, differing from each other in the percentage of crosslinking. The higher the percentage, the higher the density of the polyethylene, and hence the mechanical strength.
Advantages of XLPE pipes:
- Corrosion resistance. Resistant to acids, alkalis, organic solvents;
- Elasticity.
Pipes do not lose strength when the temperature drops to -50⁰С, as well as in cases of freezing of water in them; - Resistant to high temperatures. They can be operated in systems with a constant coolant temperature up to 90⁰С. Withstand temperature surges up to 120⁰С.
The disadvantage of using these pipes in the underfloor heating system is the need to use a large amount of fasteners, since they poorly hold the given configuration of the circuit. When installing XLPE pipes in a screed, you need to be careful, as they are easily damaged.
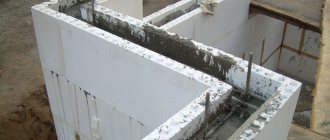
Preparatory work before installing the system
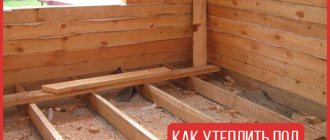
For the correct installation of the "pie" of a warm water floor made of polypropylene pipes, preparatory work should be carried out. Step by step, the actions look like this:
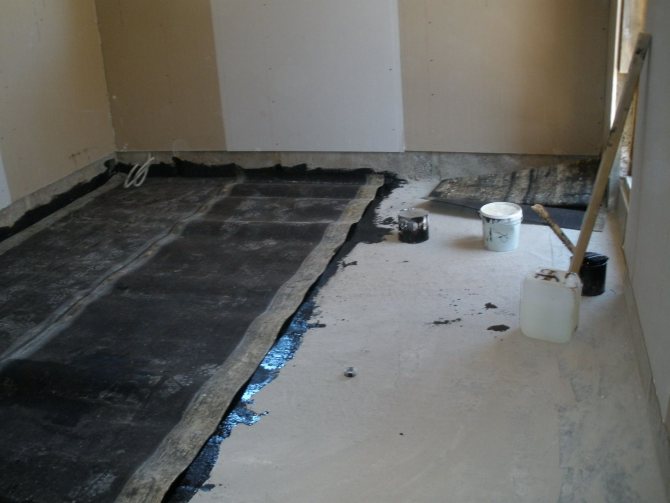
- The old flooring is removed and the screed is dismantled.
- An assessment of the base is carried out, if cracks are found, they must be repaired. But first, you should clean the surface of concrete chips and make a primer. If the subfloor cannot be renovated, a thin layer of leveling screed must be poured.
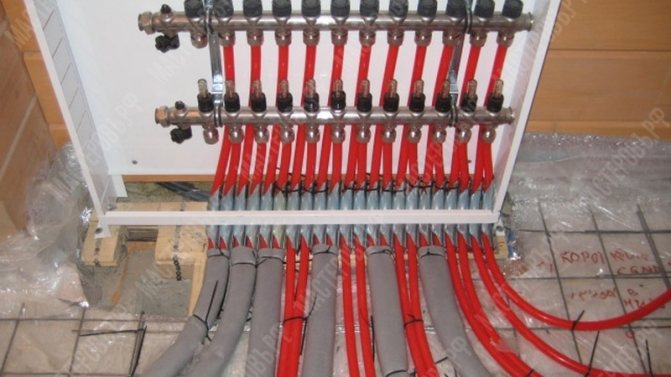
- The collector cabinet is installed, on the wall or in a specially equipped niche, at a distance of 1 meter from the floor. This must be done before laying the "pie" of the floor, as the installation process is rather messy.
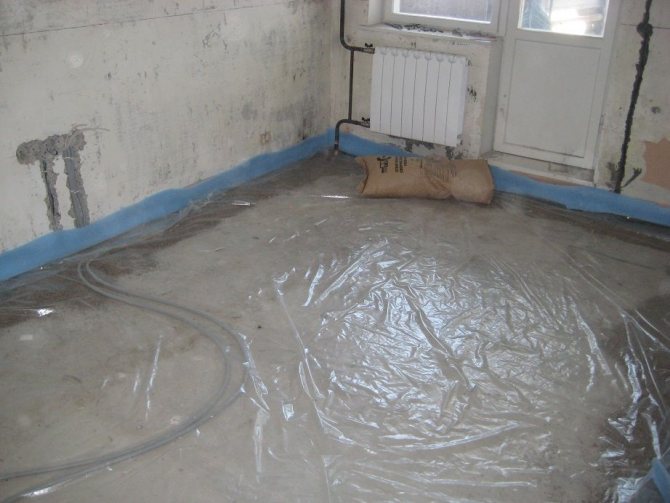
- A waterproofing layer is laid, thick polyethylene is suitable, it is able to retain moisture. The film needs to be laid with an approach to the walls - 10 cm. If the area of the room is large, and several strips of film are put, then they overlap, and you can connect them together with adhesive tape.
- A damper tape is glued around the perimeter so that the concrete screed does not crack when heated.
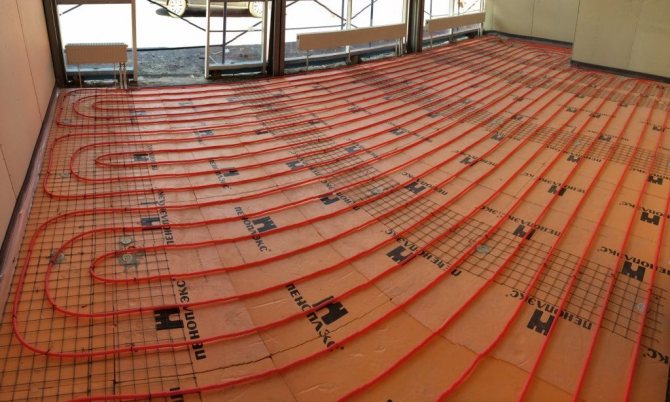
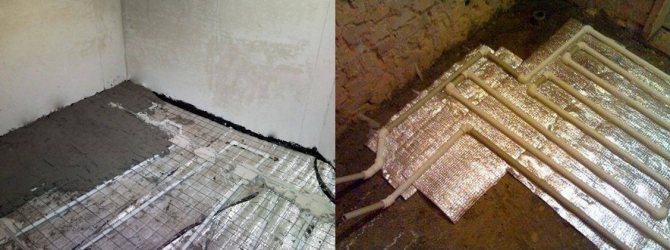
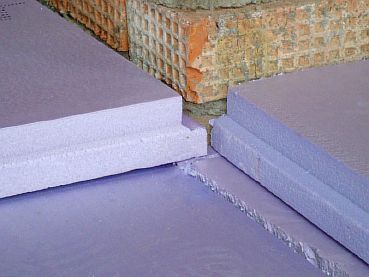
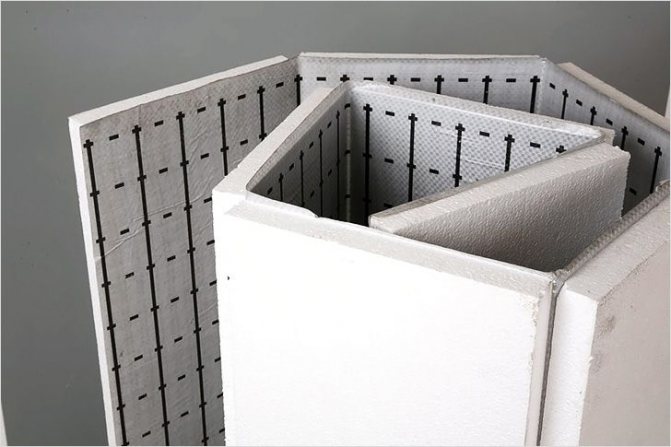
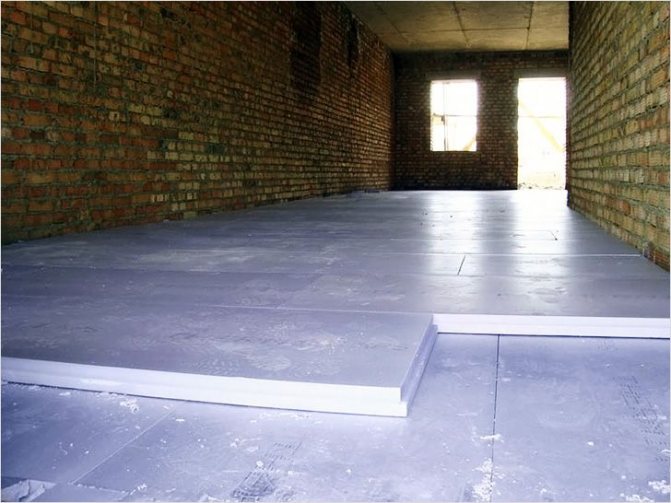
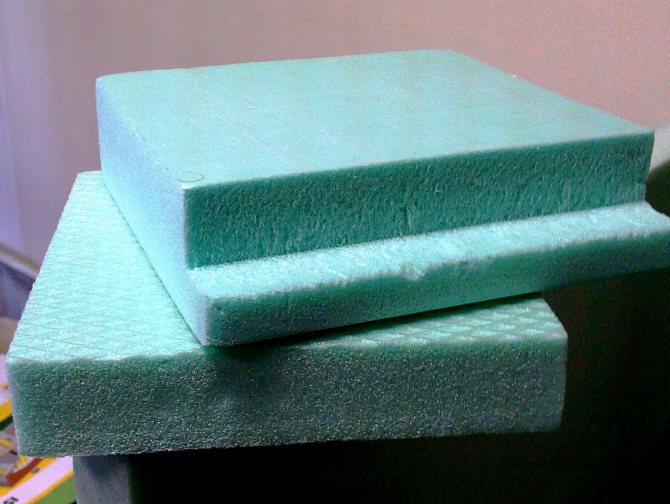
- Thermal insulation is being installed. It is possible to lay a different material - roll or sheet. When choosing expanded polystyrene extruded boards, there should be no gaps between them, therefore, the material should be laid in two layers. For greater tightness, the joints can be stitched with polyurethane foam.
- A foil substrate is laid, it is necessary to reflect heat rays. The heat is directed upward, thereby heating the floor and the air in the room. The connection of the material is carried out using adhesive tape. If the thermal insulating material is with a foil layer, then this substrate is not needed.
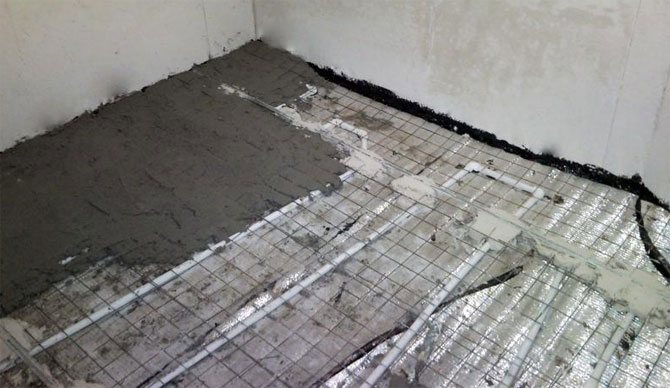
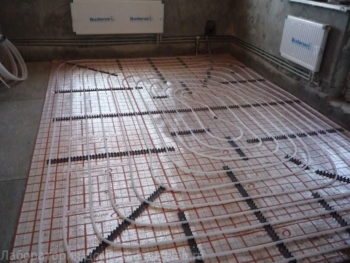
- A reinforcing mesh is placed to give strength to the structure, and a pipeline can also be attached to it.
Strict adherence to all the rules for carrying out these works contributes to the efficient operation of the system.

Installation technology
In a separate category, polypropylene pipes are distinguished for organizing a warm floor. Their characteristics allow laying in a concrete screed without fear that the system will rupture. The basis for such a statement is the pipe laying technology, in which the joints are above the floor surface, and only whole sections of the pipeline are silted up with a mixture.
The installation procedure for laying a water-heated floor is represented by the following measures:
- It is advisable to carry out a full calculation of the required material and accessories and draw up a scheme for laying polypropylene pipes. When calculating the number of products, take into account the form of laying (serpentine, spiral and other optimal for a given room).
- The surface of the rough screed is cleaned of construction debris.
- The waterproofing layer is laid sequentially, then the heat-insulating material is mounted.
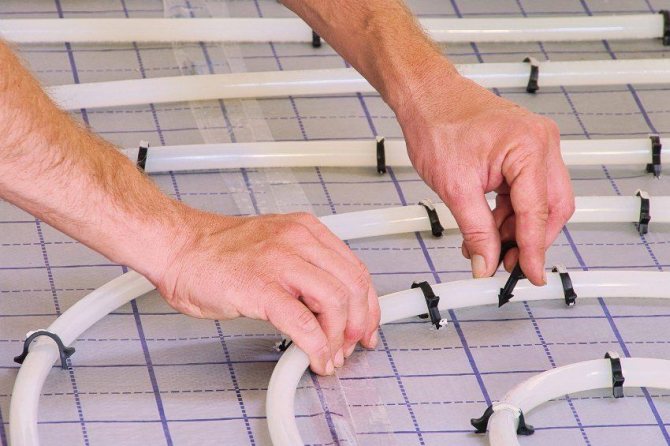
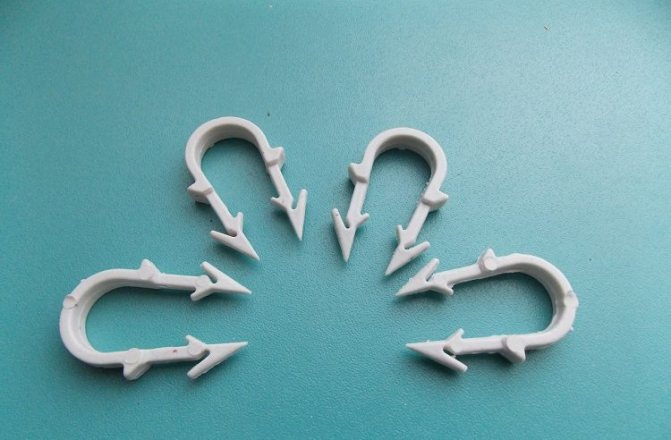
- A metal mesh is laid as a base over the entire area of the room covered by the heating circuit. Products are directly attached to it using plastic clamps or iron wire.
- All heating circuits are connected to a pre-formed manifold. The system is tested with parameters higher than the operating parameters. The temperature to the operating temperature is raised gradually.
- After checking, fill in with a final screed and lay the floor covering.
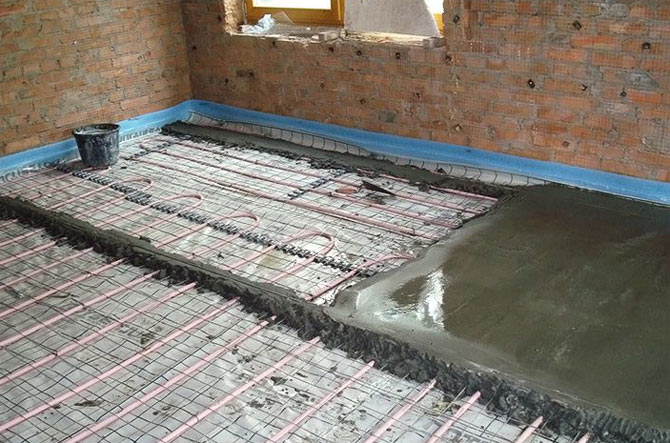
Underfloor heating under the screed
Important! If there are signs of pipe breakage under the screed, it is necessary to highlight the local area of the floor surface where the pipe was damaged, using the installation scheme, open the surface.Dry the affected area and carry out repairs.
The above information indicates that the use of polypropylene products in the installation of individual heating systems is a reasonable and correct decision. Compliance with the installation rules and high-quality soldering at the joints of the connecting elements ensures a long period of trouble-free operation. The technical characteristics of polypropylene elements, which determine their reliability, allow placing communications in the cavity of the walls and under the concrete screed.
One of the options for laying polypropylene pipes is presented in the video below.
Video 1. Installation of plastic heating pipes.
Laying polypropylene pipes

Installation is a crucial stage in the construction of a water heating floor. It is necessary to lay the pipeline in accordance with the developed scheme - "snake" or "snail". You need to start from the collector, the second end of the pipe after laying, must also return to it.
Important! When working with polypropylene pipes, the room temperature must be maintained at +5 degrees.
The pipes are fastened in several ways:
- To the reinforcement mesh using plastic clamps or wire is a reliable option. You cannot fix the contour tightly, this can damage it.
- To a heat-insulating product with dowels.
- Using thermal insulation mats with lugs. The pipeline is laid between them in the grooves, thereby firmly fixing.
For your information! Fasteners should be installed every 80 cm.
Can polypropylene pipes be poured with concrete? What conditions are necessary for this
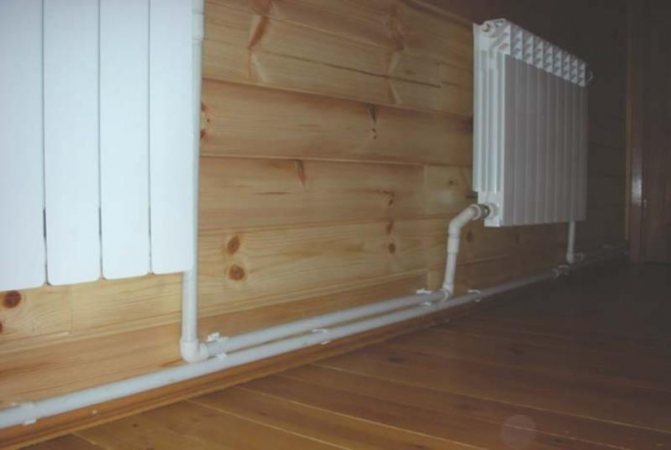
Overhaul in residential premises of multi-apartment or private houses provides for the replacement (modernization) of elements of the heating system. The need is associated with a reduction in the cost of paying for energy resources during further operation and giving an aesthetic appearance to the rooms.
Sometimes the owners decide to hide the heating pipes under the floor covering or in the walls of the room. In this regard, they are interested in the possibility of using plastic pipes for these purposes and the question is, can a polypropylene pipe be poured with concrete? How long is the service life of the communications located under the screed?
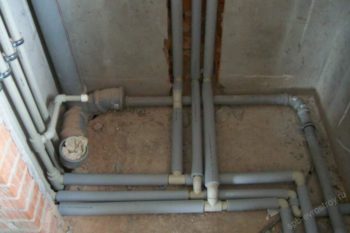
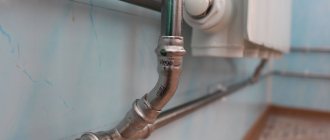
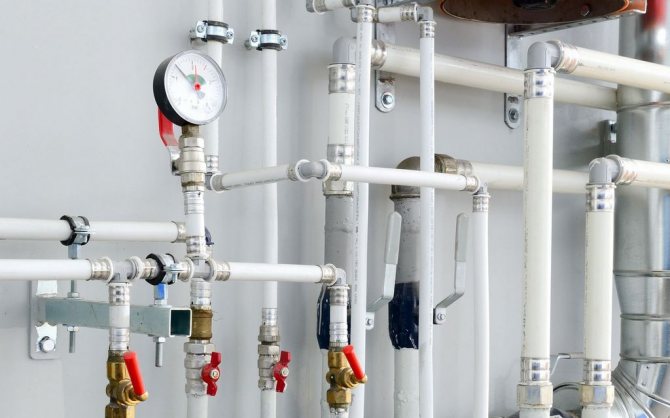
Concealed pipe placement
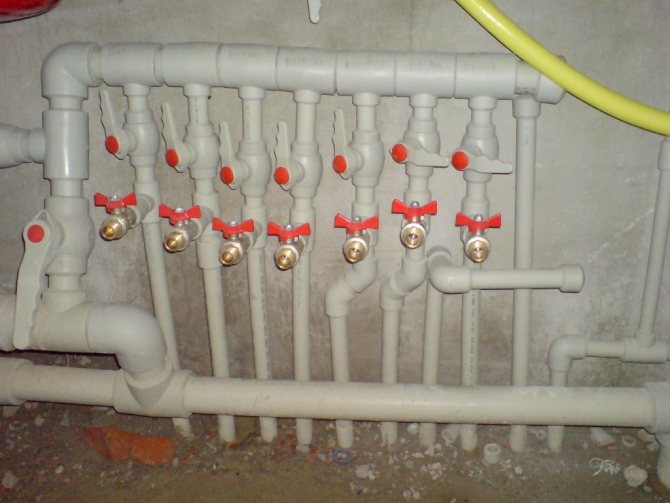
Floor connection
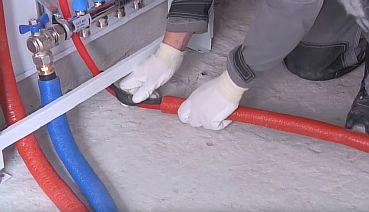
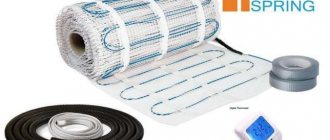
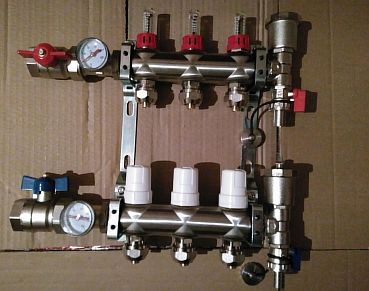
The first step is to assemble a device, which consists of a pressure gauge, an air valve, an adjustment and drain cock, and a mixer.
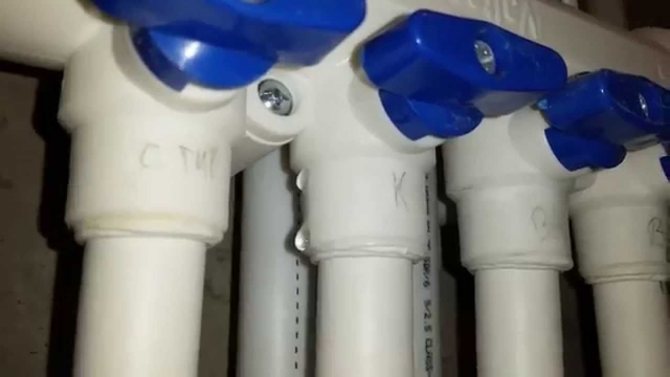
It is possible to mount a ready-made collector, with the required number of taps, into the installed cabinet. Pipes are connected to it for supplying a heated coolant with a nut and a sleeve, as well as a return hose.
After that, floor contours are connected to the collector group. One end of the pipe to the supply tap, and the other to the return.
Water underfloor heating device
To arrange such a floor, it is necessary to lay pipes through which hot water will circulate, the source of which can be central heating or a separate boiler. One of the most common methods of installing a warm floor is a concrete heating system. All work can be divided into several stages: drawing up a project, preparing the floor, laying mesh and pipes, pouring concrete, laying the topcoat.
Drawing up a project for future work is mandatory, especially if floor insulation is planned over a large area. When designing, it should be taken into account what the floors, walls and other elements are made of. This is necessary in order to calculate the desired temperature that should be in the room. Then you need to determine the installation location of the collector, boiler. After that, it is necessary to draw up a pipe layout diagram, indicate the length of the contour and the diameter, as well as other parameters.
The temperature of the heating water must be set based on a calculation that takes into account the type of room, type of flooring and design outside temperature. As a rule, the maximum temperature level for floor heating is +45 degrees with a water flow rate of 0.3 m / s for smooth heat distribution.
Preparatory work
The manifold cabinet is best placed on the wall near the floor.
In order for the thermal design of the room to go according to the rules, it is necessary to start work with the installation of a collector cabinet - the basis of the future underfloor heating made of polypropylene pipes. It is designed to connect all circuits and the location of the adjustment elements. It is better to place it on the wall near the floor. The hot water supply and return pipes are connected to the cabinet, to which the collector group is connected.
The next stage is the installation of waterproofing, which is suitable for polyethylene. It is overlapped and connected with tape. A damper tape should be glued along the perimeter of the room in which the underfloor heating is being installed. It will prevent the screed from cracking when thermal expansion occurs.
Then the thermal insulation is laid. If this is not done, then the heat loss will average 40%. The choice of material depends on the calculations of heat loss when drawing up the project. Mineral wool, polystyrene, technical cork or other materials can be used as thermal insulation. You can use a special version for a water floor, which is equipped with a reflective surface.
Laying the contours of polypropylene floors
Pipe diameter and pitch will depend on the location. In cold places (at the front door, near the windows), polypropylene pipes are laid more often, in places where furniture will stand, it does not fit. To fix a warm floor, there are two ways of fixing: to a reinforcing mesh and to thermal insulation.
Reinforcing mesh is a more rational option. It will make it possible to lay polypropylene pipes more evenly. In addition, it will increase the strength of the screed. Pipes are fastened with plastic clamps or wire. Brackets can be used to speed up installation.
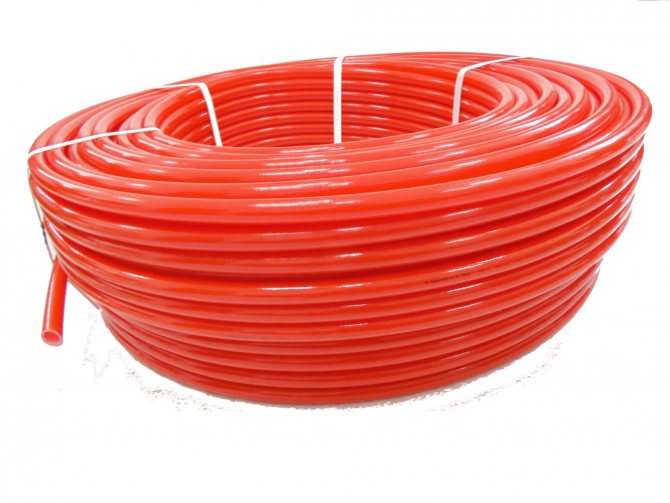
It is better to lay a propylene floor from a roll or spool. This will keep the number of connections to a minimum. This will save you time and money. The pipe is fastened every 80 cm. It is not necessary to tighten the clamps strongly, otherwise the linear expansion will lead to deformation of the pipe.
To heat the room evenly, the length of one circuit should not be more than 80 m. The ideal length is 50 m. All circuits should have approximately the same length. The manifold should be selected depending on the number of circuits. For example, if there are 7 circuits, then there should be 7 outputs.
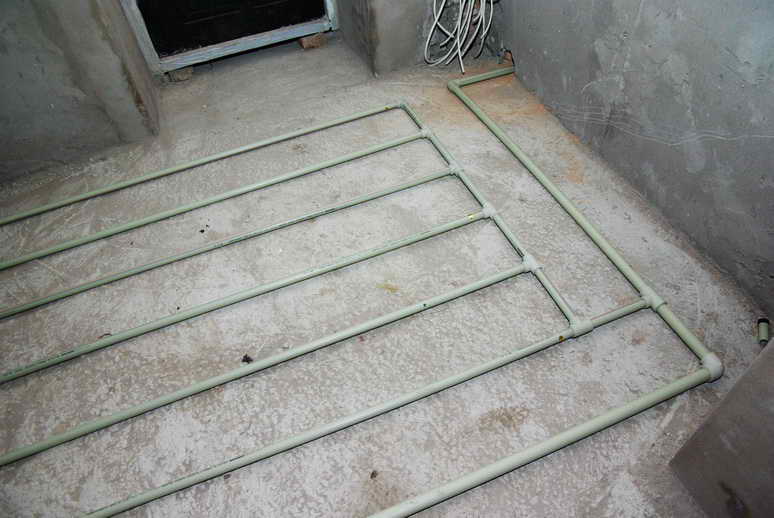
There are several ways of laying polypropylene pipes, from which the warm floor is mounted. With the parallel or serpentine method, the pipe is laid in a zigzag pattern. This method works best for a small space. The spiral method ("snail") is used in large rooms. Installation of pipes is carried out in a spiral, alternating cold and hot, which allows for better heating.
The standard choice of pipes, considering their linear expansion and the required power, is 2 cm in diameter
Attention should be paid to the quality of the pipes, since the underfloor heating is not installed for one year.
System testing
Before filling the pipeline with a concrete screed, it is imperative to test the device, since in case of malfunctions or leaks, it will be difficult to eliminate them under the concrete.
To check the system, each circuit is individually filled with water, and all control valves are opened, which helps to remove air from the pipes. At the same time, the pressure is set 1.5 times higher than the working pressure, but not less than 6 bar.
After 3 - 4 hours, the pressure drops, and it needs to be raised again. This must be done three times.After that, the floor is left for a day, and if during this time the pressure has dropped by no more than 2 bar, then the system is installed correctly.
For your information! If a leak or malfunction is found, then they must be eliminated, the leaks must be soldered, and then the floor testing must be repeated again.
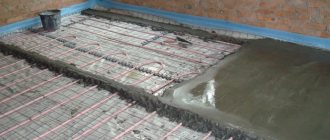
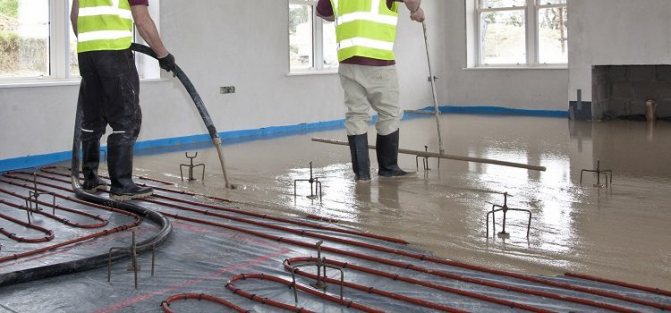
Filling the screed
For pouring the screed, a cement-concrete mortar with plasticizers is used, which can be made independently or bought ready-made.
To give more strength to the structure, you can lay another reinforcing mesh over the pipeline. If additional reinforcement does not fit, then fiber from polypropylene fibers should be added to the solution.
The room temperature when laying the screed should be + 5 degrees. First, you need to install a beacon profile, which will make the surface even.
You need to start filling from the far corner of the room, in stripes, and finish at the exit. Leveling the mortar is carried out using a rule.
Depending on the pipe diameter, the screed thickness ranges from 30 to 70 mm.
It will take 28 days for the solution to dry completely. Only after the screed has hardened can the topcoat be laid. The best type is ceramic tiles, especially for a bathroom or toilet, although installation of flooring from a different material is permissible.

Important! Until the concrete mixture dries well, it is forbidden to turn on the warm water floor. Before the first start-up, bleed all the air.
As you can see, the installation of a water floor with heating from polypropylene pipes is not difficult. The material is convenient to work with, so everyone can make a warm floor made of polypropylene in a private house or apartment with their own hands.
Application features
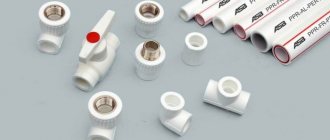
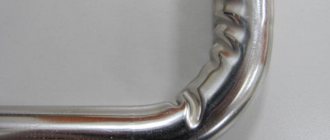
The technology for manufacturing polypropylene pipes does not exclude the linear expansion of the product when exposed to high temperatures. Correct selection of a pipe with the required properties and the installation of supports with the organization of expansion joints will make it possible to compensate for this disadvantage. Any system includes branches from the central pipeline, direct connection and the creation of turns at different angles, while differences in pipe diameters are not excluded. The use of fittings, which are divided into the following types, simplifies the solution of these problems:
- flange type;
- crimping device;
- using a threaded connection;
- welded structure.
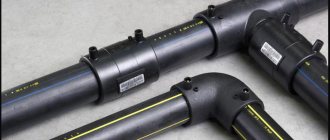
Polypropylene fittings are used to connect pipes made of the same and other materials. This effect is achieved by placing chromium-containing or brass inserts in the inner part, which determine the technical possibility of connecting to plumbing devices and creating transitions.
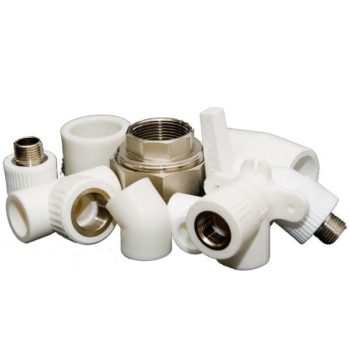
Fitting
Practice shows that the main reasons for the occurrence of ruptures of heating pipes under the screed are a gross violation of the installation technology and poor-quality soldering of fittings at the joints of products.
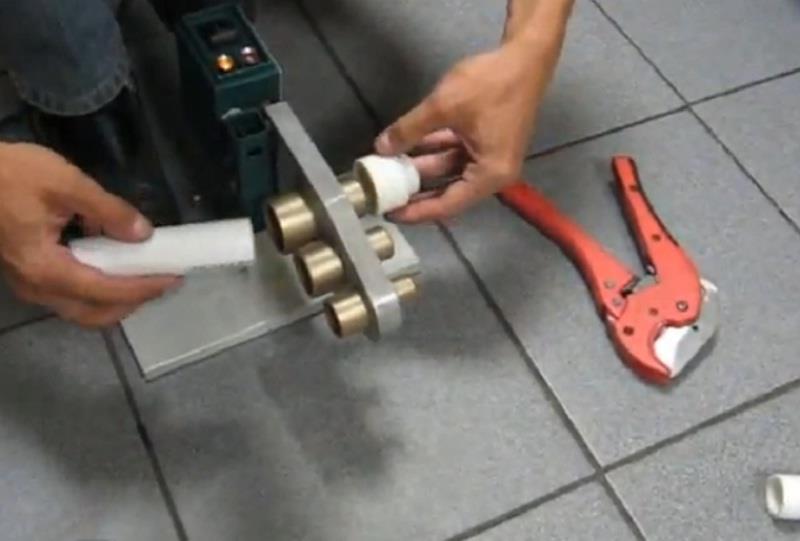
The soldering process is not difficult for DIYers. The device for connecting pipes is represented by a soldering iron with marked nozzles of various diameters. Before industrial brazing, it is recommended to conduct a trial thermal connection of materials on small pipe pieces and unused joints. Using combined fittings, it is possible at the design stage to ensure the optimal pressure in all parts of the heating structure, while preventing unnecessary costs for using pipes of a larger than necessary diameter.
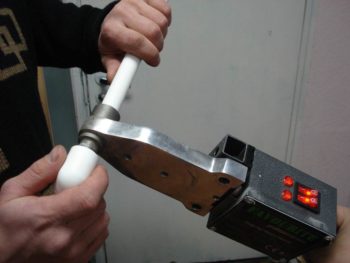
Soldering polypropylene pipes
Important! The connection of polypropylene pipes with the external location of the aluminum reinforcement requires its removal for the immersion length into the abutting element. Otherwise, all soldered elements must be dust-free. Degreasing is recommended.