Home »Equipment» Warm floor
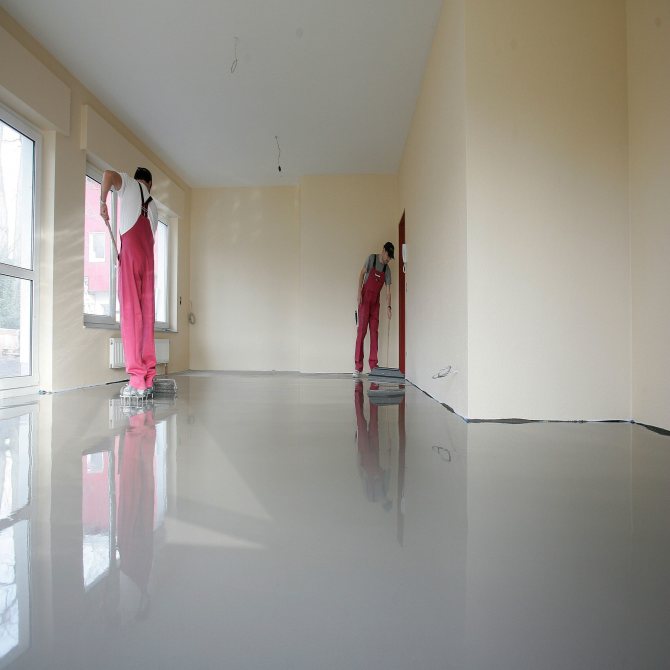
Self-leveling underfloor heating is a set of elements for floor screed that dry out in a short time and do not require additional leveling. This type of coating is compared to plaster for walls. It is easy to apply, has increased fluidity, requires an even base.
Self-leveling warm floor
Features of the self-leveling floor
In terms of technological features and purpose, the self-leveling floor is compared with the process of applying plaster to the walls. It also requires a perfectly flat base for laying various floor coverings. For wood floors, it is enough to pour a screed from a concrete solution, but laying parquet or laminate means the elimination of even minor irregularities, which can be achieved using a self-leveling floor.
Based on the purpose, self-leveling floors are divided into:
- screed bases;
- self-leveling layers on the screed;
- final coatings.
To create a screed or layer before installing decorative flooring materials, special mixtures are used. One of the main properties of such solutions is considered to be fluidity, with the help of which a flat surface is obtained that does not have pits and depressions.
The mortar mass for self-leveling floors can be prepared manually and mechanically. When choosing components for the mixture, you should take into account the required floor thickness and the residual moisture level of the coating. The solution is prepared in water, with the help of which the required fluidity is achieved. There are also anhydrous mixtures with anhydrides - gypsum masses, in the preparation of which calcium sulfate is used. As additional ingredients, such solutions contain defoamers and superplasticizers.
The first additive prevents the formation of air bubbles, guaranteeing the floor the required strength. Plasticizer components reduce water content and flow rate. Such screeds have a number of advantages:
- form a smooth surface;
- harden quickly;
- keep warm well;
- give minimal shrinkage.
Mixtures containing anhydrite give off almost all the moisture within two weeks. Having created such a floor, it is allowed to walk on it on the second, maximum third day. The minimum level of shrinkage does not create cracks, the floor retains heat perfectly, helping to save on heating. But it is not recommended to fill the bathrooms with such a self-leveling floor, because the screed quickly loses its original qualities from exposure to a humid environment. It should be added that in the process of hardening, a patina appears on the surface - a glossy layer characterized by a low strength index. And when the flooring has to be installed, the patina layer is removed by sanding.
Types of systems for self-leveling floor
Before arranging a self-leveling floor, it is recommended to decide on a heating system that suits it. The quality condition and reliability of the future coverage will depend on the right choice. Today, there are several types of systems that can be used to fill floors.
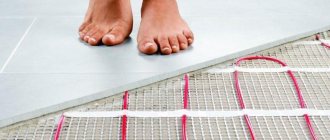
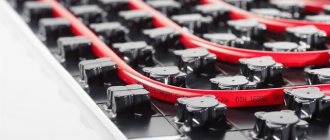
Electric floor
The most suitable option for creating a self-leveling floor with heating. Heating electrodes are not very thick, which makes it possible to reduce the costs of the filling mixture, and, as a result, the costs of repairs.
Electric floor
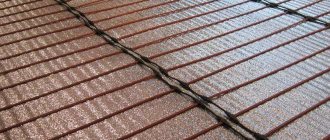
Infrared floor
The modern look of the heating system. Due to the film elements, the system differs in thermal efficiency.In addition, the film is thinner than the electrodes of the electrical system, so the installation of a self-leveling floor for such a heating system will cost you significantly less than the previous option. But there is one feature - film floors are considered a novelty, so their cost is much higher than the previous version.
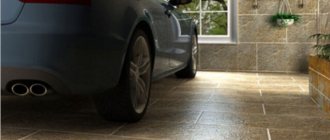
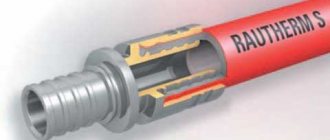
Water floor
The most popular heating method, which is rightfully called classic. Many consumers ask the question - is it possible to fill a warm water floor with a self-leveling floor? Quite, but the procedure is not considered reasonable enough. The main reason for this is the size of the pipes laid in the floor - a large amount of mixture is required to fill them, and the self-leveling floor will not seem too cheap to you. In addition, the pouring process will last in several stages so that the coating dries quickly and turns out to be of high quality. Ultimately, the thickness of the self-leveling floor for a water-heated floor will be maximum when compared with the installation of other heating systems.

Types of self-leveling floor and prices for it in Moscow
The classification of the self-leveling floor depends on the elements included in the composition. Thus, there are 2 main types:
- polymer concrete. The mixture is made on the basis of sand, plasticizers and cement. The mixture is laid on a ready-made base using beacons to facilitate installation. Reinforced mesh reinforces the structure. Such floors freeze after two days;
- polymer. This variety has 3 subspecies;
- epoxy. The combination with an infrared system will bring the greatest effect, due to the need for a fill thickness of 2-3 mm. Endowed with protection against the effects of chemically active compounds, have many color variations. However, there are also disadvantages: loose fit to the base due to increased density and low elasticity, the heating temperature should not exceed 24-25 ° C;
- polyurethane. Durable, flexible, fits snugly with any base. After hardening, the floor becomes resilient and resistant to vibration. It is pleasant to move on the finished surface. Self-leveling floor of this subspecies is combined with all heating systems;
- methyl methacrylate. Environmentally friendly subspecies of the floor, resistant to chemicals, heating temperature range from -65 to + 140 ° C. The poured solution hardens in 2-3 hours, it is combined with all types of heating.
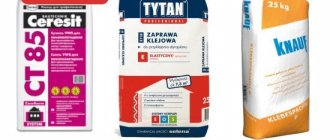
In online stores in Moscow, you can order various types of self-leveling floors. Consider popular brands:
- Volma Level Comfort. Suitable for use in bathrooms. Cures quickly, self-distributing. The average cost is from 300-350 rubles per bag;
- KnaufTribon. It cures quickly so that the flooring can be installed after one day. Price from 350-400 rubles for 1 piece;
- Bolars Optim SV-210. Used in industrial plants. Fast hardening, withstands increased loads. Prices start from 360-400 rubles for 1 piece;
- VetonitFastLevel. Used for large rooms, it can be combined with any finish. Cost from 400 rubles per bag of 20 kg;
- VetonitFinishLevel. An economical option if you need to fill a large space with a thin layer. Price from 550 rubles.
We recommend: How to choose a floor covering for a warm floor?
Self-leveling floors vary both in price and quality. Choose coverage based on your preferences and financial implications.
Criterias of choice
Before making a self-leveling floor on a warm floor, you should decide on the location of the furniture. To create a high-quality and long-lasting heating system for a self-leveling floor, it is necessary to master all the technical aspects and small tricks of the construction process. Observing the technical requirements, you will be able to successfully install a heating system, which will have a long operating period:
- arrangement of furniture. Before the start of all work, the furniture is distributed in its places. As stated in building codes, the installation of underfloor heating begins half a meter from the walls. This is necessary so that furniture stands along the walls, heating under which is not required, because in such places the heat return is minimal;
- doorways. You should not lay the heating system through doorways, since dismantling the box can lead to problems associated with damage to the heating system, which will be quite difficult to restore;
- fluctuations in temperature. This must always be remembered, because sudden temperature jumps are contraindicated in systems. So in the most dangerous places - balconies, hallways, etc., the installation of heating systems implies the installation of an additional insulation layer. This feature is important primarily for water systems.
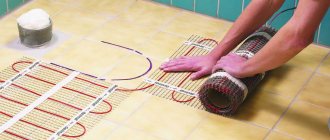
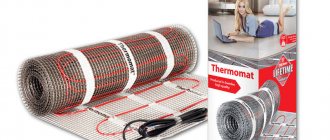
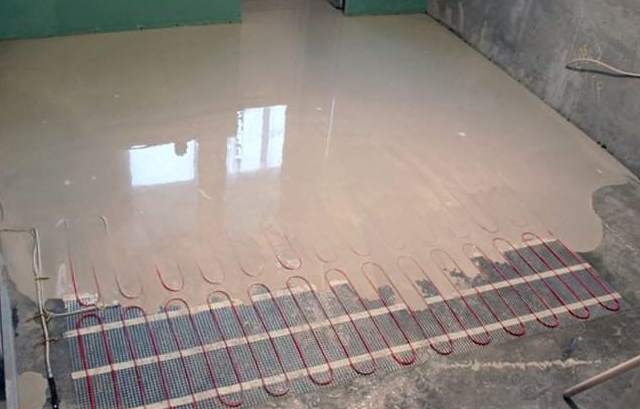
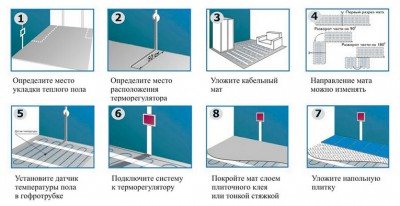
Laying mats
Laying out heating mats is a fairly simple task, there are only a few nuances. The first row is rolled to the desired length, after which you need to make a turn. To do this, it is necessary to cut the reinforcing mesh at the turning point, so as not to damage the cable.
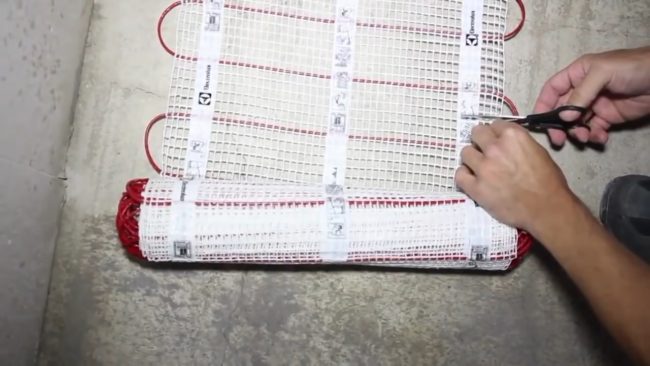
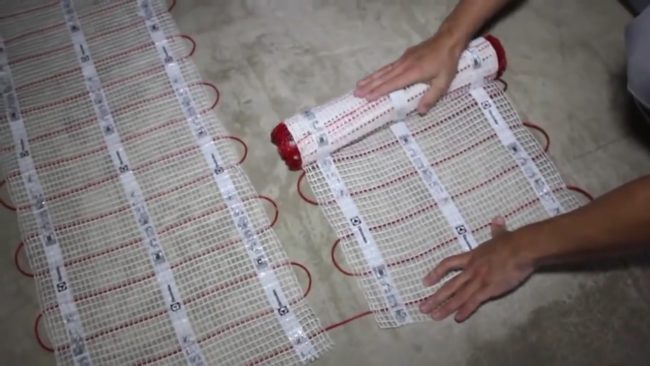
Once the mesh is cut, the structure flexes and turns easily in the opposite direction. The cable does not break when bent, there is no need to be afraid.
If, during the cutting process, the integrity of the cable was violated, we can say with a greater degree of confidence that the system will not work, it is better to replace the entire mat. Problems can only be avoided by taking a new roll. The mats laid out on the floor are fixed to the floor with mounting tape. It is very important to fix the reinforcing mesh, and in no case fix the cable.
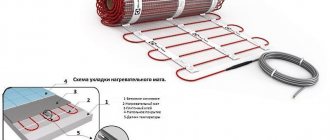
Installation recommendations:
- observance of the distance between the turns of the cable, they should not intersect or be too close;
- it is forbidden to lay the thermomat cable in those places where furniture, overall equipment, equipment will be installed;
- compliance with cable indents: from the wall - 5 cm, from electrical equipment - 10 cm.
Installation technology
Consider what stages of work to be performed when installing a warm self-leveling floor.
Preparatory work
The entire working surface is cleaned of dirt, uneven places are eliminated, defective areas are repaired. After that, you can proceed to the masses, where the heating system will be laid. Here you will have to take into account certain nuances:
- you should not use the places for laying infrared films, on which the installation of large-sized items is planned;
- when installing the system, the distance from the walls is maintained, as determined by building codes;
- make sure that your system is at a sufficient distance from other heating devices (at least twenty centimeters);
- without fail, a heat-insulating layer is laid, which minimizes heat losses. It is best to use materials with a foil surface, laying them out with the metallized side up and securing the edges with tape.
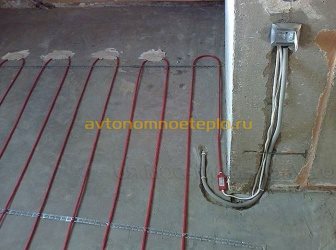
Underfloor heating installation
- film heat-insulated floor can be installed independently or with the help of eyelets. The laid areas are connected by wiring, connected to a thermostatic installation. After that, the thermostat and temperature sensor are synchronized. It is recommended to mount the sensor in a corrugated pipe. The system is checked simply. It is turned on for a few minutes to warm up all the elements. If this does not happen, you should check all the installation steps and find the error;
- cable floors are laid in almost the same way as film floors, but there are certain differences. Do not stack cables on top of each other. In addition, you can start the underfloor heating system only after the filling surface is completely dry. Do not fill the temperature sensor with a mortar mixture.The formation of void areas in which there are air bubbles is unacceptable;
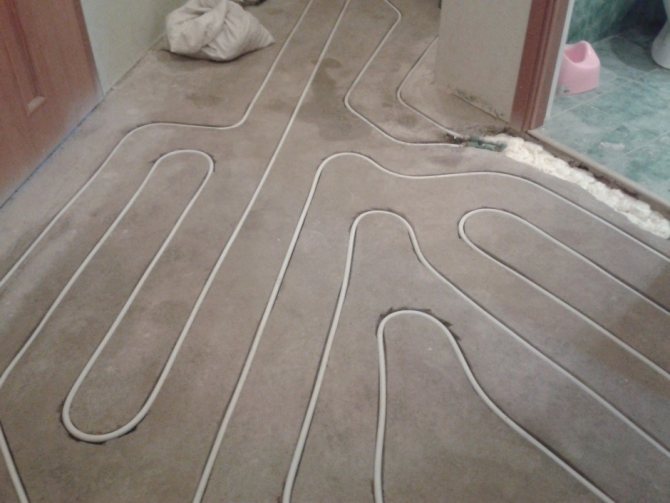
- water system. To arrange such a warm floor, pipes are laid out on the surface, connected and poured with a solution. It is recommended to use metal-plastic or copper as a material for the device. The second option is more durable, but also more expensive in terms of cost. If you want to increase thermal conductivity, then use pipes made of plastic material. It is not recommended to lay cheap polypropylene - it will quickly fail.
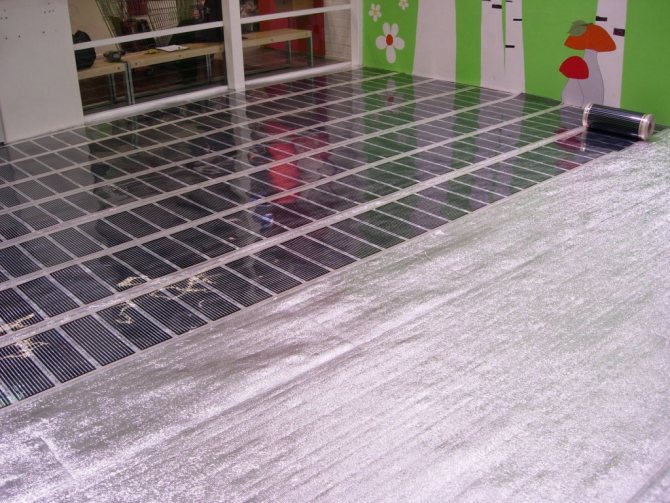
Film warm floor
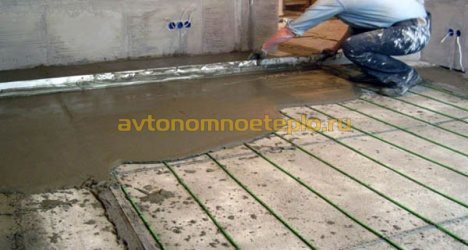
Pouring the self-leveling floor
The self-leveling floor consists of two components, purchased separately. Mixing them is allowed with an ordinary drill, installing a special nozzle. Today you can buy a ready-made composition, but its cost will be much higher than simple samples.
The mixture is prepared in accordance with the requirements of the instructions. After cooking, the composition is poured onto the floor and rolled out with a needle roller to homogenize it and remove air bubbles.
The dried floor remains covered with a protective varnish and can be walked on.
Self-leveling floor on a warm floor is considered a modern solution to the construction issue, increases the comfort in the room. Electric energy or hot water can be used as heat sources.
How to install a screed and self-leveling floor with underfloor heating systems (underfloor heating)? Which building mixtures can be used with underfloor heating and which not? What errors can occur when pouring underfloor heating? Many buyers ask our experts such questions and in this article we will try to answer them.
Screed thickness for electric underfloor heating
Screed pouring technology for warm electric floor

Laying the cable underfloor heating in a screed can be performed strictly on a perfectly flat surface. Fluctuations affect the uniformity of heating and are often the cause of overheating of the cable.
What is the thickness of the screed over the electric floor
The opinions of experts on this matter may be different. Therefore, it is best to refer to the recommendations of the manufacturers of warm floors. According to the instructions given in the operating instructions, the minimum layer of the screed should be 4-5 cm.
But the thickness can vary depending on several factors:
So, heating mats are laid out on the floor surface, after which they are immediately covered with a floor covering. The cable in the mats is attached to the reinforcing mesh. The design allows you to lay tiles using an adhesive without screed.
The larger the volume of the cable, the greater the thickness of the concrete screed. To determine the minimum parameters, it is worth referring to the operating instructions. The minimum thickness of the screed over a warm electric floor cannot be less than 4 cm for cement mortar and 2 cm for special leveling mixtures.
The total height of the screed for an electric underfloor heating is from 5 to 8 cm. Provided that the installation is carried out on a flat surface, the thickness of the cake can be reduced to 4 cm. Heating mats together with the floor covering reduce the height of the room by no more than 2 cm.
Which screed to choose for pouring
In addition to the traditional sand-cement composition, there are other types of screed recommended for pouring underfloor heating.
Each of the existing options has its own advantages:
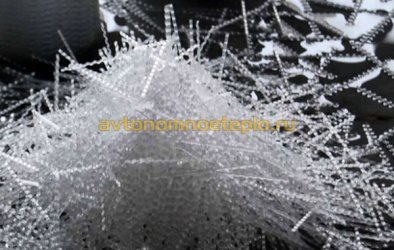
- Wet screed. For preparation, they take cement, sand and a plasticizer. Be sure to add fiber, in order to avoid cracks and deformation during drying and during operation. The advantage of the solution is that it can be made by hand. The components are inexpensive, which makes the final cost of the work somewhat cheaper.The disadvantage of a wet screed is long-term drying of the floor (28 days), a high probability of cracking, the impossibility of making a perfectly flat base.
- Semi-dry screed method. A small amount of water is used for manufacturing. Ready-made mixtures are popular. But if necessary, you can prepare the solution yourself, based on the calculation - river sand 120-140l / fiberglass 130gr / cement 1m / water 14-17l. / plasticizer 0.5 l. The advantage of a semi-dry composition is the complete absence of cracks in the screed after drying. There is no need for additional leveling of the floors after drying.
- Dry method. The composition of the screed solution may differ depending on the manufacturer, but most often fine perlite or quartz sand, fine-grained slag, etc. are used. The advantages of the dry method include: quick installation and drying. Further work can be started after 12 hours.

The tie must be done carefully to prevent possible damage to the cable. Breakage of protective insulation or conductive core during flooring is the most common cause of floor failure.
How to reinforce the screed
For the installation of the heating cable in the screed to be successful, it is imperative to prevent deformation and cracking of the floor during the drying process. Cracks cause cold zones, uneven heat distribution over the entire surface of the slab.
What methods of screed reinforcement are there?
In large rooms, floor cracking can occur due to the lack of compensation pockets. Therefore, a mandatory measure is the installation of a compensating damper tape along the walls, as well as between sections of the slab.
How to fill the screed correctly
The technology of pouring screed for electric underfloor heating is practically no different from that used when installing a conventional cement base. After completing the preparatory work and laying out the cable for further installation in a concrete screed, proceed to the following steps:
It is possible to turn on underfloor heating installed in the screed no earlier than 28 days after pouring the solution. According to SNiP, at the same time you can start laying the flooring.
How to make an electric underfloor heating without a screed
It is possible to lay the underfloor heating cable without a tie. The following two methods are popular:
The many nuances and features that must be taken into account when installing an electric underfloor heating in a screed lead to the fact that more and more buyers prefer heating mats.
Calculation of the power and temperature of a warm water floor
What kind of screed is needed for a warm floor - varieties and step-by-step pouring technology
If you want to build a warm floor, then you will need to be sure to hide all its elements before finishing. This can be done with a screed. Naturally, you would like to know about some of the nuances of its arrangement. A screed for a warm floor must be made with high quality, otherwise the heating will be uneven and ineffective.
Screed device
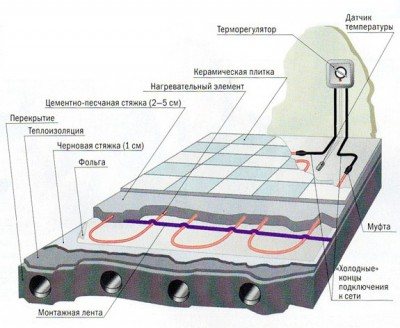
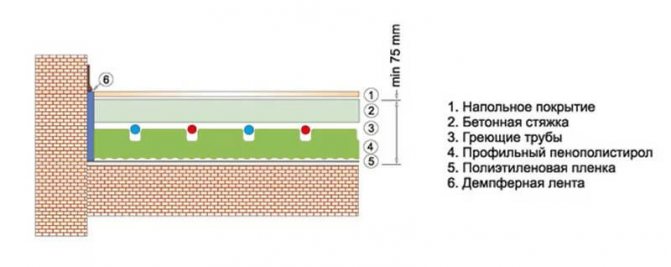
The figure shows the device of the "pie" of cable underfloor heating
A screed is a concrete layer that is applied to the base to level it or hide other elements before finishing. It should be noted that it can be made not only from cement mortar, but also using special mixtures.
The standard pie arrangement is:
Depending on the construction of your warm floor, the “pie” device may change. For example, the first layer is applied to the subfloor in order to level it. The next screed is poured onto the insulation. The last layer is already mounted on the warm floor. It is not difficult to do the work with your own hands, you just need to follow the pouring technology.
Screed varieties

These options have their own advantages and disadvantages. However, you need to choose a screed taking into account the characteristics of the room, the design of the warm floor, as well as the time allotted for repairs. Which is best for your case, it's up to you.
What should be the thickness of the screed?
The underfloor screed must be done correctly. The thickness of the screed is a very important parameter. It depends on what finishing materials you choose. If the thickness is not taken into account correctly, then the heating will become uneven, and the heating itself will be ineffective.

Screed thickness for electric underfloor heating
So, if you need to level the rough base or eliminate serious horizontal drops on it, the thickness of the screed will be about 5 cm. In this case, you can lay heat and waterproofing under it.A layer is poured over the insulating elements, the thickness of which should be at least 2 cm. In this case, it will be possible to start installing the warm floor only after 28 days. All manipulations can be done by hand.
The thickness of the screed also depends on which mortar you will be using. If it contains cement and sand, then in general there should be a layer of 5 cm above the heating structure.If you decide to add a plasticizer to the mixture, the thickness of the screed can be reduced to 2-2.5 cm.However, in this case, you will have to apply reinforcing mesh or reinforcing composition. Otherwise, the layer thickness will be 3 cm.
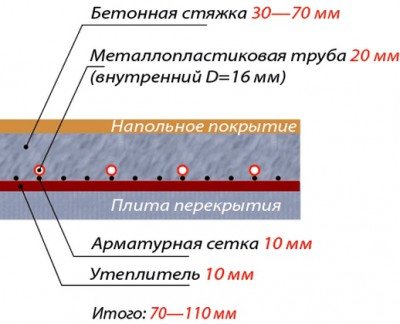
If the heating structure is made on the basis of pipes, then the height of the "cake" will be about 8.5 cm. This size is unacceptable if the house has low ceilings. In addition, you also need to consider where the apartment is located. If it is on the lower floor, then the thickness of the "pie" can be 11 centimeters.
Screed thickness for water heated floor
If you do not want to make too large a screed, then it makes sense to equip an electric floor heating. In this case, its thickness will not exceed 3 cm. Although, when using special plasticizers, this parameter can be reduced to 2 cm. In this case, overheating of the elements is excluded.
A screed under a warm floor is very quickly built with your own hands. It is important to properly prepare and pour the mixture.
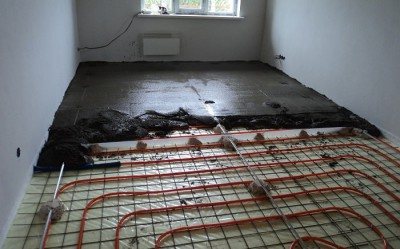
Pouring technology Preparation for work
Before you start pouring yourself, you need to prepare the room. Please note that the air temperature in the apartment during the work should range from + 5 to + 25 degrees Celsius. Naturally, the base must be cleaned of debris and dust. Otherwise, the solution may lay unevenly, and it will have poor adhesion to the surface. Try to eliminate all gaps in the base. If necessary, make a rough curl of the base.
It is necessary to fill in the solution only after all the contours of the warm floor have been laid and its performance has been checked.
During preparation, it is necessary to take into account the possibility of expansion of the concrete mixture under the influence of a temperature drop. To avoid cracking of the mortar after drying, it is necessary to equip expansion joints. To do this, you can use a special damper tape or hard insulation, the thickness of which is at least 1 cm. Such an expansion joint should be made to the entire depth of the screed.
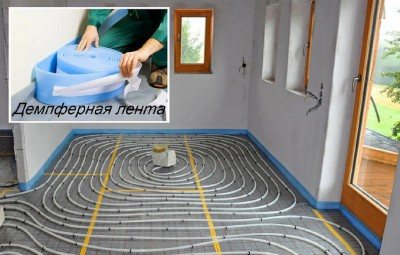
The photo shows the installation of the damper tape in front of the screed. Expansion joints are also arranged in the aisles between rooms.
Pouring underfloor heating should be done only after thorough preparation of the base. Before using the composition, do not forget to check the system for operability and absence of defects.
What is needed to equip a screed?
To work you will need the following materials:
- Cement mortar or dry mix.
- Reinforcing mesh or reinforcing composition.
- Waterproofing.
- Insulation.
- Fasteners.
- Capacity for stirring the solution.
- Construction mixer or drill with a special attachment.
- Spatula for leveling the mixture.
- Tile or other finishing material for surface finishing.
The reinforcing mesh should not have too small cells. Tiles for underfloor heating are used most often. Naturally, it is also necessary to choose this material correctly. You can lay it with your own hands, observing the technology for performing the work.
Features of filling
A warm screed is set up in several stages:
If you are pouring water underfloor heating, then there should be pressure in the pipes at this moment.
A couple of weeks after pouring the mortar, you will be able to lay the tiles.
Installation recommendations
If you decide to use a film construction, then the use of a screed compound is not advisable. A special tile adhesive should be used here. The elements are fixed on it. Naturally, the layer thickness in this case should be minimal, and the upper part of the film floor should be visible. Next, you can lay the tiles. First you need to wait for the previous layer of glue to dry. This way of installing the tiles will avoid peeling the floor covering.
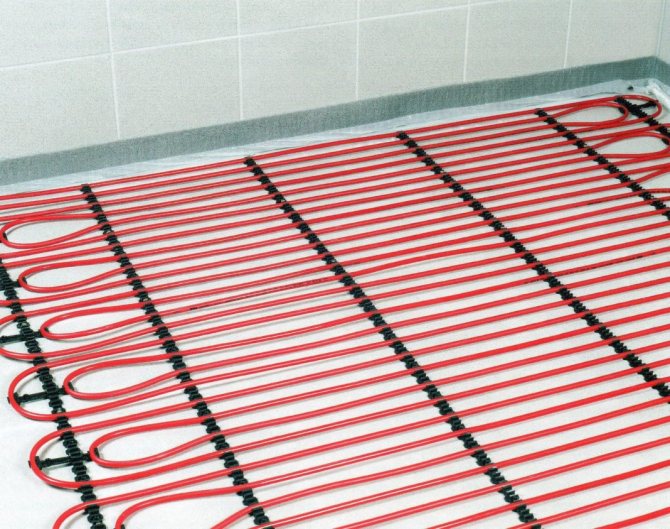
Technology of laying heating mats for electric underfloor heating
As you can see, a screed for a warm floor is not difficult if you follow the technology. You can equip it under tiles or other finishing materials with your own hands. The main thing is to choose the right composition for pouring the screed, and not to ignore all stages of the work. Leave your opinion about the article in the comments and share your experience in pouring a warm floor.
Is it possible to use a warm floor under the self-leveling
Yes, but you must first select a warm floor under the self-leveling floor, which is suitable for a particular living space. The reliability and quality of the coating will depend on this, as well as the correct operation of the underfloor heating under the self-leveling layer.
What types of underfloor heating systems are suitable:
- an electric floor is the most suitable system for a heated self-leveling floor. The electrodes are not very thick, which will make it possible to reduce the cost of the bulk composition;
- infrared floor is a modern type of system. Due to the film components, it is characterized by increased heat transfer. The thickness of the film is less than that of the electrodes, so that for the installation of a self-leveling floor using this system, you will need to pay significantly less money than for the above. But there is one point - infrared floors are considered an innovation, and therefore the price for them is much higher than for electric ones;
- water floor - the most popular heating method, called the classic. Many are interested - is it possible to fill the warm water floor with bulk? Yes, but this installation process will not be advisable due to the great complexity and high cost. So, for pouring pipes, a large volume of composition is required. In addition, the procedure is carried out in several stages so that the coating dries faster and has a high quality. As a result, the thickness of the self-leveling floor will be maximum in comparison. with filling of other heating systems.
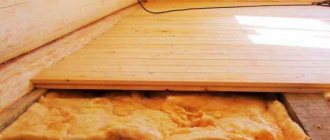
Types of water underfloor heating
The structure of the water floor is divided into two types: concrete and floor. The concrete system involves pouring the screed. The planking system is applied without pouring and can be installed in wooden houses. The key element is an aluminum or galvanized plate with a recess in the middle. The pipe fits securely into the groove, and the side wings dissipate heat instead of a screed.
In general, your gender's cake will be layered:
- Floor base, concrete or wood.
- Waterproofing.Including the installation of a damper tape, which will protect the joints of the walls with the base and provide a technological gap.
- Thermal insulation layer.
- Water floor construction.
- Concrete screed, if necessary.
- Fine flooring.
Styling features
When choosing an underfloor heating system, first of all, it is necessary to take into account the specifics of the bookmark:
- It is not recommended to use places for laying infrared films, where you plan to install large-sized objects.
- When installing the system, it is necessary to maintain the distance from the walls established by building codes.
- Make sure that the system is located at a distance of at least 20 cm from other heating devices.
- It is necessary to install a layer of thermal insulation to minimize heat loss. It is more correct to use materials with a foil surface, laying them with the metallized side up and fixing the edges with tape.
Often, in apartment buildings, it is undesirable to install a warm floor in a screed due to low ceilings. In such cases, it is more advisable to use film warm floors.
For constant heating or use as the main source of heating, it is better to arrange a water underfloor heating, since it is the most economical.
Self-leveling underfloor heating is installed according to the scheme:
- Pour the screed to level the base.
- A certain type of thermal insulation is laid: expanded polystyrene, mineral wool and others.
- They carry out installation according to the established scheme of any type of heating elements.
- A composition for pouring is being prepared: separate elements will be connected using a drill with a mixer attachment.
- The resulting composition is poured onto the base.
- The surface is treated with a needle roller.
- The composition is left to dry for 12-24 hours.
- The surface is coated with a protective colorless varnish. When 24 hours have passed, you can start operating the system.
Installation and connection of the thermostat
At the initial stage, it is necessary to choose the correct location for the thermostat. There are a number of recommendations to simplify this process:
- ideally, extend a separate line of electricity from the electrical panel;
- the height from the floor should be at least 30 cm.As a rule, for ease of use, the switch is located at a height of 1-1.5 m.
- It is strictly forbidden to keep the regulator close to window openings or “wet” places where water can get on the device.
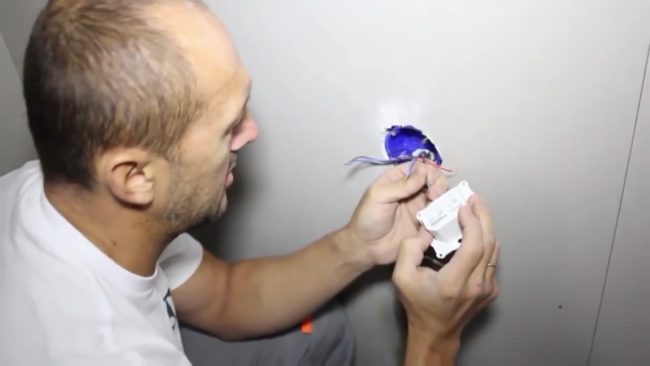
The regulator is installed in a pre-drilled "ballerina" hole, the size of a socket.
The next step will be to connect the wires from the temperature sensor and mats to the regulator. All wires are placed in a corrugated plastic tube, thereby making it possible to secure the contacts.
Wiring diagram for underfloor heating to the thermostat:
- the sensor is connected to the sensor via the first and second terminals;
- the supply wire is connected through the fifth and sixth terminals (5 - phase; 6 - zero);
- heating cables are attached to the third and fourth terminals.
The indicated terminal blocks are not typical for all devices, but in most cases the diagram is correct. Each manufacturer has the right to change combinations, therefore, before connecting, it is very important to pay attention to the nested diagrams and inscriptions present on the back of the device.
After all the elements of the system are mounted and connected, it is worth performing a functional check. To do this, measure the resistance of the heating mat with a multimeter.
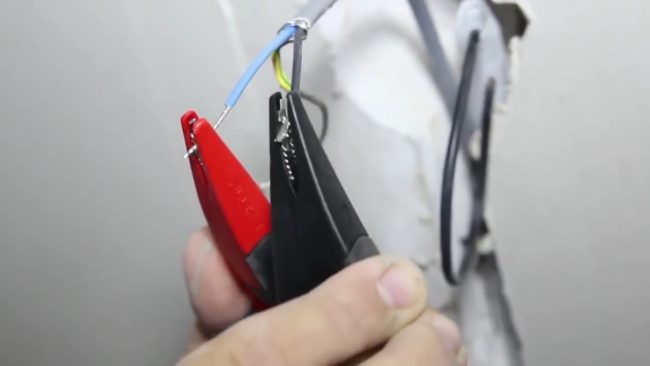
You can use a regular, household multimeter (sold in stores for 200-300 rubles). On the cable tag or in the installation instructions for the system, there is an allowable resistance value that must be measured before finishing work. The resulting value should not exceed or be less than the standard by more than 5%.
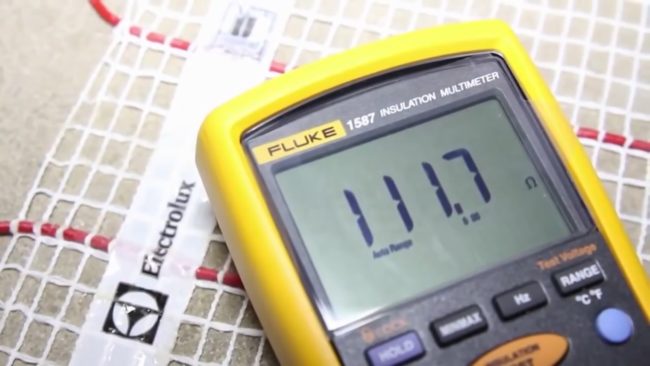
Our expert says: “Yes, according to the recommendations of the instructions, you need to check the resistance of the cable. This is very important becauseHaving rolled up the warm floor into the screed will be too late if the cable is damaged or does not work. "