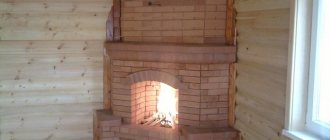
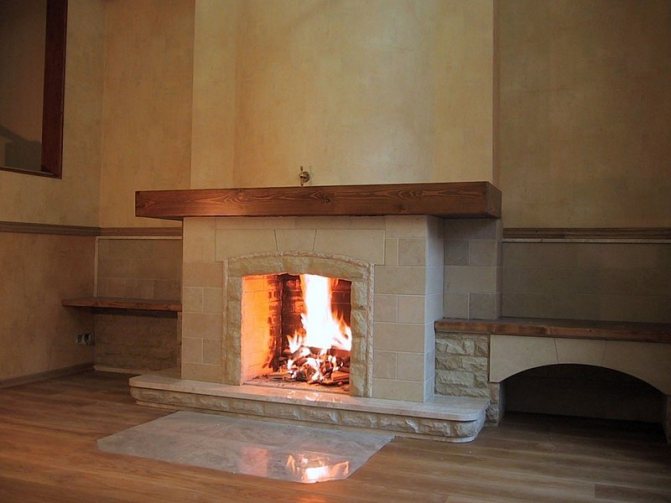
Fireplace design
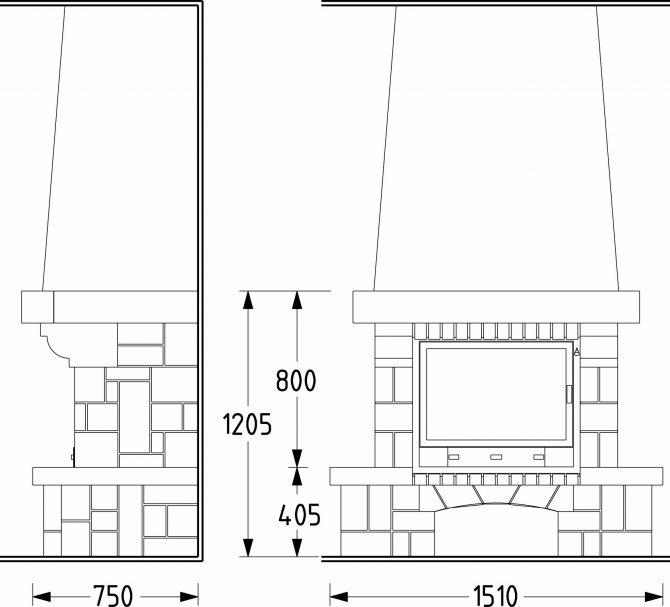
When we build brick fireplaces, the first step is to create a project that displays all the required dimensions of the structure and its parameters:
- Drawing creation. At this stage, a place for installing a fireplace is usually selected and its dimensions are calculated. When these parameters are known, fireplaces with a detailed description must be depicted on paper, observing the scale and affixing all dimensions. Of course, the drawing should also take into account the competent conduct of the chimney through all the ceilings, as well as the location of the blower and the design of the firebox.
- Preparation of tools and materials. Serious variability of materials is possible only when they are selected for cladding. So, finishing can be done using red ceramic bricks or decorative tiles. In this example, the first option will be considered.
A set of materials for laying a fireplace with the specified parameters is as follows:
- Fireclay bricks of the brand not lower than M200 for the formation of the firebox;
- Red ceramic bricks in the amount of 250 pieces (it is advisable to take with a margin of about 10%);
- Materials for pouring foundations and brickwork (cement, sifted sand, gravel and water);
- Waterproofing material for laying the foundation;
- Smooth formwork boards;
- Grate;
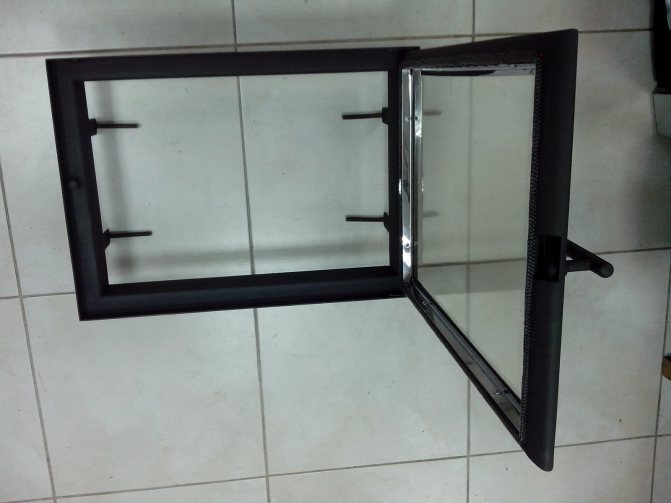
- Metal door;
- Damper;
- Blown;
- Metal wire and rods required for reinforcing the structure;
- Wire 0.8 mm thick for dressings;
- Asbestos cord.
Before you make a fireplace in the house with your own hands, you need to prepare the following set of tools:
- Master OK;
- Roulette and marker;
- An even rule;
- Bulgarian;
- Level, plumb line and square;
- Construction stapler;
- Bayonet and shovel;
- Construction mixer or drill with an appropriate attachment;
- Rubber hammer for leveling brickwork;
- Conventional formwork hammer.


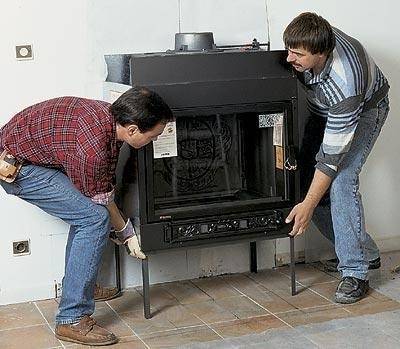
Construction of the box and lining of the furnace from steel
When installing the firebox inside the box, the following points must be taken into account:
- The wooden wall in the box itself must be reliably protected from heating from the side of the fireplace, just as reliably as when using an exposed installation. This provides for strict adherence to the required distances and the organization of heat-reflecting shields.
- The top and bottom areas of the box are equipped with a ventilation notch to protect against overheating. It is recommended to install such grilles on two or three sides of the structure. If the instruction does not contain instructions on their total area, it is taken at the rate of 0.15 m2 for the lower and upper notch.
- It is imperative to provide heat protection for the wood ceiling. The simplest way is to have 350-400 mm free space on top. In this way, protection against shrinkage and seasonal variations in size is also achieved. In the upper area, the box is made closed: the degree of thermal insulation of its horizontal overlap should not be inferior to that of the vertical walls.
- It so happens that the design development provides for the construction of the box to the ceiling. In this case, the most reasonable decision on how to properly install the stove in the house is to divide the box in height. An autonomous section with a height of 300 mm is left on top, separating it from the rest of the structure with a layer of thermal insulation. In addition, this self-contained section must have its own ventilation openings with a total area of 0.02 m2.
- Before you install the stove in the house with your own hands, you need to provide for the likely shrinkage of the log house (the box should not rest against the ceiling).It is better to entrust the calculation of the required expansion gap to an experienced specialist. To decorate the gap that appears, a cornice is often used attached to the ceiling (it is advisable to use heat-resistant steel products, since the plastic can melt).
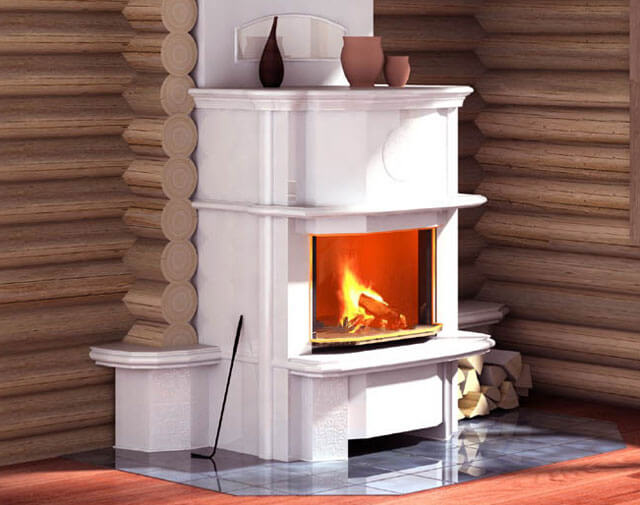
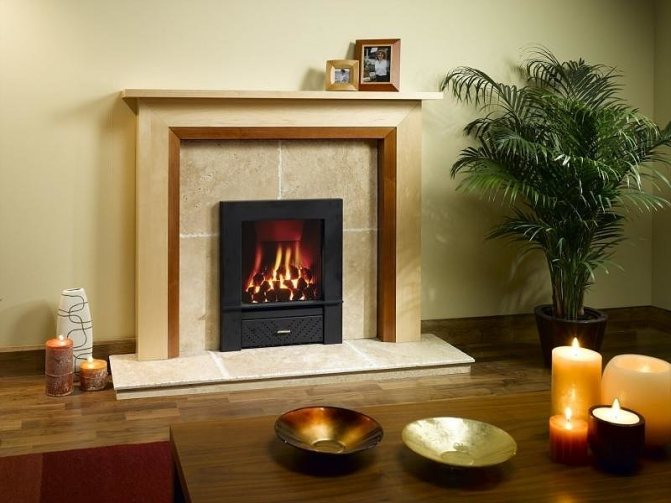
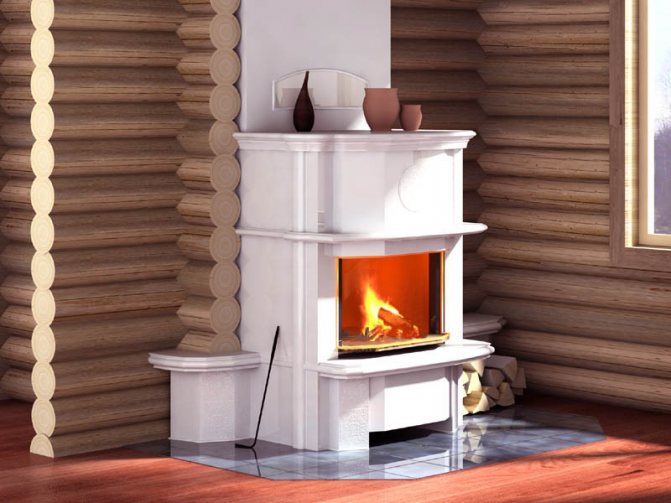
Gas fireplace
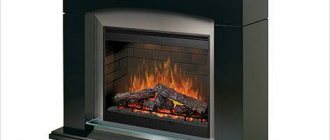
Gas fireplaces are based on a conventional gas burner. The effect of live fire is achieved with the help of artificial firewood, which is made of environmentally friendly non-combustible material that imitates real firewood. These fireplaces are convenient where there is gas. Most models can even be connected to bottled gas.
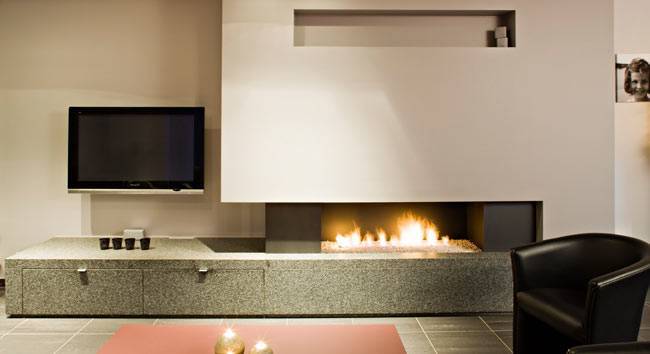
Such fireplaces do not require a special chimney installation: it is enough to bring the chimney into the flue or directly to the street. However, all work can only be carried out with the permission of the gas industry organizations. If everything is done correctly, then heating rooms with a gas fireplace is convenient and safe.

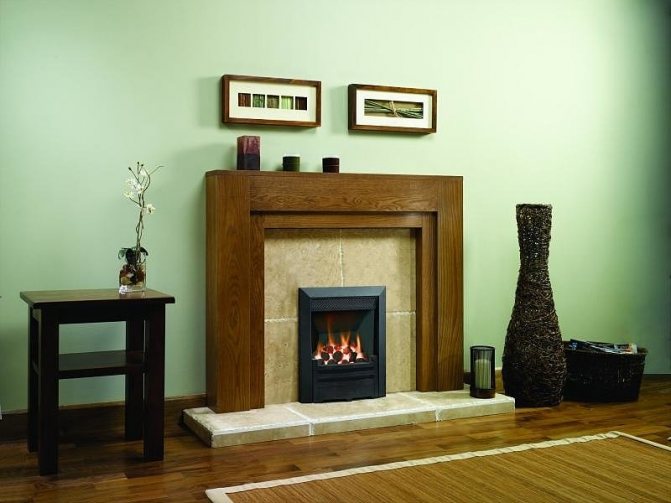

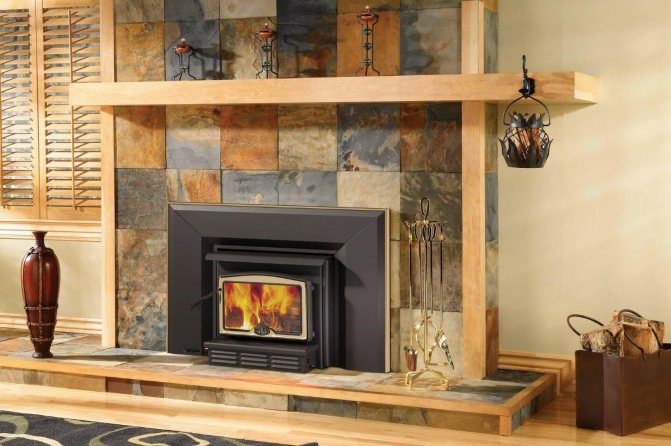
Fireplace plaster
Plaster is one of the simple and practical options for decorating a brick fireplace. Several years ago, plastered surfaces were whitewashed or painted. Today it is possible to apply a decorative layer with a different texture on top of ordinary plaster.
Plastering of a fireplace can be fragmentary
Types of plaster for fireplaces
Decorating a fireplace with plaster is popular for the reason that any design can be developed. The second plus - if done correctly, achieve a smooth surface, the finish is beautiful and durable. For plastering fireplaces, the same compounds are used as for brick stoves. Although the heating temperatures of the surfaces are different, the plaster mixes are made the same. There are two options: do the plaster yourself or buy a ready-made one. If you have no experience in working with clay and determining its fat content, it is better to buy. Store plaster for fireplaces and stoves contains additives and additives that make the surface more durable, less cracks appear in it.
Do-it-yourself fireplace rules
Before assembling a fireplace correctly so that it is as reliable and durable as possible, you need to take into account a number of rules aimed at achieving these goals:
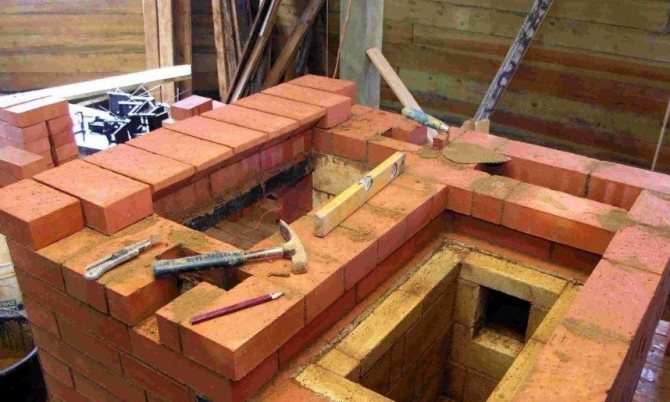
- When arranging a brick fireplace, you need to create a separate foundation for it;
- The working part of the firebox can only be made of fireclay bricks, which should not come into contact with ordinary bricks;
- When installing the door and ash pan, you need to lay an asbestos cord and leave a small gap required for thermal expansion of metal elements;
- The inner part of the firebox does not require plastering;
- The rear wall of the firebox should preferably be placed at a slight angle.
A separate item is the fire safety rules, the observance of which reduces the risk of a fire to a minimum:
- Along the entire length of the flue duct, special cuts should be installed to increase the degree of fire safety;
- When placing the fireplace in close proximity to the wall, it is imperative to lay a layer of refractory material between them with a thickness of at least 20-25 mm;
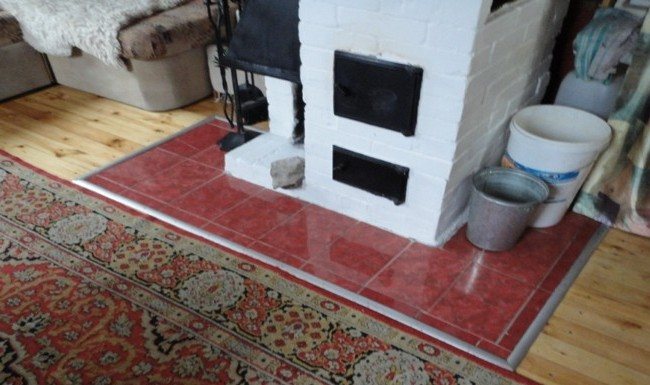
- When installing the fireplace on a wooden floor, it is necessary to lay a metal sheet or ceramic coating under the structure so that they protrude beyond the fireplace perimeter by at least 30-35 mm;
- At the point where the pipe passes through the floor or ceiling, a 15-cm layer of heat-insulating heat-resistant material must be mounted;
- Only one own chimney can be used for the fireplace.
The operation of the fireplace is also carried out according to certain rules:
- It is strongly discouraged to heat the fireplace to the maximum temperature;
- For normal operation, the fireplace must be regularly cleaned from soot and ash;
- All flammable objects must be at least 70 cm away from the fireplace;
- Only the type of fuel for which the design was designed can be used in the fireplace.
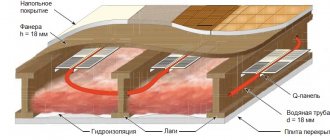
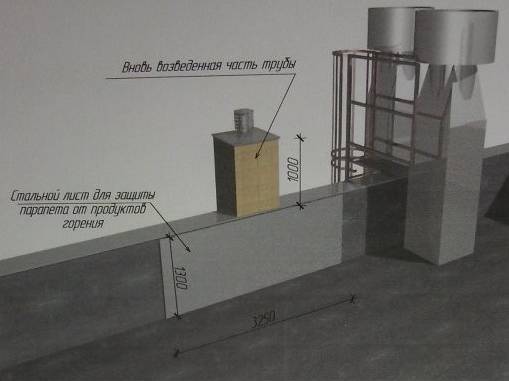
INSULATION OF THE FLOOR FROM THERMAL EXPOSURE WITH REFRACTORY GLASS PODIUMS
To provide the floor surface with maximum protection, special fire-resistant podiums are used. Such material, in addition to high technical performance, also has a rather aesthetically pleasing appearance. Fire-resistant glass is placed under the fireplace, directly on the prepared floor surface.
Also, in order to isolate the floor from thermal effects, you can resort to installing a podium. It is made of bricks and metal profiles.
Another coating that has high fire resistance parameters is a metal sheet. It, like fireproof glass, can be installed on the floor surface in front of the fireplace. The most suitable metal option in this case is copper.
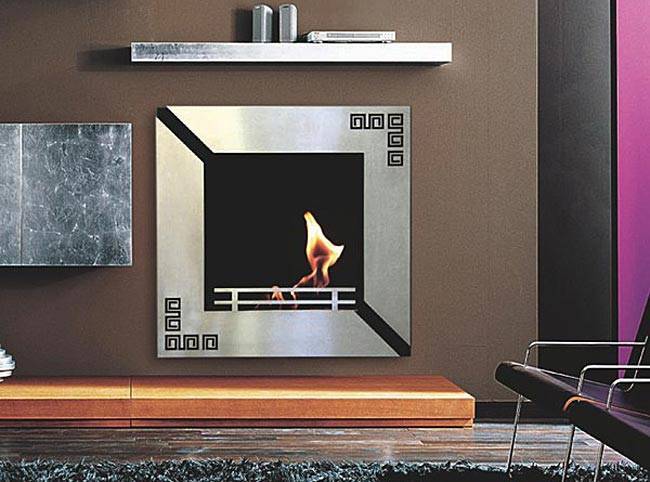
Bio fireplace eco fireplace
A biofireplace also gives the feeling of communication with a living fire. This is a real fire fireplace without a chimney. It doesn't need to be built into a wall, it doesn't need "serious" wiring, and it doesn't give off smoke when it burns. For the installation of biofireplaces in the apartment, no permits or approvals are required.
Due to the absence of heat and soot, biofireplaces can be of the most original forms and made of unusual materials. And their flame is so safe that some models are built into furniture. Bio fireplaces also humidify the air. In combination with aromatherapy, for which special kits are provided, this gives an excellent result. However, with a relatively low price of the biofireplace itself, its operation is very expensive.
We hope that our tips will help you when choosing your fireplace.
by the way
It is believed that the contemplation of fire clears the mind, streamlines thoughts, fills with spiritual warmth, the desire to warm another person, inspire him with optimism. A person becomes generous and kind, understanding and caring, generous and able to forgive and give warmth and love.
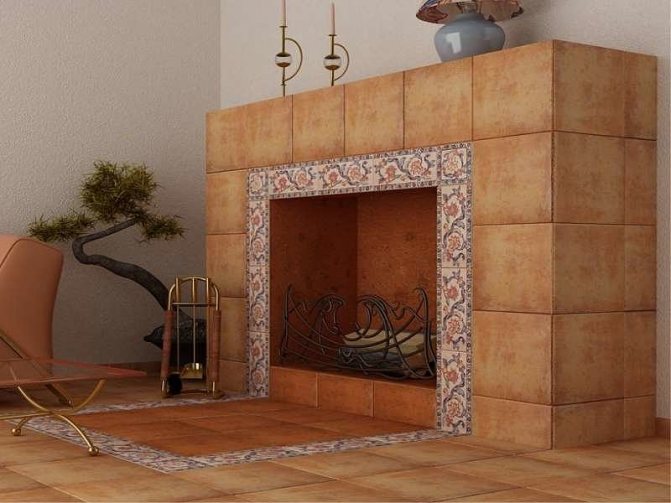
The main components of the fireplace
The portal is an external decorative part of the fireplace that frames the firebox. The area of the portal should be 1/50 of the area of the room, and the height should be no more than two times the depth of the furnace. The mantel is the upper horizontal edge of the portal. Traditionally, a mantel clock or other decorative objects are displayed on it, giving the fireplace a special charm. Smoke cornice - a ledge hanging over the open part of the firebox. Often it is performed in the form of a vault. Fireplace table - a refractory base of the fireplace, which serves to isolate the furnace part from flammable elements of the room. The fireplace insert is a niche lined with refractory bricks. The open part of it is most often square, rectangular or semicircular. The grate is used to maintain fuel and distribute the air entering from below. It is located at the base of the firebox, above the blower channel. The ashpit of the fireplace performs the same function as in a conventional stove. The rear mantel is constructed of fireproof materials and has a thermal insulation function. Khailo - fireplace smoke collector. Smoke tooth (smoke jib) - gas threshold. The smoke tooth protects the room from the ingress of smoke and soot into it; prevents the penetration of cold outside air from the chimney into the firebox. It improves the draft in the fireplace. The chimney (convector) of the fireplace is a kind of hood tapering towards the chimney. The rear wall of the convector is strictly vertical and goes straight into the chimney. A smoke damper, or gate, is a type of stove damper.
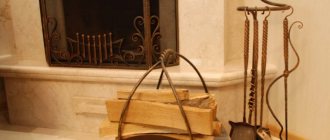
Copper plate platform
Quite often, for fire safety purposes, the floor is finished with a simple sheet of metal. Copper is usually used as a suitable material. Copper has certain advantages over other metals.It has a characteristic shade similar to the color of the flame, which harmoniously fits the platform into the cozy atmosphere of the room.
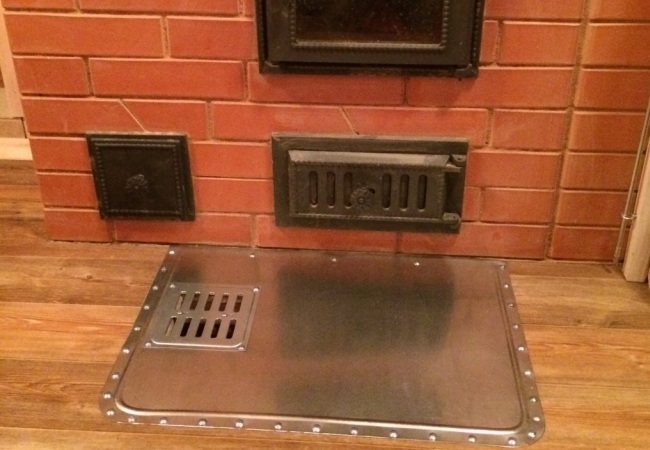
The sheet serves as a screen from which radiation is reflected. This increases the share of energy entering the room and decreases the share that is transferred to the floor. Copper has excellent corrosion resistance and is environmentally friendly.
In addition, due to the fact that the metal lends itself to processing, various patterns can be engraved on it, even at home. Being in the immediate vicinity of the hearth, the copper sheet does not lose its physical properties, and the ability to reflect radiation ensures the platform glow in the dark.
A fireplace in the house or in the country is a place of attraction for the whole family. Of course, I want it to be beautiful, but practicality will not hurt either - soot and soot, dirt or tar from firewood, all this often ends up on the walls of the portal. For this reason, the surface must be easy to clean. In addition, the finish of the fireplace must be heat-resistant - although the sides of the fireplace are heated far from such temperatures as the stove, this requirement should not be neglected. Not many materials satisfy these requirements. These are heat-resistant plaster, special types of ceramic tiles and stone - natural or decorative.
Which chimney is better
Chimneys differ not only in size and cross-sectional shape, but also in materials.
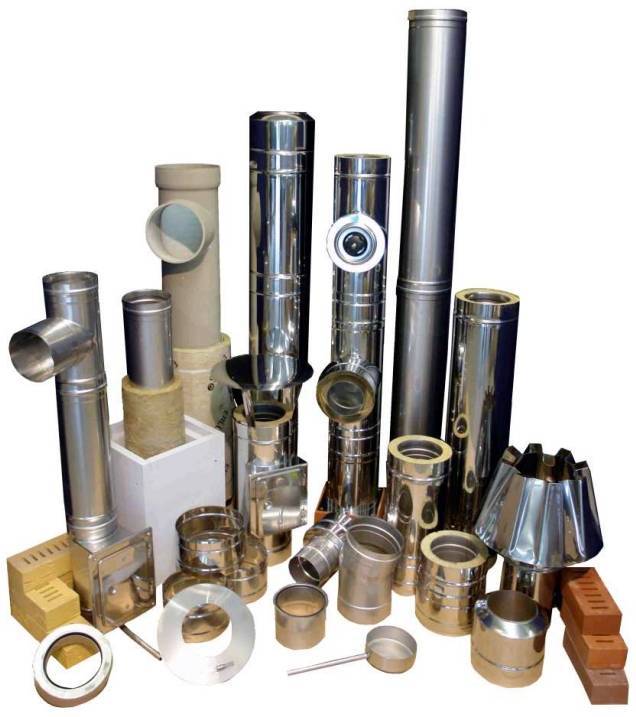
Chimneys for stoves and fireplaces
Brick chimney
Traditionally, a red solid brick is used for the construction of a chimney. It is strictly forbidden to work with cheaper material - silicate bricks - such a chimney will burst at the first firebox. Red brick is strong, fireproof and durable, with high-quality masonry it serves on a par with the building - about 150 years. But the chimney, folded from it, has an inconvenient square shape. As the smoke rises in a spiral, cold air currents develop in the corners of the structure. This leads to condensation and accumulation of soot in the corners, destroying the material.
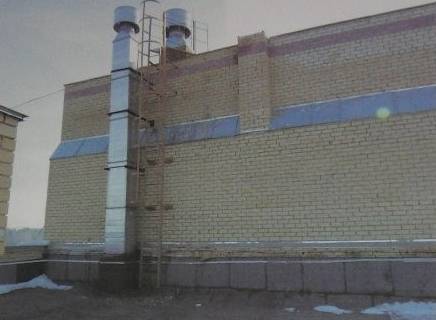
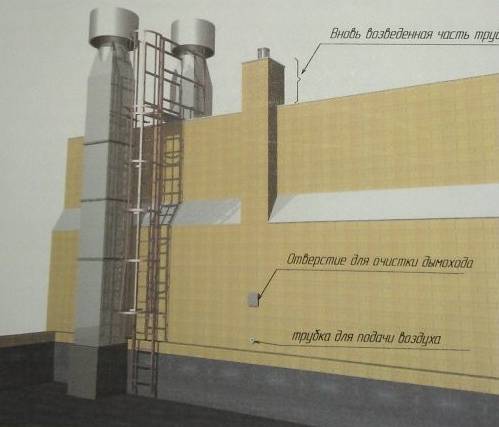
Brick chimney project in a multi-storey building |
Brick chimney project in a multi-storey building |
Brick chimney project in a multi-storey building |
Another significant drawback is the complexity of installation. It is extremely difficult to build a brick chimney with perfectly flat and smooth walls. The job is time consuming and most costly. The cost of laying a chimney is from 30 rubles. for a brick.
Older houses usually have a brick chimney. Before installing the fireplace, you need to invite the fire inspection, which will determine its condition, whether it needs repairs or not. If you are not satisfied with the location of the chimney, you can lay a new internal one nearby or install an external one, which is attached to the wall of the house. To ensure good draft of the fireplace, the height of the chimney must be at least 4 m.
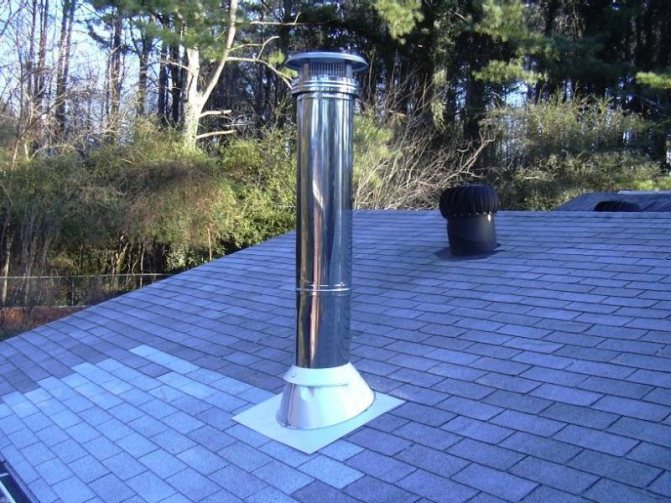
Steel chimney
A more modern and convenient option is a steel chimney. Due to the circular cross-section, the smoke rises through it evenly, without lingering. Due to the two-layer insulation, condensation does not form on the inner surface of the chimney. Material, lightweight, high temperature resistant, corrosion resistant, durable and simple, mounts on brackets. One person can cope with its installation. In terms of the cost of materials, it is somewhat more expensive than brick, but it wins on installation. Often, in order to improve the operational characteristics of brick chimneys, a steel insert with a round section is placed inside. The role of insulation in this case is played by brick walls. The service life of the steel chimney is 15 years. The cost of a steel chimney is 17,000 (diameter -150 mm, length - 4 m). Installation - 15,000 rubles.
Steel chimney
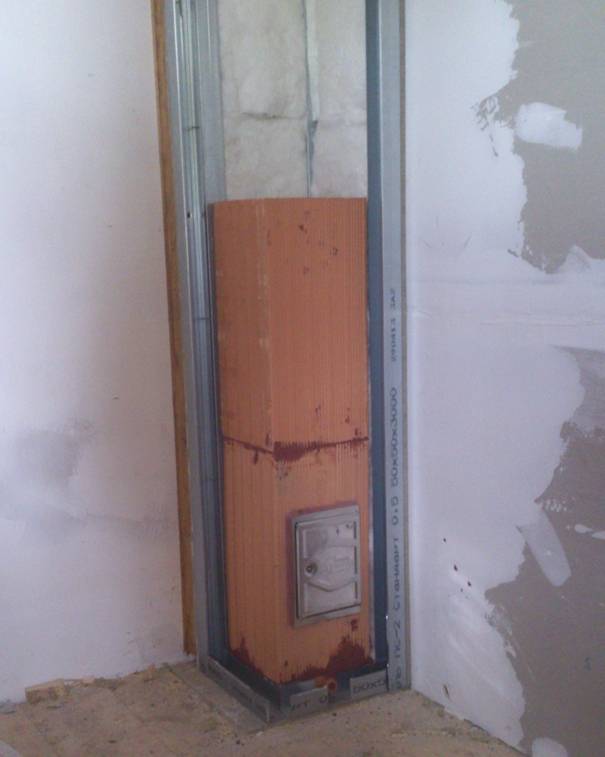
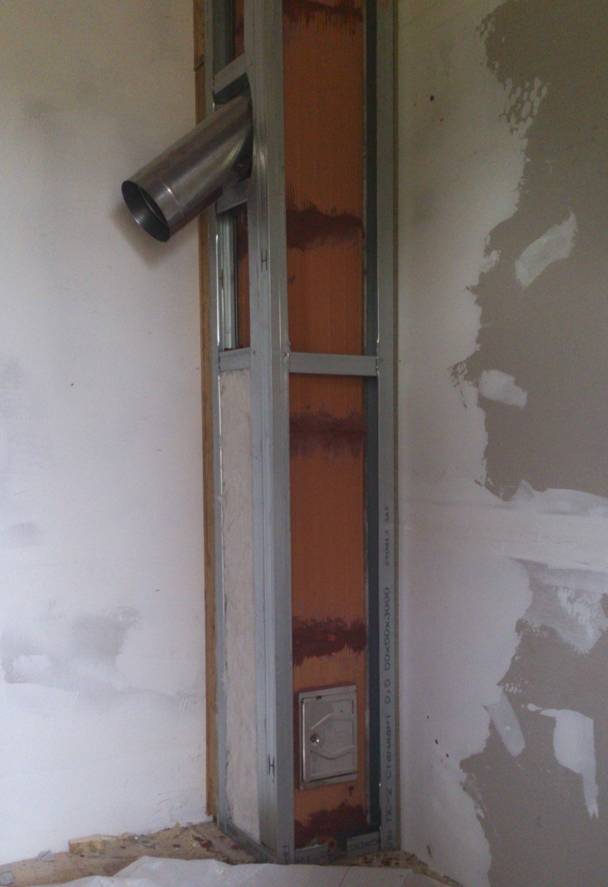
Ceramic chimney
The best and most reliable type of chimney is ceramic. This is a multi-layer construction.A round ceramic pipe is placed in a separate expanded clay block, between which a layer of basalt insulation is laid. A chimney is assembled from elements held together with glue. The fireclay construction, in contrast to the brick and steel, ordered of any section, is produced in strictly established sizes - from 12 to 20 cm. Manufacturers give a guarantee for the material for at least 30 years. The cost of a ceramic chimney is 24 600 rubles. (diameter -140 mm, length - 5 m). Installation - 15,000 rubles.
Ceramic chimney Effe2 Domus |
Ceramic chimney Effe2 Domus |
Ceramic chimney Effe2 Domus |
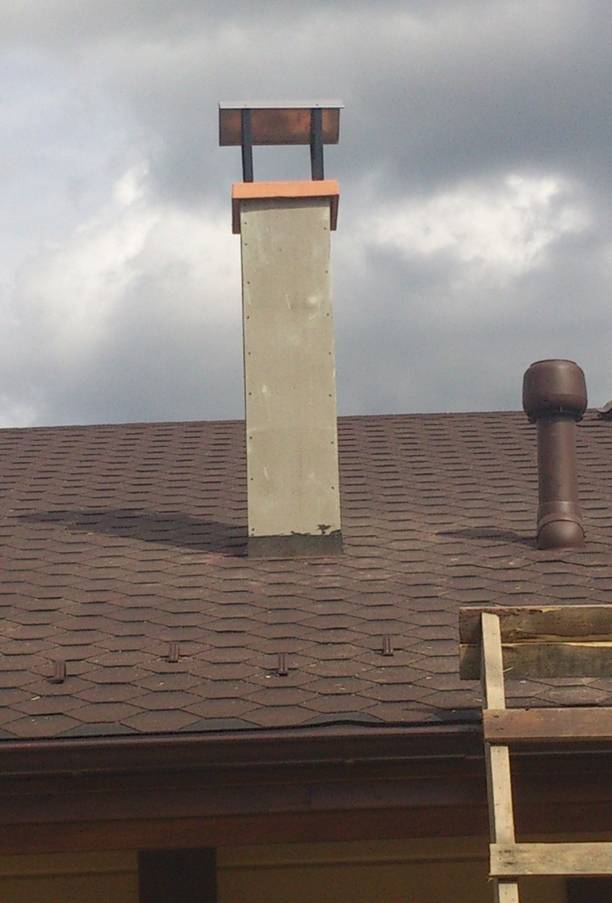
Inspect the chimney annually
Remember one rule - it is always easier to fix a thing at an early stage of its deterioration than to make major repairs after many years. Performing annual checks can help prevent a potential problem from occurring.
Since the chimney is very high, check for problems. Image courtesy of Polhemus Savery DaSilva
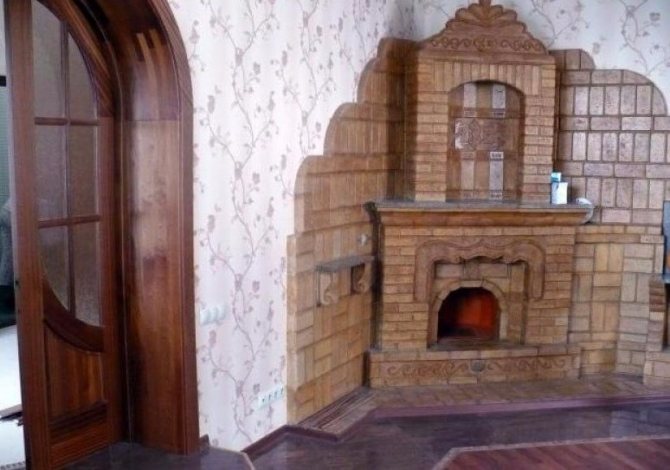
How to install a fireplace in a wooden house the correct installation process and video
Many people wonder how to install a fireplace stove in a wooden house. To do this, it is worth considering and correctly performing each of the stages of these works.
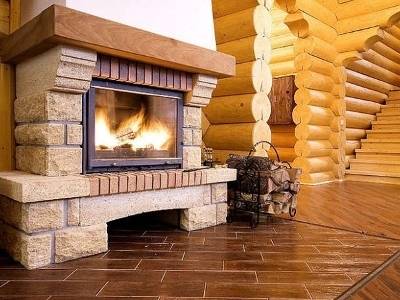
Fireplace in a wooden house
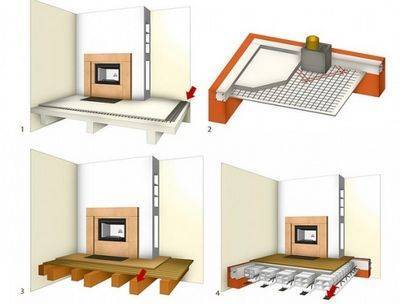
The stages can be conventionally divided into:
- preparatory (planning the location of the fireplace);
- installation of a heat-resistant base for the fireplace;
- installation of a fireplace insert;
- cladding works;
- installation of the chimney system with the implementation of all safety measures.
If you do not know how to properly install a fireplace in a wooden house, follow the step-by-step implementation of all the above works on installing the fireplace and then you will be able to achieve the desired result.
And for those who want to know in more detail how to install a fireplace in a wooden house, a video review of this procedure is posted below.
Note! Performing all these types of work requires compliance with all safety requirements, as well as possession of special knowledge and professional skills. It is best to invite a specialist, but if you still decide to carry out the installation yourself, before installing a fireplace in a wooden house, read the basic recommendations
It is best to invite a specialist, but if you nevertheless decide to carry out the installation yourself, before installing a fireplace in a wooden house, read the basic recommendations.
The layout of the fireplace in the room
Be sure to consider the fact that the fireplace should not be placed in line with door or window openings. It is also forbidden to install a fireplace in rooms that are less than 20 m2 in size.
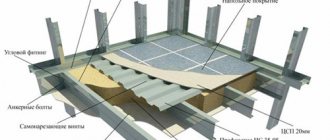
Heat-resistant base and installation of the insert
In order to prepare the room for the installation of the fireplace, it is necessary to remove the floor covering in the place chosen by you for installation and to make a concrete screed there.
Concrete base scheme
Note! If you took up the construction of a wall fireplace, then the wall itself must be secured by lining it using non-combustible material. The best option for this may be a brick.
If it is not possible to get rid of the floor covering, then the non-combustible base is installed on top of the floor.

The base surface must be perfectly flat so that the firebox can be installed in a horizontal position. You can use heat-resistant glue or mastic to secure it.
All walls adjacent to the fireplace must be replaced with aerated concrete or brick.
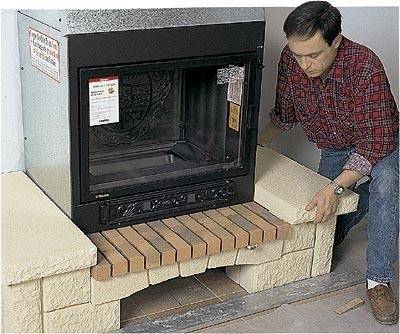
Before installing the firebox, a fireclay brick or a sheet of steel should be laid under it, and it is recommended to place basalt wool between the ceiling and the floor.

Laying bricks under the firebox
In the installation work for installing the firebox you will need:
- drills for metal;
- drill;
- sealant gun;
- grinder with a disc for metal.
For correct execution, you will need the appropriate skills.
Cladding and installation of the chimney system
Installation of cladding has its own requirements
It is very important that it does not come into contact with the fireplace insert. If you use flammable materials for decoration, you must definitely create a kind of protective belt from reinforced concrete.
Materials for cladding:
The most common option is to perform plastering. To do this, it is necessary to apply a plaster solution in a double layer to the surface. As a result, the resulting layer should be about five centimeters thick. After it dries, the surface can be painted.
Chimney installation
Heat-resistant mastic is used to fix ceramic tiles. You should monitor the location of the cladding and align it with a bar of wood by tapping it on the tiles. The result obtained is kept for a day before the tiles can be washed and cleaned.
The chimney system is made of non-combustible materials. On the inside, you can cover with foil wool. The wooden ceiling must be secured by installing a protective cover over the fireplace. The distance between the casing and the chimney must be at least 30 cm.
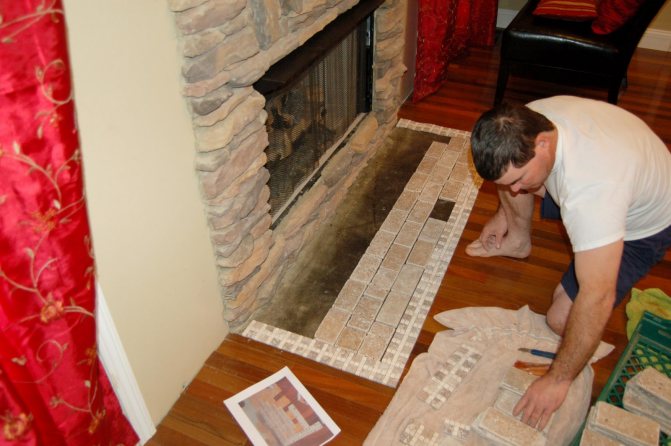
Using floor tiles
Ceramic tiles have a number of qualities that are necessary to ensure the fire safety of a fireplace, especially in a wooden house or brick building with wooden floors. It is known that laying tiles requires skill and experience, so consider your options before proceeding. But if it was decided to independently finish the floor in front of the fireplace, then some surface preparation should be carried out.
- In order to avoid differences in the horizontal plane, an analysis of the plank surface should be carried out. The detected irregularities should be processed with a plane.
- The laid tiles in front of the fireplace must have an ideal base, otherwise chips may be observed in places with irregularities. As such a base, you need to mount a plasterboard or plywood substrate. The backing sheets are cut along the prepared contour and fixed to the floor with self-tapping screws.
- At the next stage, the formed surface is treated with a primer. It is enough to apply it in one layer with a brush. The primer will promote better adhesion of the tiles and protect the substrate from delamination. You can continue working only when the soil is completely dry. According to preliminary measurements, it is possible to set aside about a day for this.
- With a spatula, a special tile adhesive is applied to the prepared surface. If a brick wood-burning fireplace is installed in the house, then the tiles should not only protect the floor from accidental ingress of hot particles from the firebox, but also prevent the harmful effects of high temperatures on the wood. This means that tiles are best laid with a heat-resistant adhesive. Its layer should be uniform. Despite the apparent pliability of the consistency, it will be impossible to level the tiles in the case of uneven application.
The complexity of the work lies in the fact that the tiles laid under the fireplace on the floor reveal all the inaccuracies of the masonry, so you should constantly check not only the horizontal level, but also the width of the joints, which, in the absence of experience, is recommended to be increased somewhat.
We dance from the stove
The arrangement and maintenance of such a hearth is laborious and not cheap, but if you cannot imagine your life without warming yourself in a rocking chair by your fireplace on cold winter (cool summer) evenings with a pipe (book, knitting) or a cup of hot chocolate ( another drink of your choice), covered with your favorite blanket, then this material will be useful to you. First, we decide on the main thing.Fundamentally different conditions when choosing a fireplace and a place for its installation for owners of apartments or a finished cottage and those who are just under construction (in this case, the choice and laying of a fireplace is possible without restrictions in the type of construction).
Ready or future layout, as well as wall and floor materials - all this suggests different possible options for installing a fireplace
It is important what material the house is built from - wood (rounded logs, profiled beams) or stone (brick, reinforced concrete, aerated concrete blocks). Remember that the fireplace will need a chimney.
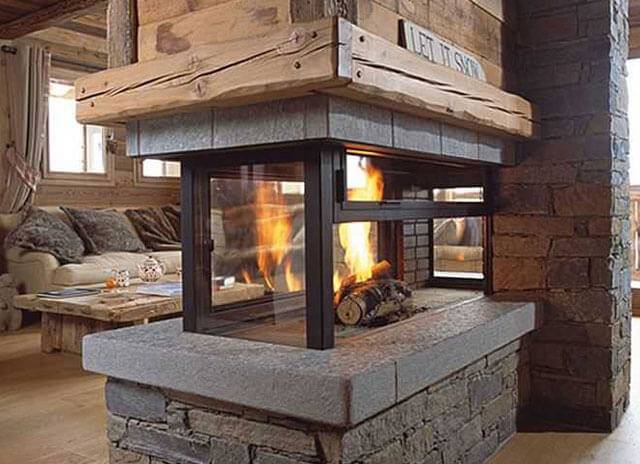
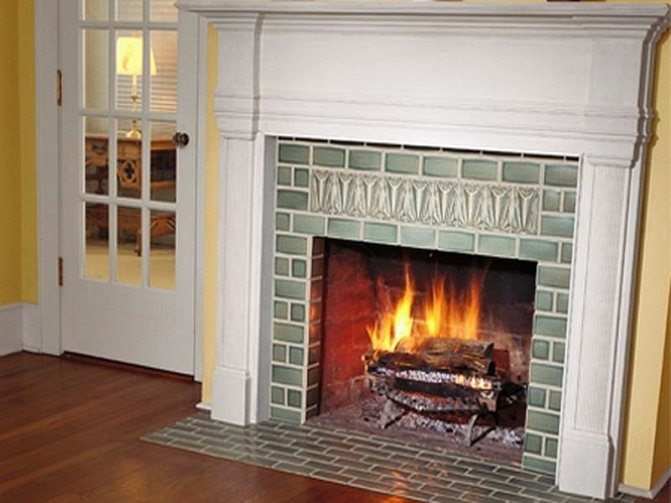
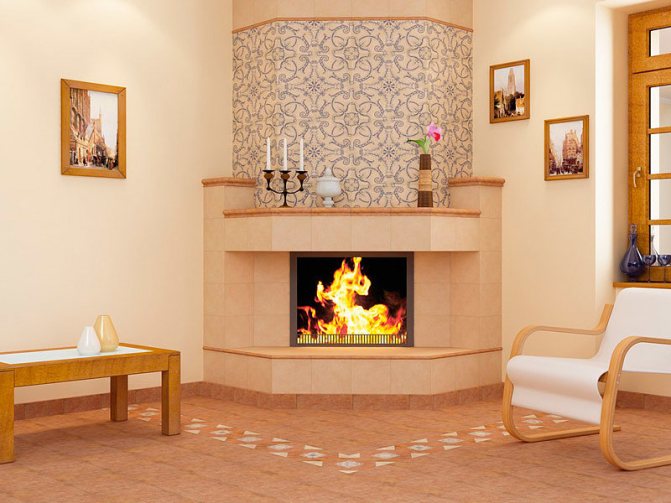
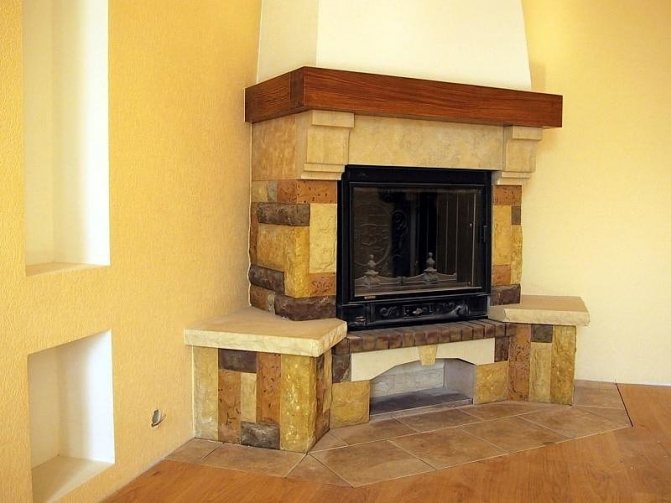
All fireplaces are subdivided by location into:
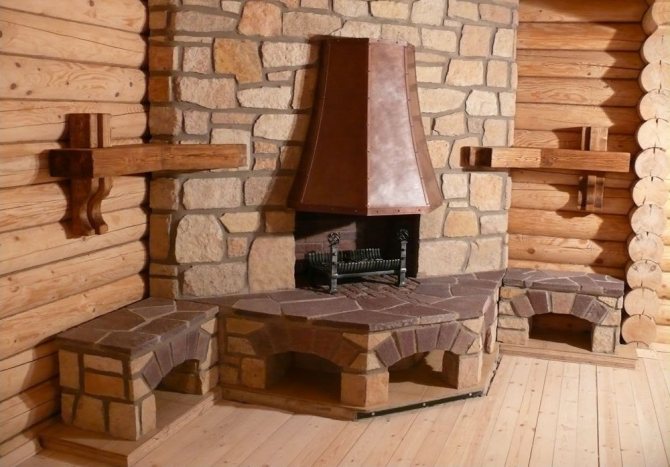
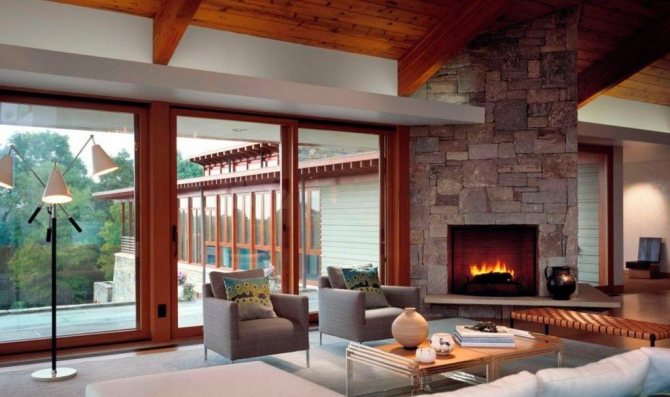
- frontal, located near the walls,
- angular, which are in the very corner of a triangular shape,
- island, or so-called. "Central" (free-standing), which do not touch the walls.
Before designing a fireplace, it is important to understand why you are installing the fireplace: just home decoration or aesthetics plus space heating. Fireplaces for the home, by the way, can perform different functions: heating, decorative, aesthetic and even culinary
Fireplaces are wood-burning, electric and gas and biofireplaces.
You must have clear answers to the questions: type and power of the fireplace; additional elements of the fireplace; the need for a foundation or reinforcement of the floor; increasing the fire resistance of walls in the fireplace area; facing material.
Those who know a lot about fireplaces are advised not to lay them on their own, like chimneys. Such work requires in-depth knowledge of the combustion and smoke removal processes, and the mistake made can be too expensive.
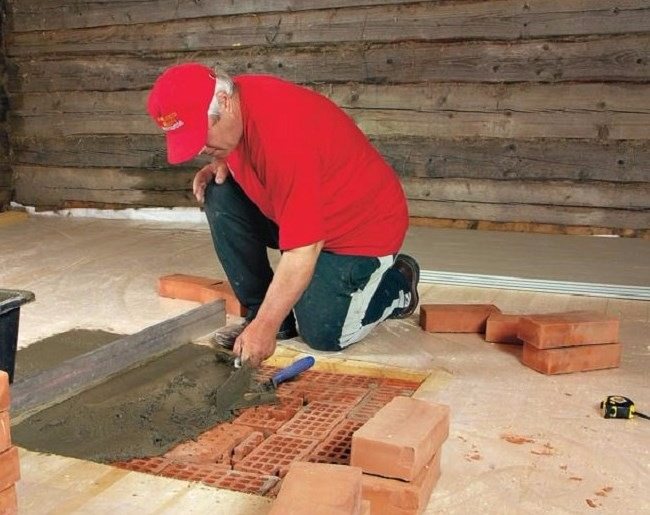
How to change the floor under the fireplace
Question:
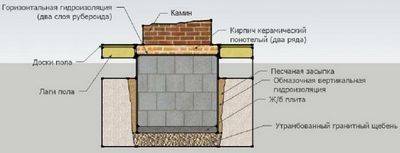
A dacha appeared. When replacing the floors, it turned out that the fireplace was on an unusual foundation. Two pillars of brick (this is such a foundation), on it is a floorboard, and on it is the whole fireplace. The 50's board is not in the best condition. My wife and I are at a loss. What to do? Housework was suspended. I would be grateful for a hint.
Best regards, Sergey, Yaroslavl.
Answer:
Hello Sergey from Yaroslavl!
The fact that housework has been suspended is the right decision. Initially, the situation with the fireplace should be corrected, because its repair can result in a complex problem and the same floor replacement will be impossible in the fireplace area. And the accompanying operations can damage the already laid floor.
You should decide if it is possible to strengthen the foundation without completely disassembling the fireplace. It is clear that such a disassembly is a long, unpleasant business, and its relocation will result in a whole bunch of problems, ranging from the search for a qualified stove-maker and ending with a host of other questions.
In the best case, you can try to make a new foundation without disassembling the fireplace.
For this, you should carefully examine the old structure of supporting the fireplace on a board and on brick posts. Trying not to damage what is in the least bit. Because, judging by the description, the board "fifty" leaves much to be desired. If those people who laid the fireplace were more or less professionals, then between the wooden floorboard and the brickwork of the fireplace there must be a sheet of metal, at least the smallest thickness. However, there is little hope for that either.
Several temporary technological supports should be prepared, best of all from a large section of wood or boards with a thickness of at least 50 millimeters.
If the brick posts stand on a concrete base (screed), and this base is large in area, then temporary supports should be supported on it. But, most likely, this is unlikely, and under the floor of the fireplace is ordinary earth.
Then on the ground in several places (not less than four, at the corners of the fireplace) they put scraps of a thick board (40-50 millimeters) about 15 centimeters wide and about 50 centimeters long.They are supported by temporary wooden racks with a height slightly less than the distance from the surface of the earth to the old floorboard on which the fireplace rests. If necessary, knock out wooden wedges so that the fireplace rests well on the racks and there is not the slightest backlash.
If there is a sheet of metal, which was mentioned above, then a metal corner with a shelf of about 63 millimeters should be brought under it around the entire perimeter of the fireplace to create a temporary support. If there is no sheet, then all the same, such a corner should be placed under the base of the fireplace as a support. It may be necessary to gouge the top surface of the floor boards ("grind") in order to get the corner. It is advisable to electrically weld a corner at the joints at the corners of the fireplace.
Then, by manipulating wooden racks - supports, wedges and corners, achieve a reliable support for the base of the fireplace.
Then - a matter of technology, as they say. Pits are made with a shovel, a layer of sand is poured into them, spilled for compaction with water, and permanent posts made of bricks or small concrete blocks are installed. All this is under the fireplace. The old floor and temporary wooden supports are removed.
The result should be new stone permanent supports under the fireplace.
Of course, you will need to be smart and have a bit of imagination to do everything right. It is possible that the permanent posts can be made of a metal assortment (corner, channel bars, brand). Yes, and under the base of the fireplace, put a solid metal sheet two to three millimeters thick and additionally a corner in the middle of the fireplace so that its base does not bend.
Much also depends on the area of the fireplace support. If it is in a square meter, then all the work can be done in three to four days. With an area twice as large, it will take three times more time.
I don’t know how anyone, but personally I like such works. Although you need to tinker. If such work is not quite up to you, then try to invite a professional builder-shabashnik. Although only for work, he can take, depending on the complexity, from 5 to 15 thousand. But that's how you agree.
And to do everything not quite according to the option described above. Maybe, without further ado, he will simply make a formwork under the fireplace, pile rubble with concrete there and, gradually taking out the old floorboard, pour the solution instead of it, without disturbing the stability of the fireplace.
Anyway, good luck!
Construction in Moscow and Moscow region
We work with a guarantee! A wide range of construction services. Foundation, walls, floors, roof, turnkey!
+7 (905) 797-20-34
luxurykomfort.ru
Other questions on the topic of floors:
- Lags thickness - table of sections of wooden logs
- The cost of replacing the floors in the bath - Estimate
- The beams of the floor of the country house sagged
- Thermal insulation of interfloor floors made of wood
- What film is needed for a floor cake on the ground
- To increase the ceilings in the extension to the house made of sleepers
- Pillar under the floor beams of the attic floor
- Wooden floors in the garage
- Open beam ceiling
- Leveling floors in a log house
- Insulation of the attic floor
- Replacing the kitchen floor with an old wooden floor
- Interfloor overlap in a log house
- Extension to a panel one-story house
- How to fill up the underground
- Why apartments have always had wooden floors
- Thermal insulation of wooden interfloor floors
- Coating with bituminous mastic of a concrete floor in a bath
- Reinforcement of ceiling lags for the attic floor
- Floor beams for the ceiling in the garage 7 by 7 m
- Workers to replace the floor in the country
- Harmful substances from furniture
- Slack floor between the first and second floor
- Replacement of joists and floors under a partition with a door
- Overlapping a house from an aerated block with a channel
- Support for the log and shrinkage of the log house
- Make a hatch in the floor to access the subfloor
- Finishing the old concrete floor on the balcony
- Replacing rotten ceiling beams
- Floor screed device
- Insulation of old floors on the balcony without removing
- Floor cake on the ground
- Replacement of support pillars for lag
- Overlap between the steam room and the residential floor
- Waterproofing the floor in a wooden house on the ground
- Fighting mice in insulated wood floors
- Ceiling uterus in the garage
- House with mezzanine under the wards for children
- How to insulate wooden floors in a gas block house
- Replacing a rotten floor in a Finnish house
- Calculation of floor beams
- New floor on top of old wood
- How to insulate floors in a bath
- Round log floors
- Concrete floors in a log house
- Floors without insulation in a black bath
- The price of replacing a wooden floor in a brick house
- Replacing the ceiling with an increase in its height
- Sagging unsupported beam alignment
- How to fix sagging wood floor
- Warm water floors in a log house
- Pie floor in the bathroom of a log house
- Replacement of wooden floors in a house of 1906
- Wooden floors in the house from SIP panels
- The floor sinks in the frame on piles
- Strengthening the wood floor
- Leveling the deflection of wooden floors
- Bloated wood floors
- How to change beams built into walls from a block
- Sheathing of the ceiling of an adobe house with euro clapboard
- Change of sex in a cinder house
- Floor on the ground in an old wooden house
- Tiled floors in a wooden bath
- Thermal insulation of a wooden floor
- Plywood floors on logs
- How to level a subfloor under a laminate
- How to reinforce a trimmed timber joist
- Coating the log floor with a bituminous primer
- How to restore old beams
- Porcelain stoneware on wood floors
- Replacement of logs and subfloors in a house from a bar
- Sagging ceiling beam
- Repair of sagging floors in a wooden house
- Lower the floor in an old log house
- Laminate flooring in an old village house
- Compatibility of polystyrene foam and wood in construction
- Bulkhead flooring in a brick house due to squeak
- Logs from a bar 150 by 4 meters of span
- How to level a sagging ceiling in a house
- Replacing rotten floor logs in a log house
- Replacement of floors on the ground in the bath
- Waterproofing the subfloor of the house
- Beamed ceiling
- Blackened ceiling in the bath
- 12mm plywood flooring in two layers
- New floors to old
- Aligning beams in a house from a bar
- Strengthening the interfloor timber floor
- Hardwood ceiling-to-floor pie
- How to raise a lag without opening the floor
- Option for arranging the floor in a log house from OCB
- Is it possible to replace the beams
- Interfloor wooden floors
- How to cut a block diagonally with a circular saw
- Glassine in the house slab pie
- The floors are dry - what to do?
- Repair of the ceiling of an old wooden house
- How and what to paint OSB
- Fastening the lag to the foundation
- Floor waterproofing on the ground
- Floating floor on the ground
- Floor pie over floor beams
- Strengthening the ceiling lag
- New overlap without touching the old one
- Floor insulation in a village house
- How to strengthen the floor joists 150x50 span 6 meters
- Arrangement of floors in the annex to the house
- Wooden floors on the ground
- Cement screed to the ground
- Cold floors in the house
- Can logs be installed after assembling a log house
- Section and spacing of beams for a span of 5 meters
- Overlap the floors in the cinder building
- Fastening of sex lags in a log house
- Attic floor in an old cinder block house
- Channel or I-beam for floor beams
- The smell of floor polish - how to get rid of
- Floor on rotten crowns
- Gouged out the floors in the country house
- How to decorate a wooden ceiling over a gas stove
- Replacing a rotten floor - the cost of work and material
- Floating wooden floor in the country
- Metal I-beam as a ceiling beam
- Fc plywood floors on an open terrace
- What is the best way to lay wood floors on a concrete slab
- Film faced plywood for sub-floor
- Rotted floors what to do
- How to change a subfloor without analyzing the final one
- Ventilation of the floor in a log house on a slab
- The mushroom is eating our home
- Installation of logs to the walls of the log house
- Country house made of blocks and wood
- Beam 8 meters what is the section
- Replacing the subfloor and floor in a log house
- Insulation with polyurethane foam of a floor in a log house on piles
- The thickness of the lag for the ceiling
- The floor rots and molds
- Subfloor made of cement-bonded particle board and insulation
- Plakhi for attic overlap 5 m
- Replacing a beam under a brick wall
- Reconstruction of an old floor in an old house
- Open beam ceiling
- What to support the floor beams
- Sandwich panel floors
- Log floor beams
- How to remove part of the floor beam
- Insulation of the floor from the subfloor
- Cold floors in a warm brick house
- Floor arrangement in an old brick house
- Insulation of the floor of the 1st floor in a log house
- Soundproofing the floor of the 2nd floor in a wooden house
- I-beam joist
- Insulation of the floor in the house on stilts
- The choice of the section of the log with a span of 5 m
- Repair of the ceiling of an old house
- Laminate flooring on the second floor in a log house
- Floor insulation in an old wooden house
- The worm wears away the wooden floors
- Overlapping in a wooden house
- Distance from ground to floor
- Protection of the log floor from moisture
- Wood floor to laminate
- Reinforcement of wooden floors
- How to install floors in a cold house in winter
- How to replace a rotten floor
- Floor insulation
- How to strengthen floor joists
- Second floor floor beams
- Floor insulation with foam
- Laying the floorboard
- Channel bars as interfloor overlap
- Interfloor overlap in a silicate brick house
- Chicken coop floor
- How to strengthen the overlap of a garage basement
- Support beam 6 meters
- Moldy subfloor
- Raise floors over the old floor
- Mastic for covering subfloors and logs
- How to lay plywood on floor logs
- Squeaky floors in the apartment
- Bath floors and drainage
- The logs and the rough floor of the country house have rotted
- Lags of 9 meters
- How to block the first floor of a log house of 8 meters
- Rotting sub floor
- What ceiling logs to choose
- How to put ceiling beams in a bath
- Transfer of beams in a log house in height
- Strengthening old timber beams
- Overlapping the first floor of a house without a basement
- Thermal insulation of wooden floors with moss
- About lumber for floor and roof
- Strengthening or replacing the ceiling lath
- Ground floors
- Tiles on the floor in the bath
- Laminate floor in the country
- Subfloor and roofing material
- Replacing the Support Structural Beam
- Finishing floor on an old floor with insulation
- Tiled floor in a wooden house
- How to insulate the subfloor
- Laying parquet boards in the apartment
- What to put on the veranda floor boards
- Renovation of an old sub-floor
- Fixing the log floor
- Sub-floor repair
- Waterproofing a floor from a board
- Floor beams - reinforcement
- Plywood thickness on logs
- Squeaky wooden floors how to clean
- Strengthening the interfloor overlap
- Film faced plywood for repairing wooden floors
- Leveling floors when shrinking at home
- Thermal insulation of wooden floors
- Installation of floor slabs
- Fastening beams to a vertical concrete wall
- How to join three skirting boards in a corner
- Floor log supports
- Floor beams for a span of 7 m
- The device of the floor in the house from a bar
- How to make a floor in an extension from a foam block
- Which timber to choose for a beam floor
- Bath floor repair
- Second floor terrace floor
- Round timber floors
- How to strengthen hardwood floors
- How to change a decayed beam
- Replacing floor beams in an adobe house
- Support for strengthening the beam
- Ceiling logs
- Laminate concrete floor
- Maximum distance between floor beams
- The middle of a wooden house sank
- Repair of floors in an adobe house
- Heated floors in a wooden house
- Raise the floor in an old house above ground level
- Replacing sex lags in an old house
- Attic floor repair
- Floors - asbestos-cement pipes for poles under logs
- Fastening the lag to the slabs
- Strengthening the log in a log house of 7 meters
- Bath floor device
- Warming of floors using Izospan V film
- Floor ventilation below ground level
- The floors in a log house are rotting
- Floor insulation on a concrete screed under linoleum
- How to make garage floors
- Types of flooring for the home
- What thickness of the floor board should be 28, 36, 40 ...
- Fastening the floor log in a panel house
- Concrete floor in a wooden house
- Repair of the wooden floor on the balcony
- Installation of logs in a log house
- Concrete floor screed on top of a Sip floor
- Strengthening and warming the floor from wood blocks
- How to align floor joists
- Strengthening timber beams
- Whether to tie the concrete floor to the house
- Insulation of a regularly flooded floor
- Insulation of the floor of the house on sleepers
- How to fix floor joists on top of a round log
- Replacing rotten floors
- Glassine in the underground of a log house
- Film blows up over the subfloor
- Questions about the floors in the garage 2nd floor
- Arrangement of a rough floor in a rounded log house
- Monolithic floors on the ground
- The better to sheathe the walls and floor of the garden house
- How to level a concrete floor in a panel house
- How to level the floor in the kitchen
- Bath floor
- What to support the floor logs on
- How to strengthen interfloor logs in a brick house
- Economical floor slabs
- Insulation of concrete floor slabs
- What is better to put under linoleum
- Sub-floor repair
- Floor arrangement with gas silicate
- Replacing floors in a country house
- Moisture resistant slabs floors
- How to put linoleum on an old floor in an apartment
- Leveling floors in an old house
- Genital lag processing
- Choosing a floorboard in the house
- Heat and vapor insulation in the floor pie
- Raise sagging floors without dismantling
- Heat and sound insulation of a floor in a panel house
- The floor in the hallway of a private house is rotting
- Rotten floor in a wooden house
- How to change the floor under the fireplace
- Concrete floor in the garage
- How to wax a floorboard
- How to make a wooden garage floor
- Repair of the concrete floor on the balcony
- Replacing subfloors
- Moisture resistant laminate for wooden floors
- How to cheaply remodel the floor in an apartment
- Bath floors
- Arrangement of subfloors
- Sagging logs and floor
- How to change a rotten floor
- How to properly lay the floor on the loggia
- Wooden floor device in more detail
- Larch sub-floors for the 2nd floor
- Second floor subfloor
- How to hide air conditioner pipes in a tile floor
- Replacing a rotten floor
- Floor repair in a panel house
- Lay the floors on the attic loggia
- The new wood floor has started to rot
- Repair of a wooden floor in a country house
- How to insulate a wooden floor
- Again about floor insulation
- Larch floors on the loggia
- Foundation and floors of an adobe house
- Floor in a ready-made (transportable) bath
- How to arrange a floor on an open balcony
- Underfloor insulation
- Connecting the ends of the floor board
- Concrete floor in the garage
- How to level the subfloor
- How to put a new floor on an old one
- How to lay a subfloor
- How to raise floors in a house
- How beautiful to lay the floors
- Underground ventilation
- How to align log beams under flooring
- The subfloor beams began to rot
- Laying the floor with a board without a thorn
- Floors in a country house
- Floor on the balcony-loggia
- Floors - leveling log logs
- Asbestos cement pipes for lightening concrete floor
- Insulation of the underground space
- Preparing the base for the laminate when laying the floor
Construction in Moscow and Moscow region
We work with a guarantee!A wide range of construction services. Foundation, walls, floors, roof, turnkey!
+7 (905) 797-20-34
luxurykomfort.ru
Construction in Moscow and Moscow region
We work with a guarantee!A wide range of construction services. Foundation, walls, floors, roof, turnkey!
+7 (905) 797-20-34
luxurykomfort.ru
Construction in Moscow and Moscow region
We work with a guarantee!A wide range of construction services. Foundation, walls, floors, roof, turnkey!
+7 (905) 797-20-34
luxurykomfort.ru
Floors
All questions to Semyonich about construction
Semyonich (author of materials)
Our site is regularly updated with interesting and unique materials and articles on the topic of lumber, building materials and works, the author's opinion and knowledge of a real shabashnik with more than 15 years of experience is given. There is a section - funny stories of shabashniki. If you would like to receive information about this, subscribe to the newsletter of our website. It is guaranteed that your address will not be passed on to third parties.
Apartment renovation in Moscow and Moscow region
We work with a guarantee! A wide range of renovation works. Professional craftsmen.
+7 (905) 797-20-34
luxurykomfort.ru
| Country house | Bath |
| For giving | Tool |
| Materials (edit) | Bikes |
| Foundation | Log cabins |
| Roofs | Warming |
| Walls | Siding |
| Floors | Cellars |
| Attic | Window doors |
| Stairs | Outbuildings |
| Wells | Toilets |
| Balconies | Loggias |
| Condensate | Flooding |
| Fences | Kennels |
| Sidewalk | Birdhouse |
| Adobe | Carts |
| Garages | Barn |
| Greenhouses | Bath |
| Swing | Brazier |
| Shower |
| Horizontal bar |
Installing a wood-burning fireplace in an apartment
Installing a fireplace in an apartment is more difficult (and sometimes even impossible) than in an individual house. The reason is that many apartment buildings were built without taking into account the installation of chimneys.
The only exceptions are three options:
- the last floor of a high-rise building;
- any of the floors of a two-story house (in this case, as in the previous one, it is possible to make an internal chimney yourself);
- high-rise building, which provides for a collective chimney, allowing the installation of a fireplace in each of the apartments.
In all three cases, before starting work, it is necessary to obtain permission to install a fireplace. First, contact the fire department. A specialist of the organization will go to the site to check the condition of the chimney, how it meets the fire safety requirements. The cost of the examination is from 1000 rubles.
Then contact the construction expertise, which will issue a conclusion whether the floors will withstand the weight of the fireplace. The expertise will also develop a project for installing a fireplace (cost - from 6,000 rubles). The prepared project, technical passport and title document must be submitted to the housing and communal services department of the district administration, the non-departmental commission of which will issue permission to install a fireplace.
In an apartment of a multi-storey building, you can install a fireplace weighing up to 700 kg and only with a closed firebox. In this case, the area of the room should be at least 20 square meters in order to ensure proper air exchange.
The installation of a fireplace should be entrusted to a fireplace specialist. They will be able to take into account a lot of specific points.
In particular, during installation, it is important to ensure the flow of air by providing a technological gap in the design of the fireplace. It is necessary to observe the distance between the firebox and the wall so that it does not overheat during operation and does not burst
In case of incorrect installation, the warranty on the firebox does not apply. It must be remembered that any chimney, regardless of material, needs regular maintenance. A specialist must be invited 2 times a year: at the beginning and at the end of the heating season. The soot accumulated on the walls of the chimney impairs draft and eventually destroys the material, since it is an aggressive substance.
Using floor tiles
Ceramic tiles have a number of qualities that are necessary to ensure the fire safety of a fireplace, especially in a wooden house or brick building with wooden floors. It is known that laying tiles requires skill and experience, so consider your options before proceeding. But if it was decided to independently finish the floor in front of the fireplace, then some surface preparation should be carried out.
- In order to avoid differences in the horizontal plane, an analysis of the plank surface should be carried out. The detected irregularities should be processed with a plane.
- The laid tiles in front of the fireplace must have an ideal base, otherwise chips may be observed in places with irregularities. As such a base, you need to mount a plasterboard or plywood substrate. The backing sheets are cut along the prepared contour and fixed to the floor with self-tapping screws.
- At the next stage, the formed surface is treated with a primer. It is enough to apply it in one layer with a brush. The primer will promote better adhesion of the tiles and protect the substrate from delamination. You can continue working only when the soil is completely dry. According to preliminary measurements, it is possible to set aside about a day for this.
- With a spatula, a special tile adhesive is applied to the prepared surface.If a brick wood-burning fireplace is installed in the house, then the tiles should not only protect the floor from accidental ingress of hot particles from the firebox, but also prevent the harmful effects of high temperatures on the wood. This means that tiles are best laid with a heat-resistant adhesive. Its layer should be uniform. Despite the apparent pliability of the consistency, it will be impossible to level the tiles in the case of uneven application.
The complexity of the work lies in the fact that the tiles laid under the fireplace on the floor reveal all the inaccuracies of the masonry, so you should constantly check not only the horizontal level, but also the width of the seams, which, in the absence of experience, is recommended to be slightly increased.
Where to install the fireplace
Mainly on the ground floor
It would seem that fireplaces should not have weight restrictions. However, it is worth considering where and which model you want to install. The weight of the complete structure (with a chimney, if not built into the wall) sometimes requires reinforcement of floors or foundation. The mass of a small brick fireplace is on average 4.5–5 tons.
As a rule, ceilings are not designed for such a load, therefore large models are installed on their own foundations and only on the first floor. On subsequent floors, light ready-made fireplaces or models built into the walls are used.
You can use fireplaces not only on the first floor of a country house, but then it should be a light gas fireplace for a summer residence.
Pipe to the street
In European homes, the chimney is often located in the outer wall or even outside. The climatic conditions of our country, unfortunately, do not allow repeating this, therefore, you will have to install a chimney in a warm part of the building, otherwise expensive work on thermal insulation will be required.
Perfect room with fireplace
Spacious and tall.
There are restrictions on the area of the fireplace room. It must be at least 20 sq. m with a ceiling height of 3 m. If you install a fireplace in a small room, then the volume of air will not be enough for full combustion. In this case, it is necessary to provide a duct for air intake from the street or from a ventilated basement.
Commensurate with the furnace window.
It is not necessary to place a small fireplace in a large room, because he simply cannot heat the whole room. The area of the furnace window for masonry fireplaces should be 1/50 of the area of the room (ratio 1:50), for fireboxes and for factory fireplaces - 1 kW of power per 10 sq. m room.
In a room with direct access to the street, the fireplace will be exclusively an element of decor - you are unlikely to be able to heat the room with it.
Has the correct shape.
It is not recommended to install fireplaces in elongated rooms and corridors, because heating and air flow will be uneven. The fireplace room must have the correct movement of air masses, due to frequent drafts, the draft will be disturbed. When choosing a gas fireplace for a summer residence, take care of good ventilation of the room.
Place for a fireplace
It is important to take into account not only your own desires, but also the recommendations of SNiPs, as well as fire safety rules. For example, the walls near the fireplace should be made of non-combustible materials.
In a wooden house, it is better to install an island model or carry out fire-fighting work.
It is undesirable to place the fireplace in front of the window, as some of the heat will be lost. The firebox should face the center of the room. In any case, it is necessary to contact a specialist who will professionally assess such moments as air movement in rooms and the quality of floors.
There are many "pitfalls" that only masters know about
For example, in a wooden house it is important to know how the floor beams are laid, the possibility of installing a chimney depends on this. He needs a meter by meter hole
If they are laid with a smaller pitch than required, an expensive renovation will have to be done. published by econet.ru
If you have any questions on this topic, ask the specialists and readers of our project here.
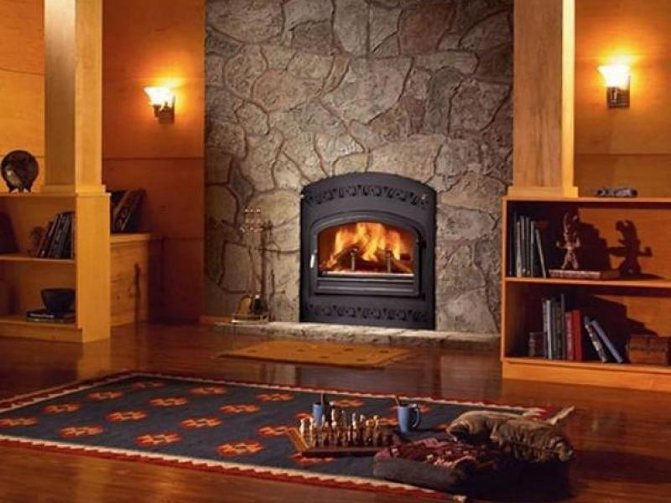
Steel and cast iron furnaces
Fireplace inserts made of steel and cast iron with a glass door are a combination of a fireplace and a stove. The configuration of the firebox in this case is very similar to the classic options, due to which the maximum amount of heat energy enters the dwelling. The damper and the transparent door provide not only visual observation of the burning flame, but also the verified dosage of the air required for combustion.
On the metal body, developed fins are used, which, in combination with a large area, leads to a noticeable, compared to a brick fireplace, an increase in convective heat supply to the room. Such design solutions make it possible to raise the efficiency level of modern furnaces up to almost 80%. These efficient, inexpensive, compact and visually appealing products are lightweight.
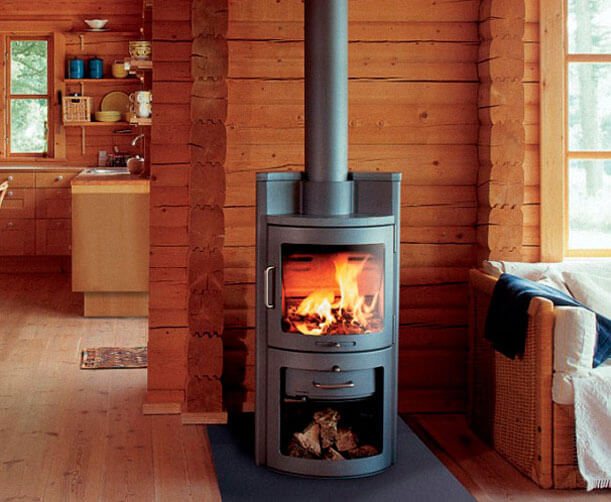
The presence of these undeniable positive qualities explain the high popularity of steel fireplaces. Their only noticeable drawback is the rapid cooling of the heated surface. On the other hand, cold rooms are heated at high speed, and one firewood is enough for a long time.
The degree of heating of a metal furnace surface is an order of magnitude higher than that of a thick-walled brick structure. Because of this, you need to correctly plan where to put the stove in a wooden house: its placement close to the walls is strictly prohibited. The minimum possible distances to combustible wooden structures are indicated in the accompanying documentation for the operation of the furnace. In their absence, the building codes act as a guideline, how to properly install the stove, in which there are corresponding instructions for fireplaces.
It is forbidden to install an un-lined iron furnace closer than one meter from an unprotected wooden wall. Closer placement is allowed only if there are fireproof heat-insulating screens on the walls. This type of protection is available for sale in a variety of options for substrates for a stove in a wooden house. The simplest and most inexpensive of these is stone wool 50 mm thick, gypsum fiber boards and an air gap of 20 mm. As a result, the total distance between the rear and side walls of the metal firebox and the wooden surface will reach 100 mm.
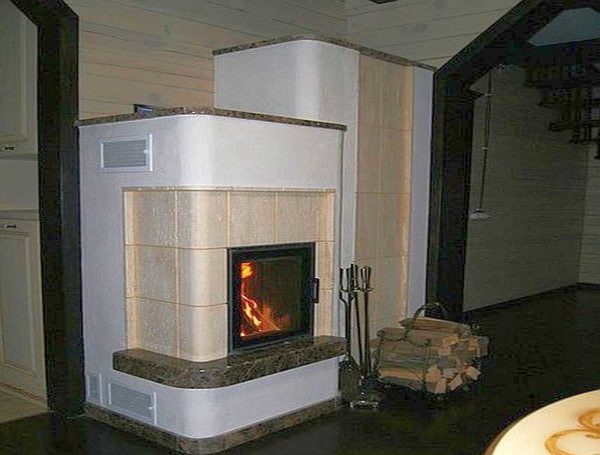
Installing a fireplace in a private house
It is much easier to install a fireplace in a private house, in terms of permits. As such, there are no regulatory documents. The only thing to consider is recommendations for the arrangement and condition of the chimney and the weight of the structure.
The location of the fireplace must be determined at the design stage of the house. Depending on the size of the room in which it will stand, and the purpose (it will be used for heating or carry a decorative role), the size and power of the firebox are selected. The parameters of the chimney depend on these values. As a rule, ready-made closed furnaces are purchased for fireplaces today, on which manufacturers will certainly indicate the recommended size of the chimney section. If the chimney does not match it, the fireplace will smoke during operation.
Copper plate platform
Quite often, for fire safety purposes, the floor is finished with a simple sheet of metal. Copper is usually used as a suitable material. Copper has certain advantages over other metals. It has a characteristic shade similar to the color of the flame, which harmoniously fits the platform into the cozy atmosphere of the room.
The sheet serves as a screen from which radiation is reflected. This increases the share of energy entering the room and decreases the share that is transferred to the floor. Copper has excellent corrosion resistance and is environmentally friendly.
In addition, due to the fact that the metal lends itself to processing, various patterns can be engraved on it, even at home. Being in the immediate vicinity of the hearth, the copper sheet does not lose its physical properties, and the ability to reflect radiation ensures the platform glow in the dark.
The room in which the fireplace is equipped is an object that is at risk of various kinds of emergencies. A live flame in a room is potentially dangerous due to the fact that the products of incomplete combustion of fuel are water, carbon dioxide and carbon monoxide. Carbon monoxide is toxic and deadly to humans, so ensuring normal chimney draft is included in the list of priorities for installing a fireplace.
Unfortunately, the pitfalls do not end there. As a result of the release of a large amount of energy, some elements of the building become quite hot, which can lead to a fire. Frequent causes of fires are incidents of incandescent fuel particles falling from the firebox onto the floor, and even if a fire can be avoided, no one is insured against a damaged floor covering.
When building a fireplace, one of the stages will be the insulation of the floor covering. This is a set of measures that must be taken to minimize the risk of fire. Even brick structures that have their own foundations must be framed with a thermal insulation plate around the perimeter. The requirements of the PB rules state that a 0.5x0.7 m plate should be installed in front of the facade, which prevents the fire of floor coverings. But in order to increase safety, many craftsmen increase the area so that the side walls are also insulated.
Preparation of tools and materials
To make a fireplace yourself, you need the following set of tools:
- Master OK;
- Mason's hammer or rubber mallet;
- Notched and normal trowel;
- Mixing buckets;
- Perforator;
- Screwdriver;
- Construction mixer or drill with an appropriate attachment;
- Building level;
- Water level;
- Plumb line;
- Roulette;
- Pencil or marker;
- Bulgarian;
- Tile cutting device.
The list of required materials is as follows:
- Red oven brick, brand M-200;
- Facing brick;
- Steel corners with a section of 50x50 mm;
- Steel strips with dimensions of 50x5 mm;
- Self-tapping screws with wide washers;
- Plastic dowels for self-tapping screws;
- Heat-resistant masonry mixture;
- Heat-resistant mastic;
- Cement grade M500 and sand;
- Heat-insulating foil material in the form of plates;
- Minirite slab (required for arranging a fireplace in a wooden building);
- Ceramic tiles or porcelain stoneware;
- UD and CD profiles for drywall;
- Drywall sheets;
- Set of decorative grilles for ventilation windows;
- Heat resistant sealant.
How to choose a tile
Fireplace tiles must be suitable in all respects. The material differs in its characteristics and what is suitable for wall cladding may not be suitable for a fireplace. If you have a decorative fireplace, then this is the easiest option. In this case, any will do, without specific requirements. If you plan to use tiles in a room without constant heating, then the criterion for choosing will be the moisture resistance of the material. In addition, the cold will reign in a room without heating in winter, the material must withstand it.
The most important criterion for choosing a tile for a fireplace is heat capacity. The temperature from the fireplace will be very high and the material must be able to withstand heat. Usually, the instructions indicate the application halo, so read it first.
The hotbed of temperatures is a firebox. When using solid fuels, the temperature can reach 1600 degrees, which means that the lining must withstand them. If you plan to heat with wood, then this figure can be reduced to 1000 degrees.Although the fireplace itself does not heat up above 100 degrees, the temperature tolerance indicator should be related to the firebox.
The modern market offers a huge range of different facing materials. What makes this niche profitable for counterfeiting.
When buying material, be sure to ask for quality certificates, otherwise you run the risk of running into a marriage. If you are denied those, do not purchase anything from this store.

The tile itself is made on the basis of natural ingredients, most often from clay, so it is absolutely safe. If during operation the material emits an unpleasant odor, then immediately dismantle the coating. The smell indicates the presence of toxins in the composition, which means that you were out of luck and you bought a fake.
Despite the fact that many consider it a waste of money to overpay for a brand, it is still a guarantor of your safety. Well-known firms, perhaps, take money for their promoted name, but at the same time they have already won it with their quality and long term of work in the market. Therefore, try not to get involved with little-known class = "aligncenter" width = "2238" height = "3187" [/ img] The facing material should not be afraid of mechanical damage. Even if you rarely use the fireplace, various situations can arise during the fuel stacking process and the material must be ready for anything.
The appearance of the tiles should correspond to your taste preferences and fit into the overall interior. Do not take immediately in the package. Measure the fireplace and in the store buy tiles in the size that suits your particular design. Remember that the more cuts, the worse the overall appearance.

Preparation for work
It is impossible to start facing immediately. Before installing any material on any surface, it is necessary to prepare the latter. If you neglect this stage, then the cladding will not live long. Otherwise, the glue will not set at all or will begin to peel off.
First, examine the fireplace. Identify the damaged areas immediately. Then, get rid of the old coating. The tile will fit well on a flat base, but on a curve it will go at random. Therefore, it is important to achieve maximum smoothness.

Take a wood panel and attach it. See if there are more than 10mm deviations. Indicators below this figure are acceptable, but higher ones need to be aligned. Therefore, they will need to be repaired. After that, the surface is covered with a deep penetration primer. The layer provides protection and improves adhesion.
If the base absorbs liquids well, then you need to go through the primer several times. Each time you will have to wait for the layer to dry completely, but you should not save energy on this. It is the primer that acts as providing better adhesion.
The construction mesh will also provide extra strength. You can attach on nails or punch holes with a puncher and screw in self-tapping screws. But the last option is possible only with a solid foundation, if it crumbles, you should still return to the option with nails. The net is hung on nails or self-tapping screws and fixed on washers.
Solution preparation
The service life of the material depends on the solution. If it is not of high quality, then the tile may simply not stick or fall off over time. Any mixture is suitable for a decorative structure. But the requirements for a working fireplace are much stricter. The mortar must, above all, withstand high temperatures and be durable. There are several options for mortar: cement and clay. Each of them has its own advantages and disadvantages.

A clay mixture is quite the best option. She is not afraid of moisture or high temperatures. The mixture is made from clay and sand. It should be elastic, but not stringy. The quality of the solution also depends on the proportions.
Before kneading, the clay is checked for fat content. Form several different balls with different proportions of sand and clay.Label them and write down in what proportions you used the ingredients so that there is no confusion. After that, they must be left to dry completely. After that, just throw the balls onto the floor. A good solution should not crumble or break. It will turn into a cake, but not liquid.
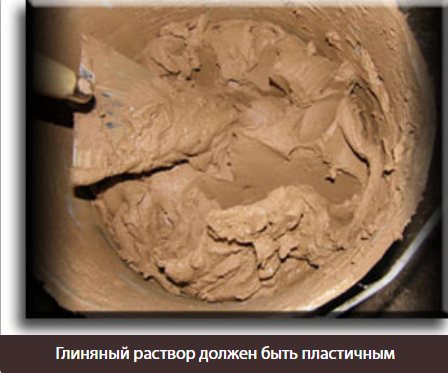
Clay and sand are sieved beforehand. There should be no lumps or other particles. The solution is mixed in relation to the identified optimal proportions. Take a mixing container. A regular bucket will do. Pour clay there and cover with water, mix. It should be infused for about 24 hours and after that the sand is poured. Then the mixture is mixed again.
Manual stirring will not work. You cannot knead until smooth without lumps. And everything depends on the quality of the mixture.
Therefore, use a drill with a mixer attachment. Continue kneading until you get a homogeneous mass without lumps in consistency similar to thick sour cream. To impart greater strength to the solution, you can add chamotte powder. It will make the solution better and more resistant to high temperatures. The cement mortar is made easier. But it is also suitable only if the fireplace is heated with wood. Cement is mixed with sand in a ratio of 1 to 3. The sand is poured into a bucket and cement is added there. The mixture is mixed in dry form, and only then it is poured with water.
Facing the fireplace with tiles
Facing a fireplace with ceramic tiles is not difficult. Installation is carried out in several stages. First of all, take out all the tiles from the packaging. Sort it by size. Lay it out on the floor in advance, taking into account the size of the seam. Think roughly which element will go where.
Ceramic tiles can be installed with or without a seam. The second option is easier, but it is more difficult to join the tiles together. There should be no gaps. The seam option is more difficult as the seams must be straight. For this you need plastic crosses. If you buy more of them, then you can not drown them completely, but put them in a perpendicular position to the tile. Thus, it will be easier to get them later.
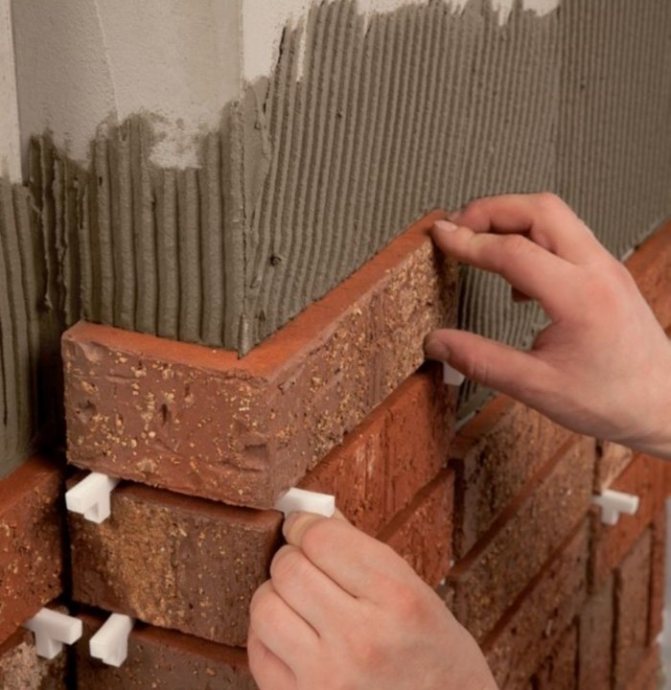
The first tile is placed in the corner from the bottom. The mortar is taken up and applied with a notched trowel. With a spatula, the solution is applied to the tile, and it is already attached to the surface. Check the evenness of the first tile by level, and the rest can already be leveled along it. You can adjust its position with a mallet.
Pre-lay each new row on dry to see if everything fits together. And each time check the laid row with a level.
When the entire surface is tiled, you need to give the solution time to dry. And then start grouting. If you did not plan the seams, then that stage is not needed. Grout can be done in different colors. Color is simply added to the mixture. Or you can leave it original. The appearance depends on the color of the seams. Therefore, try to match it to the color of the tile.

Sometimes I play in contrast, making the grout brighter. But this option does not always justify itself. Try to smear an extra piece of material with grout and see how it looks. First take out the crosses. You can fill the seams with a regular plastic bag. Just put the mortar in it and make a hole in the corner. And then gently squeeze the mixture into the seam. Or you can buy a special pistol. Someone applies the mixture with a spatula, but this is already within the power of a master with experience. During the process, try to avoid getting the solution on the front side of the tile. Keep a sponge handy in case of spillage. After closing all the seams, the composition needs time to dry. The manufacturers indicate the drying time on the packaging. On top of the tiles are covered with various impregnations for additional protection. The most commonly used wax-based impregnation.You can find them in any hardware store.
We also recommend that you familiarize yourself with our article - How to cover the stove with tiles with your own hands.
Preparatory stage
Seat selection
When planning to build a brick fireplace with your own hands, you first need to decide where it will stand.
As a rule, fireplaces are installed in living rooms or bedrooms, but the exact place must be chosen according to the following recommendations:
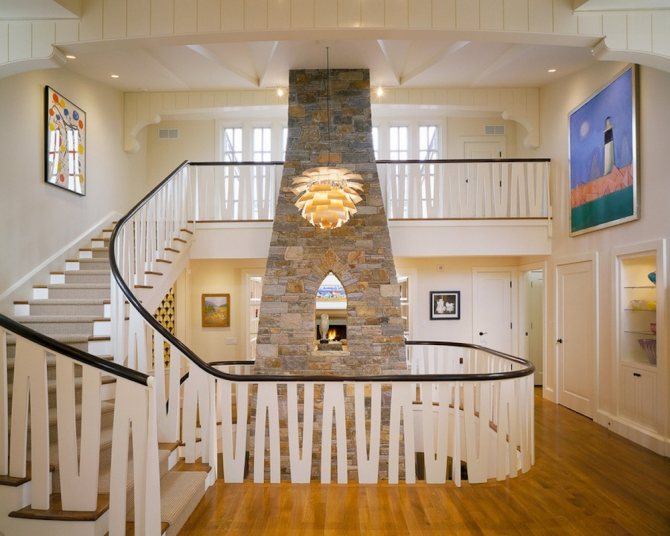
Placing the structure in the living room almost under the stairs
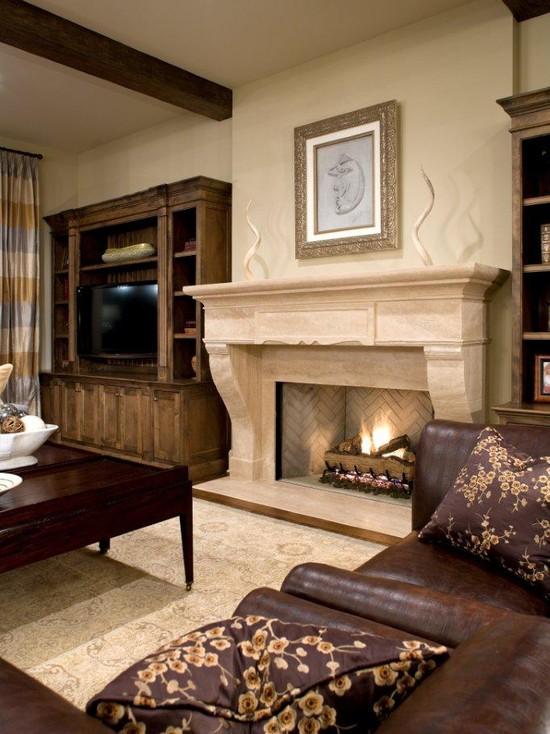
- The ideal option is to be located against one of the inner walls (or even install a fireplace built into the wall). So it will not only give off heat to the room, but also heat the next room.
- A structure installed in a corner formed by two interior walls is also very effective. But the construction of a fireplace in this case will be somewhat difficult: it is more difficult to lay corner models than standard ones.
Corner option
- It is undesirable to put a fireplace against a wall with many windows. Even if your window frames are well-fitted, drafts will inevitably occur when fuel burns in the cold season.
- It goes without saying that there is no point in attaching a fireplace to the outer wall: this way we will mainly heat the street, and the temperature drops will not benefit the structure.
It is very expensive to heat this way!
Calculation of dimensions
Now we need to determine the basic dimensions of the future structure.
The most important thing here is the correct selection of the dimensions of the combustion section and chimney.
Fireplace drawing for a large room
- The area of the fireplace insert directly depends on the area of the room in which it will be installed. The optimal ratio of these values is from 1:50 to 1:70. So, for example, for a conventional living room with an area of 20 squares (for a country house there are quite a lot), a firebox of about 0.4 m2 will be needed.
The larger the room, the larger the furnace hole
Some reference books give a ratio of 1: 100, but it can be used, rather, for decorative fireplaces that are heated in rooms with a sufficiently high temperature, solely to create an atmosphere. So if you have a separate heating boiler or stove, then it is quite possible to save on material.
- From the area of the furnace hole, we need to go to the height and width. For small fireplaces of standard configuration, the optimal ratio is 2: 3. For our example, a design of 50 - 52 x 75 - 77 cm is suitable.
- The ratio of the depth of the furnace to the height is from 1: 2 to 2: 3. It is undesirable to deviate from these ratios: if we do less, there will be a lot of smoke, if we do more, the heating efficiency will decrease. For our example, it is worth choosing a firebox from 26 to 35 cm deep.
- We make the flue hole approximately 10 times smaller (it is allowed to "spread" from 8 to 12 times) the area of the combustion hole. In our case, this is approximately 0.04m2.
- The optimal chimney height is 4-5 meters or more.
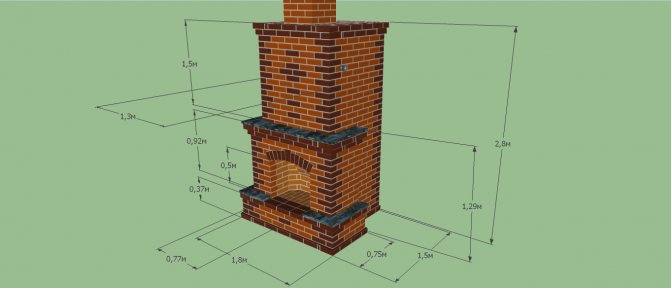
Scheme with basic dimensions
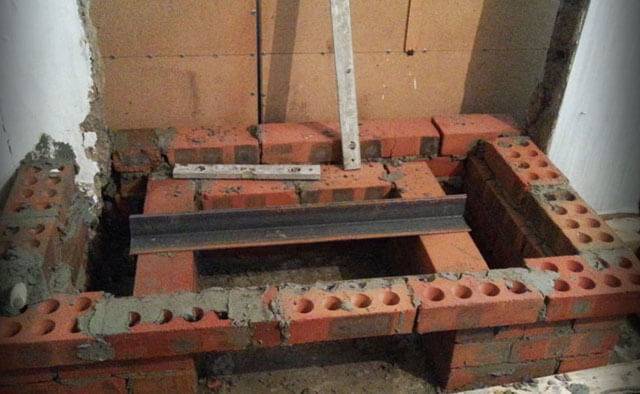
Foundation device
Now that we know where the fireplace will be located, and what dimensions its base will have, we can proceed to laying the foundation. It is not an option to simply build a structure on the floor: the mass of even a small model can reach semitones, and no overlap can withstand such a load without deformation.
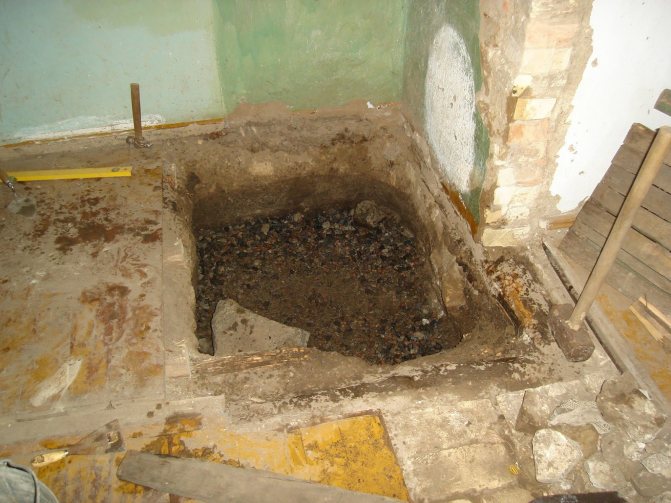
If work is being carried out in a residential building, to dig a pit, you will have to disassemble the floor as in this photo
The laying of a capital foundation for a fireplace is easiest to plan at the stage of construction of the building itself. If the structure is being built in an already operated house, then you will have to disassemble the floor covering and partially dismantle the structures located under the floor.
The work algorithm will be something like this:
- First, we dig a foundation pit at the place of installation of the structure. The length and width of the recess should be about 10 - 20 cm longer than the base of the fireplace, and the depth should be 0.7 - 1 m.For small fireplaces, you can lay a base with a depth of 0.5 m, but not less.
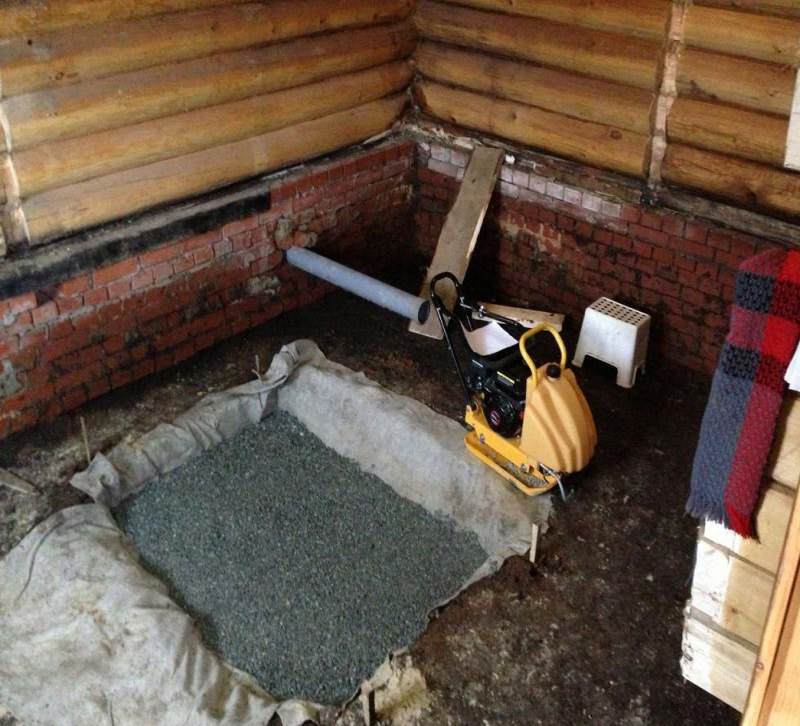
A pit with gravel backfill. Geotextiles are used to maintain the shape of the walls.
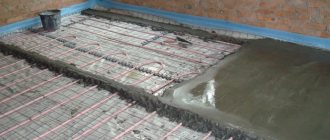
- We level the bottom of the pit, after which we lay large stones or broken ceramic bricks on the ground. We ram the filling, after which we fill in a layer of concrete about 20 cm thick.
- When the concrete is partially polymerized, we repeat the filling with rubble stone, using a finer fraction. We compact the backing again and fill in the solution (you can make it thicker).
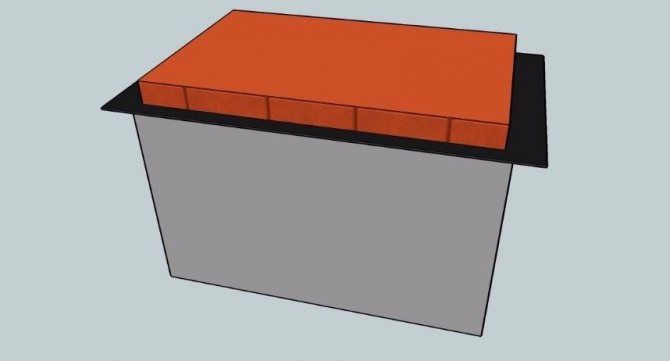
General base scheme: bottom - concrete, top - brick, between them - shut-off waterproofing
- According to this scheme, we lay three or four layers of material. Under the last layer, which should go to the floor level in the room, we lay waterproofing - a roll of roofing material or a polymer membrane. This material will cut off capillary moisture from the base of the structure.
Leveling the foundation with mortar
The last leveling layer can be made not of concrete, but of ceramic bricks with clay / cement mortar. To increase the strength, several steel corners can also be laid in the base, which will provide a more even distribution of the load.
The described foundation is the simplest, but at the same time it provides sufficient stability for the entire structure.... By the way, I would not recommend connecting it with the general foundation of the house: these bases have different shrinkage rates, therefore it is desirable to provide them with a certain degree of freedom.
Fire protection
A brick fireplace heats up quite strongly during operation, in addition, an open firebox is a potential source of sparks and "shooting" coals. That is why it is necessary to equip an additional protective circuit in a room built of combustible material or finished with such materials.
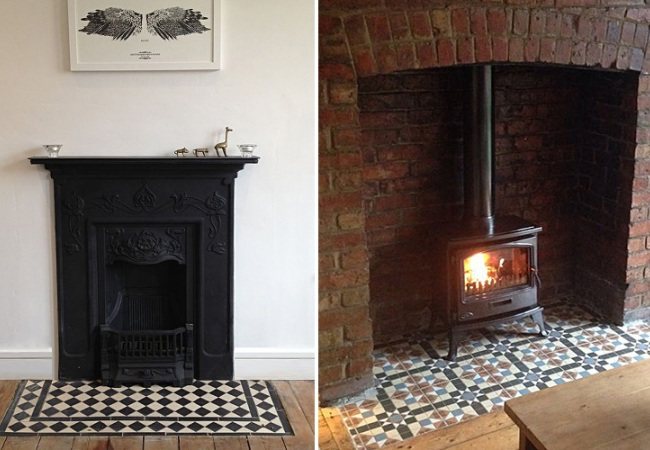
It includes a separate section of the floor covering in front of the combustion hole and the so-called leaning wall:
We must cover the area in front of the firebox
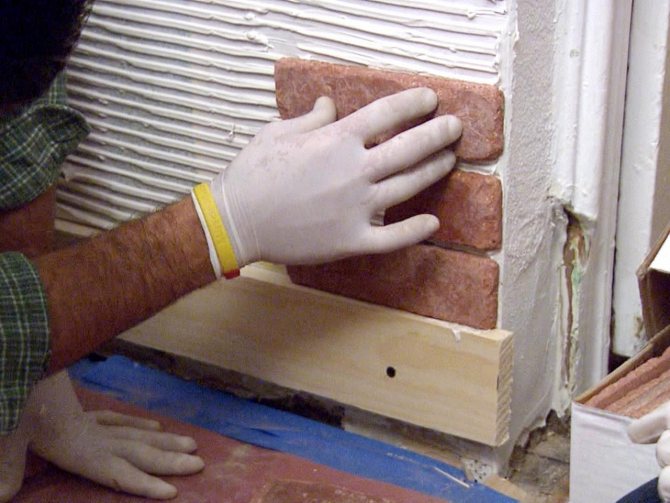
- We finish the floor area in front of the fireplace with non-combustible tiles - tiles, porcelain stoneware, clinker or natural stone. I prefer clinker, but other options are good enough as the floor doesn't get too hot anyway.
- Before starting the construction of the fireplace, we also protect the wall behind its back wall. A brick wall made of refractory bricks is best suited for this purpose. The wall should be about 50 cm wider than the fireplace - this way it will more effectively protect the base from overheating and ignition.
Protective brick wall
- Instead of a brick wall, you can make a screen. The refractory materials used here are either galvanized steel sheet on a basalt fiber or fire-resistant plasterboard backing, or a minerite slab mounted on ceramic bushings and fixed with screws. The disadvantage of such screens is their appearance: if a brick wall can still be inserted into the interior, then sheets of polished metal or refractory composite will clearly stand out.
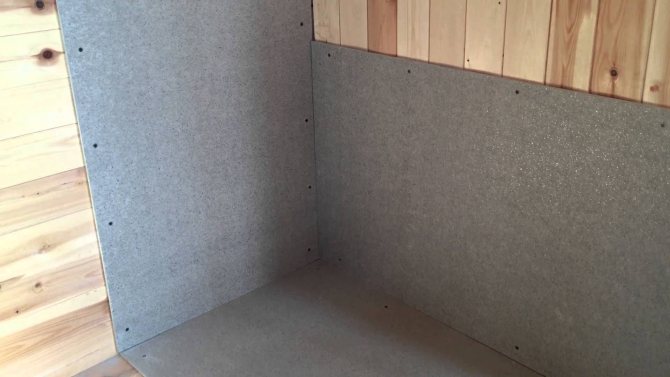
Minerite heat shield - functional but not aesthetically pleasing
- We should also mention the chimney thermal insulation. When installing a fireplace in a wooden house, all areas where the tree will come into contact with the heating surface (whether it is a brick chimney or a composite pipe made of a sandwich) must be equipped with a fire protection circuit. I usually use non-combustible materials based on asbestos or (better) basalt fiber.
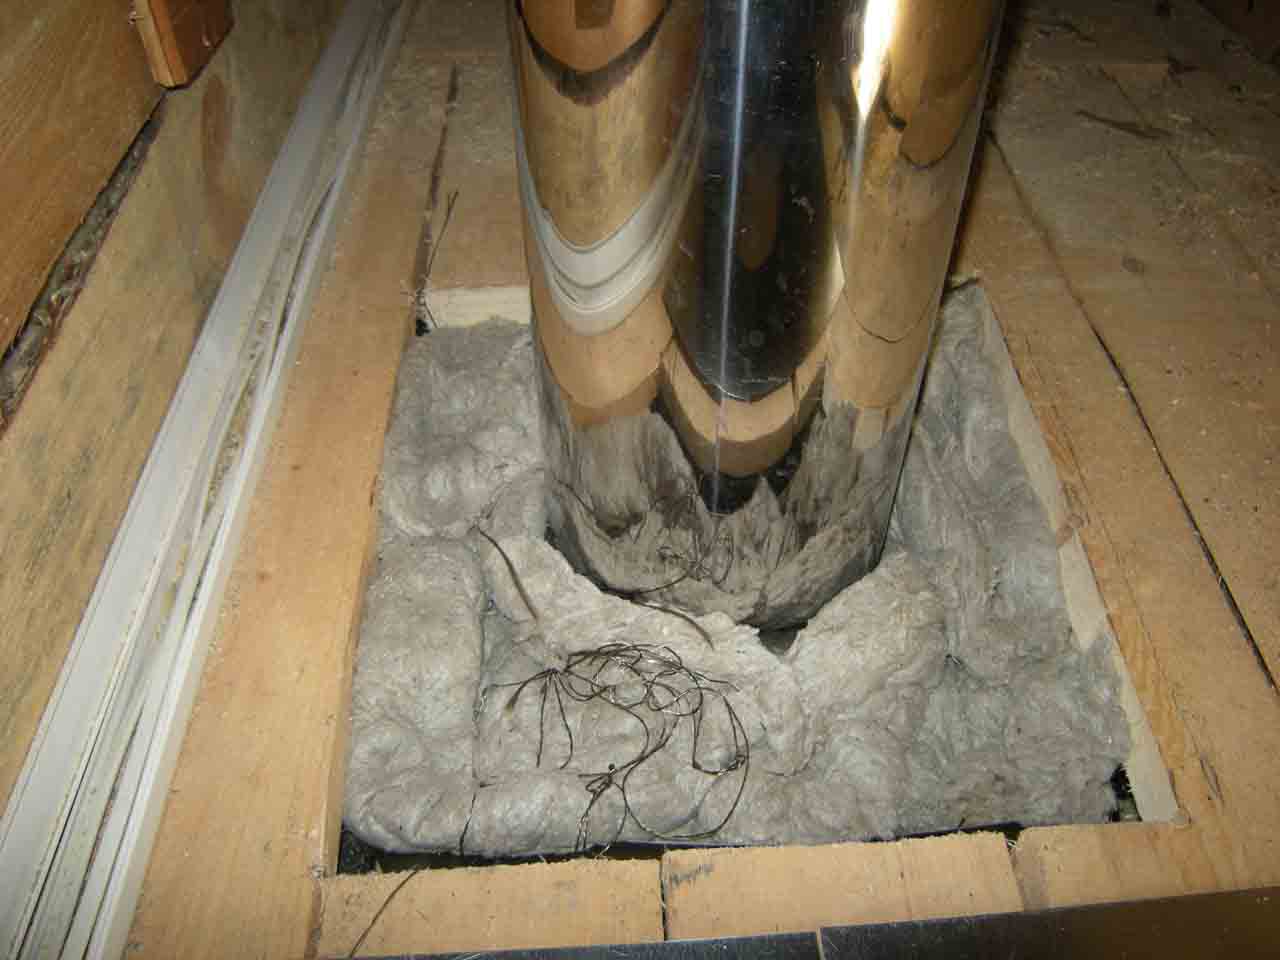
Basalt fiber overlap protection