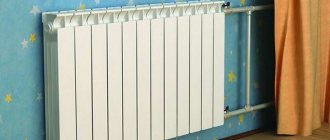
The modern market is replete with a huge assortment of different pipes for sewer systems. The vast majority of which are made of plastic, and this is not surprising, because plastic is a lightweight, strong and durable material. Such pipes are able to withstand the impact on them of the external environment, which is one of the key details when working with risers. In this article, we'll talk about how to install such sewer pipes in a house.
The advantage of plastic sewer pipes
The advantage of plastic sewer pipes will be their small specific gravity, which allows you to calmly work with pipes with your own hands, without attracting additional special equipment. Plastic pipes have a smooth inner surface, which virtually eliminates the possibility of clogging.
And one more advantage of this material is its low price. Which makes them out of competition with pipes made from other materials.
Contrary to all of the above advantages, great attention should be paid to the installation of sewer pipes in the house, since incorrect installation of them in the sewer network (CS) can reduce all the advantages of such pipes to zero. So, if a pipe or bend is improperly installed, blockages may appear in some places, which paralyze the operation of the entire sewer network. This often occurs in private houses, less often in urban apartment buildings. Since pipes of a larger diameter are installed in the latter than in a private house, this allows minor errors to be allowed.
Quality control
After completing the installation work, you need to test the system to ensure that the connections are completely sealed and that the system is functioning properly. To check, you must turn on the water supply in all plumbing fixtures.
The water should leave quickly enough, if the liquid is drawn up to half of the sink (with an open drain hole), then the sewage system has insufficient throughput.
In addition, you need to carefully inspect the pipe joints for leaks. You can put a sheet of paper in advance under each joint. The presence of wet spots indicates insufficient tightness of the installation connection. The connection with the defect must be redone using a silicone sealant.
So, the installation of sewer pipes is a crucial stage in the construction of a drainage system. When performing this work, it is extremely important to comply with the rules and regulations adopted in modern construction.
Sewerage system
Sewer systems are very often clogged. Often this is not due to violations during the installation of the sewer system, but due to the fact that it is often used for other purposes, throwing various garbage into it.
But it is also impossible to write off errors in the installation of sewer pipes in the house. Since some "masters" use pipes with a rough surface for the sewage system, which clog up an order of magnitude more often than smoothly coated ones. Another mistake is an incorrectly drawn up plan of the COP, and the assembly is correct, the result will be a high-quality assembled non-working SC, which will clog up in places of large bending and turning angles.
All this must be foreseen before starting the installation of the sewer system with your own hands.
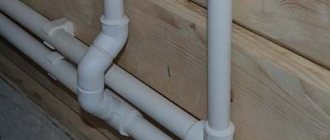
Features of internal wiring
Internal wiring of the sewage system is carried out in an open or hidden way.
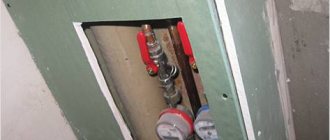
In the first case, the pipes are fixed on the wall with clamps, if the diameter is small, then with clips.It is convenient to equip the hidden system at the same time as decorating the walls, laying the floor when renovating or building a house. In order not to violate the integrity of the surfaces, they make false panels, boxes, hide in niches, behind partitions.
In a hidden system, service access must be provided. Doors, hatches are installed, removable structures are made.
Choice of pipe diameter
One of the conditions for the reliable operation of the sewage system is the correctly selected diameter of the products.
They are guided by several criteria:
- type of household plumbing, its performance;
- how many drain points are connected;
- types of effluents: homogeneous or with impurities.
Recommended pipe diameters for connecting 1 device:
- washbasin, sink in the kitchen, bidet: 32-40 mm;
- shower, bath: from 50 mm;
- washing machine, dishwasher: 63 mm;
- sink with a shredder, toilet with corrugated connection: 70-85 mm;
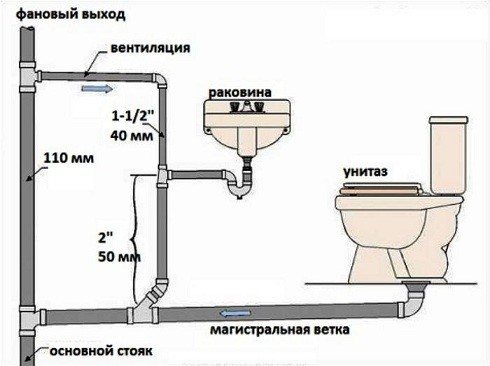
- riser, fan pipe: 100-150 mm.
If you plan to connect 2 or more devices, collect wastewater from several branches, a diameter of 75-90 mm is required.
The use of products of different cross-sections causes installation difficulties. Experts in practice make internal routing with pipes of the maximum diameter (75 mm or even 50 mm), when the number of points is small. The method does not apply to the riser: at least 100 mm.
Nuances of design
In order not to be mistaken with the wiring, they draw a diagram. It reflects the key nodes: a riser, markings with corners and turns, connection points for devices. They try to simplify the project as much as possible so that later there will be no difficulties with maintenance and repair.
At the design stage, the following nuances are taken into account:
- The sections are laid with a slope towards the exit. Optimal value: 3 cm per 1 linear meter. m for products up to 50 mm and 2 cm with a diameter of more than 85 mm.
- Devices with shredders, toilets are connected closer to the riser: the distance is not more than 1 m.
- In horizontal sections, it is unacceptable to mount pipes of different cross-sections. Possible outflow to the plumbing, you will need a check valve.
- The number of connections is minimized - the system becomes more reliable.
- In places with a risk of blockages, inspection hatches are installed.
- A common drain for several points simplifies the circuit, saves money. Only the toilet is connected separately.
If you plan to install additional plumbing, it is reasonable to provide for its connection. A branch is left in the system, temporarily closed with a plug in order to subsequently avoid dismantling and replacing the site.
Pipe preparation
Before starting the installation of sewer pipes in the house, it is necessary to adjust the work to size. This is done by slicing them up. This process is performed in several ways:
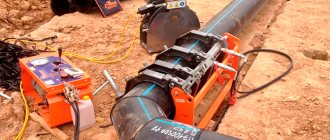
- Cutting machine - as a result, the edges of the cuts are clean and smooth. It is convenient to use this machine for cutting a large number of pipes.
- A special saw - the result is also quite pleasant, not inferior in cut quality to a cutting machine. This method is very convenient because the saw does not take up much space.
- A hacksaw for metal is the most budgetary method. If you do not want to spend extra money on the purchase of a special saw or, even worse, a cutting machine, then an ordinary metal saw, which almost every craftsman has, will suit you.
How not cool, but to cut off the pipe in these ways, you need free space. What if there is practically none? In confined spaces where the saw cannot crawl, use a steel cable attached to the handles. In this case, the pipe is not cut off, but rubbed at a right angle. The quality of such a cut is not comparable to a similar cut with a saw, but you will have to try, otherwise the joining will not be of high quality.
Important! Burrs usually remain when cutting. They must be removed, since during subsequent installation they will interfere with high-quality gluing.They will also interfere with drains advancing in the pipe.
They are easily removed with a regular kitchen knife, by scraping off the cut points. This work should be done with high quality, because the entire functionality of your design will depend on how you cleaned the gluing points.
Installation of sewer pipes
- The first thing to do is to find out the level of the finished floor. It is important to know exactly, and not approximately: how many centimeters will be filled to the level "zero". This is necessary in order to accurately display the wiring under the sinks: shower, sink, toilet, etc.
- The next step is to put marks where and at what distance each structural element will be installed. You can use chalk, construction pencil, or marker.
- Then we mark the pipes and fittings, while measuring the correct angles of inclination of the structural elements.
- To ensure the tightness of the sewage system, all pipes, bends and joints must be carefully measured and fitted. To achieve this, you must initially measure everything, try to connect, and then glue it together.
- Be sure to check the joining of the parts, since the pipe, with the correct connection, should go into the socket more than half without effort, and then with a little effort. If so, then the fit is correct.
- Be sure to sand the pipe joints with zero-grade sandpaper until it becomes rough.
- Installation of sewer pipes in the house involves the use of special glue for the connection. There is a large selection of such glue in stores, study the instructions supplied with the pipes and find out which glue the manufacturer recommends.
- Methylene chloride is a substance that degreases and softens pipes at the joints when glued. It also needs to be used.
- The glue is applied with a swab, which should come with the glue, but it will be more convenient to use a regular brush. The joint on the pipe is covered with a rather large layer of glue, and the joint in the socket is covered with a small one.
- After applying glue to the joints of the connecting surfaces, the pipe is inserted into the socket so that the marks applied to the connecting parts are a couple of centimeters apart. For a while, the structure should be fixed in this position for 10-15 seconds.
- Further, the parts are turned so that the marks coincide. When glued correctly, the extra layer of glue should come out.
- After gluing, the parts should be held for about 1 minute. Then the joint is coated with glue for reliability.
On average, one gluing operation takes about 2 minutes so that installing sewer pipes in a house with your own hands does not take much time. But you shouldn't hurry either.
By following all of the above rules in the exact sequence, you can easily assemble the sewer system yourself, without resorting to the help of expensive specialists. Good luck in your endeavors!
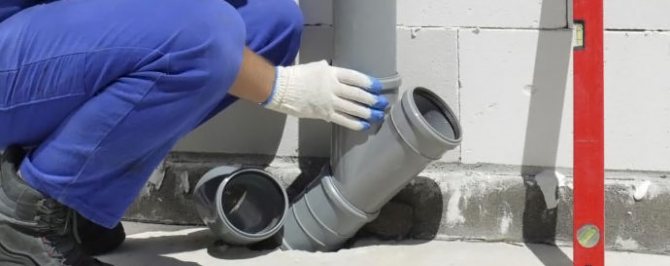
Installation
To begin with, consider the process of installing an internal sewer system. Experts recommend starting work from the most remote part to enter the system. This is where the initial part of your internal system is attached to the main common pipe.
During the entire installation of the internal sewage system, follow the basic rules.
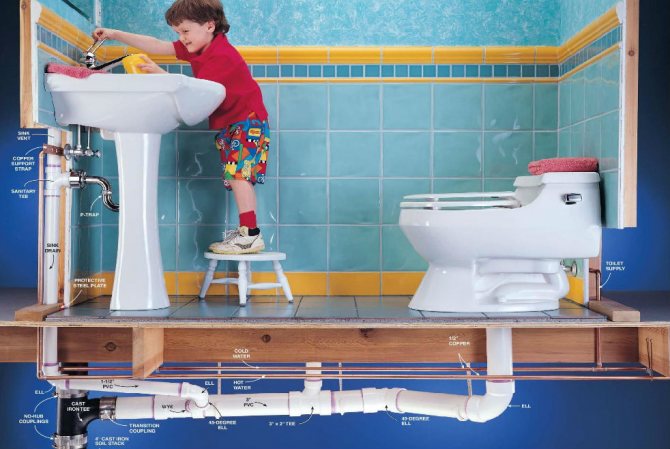
Basic principles
Sewerage laying scheme.
- The direction of the socket is the most important factor during installation. So that in the future the drain does not deliver a lot of noise and unpleasant odors do not appear in the apartment, install the bell so that it is directed either upward or at the beginning of the sewer system.
- All horizontal branches must be necessarily connected with cross pieces or oblique tees. In this case, it is important to ensure that the rotation of the branches is approximately 45 degrees. It shouldn't be allowed to be 90 degrees.
- If you need to extend the pipe, thereby increasing the duration of the sewerage system, use specially designed plugs. They will not only increase the length, but also prevent the formation of traffic jams.
- When installing vertically located sewer pipes, you can safely use corner turn signals. In this case, the angle of rotation should be already 90 degrees. This will facilitate the installation process, and the flow of water will be more free.
- Selection of the diameter. It is also very important to be guided by the fact that the main pipes for the sewage system must have a diameter of at least 10-15 cm. It is customary to refer to the main pipes not only the central sewer riser, but also the pipe coming from the toilet bowl, as well as the one that will come out of the house ... It is more convenient to install pipes under sinks and sinks with a diameter of 5-7 cm.
- When assembling, be sure to use a special sealant or gaskets. The sealant looks like an elastic thin tape that is wrapped in a small layer around the threads. This material will prevent the connection from passing water.
- If you are laying sewer pipes for a pool or shower stall indoors, be sure to take care of installing a special drain. This device will make it possible to protect the floor from a large accumulation of water, since this drain has a certain slope to drain water directly into the sewer.
- If you are installing an internal sewage system for your house, then make sure that the entire system has a slope of about 1 cm from the beginning to the end. This is a prerequisite for the free flow of dirty water. Otherwise, if such a bias cannot be done, you will have to additionally purchase an electric pump.
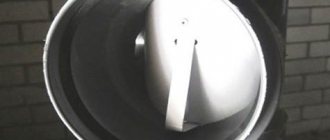
- Take care of the presence of a drain pipe on the sewer riser. Its diameter is equal to the diameter of the main pipe (a slightly higher value is allowed), and it must be brought out to the roof. The main task of the waste pipe is to prevent the discharge of air in the system, which will ensure fresh air in the room.
- When you bring the fan pipe to the roof of your own house, be sure to cover it on top with the so-called fungus. This will protect the inside of it from rain and other precipitation, thereby preventing the penetration of foreign substances into the internal sewer system.
- In the event that you decide to lay a certain part of the pipes for internal sewage inside the walls or floor, provide them with a soft cloth wrapping. To do this, simply place thick fabric spacers between the wall and the pipe. This will protect the room from noise, and condensation fungus will not form on the wall. You can pre-treat the fabric with a special antifungal antiseptic for greater reliability.
- Make sure that the pipes are fastened with clamps every 10 or 15 cm. It is advisable at the beginning and at the end to make the fastening as strong as possible, and loosen it a little closer to the middle. This will equalize the pressure along the length of the pipe.