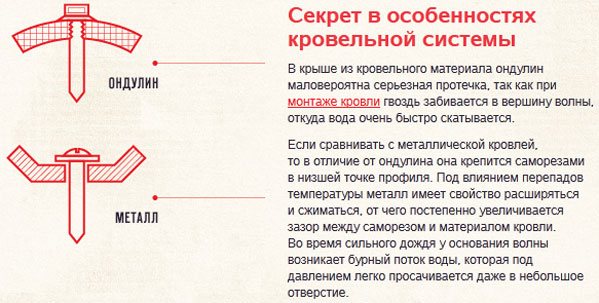
What is special about ondulin roofing
In the composition of ondulin there are no components harmful to the environment, which is achieved by the use of the latest technologies in its production. Onduline sheets are made on the basis of cellulose and some additives. To make this roofing hard and waterproof, a special bituminous material is used for its processing, with the addition of resin. For coloring the finished sheets, special compositions are used, which make them very aesthetic and more resistant to external influences.
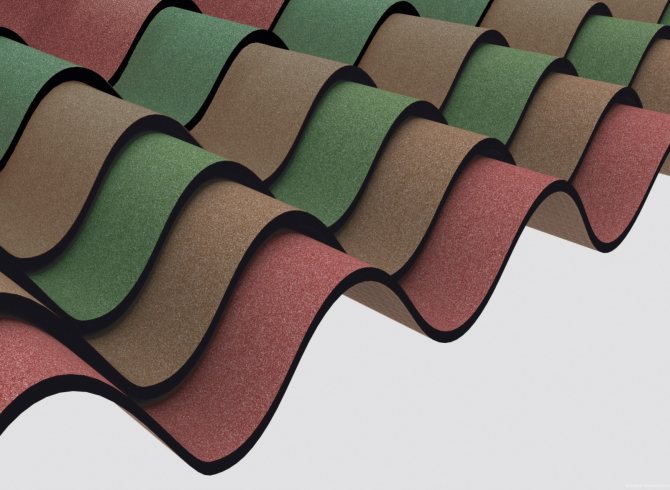
Ondulin looks like ceramic and ordinary tiles, or like slate. At the same time, the quality characteristics of both coatings do not particularly differ. Imitation slate is produced in a size of 200x95 cm; smaller parameters are used for tiles. Tiled imitation of ondulin is mainly used to decorate roofs with complex shapes, which significantly reduces the number of scraps. Simple roofs are equipped with ondulin slate: the ease of laying the material allows you to cover the roof with ondulin with your own hands in a very short time.


Strengths and weaknesses of the material
Ondulin is very resistant to destructive weathering. It is easy to install, resulting in a very aesthetic roof surface. The financial costs of purchasing the material are not very high.
Ondulin has the following positive qualities:
- Excellent environmental friendliness.
- Long service life.
- External aesthetics.
- Rich colors.
- Simple and quick installation.
- Convenient dimensions to minimize waste while increasing the speed of roof cladding.
Thanks to these indicators, ondulin has gained high popularity in the field of private housing construction. Since there are no harmful components in the material, it is often used to cover wooden buildings. With the help of ondulin, old roofs are often repaired without removing the old roofing. This becomes possible due to the low weight of ondulin (3 kg / m2), therefore, a significant increase in the load on the rafter system and the structure of the house generally does not occur.
Basically, this cladding comes with a 15-year warranty. However, practical experience shows that, subject to the rules of installation and maintenance, such a roof can last many times more. Moreover, what is important, during operation, the external decorative qualities of the coating practically do not change, retaining the initial freshness for a long time.
However, the main advantage of the material is the ability to lay the ondulin roof with your own hands. The procedure for this work is very similar to the installation of slate sheets, while ondulin is lighter, stronger and more environmentally friendly.
As for the disadvantages of ondulin, the main one is the material's ability to ignite in the event of direct exposure to a flame. For this reason, the treatment of ondulin sheets with special fireproof impregnations is practiced to reduce their flammability. It is also important to understand that a significant period of operation leads to the fact that the color of the roof gradually fades: this is especially true for dark shades.
Signs of quality ondulin
Unfortunately, on the market for construction products, there are quite a few low-quality fakes of ondulin.
The following tips will help you distinguish real from fake material:
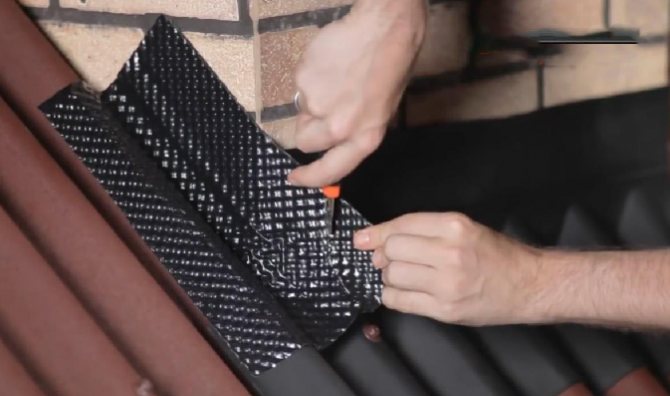
- There is always a black mesh on the back of a real ondulin.
- The number of waves of the original sheet is always fixed - 10 pieces.
- The waves have a stable height of 36 mm.
- The outer surface of the material has a characteristic roughness like gauze.
- High-quality sheets are characterized by rich matte shades.
- The extreme wave is always provided with a stamp with the manufacturer's mark.
- The material has an accompanying brand certificate and a 15-year warranty card.
Installation recommendations - fixing diagram
In order to minimize the time of laying the material and the amount of losses for trimming it, while achieving a significant service life, it is recommended to adopt a few simple rules on how to properly install ondulin. It is very important that during the installation activities, the temperature regime was in the range from 0 to +30 degrees. The heat provokes softening of the bitumen, due to which the sheets are deformed. Frost makes the ondulin very brittle, which increases the risk of cracking when moving the installer or hammering in nails. Some manufacturers allow slight frosts when laying the material, but it is better not to experiment with this.
If, during the installation of a roof made of ondulin, hot weather is established with your own hands, it is important to avoid stretching the sheets: after the temperature drops, the installation areas of the fasteners may deform or become covered with cracks. It is best to cut the ondulin with a hacksaw on wood, be sure to grease it with oil: this will avoid the tool getting stuck. A circular saw can also be used for these purposes.
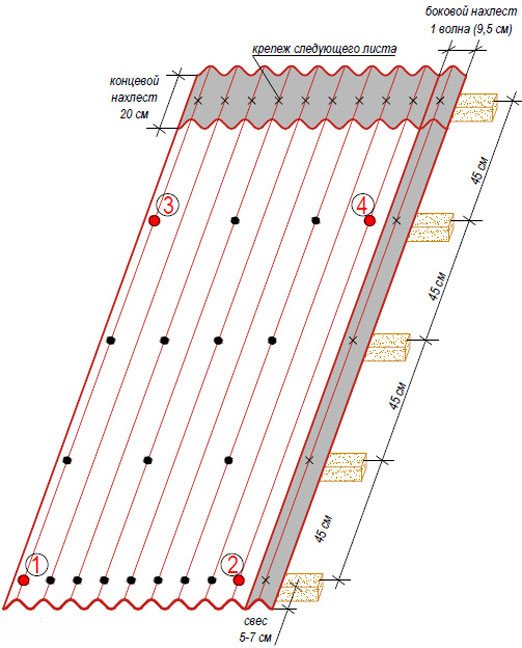
It is better to refrain from using a grinder, since the place of the cut in this case begins to melt. Onduline sheets are fixed on the lathing using special roofing nails included in the cladding package. The ondulin fastening scheme requires 20 such fasteners: 10 from below, 5 - from above and 5 - in the middle.
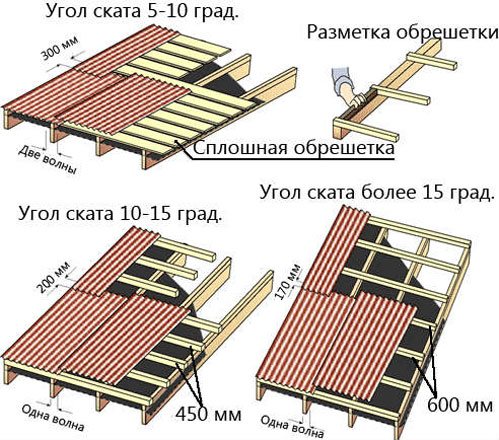
When arranging the lathing, it is very important to take into account the slope of the slope. If we are talking about a slight slope of up to 10 degrees, a solid, reliable crate is used, made of tongue-and-groove boards or plywood.
With a slope of 10-15 degrees on the crate, a step is made between the jumpers of 45 cm.And if the slope is inclined by more than 15 degrees, the step of the crate elements is increased to 60 cm.
Any frame lathing in the area of ribs, valleys and ridge is made solid, due to increased requirements for insulation.
Decking: withdrawal features
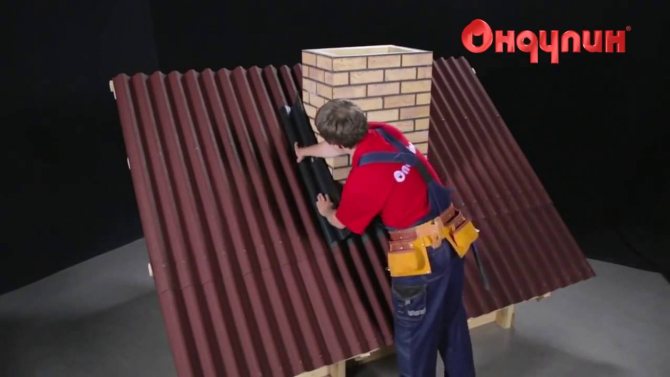
Many developers are interested in the question of how to properly remove the chimney through the roof, if it is made of corrugated board. Corrugated roofs are lightweight, durable and reliable in operation. Many developers use it as a roofing base. When passing through the roof made of profiled sheet, there are no fundamental differences in the design, in the same way the place in the roof and the material that will be used are chosen.
Before passing the chimney through the roof made of profiled sheets, it is required to stage-by-stage all types of work, taking into account each structural element.
- The diameter, thickness and material from which it will be made are determined. The quality of traction depends on the height and evenness of the laying.
- Before making a hole in the roof, it is necessary to take into account not only the dimensions of the pipe, but also the fasteners with which the structure will be fixed.
- When connecting to the rafter system, it is necessary to take into account the presence of a protective box.
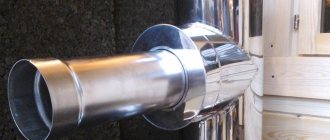
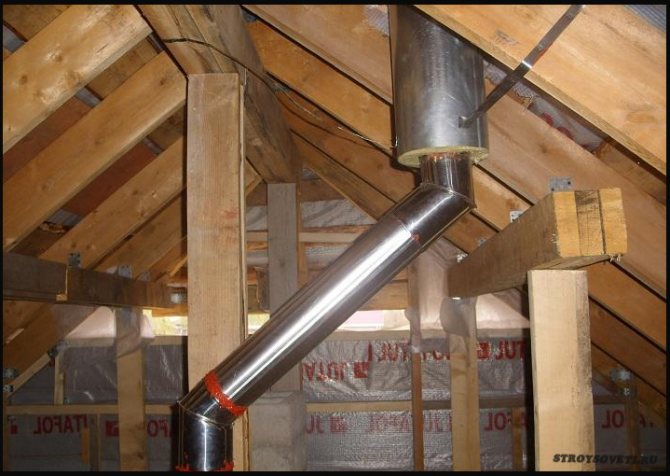
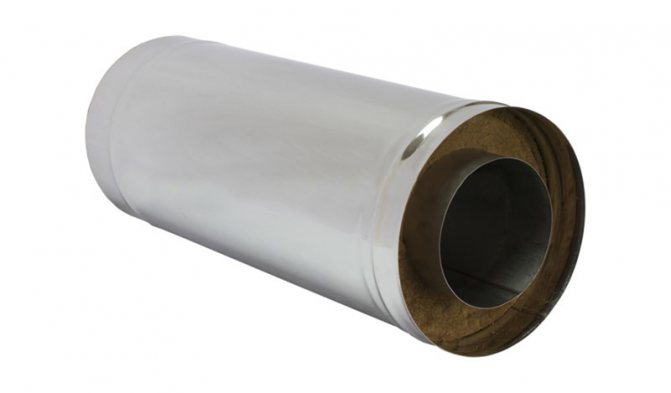
- In the presence of complex roof types with the use of heaters, it is recommended to carry out the passage of the chimney from the sandwich pipes through the ceiling, attic and roofing material. Using a chimney sandwich during installation, the entire structure in assembly is extremely simple and quick.
The withdrawal principle is in many ways similar to the standard assembly of structures:
- Using a finished chimney sandwich, you do not waste time for insulation.Installation of a chimney from sandwich pipes through the roof greatly simplifies the work.
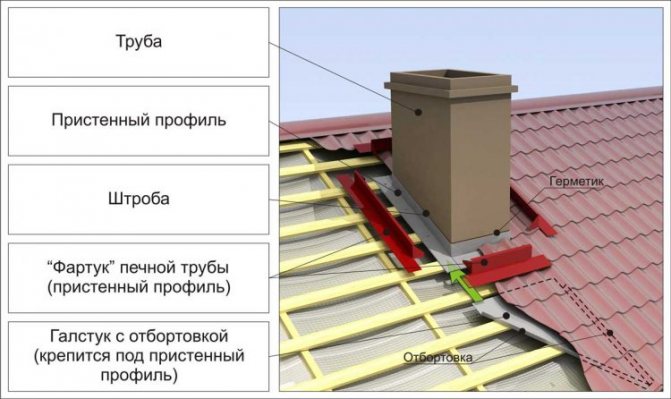
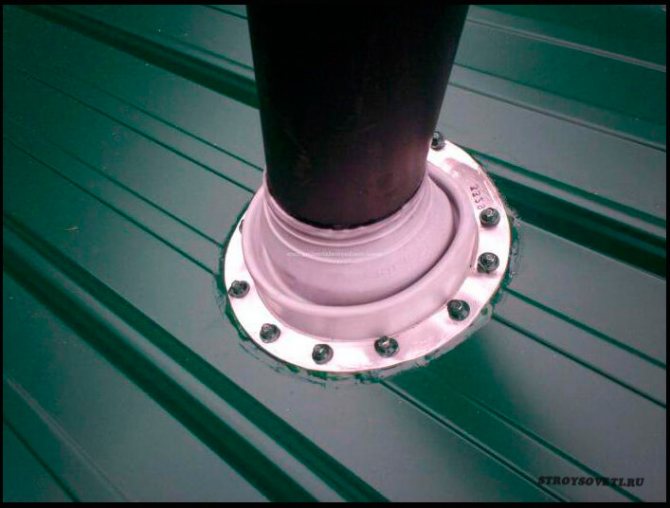
- Using the penetration as a structural element, the best sealing of the joint is ensured, which excludes the ingress of moisture into the interior of the attic. As a through-pipe, the most rational option is to use the material from which the pipe itself is made. There are ready-made elements on sale that completely solve the issue of sealing the joint and its elasticity, this is especially important if the roof has a corrugated surface.
- The node for the passage of the pipe through the roof has several varieties; its type is selected in accordance with the diameter and shape of the system.
How to cover the roof with your own hands - step by step installation
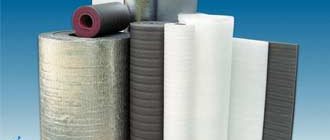
Stage 1... The installation of ondulin on the roof begins with equipping the rafters with a crate over the previously laid vapor barrier film. The same vapor barrier can be installed from the attic side. To fill the gaps of the lathing, insulation is used, closed over the rafter legs with a waterproofing film. On top of the lathing, a counter-lattice is equipped with slats, which makes it possible to create a technological ventilation cavity.
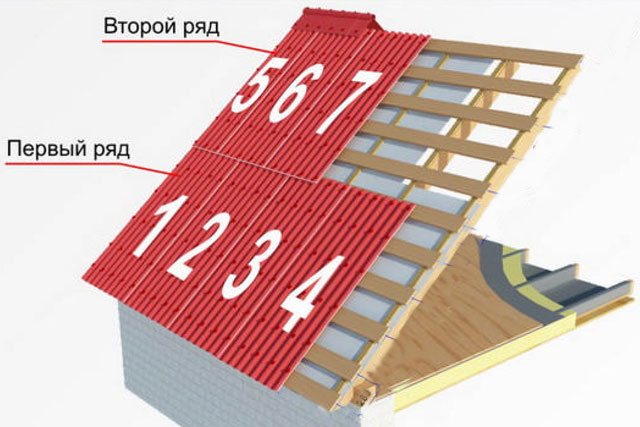
Stage 2... Do-it-yourself installation of an ondulin roof starts from the first row, from the roof slopes. It is better to choose the leeward side for this in order to avoid blowing under the roof cladding. When fastening the sheets, it is important to achieve that their lower edges extend beyond the cornice board. The protrusion is selected individually: the main thing is that the water is effectively drained outside the roof, to the middle of the gutter. In any case, the projection must not exceed 70 mm. When laying ondulin, an overlap is made by one wave. The size of the longitudinal overlap is influenced by the degree of slope of the slope: usually they are in the range of 17-30 cm. Each sheet takes 20 roofing nails, which are hammered in the center of the sheet through a wave.

Stage 3... Laying of the second and each next sheet is carried out from its half, in order to achieve the expansion of the roof joints in adjacent rows. This installation scheme is used up to the roofing ridge.
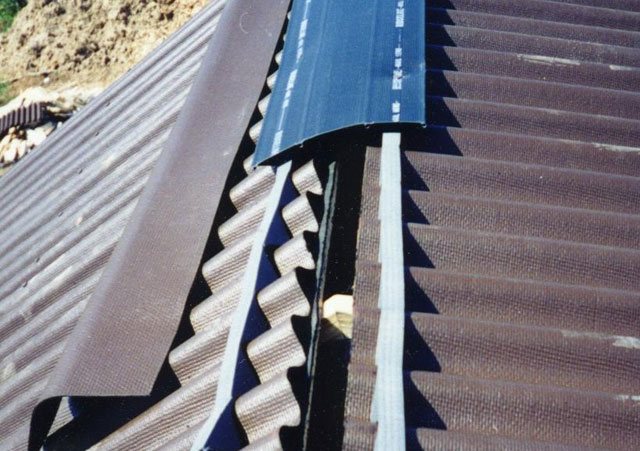
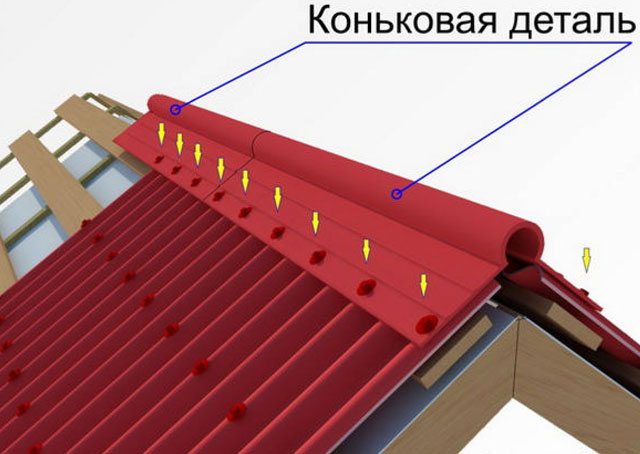
Stage 4... Before laying the last rows, an additional lathing is mounted under the ridge profile.
For these purposes, it is best to use a standard profile made by the same company as the onduline coating. The size of the profile overlapping each other is 12.5 cm. The roof ridge is nailed onto each wave.
Stage 5... If the wall and the roof structure are joined, it is designed with a standard profile from the same manufacturer. The same principle applies to the design of the connection sections of the individual planes of the roofing surface (valley).
Stage 6... The place where the roof meets the gable board must be well protected from moisture. This is done in one of two ways. One of them involves folding the edge of the onduline sheet, which is nailed to the pediment board. The second technique is implemented by overlaying the roof edge with a rectangular profile, or a tong: this also allows you to make the docking place more aesthetic.
Features of the choice of location
Exiting the chimney through the roof is not as easy as it sounds. Incorrect determination of the place where the pipe will be installed, in the future, may lead to poor-quality operation of the entire heating system and not only that. Let's list the main problems that can arise if the wrong place for the removal of combustion products in the furnace is chosen, taking into account that the sealing of the chimney on the roof and the roof itself will not be broken.
- It is not recommended to install in areas located near ventilation openings and roof windows in order to avoid the ingress of carbon monoxide into the room.
- Installation at slope joints where there is an external corner is not recommended, as this will lead to the accumulation of snow in the winter.
- Do not use hard material to fasten the system. This is taken into account in those cases if the roof itself "floats" for any reason. If the system is fixed rigidly, the drainage system will suffer along with the roof.
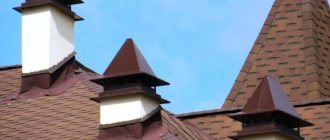
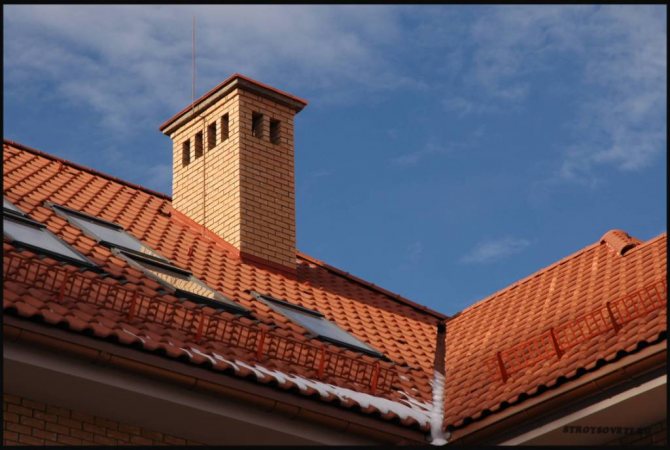
Experienced builders advise installing a chimney system directly near the ridge... Why exactly in this, and not in any other place:
- In the joint area of the structure, moisture leakage is excluded, because in this place during snowfalls the least amount of snow accumulates.
- The location of the pipe in the immediate vicinity of the roof ridge reduces the impact of external factors. By placing the structure near the ridge, favorable conditions are created for the least collection of condensate in this place.
An increase in the distance from the ridge affects the height of the chimney structure itself, since it rises above the roof. If there is another building nearby that obscures the exit node, then this factor must also be taken into account, raising the height of the structure above the structure.
How to care for an ondulin roof
If the process of laying the sheets was carried out in accordance with all the rules, special care for them during operation will not be required. All that will need to be done is to timely remove various dirt from the roof of the country house from ondulin so that it can serve as long as possible. After a certain time, a gradual loss of the original freshness of color is observed by ondulin. To restore the former attractiveness of the coating, painting is usually used, using a special material for this.
As you can see from the description, making a roof of a house from ondulin with your own hands is a quite feasible task. All that is required in this case is to strictly observe the laying technology and some recommendations that allow an order of magnitude to increase the duration of the roof.
Rules for the passage of a sandwich pipe through the ceiling
When developing a plan for future installation work, you should pay special attention to the dimensions of the chimney. In this case, it is worth familiarizing yourself with some of the rules:
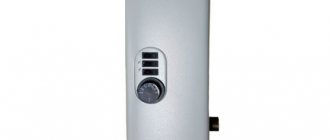
- if the pipe is being installed for a sauna building, it must be remembered that after leaving the furnace, only thick-walled pipe, which is not equipped with insulating material, is allowed to be installed. The height of such a pipe should be at least 1 m. It is advisable that the pipe is made of stainless steel, since this material is more heat-resistant than galvanized steel. After one meter of galvanized thick-walled pipe, sandwich product installation is allowed;
- pipes passing through the ceiling must necessarily have a layer of insulating material;
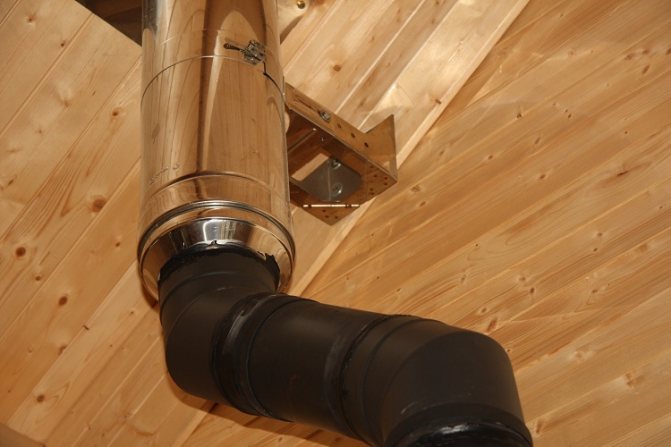
The insulated part of the chimney is installed on a thick-walled pipe coming out of the firebox
Important! It is strictly forbidden to join pipes in those areas that pass through the ceiling.
- the length of the horizontal sections in the structure directly affects the draft and other operational characteristics of the chimney. The longer the horizontal sections are, the worse the thrust performance in the system will be. The maximum recommended length of horizontal segments is no more than 1 m;
- the number of knees in the system also affects its performance. There should be no more than three of them;
- it is forbidden to rigidly fix the pipe in the place of passage through the ceiling. The connection must not impede linear expansion of the heated structure.