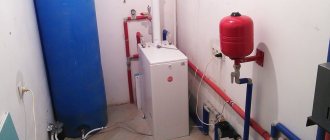
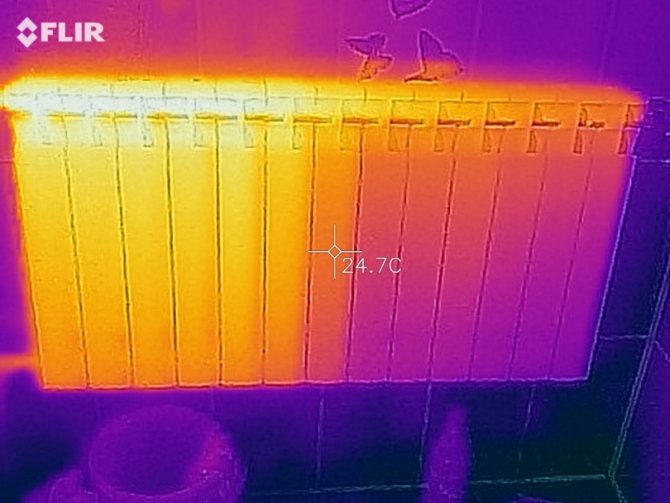
Reasons for repairing the riser
Sewer riser
Repair work is most often carried out for the following reasons:
- The build-up of dirt inside cast iron pipes, where cleaning them with a plumbing cable does not bring positive results.
- Formation of small or large cracks in pipes, couplings or tees, which causes leaks and flooding of apartments located on the lower floors.
Replacing the sewage system always involves certain difficulties and risks. An ideal option when the old sewer riser from the basement to the last floor is completely changed in a residential multi-storey building. However, there are often cases when it is necessary to replace the plumbing drainage system only in one apartment. Moreover, if the owner has professional skills for such work, he may well do it with his own hands.
Causes of emergencies in the sewage disposal system
An experienced owner knows that a sewer riser in an apartment requires constant attention and systematic maintenance. Malfunctions that have arisen in the system can be eliminated with your own hands if the smell of sewage in the room is associated with problems that arise in the piping inside the apartment. What causes a network emergency?
Damage to the pipes of the inter-house wiring leads to the appearance of an unpleasant odor in the apartment. In this case, the repair of the sewer pipes is carried out by the maintenance office. A leak in a bathroom results from the formation of a crack or fistula in a specific section of the pipe. Inspection shows that hidden sewage leaks appear most often on plastic pipes installed in the bathroom. The master needs to determine in advance the tightness of the connection of the sink, sink and other sanitary equipment. Violations that have arisen in the operation of the ventilation system of the sewage system lead to the appearance of pressure, and the absence of a water plug contributes to the penetration of fetid odors into the room.
How to replace the old sewer riser?
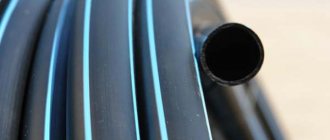
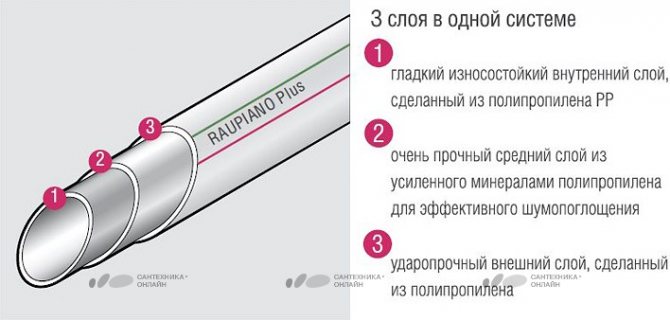
Recently, plastic sewage systems have been most in demand.
The advantages of plastic pipes are:
- in their lightness;
- resistance to flow;
- no risk of clogging;
- convenience during transportation;
- simple installation rules;
- practicality in operation.
However, along with the positive qualities, plastic pipes also have a number of disadvantages. In particular, they do not work well at elevated temperatures.
With prolonged draining of liquid media at 60-degree temperatures, they begin to deform, and they withstand a load of 90 degrees for a short time.
New technologies today make it possible to use traditional materials as well. One of the options is a socketless cast-iron sewage system. These are modern cast iron pipes with an innovative coating that increases their stability and increases resistance during the movement of waste streams. Such pipes are easy to install, and for their connection they use special clamps equipped with elastic gaskets made of special EPDM rubber.
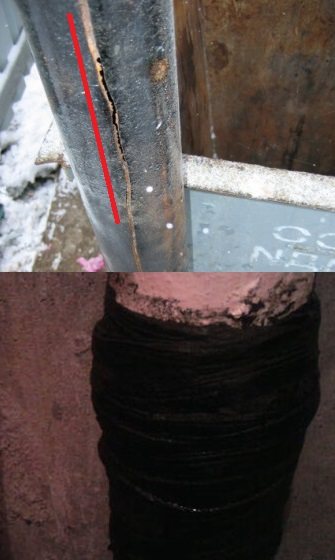
Reasons for the appearance of cracks in pipes
A long-operated cast-iron sewage drain in an apartment usually flows for one of the following reasons:
- there was an impact mechanical effect on the metal;
- decrease in wall thickness as a result of prolonged exposure to corrosion;
- destruction of pipeline fasteners and changing the direction of the static weight load;
- simultaneous combination of two or three of the above consequences.

Longitudinal cracks in plastic sewer materials appear only as a result of a lack of compensation for thermal expansion or there was an external impact of a large force.
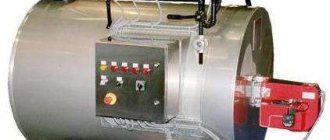
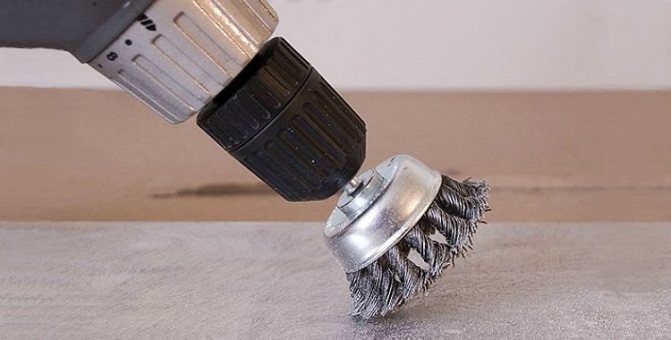
Technical equipment for work
To repair the drainage system with your own hands, you must have a set of plumbing tools.
Pipe connection
It includes:
- Bulgarian;
- a set of hammers;
- level;
- chisel;
- gas torch or blowtorch;
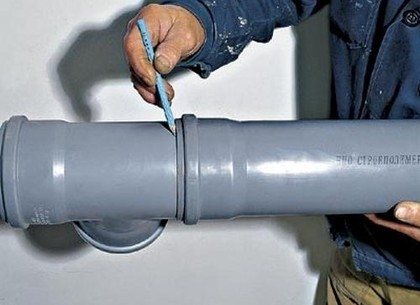
- measuring instruments;
- marker or pencils;
- personal protective equipment in the form of a gas mask, respirator and special glasses.
How to change at the expense of the UK
The procedure for free replacement of a faulty riser with the involvement of specialists from the management company is carried out in the following order:
- They call a plumber to the house, who inspects the riser with the drawing up of an act, fixes all the damage and confirms the validity of the replacement.
- After that, a free-form statement is drawn up in 2 copies addressed to the chief, indicating the reasons for the replacement, the second copy remains on hand.
It is important that the owner does not have rent arrears, otherwise the application may not be accepted for consideration, and the riser may not be repaired or replaced.
- After a positive response to the application, the time is agreed, before the start of work, plumbers bypass the apartments above and warn residents about the temporary termination of the use of the sewage system.
- The tenant provides free access to the riser, most likely he will have to remove the toilet on his own or entrust it to plumbers for an additional fee, there are no other costs for replacement.
Sometimes the Criminal Code misleads the tenants with the statement that the riser is located in the apartment, and therefore, all the costs of its repair (replacement) should be borne by the owner. With this approach, it is useful to draw the attention of the management to the document MDK 2-04.2004, according to which all risers of sewers, heating batteries, water pipes in an apartment panel or brick building are common property and therefore their maintenance, repair or replacement should be carried out by the management company of the UK.
If a cast-iron sewer riser is replaced with a plastic one with the involvement of third-party specialists, the cost of the work, depending on the complexity, lies in the range of 5000 - 7000 rubles.
Fig. 5 Replacement parts
Difficulties in dismantling old pipes
Starting the repair of the riser, it is necessary to carefully examine it for clogging or cracks, and then determine the place of damage.
Then you need to:
- remove plumbing fixtures;
- disassemble the wiring, starting with short knees;
- disconnect the pipes leading to the bathtub, toilet and washbasin.
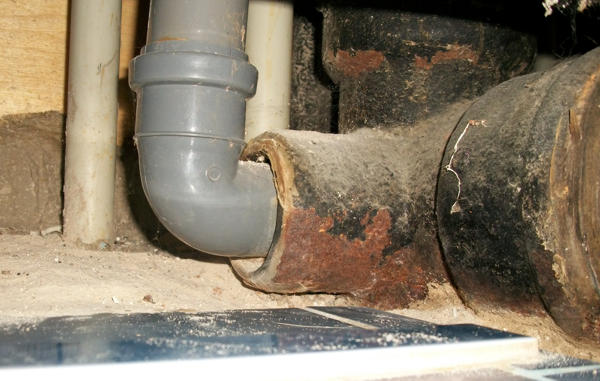
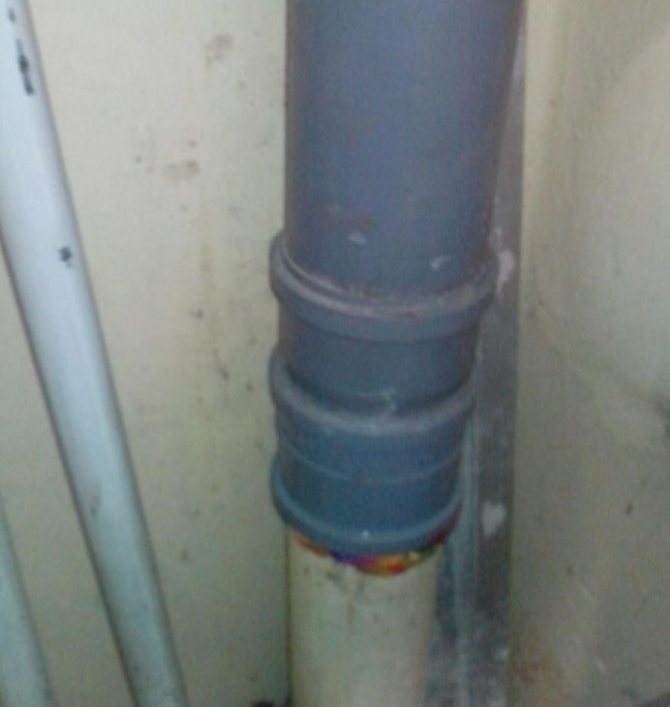
Joining of plastic and cast iron pipes
Removing the sulfur fill will be difficult in this work. Moreover, special care is needed when dismantling the old sewage system in order to avoid the destruction of the part of the system located in the ceiling. It is very difficult to do such work alone, so you need to enlist the support of an assistant.
Sulfur filling of old docking joints is removed by burning out with a blowtorch. In this case, it is necessary to observe safety measures and work in a gas mask so that toxic sulfur vapors do not enter the lungs.
It is advisable to dispose of the old pipe before the socket, so that later it would be easier to join the pipes. When working with cast iron pipes, care must be taken given their fragility. For dismantling, use hammers with a rubber or wooden attachment.
How to disassemble a cast iron riser
Repair of individual parts of the cast-iron water supply system can only be carried out with the same cast iron pipes. The combination of plastic and cast iron elements is not the best option, since such a combination will only worsen the operation of the sewage system.
If you replace damaged parts with cast iron pipes, then again you may encounter the problems described. Moreover, no one can guarantee that unreplaced elements will not stop functioning in a couple of weeks due to overgrown plaque or newly formed fistulas.
Many people think that if you lightly knock on the cast iron sewer pipes with a hammer, then all the plaque will crumble. However, this is not the case. There were cases when the cast-iron pipe itself was broken with a sledgehammer, and the post from the plaque remained intact.
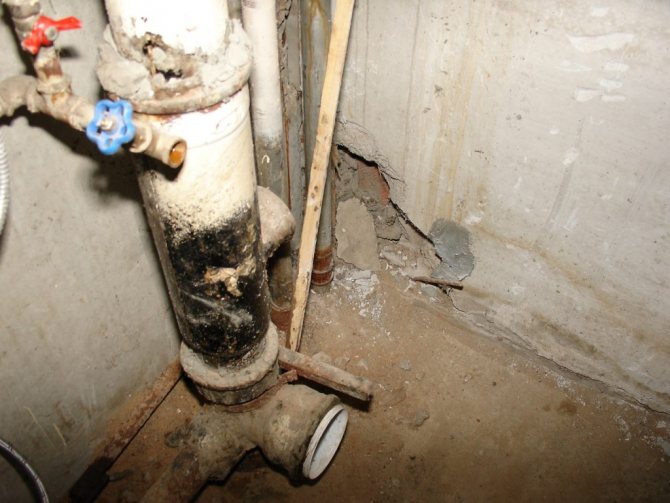
Cast-iron risers are installed in old houses
Before installing a new sewer system, you need to disassemble the old one. And this stage must be approached with all seriousness.
Dismantling a sewer riser:
- First of all, it is necessary to remove the fragile objects near the riser. Remove the sink, toilet, bathroom, etc. Shut off the water supply and warn neighbors not to use the sewer system during work.
- Step 10 centimeters from the top floor and make the first, almost complete, circular cut. Insert a chisel into the notch and hit the pipe with a strong hammer blow.
- Go down a little lower and cut another piece of pipe. Thus, cut out the entire riser. Old sewer pipes must be removed immediately.
- Use a rubber pipe to gently tap the pipe with a rubber sledgehammer. Try to shake it up. If the process started almost immediately, then continue swinging the pipe. A rope will appear shortly and will need to be removed with pliers. The pipe is also removed.
- If you knock on the pipe, but it does not begin to swing, then you should not use force. Most likely, sulfur was used in this case. Then it is necessary to open all windows and doors, wear protective gloves and a respirator, and then heat the pipe with a gas burner. When the sulfur has softened, you can start swinging the pipe and pull it out. Do not forget to remove any remaining sulfur.
These works need to be done carefully, but quickly. Also remember to wear protective gloves and a respirator.
Installation of drainage system
After dismantling, the repair of sewer equipment goes into the installation stage. For the riser, plastic pipes with a diameter of 110 mm are chosen, and for wiring to plumbing fixtures - 50 mm.
Installation is carried out in the following sequence:
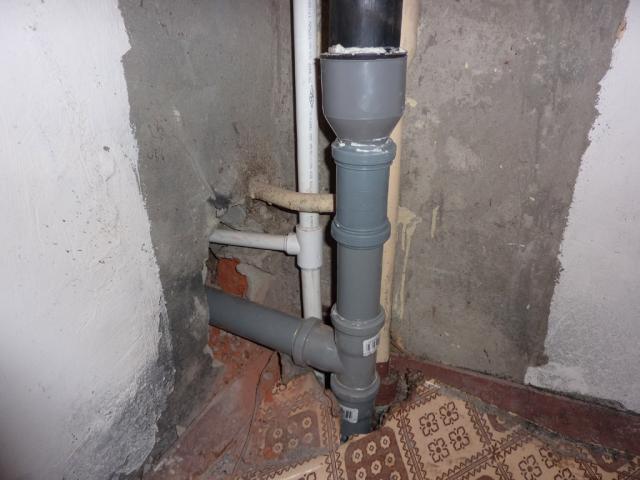
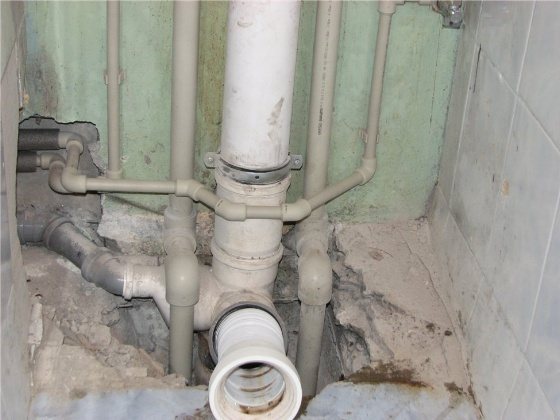
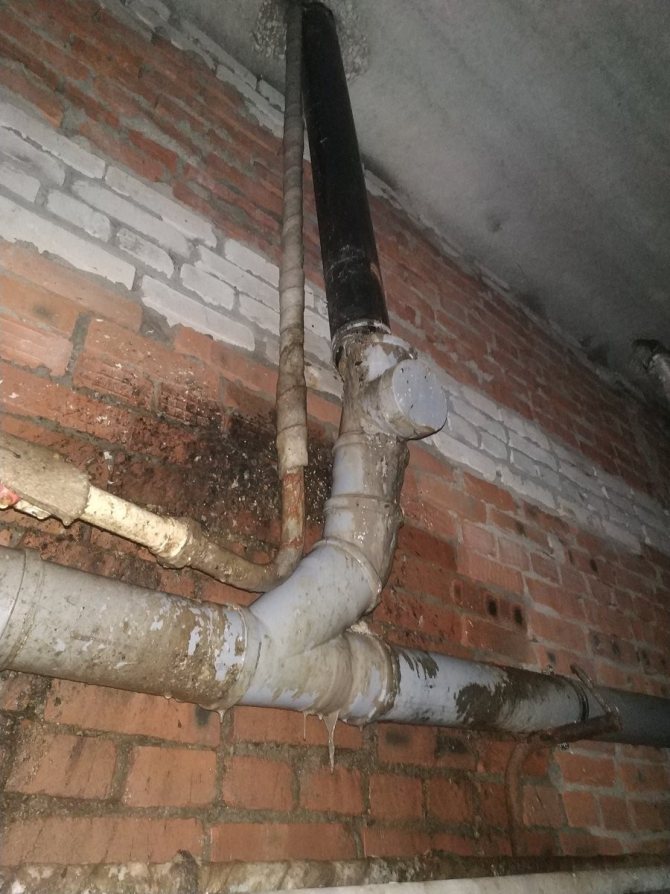
Sewerage structurally consists of pipelines
- The socket of the cast iron pipe is cleaned.
- A sliding joint or rolling collar can be used to connect the sewer system. Cuffs with a sliding joint are hammered all the way into a cast-iron socket, where a plastic pipe is inserted inside. The optimal joint density will be provided by the silicone sealant. After coating the sliding seal with a sealant, the pipes are pressed in further.
- When the cast-iron sewer pipes are replaced with plastic using a rolling collar, no lubricant is used, and the cuff itself is attached to the edge of the plastic. The cast-iron part of the joining parts is machined to be chamfered in the form of a cone.
- When joining parts relative to each other by rolling, the collar enters the bell, and the resulting joint is filled with a layer of sealant or cement for the reliability and strength of the connection.
- Do-it-yourself replacement of a sewer riser involves connecting a tee to an adapter for a plastic sewer. Only then can the toilet and other plumbing fixtures be connected. After that, the system is checked for leakage and the quality of the sealing of the joints.

Ways to solve the problem
The most correct answer to the question - how to repair a crack in a cast-iron sewer pipe - will be to replace a section that has failed. However, this option is not always available, especially for residents of the lower floors.In most cases, you will have to sort out the entire riser, or perform a partial replacement with cutting and removing the problem area. You cannot use the sewage system and water supply for the entire duration of the work, which is extremely inconvenient for all neighbors and very difficult to organize. Therefore, they usually prefer to temporarily plug the hole with something until a better repair is possible. If the work is done accurately and efficiently, the drainage system can serve for many more years without increasing the problem.
We repair
Consider how to repair a cast-iron sewer pipe without replacing the problem area:
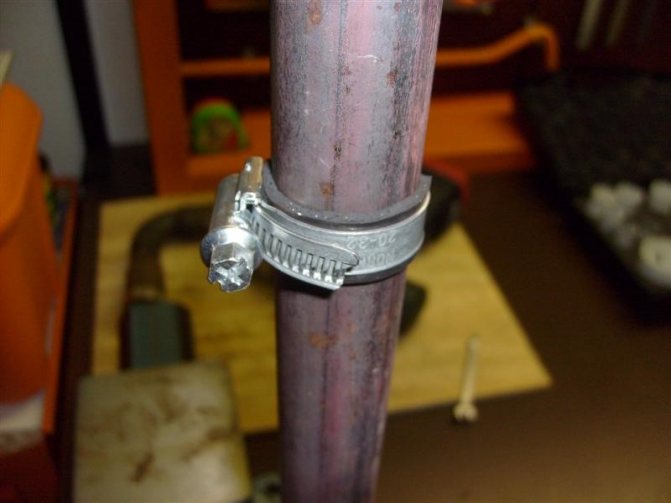
- The simplest, but quite effective way is to install a rubber pad, pressed against the crack with a clamp. A patch is cut from a piece of soft rubber, which is applied to the crack and pressed with a standard or homemade clamp. It is recommended to use non-corrosive materials - nylon or copper.
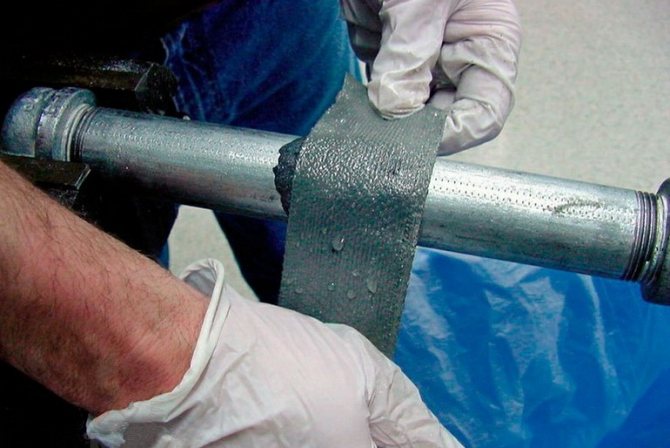
- Installing a homemade bandage from a bandage soaked in cement mortar. This method is more complicated and requires stopping the sewage system for about a day, therefore it is used much less often. Most often they use it when it is impossible to do with simpler methods. When creating a solution, water can be replaced with glue (liquid glass), and instead of a bandage, take old tights.
- Using a repair sleeve. Basically, it is a modified way to repair a pipe using a clamp and rubber. The coupling consists of two halves that completely encircle a certain area of the element and are tightened with bolts. It remains only to install a rubber gasket on the resulting gap and press it with a sleeve to completely seal the hole.
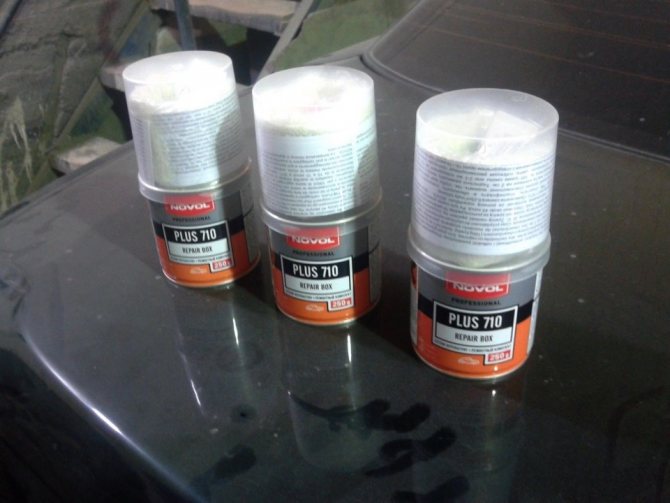
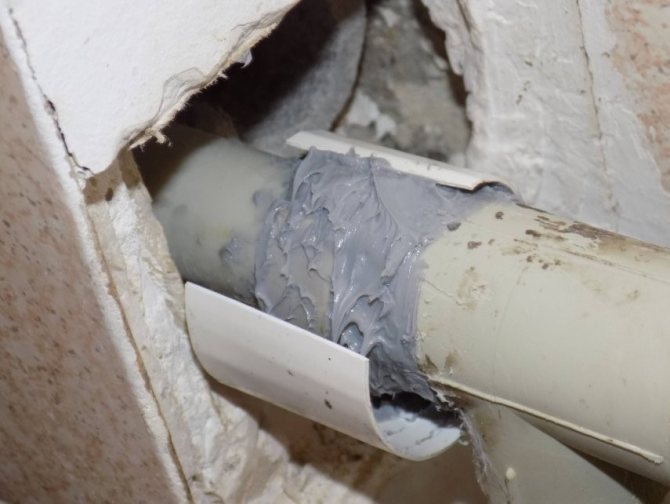
Cold welding
One of the temporary (although often permanent) options can also be mentioned - cold welding for cast iron sewer pipes. It is a two-component (most often) compound that is mixed immediately before application. Before starting to cover the crack with cold welding, the surface must be cleaned of rust and other layers, degreased and dried. There are two types of such glue - liquid and thick mass, similar to plasticine. The first type is mixed with a hardener, and the second, before starting to seal the gap, is kneaded intensively to achieve softness and elasticity of the material.
There can be quite a few ways to repair a crack in a cast-iron sewer pipe. The basic principle of such a repair is to apply a rapidly hardening compound to the problem area, fill the crack and apply it over a fixing band or clamp. New tools are constantly appearing on sale that allow you to solve the problem without calling plumbers and performing time-consuming and expensive repair work.
You May Also Like: Sewerage in the apartment - diagram and installation
Replacing the riser
Before starting the installation of the piping system, you must completely inspect the sewer riser. If it cannot be repaired, it is replaced. Given the size of the damaged area, two cuts are made on the cast-iron pipe with a grinder at a distance of 15 cm from each other. The formed piece of pipe is removed, while freeing up part of the riser. The replacement of this part of the sewage system is carried out with a grinder, observing safety rules.
Then an incision is made horizontally, followed by a bend of the lower part of the pipeline in the opposite direction.

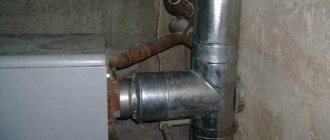
Chimney at the ceiling
- The resulting cut is grinded with a disc in the form of a conical chamfer.
- To remove the lower part of the riser, you can cut it at a distance of 30 cm from the socket.
- Further, in order to replace the sewer with your own hands, you will need a plastic pipe, 2 adapters and a compensator that is put on the part until it stops.
- It is necessary to try on the length of self-assembled parts, taking into account the distance between the bell and the lower adapter. Cut off pipes 1 cm more.In case of a positive result, the entire riser is collected. At the same time, the use of rubber seals ensures reliable sealing.
- After sealing all the sewer connections, the plastic expansion pipe is driven into the outlet pipe located at the bottom of the riser.
Completing the repair of the riser, the pipes are fastened. The riser is fixed with clamps in three positions. Initially, two fasteners are installed at the ends, while ensuring free lowering of the expansion joint into the lower bell. After these works, the final installation of all plumbing fixtures is carried out.
Installation rules
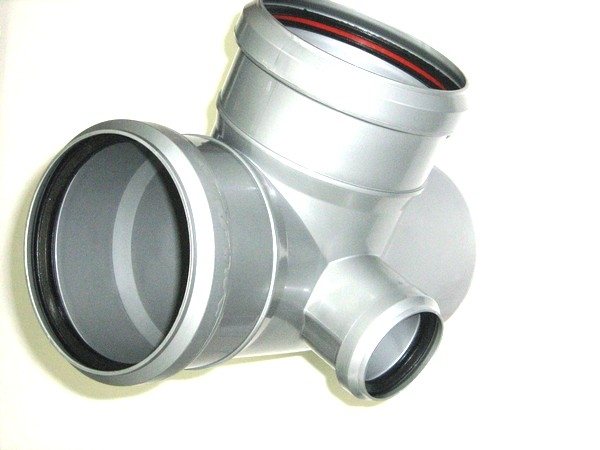
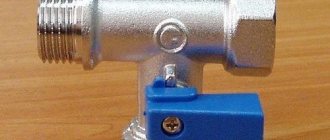
3-way fitting
Before proceeding with the installation work in an apartment building, you will need to notify the neighbors so that they temporarily do not use plumbing fixtures. Then it is necessary to shut off the water supply and free the workplace from foreign objects.
If you are planning to replace an old splitter, the first step is to dismantle the worn out part. Even dilapidated cast-iron splitters are strong enough to break them with a hammer, you need to make a lot of effort. It is necessary to emboss the joints and loosen the fitting at the joints. When performing such work, care is required to avoid damage to entire elements.
Before assembly, it is better to process the joints with silicone sanitary sealant. This will contribute to an easy and reliable connection, prevent possible leaks and the appearance of fungus.
The installation of crosses can be carried out in a vertical plane on the main sewer branches and in a horizontal plane - in additional branches.
In the first case, the installation is carried out as follows:
- A drain pipe is mounted on which the cross will be planted.
- The rubber seal is coated with sanitary silicone.
- The splitter is placed so that the taps are located in the same plane with the load-bearing wall.
- The structure is temporarily fixed to the wall so that 50–70 mm is left to the cross for the convenience of subsequent installation of pipes.
- The bend is mounted in the vertical direction.
- The installation of horizontal bends is carried out according to the general technology, taking into account the inclination of the pipe sections towards the splitter at an angle of 3-5 degrees.

Sewer five
After installing all the bends, the cross is rigidly fixed to the load-bearing wall.
In the horizontal direction, the structure is mounted taking into account the inclination of the outlet pipe at an angle of 3-5 degrees to the horizontal plane. Installation is carried out in five stages:
- Installation and fixing of the branch pipe.
- Plumbing silicone treatment of the joints.
- Installation of the splitter with observance of the slope.
- Alternate installation of the direct inlet pipe, taking into account the angle of inclination and side nozzles.
- Fixing the resulting structure with clamps and guides.
Arrangement of a splitter of complex configuration with taps of different cross-sections is carried out in the same way, while taking into account the location of the outlet elements in directions.
Removing the bottom of the cast iron pipe
Replacing the sewer riser
Further, the replacement of the sewer, or rather the riser, involves the removal of the lower piece of the old riser.
It usually consists of a number of parts or shaped elements. The design may include a cast iron revision, a coupling, an expansion pipe and others.
Let's describe the process:
- First, they check the strength of the pipe connection. For this purpose, they try to swing the upper section of the pipe. This should be done carefully so as not to damage the lower bell. In case of even the slightest swaying, carefully pull out all the dangling elements.
- If the cross (tee) "moves" at least a little in the joint area, it can be loosened with a nail puller or a crowbar and then removed.Further, with the installation of the riser, the sewer tee will also be replaced.
- If the crosses or the tee are fixed rigidly, it is necessary to clear the joint to the maximum possible depth, from time to time checking for swaying. If the width of the joint allows, for clearing, you can use a perforator with a thin drill installed on it without a winning tip.
- Carefully hollow out the solution at the joint along the perimeter, removing the remains of the solution with a chisel or a screwdriver.
- If the previous manipulations did not work, and the cross (tee) still holds very tightly, it is cut off with a grinder 2-3 centimeters above the bell.
How to change yourself
Partial or complete replacement of a riser made of cast iron is possible only with a plastic analogue, this is due to the fact that during installation, the riser column is installed from bottom to top with pipes on top of each other in the nozzles, and in order to replace one of the fragments, a special compensation sleeve is required, which allows inserting less long pipe. Such products are difficult to find in fittings for the installation of cast iron, but they are produced in a wide range in the product line of PVC pipes.
Tools and accessories
Before replacing the sewer riser in the apartment, purchase the following components:
- Plastic pipe along the height of the riser with a standard outer diameter of 110 mm.
- A typical crosspiece with two 50 mm outlets for connecting drain pipes in the bathroom and kitchen sink and with one outlet for connecting a toilet bowl. If the apartment has only one common outlet for transporting gray drains, use the appropriate tee.
- Rubber cuffs (in the absence of adapters from cast iron to plastic), one will be needed when installing a cross (tee) in the neck of the lower cast iron pipe, the other is worn from the outside on the pipe end coming out from above.
Fig. 6 One-pipe sewerage wiring inside the apartment
- Compensation coupling, which is a pipe segment with an extended expanded branch pipe with an inner diameter of 110 mm - thanks to this, the inserted pipe element can be moved in it for a certain distance.
- A transitional plastic sleeve with a built-in collar, which, if necessary, is installed in the socket of the lower sewer pipe and serves to set the cross at the required height if it is impossible to dock it directly with a cast-iron saddle recessed into the floor.
- Transitional PVC-coupling from plastic to cast iron with a rubber cuff inside the socket for the upper connection, its lower end is inserted into an expanded pipe with a rubber ring of a vertical plastic pipe.
- Metal clamps with rubber gaskets with an inner diameter of 110 mm, designed for fixing plastic riser pipes to the wall.
Fig. 7 Tool
From plumbing and construction tools for work you will need:
- Angle grinder (grinder) with a disc for metal for cutting cast iron and plastic pipes.
- Perforator for drilling holes in the wall, removing the screed and cement caulking in cast iron joints.
- A chisel, chisel, heavy hammer or sledgehammer for racking out joints and breaking cast iron pipes.
- Pencil, tape measure or ruler.
- A blowtorch for melting the caulking materials - sulfur, lead, epoxy, is used in case of incomplete replacement of the riser, if you need to leave the crosspiece or part of the pipe intact.
- Protective overalls, gloves, goggles, respirator.
Fig. 8 Removing the wall riser - basic operations
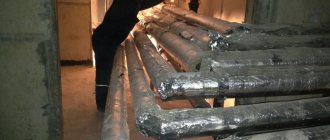
Dismantling and caulking
When joining the cast-iron pipes of the risers, a pipe connection was previously used, in which a variety of materials were used instead of a rubber seal to seal the joints.The workers carried out the docking by various methods depending on the technology adopted in the organizations: they poured molten sulfur or lead into the cracks, laid the cloth and coated it outside with thick cement, poured epoxy resin, pushed the cord or rope soaked in bitumen mastic.
The main task of dismantling is the destruction of the cast-iron branch pipe joint by several methods. Depending on the sealing material, it is carried out in the following sequence:
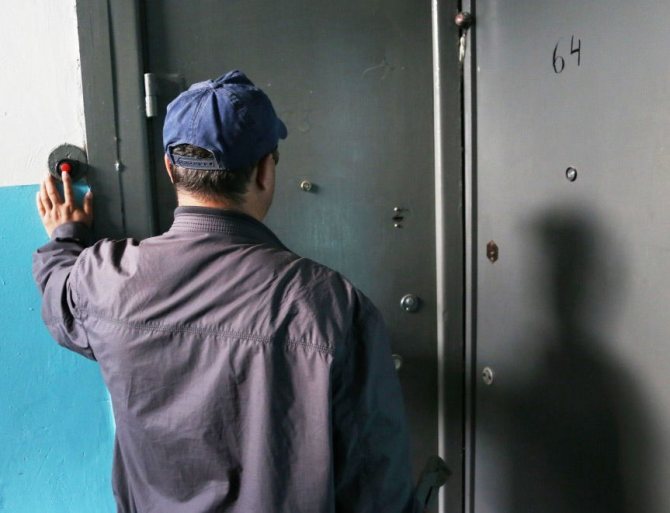
- Before starting work, be sure to bypass all the neighbors on the floors above with a request not to use the kitchen sink, bathroom and toilet for a while.
- The toilet bowl is removed and removed, for this, the corrugation is disconnected from the riser outlet, having previously drained the water from the tank and shutting off its flow with a tap at the bottom, unscrews the toilet bowl fastening screws and the supply hose, and take the toilet out of the sanitary unit.
Tip: After removing the toilet, be sure to lean the cistern against the wall - otherwise, under the weight of the cistern, it will overturn and most likely break.
Fig. 9 Methods for caulking cast-iron joints
- A perforator knocks down the tie at the bottom, freeing and cleaning the junction of the crosspiece with the pipe, if from above the solution interferes with dismantling and closes the outer shell of the outgoing pipe, it is also knocked out.
- A grinder cut the vertical pipe of the riser in the transverse direction at any convenient distance from the floor (about 0.5 m so that you can put a bucket under the pipe), if it is impossible to get close to the pipe shell near the wall with a machine, use a practically spent disk for metal of small diameter. It is not necessary to make a through cut - if the pipe is not needed, it is subsequently broken with a heavy sledgehammer or hammer.
- A chisel is inserted into the seam on the pipe obtained from the grinder's disk and with an effort they hit it with a hammer, trying to break the body, after it bursts, remove the fragments to the side. To avoid unexpected water flow from above, despite the warning, a bucket is placed under the cut pipe.
- They are trying to pull the cross from the lower pipe branch (be careful here; if the riser breaks, the expansion branch pipe may be damaged), if this presents difficulties, use various disconnection methods.
On a note: When cement-sand filling, the mortar is knocked out with a hammer and chisel, solidified sulfur, lead, impregnated rope and epoxy resin are heated and melted with a blowtorch, after which the cross is pulled up.
- After dismantling the cross, the lower branch pipe is cleaned of dirt and debris in order to avoid blockages and proceed to dismantle the upper section of the pipe. It is pulled down, if resistance is encountered, the outer pipe is heated with a blowtorch, the shell can be gently broken with a hammer, taking care not to damage the end of the riser coming out of the ceiling.
- After dismantling work, a fragment of the upper cast-iron pipe shell should remain on the ceiling, and an expanding branch pipe of the lower pipe with the outer and inner surfaces cleaned of dirt, respectively, should remain in the floor.
If none of the above methods manage to remove the lower tee or the upper pipe, they are cut off with a grinder and transition or connecting couplings of a suitable outer or inner diameter are selected.
Fig. 10 Assembly diagram with examples
Installing a new riser
After preparing the end sections of the inlet and outlet cast-iron pipes, they proceed to the installation of the plastic riser, while it is necessary to dock the cast-iron and plastic pipe with internal bore diameters of 100 mm. The outer diameter of a standard cast iron pipe is 118 mm, the inner dimension of its tapered socket is 123 - 127 mm. The plastic sewer PVC pipe has an outer size of 110 mm, and the inner diameters of the shell are 100 mm, and the socket is 110.4 mm.
From this it follows that to connect the PVC pipe at the top, an adapter from plastic to cast iron with an outer and inner diameter of 110x120 mm, respectively, and a built-in rubber cuff, will be required. If the tee is replaced from below in the sewer riser, the adapter from plastic to cast iron should have dimensions of 110x120 mm (inner and outer diameters) and an outer collar that is inserted into the cast iron socket (Fig. 10).
The installation of the riser is carried out in the following sequence:
- A plastic-to-cast iron adapter with an internal rubber seal is placed on a piece of cast-iron pipe protruding from the ceiling.
- A crosspiece with a rubber cuff is installed in the saddle of the lower cast-iron riser; if necessary, an adapter from plastic to cast iron with a similar seal is installed.
- A vertical PVC riser pipe is placed in the gap between the upper and lower sections, cut 30-50 mm shorter, a compensation sleeve is put on its lower end until it stops.
- The assembled system is placed vertically in the riser, if the length is too long, the pipe is still cut. After the ends of the structure coincide in height with the inlet and outlet openings, the expansion pipe is lowered down the pipe, immersed in the tee at a distance of 30-50 mm.
- The riser is grabbed with rubber brackets to the counterpart of the clamps with screws pre-screwed into the wall onto the dowels, the distance between the fasteners is about 400 mm.
Fig. 11 Installation of a riser
Important recommendations
When carrying out operations to replace the riser with your own hands or with the help of plumbers, it is useful to adhere to the following recommendations:
- The main reason for replacing a cast-iron sewer riser is frequent blockages associated with low channel traffic, or significant damage in the form of cracks, falling out of fragments. All other malfunctions in the form of leaks, fistulas can be easily eliminated with our own hands using sealing materials: cold welding, epoxy resin and others. Damaged areas of a large area can be closed with overhead rubber cuffs with fixation with clamps - due to the low pressure in the sewer line, high strength of the patches is not required to seal any damage.
- Many novice and experienced plumbers perform pointless manipulations with the sealant, covering the cuffs and rubber seals in the pipes with it. The sealant is intended for sealing cracks and seams between hard surfaces and is not an adhesive; it will not adhere to elastic rubber when deformed and will even cause harm, preventing the rubber seal from adhering to pipe shells.
- When installing fragile plastic in a vertical rupture of a cast-iron sewer line, there is a high probability that it will be squeezed by the upper column; in order to eliminate the danger, measures should be taken to additionally fix the upper pipe. Its protruding end is attached to the wall with additional clamps, if possible, you can coat the shell with concrete contact, special glue, and brick up a free area in the wall using materials with good adhesion to cast iron or its new coating.
- In order not to waste a lot of time when dismantling the old one and installing a new riser, it is better to rake it out in advance without removing the pipes. With a chisel or a sharp screwdriver, knock out the most common cement putty at the top and bottom, if a leak suddenly appears, it is temporarily sealed with plasticine.
Fig. 12 Price list for the services of one of the firms
Replacing the cast-iron pipe of the riser with a plastic one can be done by hand, the task is significantly simplified if the apartment is located on the upper floors and the caulking is done poorly using fragile materials.To mount a polymer riser, you will need a pair of transition couplings from cast iron to plastic, a cross or tee, a piece of pipe of a suitable length, in addition to a typical construction tool in the form of a grinder and a perforator, you may need a blowtorch.
Why do cracks form in a cast iron pipeline
To choose the right way to repair sewer pipes, you need to find out why they leaked. First of all, determine the location of the crack. Pay special attention to the joints of the pipes, as well as various external defects in the cast iron pipeline.
If you find that the sewer pipe is leaking at the junction of the fittings, then the reason lies in the negligence of the plumbers when installing the sewage system.
In general, cast iron is not particularly resistant. First of all, impulse influences, in other words, blows, are contraindicated for him. Although it should be noted that the owner would not have to repair the sewer pipe in the apartment if the load was evenly distributed throughout the pipe.

Cast iron pipes are durable and can serve for more than a dozen years, but they must be protected from mechanical stress
New cast iron products are characterized by great strength, however, they can only withstand light blows. But a crack will inevitably appear from any load within 10-20 years. And it's good if it is enough just to cover it up, and not to change the entire pipe.