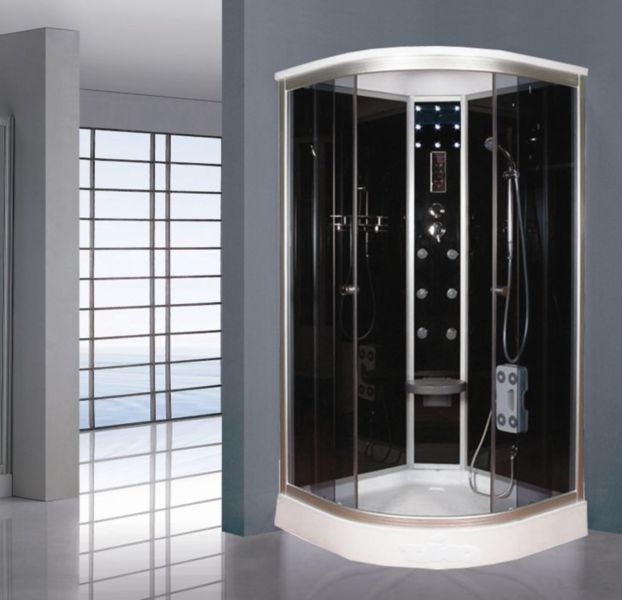
A shower cabin in the bathroom will save space and your budget. New technologies are already being introduced into people's homes, making their lives more convenient, easier and more beautiful. A shower cubicle with a low tray is a universal option for families with children, elderly people.
Compactness and simplicity of design are the main advantages of the shower. This option is suitable for people who want to visually increase the free space in the bathroom and divide it into zones.
Planning the installation of a shower stall
You need to have an accurate idea of where the shower can be placed in the bathroom. Our bathrooms are usually small, so the compactness of the booth is often the main selection criterion. The place of installation will also determine what shape the cabin is best installed in it - rectangular, square or in the form of a semicircular sector. Quarter-circle or pentagonal cabins can rightfully be considered the most compact.
When choosing the type of door, the question immediately arises: "Will there be anything to interfere with its opening?" For example, next to the intended place of installation of the shower stall, there may be a central heating radiator or a washbasin tulip, which will drastically limit the possibilities of the door. And then you will have to make a choice in favor of the door in the center of the structure, which opens inward; you can also stop at the door a la coupe, which moves along the guides.
Choosing a shower cabin model
When choosing a shower stall model, be sure to consult with a specialist: try to outline the layout of the room, mention your taste preferences, touch on the availability of prices for different types of products. An experienced consultant will help you make the right choice.
Since standard built-in cabins are distinguished by an amazing variety of shapes, sizes, functional features, it is not out of place to take an introductory tour of the shower cubicle market.
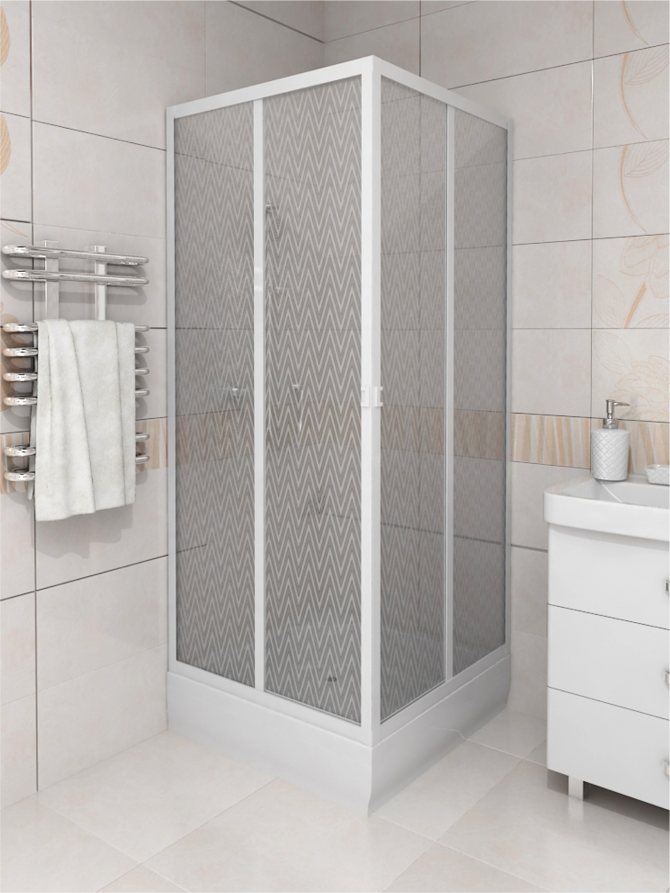
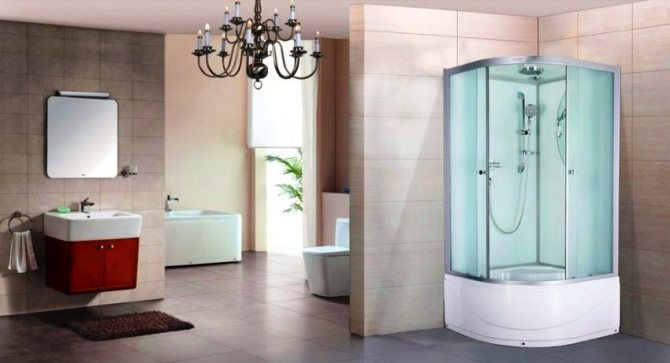
Square shower cabin
It is convenient to install such a cabin in the corner of the room. As a rule, it is spacious enough, stable and comfortable. Manufacturers produce many models with different types of doors. Some cabins can be equipped with sliding doors. Others are doors that open in both directions, compartment doors or folding doors. The width of the entrance also varies. One door can have a width of 50% of the total length of the wall on which it is located. A door with two movable parts that open in both directions gives a total entrance of 66%. However, despite the functional convenience in the diagonal model, there is also an upsetting moment - in the form of the corner of the booth itself, which noticeably limits the free space of the entire room.
Square shower cabin
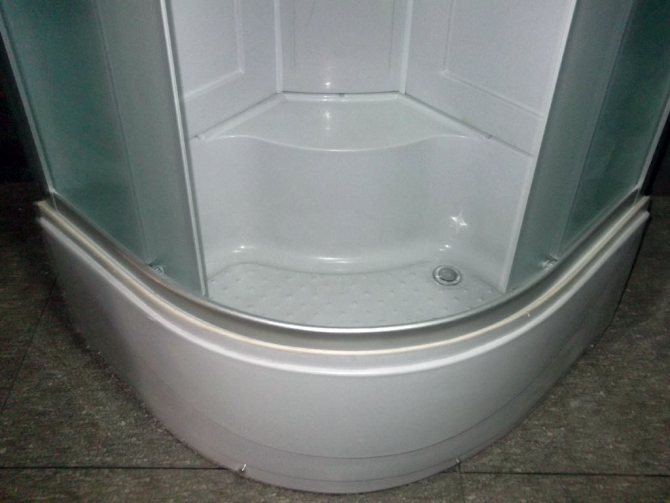
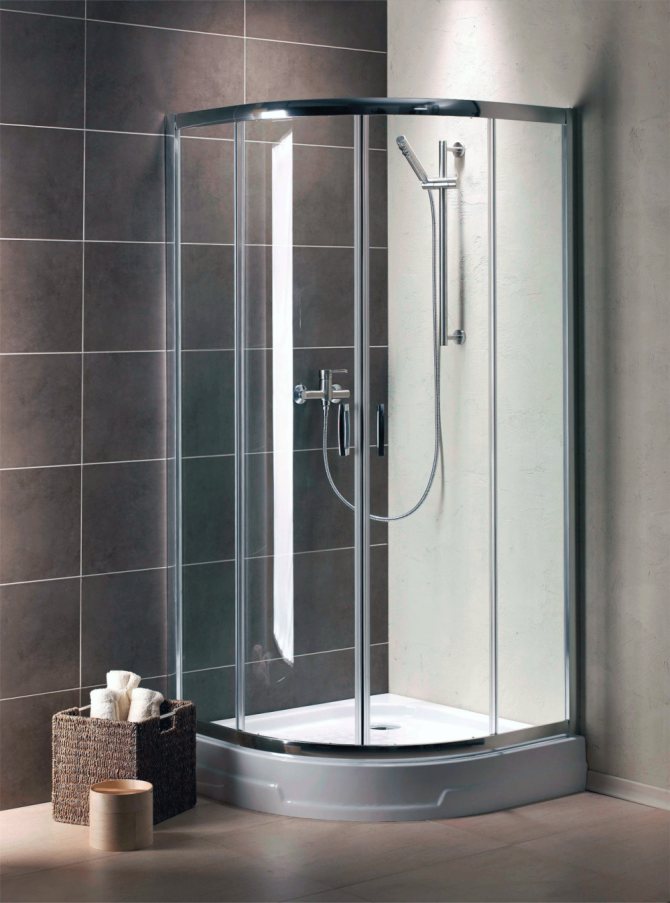
Pentagonal corner shower cabin
As the name implies, this is a pentagonal booth. These cabins are very compact. They are ideal for corner installations. The truncated corner projection successfully compensates for the design flaw of the square model. The advantage of this option is also that the location of the door can be selected at will. It can be traditional, centered. Or consist of two halves that open in both directions - either inward or outward.
Pentagonal corner shower cabin
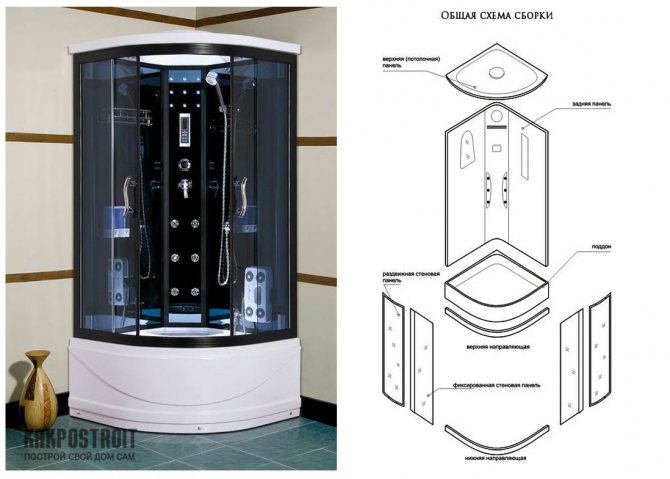
Installing and securing the center panel, rear panels and door frame on a pallet
It is worthwhile to install the walls of the bathing apparatus separately from the pallet so that all the parts fit tightly to each other. Attach the side elements of the box to the central wall in turn, joining them vertically.
Important! Do not hurry. Check that the panels are correctly aligned. They must fit perfectly with each other. Otherwise, you will have gaps and leaks.
Before covering this structure with a roof, you need to install the door frame, which you also prepared in advance, in its place. In eight places, the frame is fixed with screws and a screwdriver.
Correctly adjust the parts so that the grooves for the screws match, otherwise unwanted gaps will form, through which water will subsequently flow out.
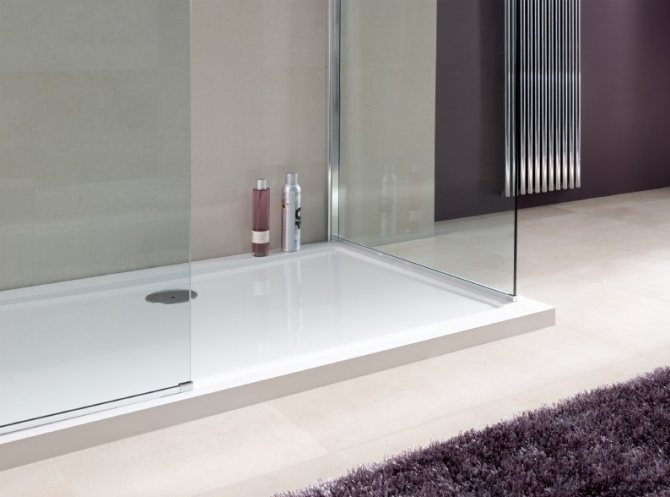
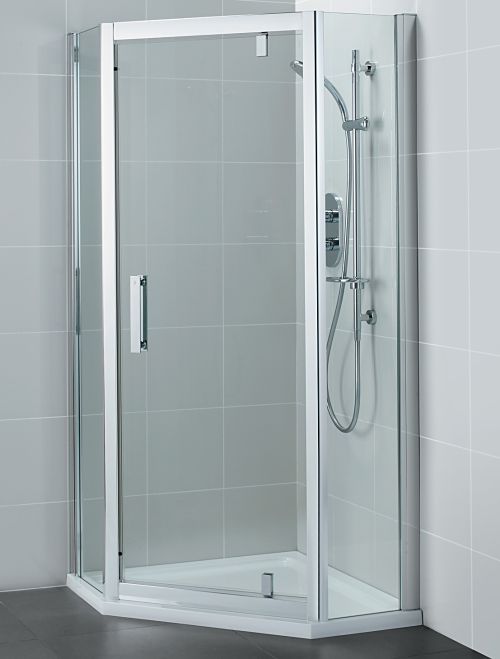
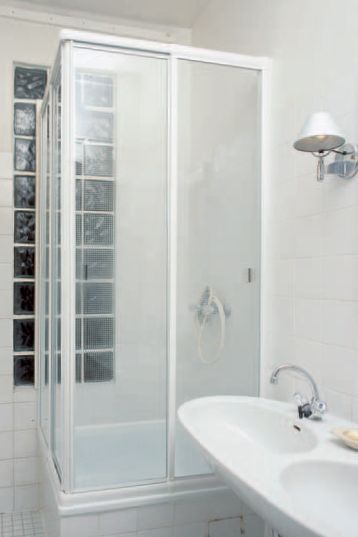
Front-mounted rectangular shower cubicle
Such a cabin can adjoin one bathroom wall or two or three. The impressive length of the booth allows it to be installed between two walls. That is, to mount such a model, it is enough to install only one glass wall - however, quite long. A cabin of this shape can be equipped with any type of door: sliding doors, doors that open in both directions, sliding doors or folding doors. With a rectangular cabin, any type of door will be convenient. This is a significant advantage of this model. The size of the space inside the cab allows you to install not one, as usual, but two shower dividers - on opposite sides of the rectangle. This will double the capacity of the cabin, which will save time in the morning or evening toilet, say, in a large family.

Front-mounted rectangular shower cubicle
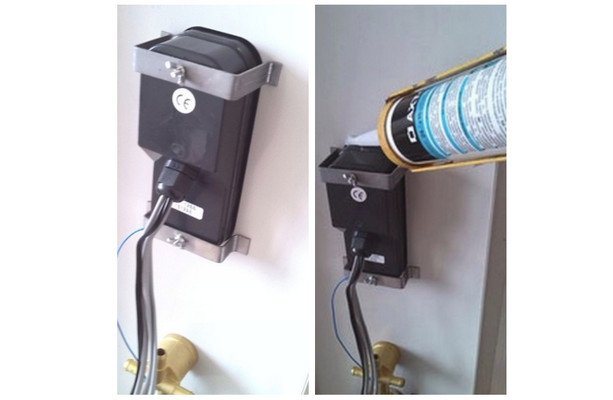
Installation of the control unit
After removing the protective film from the shower guide unit, try it on the appropriate place in the structure to make sure it fits. Such a delivery set includes special clamping brackets with which you need to fix the control unit on the wall of the shower stall.
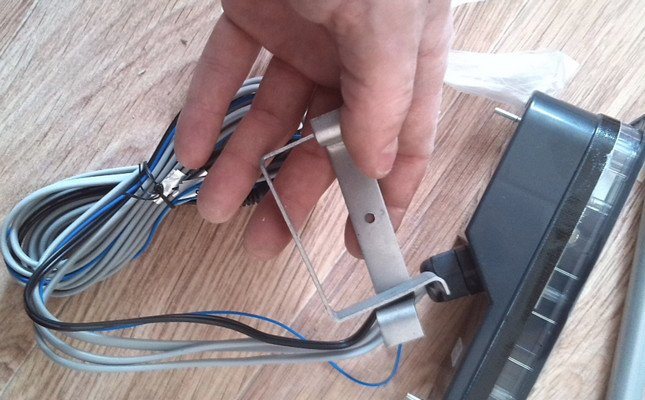
Control box Tighten the brackets with screws and grout the seams with silicone without force. Thanks to this action, you will give the panels the necessary stability and adherence to the wall surface.
Sometimes the hole for the control unit is too large, and it can stand up somewhat curved. In this case, release the brackets slightly and retighten after adjusting.
At this point, the assembly and installation process for your new shower enclosure control unit is complete.
Shower cabin installation
The installation of a shower cabin is quite within the power of one person, and in a fairly short time. If you have the necessary tools, it can be installed within a few hours. All that is required is, in fact, a shower, a drill, drills, a cutter, a level and a screwdriver. The basic principles of installation are simple and, in fact, the same for different types of cabins.
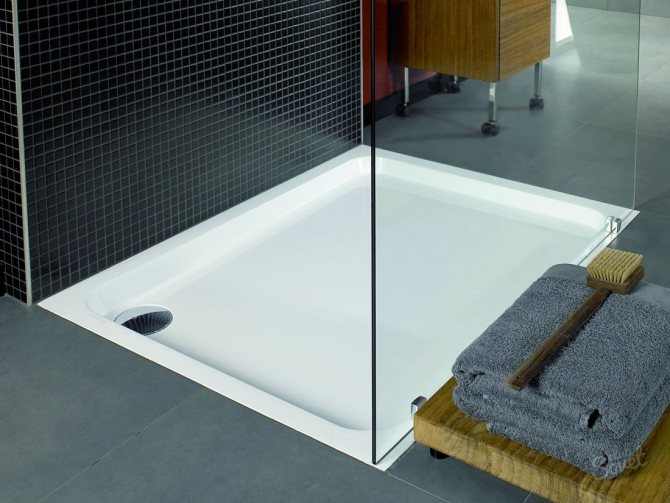
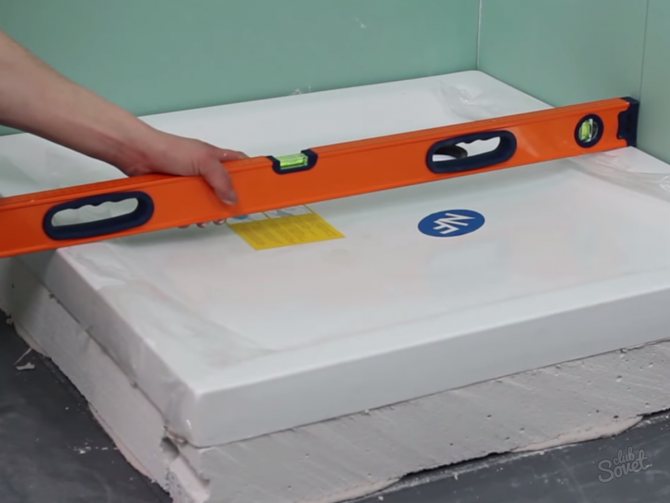
The installation of a shower stall begins with the installation of a shower tray. It is necessary to prepare a site for it. This means that you must check if the joining angle of the walls and the floor is 90 °; whether the edges of the pallet will fit snugly against the walls; whether the socket of the sewer pipe matches the drain in the pallet. After this preparation, you can connect the lower part of the drain to the drain pipe, the slope of which should be 1-3 °. Then, having securely installed the pallet, you need to seal it by filling the gap between the walls and the edge of the pallet with silicone.
| 1. Before purchasing a shower cabin, you need to carefully measure the dimensions of the bathroom and the shower tray. |
| 2. Possible ledges of the wall or tiles must be leveled by placing wooden spacers. |
| 3. Large-sized differences, for example, in a window niche, are compensated by means of wooden beams. |
| four.The fixing profile is installed 2 cm from the edge of the bathtub. The old silicone layer must be removed |
If the pallet is already installed, you can start choosing the cabin itself. Before that, you need to carefully measure the dimensions of the pallet and the height of the bathroom walls. Since there is a functional protrusion along the edge of the pallet, it is useful to know its width. This will allow you to choose such a model of a shower cabin, the fastening profile of which will best fit into the width of the horizontal platform of the pallet. The height of the bathroom walls will tell you the height of the cubicle.
| 5. The wall should be checked with a detector for electrical wiring or pipes where drilled. |
| 6. If you stick adhesive tape on the ceramic tile, the drill bit will not slip or scratch it. |
| 7. To avoid splitting, the tiles should be drilled without using the hammer drill. |
| 8. If the joints between the ceramic tiles are wide, you can choose the drilling locations between the rows of tiles. |
Bathroom wall cladding does not always reach the ceiling. When the height of the booth exceeds the height of the lined part, it is necessary to somehow compensate for the difference in the distance to the wall. This is done using spacer strips (plastic or wooden). If the most convenient place for installing a shower cabin is a wall with a niche, then the differences in distances can be compensated for using wooden beams. Naturally, they must be carefully finished with waterproof paint or varnish and securely fixed in the niche. The width of the beams in those places where the fastening profile will lie on them should be several times larger than the width of the profile.
| 9. The frame with movable glass doors is inserted into the fixing profile, but not fixed. | |
| 10. Plastic corners, entering the grooves of the bearing profiles without fastening, leave them temporarily movable. |
| 11. The plastic corners at the bottom must be rigidly connected with screws to the lower bearing profiles. | |
| 12. The frame is leveled with a spirit level so that the gap between the doors is strictly vertical. |
The vertical fastening profile is installed on the wall at a distance of 2 cm from the edge of the pallet. First, it is necessary to remove the silicone layer that connects the wall and the edge of the pallet. This is done first with a cutter, and then with a special solution. The places of the future installation of the profile, or rather the place of its attachment to the wall, must be carefully checked with a detector. If the detector shows the presence of electrical wiring or plumbing services behind the cladding or wall surface, the attachment points must be relocated.
| 13. After the final alignment, the bearing profiles are drilled and rigidly connected with screws. |
| 14. The glass elements are inserted into a U-profile, which is then drilled and screwed in place. |
| 15. Fill the small gap between the surface of the pallet and the supporting profiles with a sealant. |
| 16. Before applying the silicone, the lower support profiles are firmly fixed to the pallet with adhesive tape. |
Drilling ceramic tiles requires certain skills. To prevent the drill from slipping to the side over the glaze and scratching the surface at the beginning of drilling, a small piece of adhesive tape is glued onto the tile. If a hammer drill is used for drilling, then you need to start drilling without turning on its impact function. And only after the ceramic component of the wall is finally drilled and the wall has begun, you can turn on the percussion mode of the hammer drill. If the joints between the ceramic tiles are wide enough, you can choose the drilling locations between the rows of tiles. This will save the ceramic from unnecessary trauma.
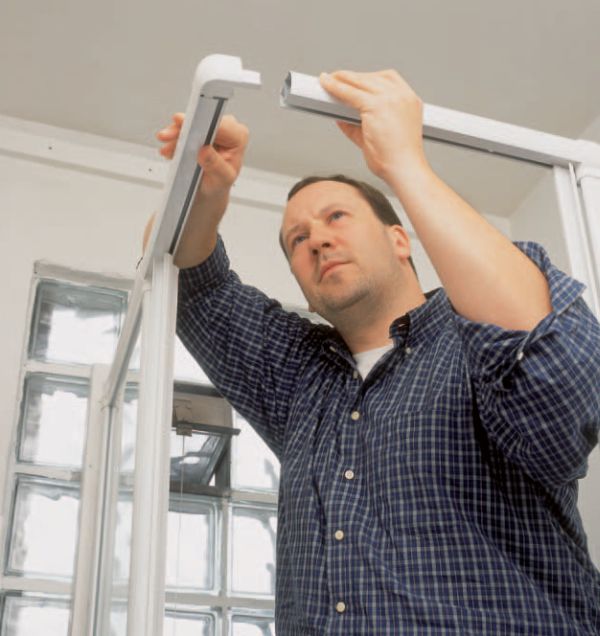
Now you can start installing the cab doors. Actually, this is not really an installation, but only a general fitting. The frame with movable glass doors is inserted into the fastening profile, but is not completely fixed. It still has to be exposed: both the plane of the glass and its edge must be strictly vertical. Then it is necessary to connect the individual parts of the upper profile.This is done in all models in almost the same way: parts of the profile are connected by means of special corner plastic or metal inserts. Since the lower and upper profiles have slide-in rails for installing doors in them, then, by sliding them in or out, you can choose the total length of the entire cabin wall in accordance with the length of the sides of the pallet.
| 17. Apply masking tape to the top and bottom of the joint. This will give the silicone seam a neat look. |
| 18. Silicone should be applied directly from the tube to the joint, trying to distribute it as evenly as possible. |
| 19. After filling all the joints with silicone, remove the excess with an elastic spatula. |
| 20. Finally, the silicone should be smoothed with fingers soaked in the detergent solution. |
The final cab installation starts from the bottom. The corner bottom insert is screwed to the bottom fixing profile, which is laid directly on the functional ledge of the pallet. Naturally, the lengths of the sides of the pallet must match the lengths of the lower fastening profile. The corner insert, being screwed to the profile, will give the necessary rigidity to the bottom of the shower stall.
The frame for glass doors is leveled with a level so that the gap between the doors (when brought together) takes a strictly vertical position. In this case, all vertically located profiles must also be strictly vertical. After that, we can assume that the cab is finally exposed - it can be fixed.
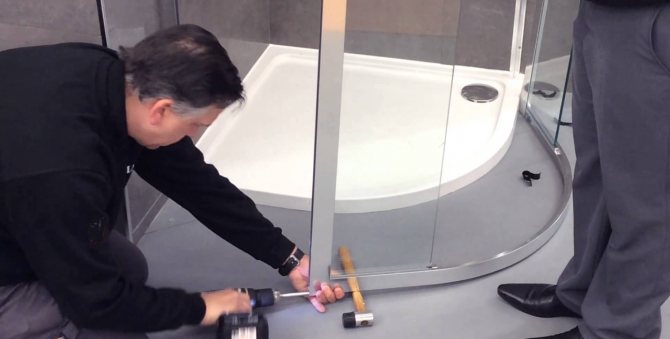
The mounting profile and guide inserts are drilled and then tightened together with screws. After that, both glasses can be inserted into the U-shaped profile, aligned with a level and drilled holes with a diameter of 2.5 mm, and then screwed together. After installing the bottom profile on the edge of the pallet, a small gap will inevitably remain between them. It is filled with a special seal, which is included in the set of elements of the shower stall.
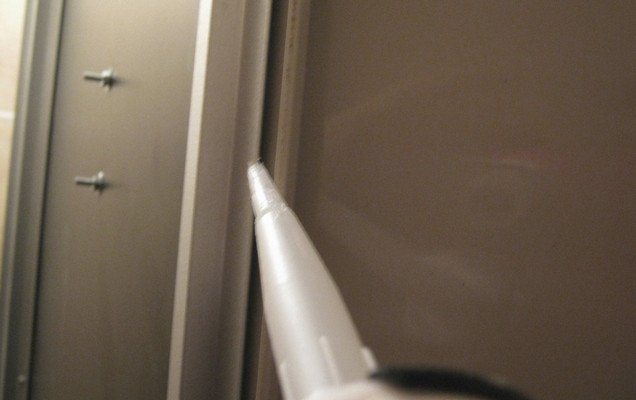
Shower enclosure sealing - this is a separate, moreover, absolutely necessary operation in the process of installing a shower cabin. It is not difficult to properly seal the joints of the shower stall if you adhere to the proven technology. It is based on the connection of edges or surfaces using silicone sealant. If you use a quick-drying sealant, then after 12 hours you can use the shower stall, testing its tightness. Regular (traditional) silicones dry approximately 24 hours.
However, before applying the sealant, the remnants of the old layer must be completely removed so that the new layer of silicone adheres well to the surface of the pallet and the fastening profiles. The bulk of the old silicone can be cut off with a cutter, and what does not lend itself to the cutter can be washed off with a special solution that dissolves it quickly enough. Remains of half-dissolved silicone can be wiped off with a clean cloth.
The frame, consisting of lower profiles, was not attached to the pallet with anything. Therefore, in addition to its insulating function, silicone will also be a means of securing the frame to the pallet. However, the framework must be temporarily secured before applying the silicone. For this, the precisely aligned lower support profiles are fixed to the pallet with adhesive tape. Then, on the outside of the bearing profiles, masking tape must be glued on top and bottom of the joint. This will give the silicone seam a neat look.
Silicone should be applied directly from the tube to the joint, trying to distribute it as evenly as possible. Silicone should "wet" the surface of both the pallet and the profiles well. After filling all the seams with an elastic small trowel available from hardware stores, the silicone must be gently smoothed out. Excess sealant is removed with the same spatula.And the final "finishing" of the silicone seam will be smoothing it with fingers soaked in a solution of detergent.
After the silicone has completely hardened, the masking tape is carefully removed. The edge of the silicone after it should remain flat, like a ruler. The adhesive tape is also removed. It's time to start testing the shower.
These articles may also be of interest to you:
- Not enough space for a shower stall and a whirlpool tub?
- How to choose a shower cabin. Dimensions, construction and materials
- Bathroom layout and rules for placing plumbing fixtures
- Selection and installation of switches
Sealing
Carefully and thoroughly go through all the joints that until this moment were left without silicone sealant. Feel free to smudge the silicone with your fingers to improve adhesion to surfaces and improve sealing performance.
To improve the sealing efficiency, wipe the silicone-lubricated joints with a cloth previously moistened with a degreaser.
Did you know? The largest bath in the world is located in the Babolovsky Palace in Tsarskoye Selo. It is hollowed out of granite, and its dimensions are 1.96 m in height and 5.33 m in diameter. The wall thickness is 45 cm. This structure weighs 48 tons.
Skip the roof and door frames for now, here you still need to complete the package and go through the stage of assembling and installing the doors, to which you proceed.