Preventing dampness
As usual, this "disease" is easier (and cheaper) to prevent than to cure. It is still being solved at the design stage:
- The material of walls and floors should have a low degree of hygroscopicity, poorly conducting water in both liquid and gaseous states. The best from this point of view is high-quality concrete - from M400 and above. But he builds a lot. You can add special substances that increase the water-repellent properties to a regular M200 or M250. (read about concrete brands and their composition here)

Eliminating condensation in the cellar is more difficult than preventing it from appearing - If the groundwater level is close or in spring / autumn its level rises significantly, external waterproofing is necessary. On the outside, liquid compounds are applied to the walls (better) or rolled up (cheaper, but less effective).
- If the cellar is being built on a slope, above it, it is necessary to lay a drainage pipe into the ground, which will drain the sediment flowing down the slope.
- Around the cellar (or the building under which it is located), a blind area is made, which removes precipitation flowing from the roof.
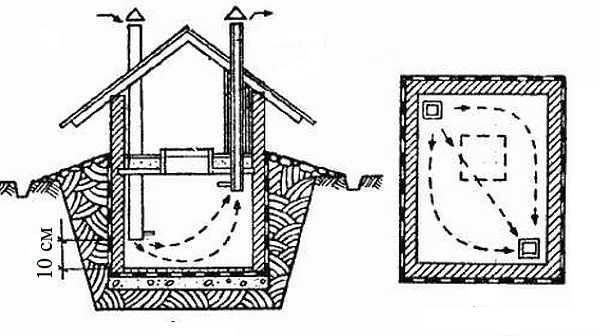
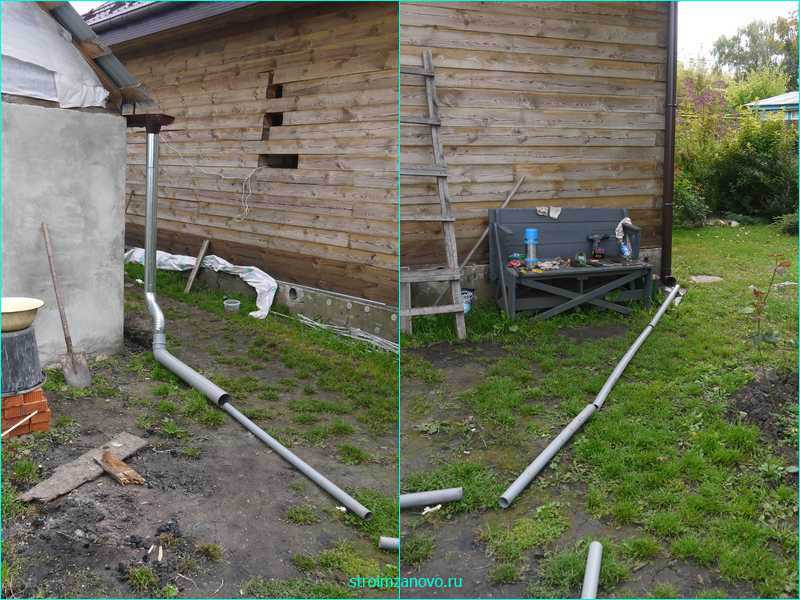
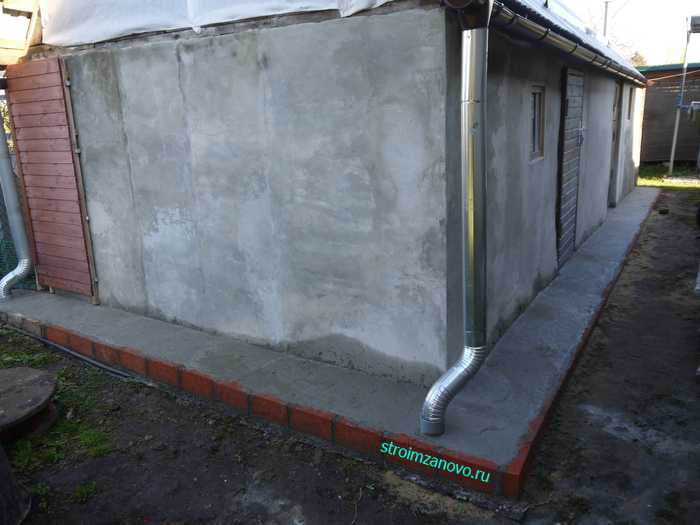
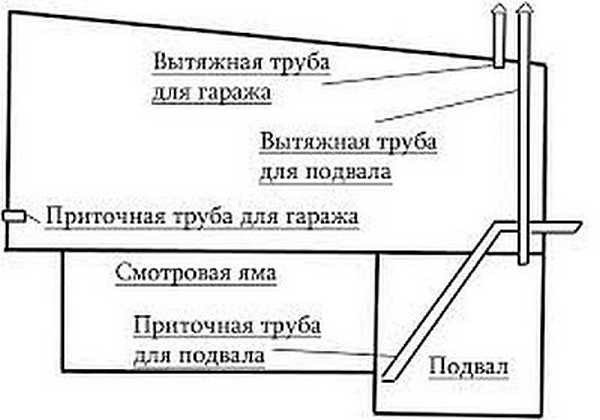
- Inside the cellar, in opposite corners, there should be two ventilation pipes with a diameter of at least 125 mm. One of them ends at floor level - 10 cm higher. Air from the street or room enters through it (supply pipe). The second ends almost under the ceiling - 10 cm below its level. This is a cooker hood. Outdoor ventilation pipes should be covered with umbrellas to prevent foliage and precipitation from getting into them. The exhaust pipe (the one that ends near the ceiling) should be higher and it is better to install a deflector on it - to activate traction. It can be painted black: due to the heating from the sun, the traction should be better. Another subtlety: in order for the draft to be good, ventilation ducts with natural air movement must be straight. If it is necessary to bend to the side, its angle of inclination should be at least 60 ° relative to the horizon, the length of the inclined section should not exceed 100 cm.
Drying a cellar without ventilation is a difficult task. The figure shows a diagram of the organization of ventilation channels to maintain normal humidity in the cellar. - There must be a vapor barrier between the room located above and the basement to prevent moisture from entering both the basement and the basement.
Inspecting the floor
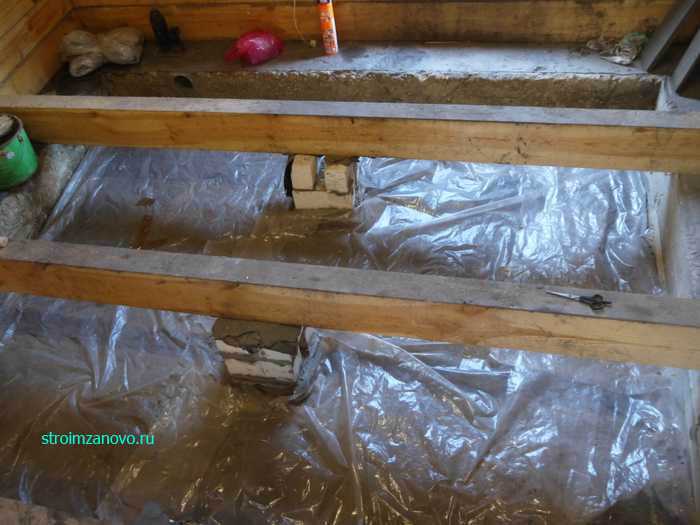
Very often in the cellar, the floor is made earthen. It is often the source of excess moisture. Through it, the moisture contained in the soil gets inside. To reduce the humidity in the cellar, you need to level the earthen floor, tamp it and cover it with a thick plastic wrap. You can use roofing material, but it breaks more often. Although it seems to be more durable, it breaks due to less elasticity.
It is not necessary to sprinkle sand or earth on top of the film. Sometimes there is a lot of water in the basement (accidental flooding). Then you simply take out the film, the water partly goes into the ground, partly evaporates through the ventilation. After the dampness is gone, you can cover the floor again. If there is earth or sand on top, you will need to poke around in this slurry, extracting a film.
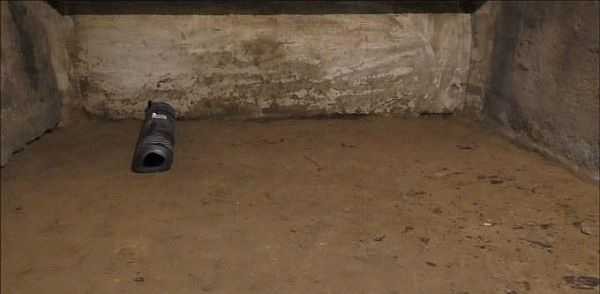
If the floor in the cellar is earthen, most of the moisture enters through it.
If, after laying the film, the humidity level in the cellar has dropped, then you have found the reason. You can leave everything as it is, only periodically change the "flooring", or you can make a concrete floor with full waterproofing. The choice is yours. To prevent the film from tearing when walked on, knock down the wooden shields and throw them on the floor.
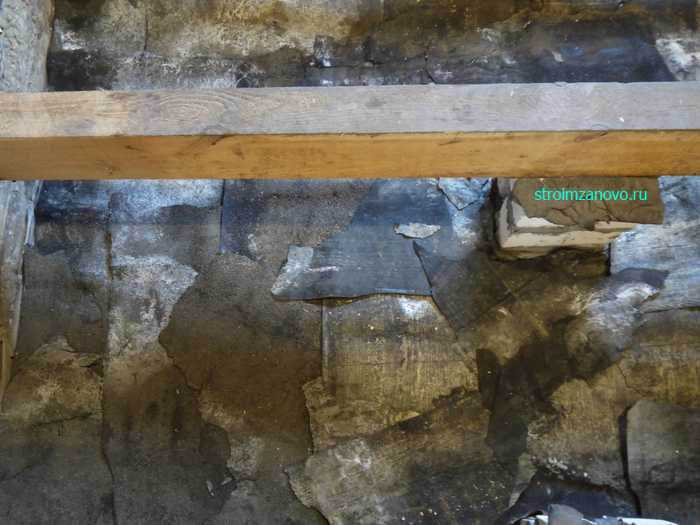
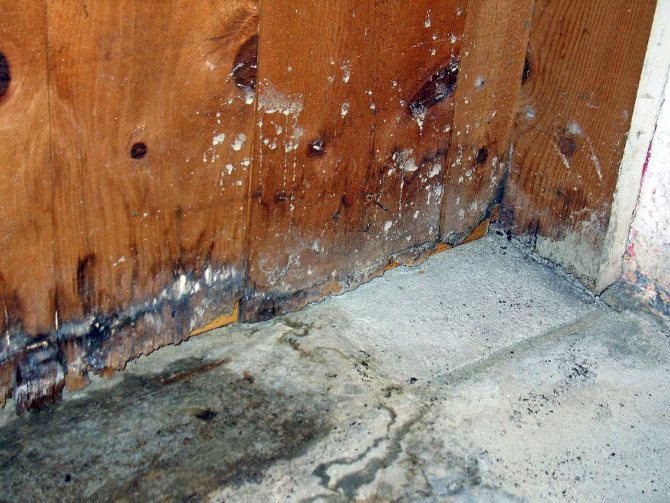
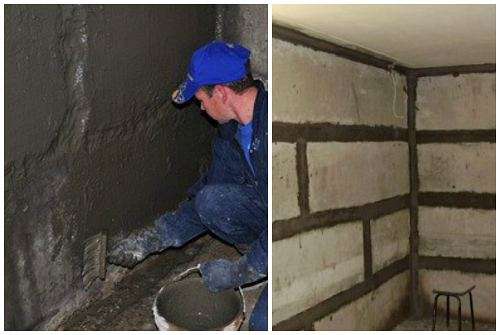
The second reason why humidity rises in the basement is an insufficient degree of vapor barrier or waterproofing of the walls. This usually occurs if the cellar is lined with bricks, especially silicate bricks. The material is very hygroscopic and passes water vapor well. They settle in drops on the ceiling and all objects.
The problem can be solved if you make good external waterproofing: dig up the walls and apply bitumen mastic in two layers. Previously, they were coated with resin, but the mastic is more effective and easier to handle.
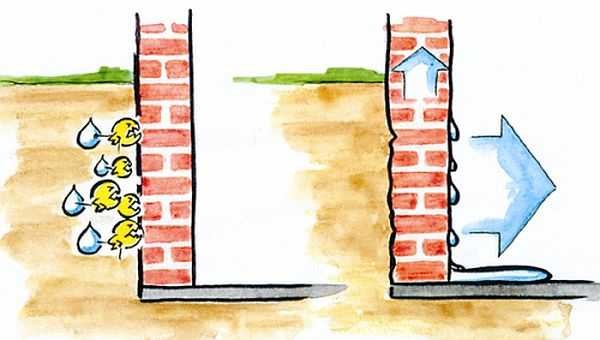
Brick walls require additional waterproofing
But earthwork is not always a joy, and it is not always possible to dig out the walls. In this case, you can make the internal waterproofing of the walls of the cellar. For this, there are cement-based impregnations: "Pnetron", "Kalmatron", "Hydrotex", etc. They penetrate to a depth of up to half a meter into the thickness of the material (concrete, brick, etc.
All of these measures will prevent excessive moisture in the basement. But what if there is already moisture, how to dry the cellar? Next, let's look at ways to reduce humidity.
How to organize drip irrigation of the garden yourself, read here.
This could be:
- insufficient ventilation of the room;
- shortcomings associated with the construction of a house - incorrectly laid floors and clogging of ventilation with garbage. As a result, a temperature difference occurs and condensation forms;
- the presence of groundwater lying side by side;
- the groundwater situation is exacerbated in the off-season. To minimize the problems associated with flooding the basement and increasing dampness, it is necessary to consider reliable drainage - a system that absorbs water before it enters the room;
- the presence of cracks and holes in the foundation, allowing moisture to pass inside.
Also, this problem is associated with deviations from construction technology. Over time, damaged foundation walls can begin to collapse.

Design and calculations
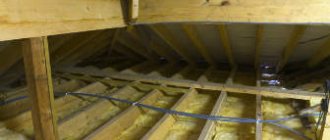
To create natural ventilation ducts in the underground of a private house, no particularly complex calculations are required. Supply air vents or air vents, which are made in the walls of the foundation or in the plinth, must be located at a height of at least 30 cm from the ground level.
The distance between the vents is not more than 3 m. They are laid along the entire perimeter of the building. The ventilation duct should be located no closer than 1 m from the corner of the house.
Dimensions of air ducts, if they are square or rectangular, from 100 mm, round - from 120 mm. If the construction of the house provides for the base of the internal partitions, the air vents are made 1.5 times more often.
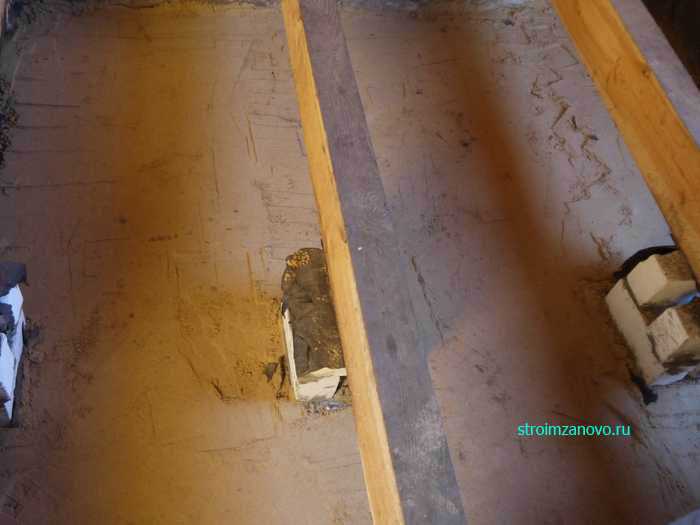
If the floor in the house is floating, that is, it rests on separate pillars or piles, ventilation gaps of 1-1.5 cm are left between the walls and the floor.
Also, to improve air exchange between the subfloor, on which the insulation is laid, and the finished coating, a gap of 1.5 cm to 5 cm is left.
The total area of the vents should be equal to 1/400 of the area of the inner space of the basement. Natural ventilation is usually sufficient if the basement area is less than 50 m2.
If it exceeds this value, then it becomes necessary to install forced ventilation.
Causes of problems
First of all, you need to consider the problem from the inside and find out why it is constantly damp underground under the first floor and condensation accumulates. There can be several ways for dampness to penetrate underground:
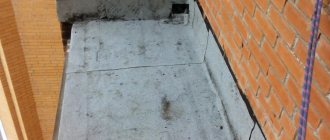
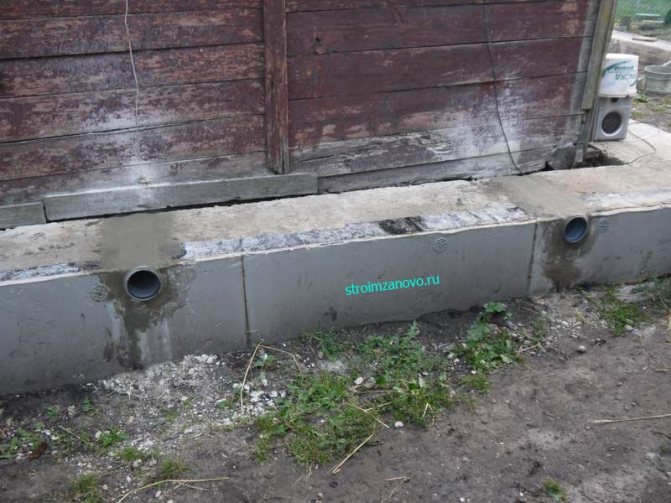
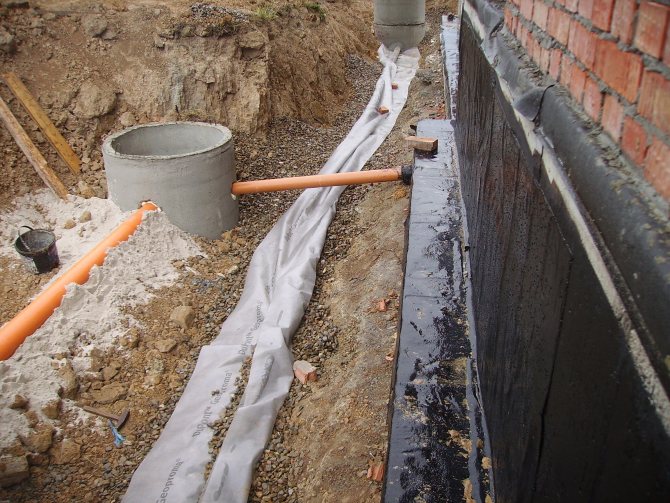
- If a high-quality blind area was not made during the construction of the structure, then when precipitation falls, water flowing from the walls and roof will collect near the foundation. It can penetrate into the subfloor through cracks, and also rise capillary to the walls of the house. It is important to note that moisture through the capillaries in the foundation can rise quite high, therefore it is necessary to create an effective vertical waterproofing layer.For this, the outer surfaces of the foundation must be treated with bitumen mastic, on which, immediately after application, roll waterproofing, for example, roofing material, is laid with an overlap. The joints of the rolls are also treated with bitumen mastic. The unattractive appearance of roofing material can later be closed with the help of any decorative finishing materials. Horizontal waterproofing must also be performed between the foundation and the plinth.
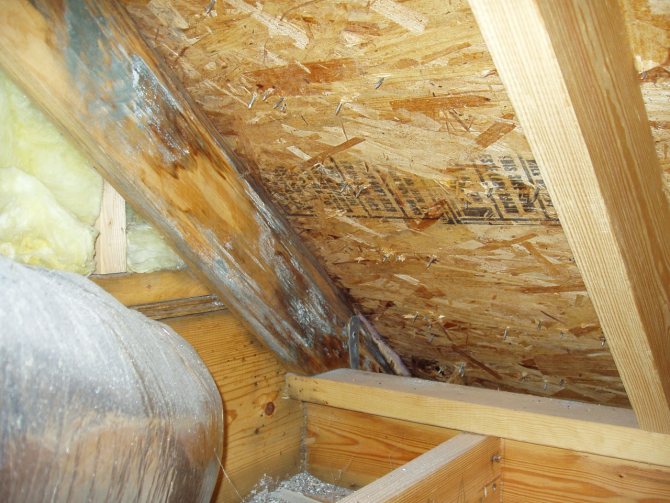
- A high water table can also cause a lot of moisture to build up under the floor of a wooden house. The problem of groundwater is especially acute in spring and autumn, when their level rises as high as possible. The universal solution to this problem is the creation of a highly efficient and modern drainage system. Best of all, do it during the construction phase of the house.
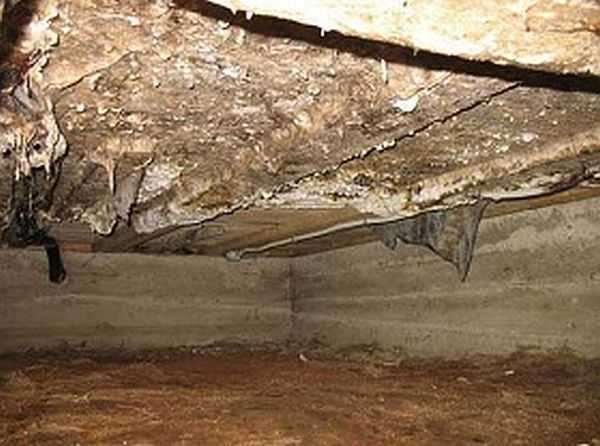
- Penetration of warm and humid air from living quarters into the underground, in the absence of proper ventilation. Warm air will condense on cold walls, settling as water droplets. This can lead to the destruction of not only wooden logs, but even concrete foundation structures (especially if water penetrated them in summer and froze in winter).
We suggest that you familiarize yourself with Mushrooms with worms what to do


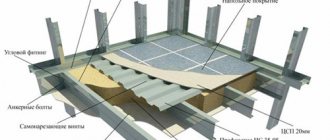
Vault floor
After the reinforcement mesh is assembled, concrete can be poured.
- Anaerobic bacteria can emit gases that are potentially dangerous to humans, which never enter the cellar through the concrete floor.
- A variety of pests will also not be able to enter the store through the concrete surface, so arranging such a floor is the right solution if you are concerned about this problem.
- Even large rodents cannot destroy the concrete floor.
- During floods, when the dirt floors simply begin to slip from under your feet, the concrete surface will remain in place.
The construction of a concrete floor in a cellar in a private house involves the following steps:
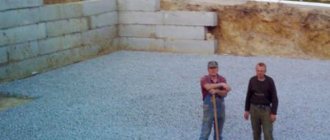
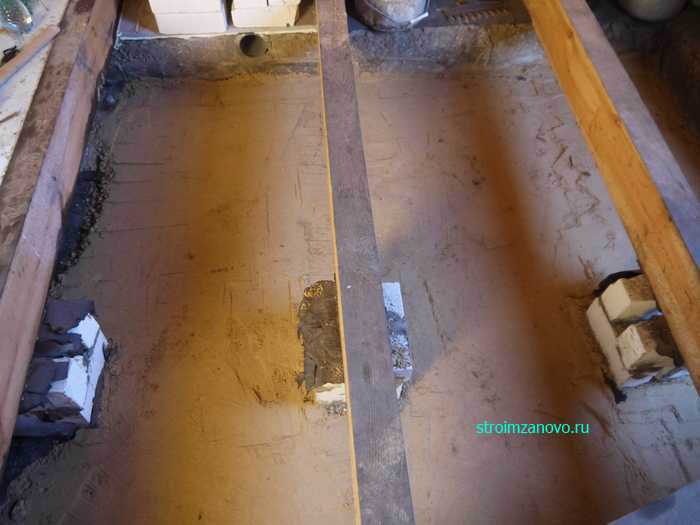
- The first step is to dig a pit, determine the size of the cellar and level the bottom of the pit.
- Next, you need to make a sand pillow, the thickness of which should not exceed 20 cm. It is tamped with the help of improvised tools and water. The pillow must be firm and level, otherwise the concrete floor will deform in the future.
- Then it is recommended to lay a layer of gravel, which also needs to be well tamped and made as even as possible. Arrangement of this layer will ensure high reliability of the surface and the cellar under the house will not be subject to deformation.
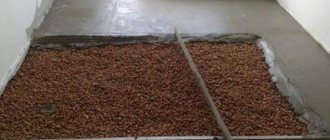
- A waterproofing material is laid on a gravel-sand cushion (special polyethylene or roofing felt can be used). This is necessary not only as a barrier from groundwater, but so that the cement milk after pouring the solution does not go into the lower layers. Due to this approach, concrete is gaining ultimate strength. Of course, this will not give an absolute guarantee against moisture penetration into the premises, but at least it will minimize the risks.
- A stack of reinforcement is placed on the waterproofing layer. In this case, the thickness of the reinforcement rods should be 5 mm or more. Reinforcement of the floor surface ensures surface resistance and durability during operation.
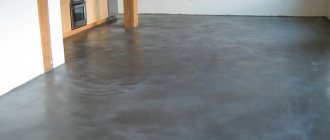
- At the end, the floor is poured with cement mortar with a thickness of about 10-15 cm. It must be understood that the coating will gain working strength only after a few weeks. Walking on such a floor is prohibited for the first days after the completion of the work.
We offer you to familiarize yourself with: Self-tapping screws for clapboards
Preparatory work
All supplies are taken out of the basement, as well as all wooden structures, they are well cleaned. On the street they inspect wood - shelves / boxes / boxes. If they have not suffered, and there is no fungus or mold, they are simply laid out in the sun to dry.If there are traces of damage, the wood is impregnated with a solution of copper sulfate (concentration 5-10%, no more).
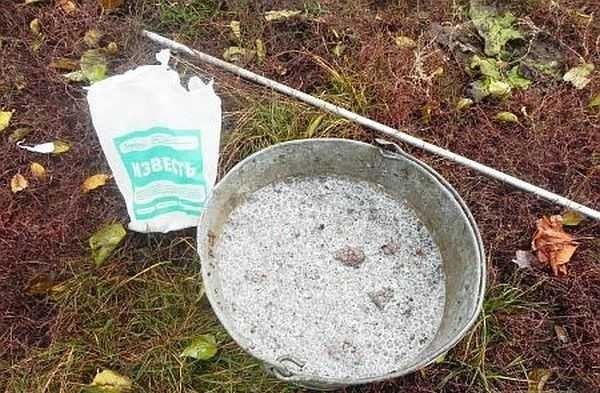
Whitewashing with lime gives good results - it will also "collect" moisture from the air. Therefore, before draining the basement, it makes sense to whitewash everything. Only they do it differently from the outside. Apply a thick layer of lime to the walls. To do this, make a bucket of thick whitewash, add a little diluted copper sulfate. He is an excellent disinfectant, but the concentration should not be higher than 5%, maximum - 10. The resulting thick liquid is poured in half into two containers.
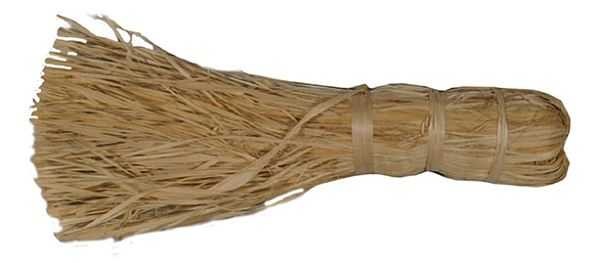
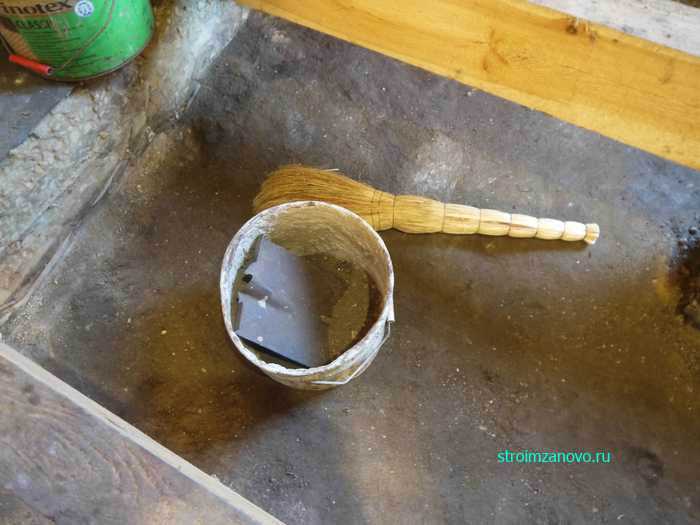
This is what a paint brush for whitewashing looks like.
The first half is lowered into the basement, dressed in old clothes, put on glasses, covered their hands. They take a paintbrush for whitewashing (it looks more like a small broom) and it is good to coat the corners with it. Then use a brush to spread the liquid and spray it on the walls and ceiling. Just dip in thick whitewash and spray on the walls. They are covered with drops, bumps of lime.
After everything is covered with lime, wait a day until it dries. Repeat everything with the second bucket. As a result, the walls and ceiling are porous and uneven. But condensation rarely hangs on them: lime keeps moisture inside well. After the lime has dried, you can start drying the cellar.
Do-it-yourself greenhouse construction is described here.
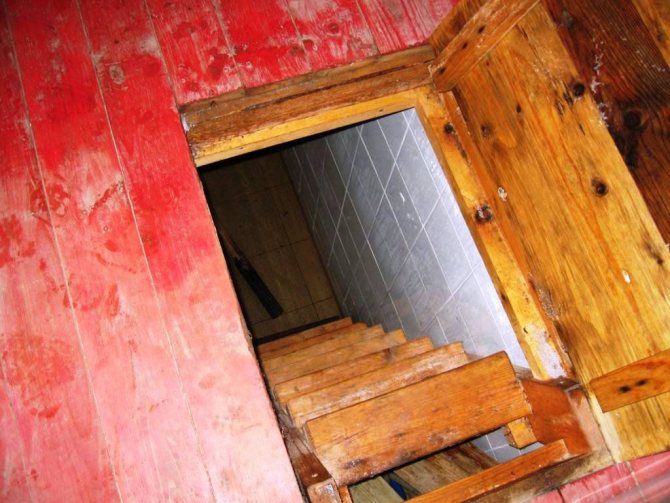

Basement door construction
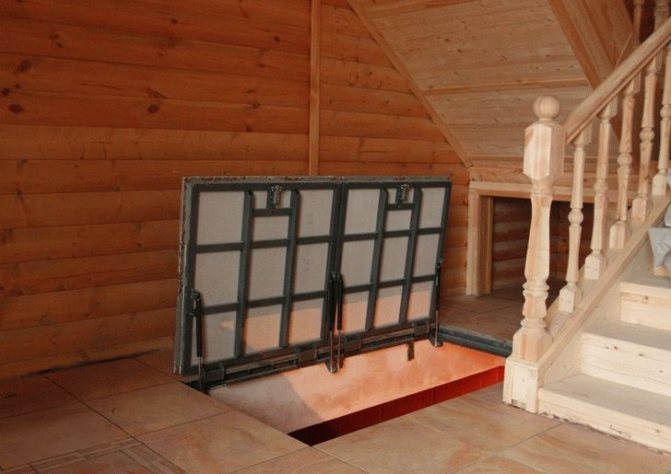
Also an important component of the basement building is the hatch and doors. The design of the basement closure device must include special insulation that will pass between the layers of the door. This will increase the thermal insulation so that the low temperature will not affect the crop in the basement. One of the functions of such a hatch or door with an interlayer will also be to avoid the penetration of a specific smell from the basement into the living space. For the same reasons, the coating above the basement should be dense and contain the same heat-insulating material.
Eliminate moisture underground
It is possible to eliminate dampness underground only with an integrated approach, which includes the following work:
- Reliable waterproofing of the foundation and basement of the house from the outside and inside. It is recommended to concreting the floor of the underground, if this has not been done. All surfaces are pasted over from the inside with waterproofing material. The problematic performance of this complex of works is that it is quite difficult to hermetically seal the joints of the waterproofing. Therefore, it is laid with an overlap, and the seams are additionally glued with bitumen mastic.
- Design of a highly efficient ventilation system. As a rule, if the underground is large enough, then traditional ventilation in the form of several vents cannot cope with its functions. As a result, condensation accumulates under the floor due to insufficient air exchange. If you notice this problem, then it is necessary to increase air circulation and dry the room with electric fans (make forced ventilation). In addition, sometimes replacing the supply and exhaust ventilation pipes with analogs of a larger diameter helps. Do not forget about the correct location of the natural ventilation pipes. The lower part of the supply pipe should be located at the underground floor, and the lower part of the exhaust pipe at the upper ceiling.
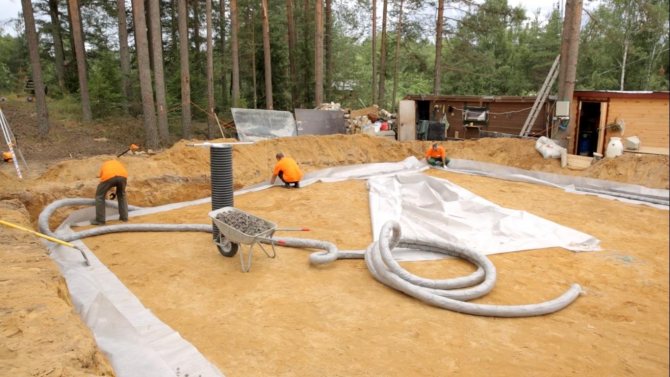
- The problem with dampness underground in 50% of cases is associated with the impact of groundwater and the lack of a high-quality and efficient drainage system at the site. In the absence of construction experience with the issue of creating a good drainage system for a country house, it is better to contact specialists who can determine the level of groundwater, choose the right materials and arrange pipes around the site.
- The easiest, but not the most effective, way to deal with damp underground problems is to use regular plastic wrap. This method is relevant for small sub-fields where it is difficult or impossible to carry out work. The technology is as follows: any waterproofing material is laid on the ground under the house (it is best to use a polyethylene film as a single sheet). As a result of this, most of the moisture from the soil will not be able to rise further than the insulator, therefore, it will settle on it and go back to the ground.
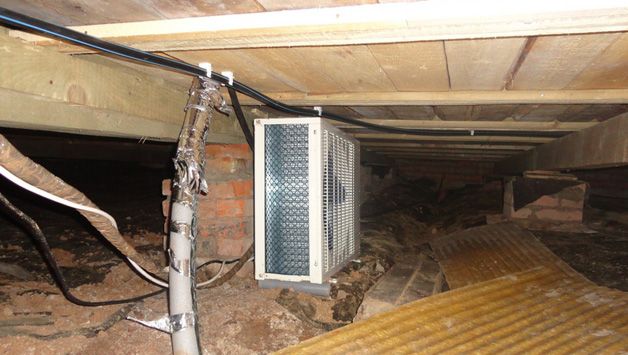
Air conditioners and fans can be used periodically to maintain the required microclimate.
If problems with dampness arise in a wooden house systematically, then you cannot hesitate in solving it. At the first signs of high humidity, the subfloor is thoroughly dried and waterproofing and ventilation are done.
When building a country house, only high-quality and suitable moisture-proof materials should be used. Vertical waterproofing is used in combination with horizontal.
We suggest that you familiarize yourself with Gnawing the bark of an apple tree what to do
Functional basement
Having decided to build a basement in the house with a cellar for storing crops, it is necessary to take into account many factors that will also affect the ease of use. The owners should take care of:
- Special compartments for storing vegetables, which should be no higher than fifty centimeters in height.
- Ventilation;
- Availability of galvanized mesh or solid wooden boards.
Otherwise, it will not be very convenient to get vegetables out of such compartments at the time of need. Also, it is these parameters of the height of specialized boxes for root crops that will help maintain acceptable ventilation, a violation of which will entail rotting of vegetables. But the width of the compartment has no boundaries, here everyone can arrange them depending on their personal preferences.
The materials for the construction of vegetable compartments must also differ in certain qualities. It is best to construct such storage devices for vegetables using solid boards or galvanized mesh. In the event that you use a mesh made of other materials, then in contact with root crops, the oxidation process will take place.
Ventilation in basements and cellars is an important component of the entire building. To do this, you need to make several small windows in the basement area. In cases where temperature rises or falls by six degrees and humidity in the region of eighty-five, it is worth creating additional ventilation.
Basement drainage with ventilation
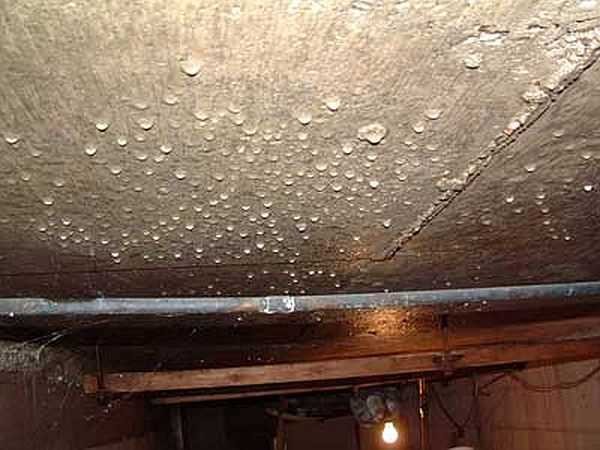
Sometimes it happens like this: it was dry in the cellar, but suddenly there was dampness. One of the reasons is poor ventilation. First of all, check the cleanliness of the ventilation ducts. Clean if necessary. If everything is fine, but the dampness does not go away, then the chimney is not working well. This happens when the air in the cellar is colder than outside.
Heavy and cold, he himself will not climb the pipe. At first glance, a paradoxical situation arises: it was cold and damp outside - it was dry in the cellar. It got warmer - drops of moisture hung on the ceiling, walls and objects, a musty smell appeared. In this case, in order to dry the cellar, it is necessary to activate the movement of air. There are several solutions.
- Put a powerful fan on the chimney to draw air. Ensure the flow of air masses - open the hatch, if any - windows or dampers. In a few days (from three to ten) everything will dry out.
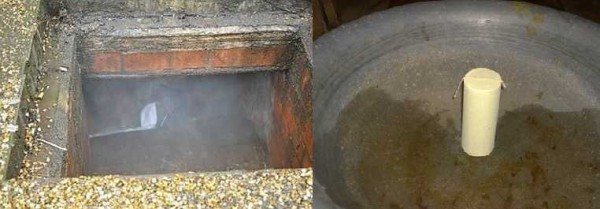
Organization of basement ventilation in a garage with a viewing hole - Use the old "old-fashioned method" with a candle. It is suitable if there is no electricity and there is nowhere to turn on the fan. This happens if the cellar is built separately, on the street.To dry it, temporarily grow it into the exhaust pipe (the one that ends under the ceiling) so that it almost touches the floor (it was 5-10 cm higher). A burning candle is slipped under it, but it is placed on some kind of non-combustible base. Due to the fact that the air in the pipe heats up, there is a normal draft, the raw air is pulled from the floor. Change the candle until the basement dries out. Instead of candles, you can use dry alcohol tablets. Sometimes the flame of a candle is not enough to start the movement of air. Then first slip a piece of burning newspaper into the pipe (just carefully, do not burn or melt the ventilation), after it has burnt out, move the burning candle forward.
How to dry the cellar in this case? Wait until autumn, and when there is no rain yet, but the temperature is already about 10 ° C, start ventilation using one of the methods suggested above. Works. If your nights are cold in summer, you can turn on the fan at night, and close the ventilation ducts during the day. So gradually you can reduce the humidity in the cellar in summer.
We heat the cellar
If it is necessary to remove dampness even during warm weather, and ventilation only worsens the situation, you need to heat the air in the basement so that it goes outside by itself, carrying away moisture (the higher the air temperature, the more vapors it can contain).
To do this, take an old bucket or other metal container of about the same volume. They make many holes in it (you can use an ax) in the bottom and walls. Such a leaky bucket is tied to a cable (fasten securely). Coals for kebabs are poured inside (you can burn it yourself), the bucket should be almost full. The coals are kindled and stable combustion is achieved (to accelerate combustion, you can adapt the vacuum cleaner by turning it on for blowing). A bucket with embers is lowered on a cable into the cellar, fixed so that it hangs above the bottom, and the lid is closed.
The lid on the cellar in the house should be practically airtight.
Periodically, the cellar lid must be opened, letting in an additional portion of oxygen (every 20-30 minutes). You can put a fan on the supply pipe or periodically turn on the same vacuum cleaner. If the coals are still extinguished, they are kindled again.
Attention! It is better not to climb inside, to do everything from above. Firstly, the temperature there is high (in a room about 2 * 3 meters about 70 ° C), and secondly, smoke and, perhaps, carbon monoxide accumulates inside.
As the coals burned out, the bucket was taken out, the lid was closed. Do not look inside for three days: smoke and gases will kill the mold and at the same time with drying you will disinfect your cellar. Usually one such "furnace" is enough to dry out the basement in the house or on the street. Likewise, you can get rid of dampness in the basement under the garage.
Sometimes coke or coal is used instead of charcoal. It gives a higher temperature and takes longer to "process", but it burns harder, requires more oxygen, often forced blowing (adapt the old vacuum cleaner and corrugated hose, but turn it on for blowing). But the temperature rises even higher and dries even more efficiently. But the price of coke is high, although buying a bucket will not go broke.
Instead of a bucket of burning coal, you can use other heaters:
- a propane burner (lower the burning one on the wire, make sure that it does not light anything and leave it hanging in the middle, as tired of it, close the valve, you can open the lid only every other day);
- a heat gun of decent power (3-5 kW);
- kirogas;
- lower the potbelly stove into the basement and heat it.
All these methods can be used, but you have to go down into the cellar in order to ignite the pyrogas or potbelly stove. And this is an unsafe undertaking and do not use this method alone. You need someone to belay you upstairs. Regarding the heat gun: it is also better to lower it by tying (tying) with a rope, and not to lower it yourself.
How to dry a basement in a garage is described in the video.
How to make high beds (to increase yields) read here.
If ventilation was not done during construction, it is advisable to arrange it now. At least some: getting rid of dampness will be easier. Better, of course, two pipes - one for the inflow, the second for the outflow - as described at the beginning of the article. If the cellar is made separately on the street, it is easier to organize: they pierced the ground and the roof of the cellar, inserted pipes, poured everything with concrete mortar.
We suggest that you familiarize yourself with a Collapsible brazier with your own hands (47 photos): a folding drawing, how to make a folding, prefabricated homemade portable brazier for nature
It is more difficult with a garage, but no one clings to aesthetics here. But if the basement is without ventilation under the house, it is more difficult to do everything: it is better not to break the foundation, and you cannot stretch many pipes through the floor into the room. But even in this case, make at least one pipe. Even through the lid, take it out into the wall or ceiling, put a supply and exhaust fan. It can be turned on now for supply, then for the hood and in this way at least somehow dry the cellar.

With at least such ventilation, you can use any of the methods described above. You can also try to collect more moisture. For this, hygroscopic materials are laid out inside:
- Pour dry sawdust as soon as it gets wet - throw it out, fill it with new ones. Drying this basement will not dry out, but will lower the humidity. There will be no condensation drops on the ceiling for sure.
- Slaked lime. Unfolded around the perimeter, along walls and on shelves. It not only collects moisture, but also kills fungi in vapors.
Slaked lime can be used to reduce moisture in the cellar - Calcium chloride. 1 kg of dry matter absorbs 1.5 liters of water. You buy a few tens of kg, lay it out, collect it in a day, heat it up (heat it up) and can be used again. But you also need to work carefully: chlorine and calcium vapors are also toxic.
- Dry cardboard boxes. Ironically, they also absorb moisture well. You put a few dry ones, after 12-20 hours they are so wet that they almost creep in your hands. Throw it away, throw in new ones. Cheap and cheerful. Drying the cellar will not dry out at all, but it will collect condensation from the ceiling and walls.

If all these dances with tambourines do not inspire confidence in you (although they work), you can dry the cellar using modern technology. There are such household appliances - household air dehumidifiers. They are often placed in swimming pools to get rid of dampness in the room. You will need a medium power model. They cost about 20-30 thousand rubles, they work from a household network of 220 V. In the process, they collect moisture from the air into a special container. You will need to drain the water periodically.
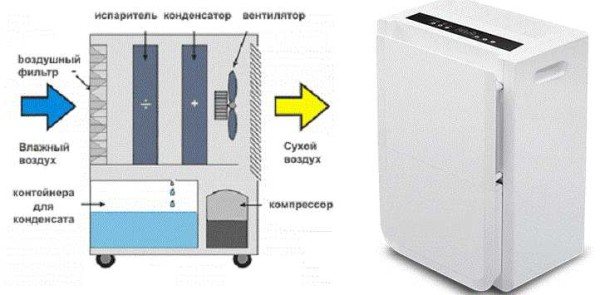
One way to dry out a damp basement is by installing a household dehumidifier.
If the flooding was accidental, you need to pump out the water in any available way, and then proceed according to the standard scheme:
- Take out everything you can from their cellars.
- Leave all lid and air vents open for a while.
- When more or less dry, remove debris, fungi, mold from the walls and floor.
- Whitewash with lime.
- Dry in one of the ways.
If the flooding is periodic - in the spring, for example, you will have to make a full-fledged drainage system, and this is a separate conversation.
All of the above methods of how to dry a cellar are mostly based on practical experience. They are used everywhere and very often. In one case, one method works, in the other, another. Your task is to find the most effective one for your situation.
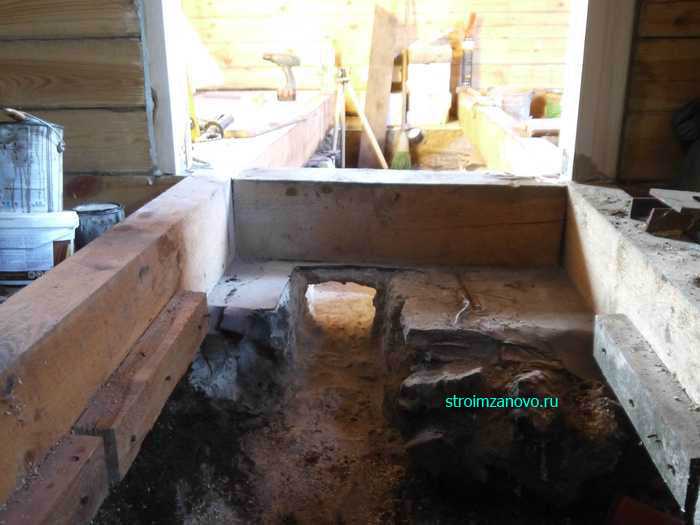
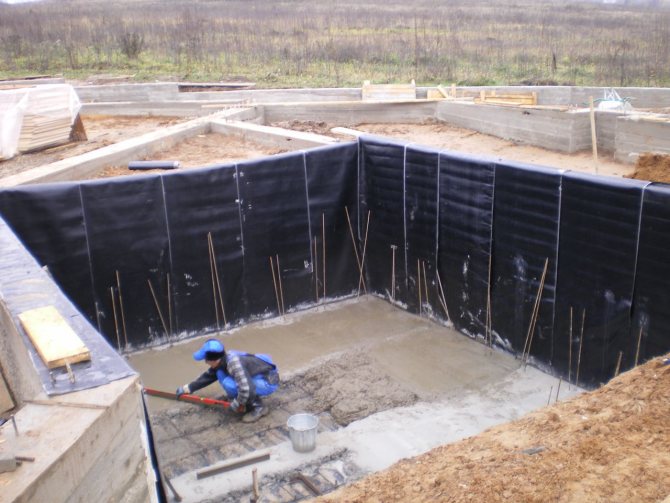
Monolithic walls
The walls of any basement are usually built from bricks or foam concrete blocks. When the construction of a cellar is carried out in an already erected house, certain difficulties may arise with waterproofing and backfilling.However, if you carefully consider the work, you can do it yourself.
The concrete is not poured to the top right away, but little by little with the compaction of each layer.
The optimal solution is the construction of reinforced concrete walls. The order of work for the construction of a reinforced concrete structure with your own hands is as follows:
- The first step is to install the reinforcing mesh. For these purposes, corrugated reinforcing bars with a cross section of 10-15 mm are usually used. If you cannot find rods of this thickness, you can fasten two small rods together, or use pipe cuttings. To tie the reinforcement net from the rods, it is recommended to use wire and special hooks; it is best not to use welding.
- Do-it-yourself vertical formwork device involves the use of various scrap materials. Slabs, plywood sheets, chipboard are excellent for these purposes. In principle, even large pieces of wood will do. If there is not enough material for the formwork, then the boards can be gradually rearranged as the walls are being erected. In this case, it will be possible to build a wall in a few days.
- For pouring, it is recommended to use concrete of the M200 grade (and more durable). In some cases, it is recommended to add some of the rubble to the solution. The formwork must be poured in little by little, in layers of several tens of centimeters. In addition, each layer of concrete must be compacted. The wall must be built up to the floor level.
During the construction of monolithic basements, the walls are equipped using the strip foundation technology. Trenches are dug, sand is poured at the bottom and formwork is installed. After the completion of the waterproofing work, a reinforcing mesh is laid and concrete is poured.
If you first need to pour the floor, in this case, the formwork for forming the walls is installed only after the concrete has completely solidified. Otherwise, due to the gravity of the mortar, the formwork braces can press into the floor and form completely unnecessary recesses.
Walls can be made of bricks. But doing this work requires carefulness, because it is necessary to ensure that the walls are erected strictly horizontally and vertically. Laying starts from the corner and continues up to the 7th row. It is recommended to lay reinforcement every half a meter in order to give the structure additional strength.
We must not forget about the place of the doorway. Lintels are made of reinforced concrete or wood.
Another option for building walls is to use blocks. This method saves a lot of time - a basement in a private block house can be built quite quickly. The only thing that will need to be done is to align each block both vertically and horizontally, as well as to the level of the wall. It is best to start styling from the corners.
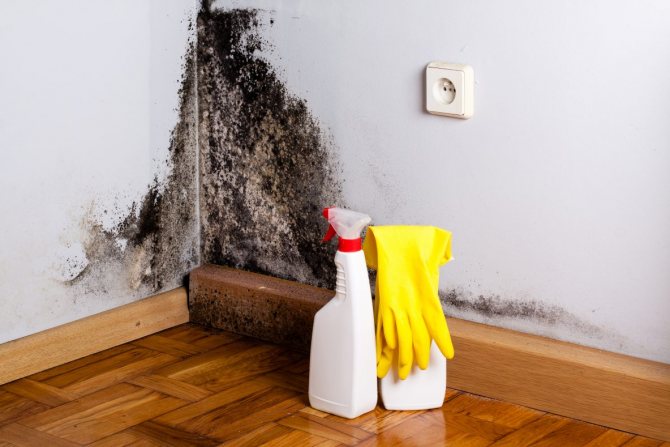
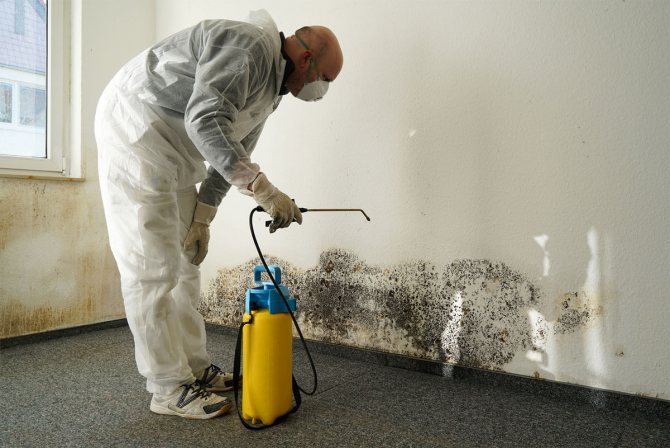
Disinfection and fight against fungi and mold
The increased humidity in the cellar leads to the fact that mold, fungi of different types and colors appear on the walls, shelves and ceilings, and all this beauty is accompanied by "aromas". In this case, all that can be taken out of the cellar is taken out and laid out to dry. After drying, whitewash wooden shelves, boxes, boards, racks with lime with the addition of a solution of copper sulfate. Better twice.
In the cellar, clean off all growths from the walls and ceiling, whitewash with lime with copper sulfate twice (the technology is described at the beginning of the article). Before the main drying, special measures can be taken that will destroy the spores (or neutralize them for a while).
Lime vapor
Place the barrel in the cellar and sprinkle with quicklime. Lime is taken at the rate of 3 kg per 1 cubic meter of volume. In a barrel of lime, there should be a maximum, a little more than half. Pour water over everything. Do not interfere. Crawl out quickly and tightly (hermetically) close the lid and all ventilation ducts. You can open it in two days, ventilate well, then you can go down.
Repeat the treatment after 7-10 days.Lime vapors should burn out mold and fungi, destroy insects and their larvae. They also deal with the smells of dampness and musty very effectively. True, the cellar will smell of lime for several days.
Disinfection of the cellar with lime vapor
Use a sulfur checker. They are sold in shops selling seeds or household stock. Each has instructions. But, in short, you need to act according to the following scheme:
- take out all metal things, if this is not possible, cover them with a layer of grease - grease or something similar.
- You set fire to the wick of a sulfuric checker, it starts to smolder.
- Get out quickly, close the lid and ventilation ducts, leave it for 5-6 hours.
If the basement is in the house, it is advisable to leave it during processing: a couple of breaths with insufficient tightness and the lungs will need to be put in order for a long time.
Disinfection occurs due to the formation of sulfuric acid. It is obtained by the reaction of sulfuric anhydride and water. Therefore, mold is more efficiently killed with a sulfur checker in wet cellars.
A sulfur stick is placed on the metal, set on fire, quickly come out and all holes are closed
After 5-6 hours (or after the time indicated on the package), open the ventilation channels and the lid (in this order). Leave it open for at least 12 hours. Remains of gases erode during this time. You can go in.
From the experience of operating such checkers, we can say that they need to be lit twice as much as normal. Then everything will really be rendered harmless.
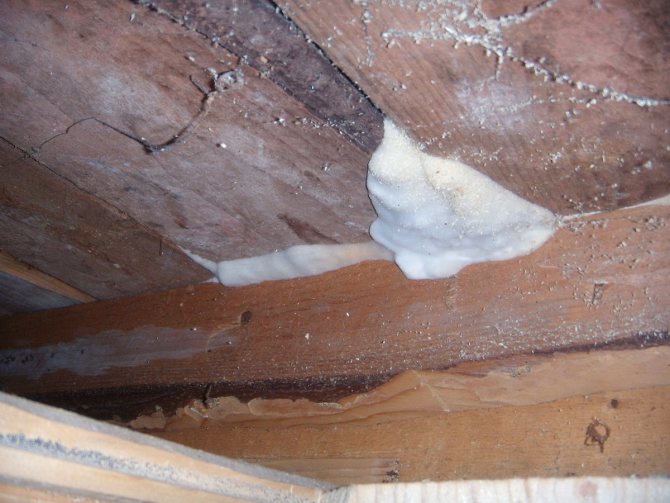
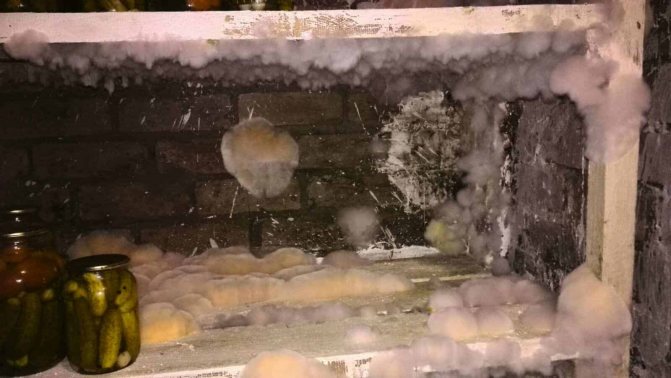
Sometimes white fluffy growth appears on wood or walls. This is a type of fungus. It can be dealt with by the methods described above, but if only it is present, you can find on the construction market a means for removing solid polyurethane foam (sold in the same place as foam). Insert the tube into the assembly gun and apply to the places with the fungus. It instantly begins to roll up. And then at this place does not appear.
You can get rid of this evil with a polyurethane foam remover.


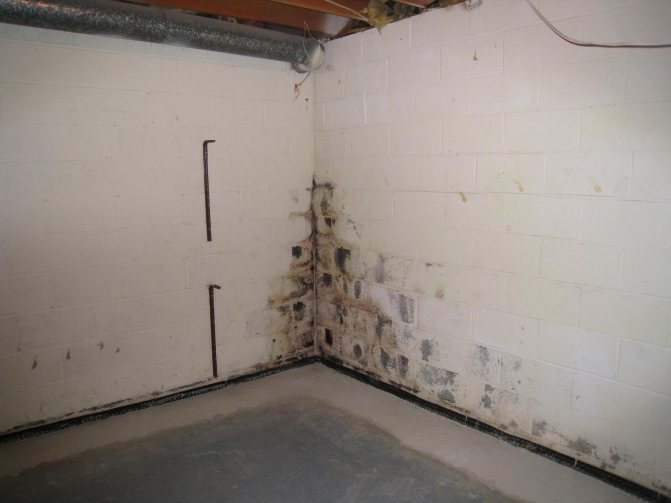
Finding mold
If you have stains on the floor, walls, you should pay attention to the condition of the sewage system. Eliminate the cause, if any, in order to prevent moisture build-up and create favorable conditions for the development of the fungus.
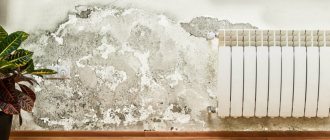
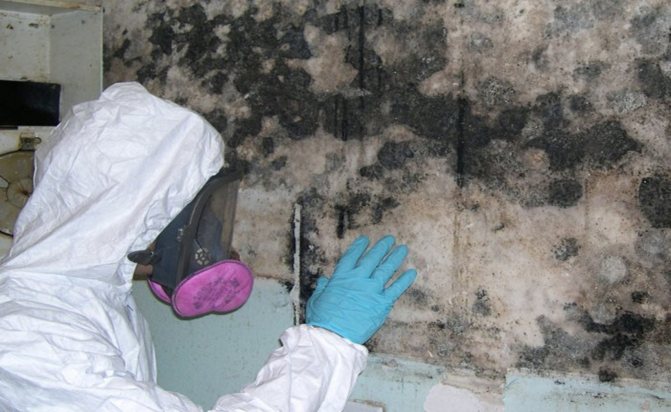
Homeowners tend to panic when black mold occurs.
If the sewer pipes and the entire drainage system are in good working order, pay attention to the condition of the floor boards. Pay attention to the quality of the waterproofing, whether it is broken. There is poor ventilation under the floor and when moisture gets there, a beneficial environment for the formation and spread of mold over the floor area is created.
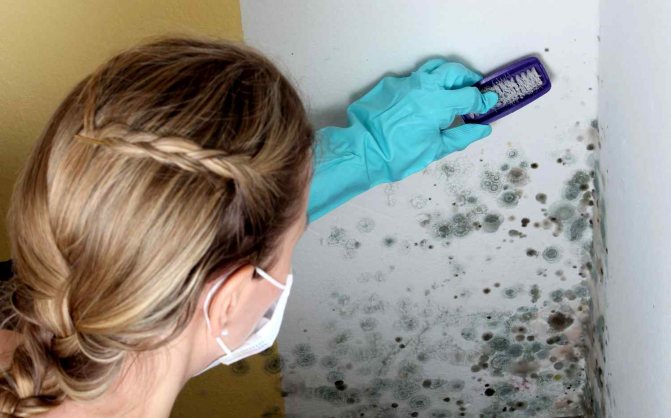
Vigorously remove mold in your basement.
Where to spot mold:
- In the basement;
- In the subfield;
- In the cellar.
It is these places that are more susceptible to a beneficial climate for this type of fungus. In addition, it has a specific aroma.
The use of antifungal agents without addressing the root cause does not bring sufficient results.