Birds spend a lot of time on the floor, so floor insulation must be carried out carefully. Before distributing the litter, the floor is inspected, the existing gaps are covered. In the winter season, they use a deep type of litter (embankment 20-30 cm high).
To date, irreplaceable fermentation deep beddings ("Bioherm" Germany, "Netto Plast" China) have proven themselves. The cost varies from 2000-2500 rubles per 0.5 kg (for an area of 10m²). They are a powdery product made from a mixture of bacteria and other microorganisms that are harmless to animals. The principle of action is the biochemical processing of poultry droppings inside the litter. The vital activity of bacteria generates heat (25-35 degrees) playing the role of a heater, and also eliminates the odors of vital activity.
A big plus of this litter is the lack of daily cleaning of chicken droppings. The only requirement when using a mixture of bacteria in flooring materials is to loosen the trampled litter 2 times a week. This is done to allow oxygen to enter the inner layers. Oxygen supply is essential for bacteria to function properly.
Keep litter dry during winter. Wet litter interferes with microorganisms and stops generating heat. This leads to an increase in humidity and a decrease in temperature in the chicken coop.
It is also important to know that wet litter is a source for the favorable development of helminths, chicken mites, pathological microorganisms that cause coccidiosis and diseases of the respiratory system of birds.
Suitable raw materials for bedding are moss peat, sawdust, hay, and straw. The most successful choice for winter floor insulation is peat. This natural material has a number of useful properties:
- absorbs moisture well;
- eliminates the odors of the end products of the vital activity of birds;
- has a soft consistency;
- keeps warm (paws of chickens do not freeze);
- waste-free material (then used as fertilizer).
A combination of raw materials for floor mats is possible. For example: straw (15 cm), sawdust (5-10 cm), moss peat (up to 10 cm).
It is not recommended to cover the floor with sawdust only. The sawdust quickly becomes wet and there is a risk of birds eating the sawdust.
As it gets dirty, the top layer of the litter is replaced with a new one. And the bottom layer (10-15 cm) is left.
Insulation of the walls of the chicken coop
Wall insulation is carried out both outside and inside. It depends on the materials of the house. If you plan to keep chickens year-round, then they take the construction of a chicken coop seriously. The walls are erected from solid building materials (brick, foam block). The surface of the walls must be plastered and whitewashed with slaked lime.
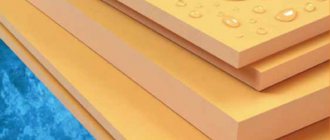
In regions with harsh climatic conditions, the walls are additionally insulated with sheets of polystyrene or polystyrene foam. Let's consider the characteristics of these materials.
Styrofoam
Foam plastic is polystyrene granules, foamed and compressed to the required thickness. The main volume of the material is air, which gives high thermal insulation and lightness to the product. Polyfoam from different manufacturers has different strength and density.
It is worth giving preference to polystyrene, which contains antiperen - an important component that protects the insulation from fire.
It is used as a heat-insulating material, widely used in construction:
- for the foundation (protection against soil pressure, the influence of cold);
- for the floor (laying on the floor in front of the screed);
- for walls (fastening from the outside and inside);
- for the roof (it is laid in two ways - a warm roof 70 mm foam sheet in combination with bitumen and a cold one);
- for the facade (a sheet with a thickness of 50-60 mm is used, glued to even walls with special glue, fixed, plastered).
When buying polystyrene, it is worth knowing in advance certain nuances - the higher the density (stability), the lower the thermal insulation of the material. A low degree of strength and density implies protection against mechanical damage. The latter characteristics are used to insulate frame and other rooms.
A big plus when choosing foam as insulation is:
- excellent thermal insulation;
- its availability;
- relatively low price;
- durability;
- does not require additional waterproofing, resistant to moisture;
- light weight;
- ease of installation.
The disadvantages include:
- low strength of the material;
- does not allow air to pass through;
- emission of gases hazardous to health in case of fire.
Penoplex
Penoplex is a new generation of thermal insulation boards. It is a dense slabs with a fine-mesh structure, measuring 120 by 60 cm. The basis of the foam is also polystyrene. A feature of the foam is the presence of a solid L-shaped edge, which allows the joining of plates without cracks.
Besides the same purposes as the use of foam, it is also suitable for pipe insulation. Also has some properties:
- high thermal protection;
- does not emit fumes and harmful odors;
- extended temperature range (from -50 to +75 degrees Celsius) makes penoplex suitable for different climatic zones;
- does not absorb moisture;
- long service life (about 50 years);
- withstands sharp freezing.
The disadvantages include:
- not used without lining (plaster);
- toxic when burning;
- poor barrier against rodents.
Foil penofol
A relatively new type of insulation. It is a material characterized by high qualities of thermal protection, consists of a layer of polyethylene foam and reflective foil. The base thickness varies from 2 to 40 mm. Foamed polyethylene blocks direct heat transfer. It can be installed in combination with other thermal insulation materials.
If the walls of the hen house are thin (barn type of building), there will be much more insulation work. Warming is achieved by combining different types of materials. Additional materials are mineral and basalt wool - used for thermal insulation of walls and ceilings. These heaters perfectly tolerate temperature changes, are hygroscopic, have fire-fighting properties and are easy to use.
Insulation of the roof of the chicken coop
When planning a building, it is recommended to think about an attic and make a structure with a reliable black ceiling. Subsequently, bedding and feed material can be stored there.
With regard to the finished structure, almost the same materials are used (for roof insulation, additional waterproofing and vapor barrier are used), only the fastening methods change:
- Vapor barrier (vapor barrier films, membranes) is the protection of the insulation from moisture that is generated inside the building.
- Waterproofing (roofing felt) serves the same purposes, but is placed outside to protect the insulation from precipitation and condensation resulting from temperature changes.
Step-by-step instructions for warming a chicken coop
Based on the cost, the most convenient type of insulation is foam and mineral wool. Before starting insulation, the following tools are required:
- electric drill;
- roulette;
- screwdriver;
- level;
- assembly knife for cutting foam;
- construction stapler;
- hacksaw.
Next, the material is calculated for the entire room. List of materials:
- timber for making the frame (4 / 4cm);
- sheets of polystyrene or polystyrene foam;
- self-tapping screws (for installation in wooden walls), dowels (for hard surfaces);
- mineral or basalt wool;
- vapor barrier film;
- any available panel material (plasterboard, plywood, reinforcing mesh).
What should be the temperature
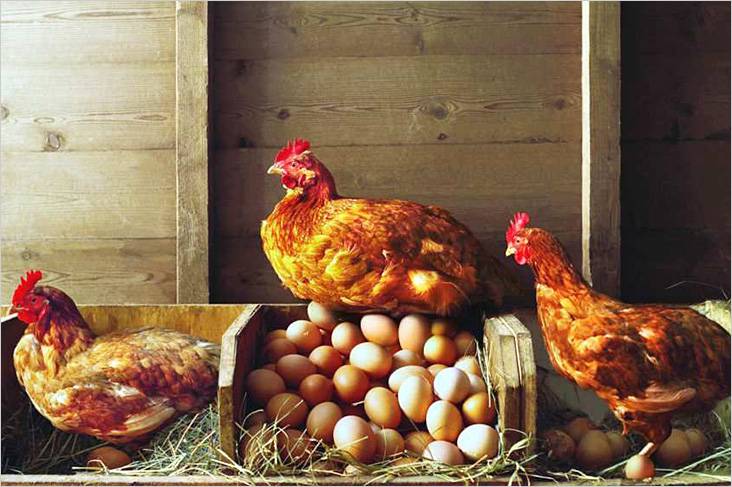
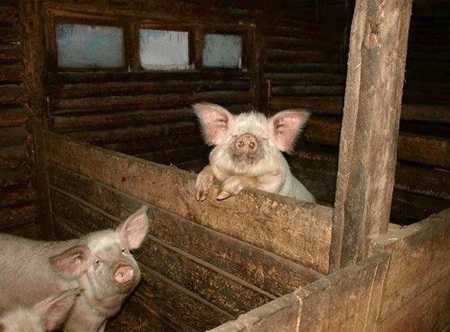
Chickens rush only when it is warm in the barn
For pigs, it is necessary to heat the room to an average of 18˚C, which will prevent the animal from getting sick. And for the winter keeping of chickens, such a high temperature is not needed, since, thanks to their strong plumage, they can even tolerate frost. But you can only hope that they will feel good and rush if the temperature inside does not drop below + 7˚C. Optimal - 12-15–C. Depending on which inhabitants "get a residence permit" in the barn, the temperature regime is selected, but it is much easier and cheaper to maintain if the structure is properly insulated before the onset of cold weather.
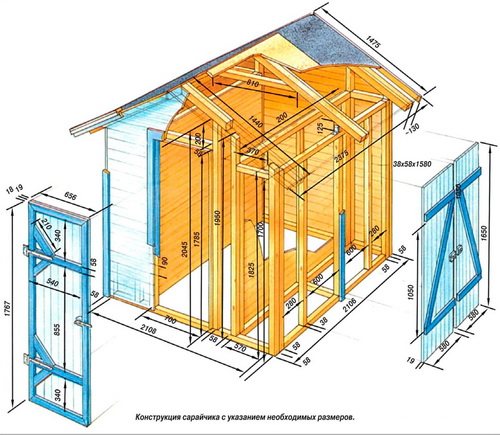
Barn design
Design is the foundation of construction. Anyone, including private. If you don't take care of the main purpose of the building in advance, as well as important and secondary details, then you won't be able to build anything more sensible.
And if it works out, then in the process of operation the negative sides of the previously not thought out construction process will be revealed. And you will feel more negativity than satisfaction from the operation of a building built with your own hands.
So how did I design my barn. It was supposed to store things for seasonal use - skis, a lawn mower, a pressure washer, garden hoses, winter and summer car tires, tents, sleeping bags, winter and summer garden shoes, fishing tackle, a boat, an outboard motor and a catamaran.
For this reason, the shed must be insulated and heated. When I was building a frame garage, the lack of experience in designing outbuildings affected. I did not include in the garage space the possibility of storing all these things there. Therefore, the shed had to compensate for that lack of a garage - the lack of additional space and the ability to store seasonal items in a warm room.
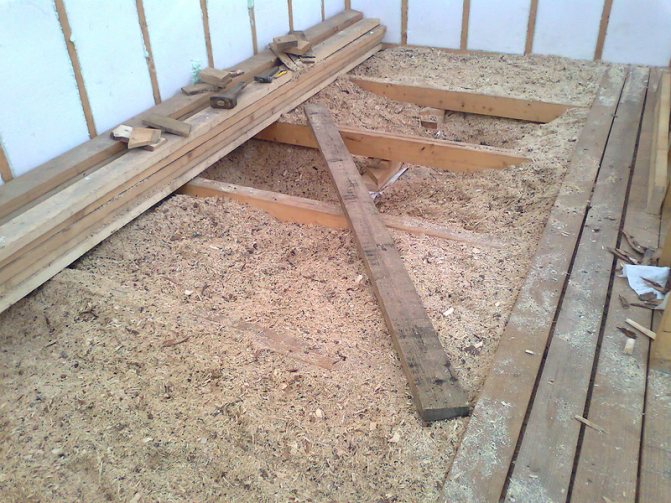
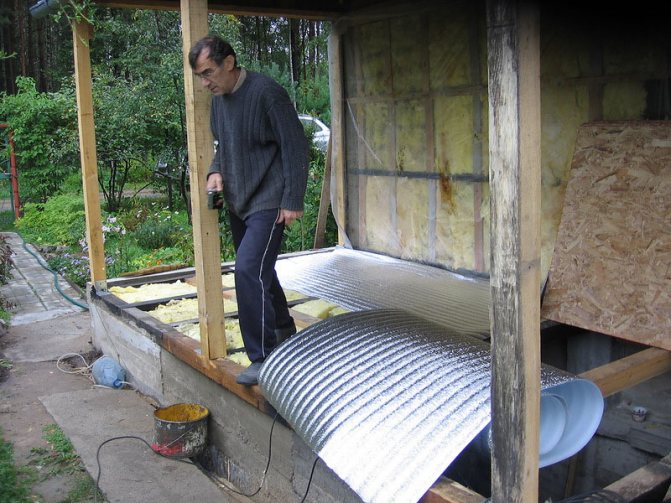
We insulate the floor
As you know, the coldest air is always from below (in this case, we will not consider the principle of operation of a warm floor). If the shed is not capital, then at best it is installed on a shallow, non-insulated strip foundation, and often it is not observed. One can only guess how the ground freezes. A blind area with insulation will seriously help, but not everyone will consider it appropriate to do it. Some people sprinkle manure, reeds or leaves around and cover it with clay on top, and in the spring this structure is removed so that the walls do not rot. The method is peculiar, but when there is frost on the walls and the floor inside the building, then at least something is better than nothing.
To insulate the floor, you can add soil around the entire perimeter of the structure in order to raise the level by 10 см15 cm, and then pour clay on top and tamp it all down. Such a floor can be sprinkled with sawdust, which must be changed periodically.
Making a clay floor
You can also knead the clay with straw and make a clay floor.
More seriously, thermal insulation is carried out in capital premises made of stone, blocks or bricks. In this case, the foundation is insulated with penoplex, a solid blind area is made, and from the inside (if necessary) the floor is insulated, and then a concrete screed is poured.
The situation is somewhat different with a barn built on piles.
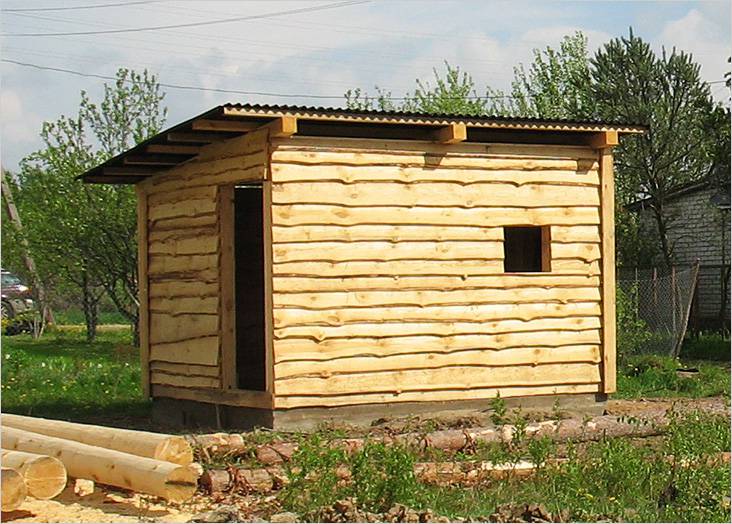
Construction of a frame shed
As a foundation, I used concrete blocks 400x300x200 mm every meter. After the barn was 8 meters long, I did not make the floor along the logs, but filled in a screed 100 mm thick using a masonry mesh as reinforcement.
I put the frame racks from a 150x40 mm board, rafters and screeds from the same board.The frame was sheathed diagonally with a 150x25 mm board. With such a diagonal sheathing at 45 degrees, the jibs in the frame are not needed.
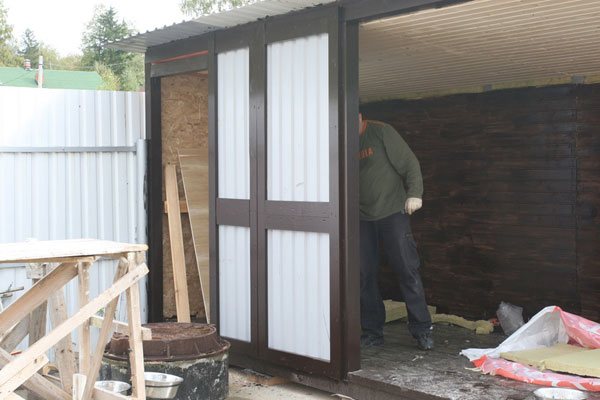
The doors are the most common, plywood. Sheathed them outside with sheet iron. Installed an internal lock that will not let you down in cold weather.

Outside, the shed was sheathed with the cheapest profiled sheet I could find at that time.
Let's go to the doors
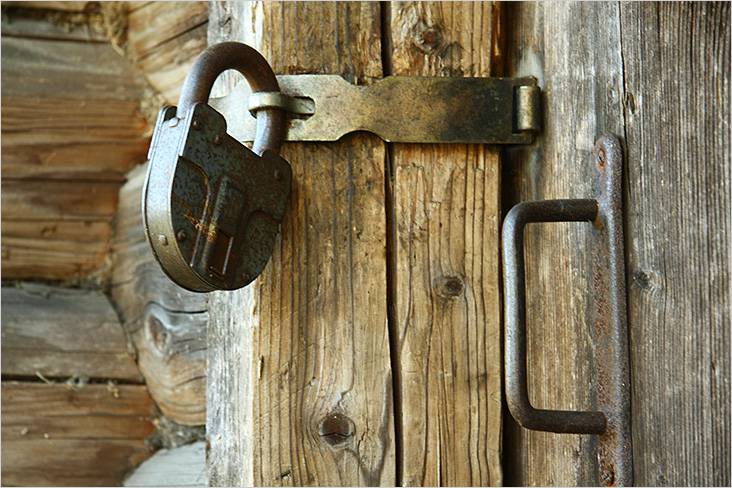
It is impossible to look at the doors installed in sheds without tears. Most often, you can apply the words from the song “I blinded you from what was” to them. If, at the sight of your door, the same song comes to mind, it means that it cannot be restored and you need to make a new one, preferably together with the door frame, otherwise the whole further process of warming will be meaningless.
We hope that your door is not in such a state and will serve for a while. In this case, it can be restored. Benefit from the experience of a person living in a village.
The door was hastily assembled from existing planks
You can often find just such a door. It is good in summer, since there is ventilation, but it is not suitable for using a barn in winter.
Naturally, she turned out to be thin
The thickness of the door itself is usually small.
It's good that powerful hinges were installed in advance
Since the mass of the door after our repair will increase significantly, so that it does not sag and come off, reinforced hinges will be required.
Let's start stuffing horizontal boards
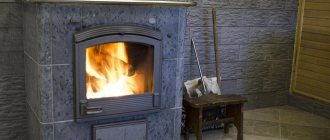
Heating is a radical way to keep your barn warm
If winter caught you suddenly, and the sheds with animals turned out to be poorly insulated, a radical way to increase the temperature inside the premises is to provide heating for the winter. Heating can be electric or wood-fired. In the first case, heaters are used, in the second, they build a stove. Heaters are a temporary solution to the problem, but the stove should be installed even in insulated rooms.
The fact is that thermal insulation does not warm, but only prevents heat from leaving the shed. The stove will allow you to quickly and inexpensively heat the air for a comfortable life for your pets. From what to make the stove, you decide. Just keep in mind that brick structures heat up for a long time, but then cool down for a long time. Metal stoves heat up almost instantly, but then cool down just as quickly.
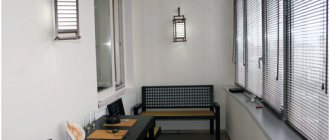
What to do with windows
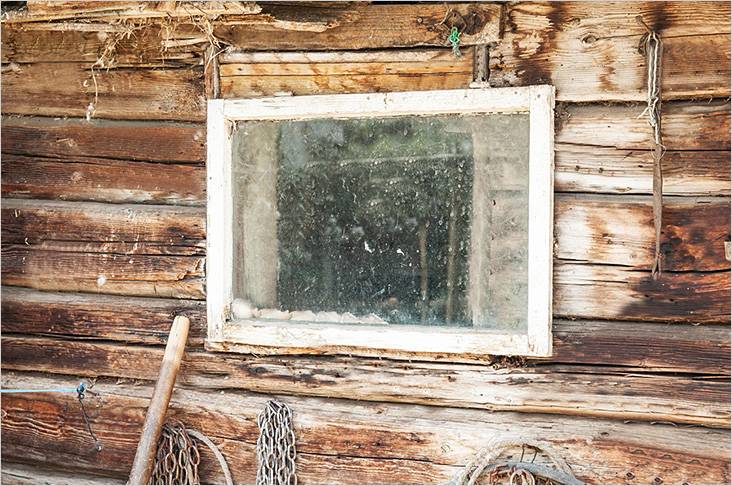
A window in a barn that won't keep warm
Even for the sake of maximum heat preservation, it would be extremely unwise to clean all the windows, no matter how frail they are. If the frame is still not falling apart, but the glass in it rattles every time the door is opened, then you can use a putty for the windows, sealing the glass. This will partially solve the problem, but not completely, even if 2 rows of glazing are installed. You can improve thermal insulation by nailing a dense plastic wrap over the frame, after pressing it with slats.
Wall insulation
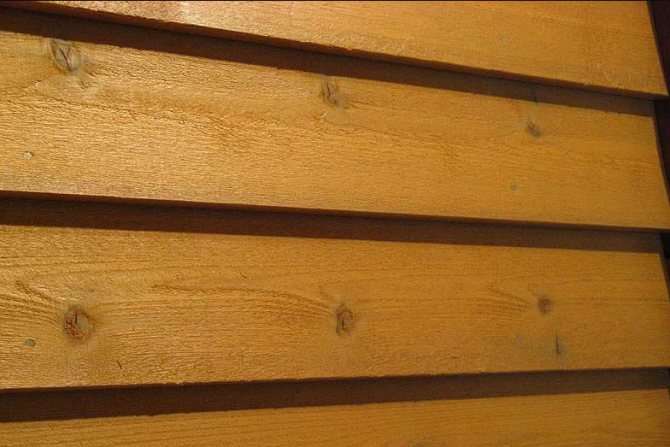
Plank structure
Shed of boards
Even if the barn is built of planks, it can be well insulated.
- Boards crack even with good care, and even more so in a wooden shed. This phenomenon will have to be fought. You can use materials at hand (tow or dry moss) in order to seal cracks, but this can be done much faster with the help of polyurethane foam.
- Now, from the inside, you need to make a second wall at a distance of 30 cm from the main one. A frame is simply made onto which the OSB sheets are screwed, and the space is filled with heat-insulating material. Design features do not matter, the main thing is that the system is reliable. Instead of OSB, you can use an unedged board, nailing it with a herringbone. In this case, the cracks from the inside will have to be sealed with polyurethane foam.
- To prevent the insulation from pulling moisture from the floor, roofing material is laid on the ground under it.
How to carry out work
Various materials can be used for insulation.
This natural material can effectively and very inexpensively insulate walls.Of course, if there is no straw nearby, then it will have to be purchased and delivered, but it will be relatively inexpensive. This material cannot be used in its pure form, as insects can start in the straw, or it will simply begin to rot. Therefore, for every 25 kg of straw, add 1 kg of lime. Everything is thoroughly mixed, and only after that the composition becomes suitable for filling the gap between the walls. Do not confuse straw and hay, as it is not suitable for insulation and will rot very quickly.
If there is a sawmill nearby (or there is another possibility of delivering this material), then dry sawdust can be used. They also need to be mixed with lime in a 1:15 ratio (lime / sawdust). You can also add cement, about 10% of the sawdust volume, which will make the mixture more resistant to caking and more moisture resistant. When laying sawdust, it is necessary to ram them, of course, that this will be done within reasonable limits. After a couple of weeks, it is necessary to check and, if necessary, add sawdust, as they could have caked.
Penoizol is very similar to foam crumbs. The degree of thermal insulation is much higher than that of sawdust and straw, and if you have to buy insulation, then it is better to purchase penoizol, since it is not afraid of moisture, and its cost is quite acceptable - about 5-6 thousand rubles. per m 3. The crumb is simply poured into a place prepared for it and is closed from precipitation with plastic wrap.
It would be easier to fill all cavities with penoizol, but it will not be cheap.
It is also a fairly effective insulation that is not damaged by mold. Its cost is almost the same as that of loose penoizol. No need to ram.
Expanded clay will cost 3, or even 4 times cheaper than the above materials. Give preference to the material of the fine fraction, since there are large voids between the large "stones", which are bridges of cold. If you have just such a material, then it can be mixed with clay and such "concrete" to fill the voids between the main and auxiliary walls. In this case, the filling is carried out gradually, the lower layer is allowed to grab, otherwise a large mass of the composition can squeeze out the inner wall.
Video: sealing gaps between logs with foam
Only half the battle has been done, since it is not enough to eliminate drafts to maintain an acceptable temperature inside the room.
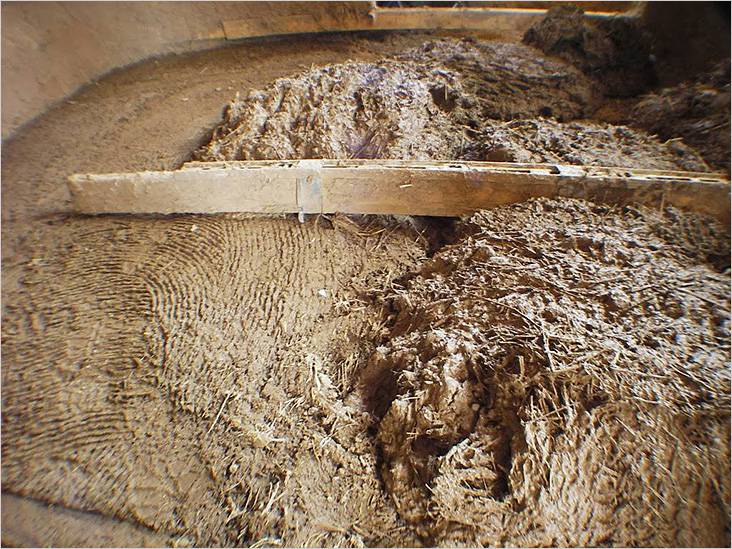
Warming with clay with sawdust
We will not insulate a log shed using the same technology as a wooden house. There is another method, which is also very effective, but is no longer used in modern houses - clay mixed with sawdust.
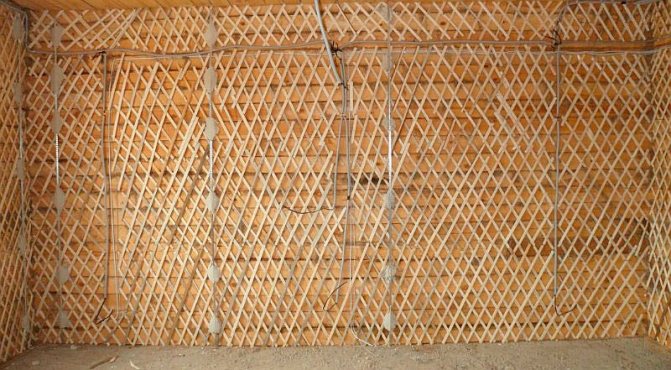
Of course, we will not apply the clay to bare walls, since with this kind of work it will simply fall off, but first we will fill the shingles from the rails.
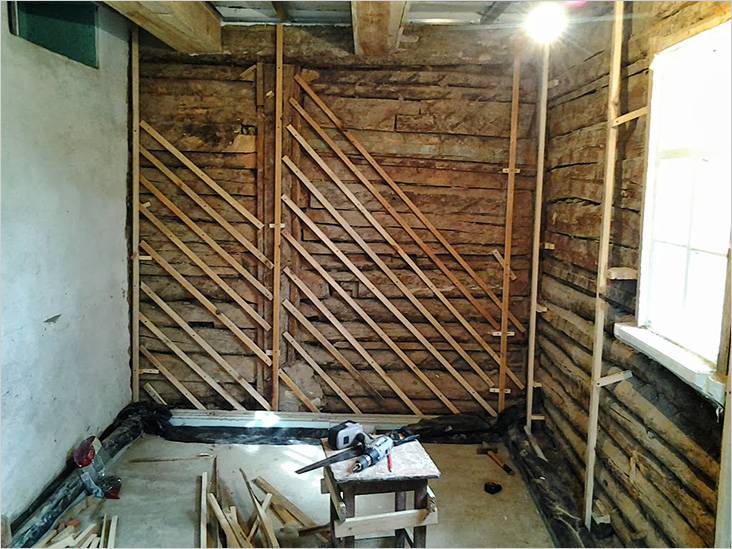
We nail shingles to the walls
The first layer of battens is nailed diagonally in one direction, and the second layer in the opposite direction.
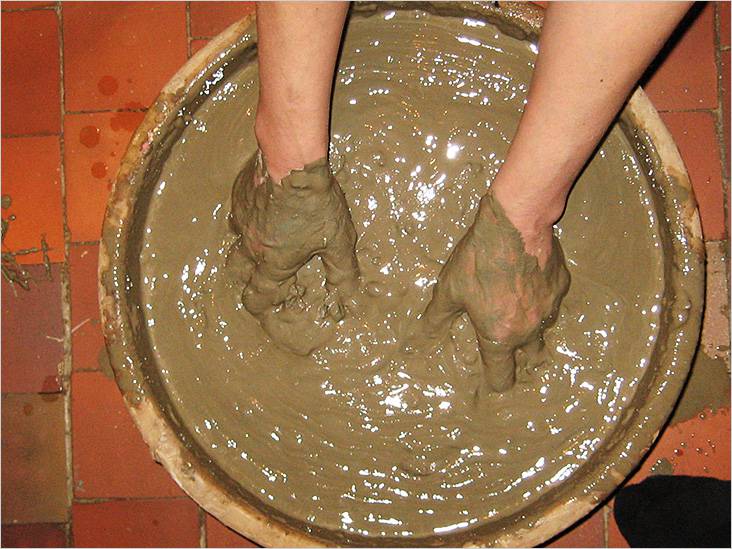
Clay must be diluted to the state of sour cream
Having finished with the shingles, we will soak the clay for half an hour so that there are no lumps left in it, and the mass itself turns out to be pliable and plastic.
If the clay is very dry, then it is better to fill it with water a few days before the start of the insulation process.
Sand can be added to the greasy clay in a 1: 1 ratio, and then, after mixing, add hay. To prevent rodents from settling in such plaster, slaked lime is added to the solution. Instead of straw, some use reeds, which are too tough for mice.
Now you can use the prepared solution, applying it to the wall in a layer of about 5‒7 cm. A thicker layer will crack. Basically, the plastering of the wall is done. The solution is poured onto the surface and then leveled. The corners do not need to be made straight - it is better to leave them rounded, adding a little mortar in these places.
Depending on the season, the drying rate of the plaster may vary, but it should still take a few days until the wall is ready. The process should not be accelerated, as this will lead to the appearance of numerous cracks. Even with the most correct approach to performing the work, a number of cracks will appear, but this does not matter. Prepare a solution of sand and clay (2: 1), and then rub all the flaws with it.
At the end of the work, the walls can be whitewashed with slaked lime - the view will become more attractive and protection from rodents will be provided.
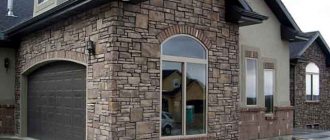
Stone or brick shed
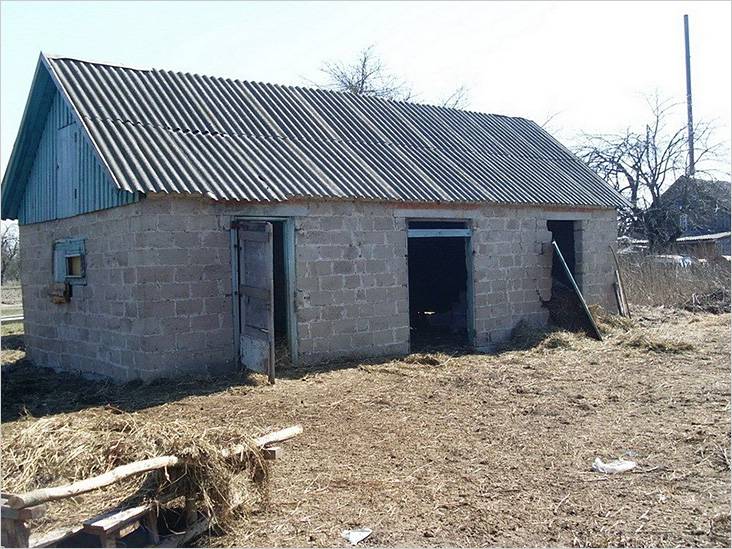
Whether it's a brick or stone shed, its thin walls freeze through and through in winter. There are many options for insulation, but many of them will cost the owner a lump sum. In addition, the approach associated with the conversion of a barn for animal hibernation is somewhat different. For example, the use of Styrofoam can lead to increased humidity, and chickens will peck it out, so additional protection will be required.
How to insulate a chicken coop, shed, shed cheaply
In winter, chickens can lay no worse than in the warm season. If they are warm enough (the ideal mode is from -2 ° C to 20 ° C), there will be enough light and good (not excessive, but balanced in composition) nutrition, the number of eggs may be the same or slightly less. Plus, knowing that your bird is warm, you don't have to worry.
A warm shed for chickens and lighting is what is important for their normal well-being.
Immediately about the size of winter chicken coops. The norms for placing poultry in the room are recommended as follows: from 2 to 5 chickens per square. If the size of the area is cramped, you can "populate" the house more densely. You just need to make more nests and perches. They can be arranged in rows, one above the other. Laying hens feel great in multi-tiered small rooms. With broilers, of course, things are worse - it's hard for them to climb up, but they are rarely kept until winter.
Winter walking is also needed: down to -15 ° C, laying hens can walk outside. Only in calm weather. With height, too, everything is more or less clear. A meter and a half height is enough for chickens, but you need to do so that it is convenient for you to serve the room.
What to build from
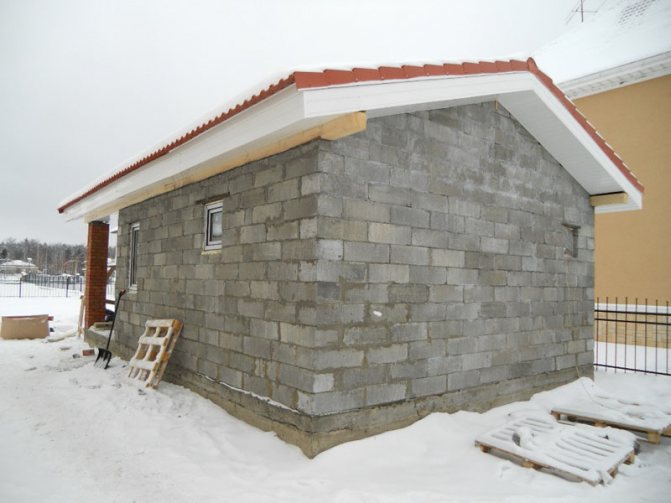
You can inexpensively build a chicken coop from cinder block, foam concrete. If there is a place nearby where there is clay, you can drive out the walls using adobe technology (hut or dry bricks).
If you need a budget warm chicken coop, you can make it like a dugout. The walls can be brought out half a meter above the level, in the south, well-insulated windows with double or triple glazing can be made. It is good to insulate the piece that protrudes above the ground and the roof. For warmth, all walls, except for the southern one, can be covered with earth. If the top is still covered with snow, it will be quite warm.
Those who are seriously going to engage in poultry breeding should think about building a chicken coop from foam concrete: it is light, warm
Another, perhaps, the most popular and economical option is a do-it-yourself frame chicken coop. Since the rooms are usually small, the timber for the frame needs a small section and it does not take much. You can sheathe the frame with a board, plywood, OSB and other similar material. Lay insulation between the racks and sew on the other side.
To prevent mice from settling in the insulation, the people came up with the idea of covering the insulation on both sides with a metal mesh with a fine mesh. This makes the building somewhat more expensive, but fighting the mice is more expensive. It turns out a warm chicken coop and the thickness of the insulation depends on the region. You can focus on the recommendations for the construction of frame houses.
A chicken coop from a log or from a thick bar can do without insulation in the middle lane. Only the caulking seams need to be sewn up with slats. Not so much from drafts as from chickens: so as not to pull the tow or moss.
There are options. They build most often on columns - they make a columnar foundation. It happens - they make a shallow pile or tape.But this is in the event that a heavy material is chosen for the walls, or that requires a rigid base: brick (ceramic, silicate, adobe), foam and slag blocks, shell rock, etc.
These are the posts for a frame shed for chickens
In the case of a columnar and pile foundation, the supports are placed in the corners and after 2-3 meters in the interval between them. The load on the base will turn out to be small, therefore they are rarely very zealous.
Warming
Warming and heating - these two issues are very closely related: in a warm chicken coop, even in severe cold weather, you can do without heating. There are many examples. No matter how economical the heating is, as a result it flies into a good penny. Therefore, it is much more cost-effective to build a well-insulated barn right away than to pay annually for heating it later.
Any modern materials can be used as insulation. You can stuff them from the inside or outside. The main selection criterion is most often the cost. The most optimal is polystyrene. It is inexpensive, has excellent thermal insulation: a 5 cm thick slab replaces a 60 cm brick wall. It is mounted on glue or with long nails with plastic washers, you can put pieces of some kind of plastic.
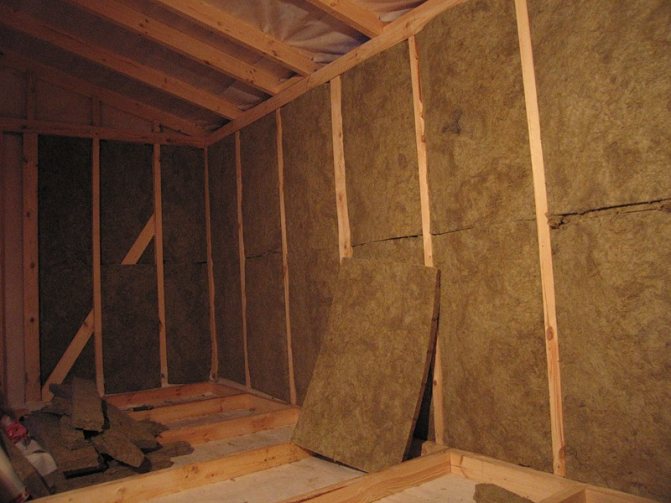
Insulation of a chicken coop with mineral wool
You can also use mineral wool and expanded polystyrene. But mineral wool requires membranes on both sides. Outside, they put a wind-hydro-protective one with one-sided vapor permeability (vapors should be removed from the insulation). From the inside (indoors) it is vapor-tight.
Styrofoam is definitely good. Performance is even better than foam, even mice don't like it. But it's expensive. But, you don't even need to sheathe it: the plates are even, smooth, there are also colored ones.
You can also use natural insulation: hammer between two planes with sawdust, coat with clay mixed with sawdust, etc. In terms of heat conservation, such insulation is inferior to modern materials, but it costs practically nothing. So these methods are also used. For the southern regions with mild winters, "folk" warming is more than enough, but even in the central part, and even more so in the North, they are probably not enough.
It was about the walls. It is imperative to insulate the ceiling in the hen house: warm air accumulates under the ceiling. If it is not insulated, it will always be cold. If you knock out the bottom with cardboard (it keeps heat well) or any board material (plywood, OSB, fiberboard, gypsum fiber board, etc.), and put sawdust on top of the attic or lay hay, it will become much warmer. And if you insulate it according to all the rules, it's generally excellent.
The insulation of the floor is done according to the same scheme as for the house: a rough floor, on it - logs, insulation between them, on top of a final floor. Make it as warm as possible: you won't regret it.
Not everyone makes a wood floor. There is also adobe - the clay is mixed with straw and allowed to dry, or concrete. The coldest is concrete, but if you pour enough sawdust, it will be fine. And if, all of a sudden, you still make a concrete floor with insulation (even if the bottles are bricked up), it will be generally fine.
We suggest you familiarize yourself with: Ferrets at home (65 photos): how to care for animals at home? Pros and cons of content. How to train to the tray? Owner reviews
Option for floor insulation in the hen house
When you are still planning a winter chicken coop with your own hands, consider the presence of a vestibule. This small extension allows you to significantly reduce heat loss, which means - reduce heating costs.
The internal arrangement of the chicken coop is described here.
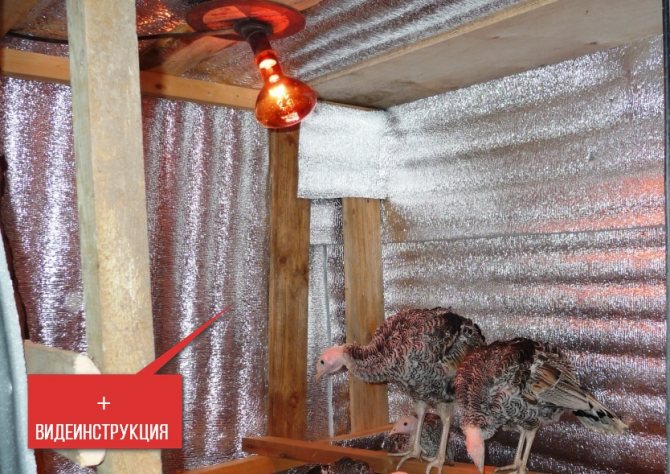
Heating
It is difficult to overestimate the importance of properly arranged heating for a winter chicken coop. All owners of poultry houses know this: at above-zero temperatures, laying hens feel great and rush well in winter.
Often, in a subsidiary farm or on a small farm, it becomes necessary to insulate premises, buildings where animals and poultry are kept.Usually these structures are not permanent, made of board panels, plywood.
The purpose of insulation is to maintain a positive temperature throughout the winter without heating or with its minimum power - up to 2 kW for a building of about 30 square meters, and also so that insulation is extremely cheap. But that doesn't mean bad. Savings occur on finishing, "brand" materials, fastening structure, and also because it is done by hand.
Housekeeping has become a real fashion trend today. The diet of a successful farmer includes vegetables and dairy products, as well as eggs and poultry. In order to eat fresh eggs and poultry meat all year round, it is necessary to properly insulate the house for laying hens, providing them with a comfortable winter. The temperature inside it must not be allowed to fall below zero degrees. This will cause serious inconvenience to the chickens. In this article, you will learn how to insulate a chicken coop for the winter.
How to insulate a chicken coop
The content of the article
Floor insulation
You should start insulating the chicken coop from the bottom of the room. A mat should be placed on the floor of the building. At this stage, you will not be able to save money. It is possible to make the layer small, but this will definitely reduce the final thermal insulation efficiency. The deep bedding will provide a very comfortable temperature for birds between about 25 ° C and 28 ° C.
Floor option in the chicken coop
A wide variety of materials can be used as insulation for your chicken coop.
Often on a small farm or in a subsidiary farm, for the winter, it is required to insulate a room that contains a bird or animals. Most often, such buildings are made of lightweight materials - plywood or board panels. Of course, such walls cannot withstand the winter frosts. Insulation of the chicken coop is very important, it not only allows you to maintain the required temperature, but also reduces the amount of electricity consumed for heating. So, how to insulate a chicken coop with your own hands?
So, how to insulate the chicken coop so that the chickens do not get sick and endure the winter well? Natural materials are most often used on the floor - straw, hay or wood shavings.
It is better to insulate the habitat of chickens with natural materials.
So that parasites do not start in the soft flooring, it must be treated with a special compound. For this you will need:
- lime;
- boric acid;
- copper sulfate.
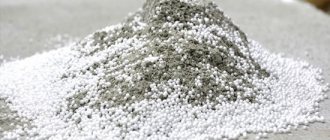
A mixture of lime, boric acid and copper sulfate for insulation
In order to insulate the shields with shavings, straw or hay, you need to make the mixture stronger by adding cement in a ratio of 1 to 10. Antiseptics are added to the resulting solution, and then everything is mixed with the required amount of insulating material. This mixture should be placed in the shields until it is dry. When the insulation hardens, it will become strong enough.
We put the mixture in the shields
If you are using straw or hay, it is advisable to use materials about 30 cm long. Such material will better keep the hen house warm.
Straw from 30 cm long
Instead of natural materials, foam plastic can be used as insulation, it is quite cheap and easy to use. However, there are some nuances here - because of the foam, the vapor permeability of the walls is disturbed, and the wood begins to rot, and eventually mold. However, for the chicken coop this is not such a serious problem.
We insulate the ceiling
The ceiling can be insulated both from the inside and from the attic side (if any).
From the attic
Insulation of the ceiling with sawdust
A plastic wrap is laid on the attic floor. If its size is not enough to cover the entire span from edge to edge, so that it goes onto the walls, then you can overlap it, gluing it together with tape. If you do not take care of the vapor barrier, then the insulation will soon get wet, and there will be little use from it. It remains to pack straw or sawdust, and the cold from the attic will not penetrate into the shed.
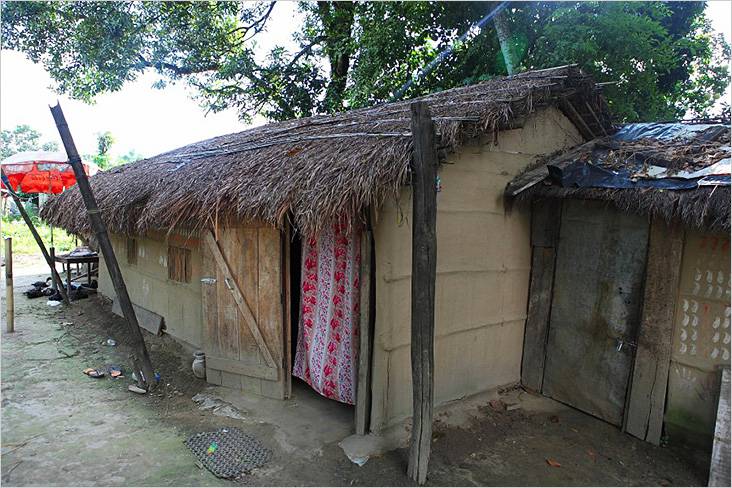
The roof of the barn is covered with thatch
Video: ceiling insulation with sawdust
Internal works
Not every shed is made with an attic - many are simply covered with slate or other roofing material. In this case, the insulation can be attached to the beams (make a rough ceiling or fix the lathing).
Video: ceiling insulation from the inside
It is advisable to know before construction what the shed will be used for, to foresee a method of insulation in advance and implement it.
Barn and household insulation options. buildings
- The best option is to build two parallel walls with space for insulation;
- The roof as well as the walls must be insulated. To do this, you need to lay the insulation on the logs and press on top with boards. It is necessary to make a sloping roof so that moisture does not penetrate inside;
- To prevent the cold from coming out from the ground, you can put wooden pallets with straw on the floor.
This method is the cheapest, since everything can be made from scrap materials, and no special skills are needed.
If you decide to remodel an old barn for the winter, there are several ways to do it.
Planking
The easiest option is to make a second wall of planks with space for insulation. In this case, the boards will need to be overlapped to avoid gaps between them.
As you can see in the photo, to form a wall without gaps, two boards are first nailed with a retreat, and then it is closed on top of the third.
Edges that are too curved can be trimmed in advance with a circular saw.
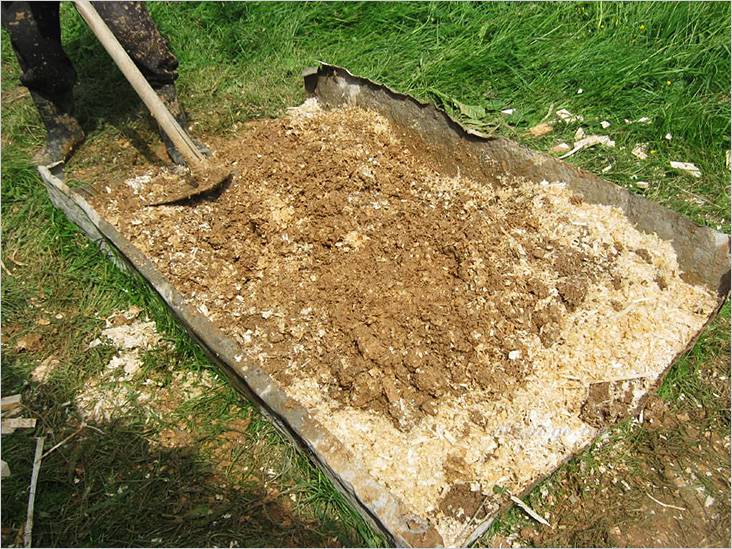
In the process of erecting the wall, you need to fall asleep in the resulting compartment with insulation. Sawdust is well suited for this, but sometimes dry fallen leaves and pine needles are also used. The advantage of sawdust is that they are small, dry, and the price is practically zero, they can be obtained in any carpentry workshop.
To avoid rodents between walls, mix sawdust with hydrated lime ("fluff") in proportions 25 to 1.
Pour the materials onto a wood or metal backboard and stir with a shovel.
The sawdust insulation layer should be 20-30 centimeters thick on the walls, ceiling and field. You need to fill them up in layers and tamp them constantly. After that, you need to give time for the sawdust to sit down, it is advisable to add more after 1-2 weeks.
The ceiling will need to be hemmed and sawdust filled in in the same way. To obtain a box for insulation, you need to make a false ceiling, filling the second layer of boards over the rafters. From above, they are covered with roofing material and nailed every 50 centimeters.
To protect it from rodents in the lower part of the barn, you can shield the walls with slate on both sides. The floor is insulated by pouring a layer of soil 10 cm above the main one, and then clay is poured and compacted from above. The main thing when insulating is not to allow moisture to penetrate into the sawdust, otherwise they will quickly begin to rot.
To make a warm door, the boards are knocked off diagonally, and roofing material is inserted between them. With this design, you will keep the heat inside the room as much as possible.
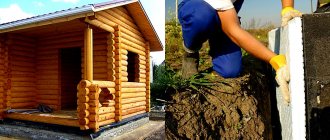
Shingle wall cladding
If money is tight, but you want to get a warm utility room, then the walls can be sheathed with shingles:
- To do this, you need to nail the slats diagonally, first in one direction, and then in the opposite direction. Reiki can be replaced with goat willow branches, then the clay layer can be made thicker;
- To apply clay to shingles, you need to prepare a solution. Soak the clay with water until the consistency of sour cream and gradually add sawdust or straw, achieving the desired consistency. Do not apply the solution right away, but let it stand for a while;
- Start work from the bottom, applying a clay mortar with a thickness of at least 3-5 centimeters. Throw it in and level it with a spatula. The layer should be even, pay special attention to the corners - you can increase the layer on them by rounding them;
- After the clay plastering, the walls should dry within a few days;
- Cracks will appear, which can be repaired with a solution of clay and sand, mixing them 1 to 2;
- Then you need to whitewash the walls with lime.If you work in the cold season, it is better to use slaked lime, as it will heat up on contact with water, but then be especially careful about safety precautions.
Lime Instruction: Dissolve the quicklime granules in half a bucket of water.
In just a minute, the reaction will begin and the solution will be very hot.
After that, fill the bucket with water to the end and add a spoonful of salt;
- With the same clay solution, fill up all the remaining gaps in the ceiling and floor. To insulate the ceiling, make a box of boards and bars, and fill it with clay and sawdust with a layer of about 10 cm.
This method is quite laborious, but does not require money.
Insulation of the barn from the inside
The next method is to insulate the shed from the inside, it will suit you if the boards on the walls are more or less even and without cracks. It can be called the most expensive, since it requires the use of purchased materials, in contrast to the previous two options. But on the other hand, the appearance will be more or less beautiful, you can even convert the shed into a workshop.
Usually, mineral wool is used for internal insulation, which is tightly packed into cells made of bars. As well as the insulation of the loggia and the facade, in the shed you need to protect the insulation from moisture with a layer of vapor barrier with foil. Also, for insulation from the inside, you can use foam, sprayed foam.
How to build a warm barn - the right approach to the question
Let's first consider the ideal option - building a poultry shed for all requirements. Experienced summer residents recommend building a poultry shed from foam blocks and aerated blocks - in this case, the room will not have to be insulated. The disadvantage of this method is unnecessary financial costs. How to build a warm barn with minimal costs?
You can make wood concrete yourself - blocks of mixed wood chips, sawdust and cement. The only cost is the purchase of cement. It will need no more than 10% of the sawdust mass, for one cube of finished material - about 250 kg. The advantages of wood concrete in construction are obvious - the room can be built on a lightweight foundation, it will not need to be insulated, the shed can be made spacious and high due to the cheapness of the finished wood concrete.
But with all the advantages, there is also a drawback - arbolite does not tolerate moisture too steadily, therefore, it is recommended to plaster it from the outside or upholster it with a waterproofing material, for example, the same roofing material.
Inside, the floor can be made of wooden planks - the material itself is quite warm. Do not forget about the roosts - you can use old wooden boxes filled with straw. If there are many chickens, they can be arranged in several levels. By the way, one of the ways to insulate the shed from the inside is to increase the number of chickens themselves, so if you build a large room, then you can have more chickens. We figured out how to make a warm shed with our own hands!
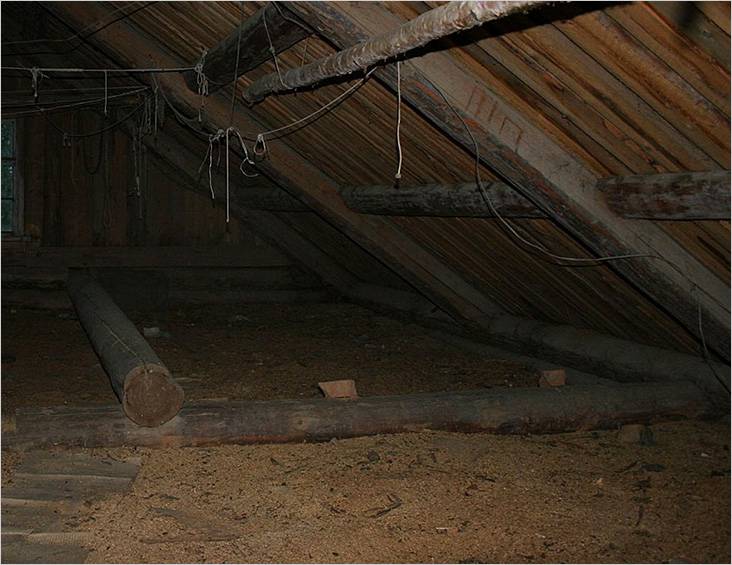
In the photo - the insulated roof of the barn, uyutniidom.com
In the photo - brekhoff.livejournal.com, brekhoff.livejournal.com
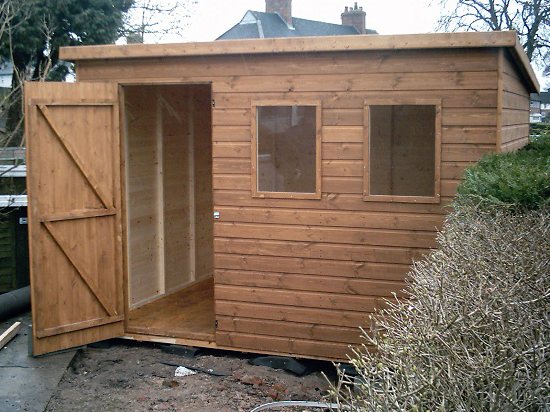
Photo of a barn before insulation, stroy-shkola.ru
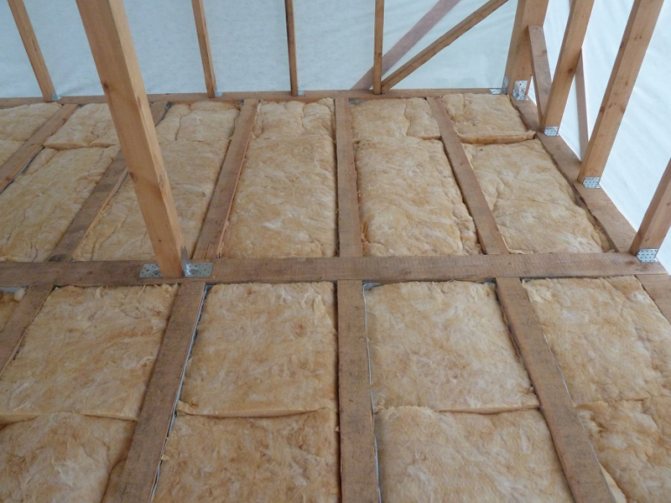
Photo of roof insulation, land.umonkey.net