A profitable option for a steam room
A competent choice of a heating stove is the most important stage in the construction of a bath. Both the quality of the steam room and the comfort of relaxation in the dressing room will depend on this. By heat transfer, all stoves are divided into wood and electric. As the statistics of user reviews show, electric sauna stoves are the most popular, as they are much more convenient to use.
In addition, electric ovens are highly functional. When using them, you do not need to constantly think about putting firewood or other fuel, there is no smoke and soot during. Due to its lightness and compactness, even in the smallest steam room, such a unit will not take up much space.
Modern electric stoves are good not only because they are very ergonomic, but also because they do not require the installation of a chimney. In this regard, the installation of such furnaces will be much cheaper. Since the oven has a wide temperature range, it can be adjusted to suit your needs.
Installing an electric stove in a sauna with your own hands will save money on installation.
The principle of an electric sauna cabin
The design of the steam room is so simple that it is assembled with several working tools and fasteners. A saw, a hammer (screwdriver) and nails (screws) are the key to half the success, and you can even cope with the installation alone.
Installation materials
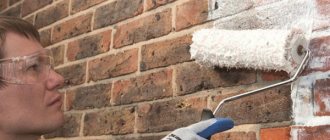
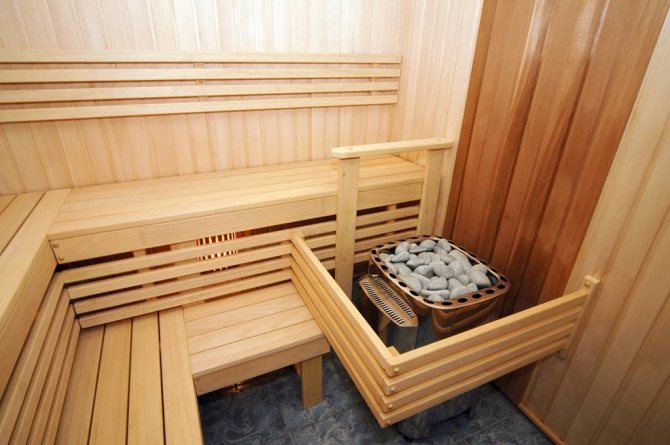
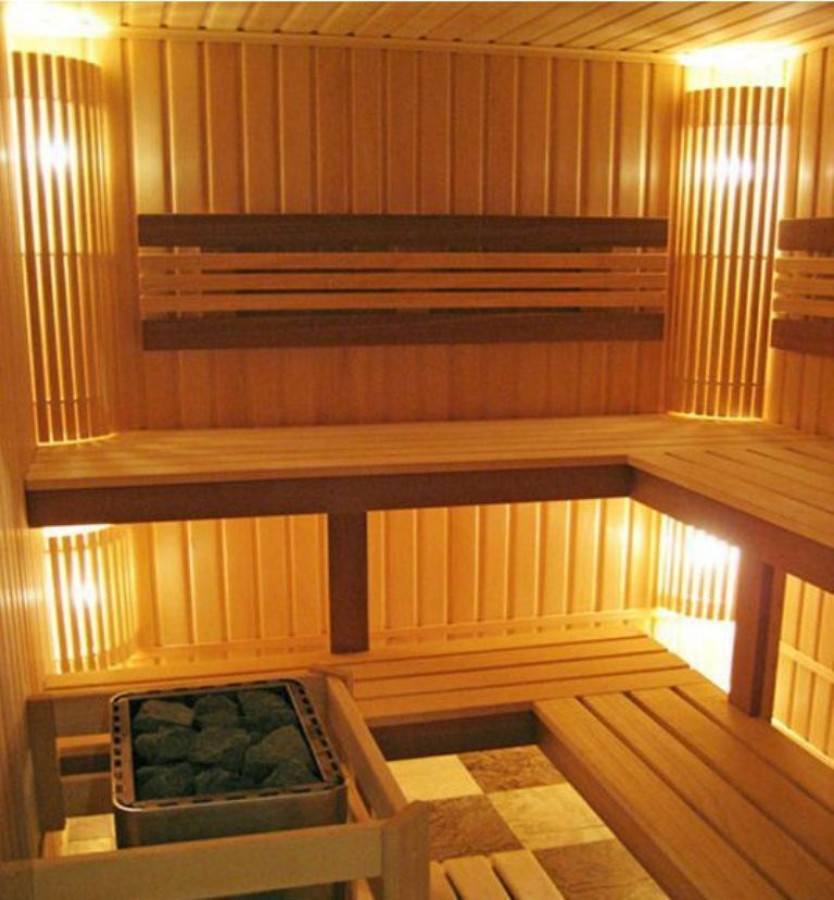
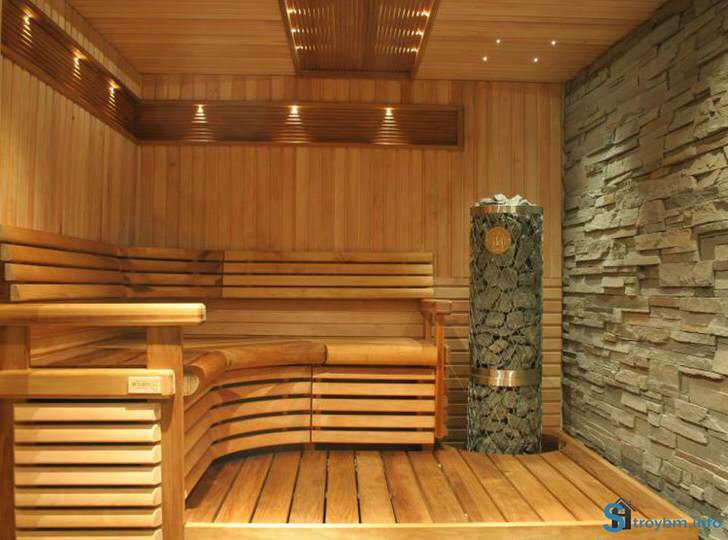
The sauna room is made of wood. Slats are sewn onto a frame made of timber and a wooden lining is attached to them. The decorative elements of the cladding are aspen, cedar, or pine wood. The outside can also be sheathed with compressed wood.
It is advised to carry out all the decoration from wood in the steam room - walls, ceiling, and even benches. For the latter, the best option is abasha wood with low thermal conductivity.
As for the steam room door, it is also made of wood, with a gap of 2-3 centimeters to the floor - for full air circulation. For safety reasons, the sauna door must only open outwards!
Steam room air exchange
As for the sources of ventilation, there should be two of them in an electric sauna - a supply one and an air outlet. The hole size is small. Some people prefer forced air exchange with built-in electrical forced ventilation. But, in the presence of a normally functioning natural system, fans are impractical, unless only for quick drying of the electric sauna cabin after use.
An important parameter of the cabin
Maintaining the correct temperature / humidity ratio in an electric sauna is imperative. In it, the temperature of the upper layers of human skin reaches the maximum permissible +50 degrees Celsius, but such a temperature can be tolerated only when the air mass is stationary. The sharp currents of hot air in a dry sauna will cause burns on the body. In order to prevent intense convection, the room of an electric steam room is made no higher than 2.1 meters - then the humidity of the sweat secreted by the skin is enough to cool the body.
Thermal insulation
An electric sauna is installed indoors at a distance of at least 5 centimeters from the wall to avoid condensation and the formation of mold or mildew.
Walls and ceilings made of wood are insulated with mineral wool, fiberglass or cork insulation. Tightness must be observed in everything, including the door to the electric sauna cabin. Maximum thermal insulation is achieved by a three-stage door leaf.The glass door is treated around the perimeter with a silicone seal.
Light in the steam room
High temperature and humidity in the room excludes bright lighting. Electric light should be dim and diffused (light bulbs up to 60 W). Better that the light source is not visible, place it either on top or under the benches.
Lamps must be used heat-resistant.
Materials and tools
When they talk about making an electric fireplace with their own hands, they first of all mean the independent design and assembly of the portal by the user. The hearth in most cases is purchased in a store.
As stated, a portal is just a box with a decorative cladding. It is not exposed to high temperatures, even if the electric fireplace is equipped with heaters, therefore, almost any sheet material can be used as frame cladding:
- drywall;
- plastic;
- aluminum panels;
- steel sheets in a polymer sheath or painted with powder paint;
- glass;
- chipboard and fiber boards: chipboard, fiberboard, OSB, MDF (can be produced in laminated form);
- plywood;
- board: solid or parquet (multilayer).
The portal can also be laid out of piece materials - brick or stone, but due to their massiveness and high cost, these options have not gained popularity. Usually a frame is built, and in most cases drywall is used for sheathing. This is a rather tough material, it holds its shape well, at the same time it is easy to process, has a low weight and, most importantly, allows you to use a rather spectacular-looking cladding.
Decorative gypsum stone for portal cladding can also be made at home
Another useful feature: if you make a perforation in cardboard with a needle and moisten a gypsum core through it, then a curved surface, for example, an arched vault, can be made from a rigid flat sheet.
With regard to plywood and solid boards, these materials should be used with caution. The constantly circulating warm air can cause them to dry out with subsequent deformation. This also applies to the frame if it is made of bars and strips.
Factory production is not the only option. In a simple version, you can reproduce it yourself, although, of course, a homemade product will look less attractive.
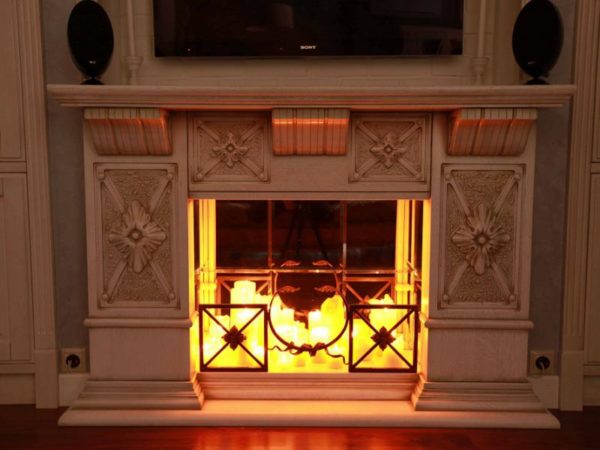
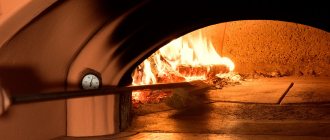
Using candles in the fireplace, you can create a real living fire
Instead of an electric fireplace, you can install in the portal:
- Electronic photo frame with a picture of a flame. A more interesting option is a photo frame with the ability to play primitive animation, into which you need to load a "cartoon" with dancing tongues of fire.
- If the costs do not scare you, you can go even further: install a small TV in the portal that plays video from a flash card, and record a video for it with a real fire.
- The image of fire together with a system of mirrors, thanks to which the observer sees the volumetric illusion of a flame.
We suggest that you familiarize yourself with: How to make a door from boards yourself
Instruments
What tools need to be prepared:
- plumb line and building level (for installation without distortions);
- scissors for metal or a grinder with a thin cutting disc;
- stationery knife;
- spatulas;
- sandpaper;
- screwdriver or screwdriver.
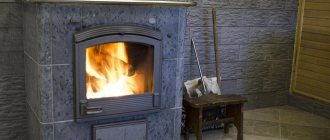
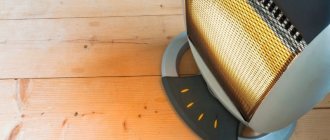
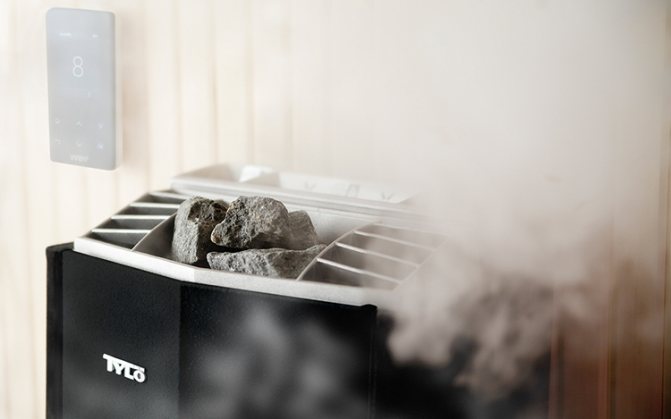
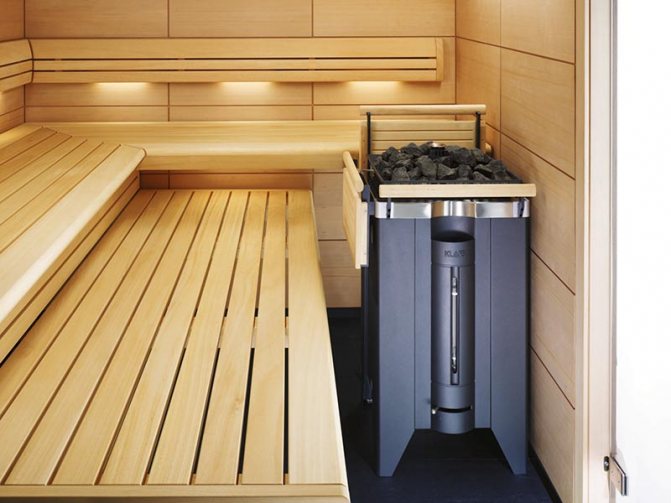
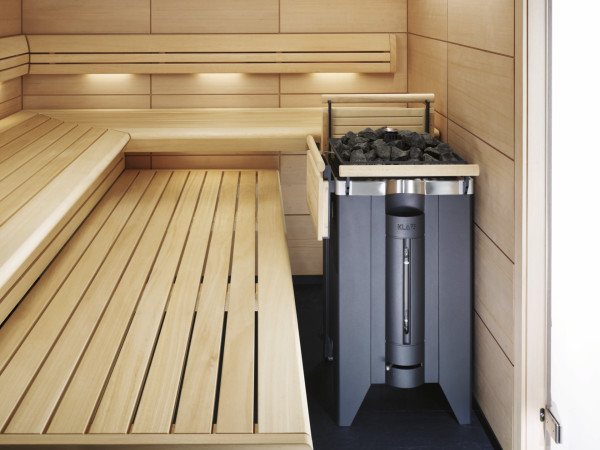
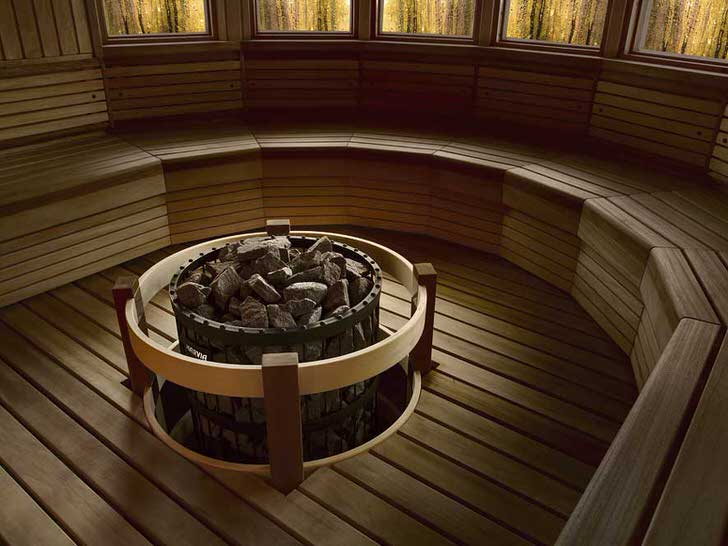
Heating device for electric sauna
The electric sauna is characterized by maximum safety, simplicity and ease of use. The temperature regime is easily set using the electronic control, the set temperature and humidity are maintained automatically.
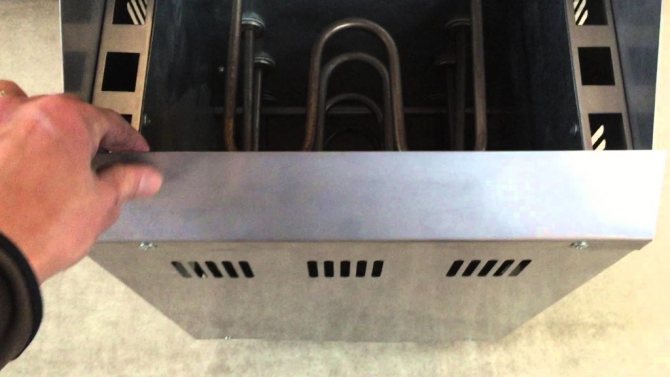
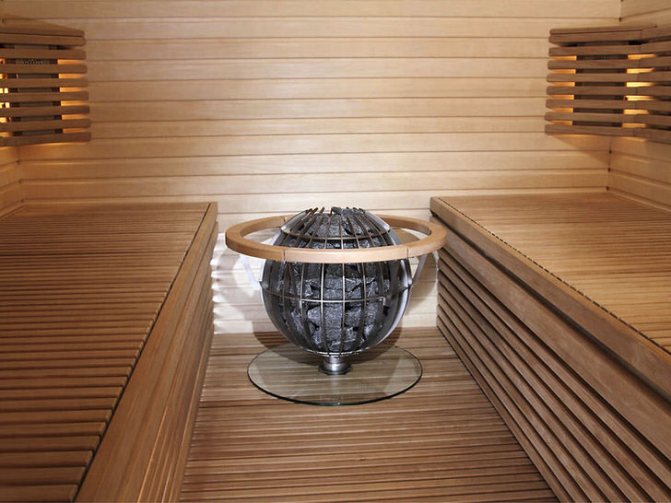
The operating principle of the oven is convection. The stove is capable of heating the air up to 80-95 degrees Celsius in an hour. The built-in heating element heats up the stones, which are laid in a compartment of the furnace specially designed for them.
The heating element is reliably protected from moisture. It does not burn oxygen like infrared heaters, the heat from it is distributed more evenly and the effect is softer.
The stove body is usually made of metal. A well-made stove does not heat up the outer casing, and you cannot burn yourself on it.

Preparatory stage
Before you start making a false fireplace, you need to think over its installation location and power supply.
Seat selection
Work on the creation of a homemade electric fireplace must begin with choosing a place for it, since the shape of the portal will depend on this. Options to consider include:
- Wall-mounted location: this is the most preferable option - it is the wall-mounted electric fireplace that is most similar to the real one. But such an installation is possible only under one condition: the room must be quite spacious. In the wall-mounted version, the electric fireplace is made rectangular.
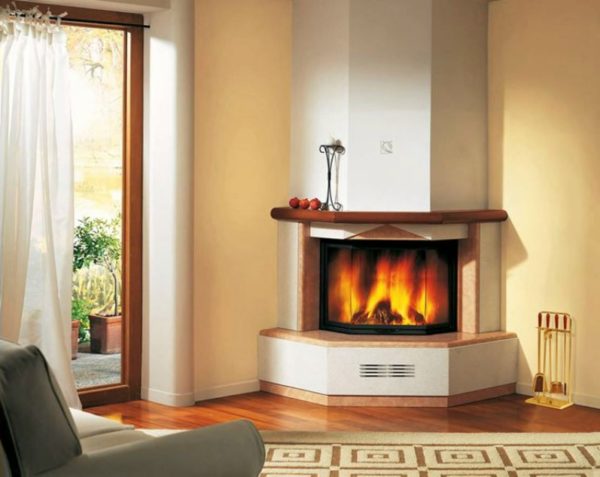
- Corner: this method is used if the room is of modest size. The corner is usually the least demanded area, so installing a false fireplace here has almost no effect on the amount of free space. The corner portal will no longer have a rectangular, but a triangular base.

A corner electric fireplace will not take away the useful area from the room - Hinged version: as you know, a floor-standing fireplace is considered a classic. But the mounted version will look good, provided that the space in front of it, at least a few steps away, is not cluttered with anything.
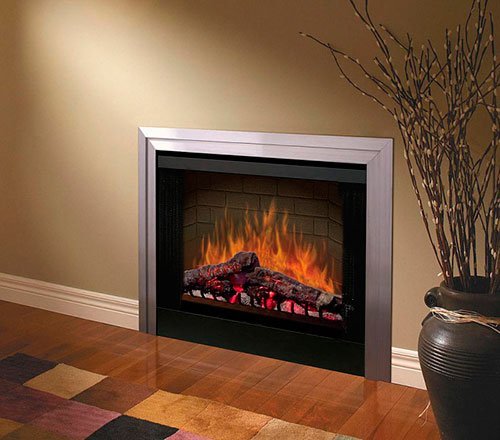
- Built-in fireplace. This option will significantly save space.
An electric fireplace built into the wall is ideal for small rooms.
If the problem of lack of space is so critical that none of the above options are suitable, the electric fireplace can be built into the partition or furniture. Especially for such tasks, "ultra-thin" hearths with a depth of only 7 cm are produced. By the way, it is worth considering, perhaps such an almost flat fireplace can be made wall-mounted.
Some users are faced with a problem: wherever you put the fireplace, it always ends up close to one or another piece of furniture - a table, sofa, pouf, etc. The way out of this situation would be to create a wall fireplace located at a certain height. In this form, it will not lose its decorative qualities. At the same time, at any distance from the wall and even under the fireplace itself, it will be possible to put a low piece of furniture.

Suspended electric fireplace saves space
Power supply
An important point: at the stage of preparation, you should think about the power supply of the hearth. So that the impression of the decoration is not spoiled by an extension cord stretched across the room, an electrical outlet must be fixed on the wall near the installation site of the portal. At the same time, it is useful to heed the following recommendations:
- You should not install the outlet so that it is inside the portal, although this option seems to be the most successful from the point of view of aesthetics. A false fireplace, like any other electrical appliance, is potentially dangerous, and the user must be able to quickly unplug the power cord in case of anything.
- It is better to install a socket with a switch. After installing the hearth into the portal, the standard power button will most likely be difficult to access, and it will be inconvenient to constantly pull out and insert the plug into the outlet to turn off and on the device.
We offer you to familiarize yourself with: How to knit a loofah with your own hands
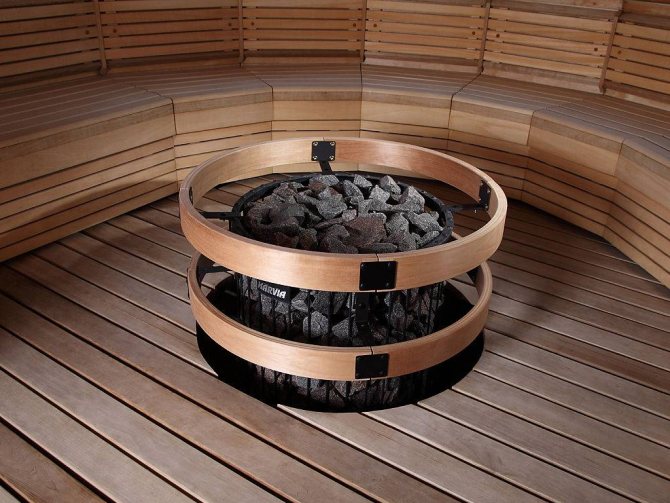
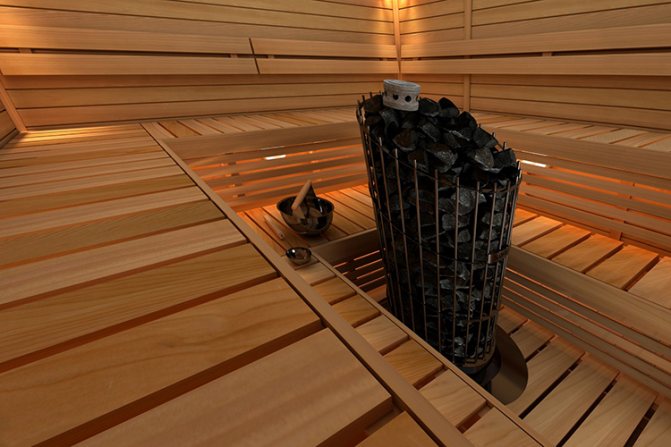
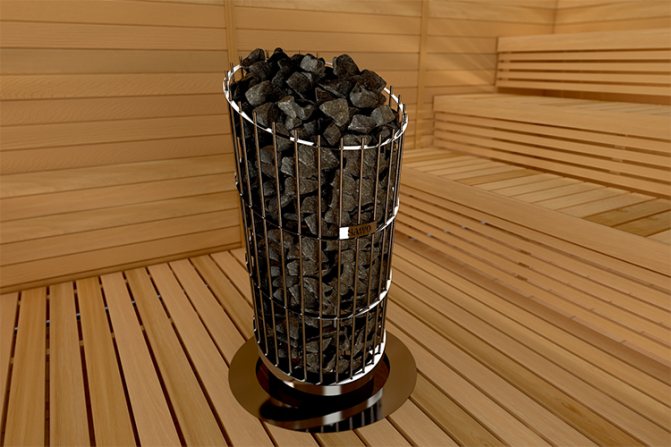
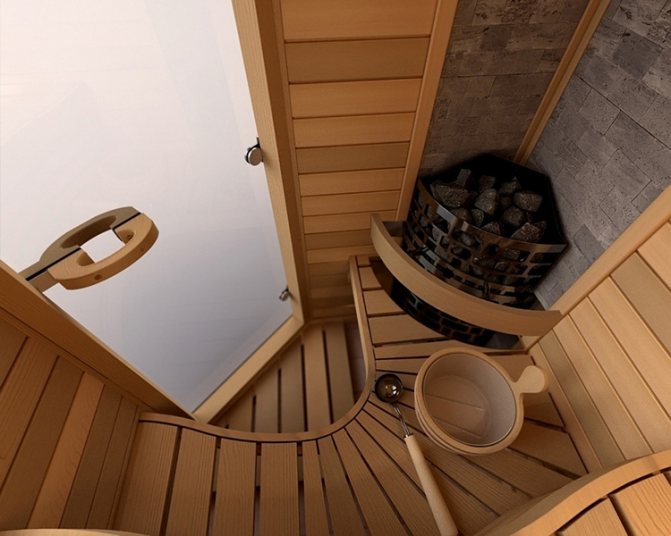
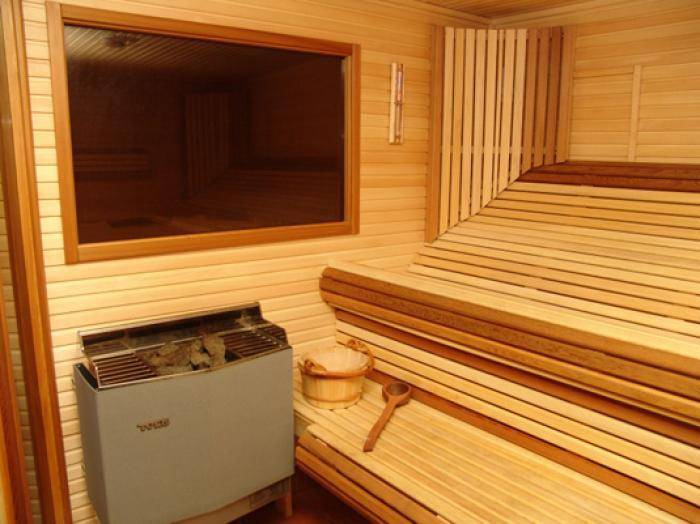
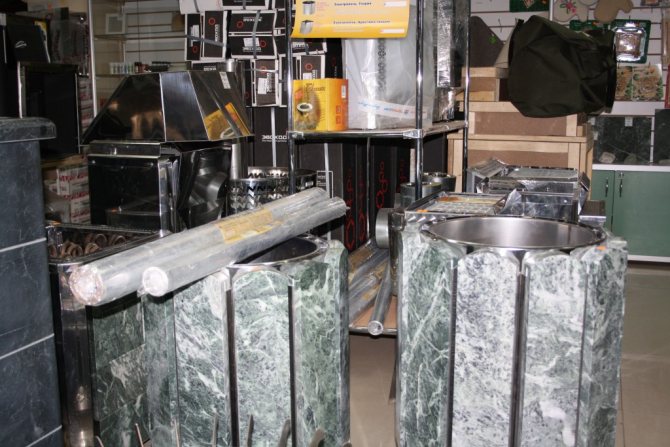
Sauna stones
An electric sauna needs special stones, which are placed in the gap between the heating elements as tightly as possible, but leaving space for air circulation.
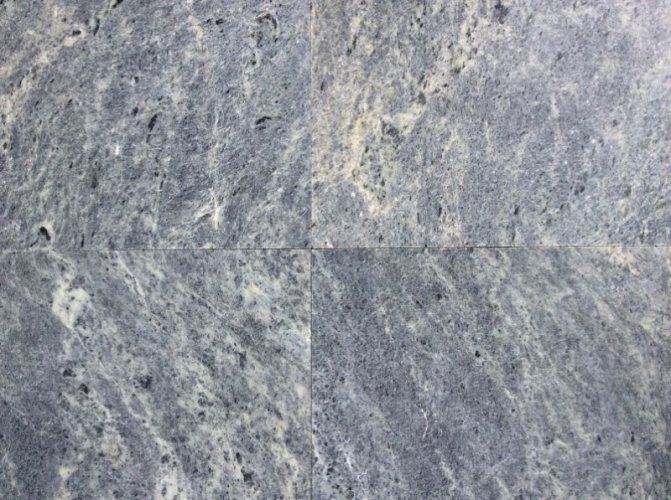
Not all stones will fit - a heat-resistant structure is required.The temperature of exposure to stones is very high, and ordinary stones can crack and even injure a person. Also, they should not emit harmful substances.
It is strictly forbidden to lay stones with a smooth surface and cracks. Only on an uneven structure is water retained and evenly evaporated.
The following stones are ideal for an electric heater:
- jade;
- volcanic peridotite;
- chipped talcochlorite;
- Scandinavian diabase;
- Karelian gabbro-diabase.
From time to time it is necessary to revise the stones in the furnace - to replace the broken and used ones for a long time. It is recommended to sort out stones according to the scheme: the frequency of bruising stones (per year) is equal to the frequency of visits to the sauna (per week). That is, if the sauna is operated every day, then once every couple of months the stones need to be sorted out.
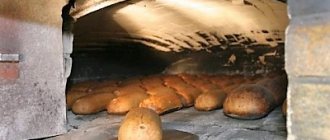
Making an electric fireplace: step by step instructions
The question arises, how to make an electric fireplace with steam with your own hands? Let's figure it out. Models of electric fireplaces are different and they are made from different materials. For example, such as: drywall, stone, noble wood species, chipboard, plywood and many others.
To create an electric fireplace with your own hands, special skills are not required, the main thing is to clearly follow the instructions
After all the preparatory work has been done, you can start making the electric fireplace itself.
The pedestal is a tabletop laid on a frame made of a metal profile with a height of about 50 mm. The worktop can be made from various materials:
- thick plywood or several thin plywood sheets glued together;
- solid wood or a shield knocked down from several boards;
- chipboard.
The most attractive worktops are made of laminated MDF (the board is enclosed in a plastic sheath). Such a product can be easily found on sale.
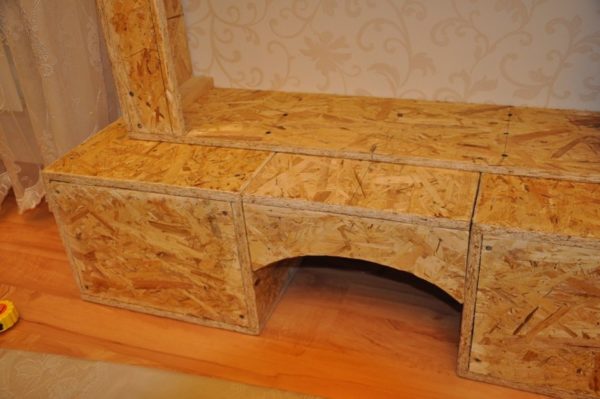
A pedestal for an electric fireplace can be made from chipboard
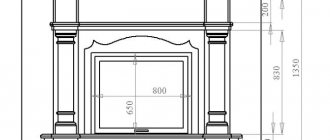
The worktop for the wall fireplace has the shape of a rectangle, for the corner fireplace it is a pentagon. In size, it should exceed the dimensions of the portal by several centimeters. As side walls around the pedestal, a plinth of the same color as the countertop is installed.
As already mentioned, the frame is best made from a metal profile specially designed for the installation of plasterboard structures. It is of two types:
- rack-mount (for the portal, you will need a variety with a cross-sectional size of 50x50 mm);
- guide (standard size 50x40 mm is applicable).
To fasten the sections of the profile to each other, special short self-tapping screws with a length of 11-13 mm, which are popularly called "bugs" or "seeds", should be used.
The installation of the frame is carried out in the following sequence:
- The section of the wall, which will be closed by the portal, is sheathed with a fire-resistant screen. In this capacity, it is better to use a sheet of tin with a lining of basalt cardboard, a less successful option is a layer of asbestos (it has carcinogenic properties).
- According to the drawing, markings are applied to the wall and countertop, while the vertical / horizontal lines are controlled by the plumb line and level.
- Using dowels (to the wall) and wood screws (to the tabletop), a guide profile 50x40 mm in size is attached according to the marking.
- A rack profile 50x50 mm is screwed to the guide profile using self-tapping seeds, so that the result is a parallelepiped.
The frame of the electric fireplace is best mounted from a metal profile intended for drywall - The frame is reinforced by installing braces from the same rack-mount profile in each side face with a step of 20-25 cm.
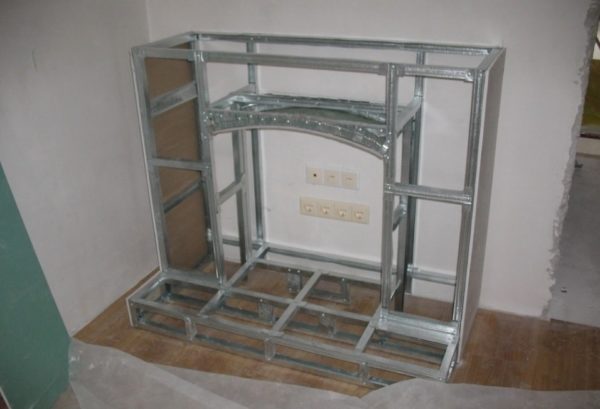
On the front side, sections of the profile are attached that limit the opening, and inside there is a frame on which the hearth will be installed (if such is provided for by the project).
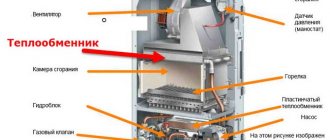
Installing a stone oven
The device is extremely simple to operate: it is connected to the mains, turns on, and the room starts to warm up. After reaching the required microclimate in the room, the heater automatically maintains the set temperature level.
Installation of the stove is elementary, but requires compliance with safety regulations. It is worth reading the instructions carefully. It contains simple rules that an inexperienced user will not always think about. For example, that you cannot install the stove on the aisle (you can get burned), or that you need to bring a three-phase network.
Decorating an electric fireplace
You can decorate the false fireplace portal with stucco molding, which is fixed with glue. If the frame and cladding are strong enough, use real plaster decor. It is better not to overload the drywall structure - use a lightweight imitation of polyurethane stucco molding.

A strong impression is made by the entourage created with the help of objects usually accompanying the fireplace. Tongs, a poker, a scoop for removing ash, a broom, etc. are hung on the portal or on the rack next to it. Some of these objects, for example, a scoop and a poker, can be placed next to the hearth - as if they had just been used.
Torch-shaped lamps can be hung on the wall on either side of the portal.
Another trick from the same opera is to install a woodpile next to the fireplace. It is a box, rather high, but shallow - the bottom is cut almost at the very top. Several real logs or dummies made of plastic or ceramics (sold in stores) are placed on it.
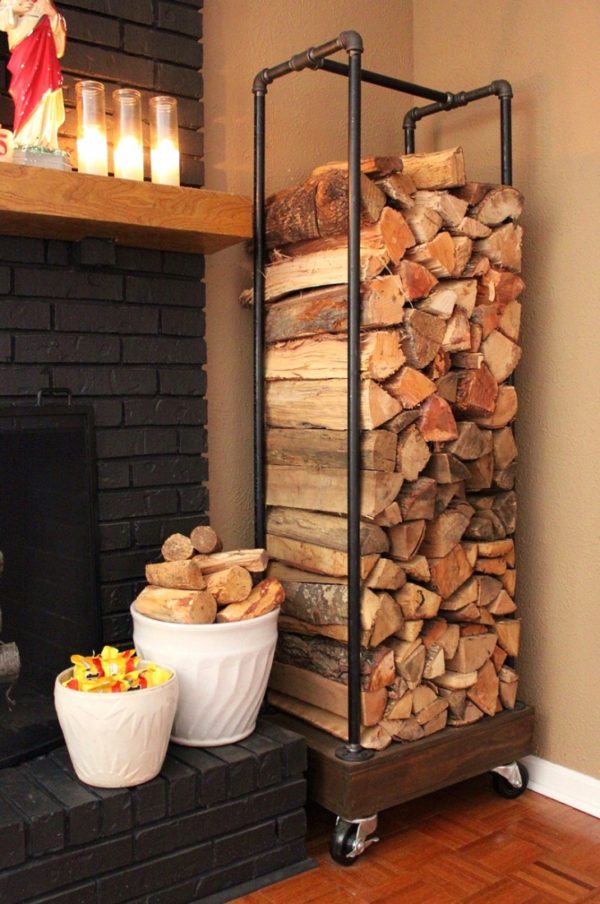
Woodpile entourage makes the false fireplace more realistic
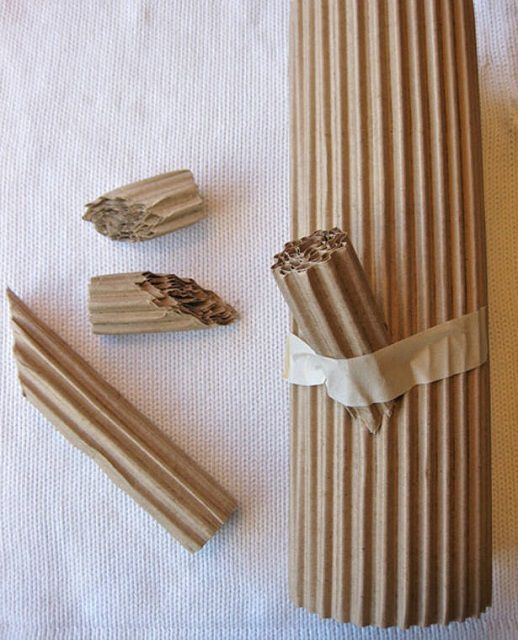
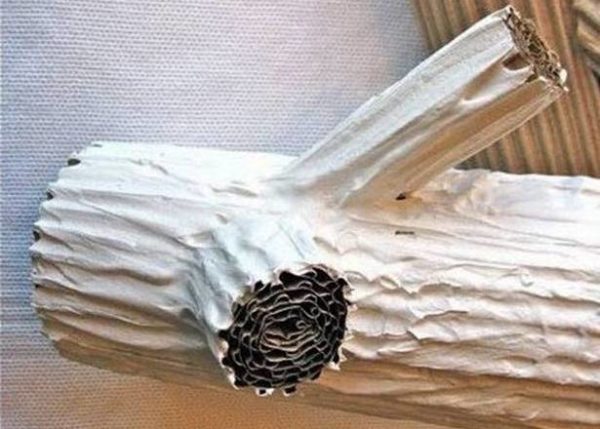
A fairly naturalistic dummy can be made by yourself, using corrugated cardboard as a material. Here's how to do it:
- Parts are cut out of cardboard, which are then twisted into cylinders of various lengths and diameters. Large cylinders will play the role of logs, with smaller ones - knots.
- Using a wide tape and glue, we attach the "knots" to the "logs".
Logs can be made from corrugated cardboard, very similar to real ones. - Ready-made dummies need to be painted and put in a woodpile.
To make cardboard firewood look realistic, they need to be painted
A fireplace, even a fake one, significantly enriches the interior, brings into it the enchanting atmosphere of ancient romance from the times of chivalry. But such a decoration will be exclusive only if the user makes it himself. We hope our ideas and tips will help you with this.
Heater electrical requirements, power
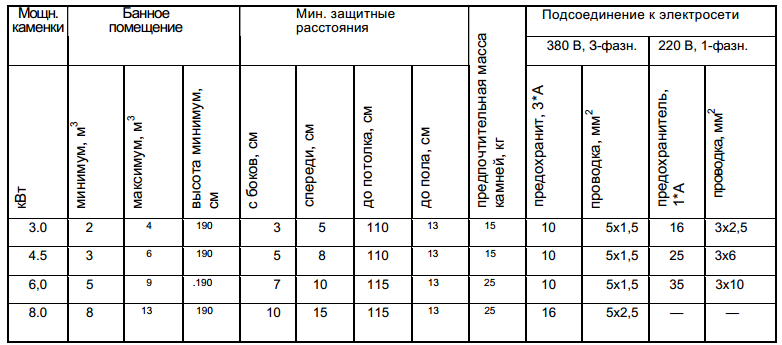
The general principle for calculating the power of a sauna stove is as follows: one kilowatt of energy is enough for 1 m3 of room volume. Usually, about 30% of the power is added to the resulting indicator, so that the electric oven will last longer and probably cope with its function.
Electric heaters up to 8 kW are connected to a 220 V network, while high-power ones (from 9 kW) require a three-phase network (380 V). This applies to saunas with a volume of 12 m3 or more - they require 9 or more kW, and a heater of this power is connected only to a three-phase network.
Electric heater, reviews
Bystryakov Alexey, Ufa
I have a domestic ECM in my bathhouse, I bought it because it is inexpensive and easy to maintain. I have been using the electric heater for almost three years, I have completely switched the heating of the bath to electricity and I am satisfied. There is no smoke or breath in the steam room, and it is safer with an electric heater, the neighbors have already repaired their wood-fired sauna twice.
Batalinsky Sergey, Zelenograd
I read reviews about the electric heater for a bath, I doubted for a long time, it turns out too expensive - to heat the steam room with electricity. Friends persuaded, they installed a Turkish electric heater in two hours. For two years of weekly operation, there was only one breakdown - the contact on the heating element burned out.I disassembled, irradiated all the contacts of the electric heater, and now, like what a holiday, so everyone gathers in our bathhouse.
Tags: fireplace, hand, sauna, own, electric
«Previous post
Features of electric heaters
When choosing an electric stove for a sauna, you need to clarify the following points:
- power sufficient to heat the room;
- heater dimensions;
- maximum amount of loaded stones;
- execution (corner, wall, floor, for installation in the center);
- type of control panel (built-in, remote);
- the presence of a steam generator;
- layering and quality of the metal body;
- the presence of overheating fuses.
Case execution
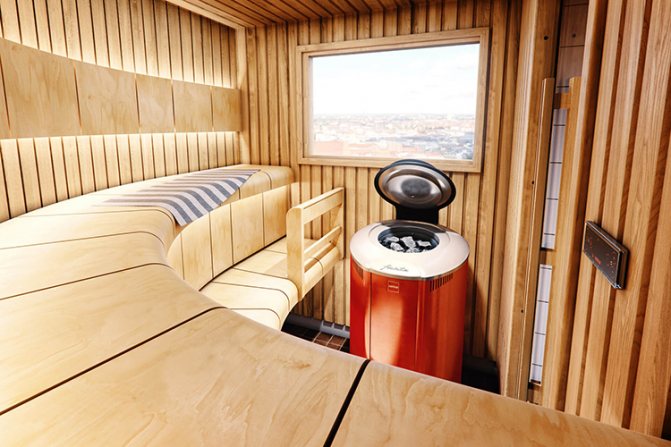
Depending on the location of the electric furnace, floor and wall mountings are performed:
- floor-standing - equipped with a powerful heating element up to 30 kW and a volume of loaded stones up to 240 kilograms, often installed in the center of a large room, without additional preparation;
- wall-mounted - low power within 9 kW, mounted on the wall, over the decorative sheathing. A wall oven can hold no more than 30 kilograms of stones.
Do-it-yourself electric stove connection
Collecting or buying a ready-made electric heater is only half the battle. You also need to know how to install it.
The electric oven must be connected to a stationary power supply. The required power for heating a wooden bath is 1.4 kW per 1m³, for a tiled one - 0.8 kW. The operation of the oven must be monitored using the control panel. It can be either built into the structure, or taken out into the dressing room.
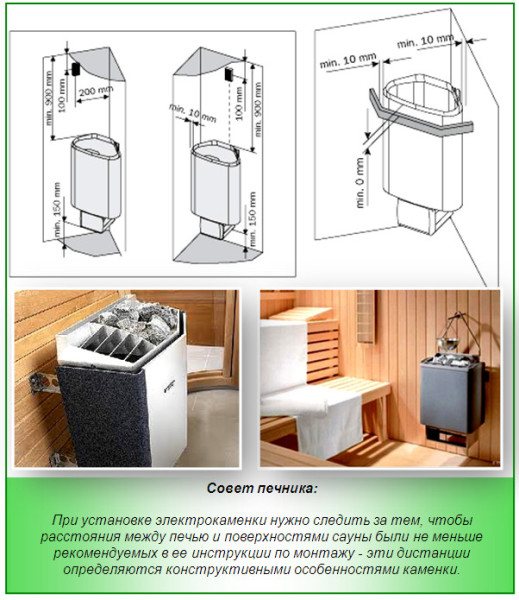
As for the distance between the stove and the sauna surfaces, it must be at least as specified in the instructions. These distances are determined by the parameters and design features of the stove. It must be remembered that the floor covering must not be flammable. It is recommended to lay out the area where the stove will stand with ceramic tiles.
The distance between the stove and other objects subject to ignition and melting must be at least 7-10 cm. Before laying, stones must be rinsed in running water and placed in the required amount in the oven. It is strictly forbidden to turn on the heater without stones, as this could result in a fire.
The sauna must be equipped with good ventilation. The minimum dimensions of the inlet and outlet ventilation openings for a furnace with a power of 3 to 6 kW should be 150 mm.