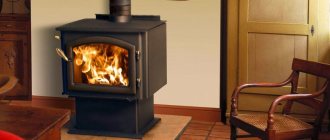
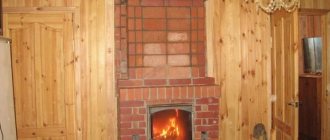
Since ancient times, people have erected active hearths in the country or in country houses, which filled the rooms with warmth and made it possible to cook food. If such a structure is old enough and is subject to restoration, then a natural question arises of how to paint a brick oven in the house.
Here, two ideas should be repelled: either the owners pursue an aesthetic goal, or the safety item is of primary importance to them. In most cases, you can do this work yourself, the main thing is to choose the right tools and paints and varnishes.

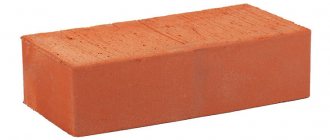
Brickwork processing
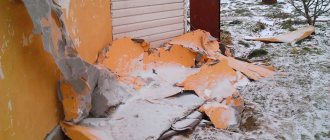
Cracks in plaster - a disease of brick ovens
Very often the walls of a stucco stove are covered with a large number of cracks. It's all about the overheating that happens when using the stove. Warm air, unevenly distributed, heats up one part of the masonry very much and not so much the other, that is, hot bricks expand and shift from overheating.
After the temperature drops, the bricks remain in place. Over time, repeated overheating leads to a curvature of the outer wall. It is very difficult to notice it, but this is enough for the appearance of cracks in the plaster. However, it would be premature to break the oven in such a situation, as it can still be fixed by making repairs.
Why paint the oven?
The main purpose of coating a red brick oven is undoubtedly to provide a decorative effect. After all, it is not only a heating device, but also an element of the interior, which should be in harmony with the atmosphere in the room.
- prevents the formation of cracks in bricks and their growth;
- increases heat transfer;
- makes the surface smoother.
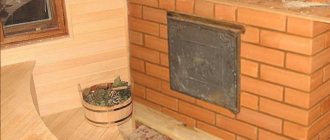
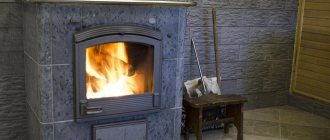
Note! The stove in the bath is strikingly different from the stove in the house. Accordingly, the technology for applying a protective and decorative coating will also differ, as well as the materials used.
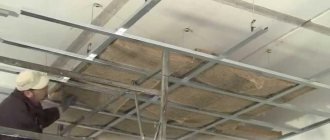
How to extend the life of your oven
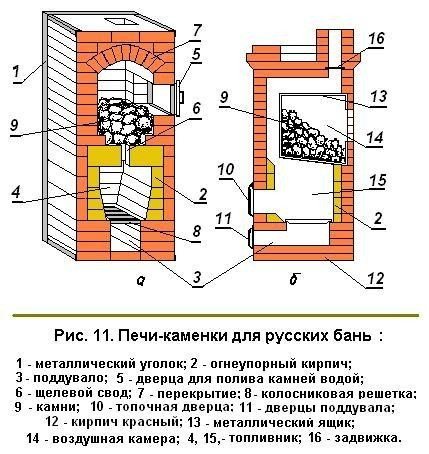
Stove-heater scheme.
Repair can be done by hand. This does not require a lot of free time and skills. If the walls are refurbished with high quality, the old furnace will work for a very long time. The presence of cracked plaster may indicate that combustion products penetrate into the dwelling, and this is already serious.
Some simply fill up the cracks with clay and paint over the stove. Experts say this is wrong. The outer masonry of the oven must first be strengthened. To do this, it is enough to make a wire tie.
For work you will need:
- punch or hammer and chisel;
- steel wire;
- a hook or bar for tensioning the wire.
Outside, several horizontal grooves are grooved on the brickwork, having a depth of 1.5-2 cm. Subsequently, the wire laid in the groove should completely encircle the stove. After installing the wire, it is tensioned. To do this, you can take a metal rod or a special hook and make twists in several places. Furrows are sealed with clay mortar. The walls are plastered with clay-asbestos mortar.
It is better to put the plaster on a preheated oven.
All about greenhouses and greenhouses - parnikiteplicy.ru.
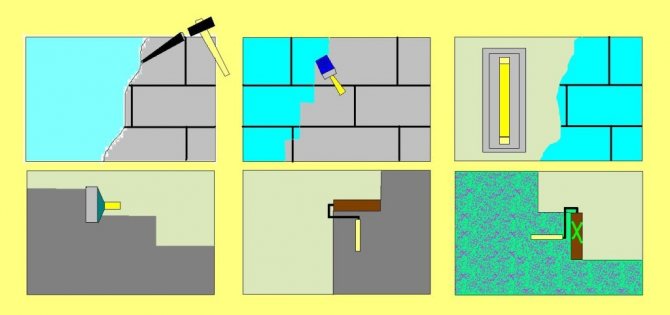
Preparation of the furnace surface for work
When painting a stove, the first thing to do is to prepare its surface for painting. The stove with new masonry does not need any special operations, only dust cleaning. If the oven is plastered, pay attention to the thickness of the plaster layer.
You will need the following tools to clean the oven surface:
- Metal trowel to prepare the surface and also for filler,
- Brush for removing the remnants of the previous finish.
If the layer of plaster is more than one centimeter, the plaster needs to be dismantled - the crumbling areas are removed, the surface is cleaned with a metal spatula, brush or sandpaper. All cracks and missing parts are covered with lime-clay or gypsum mortar.
After the solution has dried, wipe the surface with a damp cloth, wait for the water to dry and apply the coloring agent.
It is important to carefully read the instructions before using any coloring agent from the store, because some types are applied only to a preheated surface!
For good interaction of paint with other substances, you can impregnate the surface of the oven with a primer before starting to paint it.
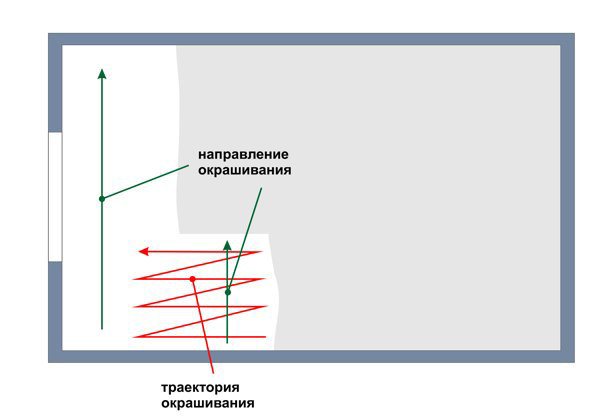
Brick oven painting
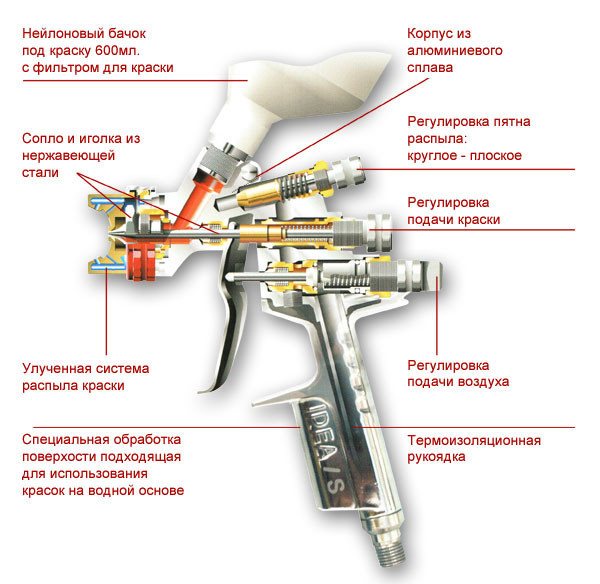
Spray gun device diagram.
The following materials may be needed to complete the work:
- brushes;
- containers for paint or lime mortar;
- roller;
- varnish;
- glue;
- lime;
- a piece of chalk;
- enamel;
- dyes;
- solvent.
If there is a plaster layer on the outer walls of the oven, painting can be done with both lime and chalk mortar. They are easy to do with your own hands. A solution of chalk is prepared as follows: it is necessary to place chalk (pieces, paste, powder, granules) in a large container and pour water in a ratio of 1 kg of chalk to 1.25 liters of water.
In addition, it is necessary to purchase special glue in advance at the rate of 0.1 kg per 10 liters of solution. You can find it in shops that sell painting supplies. As a substitute, wood glue diluted in water in the same volume is used.
Brick wall painting scheme.
Dissolving chalk in water, by stirring, achieve the required density. The consistency readiness is checked as follows: whitewash is dripped onto a vertically installed glass, and if the drop stops moving after 20-30 mm, the consistency is ideal.
If you need to add color to the dyeing composition, use special dyes. When choosing, you need to make sure that they are resistant to heat. You can take a simple blue in the ratio of 0.1 kg to 17 liters of solution.
Currently, blueprint is not available, so it will be rather difficult to find it. Before starting painting work, you must make sure the integrity of the plaster layer, then use a brush to clean it of dirt and dust.
They usually paint in two stages. Dry the first coat completely before applying the second coat. Of the disadvantages of cheap chalk staining, one can single out the fact that it is very difficult to achieve a solid color. Although this can also be used as a decor - the stains left by the maklovitsa will add zest to the stove. Quite tolerable uniformity of paint can be achieved using a roller with medium pile.
If lime whitewashing is used, then 0.7 kg of slaked lime is taken for 1 liter of water. If you add a little drying oil or salt to the lime, this will increase the coefficient of water resistance of the coating. For color, as in the first case, add blue or dyes. The only difference in the production of work is that there is no need to wait for the first layer to dry, that is, the second layer can be applied immediately after the first.
The principle of operation of the spray gun.
You can not use chalk for whitewashing, and then lime and vice versa. If the old paint was made with lime, but you want to paint it with chalk, you must completely remove the old layer. Ideally, the stove should be revised after each winter, as multiple heating and cooling cycles can lead to cracks or defects.
The metal parts of the stove should also be put in order; during operation, they become covered with soot, whitewash or rust.For painting them, simple enamel will not work; as a result of overheating, the paint will crack and change color. It is necessary to purchase heat-resistant enamel, it is produced in aerosol cans.
You can find paints that can withstand up to + 600 ° C without losing their characteristics. Such paints will not be covered with a cobweb of cracks, they are elastic. Using sandpaper and a rag, the metal elements of the furnace are cleaned before painting, then the surface is degreased with a solvent.
Newspapers are glued around metal parts with adhesive tape in several layers. Newspapers are overlapped. The floor is covered with oilcloth. Heat-resistant enamels do not require a primer layer, especially since it can rarely withstand high temperatures, that is, after cleaning the surface, you can paint immediately.
Before staining, the balloon is shaken well, otherwise the layer may turn out to be uneven. The aerosol is applied to the part from a distance of 0.25-0.3 m. There is no need to wait for the paint to dry, the oven can be melted immediately.
Whitewash
The oldest and most proven way to protect a brick stove is to whitewash with an aqueous solution of lime or chalk, blue-tinted for whiteness. The coating is not the most durable, but the addition of salt or wood glue increases adhesion to the surface and improves quality indicators.
When breeding, a kilogram of chalk and lime is taken for one and a half liters of water. Blue is enough 20 ml. Salt is taken at the rate of 150 grams per kilogram of solution, glue - 100 ml per 10 liters of paint.
The application of chalk and lime compositions differs in nature. Lime can be whitewashed in several layers at once, one by one. Chalk painting requires drying of each applied layer.
A sufficient range of paints and varnishes makes it possible to choose a coating for a brick oven in accordance with individual preferences. Considering that safety must be approached responsibly, it is better to study the certificates for the selected paint.
How to paint the stove: tips and tricks
The scheme of plastering and painting the wall.
Not every paint is able to withstand temperatures up to 80 ° C, so the question of choosing a material for painting arises. In any case, before painting, it is necessary to put the surface in order, fix all defects, repair chips and cracks.
You can make your own oven paint. In this case, you will not need especially expensive materials. You need to purchase the following items:
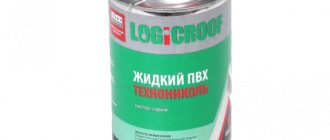
- turpentine;
- PF-283 varnish;
- gouache of the required color.
Figure 1 shows: 1 - gate valves; 2 - reverse thrust; 3 - cooking place; 4 - main riser.
1 liter of turpentine requires 1 liter of varnish. The materials are thoroughly mixed. The prepared solution has a transparent color, but after staining it will give the coating a matte shade.
To make colored enamel, you need to take gouache and dry it well. The color of the gouache does not matter and is selected individually. When the gouache is dry, it is ground into powder. It remains only to gradually add the powder to the turpentine and varnish solution until the desired color is obtained.
Special paints and varnishes for the oven
- natural drying oil;
- varnish;
- organosilicon enamel;
- heat-resistant paint.
These formulations are manufactured commercially and are commercially available. But some materials can be made independently, we will also talk about them in our article.
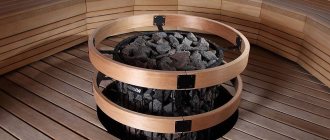
Only natural drying oil is used. Its distinctive quality is that it does not change the color of the brick, but only makes its shade darker. It is used only for painting a red brick stove in a bath, while the stove must be melted and worked for at least 2 hours, after which it can be painted. We do not recommend using it in the house - here the stove warms up less, and the drying oil may not dry out.
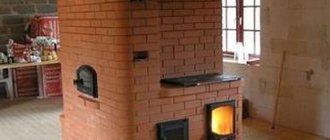
Many owners of private houses ask the question of how to varnish a red brick stove.And this is not surprising, since the transparent glossy coating effectively transforms the appearance of any interior element. For painting the stoves, a special varnish of the PF-283 type is used in equal proportion with turpentine, which makes it possible to obtain a decorative layer with increased strength characteristics.
Photo 5. An example of a varnished oven
Note! The main feature of the varnish application is the ability to add dry gouache to the composition and give the coating the desired shade.
- excellent adhesion to a brick base;
- good strength;
- moisture resistance;
- long service life.
Of the shortcomings, only a small selection of colors can be noted.
Heat resistant paint
The main advantages are resistance to high temperatures (up to 600 ° C) and a wide range of shades. They are used to paint steam lines, so if you have not yet decided how to cover a red brick stove, then heat-resistant paint will be the perfect solution.
We suggest you familiarize yourself with Pineapple - is it a berry, fruit, vegetable or herb?
Another way to make paint
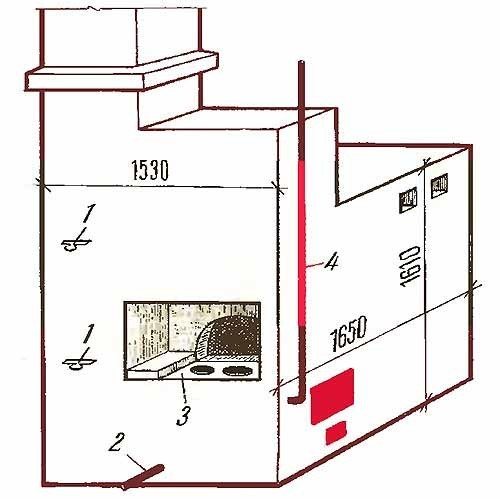
Image 1. General view of the furnace: 1 - gate valves; 2 - return pipeline; 3 - plate; 4 - main riser.
For cooking you will need:
- brick chips (brick ground into flour);
- eggs;
- milk.
Whipped protein and milk are added to the brick powder. The approximate amount of proteins ranges from 10-15 pcs. (depending on the surface area). It is necessary to achieve a consistency that can be easily applied with a stiff brush.
With the same solution, but with a thicker consistency, surface defects can be repaired. As a result, after painting, the oven should acquire a bright red hue. This color is resistant to temperature extremes, overheating and mechanical damage. If the color is not bright enough, then at the very end you can cover the surface with a layer of drying oil.
Stages of painting a brick oven
If it is decided to paint with enamel, it will be necessary to purchase heat-resistant enamels of silicon-organic type. Before painting, it is necessary to check the density of the enamel, if it is too thick, then it is difficult to work with it, it is almost not absorbed into the brick.
Therefore, when buying, you must immediately purchase a solvent. If for some reason there is no solvent, you can use ordinary turpentine. Having achieved the optimum consistency, start applying the first layer with a brush.
Before painting a second time, you must wait until the paint of the first layer dries. This may take 10-15 hours. Although some, after waiting for the moment when the paint sticks when touched, but does not stain, they begin to apply the second layer.
The third layer is necessary only if, after applying the other two, a brick is visible or stains are visible. Brick fireplaces are painted in the same way.
Choosing paint and preparing the surface
Before you start choosing the necessary coloring composition, you need to understand one important nuance. Namely, whether plaster was applied to the surface and what material the stove was decorated with. So, for example, you cannot apply chalky whitewash on a surface that was previously covered with lime. The fact is that they simply do not fit together, and the whitewash will not hold. Therefore, it is necessary that all layers are of the same material, or the paint must have good adhesion to the surface.
Advice! If it is not possible to determine what composition is applied to the stove, then the best solution would be to clean everything to plaster.
What causes the redecoration of the oven to start? Often this happens for the reason that the previously applied material becomes unusable or simply does not correspond to the changing appearance of the interior.
Various types of paints and compositions for stoves and fireplaces
In different situations, those formulations are used that are suitable for specific reasons. So we must not forget that stoves and fireplaces have metal parts. They also need to be processed.
Painting the oven with chalk
Stoves and fireplaces can be painted when the surface is dry after other work (plastering, priming). The simplest and cheapest is the application of chalk paint. It is not necessary to make it white, you can add color and give the desired shade. For greater convenience, such a solution can be applied using a spray gun.
A bit of history! Chalk paint has been used for a long time. Previously, each housewife could independently prepare such a composition. And in order to get rid of the grayish tint that forms after such staining, they used blue. This method finds application in the modern world.
The chalk composition is more likely to be correctly called not paint, but whitewash. It is prepared quite simply:
- They take a bucket, after which chalk is ground in it.
- Everything is filled with water so that it completely covers the previously crushed composition.
- Wait two hours. By this time, a solution of wood glue is diluted. The ratio is as follows: one hundred grams of glue is taken for ten liters of whitewash.
- The two mixtures are combined into one, with constant stirring. A drill with a mixer attachment is great for this.
- If necessary, add blue (for 9-10 kg of chalk take 50-60 g), and it is better to use a heat-resistant color scheme.
- When the solution becomes the required consistency, it is applied to the oven.
Applying a pattern will make the oven more beautiful
Applying a pattern to the stove will make it special and even more beautifying. The stencil can be cut from hard cardboard, which is first decorated with the ornament. Painting is done with paint based on gouache and egg white. Gouache is diluted in water, an egg is added there. Everything is thoroughly mixed.
It is better to stock up on two stencils, and while one dries, use the second. It can also be noted that enamels and oil paints have a good heat transfer rate, and the lighter the color, the less heat the room will receive.
Recommendations
As in any other case, all users recommend working in a room with open doors and windows so that air flows freely and the person does not get poisoned. It is also advised to do staining with protective gloves and a special protective mask. Especially when it comes to using varnish.
Many users recommend using water-based formulations based on their experience, since components such as varnish can be toxic and lead to serious respiratory diseases.
Note! Some even recommend abandoning toxic paint and harsh enamel compounds if the stove is operated in the house, giving preference to natural tiles or even natural and artificial stone.
In general, there are many ways to make a beautiful stove. There are different staining methods. To do everything right, you need to choose the right paint and pay attention to the recommendations presented above. In the absence of experience in painting, it is better to give preference to another facing material or to hire professionals.