With the advent of cold weather, people think about how to heat the room. In city apartments, the relevant services are dealing with this issue. But, as far as a private house is concerned, the solution to this problem rests with the owner.
It is quite difficult to organize heating on your own. It is necessary not only to install heating units, but also to stock up on fuel. The task becomes more complicated when the question arises about heating not only the house, but also auxiliary buildings. In this case, the do-it-yourself Bubafonya oven will help. A schematic drawing of such a design can be found on the net.
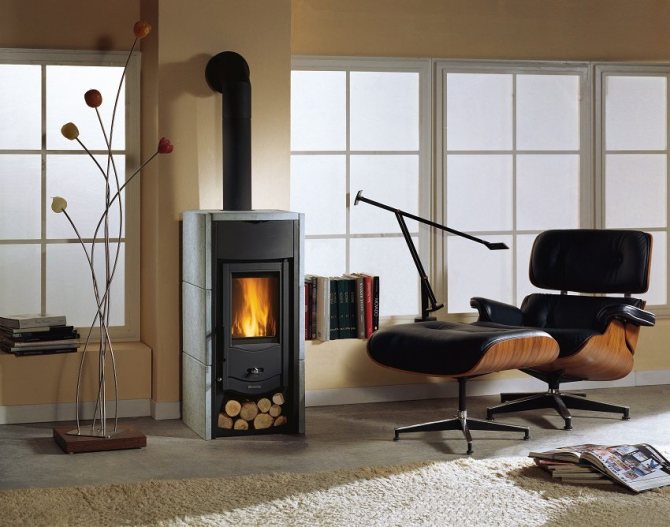
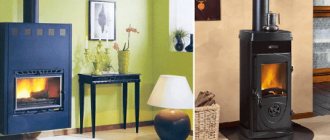
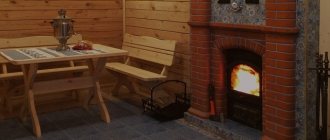
Modern stoves fit easily into the interior of the house
Long burning oven: working principle
When organizing heating in the house, it is worth carefully considering all the questions of interest. And you need to start with how the burning of wood, which is the most popular fuel in the private sector, is carried out. The process begins with heating the wood to a certain point, when it starts to ignite.
So, after setting fire to paper or other material, the fuel starts heating. Upon reaching 250 degrees, the wood decomposes into chemical elements. White smoke indicates that steam or gas is being emitted from the wood. Subsequently, as the temperature rises, they ignite, which accelerates the thermochemical reaction.
The principle of operation of the boiler is quite simple.
The study of pyrolysis has become the key to the creation of modern long-burning boilers. Thanks to pyrolysis ovens, it has become possible to use wood as efficiently as possible as a source of thermal energy. The secret is that vapors and gases burn separately from the fuel. This, in turn, ensures its slow decay. As a result, one bookmark burns longer than usual.
There are several main stages of fuel combustion in such units as the Bubafonya long-burning stove:
- drying wood;
- pyrolysis;
- combustion or oxidation;
- recovery.
As a result, a small amount of ash remains after the burning of the bookmark. Almost all of the fuel is efficiently used.
It's pretty easy to make the unit yourself.
Oven with top loading - "Bubafonya"
Before using the top-loading oven, you should know their benefits. In this article, we will tell you in detail how they differ from conventional counterparts, and why it is better to use them. Experts highlight the following design advantages: · These furnaces have a compact combustion chamber, which is easy to use. · It is possible to use gravity in the furnace; · Fuel is consumed in minimum quantities, i.e. a top-loading oven helps save firewood. · The above design has a low discharge temperature. Those. you do not need to insulate the chimney using additional technologies. · Smokeless emission will not pollute the atmosphere. A distinctive feature of top-loading furnaces is that there is a gradual combustion of the fuel. This means that the heat in the room will be distributed evenly, i.e. the body will have time to get used to the rise in temperature. As for the stoves and the like, the fuel immediately burns up. The most popular are "Bubafonya" and "Raketa"
The Bubafonya stove, why is it called that?
The furnace received this name from its creator. The peculiarity of this type of PDG (long burning furnace) is that there is a constant piston pressure. The heel of this piston maintains the optimum room temperature for a long time.As a result, some areas of the room will not overheat, and some will not be too cold.
How to assemble a stove
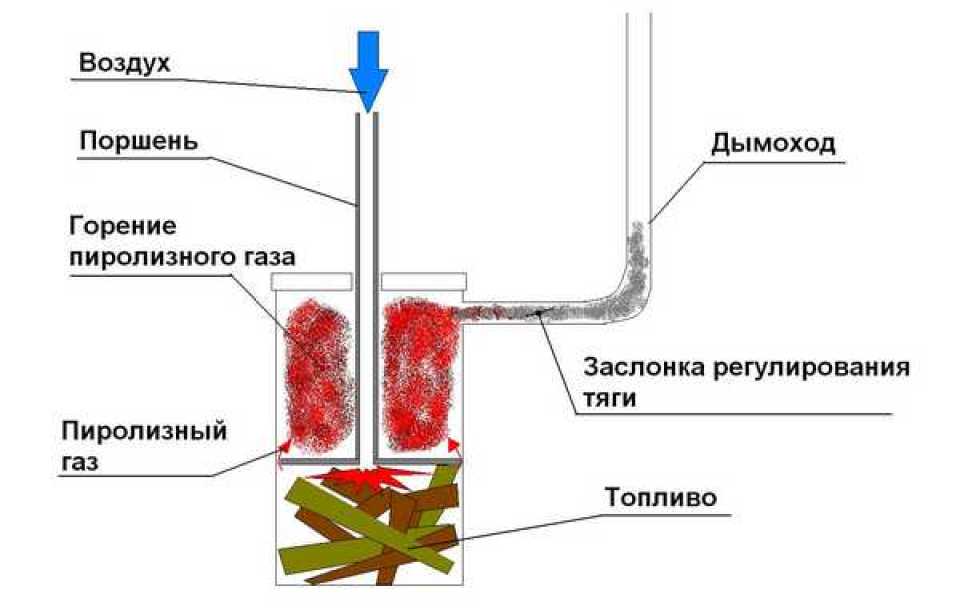
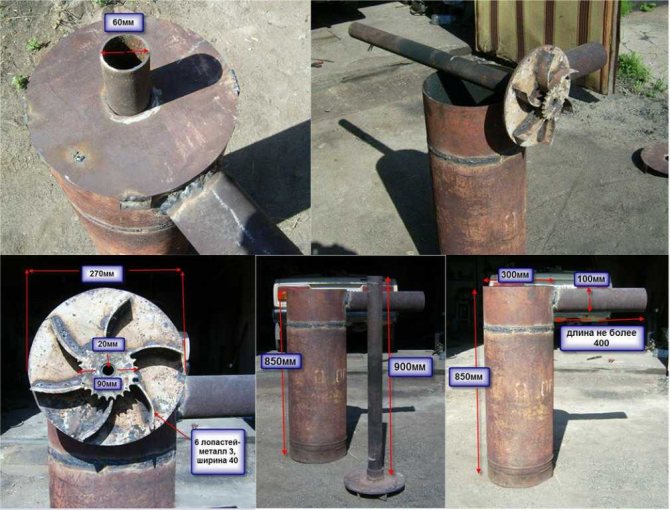
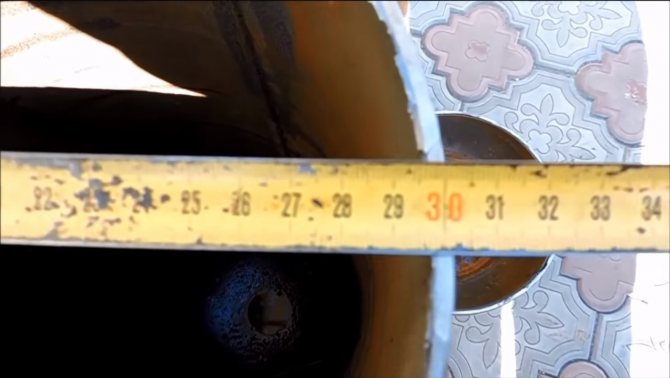
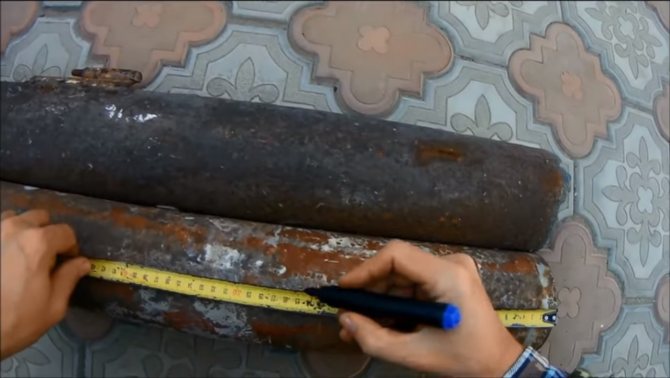
To assemble the stove, you must follow the instructions below: · Initially, we need a barrel. We cut off the upper part of it (it can be used in the future as a furnace lid). If you used a gas cylinder instead of a barrel, you should cut off the upper part along the border of the seam. Do not forget that a balloon is a flammable structure. Therefore, you should make sure that there is no gas left in it. To do this, pour water into it, and then you can already use it without fear. · A little lower from the cut-off part it is necessary to locate the hole for the chimney. Then we weld the channel from the pipe, the diameter of which should be about 120 millimeters. · We proceed to the construction of the air duct. The inner diameter of the duct should be 75 millimeters. The length is about 30 millimeters. · We spend a sheet (6 millimeters) on the heel. We cut out the structure in the form of a circle, the diameter of which should be 4 centimeters less than the combustion chamber. Next, in the center of the heel, cut out a special hole of about 3 millimeters. Then you should weld corners 30x30 or 40x40 on the working surface of the heel in the form of rays from the center.
Furnace device
To make a Bubafonya boiler, you need to carefully consider its design. This will create a truly productive unit that will not only heat the desired room, but also save fuel. So, Bubafonya from a gas cylinder, the drawing contains the following elements:
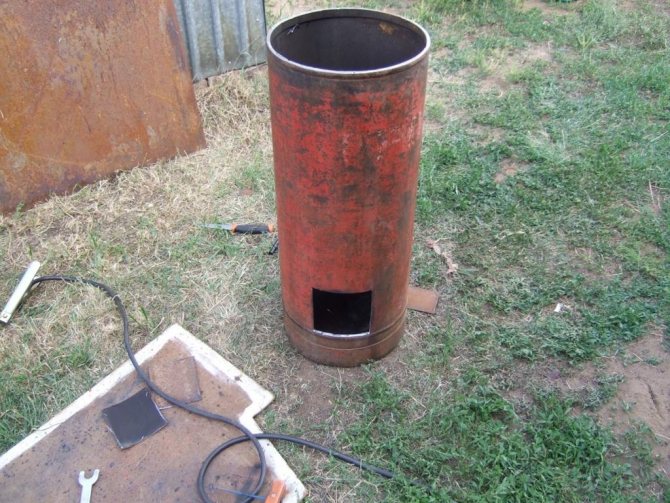
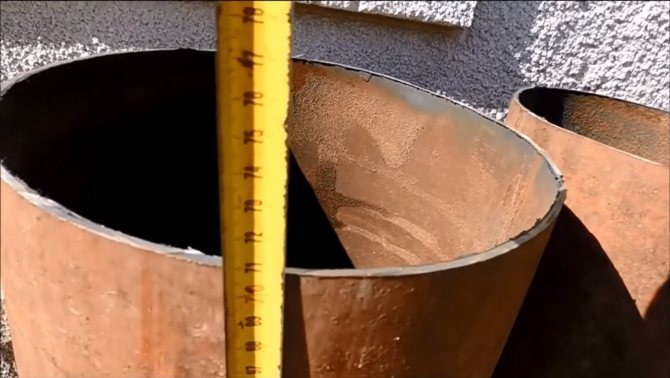
- Housing. The main element of the oven, which is often cylindrical. For the construction, a barrel, cylinder, bulky fire extinguisher or pipe is often used, to which the bottom is welded.
- Chimney. The element is often made of a metal pipe, which has a diameter of 11 to 25 cm. It is welded on top of the body and serves to remove combustion products.
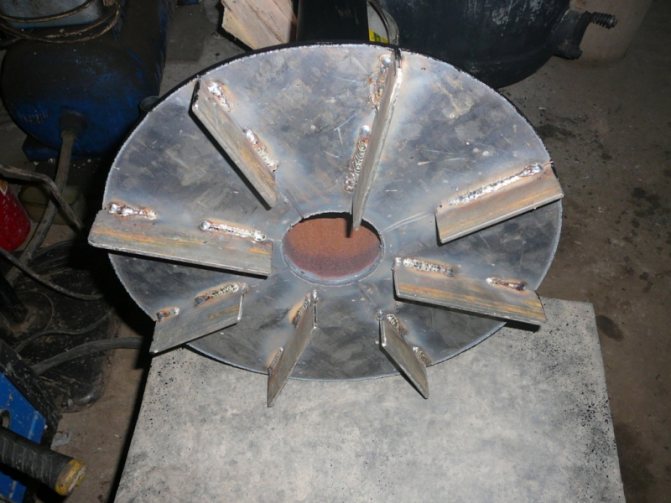
- Feed piston. The part is made in the form of a circle, on the lower part of which ribs are welded. An air pipe is attached to the center of the piston. The main purpose of the ribs is to create an additional layer of air between the piston and the piston. This has a positive effect on smoldering and the rate of gas evolution.
- Regulating valve. Everything is pretty simple here. It serves to control the supply of oxidant to the combustion chamber.
- Cap. A hole is made in it through which the air duct is passed. A secondary combustion chamber is formed between it and the piston, where vapors and gases are ignited.
These are the main structural elements. But, if we are talking about Bubafoni with a water jacket, then the scheme will look somewhat different.
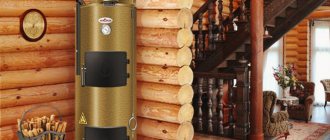
The unit can be used for a complete heating system
How to make "Bubafonya" with your own hands? Long burning furnace drawing
The Bubafoni device seems to be extremely simple. But you need to understand that the device will work effectively only when correct ratio of parameters... Here are some guidelines to consider when designing a stove:
- Internal clearance of the firebox (D) should be 30-80 cm... If you make it smaller, the gases will not be able to completely burn out. Consequently, the efficiency of the stove will be low. If the diameter is overestimated, the rate of fuel burning at the edges will be too low, and the oppression will drown in the bookmark. As a result, the stove will go out.
- Height furnaces (H) is taken equal to 3-5 D.
- Wall firebox has thickness sequal to 2.5 mm or more.
- Diameter oppression is 0.9 D.
Channel height (h) to heat the air mass on the lower surface of the nest:
- for D = 300 mm: h = 40 mm;
- for D = 600 mm: h = 60 mm;
- for the range between D = 300 mm and D = 600 mm: h calculated proportionately;
- for D over 600 mm: h = 0.1D.

Photo 2. An example of a drawing of a long-burning Bubafonya furnace in two projections: top and side view.
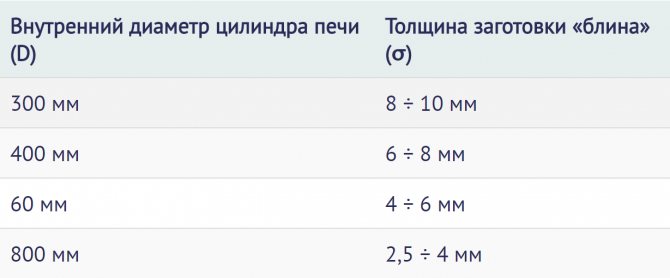
Oppression thickness picked up based on its optimal mass: it should not be too heavy, so as not to sink in the fuel, and not too light, otherwise, due to the weak pressure, the fuel will flash with reverse combustion. The following values should be taken:
- at D = 300 mm: thickness oppression - 6-10 mm;
- at D = 400 mm: 6-8 mm;
- at D = 600 mm: 4-6 mm;
- at D = 800 mm: 2.5-4 mm.
Thickness for diameters between the specified values is calculated proportionally.
What to make the furnace body from: barrels, pipes or a gas cylinder?
The most convenient make a "bubafon" from a piece of pipe or from a bottle of liquefied gas.
The second option is the most preferable: bottom already available, but domed apex serves as an excellent chamber for afterburning gases.
The starting material for the manufacture of the case can be Sheet steel - amateur sheet bending machines, which are equipped with small private workshops, with a sheet thickness 2.5 mm may well cope.
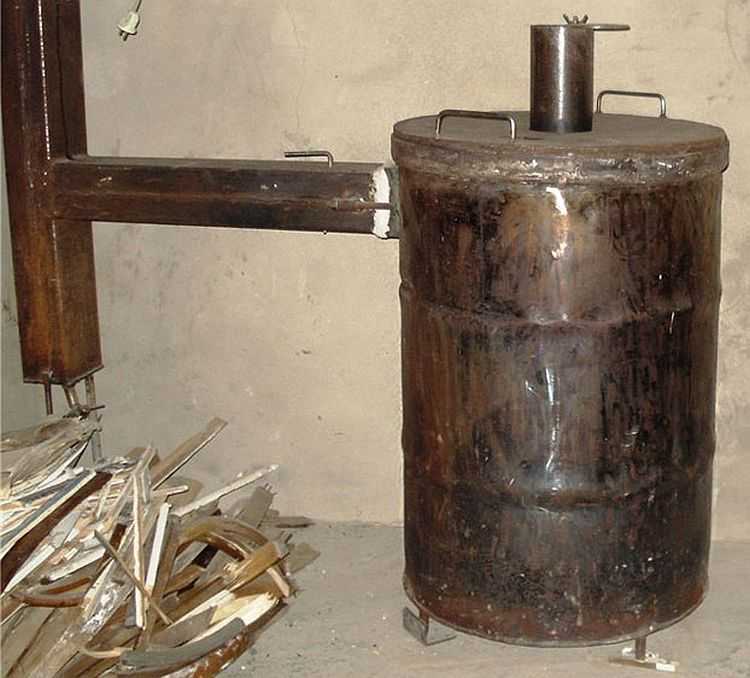
Sometimes "bubafon" is made from a barrel.
Manufacturing process
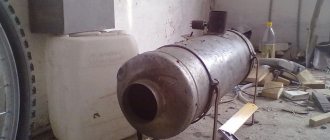
We will show the manufacturing process on the example of a furnace from a cylinder.
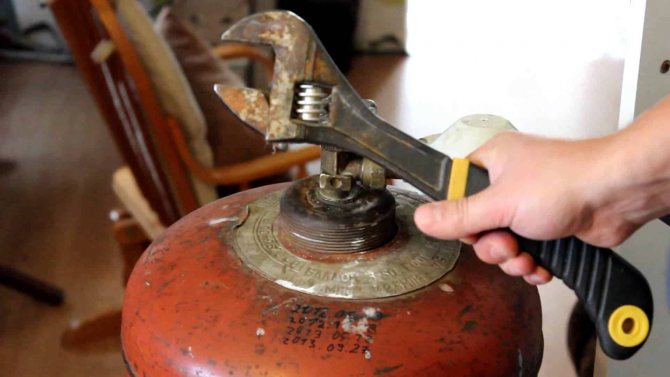
- You need a balloon fill with waterto relieve it of gas residues in a guaranteed way (without this, an explosion may occur when the container is cut).
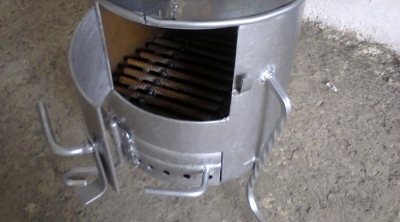
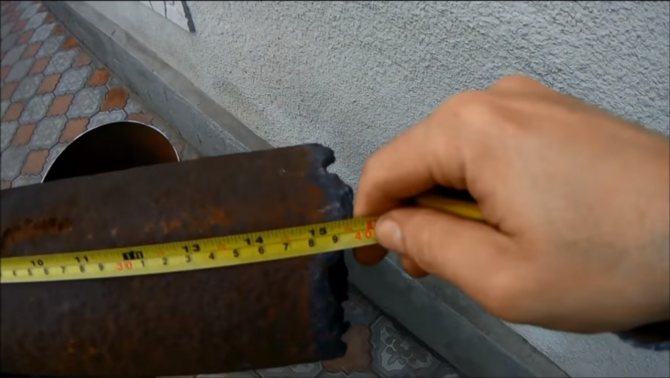
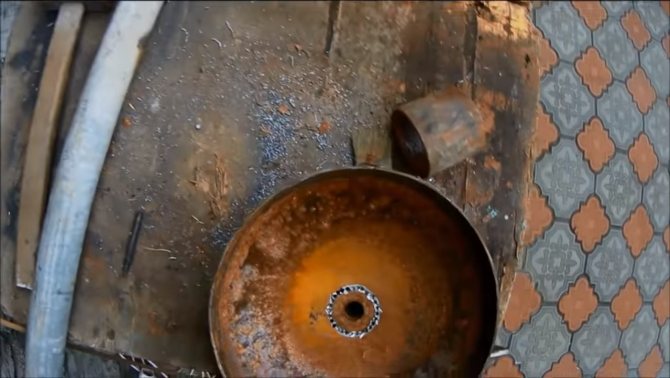
- Draining water from a cylinder cut off the domed top and, having welded handles and latches to it, turn it into a lid. The rest weld the branch pipe for connecting the stove to the chimney, diameter which should be not less than 150 mm.
- After welding legs the furnace body is ready.
- Weld to the top of the lid collar - a piece of pipe (can be made of galvanized steel), which, hugging the air duct, will limit the unplanned infiltration of air masses into the combustion chamber. The gap between him and the pipe for air supply should not be more than 2.5 mm... To determine the height collar, you need the actual gap size between him and the duct multiply by 80... So, with a gap size of 0.8 mm collar height will be 0.8 * 80 = 64mm.
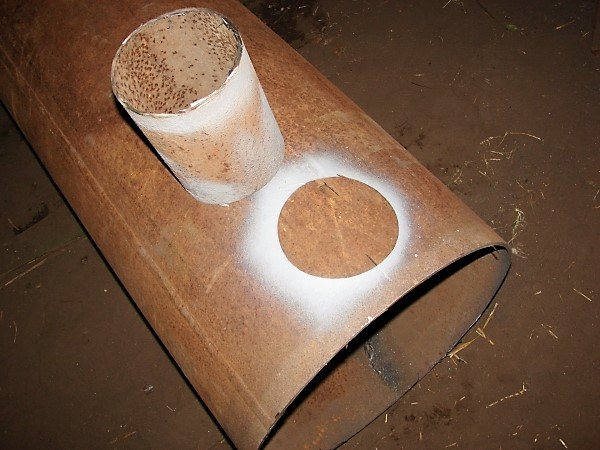
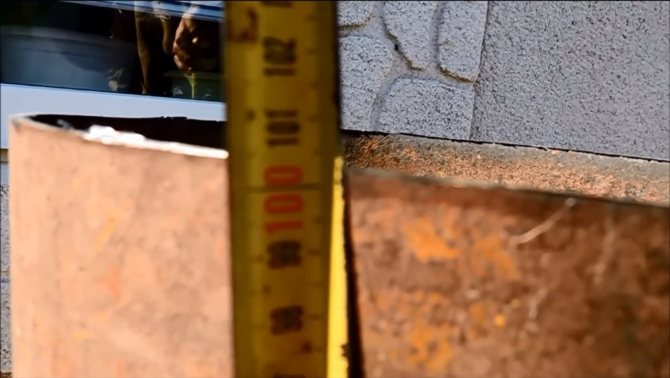
Photo 3. Before welding the pipe to the furnace. An example of how you can easily measure the hole you need with a paint sprayer.
- A round is cut from a sheet of steel of the required thickness oppression, in which they then do hole 75-80 mm in diameter.
- Welded to the oppression in the center duct - a pipe with an internal with a diameter of 75-80 mm... Her length must be such that after the load is completely lowered from the collar segment was duct length not less than 150 mm.
- A hole must be drilled in the duct and install the damper (round plate welded to the rod).
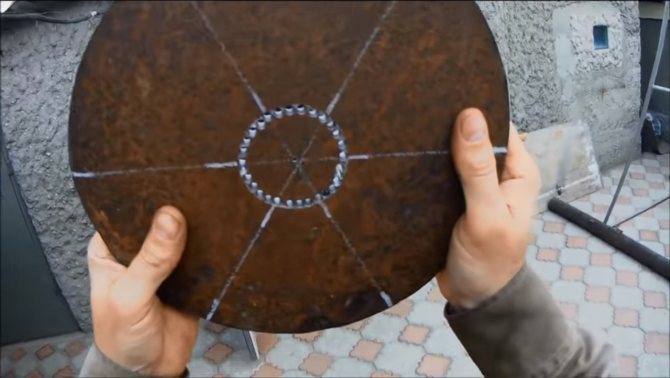
- From the bottom to the oppression are welded several radial ribsmade of a channel or corner. They form ducts for heating the air.
Note! If the diameter of the inner space of the furnace less than 500 mm, the ribs need to be lengthened, giving them curvilinear shape (in this form, they resemble the impeller of a centrifugal pump). The air must twist clockwise... The direction of the twist is determined by the Coriolis force.
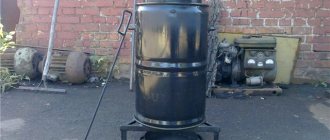
The bubafonya oven is ready. Now it can be connected to the chimney and loaded with fuel. In this case, we take into account the following:
- You need to put "bubafon" on refractory base (a brick made of fireclay clay is suitable).
- In the chimney is formed large amount of condensationtherefore it must be equipped with a condensate trap with a tap.
Useful enhancements
Disadvantage classic "bubafoni" - difficulty in ash removal... You can offer two options for solving this problem:
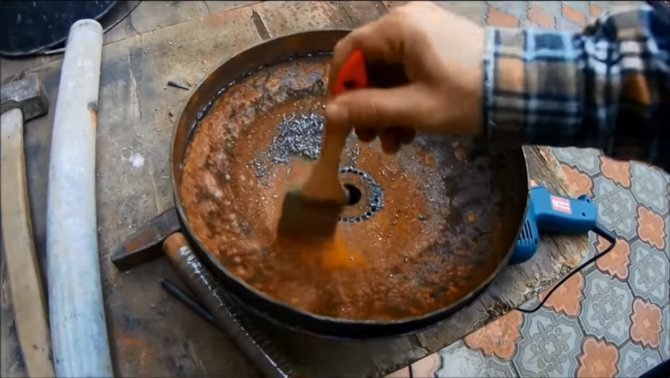
- The easiest one: to lay to the bottom of a round steel plate with a piece of reinforcement welded to it. After the fuel burns out, this plate can be easily pulled out along with the ash.
- The solution is more complicated: weld to the body furnace doorthrough which it will be convenient to clean the oven.
Important! When door available it will be possible to load the "bubafon" with fuel until the current bookmark is completely burned out.
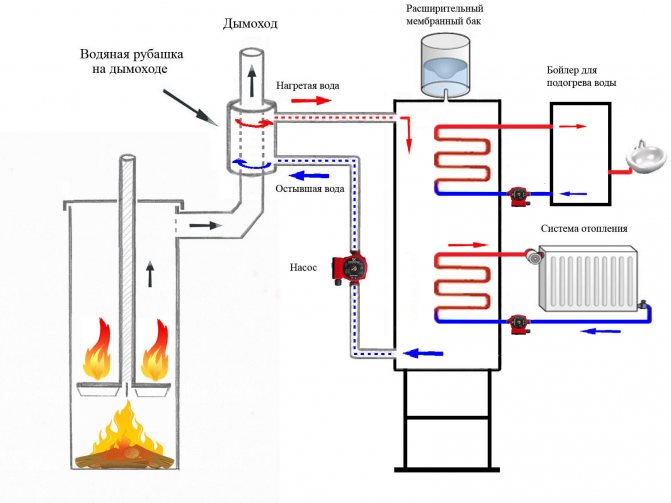
"Bubafonya" with a water jacket
It should be understood that “bubafonya” is suitable for the role of a water heating device not very good.
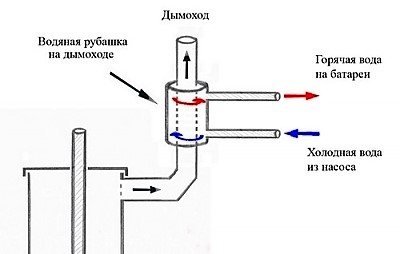
During the reception of heat by water, the temperature in the furnace decreases, as a result of which the efficiency of the afterburning of pyrolysis gases, and with it, Installation efficiency drops sharply.
Nevertheless, subject to certain rules, the "bubafony" in the form of a boiler can work:
- The heat carrier can assimilate no more than 10-15% of generated heat.
- Furnace wall thickness should be 4-6 mm... With a thinner thickness, heat will go into the water too quickly, which will lead to an unacceptable decrease in temperature. With a larger one, the thermal inertia of the boiler will be so high that it will be impossible to prevent boiling of the coolant.
- Optimal water jacket thickness is 40-60 mm.
- Necessary outer shell thickness shirts are taken from the calculation 1 mm for each unit of atmospheric pressure in the heating system (at a height of up to 2 m). So the steel is thick 2.5 mavailable for bending on an amateur machine, will be able to withstand pressures up to 2.5 atm.
- Thickness water jacket should be everywhere the same: Uneven heat dissipation will have a negative effect on the combustion of gases.
Advantages and disadvantages
Before building a potbelly stove, like Bubafonya from a gas cylinder, it is worth considering its advantages:
- Simplicity of design. With the skills of working with material in the form of metal and a welding machine, any person can build such a stove.
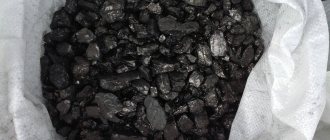
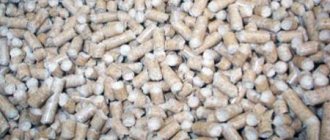
- The versatility of the fuel used. The stove is not picky in terms of energy. So, it can work on wood, sawdust, coal and wood waste. It is also quite suitable for working on pellets, the popularity of which is growing rapidly.
- Burning duration. One bookmark can be enough for a long time. So, the unit will heat the room throughout the day. Of course, the exact value directly depends on the size of the combustion chamber, as well as the presence of additional circuits.
Despite the popularity and many advantages, the stove has some disadvantages:
- in comparison with modern models, the stove has a low efficiency;
- it is quite difficult to clean the structure from working off;
- the design has an unattractive appearance, which makes it impossible to use it in a residential area.
As for cleaning the oven, they solve this issue with the help of a door, which is installed in the lower part of the body.

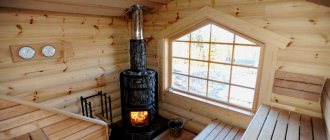
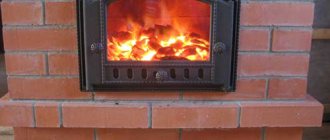
The furnace has a simple design
Oven advantages and disadvantages
A simple-looking stove combines many important advantages, among which the following points must be noted:
- Extreme simplicity of design. Almost anyone can handle the assembly of bubafoni.
- Profitability. Depending on the volume of the firebox and the quality of the raw material, the bubafonya can operate on one load for up to several days.
- Unpretentious care and handling. After lighting the fuel, the bubafon can be left unattended for a long time and go about his business (but it is better, nevertheless, to periodically check the condition of the unit), and all the care of the stove comes down to periodic cleaning of the ash pan and chimney.
- No expensive and hard-to-find materials are needed to assemble a bubafoni. A tank, a lid, a few pipes and various simple metal products will be enough.
- The stove perfectly copes with its main task even in very severe frosts.
- Bubafonya can be used to heat a residential building, greenhouse, garage, country house and other objects.
- The unit is characterized by a high rate of fire safety - there are no openings in its design for an open flame.
Despite the obvious advantages, this stove also has disadvantages:
- Small "radius of action" with high heat transfer. It is warm near the stove, even hot. A little further away - it's cold.
But this problem can be solved. To improve the situation, they act in two ways: arrange forced convection (air change) using a fan or make a water jacket, and heated water is passed through pipes to heat the room.
If everything is simple with the fan, then the water jacket can be made in two ways: around the body or remove heat from the chimney pipe.
A shirt on the chimney is easier to implement. This option also has one more advantage: then the heat from the furnace body is used for heating, as well as that which used to go outside through the chimney. Now it also heats your room.
In addition, when installing a water jacket on the pipe, the smoke at the outlet will no longer be so hot and you can not bother so much with insulating the wall around the pipe.
- Another important drawback is not the most attractive look.
If the bubafon is used in a technical room - in a garage, greenhouse, in the country, then there is nothing to worry about. As it is, so it is.
Well, if you want to use it to heat the house, you will have to hide it somewhere in the boiler room, basement, in an extension.
You can still refine it. For example, brick it. By this, by the way, you will greatly increase the comfort of being near the stove: the brick will extinguish most of the hard radiation, soften it, and become a kind of heat accumulator: the brick will heat up, and then, when the stove goes out, it will gradually cool down and give off the accumulated heat.
Self-fabrication of the structure
The construction of the boiler is carried out in several stages:
- arrangement of a place for work, preparation of the necessary materials and tools;
- manufacture of parts and assembly of the stove;
- arrangement of a chimney;
- construction of a solid base for the furnace.
Each stage is carried out in a specific sequence.
Before creating a furnace, you need to deal with all its details.
Drawing creation and calculation of basic values
To build a structure, it is necessary to develop a drawing on which the following values are indicated:
- Height and diameter of the body. The values are interrelated. The height of the structure is several times the diameter. In this case, the section should be within 30-80 cm. Structures with a diameter of 30 cm are unproductive, and from 80 cm - uneven combustion of firewood. Therefore, experts recommend choosing an average value between these values.
- Wall thickness. The best option is a case with a thickness of 4 mm. If the walls are thinner, this will significantly reduce the efficiency and service life of the furnace.
- Piston pancake size. Here calculations are carried out according to a certain formula. It is important to determine the size of not only the pancake itself, but also the height of the ribs.
- Pancake thickness. There is a developed table with the required values depending on the body diameter. This parameter is very important, since it will determine with what force the piston will press on the bookmark. In turn, this will affect the operation of the entire unit. So, for example, if the pancake is heavy, then the air gap will be so small that the fuel will go out over time.
During development, special tables are used
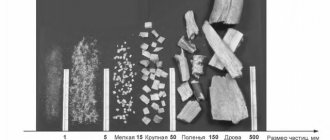
- Required chimney area. The density and volume of the fuel are taken into account, as well as the energy release during its combustion. When calculating, special tables with the required values are used.
- Air intake diameter. Knowing the size of the chimney, it is very easy to perform calculations.
Knowing all the meanings and having a drawing at hand, you can start making a furnace. The main thing is to carry out the calculations correctly. Before starting work, everything must be carefully checked.
Work must be carried out in a specially separated place
Preparatory stage
The work is carried out in a room that is protected from atmospheric precipitation and productive ventilation. The place should be away from residential buildings so as not to cause discomfort to neighbors and households. Having chosen a suitable room, you can start preparing materials. For this you will need:
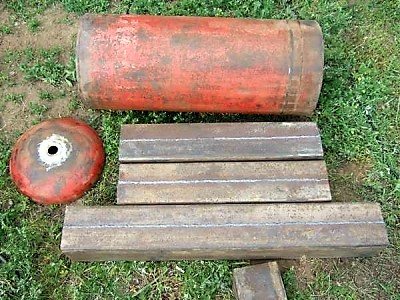
- Housing for the unit. Often a gas volume is used for this. A steel or cast iron barrel, steel pipe is also suitable. The workpieces must be free from signs of corrosive process and other damage.
- Legs material. A metal profile, fittings and steel tubes are used as supports. The structure must be securely installed on the base.
- Pens. Two on the casing for easy transport and one on the lid for easy maintenance.
In addition, you will need the following auxiliary materials:
- Sheet steel;
- two pipes with a diameter of 10 cm and 15 cm;
- metal profile or channel;
- materials for the base.
As for the tool, here you need the following set:
- a hammer;
- vice;
- Master OK;
- Bulgarian;
- level and tape measure;
- welding machine and electrodes.
Important! When cutting and welding parts, do not forget about safety precautions.
It is necessary to work with the cylinder very carefully.
Assembly of the unit
The manufacture and installation of the stove and chimney is carried out in the following sequence:
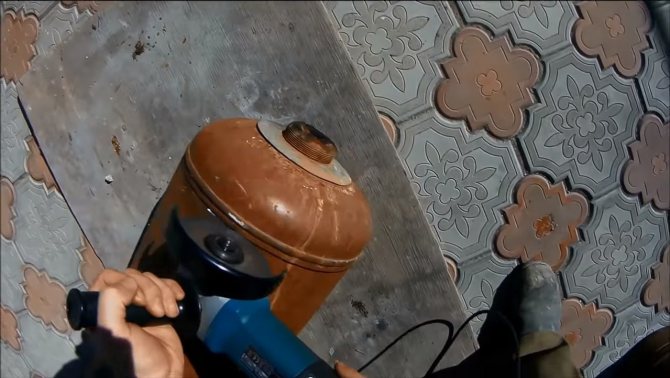
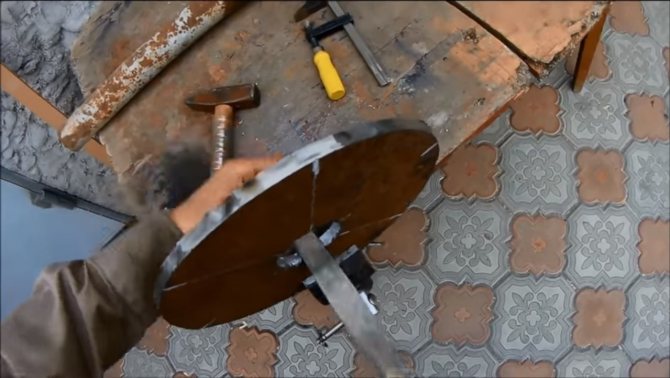
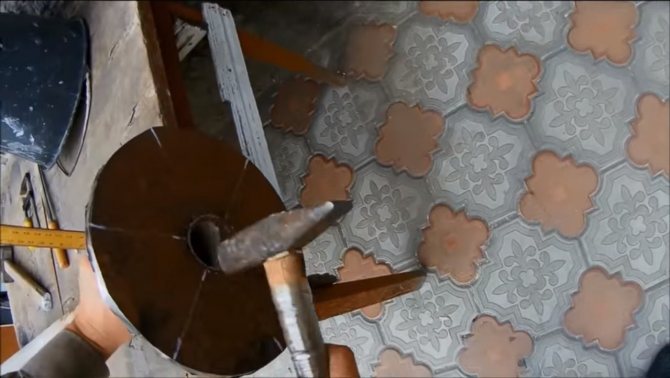
- Carefully cut off the top valve and then the cylinder cap. It is preliminarily recommended to flush it. In the future, the cap will be used as a cover.
- Attach the legs to the bottom. To check the accuracy of their installation, it is worth using a level or plumb line.
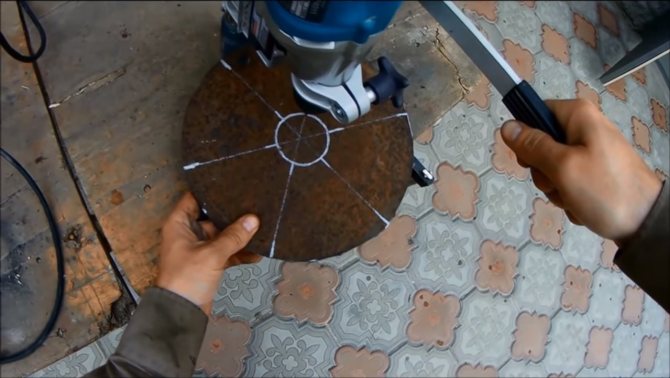
- Cut a circle out of steel. In the center, make a hole for the air duct. Weld a circle and a pipe. Prepare the trims of the channel of the required size and fix them on the lower side of the circle. Thus, the furnace piston is constructed in several stages.
- Make markings for the air duct on the hood. The hole should be such that the pipe moves freely in it. Make a cut. Clean the edges. Weld the handles to the lid. It will be enough to use fittings.
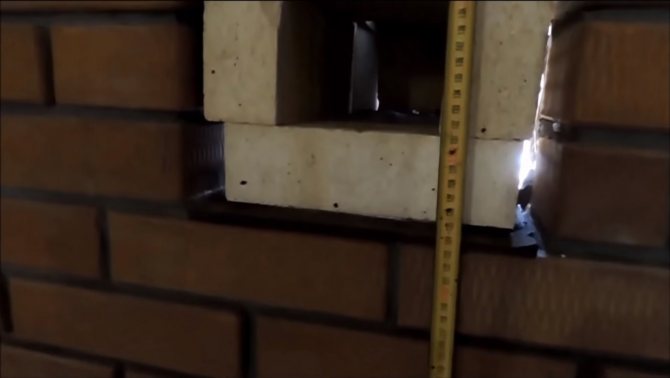
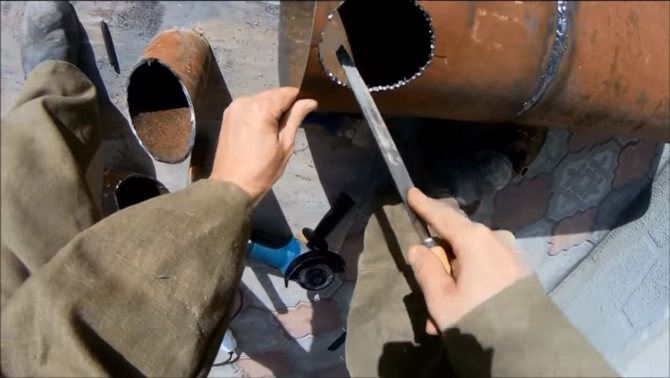
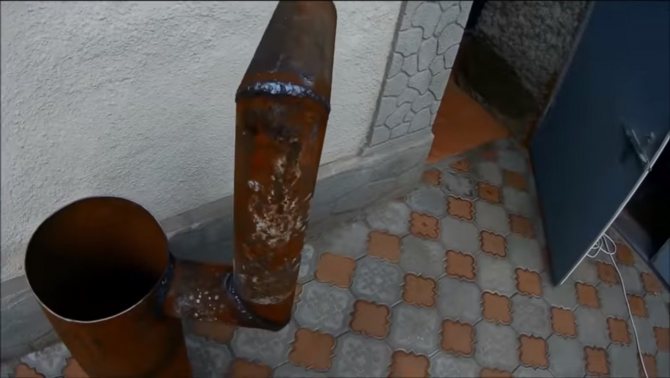
- In the upper part of the body, make markings for the chimney opening. Make a cut. The hole must match the dimensions of the pipe. This will allow the parts to be sealed. Weld the pipe to the body.
The arrangement of the chimney must be approached very carefully. In order to provide adequate traction, the channel must have two elbows. They connect at right angles. The two pipe sections are cut at a 45 degree angle. In this form, they are welded together, which ensures a smooth transition of the channel.
In addition, it is worth building a protection for the pipe in the form of a cap. Such a special device makes it possible to protect the channel from precipitation, which can cause the stove to fade. At this stage, the assembly of the unit can be considered complete. All that remains is to create a solid foundation and install the boiler.
Particular attention should be paid to creating a pancake.
Foundation creation
The foundation for a homemade boiler is being built in the following sequence:
- Dig a hole 150x150 cm. In this case, its depth should be close to 30 cm. The exact area of the base directly depends on the size of the unit.
- Make a cushion of rubble and pour concrete on top. Level the surface with a trowel. When the mortar is dry, check the area with a spirit level. Align if necessary.
- After the concrete is completely dry, lay out several rows of refractory bricks.
When laying bricks, special attention should be paid to the evenness of the surface. This will determine how reliably the boiler will be installed.
Bookmarking and lighting should be done very carefully.
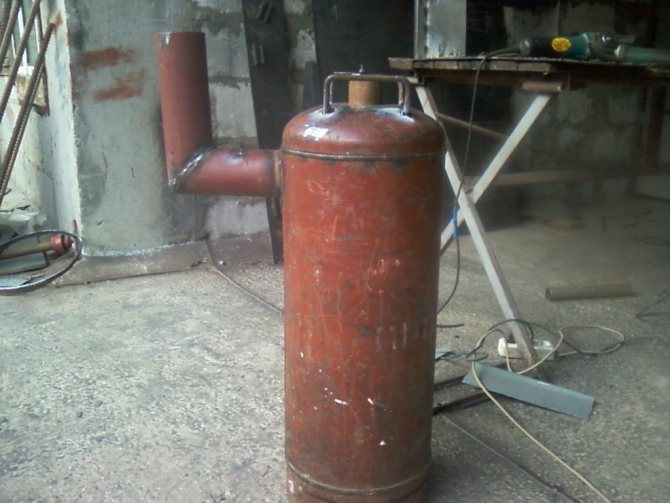
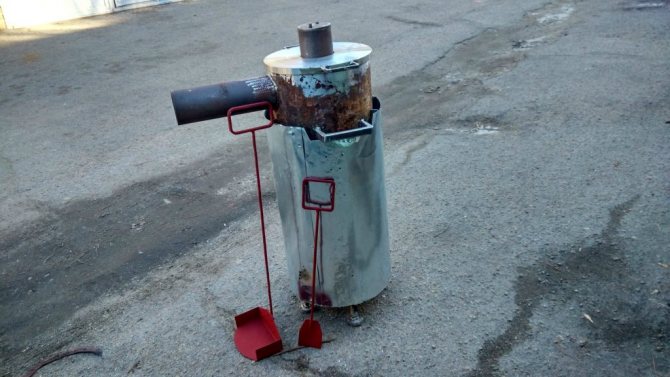
Bubafonya stove from a gas cylinder
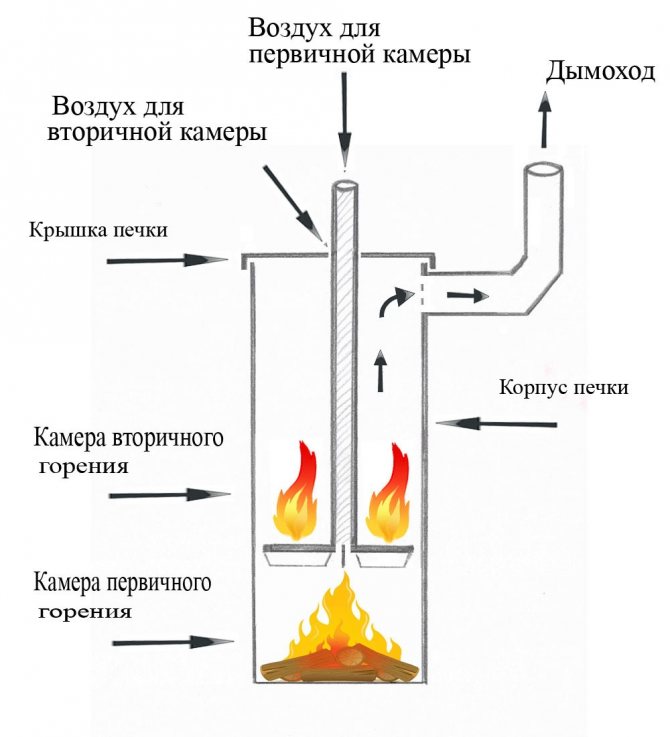
I propose for consideration such an interesting design of the stove, which was named "Bubafonya".Such a stove is classified as a long-burning stove, and you can heat it with almost anything, from ordinary firewood to sawdust, grass, bark, and so on. The peculiarity of the stove is that combustion in it occurs from top to bottom, and not vice versa, as in classic stoves. The air supply is also carried out from above, and the air, while reaching the point of combustion of the wood, heats up.
Also, the design is interesting in that the firewood is pressed from above by a plate with an impeller. Thanks to the plate, a combustion chamber is obtained, the plate presses on the wood and the combustion chamber decreases depending on the degree of combustion of these wood. And the impeller is needed so that the incoming air forms a vortex at the point of combustion. Of course, the design is quite tricky and it is difficult to fully understand the principle of operation of such a furnace, but, according to its owners, it works quite interesting and efficiently. Let's consider how to make such a stove from a gas cylinder!
Materials and tools used by the author:
List of materials:
-two gas cylinders; - incoming pipe for air supply; - outgoing chimney; - thick sheet steel.
Tool list:
- welding machine; - grinder; - a drill with good metal drills; - roulette; - marker; - clamps.
The manufacturing process of the Bubafonya oven:
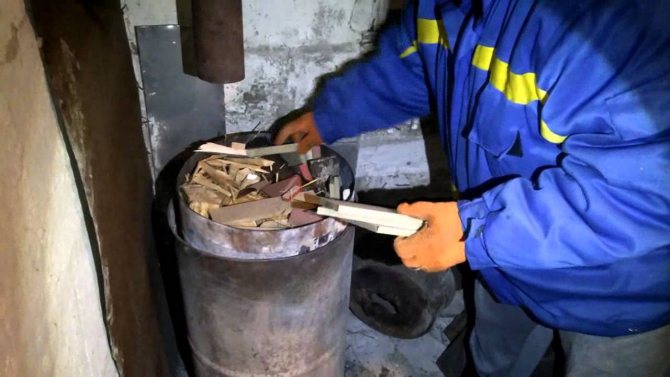
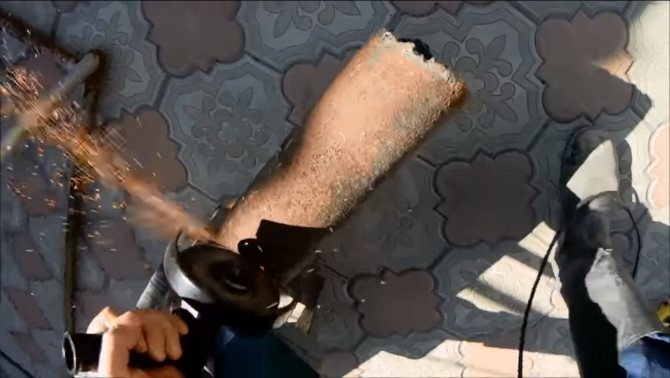
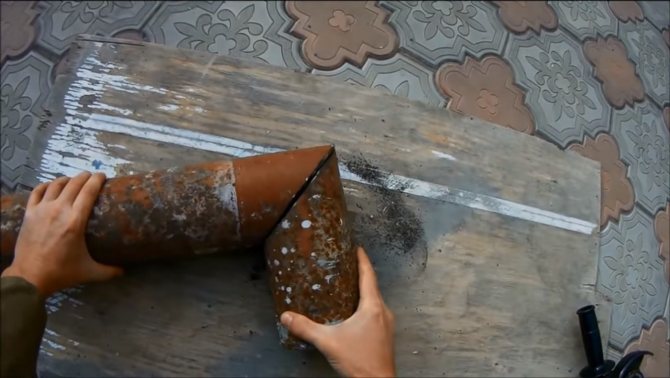
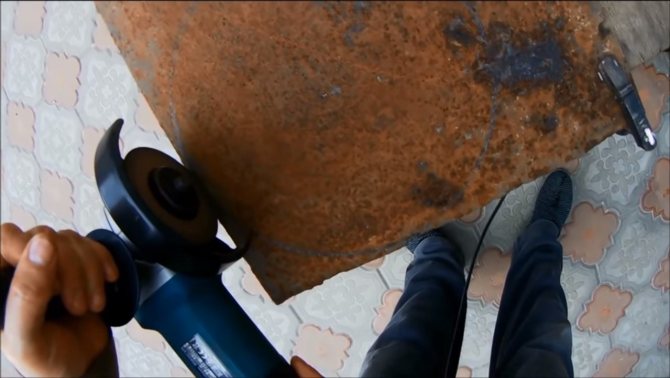
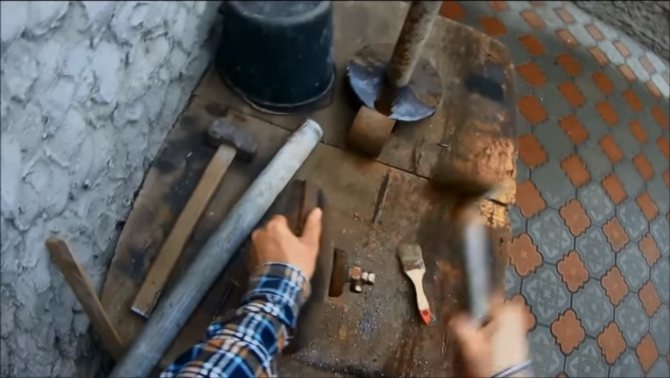
Step one. Gas cylinder preparation
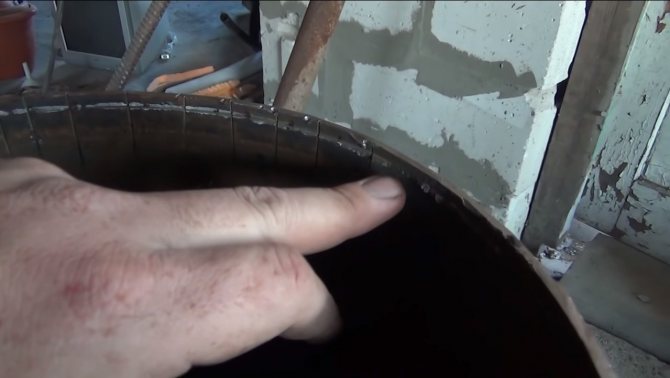
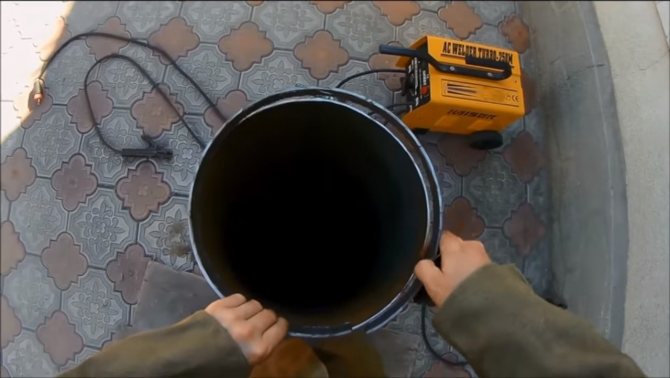
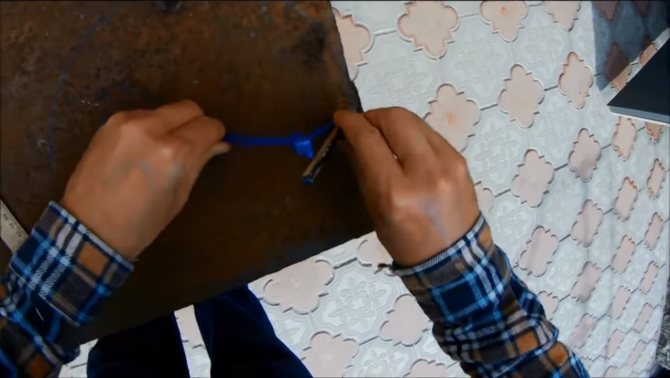
Working with a gas cylinder implies a high danger, if you just start cutting the cylinder, it is highly likely to explode. There are tons of ways to clean the bottle. The easiest way is to fill it under the neck with water and start cutting directly with water. But at the same time, you need to be careful and try not to wet the grinder, as you can earn an electric shock.

Some more masters thoroughly wash the bottle with water and detergents. The water must be used hot so that the flammable substances evaporate. But this procedure must be repeated several times.
In any case, first remove the valve and drain the contents from the cylinder. What leaks out is a combustible substance, gasoline is similar in properties to gasoline. Therefore, avoid open flames when doing this.
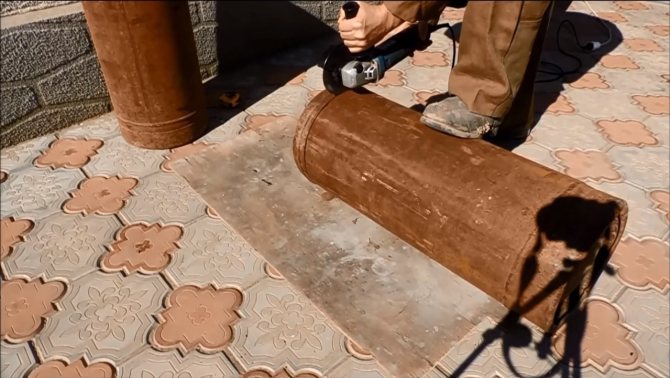
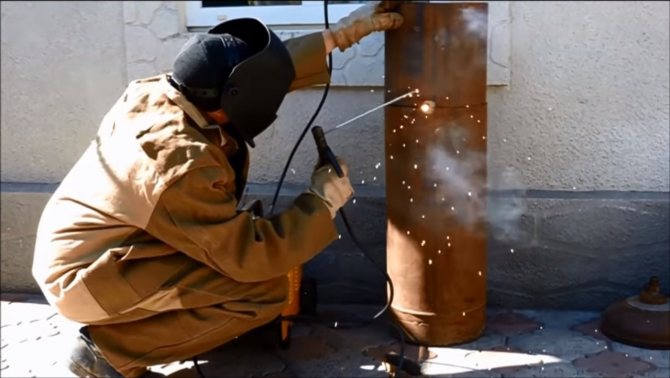
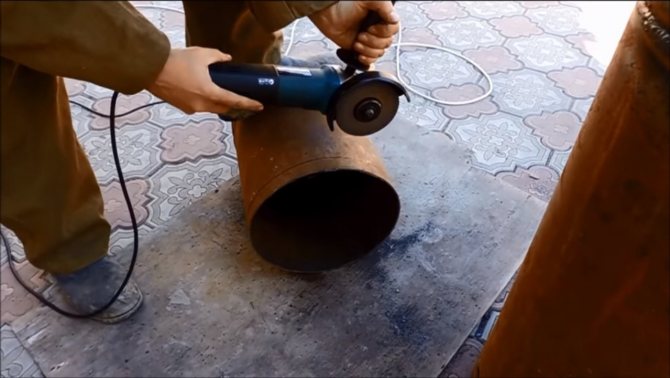
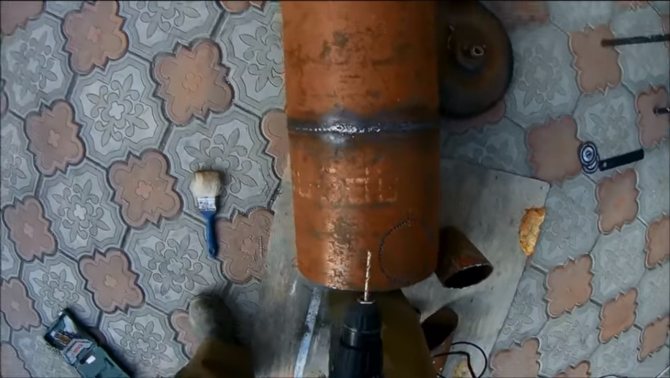
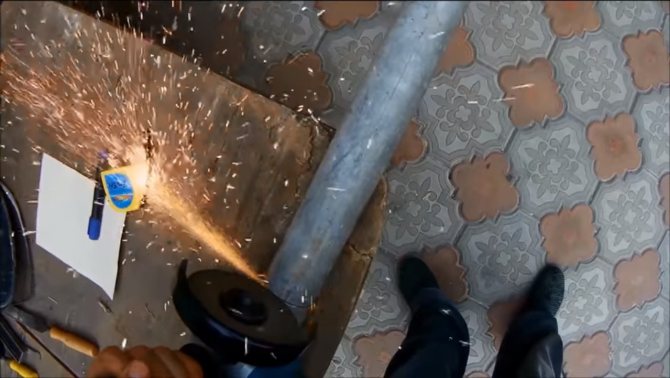
Step two. Cutting and welding
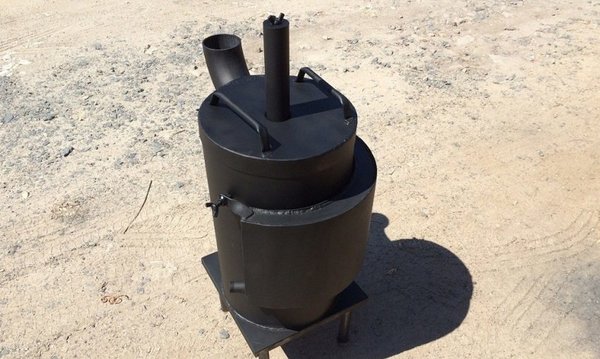
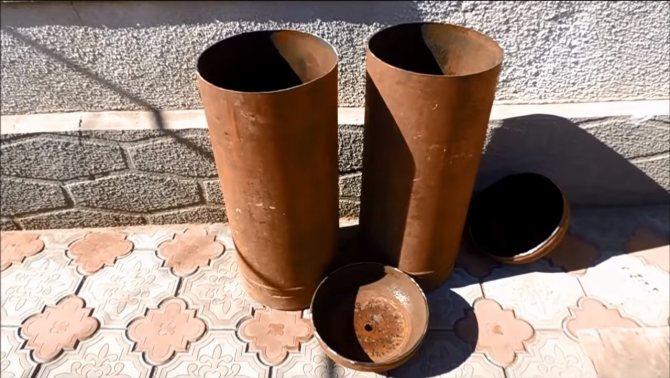
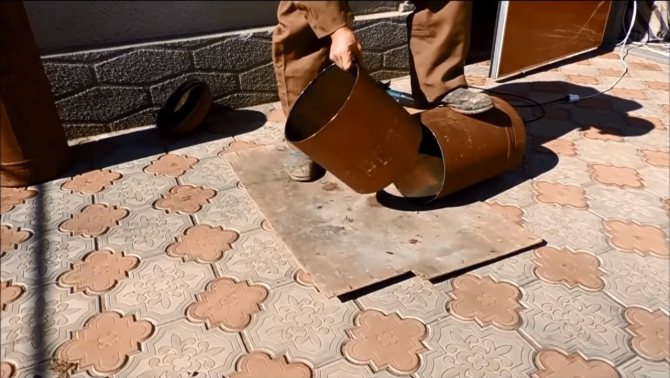
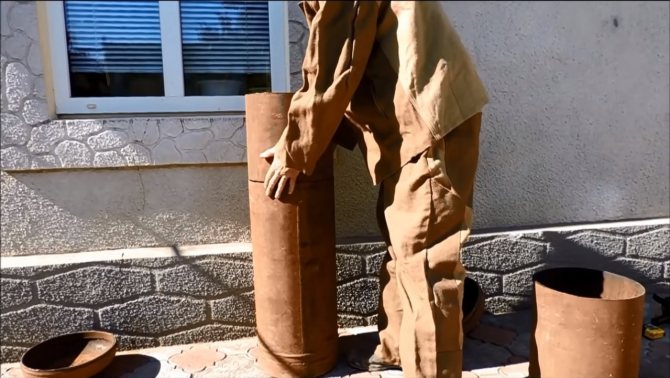
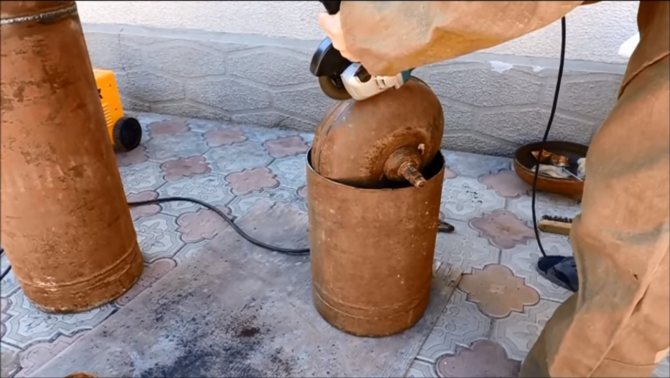
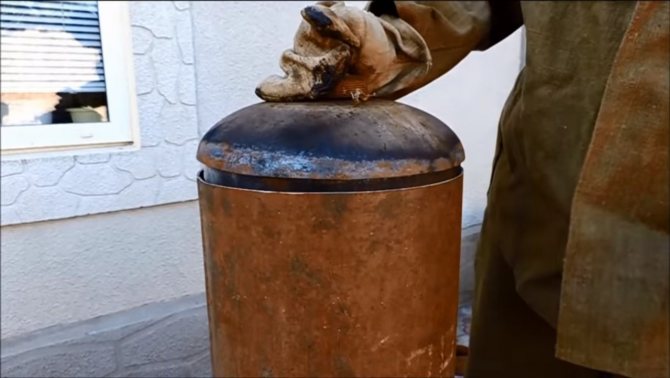
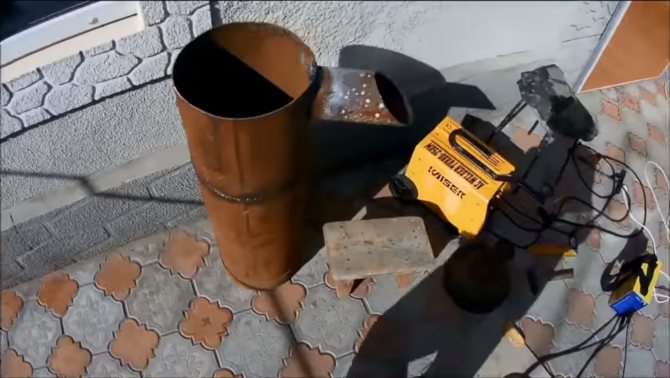
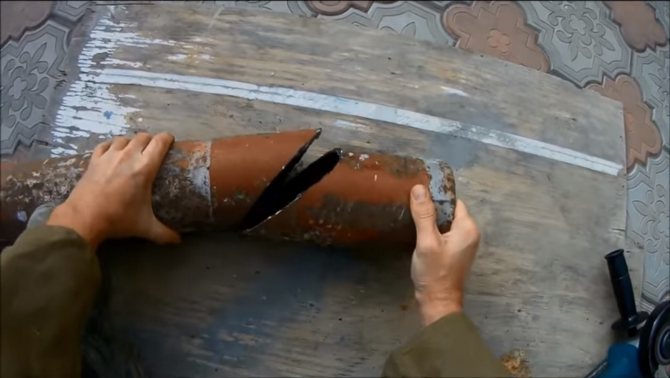
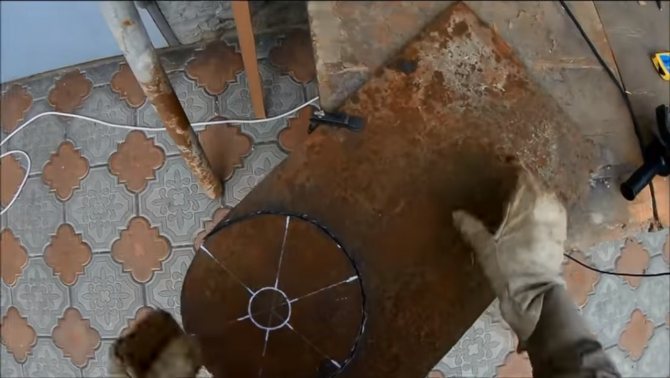
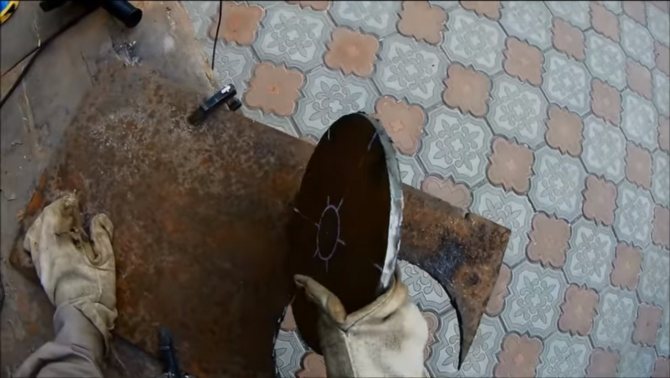
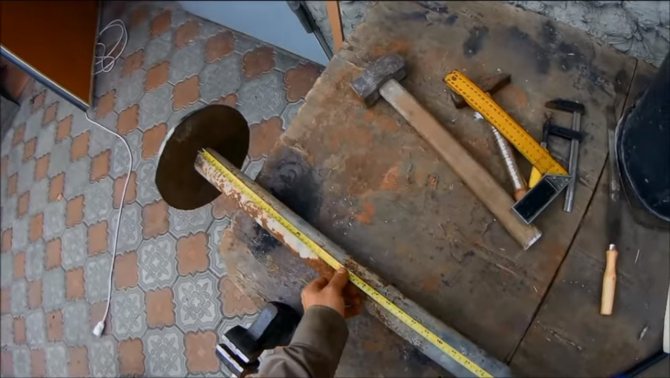
When the cylinders are prepared for cutting, we arm ourselves with a grinder and get to work. We cut off the necks of both cylinders. One cylinder will be the main one, and from the second we will cut a piece to lengthen the oven. When everything is ready, weld all the parts well together. As a result, the resulting design from the author has a height of about one meter.
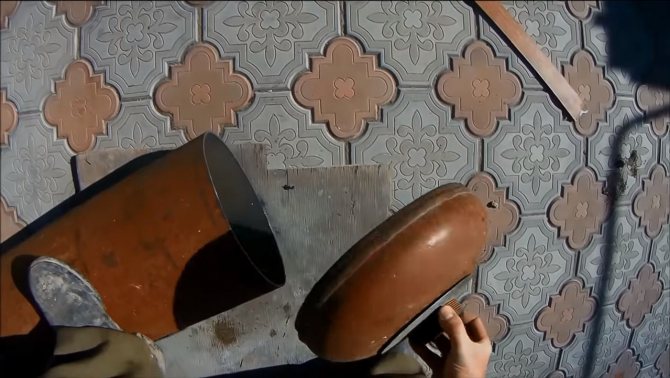
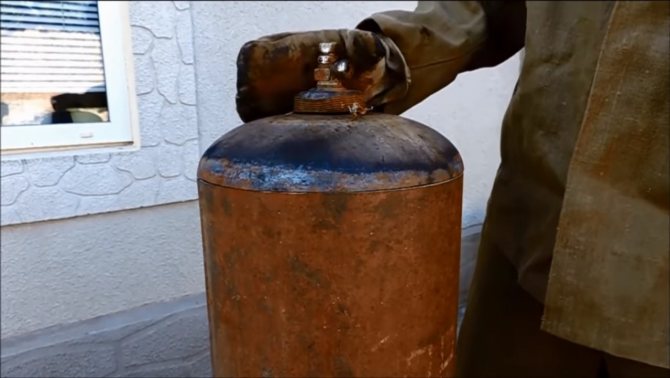
To make the lid, we need the upper part of one of the cylinders. In order for the cap to be well fixed on the cylinder, we need to make a protrusion in its inner part. To do this, we cut off a piece from the cylinder, and then cut the resulting rim and narrow it so that it goes inside the cylinder. That's all, now we weld this to the inside of the lid. As a result, we get an excellent lid that fits tightly and securely on the stove.


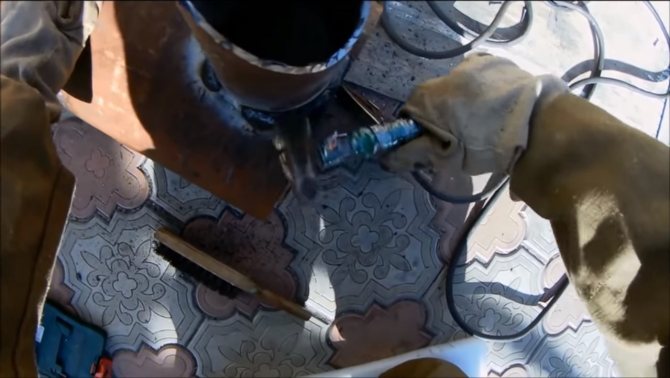
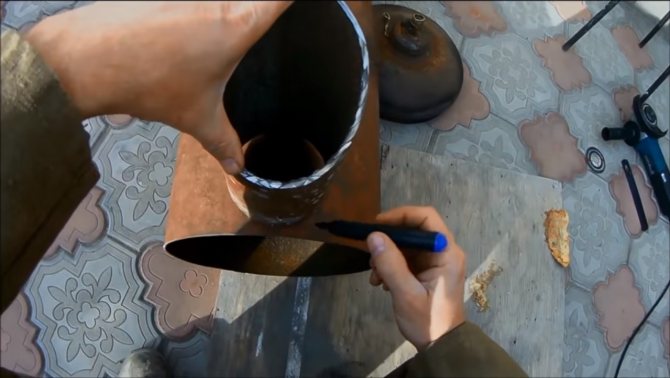
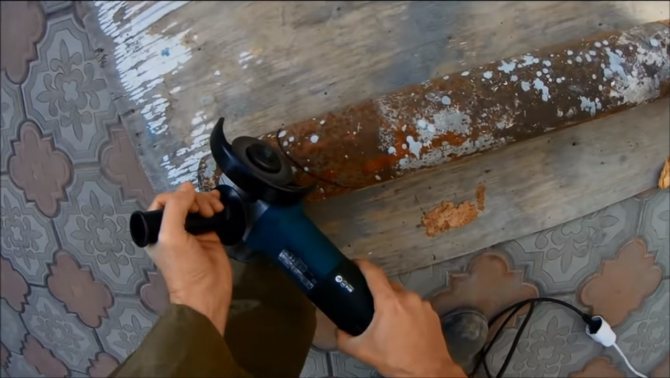
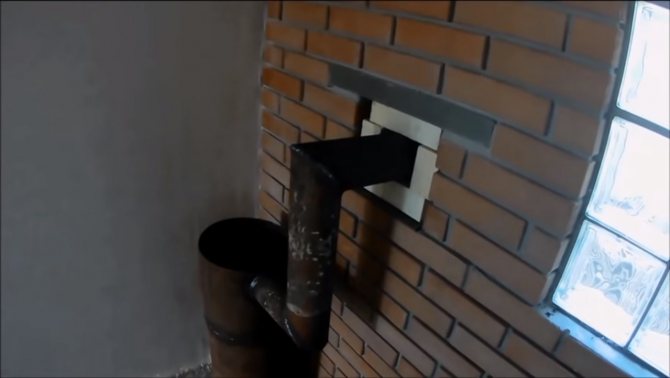
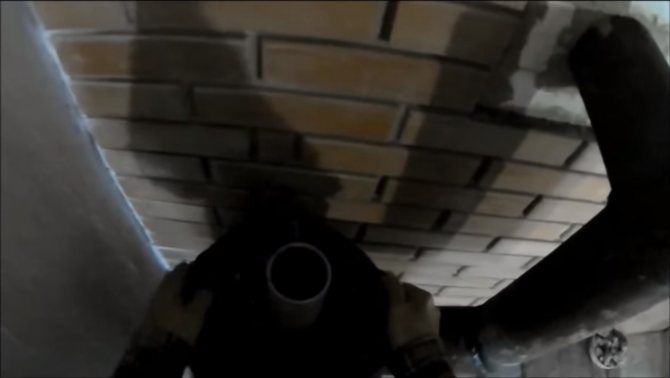
Step four. We install the chimney
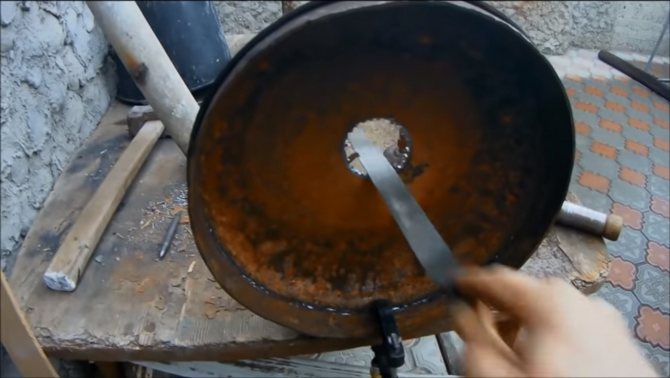
In the upper part of the furnace, you need to make a hole for the chimney. The author makes such holes with a drill. We drill a number of holes, and then knock out the part with a hammer. The hole can then be finished with a file. That's all, it remains to weld the chimney.
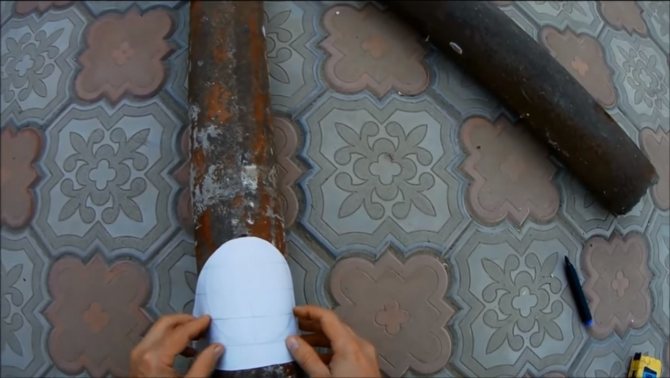
The author needed to weld a knee to bring the chimney out into the street. In order to cut the pipes at the correct angle, it is recommended that you first make templates out of paper.

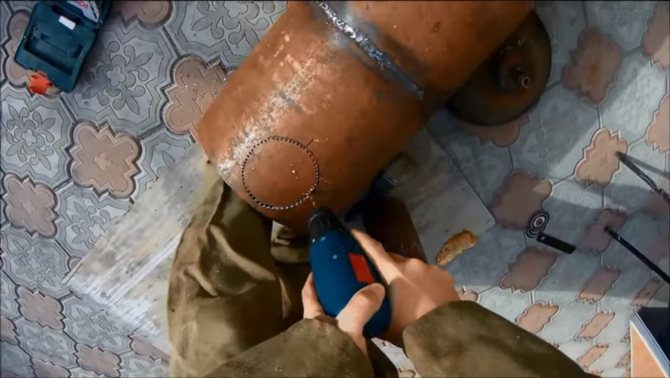

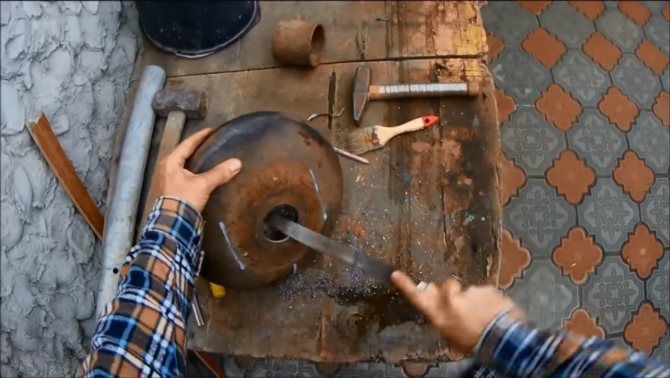
Step five. Air intake part manufacturing
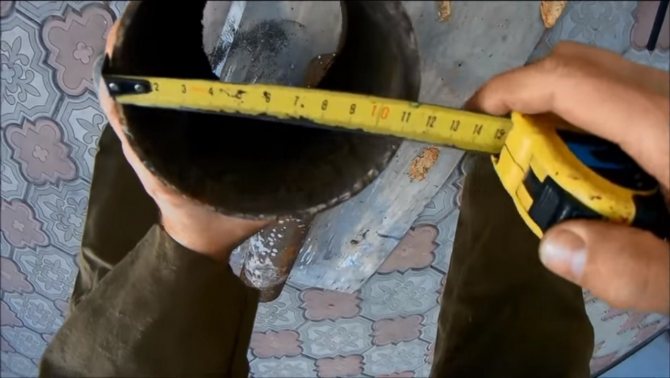
The air intake is a piece of pipe with a plate at the end, the pipe goes through the furnace to the firebox. Select the desired pipe and cut a piece of the appropriate length. The length of the pipe should be slightly longer than the length of the furnace so that it does not completely fall into the furnace when all the fuel has burned out.
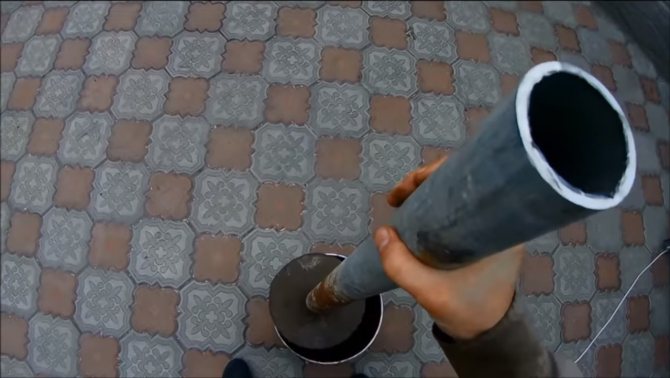
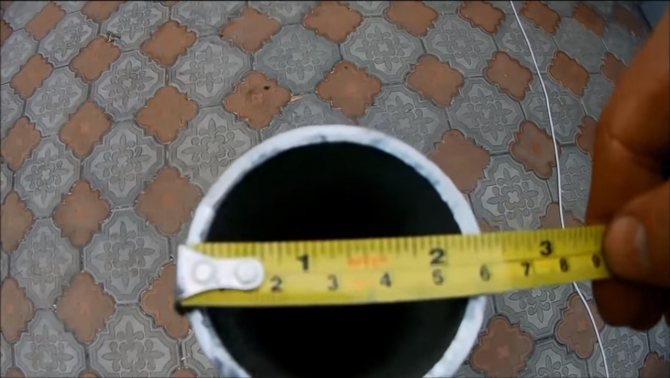
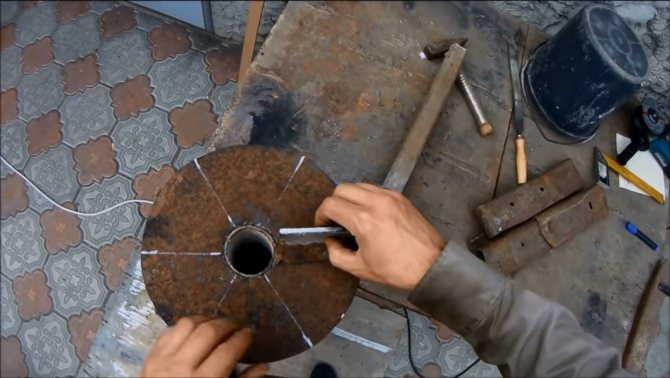
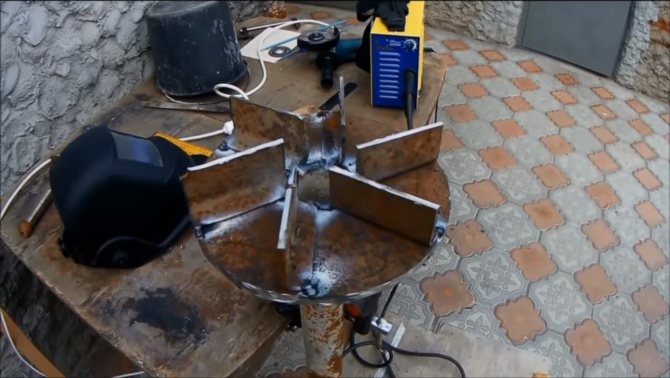
In the center of the round timber we make a hole for the inlet pipe and weld it. For even distribution of air throughout the combustion chamber, an impeller is installed on the plate. For its manufacture, you can use a corner or other similar material.
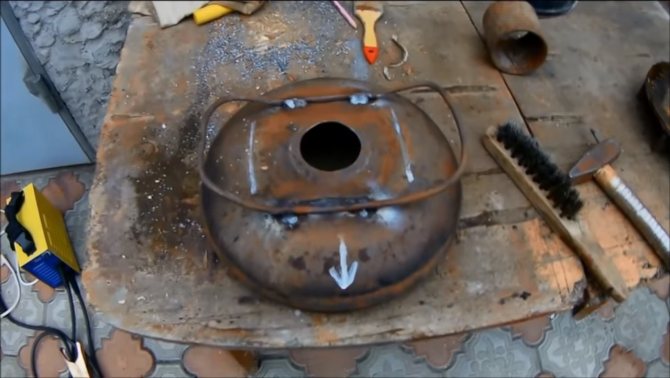
Step six. Modifying the oven cover
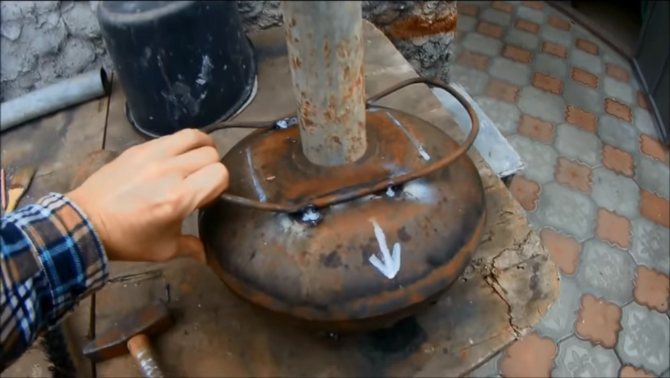
The stove is almost ready, it remains to make a hole in the lid for the intake pipe. The gap here should be small, but at the same time, the pipe should easily pass through the cover. You also need to weld two thick wire handles to the lid.
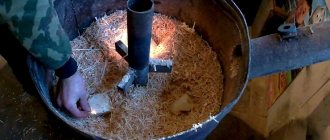
That's all, after that the oven is ready. Firewood is loaded from above, lit in the same way from above. The furnace is closed and a slow and efficient combustion process begins.
Of course, a door still needs to be made at the bottom of the stove, so that it is more convenient to light the stove, monitor the combustion process, and also rake out the ash. But the door must be airtight, since, as planned, the air supply comes from above.
That's all, the project is over, leave your opinions about such a design, and also write reviews if you have such a furnace. Good luck and creative inspiration if you decide to repeat it. Don't forget to share your DIYs with us!

Become an author of the site, publish your own articles, descriptions of homemade products with payment per text. More details here.
Furnace ignition
You need to fire up the unit in the following sequence:
- remove the lid from the boiler and remove the piston;
- place the fuel correctly, otherwise combustion, as well as the working process of the furnace, will go wrong;
- additionally lay a layer of chips and sawdust on top;
- moisten a rag in kerosene or other flammable liquid and put it on top of the bookmark;
- install the piston and cover with a lid;
- throw the lighted paper through the air duct, since the match will not give the desired result.
When the fire starts, you need to close the valve somewhat, which will limit the air supply. Otherwise, the fuel will start burning and not smolder. And as you know, the basis of work is precisely the decay of wood, and not its combustion.

The shirt will hang the efficiency of the unit