To ensure an acceptable temperature in your unheated garage in winter, you can build a working oven with your own hands. It is not expensive, and fuel can be obtained for it at a bargain price if you try. There are several options for the construction of such a structure of varying degrees of complexity. Let's consider some of them.
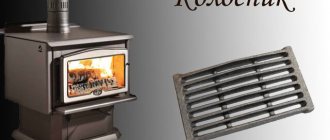
To save on heating a small utility room, you can build a furnace for working out with your own hands
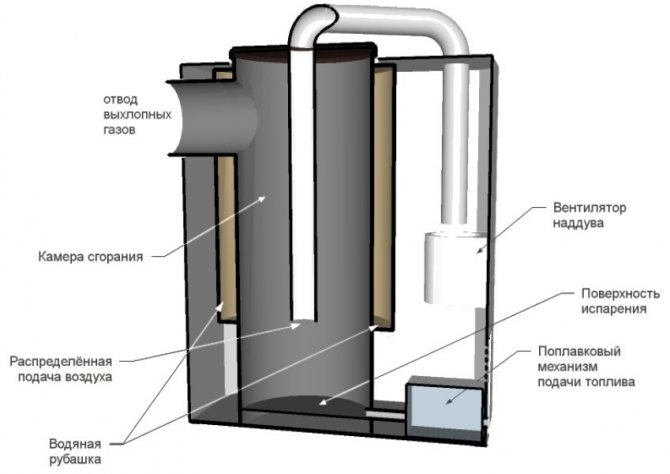
The operating principle of waste oil furnaces
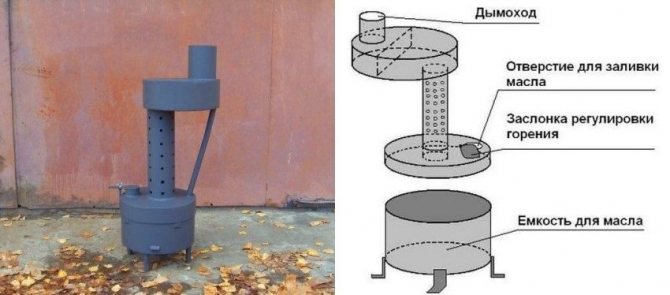
Fuel oil has been used by man as fuel for a long time. Being one of the heaviest components of oil, this substance is used not only for fuel, but also for the production of various oils and other liquids for petrochemical production. Like all components of oil, fuel oil and its derivatives have good flammability with the release of a large amount of heat. Used automotive oil must be disposed of using complex technological processes. However, you can benefit from it by carrying out combustion in a homemade furnace at working off. A drawing of the simplest version of such a design may look like the one shown below.
Waste oil is a very complex substance made up of a mixture of various hydrocarbons. If you set it on fire, only volatile substances will burn out, and everything else will go to waste. Moreover, they are very toxic and it is forbidden to dispose of them in an ordinary landfill. When heated without combustion, the mining begins to disintegrate into many components, most of which are gaseous. Here they, with sufficient access of oxygen, burn out completely, leaving no harmful substances. For such a process to occur, it is necessary to build a working furnace. You can do this with your own hands, for example, from an old gas cylinder.

Waste oil furnace operation principle
What are camping stoves for?
The camping stove is an effective substitute for a fire. But for her, unlike the same fire, very little fuel is needed. It can be:
- dry branches;
- bark, chips, cones;
- reed;
- coals left over from an old fire.
Note! The ratio of the generated heat and the loaded fuel in a camp stove is several times higher than that of a fire. In other words, with an equal volume of fuel, the amount of heat is not the same.
It turns out that, having the same amount of firewood, you can cook dinner on the stove, but, alas, you will not be able to do this on the fire. Thanks to domestic craftsmen, today there are many different modifications of marching structures. Conventionally, they are all divided into single and double-walled. You can:
- to build on the place of rest, having available materials at hand;
- do it in advance using an old saucepan, cans, sheet metal, etc.
At the same time, the camp stove itself should consume minimal amounts of fuel, be small-sized, lightweight, convenient, and also heat the dishes, and not the ambient air.
Video - Camping oven. Detailed overview
How to make a working oven with your own hands is the easiest way
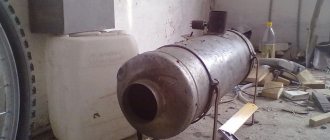
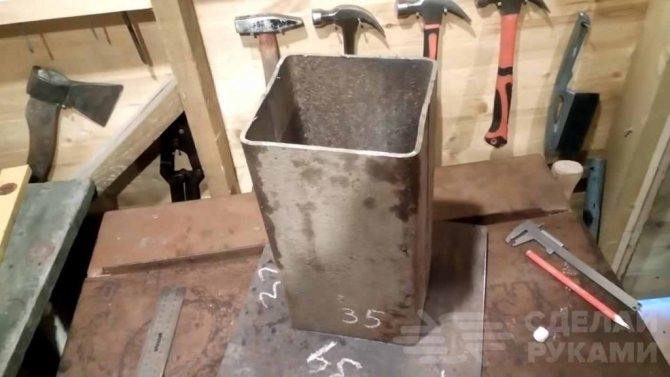
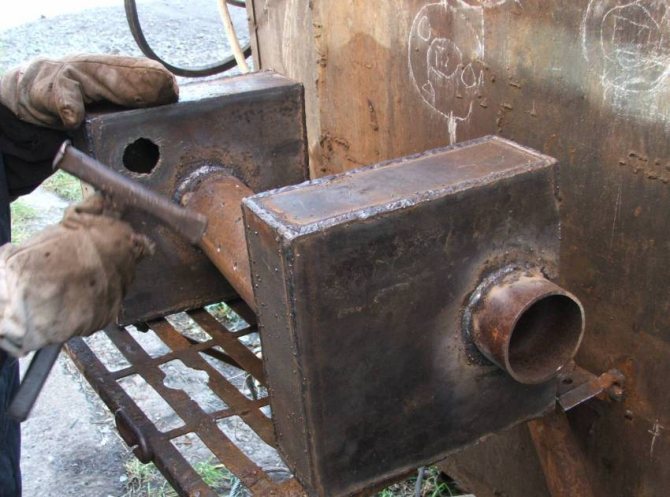
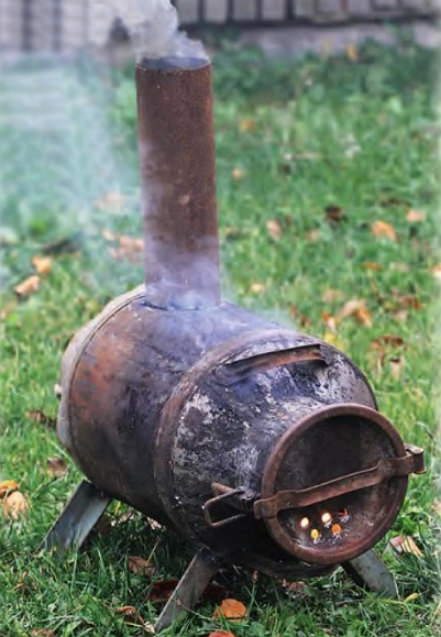
In order to independently make a stove for a garage, which will consume used car oil as fuel, you need to find an old gas cylinder. Before you start cutting it, you need to release all the residual gas and drain the condensate. After that, the balloon is rinsed with water to exclude even the very possibility of ignition. To disassemble the cylinder, you need to release the gas from it by pressing the valve.
An example of a homemade stove made from a gas cylinder
After the gas is completely drained, the valve must be unscrewed. If this is not possible, then you will have to drill a small hole with a diameter of 10 mm in the bottom of the cylinder. To do this, take a drill and drill in the center of the bottom, without pressing hard, so as not to get sparks. To be sure, we constantly water the drilling site with water. As soon as the hole is ready, ordinary water is poured into the cylinder and rinsed. Then the water is drained and the places of the cuts on the cylinder are marked.
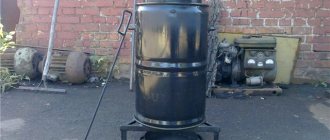
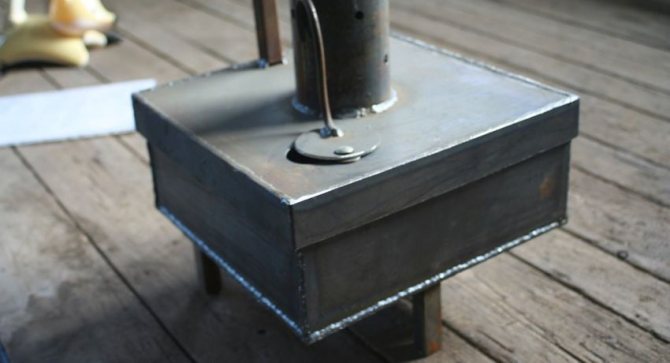
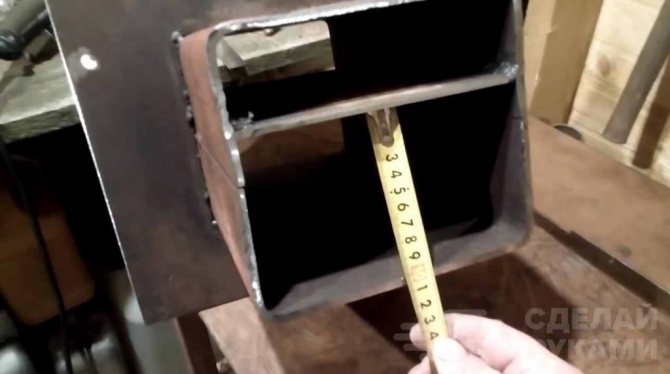
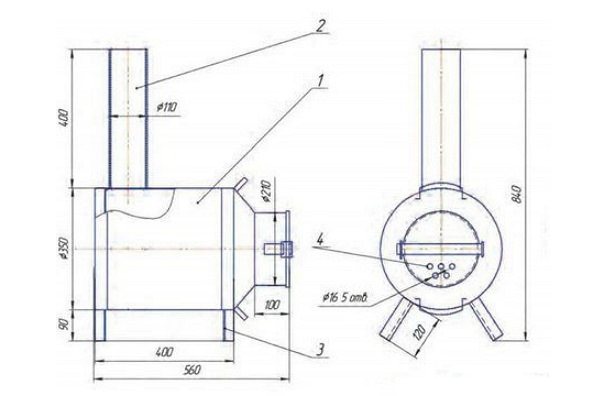
When making a do-it-yourself furnace from a gas cylinder, a drawing of which was presented earlier, it is necessary to cut off the lower part. Its height is 20 cm. Legs are welded to it, which can be adjusted for ease of installation on any surface.
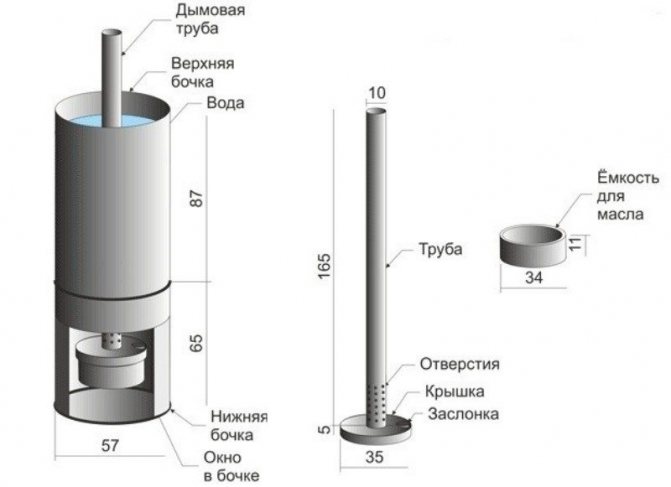
Mounting dimensions of the furnace from a barrel for DIY creation
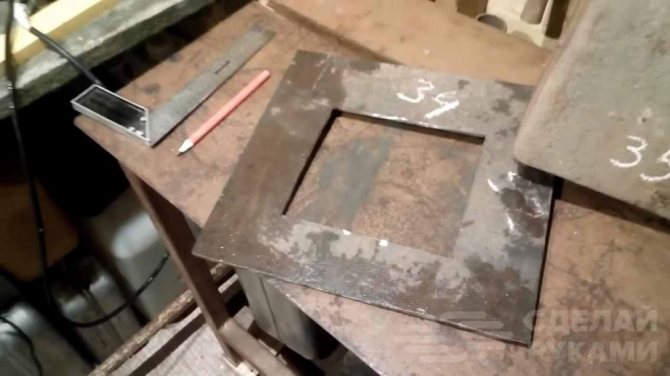
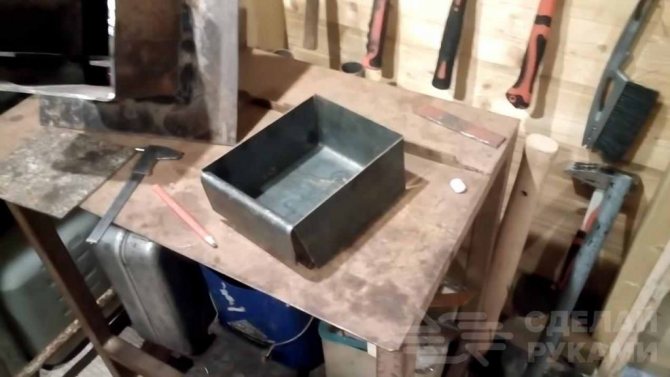
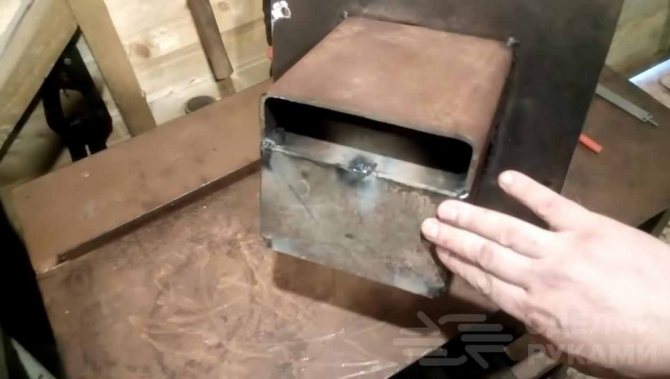
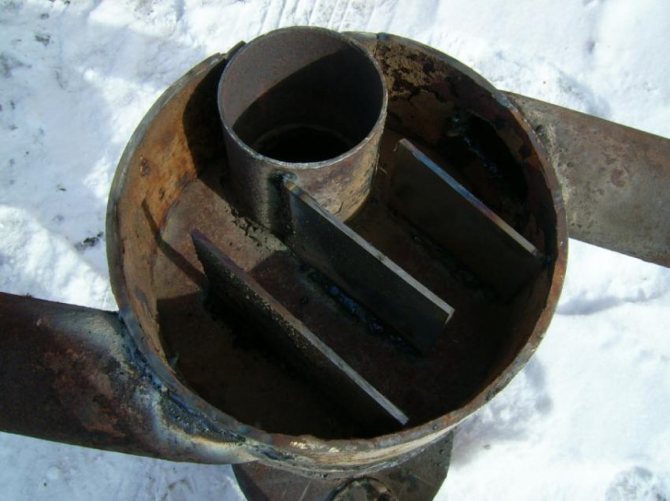
A primary combustion chamber is made from the bottom. Waste oil will be poured into it, which in the process of controlled combustion will be heated and decomposed into volatile fractions. The top of this chamber is closed with a 4 mm thick round steel lid. It must be easily removed if necessary, since the inner surface of the chamber needs to be thoroughly cleaned from slags every week.
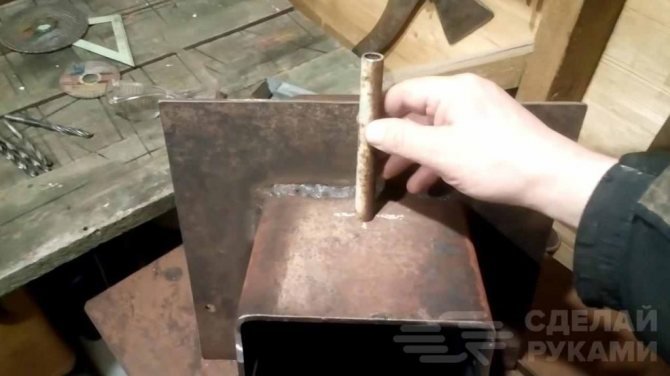
A hole with a diameter of 10-15 cm is cut in the middle of the lid. A 50 cm long pipe is welded onto it, in which a set of 10 mm is drilled. holes. The pipe must be thick-walled, at least 4 mm. In the same lid, a hole is made on the side of a smaller one, up to 5 cm in diameter. A small tube with a shutter is inserted into it. It plays the role of a filler neck for oil filling and a throttle to control the flow of the air mixture into the furnace.
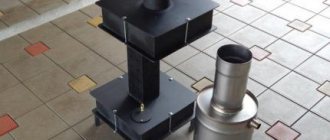
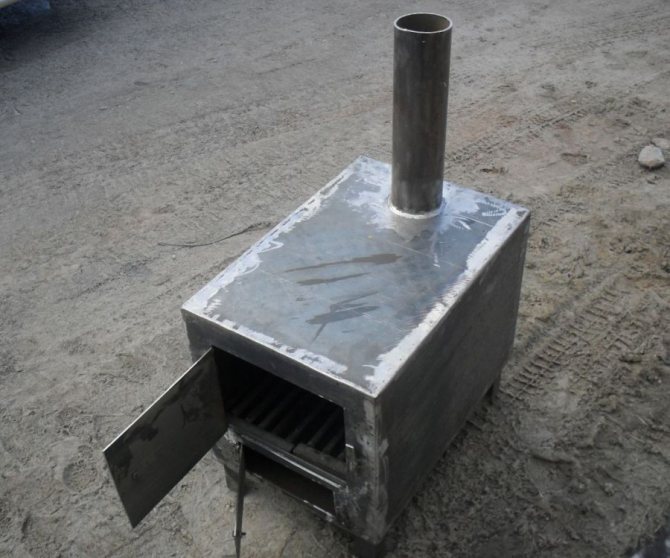
A working furnace welded from sheet metal
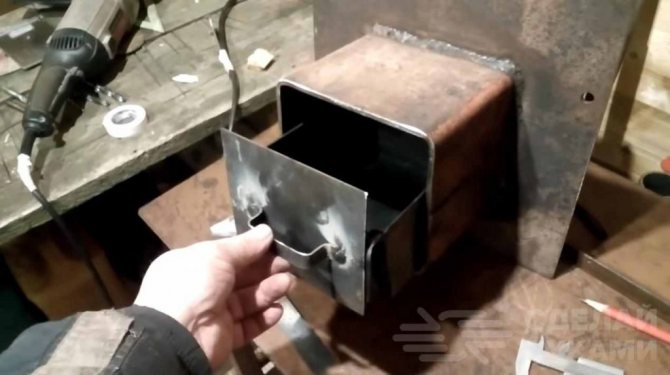
Since a self-created furnace for working off needs to remove smoke without exhausting fire, another chamber is made from the top of the cylinder, in which the exhaust gases cool before flying into the pipe. There is a baffle inside this chamber to prevent direct fire from entering the exhaust pipe. The incandescent gases have time to completely burn out in this chamber while they bend around this partition.
Making a furnace for working out with your own hands
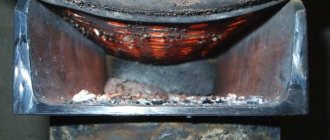
This oven works as follows. Through the hole in the combustion chamber, waste oil is poured into two-thirds of its volume. There it is set on fire. When the combustion intensifies, the damper is closed. This ensures more economical oil consumption and complete burnout. When heated, the fractions that are not immediately burnt rise into a perforated pipe, where they come into contact with air, after which they ignite and burn, releasing heat in large quantities. The exhaust gases enter the upper chamber, where they are finally burned out and exhausted into the pipe.
So from a conventional gas cylinder, you can make a working furnace. A drawing with all the details and their dimensions can be seen in the photo.
A simple version of a potbelly stove from a can
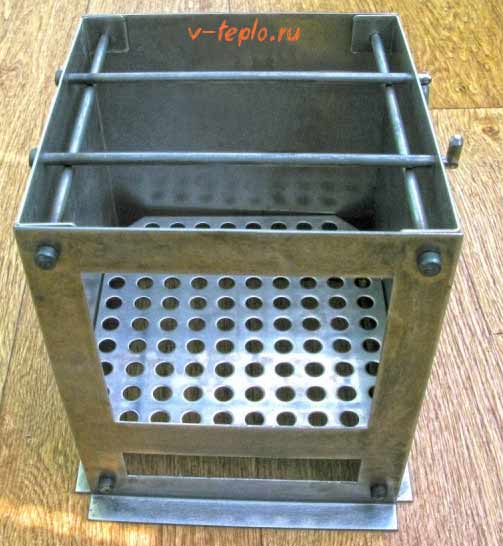
The simplest do-it-yourself potbelly stove can be made from an ordinary canister. Of course, such a structure is not very durable, but it is quickly assembled, easily built and gives off a lot of heat to the surrounding space.
Actually, the whole manufacturing process consists in the fact that you need to weld the legs, the grate and equip the chimney pipe. To start work you will need:
- directly an iron can;
- welding machine;
- chimney pipe;
- wire for the grate;
- tools;
- drawing.
The sequence of actions on how to make a simple potbelly stove in the garage with your own hands from an old can or an iron barrel:
- Place the can in a horizontal position and mark a place for a sickle-shaped or small rectangle-shaped blower under the lid.
- Cut a hole in the bottom or wall of the tank for the flue pipe according to its diameter.
- To make a grate, bend the steel wire and pull it inside the can through the lid and gently unbend it so that the zigzag is in the desired position, while leaving space for conveniently laying firewood.
- Then weld the legs from the pipes or corners and the chimney.
- This stove can be equipped with several useful accessories. To reduce the loss of heat generated, you can fix the reflector on the outside of the can. And if you weld the handles on the sides, then the tank will be easy to carry from place to place.
Photo of "potbelly stove" from a can:
Following the same example, you can also make a potbelly stove from an iron barrel.
But there are other, more complex options with greater efficiency.
The use of capillary technology in the manufacture of the furnace
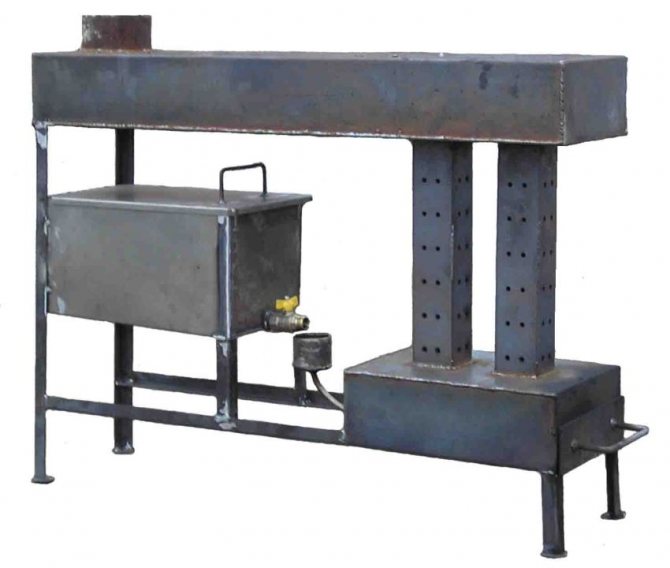
In addition to the simplest method of manufacturing an oil oven described above, more advanced versions are also used. One of them is a working capillary furnace. It is also within the power of anyone who knows how to handle metal and tools to make it with their own hands.
Oil in this design is not just poured into the combustion chamber, where it is in large quantities, but it is done gradually by means of a drip system. This method allows the oil to burn out with greater efficiency, and its consumption is reduced to a minimum. Separately from the furnace, an oil tank is installed in the upper part, which is connected to the combustion chamber of the furnace by a branch pipe. An adjusting valve is installed in the branch pipe, with the help of which the flow of oil into the furnace is dosed. Otherwise, the design is no different from the simplest furnace for working out. With your own hands, the drawings presented below will help you make such a unit without difficulty.

Drip fuel flow diagram for a homemade stove
Organization of additional features of the waste oil furnace
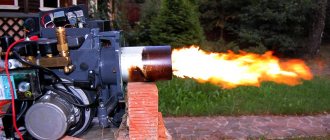
When making a homemade stove that runs on waste oil, you can use electric fans. With the help of them, you can not only inject air mass into the combustion chamber, but also remove hot air from the furnace, creating artificial circulation in the room, which will significantly speed up the process of heating it to the desired temperature. For this, a casing is mounted around the main chamber, in which an air flow is created using a fan. You can see the work of such a do-it-yourself furnace for testing live. The video of the entire combustion process is very interesting and visual.
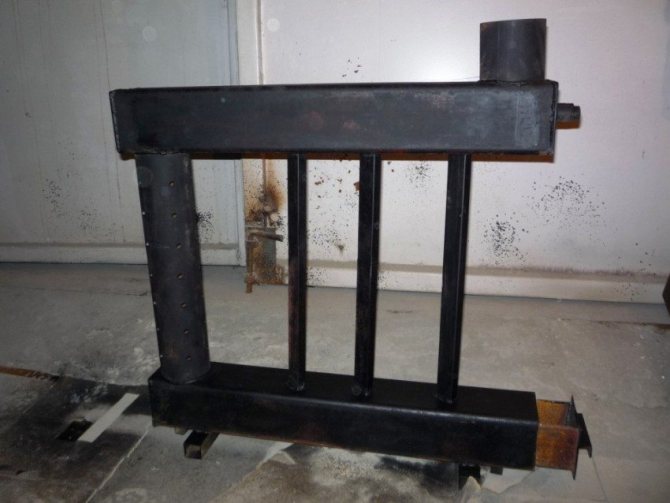
Another improvement is the manufacture of a water circuit for a homemade oil stove. The pipe coil is placed inside the secondary combustion chamber, where the highest temperature is observed. Or it is screwed on from the outside onto a perforated pipe. The coil is connected to the flow and return pipes of the heating system. When the liquid is heated, its natural circulation occurs in all batteries. You can make such a furnace for working out with your own hands, a video of which well reflects its effectiveness, in one day.
More complex design of a working furnace with a water circuit and a blower fan
How to use it correctly?
- Emelya coating for stoves and fireplaces requires a certain temperature in the working room. It should not be applied if the thermometer mark is below 5 degrees.
- Before use, open the working container and mix the mixture thoroughly.

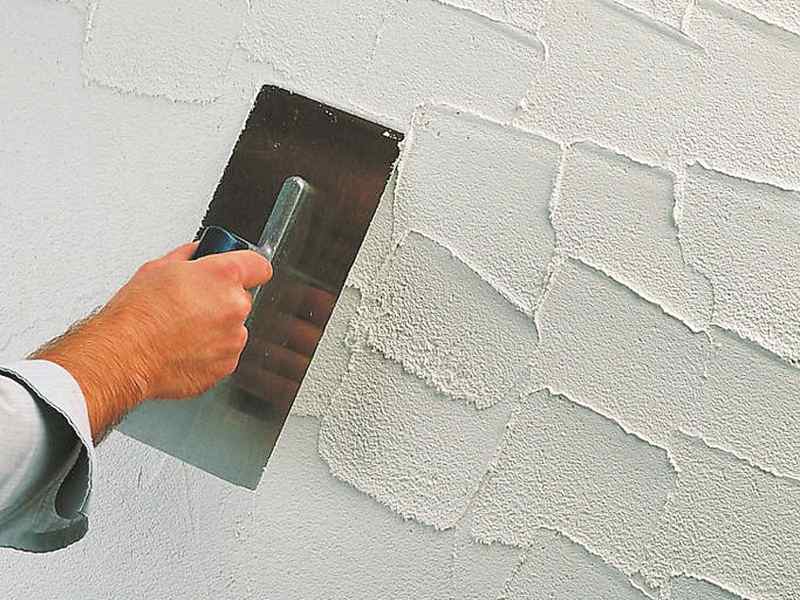
- Next, you should proceed to the preparation of the surface of the heating device. It is necessary to thoroughly clean the surface from dust and dirt, grease stains. If the coating has an old layer of cladding, it must be removed with a stiff brush. This will keep the new layer from chipping and falling off.
- Using various tools (spatulas), apply the composition in an even thin layer. Its thickness should not exceed 5 mm, otherwise rolling and deformation of the material is possible.
- Leave the veneer for a few days for the product to dry completely. The manufacturer recommends the optimum drying temperature - 20 degrees. At this temperature, complete drying will occur 72 hours after the last manipulations with the composition.
- Only then can the device be heated a little. This will ensure reliable adhesion of the composition to the surface.
Subject to all the rules of storage and use, the manufacturer of the mixture guarantees the durability and reliability of this building material.
Advantages and Disadvantages of Oil Furnaces
Like all homemade designs, oil ovens have the main advantage - they are cheap. They can be made from old parts that have been lying around for a long time in the corner of the garage, waiting for their use. The second advantage of these devices is the fact that they actually run on cheap, unnecessary fuel, which is not difficult to obtain. These ovens are able to heat up a small room very quickly, as they use an open fire.
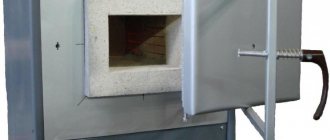
Waste Oil Furnace Chamber - Inside View
Moving on to the disadvantages, it should be said that such self-made structures do not pretend to be permanent and main sources of energy. They only help to warm the utility rooms. So, we list all the disadvantages of oil ovens:
- the inability to use inside residential premises;
- an increase in the size of the combustion chamber does not lead to an increase in the power of the device, since the efficiency decreases;
- you cannot extinguish the stove with a fire extinguisher with powder, since the mixture simply explodes from the red-hot parts of the stove;
- it is impossible to accurately regulate the intensity of heat transfer;
- there is a risk of explosion when mining boils.
An example of a working furnace that you can do yourself
Creating a furnace for testing with our own hands, we ask ourselves where to get fuel for it. This question can be solved in the simplest way. You just need to negotiate with the owner of one of the car services located near your home. Perhaps he will be happy to sell you this fuel that is valuable to you, but has no practical benefit for him at a low price.
This can lead to consequences, the losses from which will probably outweigh all the benefits of such a furnace.
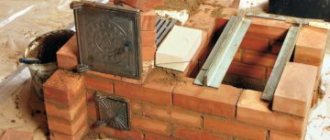
We build stone wood-burning ovens barbecues and barbecues for summer cottages
To build the foundation, it is recommended to first dig a small pit, each side of which should be about 20 cm wider than the side of the future barbecue. Sand and crushed stone should be poured into it, poured with water and carefully tamped. After that, it is necessary to install the formwork from the boards, and inside for greater strength, lay a reinforcing belt and pour concrete. For reinforcement, you can use steel mesh or wire. It is recommended to add rubble or pieces of old brick to the concrete mix. After pouring, it should take 5-7 days for it to properly fix. Roofing material or some other waterproofing material should be laid on top.
Then you can proceed to the construction of the basement. Masonry should be carried out on a pre-marked surface using a building level. To achieve greater strength in the corners, it is recommended to use wire reinforcement. The dimensions of the basement depend on the planned width of the firebox and the availability of additional compartments for firewood. The brick should be soaked so that it does not absorb moisture from the solution. The stone can be laid dry. The width and height of the basement can be different, but 5-6 rows of bricks are quite enough.
For the further arrangement of the stove from scrap materials, it is necessary to lay the inner part of the structure. For this, it is recommended to use refractory bricks.If it is not available, then you can use ordinary red brick or natural stone, thoroughly soaked in water beforehand.
When laying from any available means, you should use clay soaked for several days. It must be mixed with sand in a ratio of 1: 3. You can also use another composition by mixing cement, sand and slaked lime (1: 1: 3) and adding water to bring the solution to a thick mass.
At the bottom, it is necessary to leave a gap for the blower so that the air necessary to maintain the fire can freely flow into the firebox. Place the grill rack in the roasting pan. It must be installed on built-in iron corners or brick ledges so that it is removable. You can also make spit racks from reinforcing steel.
After that, you can proceed to the exterior decoration. Outside, a stone stove with a barbecue can be beautifully overlaid with natural stone, with which forged decorative elements will be beautifully combined.
It is recommended to lay the floor around the structure with paving slabs, and the cutting surfaces are best made of porcelain stoneware or marble slabs. Additionally, a chimney can be constructed on request.
To complete the construction of a stone stove should be equipped with a roof, which will allow you to use the hearth in any weather.
Further, several photos of stone furnaces are proposed, where finished objects are presented: