Such an installation of a modern underfloor heating, which operates from a standard electrical network, is considered a rather original solution when carrying out major repairs in a dwelling. Such a seemingly unexpected decision justifies itself in cases when the walls of the room need to be insulated, but for a number of reasons, it is not possible to produce the classic insulation familiar to everyone.
To carry out the installation of insulation, the following tools and materials are required:
- construction trowel;
- notched spatula;
- a roller with a pile;
- electric puncher;
- construction (assembly) knife;
- chisel;
- a hammer;
- means for the destruction of fungus and mold "Neomid" (0.5 kg);
- moisture resistant plasterboard (thickness - 1 cm, area - 4 sq. m);
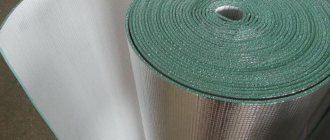
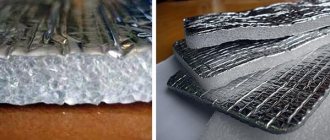
- insulation for walls with a self-adhesive base "Penoflex" (thickness –0.3 cm, width –1.5 m, length –2.5 m);
- heating mat for underfloor heating system Teplolux Mini MN 250 - 1.8, where the area of the heated surface is 1.8 sq. m. m;
- masking tape;
- aluminum tape;
- fasteners (dowel-nails 5x50);
- acrylic based primer EK G200 (capacity 5 liters);
- adhesive for tiles EK 3000 (quantity - 25 kg).
After all the materials and equipment have been prepared, you can proceed to the installation work.
Stage two: installing the base of the warm floor
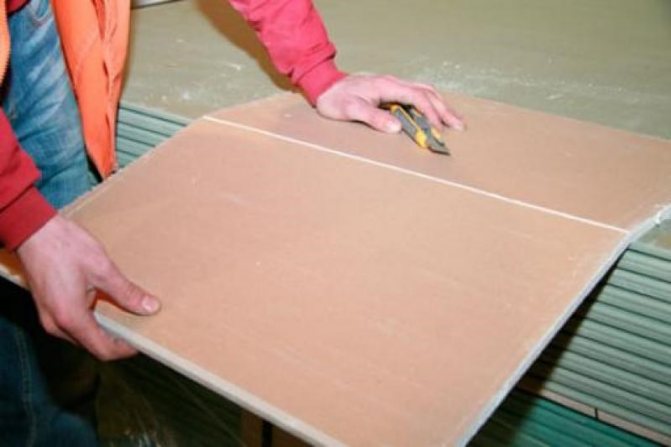
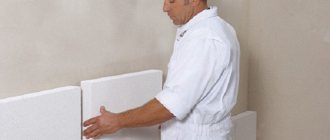
At the second stage of the installation work, using a construction knife, the sheets of moisture-resistant drywall that are necessary for the size are cut. Fixation to the wall surface is carried out using dowels. Due to the fact that the walls of the bathroom are made of concrete panels, the fasteners of the sheets should be carried out end-to-end with the adjacent mills. Compensatory
the gap in this case does not play a role, and its functions are performed by deviations in cutting drywall.
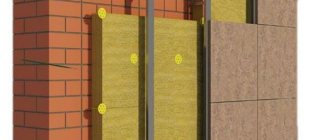
In accordance with the dimensions of the drywall, the material for the insulation is cut with the help of scissors. Insulation with a self-adhesive base is perfect for this, since it is much more convenient to work with it. The insulation is fastened in this way: the protective material is removed from the adhesive base and fixed on the surface of the drywall with short clamps. The joints in the heat-insulating layer are glued with aluminum tape.

Thermal insulation of the steam room from the inside: the order of work on the ceiling
Thermal insulation of the bath room from the inside is completed by insulation of the ceiling. The ceiling has the highest temperature, which can reach 160 ° C. Do-it-yourself sauna ceiling insulation is a process that depends on its design. The ceiling can be with an attic or with another superstructure on top and without an attic.
If the building has an attic or an attic, the insulation process is as follows: the ceiling boards must be coated with clay with a layer of 20 mm. Clay effectively copes with the task of retaining moisture. In the cracks between the boards, you need to fill in wooden chips. You can use any other material with thermal insulation properties, such as expanded clay. The layer of such a coating must be at least 200 mm.
In saunas without an attic, be it a log or panel building, the insulation scheme looks something like this: material for vapor barrier, insulation, sheathing layer, beams, ceiling boards. The order of the layers of ceiling insulation in the bathhouse with your own hands will be different depending on the design of the room and the materials used.
Particular attention should always be paid to the joints of the pipe and insulation. In order not to violate fire safety standards, it is necessary to make an indent between the pipe and the heat-insulating material of 200 mm.This problem can be solved by constructing a box from the rafter legs, which will separate the pipe and insulation on the roof. The space inside the box is filled with fire-resistant insulation, such as stone wool.
In any case, the roof and ceiling of your bath must be designed so that there are simply no places through which warm air can leave the room, and cold air can get outside. The main goal is also to avoid the formation of condensation. Moisture is, first of all, the enemy of building materials.
Ceiling insulation materials are not suitable for all. It is not recommended to use thermal insulation made of plywood, chipboard or fiberboard, etc. Such materials can deform and release harmful substances when exposed to high temperatures. Plastic ceilings will also be a bad solution - condensation will accumulate on them. It is better to use natural insulation or mineral heat insulators.
Stage three: installing a warm floor
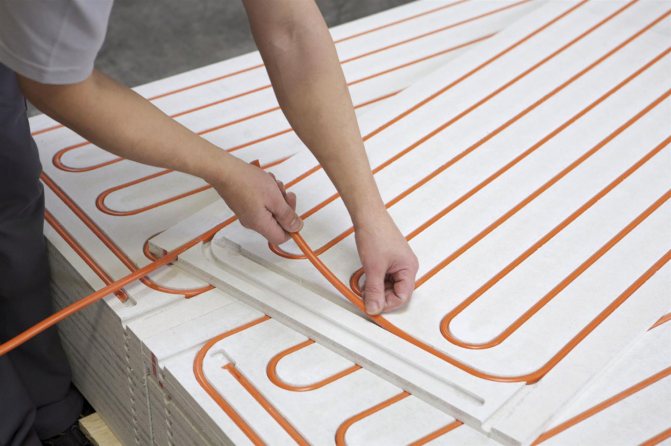
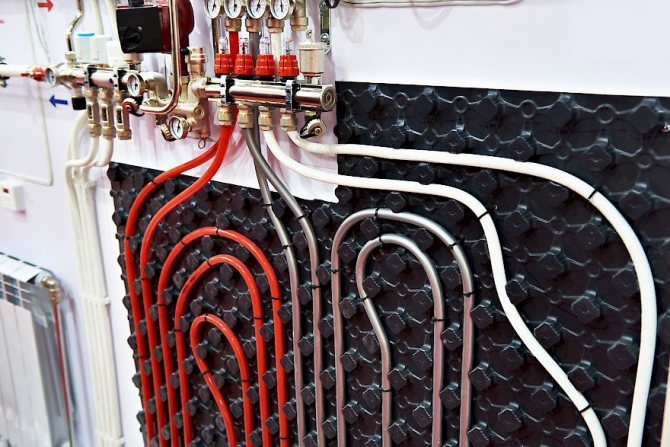
The above-mentioned underfloor heating model is quite convenient to install, because it looks like a self-adhesive polymer mesh with a cable fixed on it, which heats the room. The mesh must be spread over the entire surface, the protection removed from the adhesive base and fixed to the wall. The adhesive base of the heating mat is not designed for vertical fixing, which is why additional fixation is required using aluminum tape. In accordance with the instructions for installing a warm floor, it is required to prepare special leads in order to connect a special sensor and electrical power in the future.

Control points
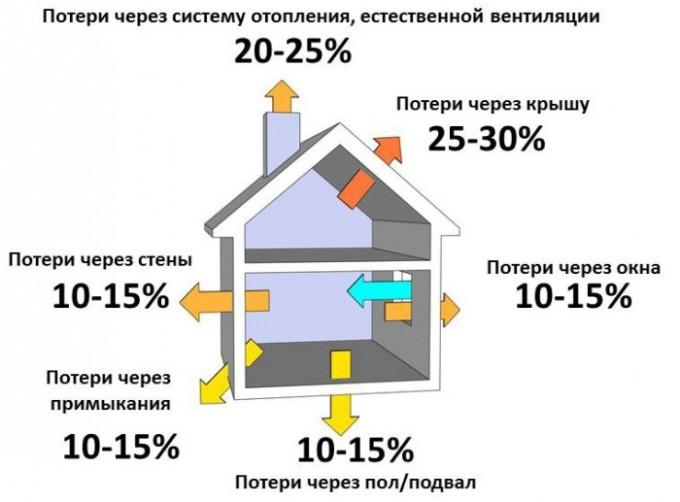
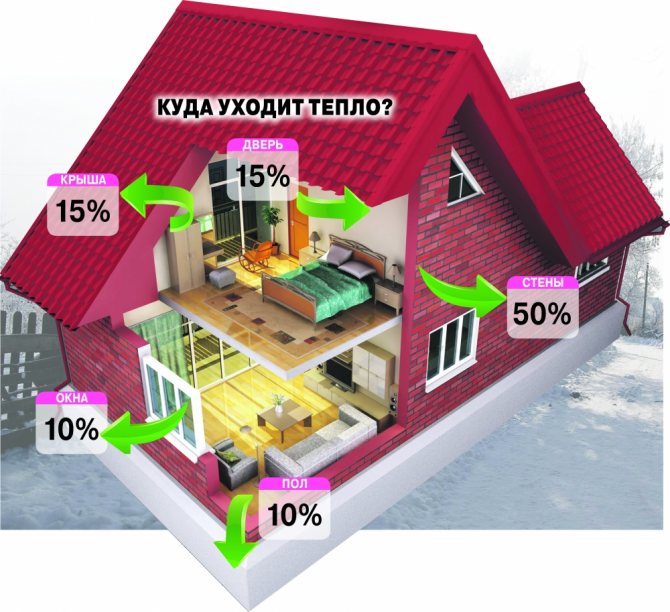
So, the Ministry of Fuel and Energy reports that more than half of all energy resources in the housing and communal sector are spent on heating. And he advises to insulate windows, doors, floors, walls and roof to keep warm in winter. Let's walk through these checkpoints.
With windows and doors, the issue can be solved independently. If they are not made of metal-plastic, then - in the old fashioned way: lay with cotton wool, paste over with tape, paper and flour. If the source of the draft or cold is the gaps in the front door frame, they can be filled with polyurethane foam sealant and plastered. But it is worth knowing that only a quarter of the heat loss falls on windows and doors. Another 15% go through the roof, 10% through the floor (the cheapest way: carpet or carpet, you can also use foam) and basement walls (if you have the latter). The walls are to blame for half of the heat loss in the dwelling. It is them that are most difficult and most expensive to insulate.
Heat Photo: AIF in Ukraine
Stage five: connection
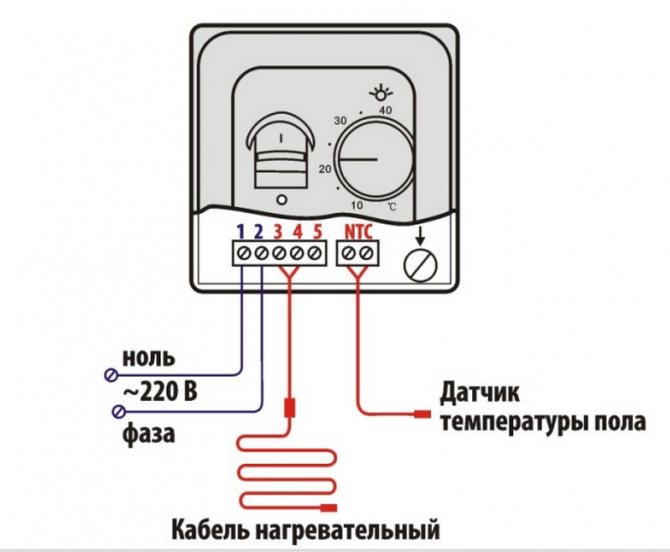
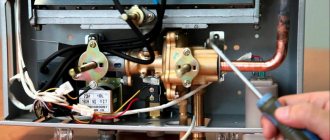
After the completion of all work related to the decoration of the walls, it is required to connect the heating mat to a special sensor that regulates the functioning of the mat and to the power supply. When connecting the heating mat, the following operations are required:
- check the RCD machine to which the heating element will be connected, only then can the power supply be connected;
- equip a protective ground for connecting the sensor-regulator and batteries;
- to install wires and cables of the sensor-regulator in a special cable channel.
It should be noted that the sensor-regulator should only be installed outside the bathroom, because there is always high humidity in this room. In the event that it is not possible to mount the regulator sensor outside the bathroom, its installation should be carried out only in a special case protected from moisture.
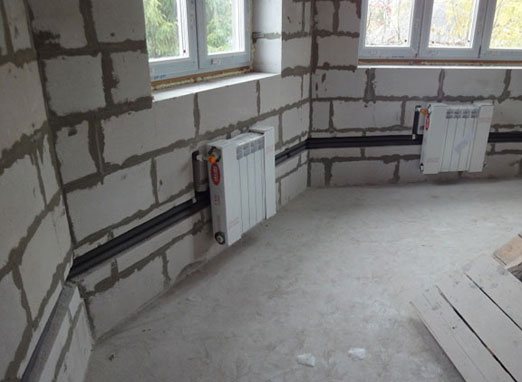
Heating pipes in the wall - do-it-yourself correct laying
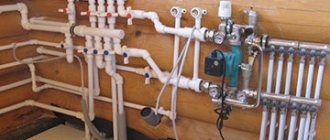
In order for the living space to have a neat appearance and not be filled with numerous communication elements inappropriate for design, it is possible to hide some of them in the wall.This is especially true for heating pipes, which, being located outside the room, undoubtedly hide part of the usable area and simply spoil the interior. Therefore, further we will talk about how to remove the heating pipes into the wall so that it is invisible and at the same time does not affect the operation of the heating system.
When included in a project
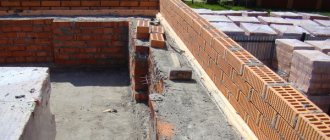
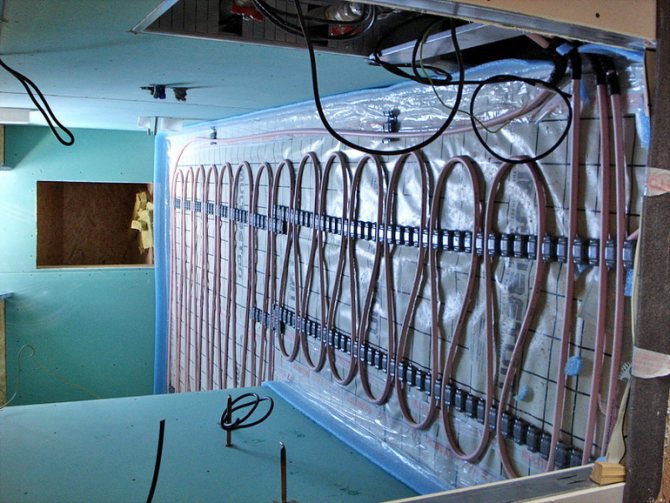
Wall-mounted built-in heating can be taken into account in the home construction project itself. In this case, the pipeline can be filled with concrete. For this, after the installation of the heating network, the formwork is exposed and covered with pouring.
Built-in “warm walls” can serve not only to heat the room, but also to cool it. To do this, you just need to start chilled water through the pipeline. This type of cooling is much preferable to the usual air conditioners - after all, the room is cooled naturally in the absence of drafts.
Water heating, closed in the wall, can be used to heat two adjacent rooms. In this case, the interior partitions must be made of a heat-conducting material - brick or concrete. For this, in-wall heating pipes are fixed in the interior walls without an insulating layer.
Thus, the walls will simultaneously heat both rooms. This will solve the problem of heating several rooms in a compact manner. And in combination with the "warm floor" system, such heating will be the most effective.
Wall-mounted water heating, in comparison with other methods of transferring heat to a room, has a number of undeniable advantages.
Main advantages:
- Heat transfer from warm walls is 85% due to radiant heat transfer. With such heat exchange, people and pets feel comfortable in the room, despite the fact that the temperature is 1.5-2.5C lower than with convective heat exchange. The convective component of heat exchange prevails when heating with a radiator. That is, by maintaining the temperature of 18-20 ° C instead of 21-22 ° C, warm wall systems make it possible to significantly save fuel per season (up to 11% for a heating heat generator (boiler).
- Reducing convective flows to a minimum, with wall heating, allows you to reduce, and in most cases completely stop the circulation of dust throughout the room. Such conditions improve the microclimate, especially for human breathing.
- The heat loss of the room is compensated within the range of 150-180 W / m2. These are significantly higher rates compared to underfloor heating (100 = 120 W / m2). Such processes are associated with the fact that the temperature of the water supplied to the heating system can be increased to 70 ° C in order to obtain a temperature difference between the supply return line in the warm wall system, which can reach 15 ° C (in warm floors, this indicator is limited to 10 ° C) ...
- Compared to water-heated floors, water-heated wall systems can be dispensed with with circulation pumps with a lower capacity, which is due to the increased temperature difference that occurs between the direct and return pipelines.
- With wall heating, the piping spacing is not limited by anything. This is due to the presence of temperature differences arising between adjacent sections of the wall surface. These differences do not affect in any way the sensations of the person who is in the room.
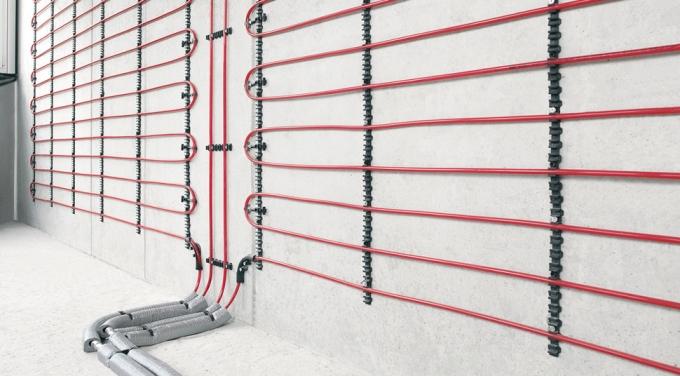
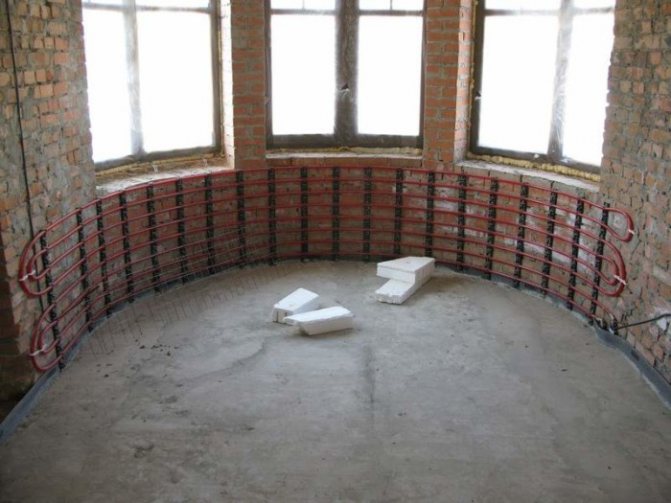
- When using a variable pitch of piping, in a system of warm water walls, heat distribution in the room is achieved, which is close to ideal. For this, pipes are laid in sections 1-1.2 m from the floor (step 10-15 cm); on a section of 1.2-1.8 m from the floor - a step of 20-25 cm, and higher than 1.8 m - a pipe pitch can reach 30-40 cm. This value depends on the calculated data on heat loss. In this case, the direction of movement of the coolant is almost always taken from the floors to the ceiling.
- Attention! The system of warm water walls belongs to radiant heat transfer systems, therefore it is not recommended to place it on sections of walls that will be covered by furniture during operation.
- The use of a system of warm water walls makes it possible to heat two adjacent rooms with one loop. For this, the hinges are laid along internal partitions, which are made of materials with relatively low resistance to heat transfer (reinforced concrete, brick).
The features of the warm wall system, which are listed below, determine the scope of its application, where this method of heating will give the maximum consumer and economic effect.
Examples of optimal application conditions:
- premises with a small amount of furniture and equipment located near the walls (office premises, auditorium corridors, bedrooms);
- premises without free floor areas, where it is impossible to place water heated floor systems (bathrooms, swimming pools, garages, workshops);
- rooms with high floor humidity, where the use of a warm water floor is ineffective due to high energy consumption for moisture evaporation (bathrooms, sinks, laundries, swimming pools);
- any premises that lack the capacity of one individual system;
- water-heated walls - in addition to the water-heated floor, to compensate for heat loss through the windows (any premises).
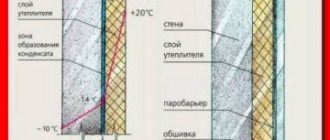
When installing warm water walls, special attention should be paid to calculating the temperature regimes of the outer walls. When designing a system, questions may arise - where to be the insulating layer, and how thick it should be. When using insulation layers from the outside, the freezing point will be shifted into the thickness of the insulation, and therefore the enclosing structures can be made of non-frost-resistant materials. The disadvantage of this solution is that in addition to energy consumption for heating the premises, a significant proportion of thermal energy will be spent on heating the enclosing structures.
The option with the placement of layers of insulation from the side of the premises will lead to a shift in the freezing point of the walls in the direction of the inner edge. This solution will require the use of frost-resistant wall materials, and fast, low-inertia regulation of the average temperature of the coolant. Otherwise, situations are possible with complete freezing of the walls and the inevitable appearance of condensation.
The same requirements are imposed on wall heating, without the use of insulation. In such cases, miscalculations or delays in the regulation of heat flows can lead to significant heat losses through the outer walls. Structurally, the installation of a warm wall system for specialists who are familiar with the installation of water heated floors does not present serious difficulties.
When using wall heating with pipes for warm water walls, remember a few technological rules with which you can avoid the most common mistakes:
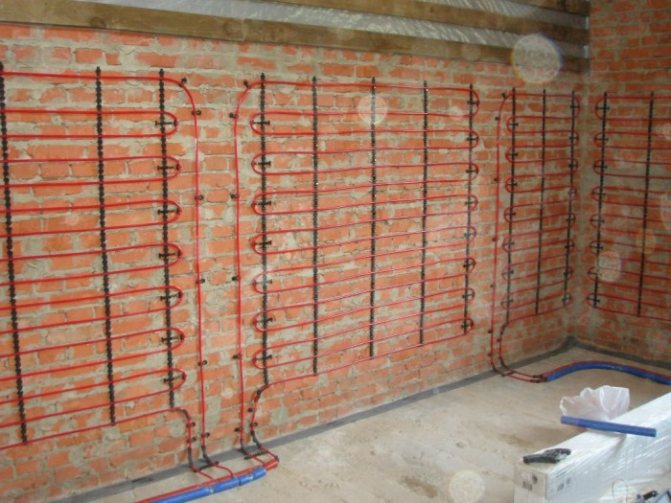
- When creating a plaster layer, it is optimal to produce it in two stages. The first layer is applied over reinforcing wire frames to which the pipes are attached. When this layer reaches the required strength, a plaster mesh is attached to it and a finishing plaster layer is applied.
- On top of the finishing plaster layer, apply a layer of "Strobi" mesh, or similar elastic paper. This measure is necessary to prevent the appearance of cracks on the leveling layer;
- The thickness of the layers of cement-lime mortar above the pipe for a warm water wall should be in the range of 20-30 mm.
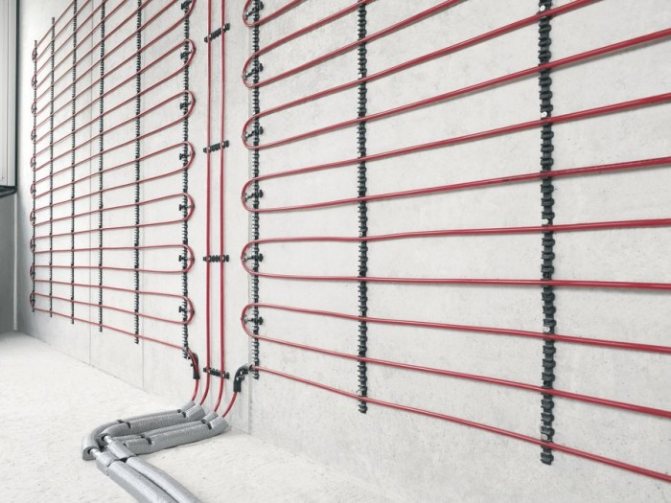
- Before starting work on the installation of warm water walls, it is necessary to pre-install distribution and installation boxes for low-current and electrical wiring. The wiring itself is laid after the final plastering in the thickness of the upper layers of plaster.
- The supply of heat carriers to the pipes is allowed after the final drying of the plaster layer.
- To avoid subsequent mechanical damage to wall heating pipes, it is recommended to carry out its executive scheme with pipe axes bindings.
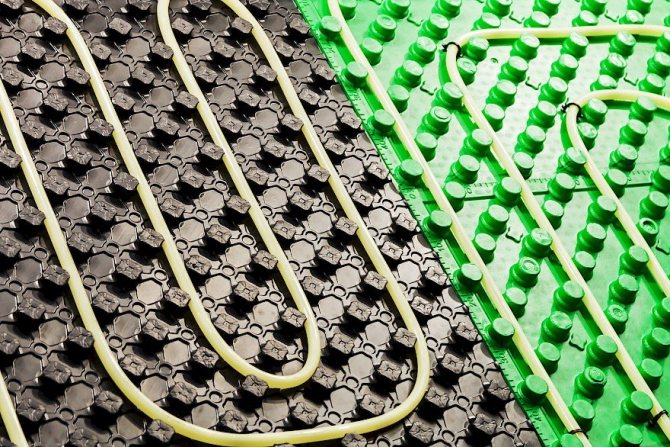
Water-heated walls can be used simultaneously with a water-heated floor. A water-heated floor is an independent piping system installed below the floor covering. These are closed systems through which water circulates. Both the heat source in the house and communal heating systems can serve as a make-up for a water-heated floor. And if the house has a boiler, then the water-heated floors will completely replace the existing heating system. Such thermal systems will not leak, since they consist of flexible pipes of durable material with a screed layer that protects against any kind of damage. Distinguish between light and concrete systems, depending on where the water-heated floors are installed. If the systems are oriented towards wooden country houses, then the technology of installing a warm floor on the second floor and higher will be used not in a heavy concrete screed, but in expanded polystyrene, after which the floor is covered with a moisture-resistant gypsum fiber sheet. When installing this type of floor in city apartments, it is quite possible to use a light polystyrene system. If these are large-scale construction projects, you can resort to a concrete screed.
In the presence of underfloor heating systems in an apartment, heating radiators simply lose their value. To increase the heat transfer of a water-heated floor, you do not need to use cork and parquet, since such floor coverings do not allow heat to pass through, and quickly deteriorate due to incompatibility with heat carriers. For such floors, it is better to choose other materials such as linoleum, laminate, carpet, tiles or porcelain stoneware.
You can buy pipes for warm walls in Kharkov from a warehouse. We provide delivery across Ukraine!
Today, the issue of keeping warm in the house is very relevant. There are many different methods for keeping warm in the house, for example, interior or exterior wall insulation, installation of plastic windows, underfloor heating or warm walls.
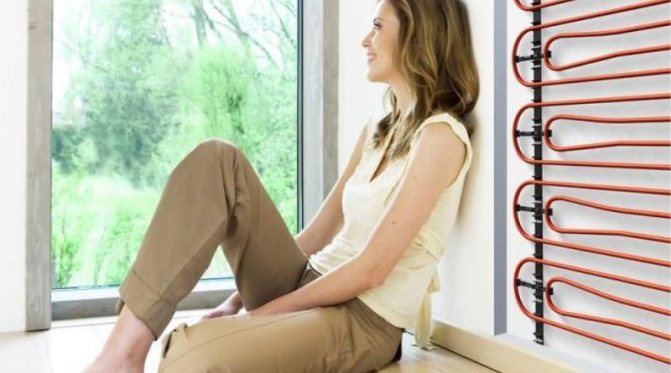
Warm walls are a rather promising type of heating, somewhat reminiscent of a system of warm floors, however, in this case, heating elements are installed in the walls. The heating elements used in this case are similar: a heat cable or infrared film, a heating pipe layout, a divorce.
The heat radiated from the walls allows the air in the room to be heated evenly, while this effect is similar to the effect of the heat emanating from the sun, due to which the feeling of warmth and comfort can be perceived at a relatively low air temperature, namely approximately 15-17 degrees. At the same time, it is permissible to use energy-saving technologies in the heating system, for example, solar heating or condensers.
For the human body, such a largely reduced air temperature is more favorable, since cool air is able to facilitate breathing and raise health. Such heating is also beneficial for the budget, since it uses less energy to create a comfortable environment in the house.
However, warm walls have some disadvantages:
- you cannot pile up the walls with furniture and hang carpets on them, since they are heaters;
- if necessary, hammering a nail into the wall can damage the heater itself. To do this, for the future, it is necessary to draw up a detailed communication plan during the installation of the system. At the same time, if heating films are used, then it is strictly not allowed to hang any objects on the walls.
Pros of using
The advantages of wall heating are as follows.So, heat exchange is carried out due to the transmission by the radiation method - both people and animals feel comfortable with the fact that the temperature in the room becomes several degrees lower. Due to the optimal fuel consumption for heating in one season, it will be possible to save about 10% of energy resources.
In addition, "warm walls" significantly reduce convective air flows in the room. Due to this, dust is not scattered in the air, and living conditions for those living in the house are improved - this is especially important for people with chronic respiratory diseases. Finally, for the efficient operation of the "warm wall" system, it will be necessary to install circulation pumps of less power than in conventional heating systems.