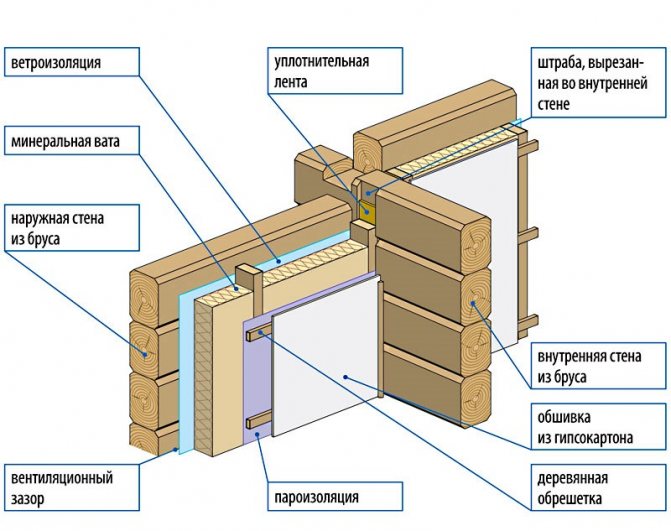
Is it preferable to have internal or external insulation?
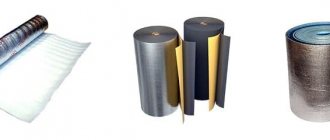
First of all, measures should be aimed at reducing heat loss in the house. The thermal insulation procedure may differ slightly depending on whether the wall of the house is made of brick or wood. The most commonly used materials for keeping warm are:

Wall insulation
- Plaster;
- Styrofoam;
- Mineral wool;
- Penoplex.
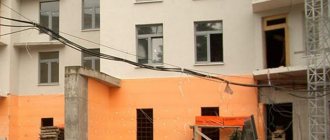
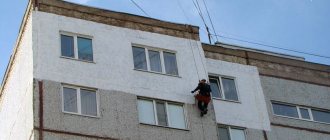
You can insulate the wall both from the outside and from the inside. If we are talking about a private house, then the best option would be insulation from the outside, since the interior space of the rooms will be preserved as much as possible. If a private house is planned to be insulated from the inside, then this moment must be foreseen even at the stage of project development in order to lay additional space in the premises for laying a heat-insulating agent.
The version of insulation from the outside is more efficient in terms of saving heat and energy. But the assembly process of such a structure is not so easy to perform, it will require the involvement of third-party specialists who are qualified to perform this type of work. A very wide variety of heat-saving substances are used for such work. These are mineral wool, polystyrene foam, polystyrene foam, plaster with thermal insulation properties and much more. With this option of insulation, care must be taken to provide the insulating agent with protection from the effects of an unfavorable environment.
If we are talking about an apartment, then there are no options, you can only insulate from the inside, it is easy to do it yourself, but then you need to carefully approach the choice of a heat-insulating substance, since its thickness hides the inner space.
Another important nuance, only dry walls can be insulated. If condensation and moisture collects on the surface, you must first solve this problem, only then carry out insulation measures.
Plaster as insulation

Will additional home insulation be economically justified?
House insulation is required when a lot of money is spent on heating it in the cold season. If the numbers are too high for the home owner, then it is worth considering how to make your home warmer and more energy efficient. The walls of the house can be insulated in two ways:
- from the outside;
- from inside the room.
Thermal insulation of a house from the outside is the best option, both in terms of efficiency and saving of internal living space, in comparison with internal insulation. But at the same time, it is necessary to take into account the difficulties and costs that arise as a result of the need to remove the existing facade decoration and its entire substructure. Next, you need to install a new substructure, carry out work on thermal insulation, and then re-finish the facade of the house. At the same time, old facade materials are no longer suitable for re-installation. Therefore, when deciding on additional insulation of the house, you need to calculate everything and find out whether it will be expedient from a financial point of view, in your case.

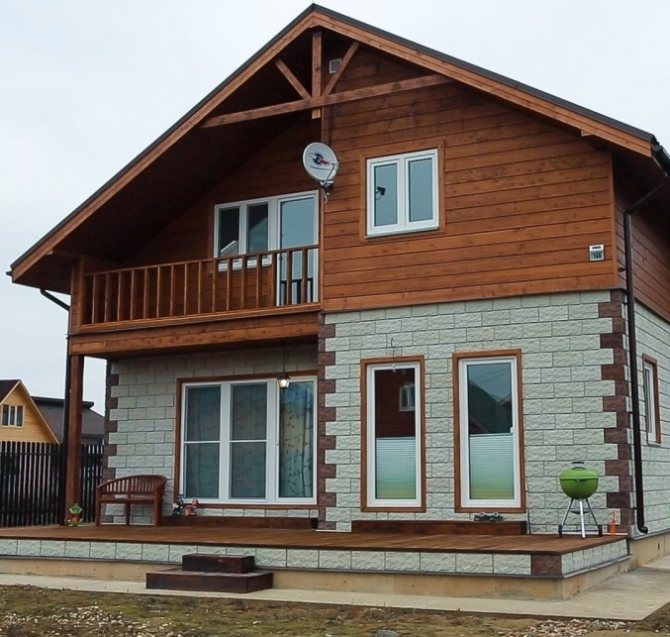
Vinyl siding is one of the most popular materials for finishing the facade of a country house.
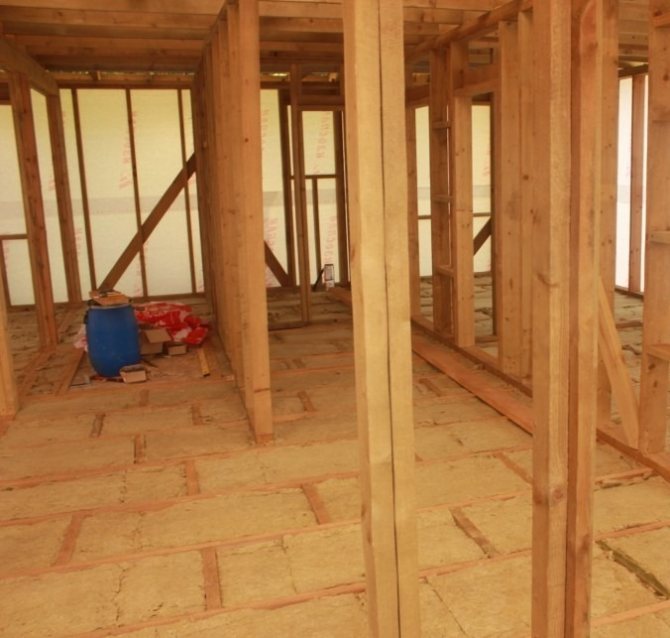
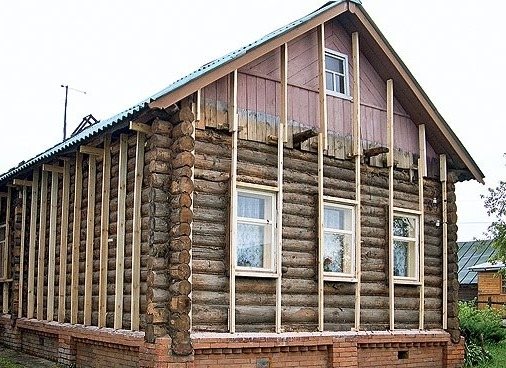
Most often, additional insulation is used for frame houses with walls of a small layer of insulation. It should be noted here that frame houses located in the middle part of our country must have a thermal insulation layer of at least 15 cm.
In second place are houses made of laminated veneer lumber.As a rule, houses built from profiled or glued beams, which were not properly insulated during construction, are subject to additional insulation.
Concrete siding allows you to give a wooden house a brick or stone look. |
A frame house or from a bar, sheathed with a blockhouse, looks like a house made of rounded logs. |

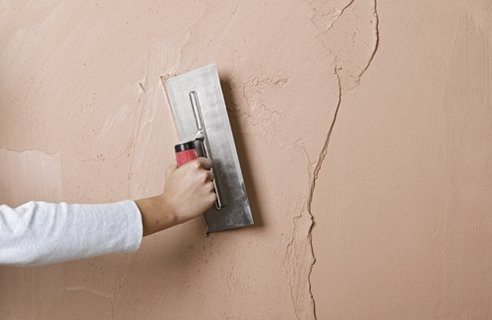
Wall insulation plaster
The most common, well-known method is insulation with plaster. The advantage of this type of thermal insulation is that the plaster is an environmentally friendly agent, has sound insulating properties, and is a reliable prevention of fungus and mold on the walls.
The disadvantage of this method of thermal insulation is that it is quite laborious and takes a lot of time, both for applying the mixture and for full drying.
Even special compositions have been developed that have good thermal insulation properties and, when applied in three approaches, create a decent thermal insulation effect. Especially when it comes to brick walls.
Instructions for making warm plaster:
- The first layer is made with a liquid plaster mixture, the thickness of the application is about 3 centimeters;
- The second layer is considered a primer, its thickness ranges from 5 to 15 centimeters, it is the most important in this type of insulation. The primer, in turn, also consists of three layers, the thickness of each should not exceed 5 cm. It is possible to apply the next portion of the plaster mixture only after the previous one has completely dried;
- The third layer is called a cover, it is done more for decorative purposes to level the surface of the wall, it is the thinnest of all three. The mixture for it consists of sand diluted with water.
Plastering the wall
Before plastering, it is recommended to moisten a brick wall with plain water. Then the adhesion of the plaster to the wall will be the strongest. Be sure to dry each coat thoroughly before applying the next one.
Wooden surfaces are also insulated with plaster. An important nuance is that a crate must first be completed on a wooden wall, only then proceed to applying the plaster composition.
Plastering concrete walls is more difficult than all others, since they require preliminary installation of a frame made of metal mesh.
Output
So, we examined the features of the choice of thermal insulation materials and found out what the instructions for their installation on wooden walls are. Provided that the installation work is performed correctly, the external insulation is guaranteed to last for 10 or more years. As a result, the house will be warm in winter and cool in summer.
But you need to understand that the optimal result is not guaranteed by separately performed insulation, but by comprehensive insulation, during which the walls, ceiling ceilings and the base of the floor are processed.
Do you still have questions that require comprehensive answers? You can get the necessary information by watching the video in this article.
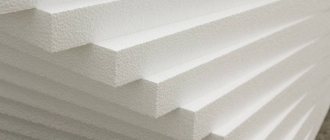
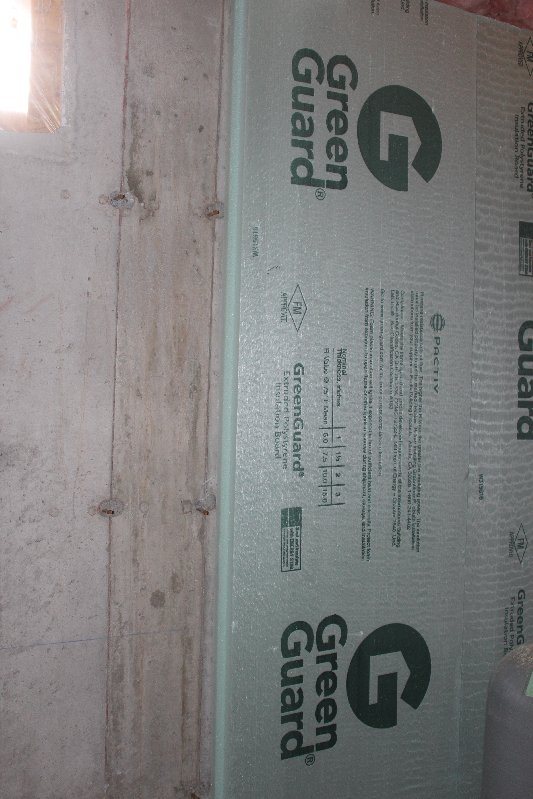
Styrofoam for wall insulation
Foam plastic has become widespread as a heat-insulating insulation due to its insulating properties and low cost, another advantage is its low weight. It tolerates low temperatures well, does not lend itself to mold and mildew. Under the influence of high temperature, the substance deforms, but does not burn in itself. Professionals in the field of renovation work advise, for prevention, to carry out edging of door and window openings using mineral wool.
It is very easy to install such insulation, but the peculiarity of wall insulation with this type of insulation is that you need to carefully level the surface beforehand so that the foam sheets fit as tightly as possible. You need to level the walls with plaster, it will be enough to apply it in two non-thick layers.
Bonding styrofoam to the wall for insulation
The next point that must be taken into account, the foam requires the creation of a vapor barrier so that moisture and condensate do not accumulate on its surface. The accumulation of moisture on the surface of the insulation is dangerous because it deprives it of its thermal insulation properties, turning all the work done on insulation into useless.
There are different ways to fix the thermal insulation on the wall. Fastening the insulation to a brick wall, with a pre-applied layer of plaster, is performed using glue. The adhesive is applied on the reverse side of the foam sheets over the entire area of the sheet. Particular attention should be paid to the perimeter. After that, the sheet is pressed as tightly as possible to the surface and fixed.
Fastening of insulation to a wooden wall or concrete surface is carried out using special dowels, which are shaped like fungi. To do this, several holes are made in the surface, with a piece of foam attached to it. It is necessary to calculate the required depth of the holes so that it is sufficient for reliable fixation of the material. These holes are designed to reinforce the insulation sheets with fungi. After preliminary fixation of the foam sheet, the remaining holes are finalized in the required quantity along the entire perimeter of the attached thermal insulation. The spacing should be about 25 centimeters.
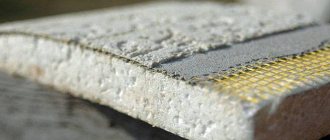
Next, a mesh is installed on top of the insulation layer, fixing it with special glue, and work is carried out to plaster the surface.
How to Attach Insulation to a Wooden Wall: 3 Factors of Heat Loss
The smaller the pieces of insulation, the more convenient it is to attach it to the wall. Construction projects that were erected with lumber have always been very popular. However, it is these materials that can be considered the thinnest and have increased thermal conductivity. It is for these reasons that at a certain time the owners of the house are looking for an answer to the question of how to attach insulation to a wall made of wood and not reduce heat loss. You should consider all the main points of this work and find out what the difficulties may be.
Why the room loses heat: fastening insulation to the wall
It is wooden houses that have always been glorified as the most heat-insulating. But it happens that the owners are faced with the task of making the facade more modern, but as it turns out, everything is not so simple. And what to do if the heat in such a house does not hold? It is with these problems that the insulation can cope.
By insulating the house, you can significantly save financial resources for paying for heating
Basically, heat loss occurs for 3 reasons:
- The logs were not correctly joined during construction and as a result, holes appeared,
- The grooves in the corners of the house do not fit correctly,
- The wood is so old that it no longer maintains the qualities it should.
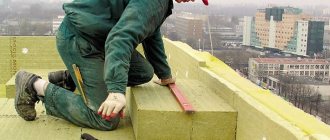
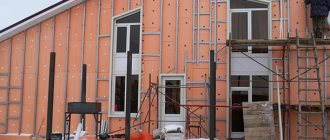
Examine carefully the walls of your house, not only inside, but outside. It is the condition of the tree that will play an important role in the performance of further work. For insulation, it is best to use a facade, since it is believed that it is he who is most susceptible to decay and destruction. Due to the fact that you insulate the facade, you can give your home an aesthetic look, as well as significantly extend the life of the house several times.
How the work is carried out: fastening the insulation to a wooden wall
If the surface of your walls is not finished with any material, then the insulation will be carried out in several stages.
Namely:
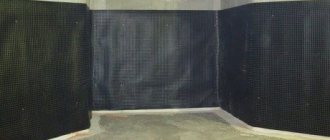
- Attach the metal mesh to the wall using metal staples. Choose a mesh with meshes of 20-50mm. Secure the joints with construction tape.
- You can prepare the wall for plastering. Be sure to check the walls for bumps, bends and drops, these places need double the amount of the mixture.
- Place the mortar on the wall. Work the wall with smooth movements. At the zero level, seal all the bumps so that the surface is perfectly flat and smooth.
- Leave the solution to dry completely. On the packaging, the manufacturer always indicates how long it takes for this, usually it takes at least 12 hours.
- When the first coat is dry, you can start applying the finishing coat. In order to achieve the required consistency, you need to dilute the rough solution with an additional amount of liquid.
- Check the smoothness of the walls with a level, apply it in different directions. After that, the walls can be putty or primed, if desired, with a water-based solution.
Thanks to the heat-insulating material, you can not only insulate the wall, but also level it
What should those owners who have old plaster do? In the old days, the remains of shingles were often used instead of metal mesh, but if the plaster is not reliable and you notice that it is peeling, then it must be completely removed. If there is a layer of clay on top, it must also be removed. Although clay is considered an excellent heat-retaining compound, it is not worth attaching insulation on top of it.
The sequence of work: how to fix the insulation outside
Any work involves the preparation of materials and the necessary tools.
In order to insulate the facade from the outside, you will need:
- Screwdriver (preferably on a battery, since you will be moving),
- Self-tapping screws,
- Roulette,
- Level and slopes of various sizes,
- Corners,
- Umbrellas-mounts for insulation,
- Jigsaw for wood,
- Profile.
As for the process of warming itself, having all the necessary materials, it will not be difficult.
To fix the insulation, you need to purchase special glue at a hardware store
The work consists in the following:
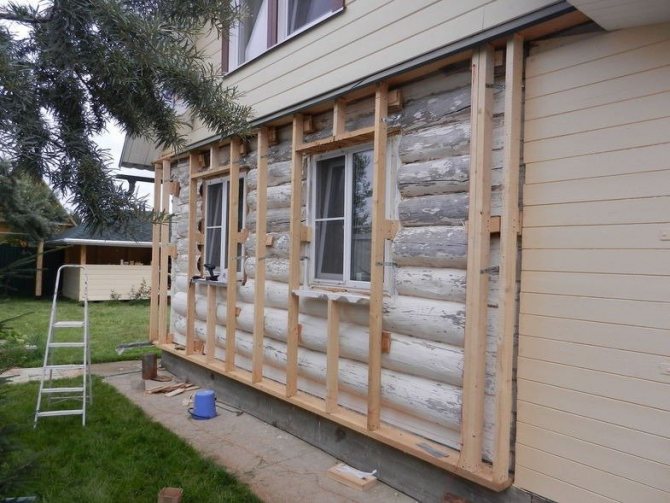
- A frame made of profiles must be attached to the wooden base, the distance between them must be at least 50 cm. To be more precise, the distance between the profiles will dictate the width of the insulation, it must fit into the opening.
- The frame must be made using a level and attached to metal corners. After that, you can put the first layer of mineral wool. You need to install the insulation close to the frame.
- As for the loosened insulation, their fastening occurs in a special way, so that a kind of bag is formed. The material is thrown from above and fixed with a stapler.
- Mineral or basalt slabs follow after membrane laying. All this is fastened with umbrellas so that the structure is stable.
- Install the membrane insulation on the battens. Secure this layer with staples or self-tapping screws. This layer will keep moisture out and reduce heat loss. Only after this step can you start finishing in order to consolidate the result. This can be brickwork, siding, or slabs.
It must be remembered that if you choose siding, then it expands in direct sunlight. For this reason, while tightening the screws, leave a little space for them to "walk", so to speak, at elevated temperatures. If this is not done, the plastic will change its shape, which will depressurize the facade.
Fastening insulation to a brick wall: choosing a method
Insulation of brick walls is done in several ways. It can be interior and exterior decoration.This finish does not depend on the type of material.
In order to decide which method you will use to insulate brick walls, such a construction concept as "dew point" can help.
It is better to insulate a brick wall in clear weather.
The dew point is the temperature regime in which condensation appears on the inside of the wall, or rather on its surface. This very point appears exclusively in one place on the wall. This indicator is influenced by the temperature and humidity in the room. If you calculate this indicator correctly, you can determine whether it makes sense to insulate your house inside. In simple terms, if your brick wall was wet all winter, then there is no point in insulating the wall inside, but if it is dry, that is.
We tried to reveal all the most important aspects of the insulation of a wooden wall. Now, thanks to our article, you have learned in what cases it is necessary to insulate a wooden house, as well as in which parts of the room it is best to carry out these works. Thanks to the clearly described actions, you can independently and without much effort do a number of these works and enjoy the warmth in your beloved home for a long time.
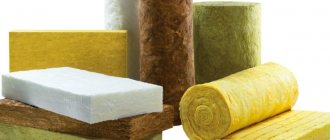
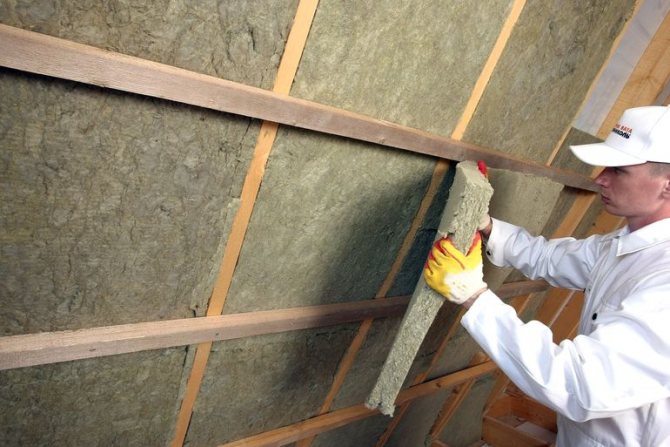
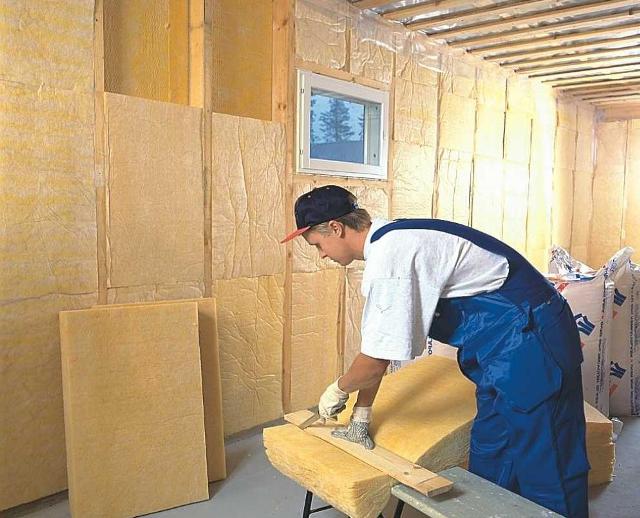
Mineral wool for wall insulation
This is another thermal insulation material that is very often used for high quality work. The advantages of mineral wool are that it is breathable and also fire resistant.
Mineral wool is especially good in that, in addition to thermal insulation properties, it also has sound insulation properties. Thus, in one step, two problems in the apartment can be solved at once.
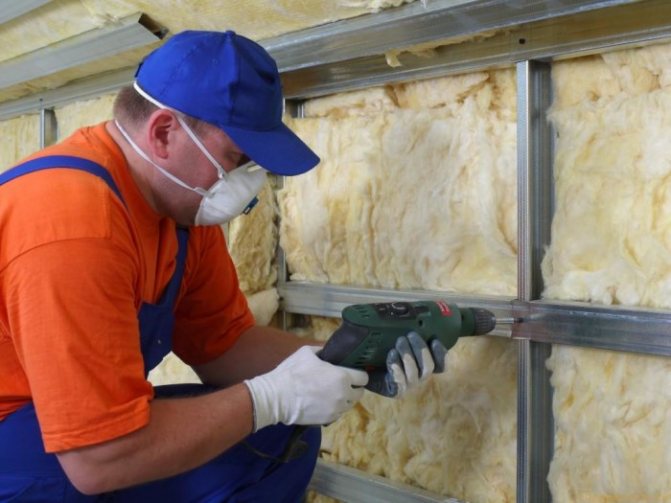
In general, the methods of fixing mineral wool are not difficult. The only caveat is that to fix pieces of material on the surface, additional assembly of a special frame will be required. It is he who will hold the mineral wool.
In order to assemble the frame with your own hands, you will need either wooden slats or a metal profile. The choice depends on the wishes of the apartment owners and financial capabilities. The easiest way is to assemble a frame from wooden elements; this option will also take much less time to work.
The slats are fastened vertically or horizontally with self-tapping screws. The distance between the frame elements should be slightly less than the width of the thermal insulation material. Such a frame will make it possible to lay pieces of thermal insulation as tightly as possible, avoiding cracks or gaps.
If the mineral wool is released in the form of a mat, then it is enough to just put it tightly into the cells of the frame and that's it, it does not require additional fixation. For a more reliable fastening, you can fill the space between the frame elements with small studs driven in, staggered, for greater reliability, pull the threads between the studs. All these elements will keep the insulation near the surface reliably enough.
After strengthening the insulation layer, it is necessary to complete the stage with plastering.
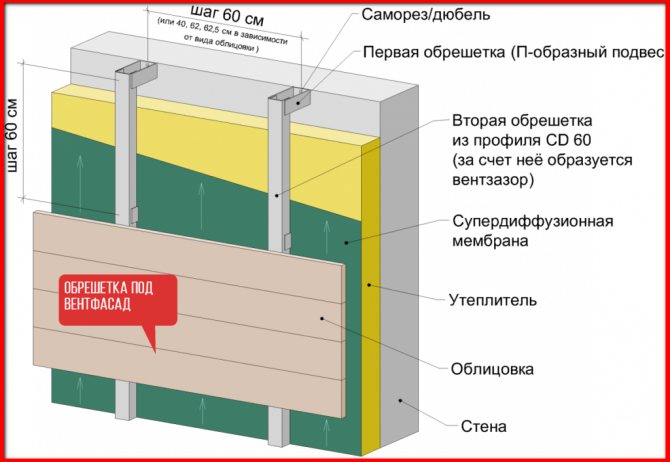
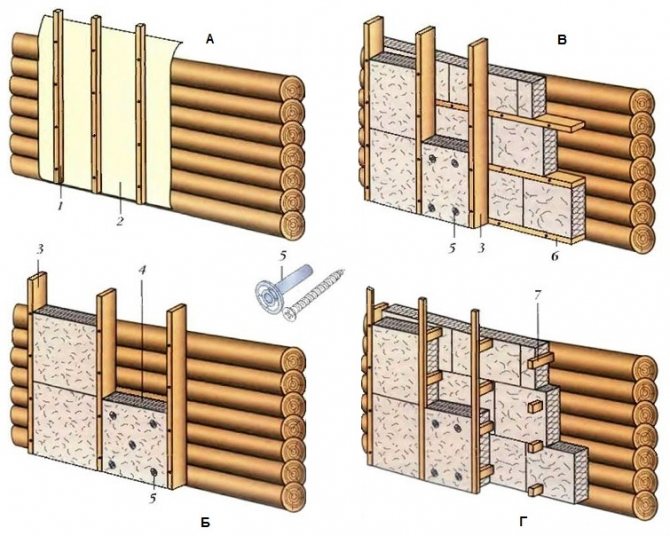
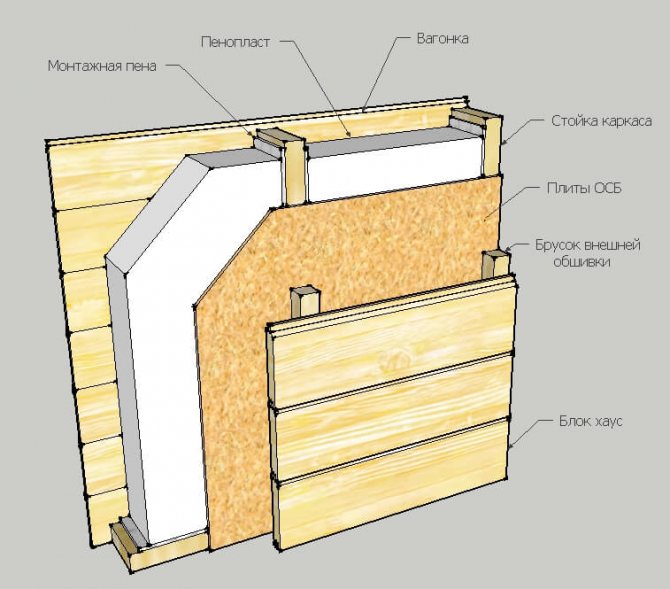
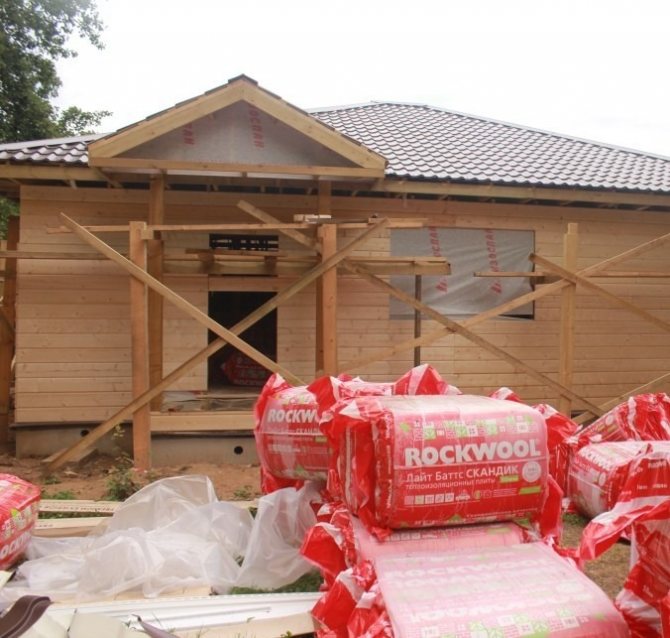
Technology of additional insulation of a frame house
For additional insulation of frame walls, it is first of all necessary to remove the exterior trim elements, base, counter-lattice and material for wind protection. Further, one more racks are attached to the vertical frame racks. Their thickness should be equal to the thickness of the thermal insulation layer. In order to save money, you can replace the bars with wide boards, which are attached to the racks with metal corners. If boards are used, then when selecting the correct width, a frame for thermal insulation and a ventilation gap are created in parallel. In this case, the counter grill is not required. The frame can be made of metal corners or racks, between them plates or insulation mats are also installed.
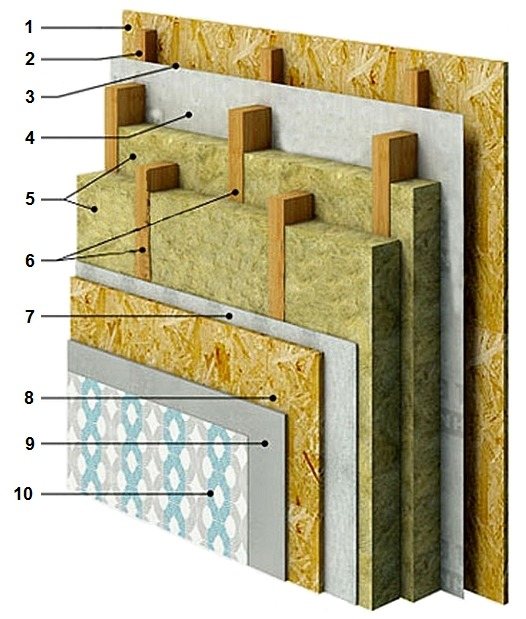
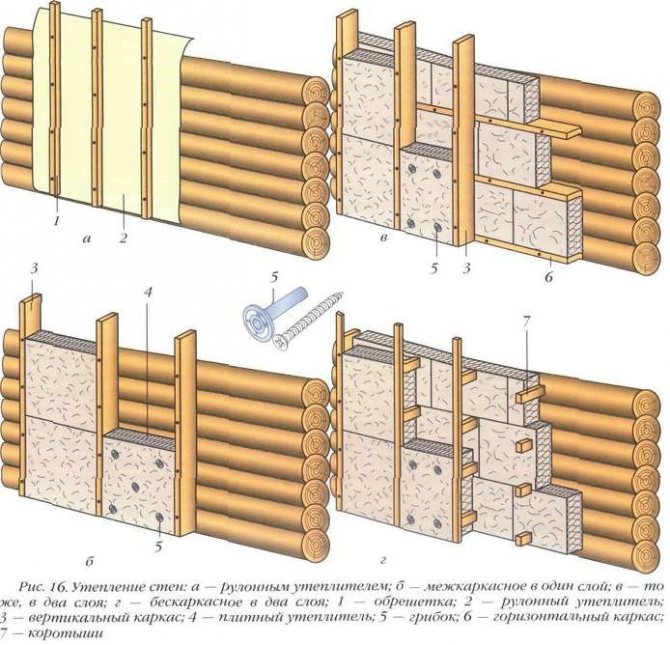
Design option for a double insulated frame wall: 1. OSB board (OSB), the base for exterior decoration; 2. Counter-lattice forming a ventilation gap; 3. Ventilation gap; 4. Wind protection in the form of a vapor-permeable membrane; 5. Fiber insulation (basalt insulation); 6. Independent double frame racks; 7. Vapor barrier; 8. Internal OSB board (OSB); 9. GKL, base for interior decoration; 10. A layer of interior decoration.
According to experts, when conducting inspections of such buildings by using a special device - a thermal imager, freezing of the structure through the racks is revealed. By doing additional double insulation, the cold bridges overlap. It is possible to eliminate freezing, which occurs as a result of loose laying of fibrous insulation plates in the frame base. In this case, thermal insulation is made of two layers. Vertical racks are attached to the frame and plates of fibrous insulation are placed. Next, the lathing bars are nailed perpendicularly. A second layer of heat-insulating material is placed between them. And then they make windscreens.
Other options involve the laying of fiberboards in two layers, further installation of the ventilation gap and installation of external finishing. During the installation of external finishing, it is necessary to ensure the flow of air under the facade from the bottom side and its exit at the top. How it's done? Perforated siding can be used for air intake. The air outlet from above is created by combining the ventilation gap on the façade with the gap in the eaves. The filing of the eaves must be equipped with air vents.
It is worth considering one nuance with additional insulation at home. If the insulation has a thickness of about 10 cm, then the entire thickness of the structure with a facade and a ventilation gap will be about 15 cm. Therefore, if additional insulation of the walls of the house is necessary, it is necessary to provide for what the eaves overhang of the roof will be. If initially it is small, then after insulation, the appearance of the cornice may deteriorate. Also, the eaves overhang of insufficient length will no longer save the facade of the house from the effects of precipitation. In such a situation, it is better to use facade materials that are highly resistant to moisture. It is also necessary to install a blind area to drain water from the foundation. Situations arise when a small eaves overhang of the roof does not allow the installation of additional thermal insulation. The fact is that building the roof and reworking the overhang in a new way is troublesome.
With additional insulation of the house, there will be no problems with arranging the openings of windows and doors. In this case, other slopes are installed, which are wider than the old ones.
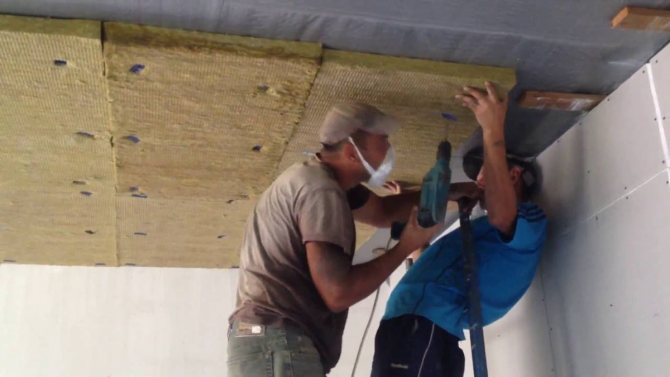
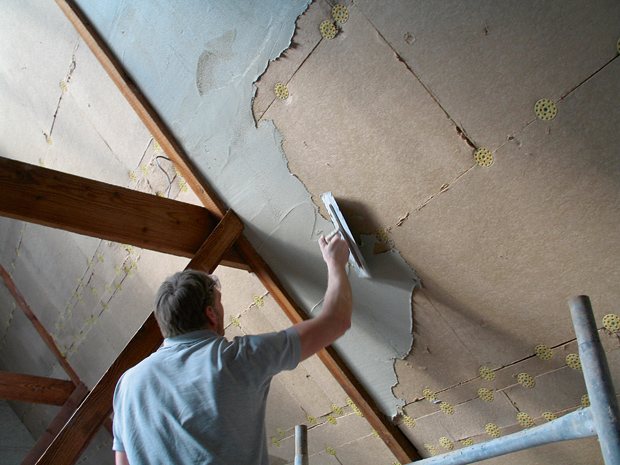
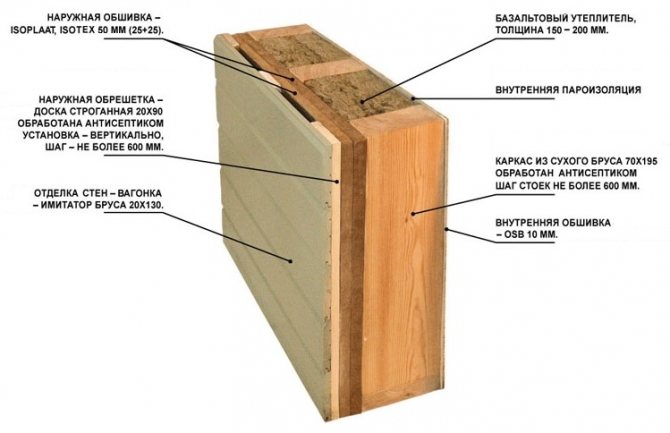
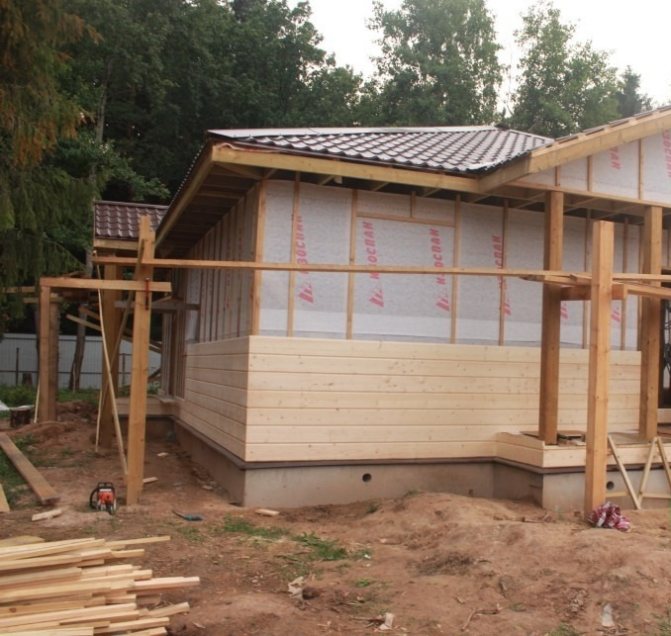
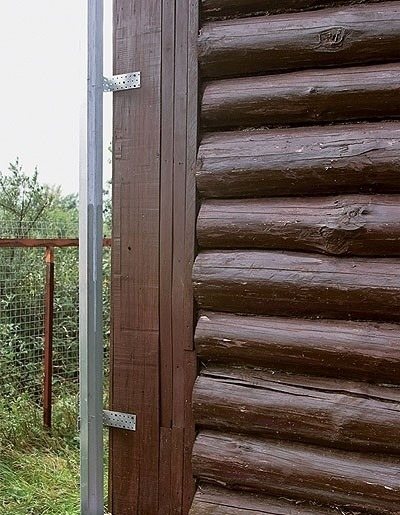
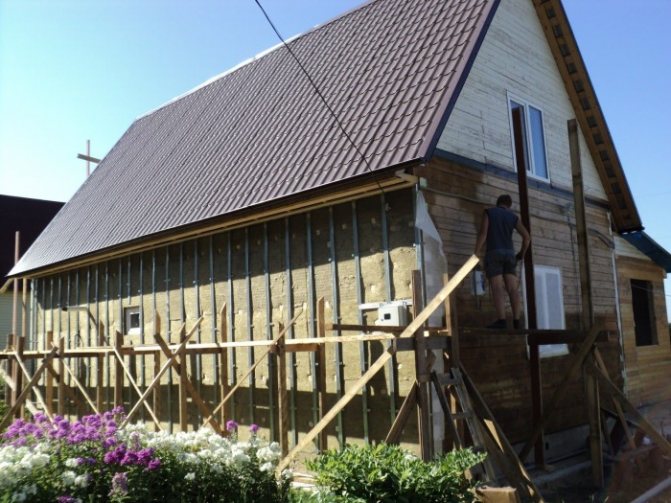
Thermal insulation of a wooden house using fiber boards
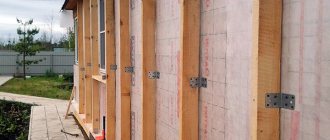
| Using corners, metal profiles are vertically fixed around the perimeter of the house. |
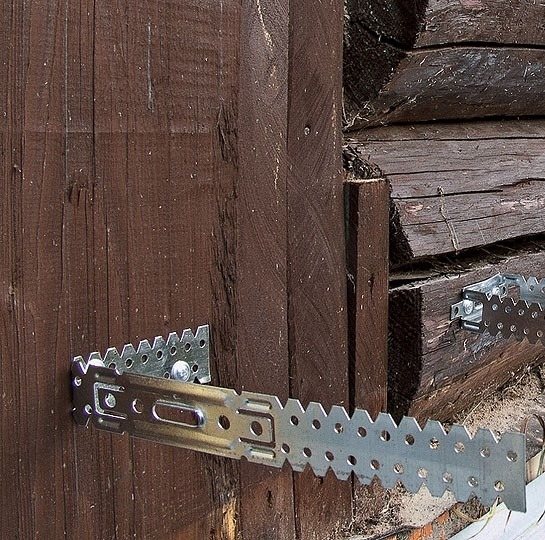
| Metal hangers are attached to the wall of the house using self-tapping screws with a step of 60 cm. |
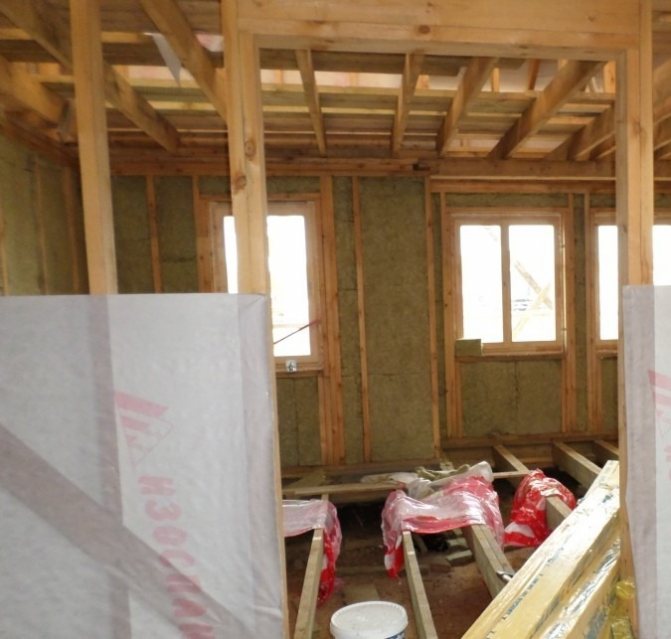
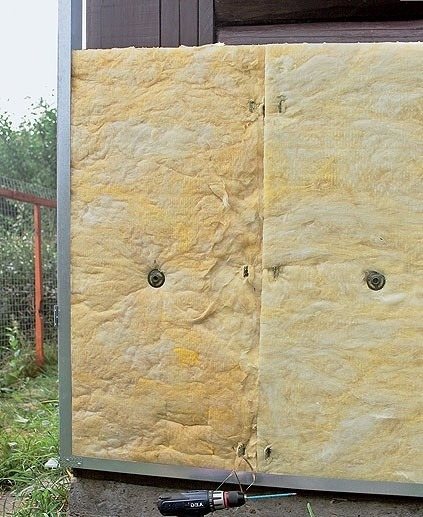
| Then the fibrous insulation plates are installed and fixed. |
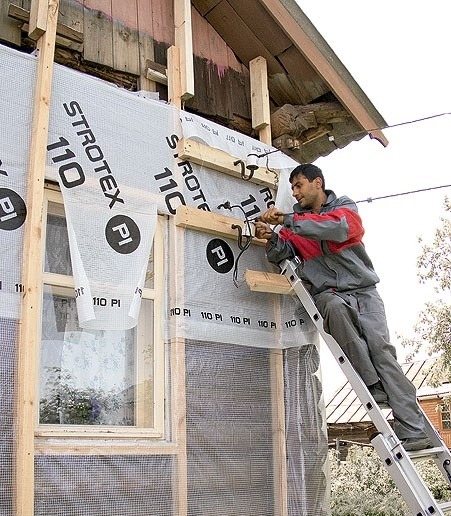
| When installing, the insulation slabs are first laid in the profile framing the wall, and then cut through with the bent whiskers of the suspensions. In order for the insulation not to shrink, the plates are additionally fixed in the center with disc dowels. |
| Then the insulation is covered with a windproof film and fixed. After that, each slab is fixed to the wall through the foil with four more dowels. |
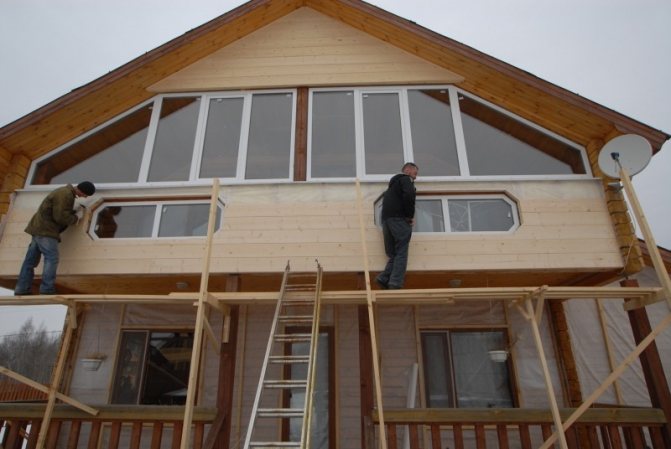
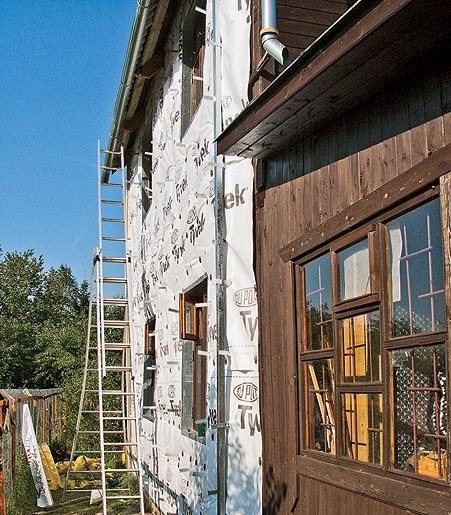
| The windows are framed around the perimeter with a frame made of profiles. |
| They carry out similar actions according to the described scheme and mount the insulation along all the walls of the house. |
| After the installation of the windproof film is completed, the posts-profiles are fixed for installing the siding. |
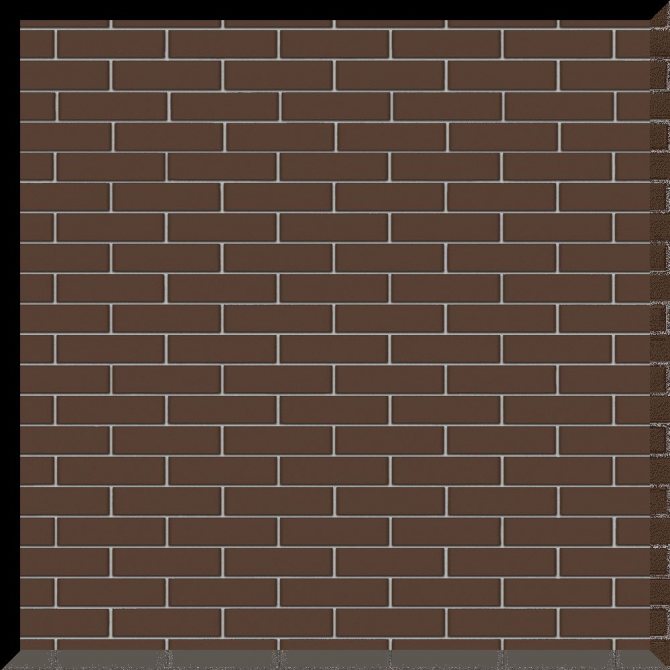
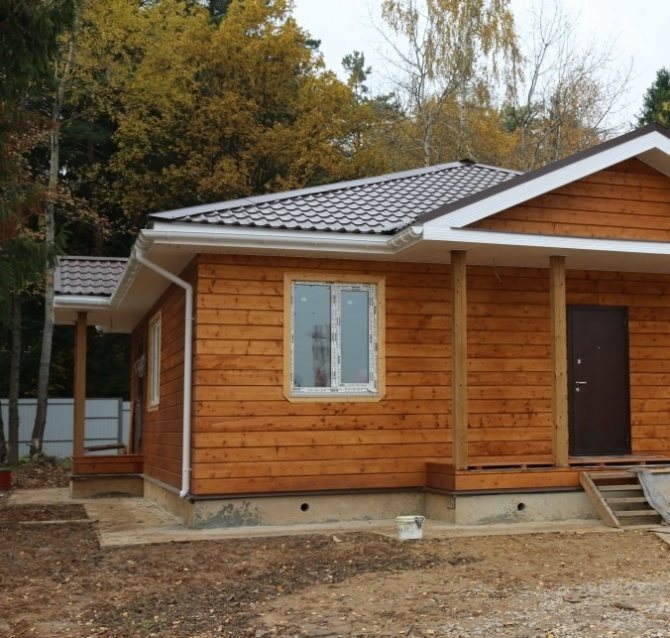
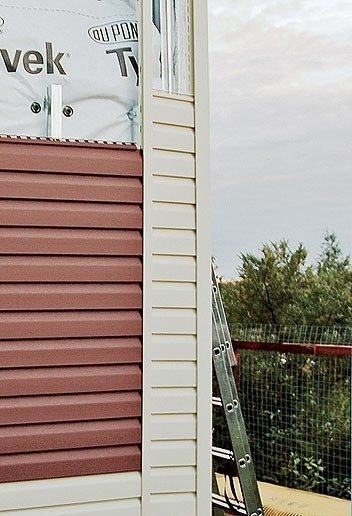
| Siding began to be installed from the corners of the house. First, the corner profile was fixed, then at a distance of about 30 cm from it - the H-shaped one, after which a starting bar was attached to the lower strapping profile.The space between the corner and H-profiles was filled with cut-to-size light siding panels. After the corner decoration was ready, we proceeded to the wall cladding. Here they used panels of red-brown siding, and in the 3rd and 14th rows in height - light. When decorating windows, platbands with a wide shelf were used. |


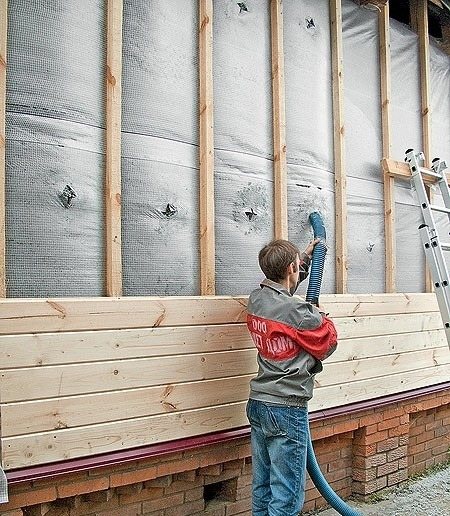
Thermal insulation of a wooden house using ecowool
| A frame made of 100 x 50 mm bars is fixed on the log house, on which a windproof film and external finish will be fixed in the future. In addition, the frame will not allow soft ecowool to squeeze out. The pitch of the bars can be determined locally, without paying attention to its accuracy, the main thing is to carefully monitor that their outer edges lie in a vertical plane. |
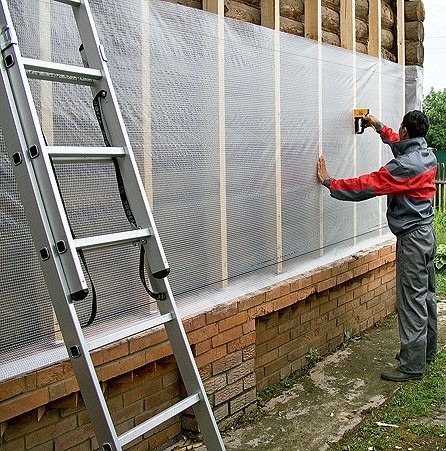
| A windproof film is attached to the lathing of bars, with staples using a construction stapler. |
| A counter-lattice of 50 x 50 mm bars is stuffed on top of the film for the installation of facade cladding. |
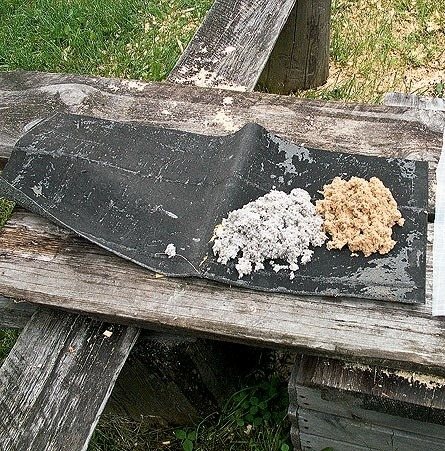
| Ecowool consists of cellulose fibers with additives of fire retardant and antiseptic. It is delivered to the construction site in bags. |
| Ecowool fluffed up in a special mobile installation with an air flow is fed to the desired place through a flexible hose. The material penetrates into all cracks, covering the structure with a continuous uniform layer. In this case, the walls were insulated in sections between the frame bars. The hose was inserted into incisions made in a windproof film. When the cotton wool within a radius of 0.8-1 m around the hole reached the specified density, the feeding was automatically stopped. Next, a new incision was made, and the process was repeated again until the entire frame was filled with insulation. |
| A facade cladding was attached to the counter-lattice - boards imitating a bar. |
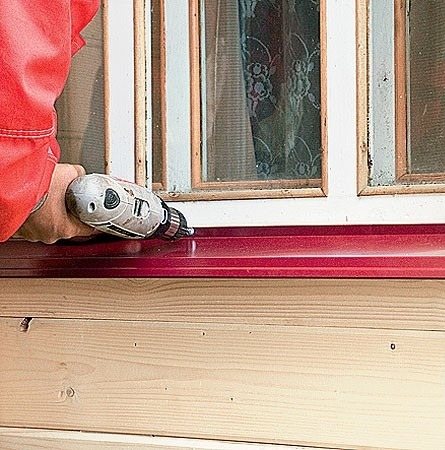
| The windows were finished after the wall cladding. The slopes were made of planed boards, and the ebbs were made of painted steel. |

Errors with additional insulation at home
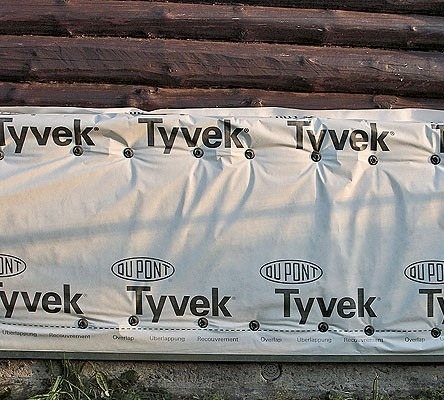
A common mistake made with additional insulation of an already built house is the use of an unsuitable film material for a wind protection device. There are a large number of protective films on the market, which sellers call waterproofing, hydro-windproof, etc.
Please note: it is permissible to use only films with high vapor permeability (diffusion membranes). They are laid close to the layer of thermal insulation, and they should not prevent water vapor from escaping from it, otherwise the steam will condense and moisten the insulation, as a result of which its thermal characteristics will significantly deteriorate.
In addition, moisture will have a detrimental effect on the wooden frame.
Another mistake is attaching a soft fiber insulation to a timber wall with disc dowels. In this case, the insulation can sag or be sagged by fasteners, which will also reduce the thermal protection of the building.
When insulating a building from the inside, you need to carefully mount the vapor barrier, gluing the joints of the rolls and the places where the film adjoins the structures with special adhesives or tapes. And to remove water vapor from the premises of the house, it is imperative to provide a ventilation system.
Penoplex for wall insulation
This thermal insulation material of all listed is the youngest. But it has already gained great popularity and is used very often. Particularly attractive in the use of this material is that it is easy and fast to work with it, but other qualities of this material are also at a very high level.
The insulation is fastened to the wall using special self-tapping screws that are included in the kit with the material. To fix the insulation, it is enough just to attach it to the wall, make holes through the material with a tool, and fix it with self-tapping screws from the kit.
When choosing a heater for an apartment, you need to take into account its thickness, if the heat-insulating material is laid inside the room, then the useful area of the room becomes smaller.
The choice of the method of fastening the insulation for external and internal work.
Insulation of external walls.
With this option, the internal usable area of the building is preserved, and there is no need for a vapor barrier layer. For external walls, the frame option is rarely used, only in cases where a ventilated facade is planned.
To perform subsequent plastering work, you must choose hardware.
Insulation of internal walls.
Installation of insulation on internal walls is carried out mainly with the use of lathing. If mineral or basalt wool slabs are chosen as insulation, then, in this case, the correct installation consists of laying the heat insulator itself, and then it is sewn up with horizontal strips of vapor barrier. In order to fix the vapor barrier, you can use a construction stapler. For fastening the insulation, aluminum tape is chosen.

Installing insulation behind the radiators can cause some difficulties.
Important! To minimize heat loss, you need to install a reflective screen that will dissipate heat throughout the room.
Mounting methods
The choice of fixing method depends on several factors. One of them is the base of the surface: concrete, brick, wood or aerated block.
- The glue is used in a dry composition, requiring preliminary preparation: a mixing container, a construction mixer, spatulas. For outdoor use, certain brands are used that meet all the requirements: frost resistance, moisture, temperature drops, maximum heating.
- Liquid glue in cylinders is applied using a construction gun. It must also have features: adhesion percentage, moisture-tolerance, service life.
- Dowel-umbrellas. There are 3 types: plastic, with a metal pin, with a metal nail and a thermal head. Mostly they use polymer products or with a thermal head.
- Lathing. They are created extremely rarely due to the properties of the tree. Relation to moisture, temperature changes. Sometimes the crate is made of metal profiles. They are galvanized - this is an advantage, since the water does not wiggle on them, as well as the temperature regime.
- They also use insulating plasters. They are applied in 3 layers on a reinforced mesh (facade).
Dowels to a concrete wall
Advantages of external wall insulation
There are several reasons for insulating the outer walls of the house:
- complete protection of load-bearing structures from negative atmospheric influences;
- maintaining the size of the internal area of the building;
- maintaining high-quality ventilation of the premises;
- reduction in heating costs.
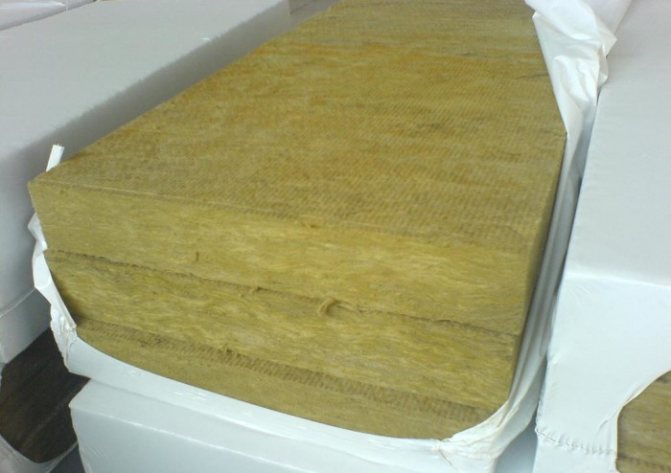
Advantages and disadvantages of mineral wool
Minvata has a wide range of applications in construction work for insulation. This is due to its high performance characteristics:
- Durability.
- Low thermal conductivity.
- Water vapor permeability.
- A high rate of sound insulation.
- Easy to install.
- Flame retardant.
Low thermal conductivity, as one of the main indicators of insulation, prevents heat loss in winter, and prevents the building from heating up in summer.
Vapor permeability allows steam to pass through the fibers of the material, but not to accumulate in them, but to be discharged outside. This prevents mold and mildew from forming.
Good sound insulation is also provided. Depending on the type of material, air or impact sound insulation is performed. This indicator is indicated on the packaging of the insulation. The incombustibility of the material confirms that the mineral wool can withstand temperatures up to 1000 degrees. Therefore, the material does not burn.
When working with mineral wool, you need to observe safety precautions, because it has its drawbacks.
Formaldehyde resin is also released from the material, which is also harmful to health. To avoid this, it is enough to work with the product at room temperature - this substance will not be released under such conditions.
Having studied the characteristics of mineral wool, you should familiarize yourself with the features of its use and the cases in which it is recommended to use this material.
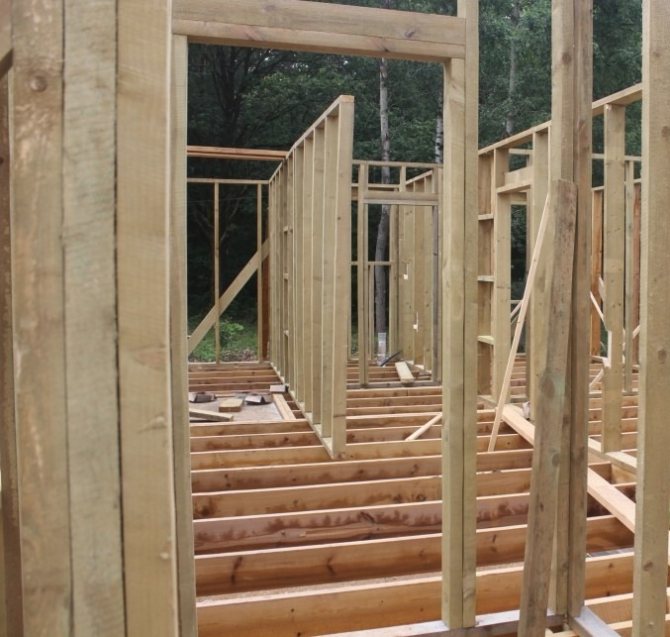
Installation of insulation for a frame structure
The technology of insulating a frame house is generally similar to the process of insulating wooden houses described above.
On the inner walls, chipboard is attached to the frame. They are joined along the beams and beams of the harness. Then the vapor barrier is fixed and plasterboard or lining is mounted.
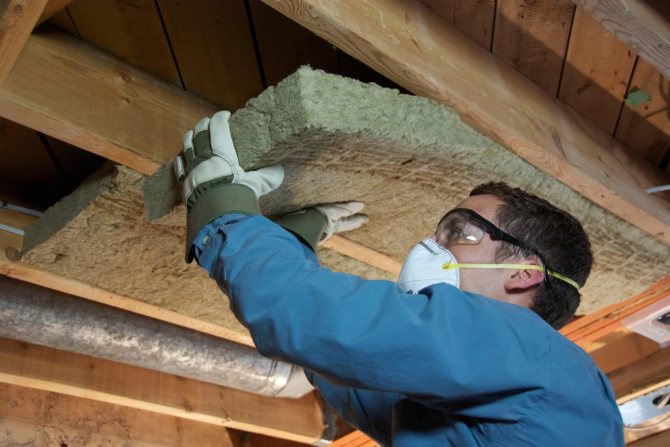
Installation of mineral wool
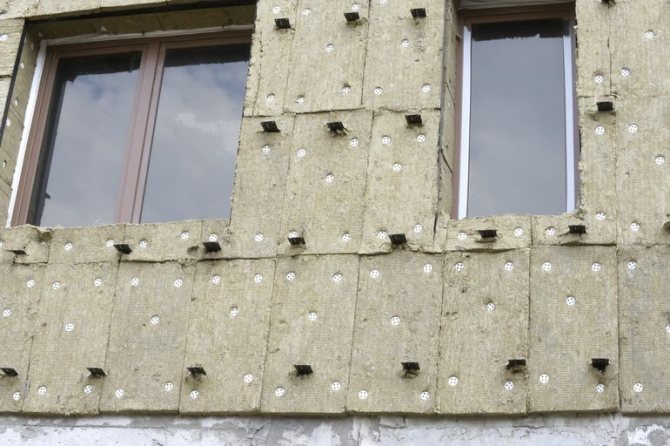
Mineral wool slabs are laid on the outer wall surfaces. The number of layers depends on the region in which the house is located. The joints of the previous layer are overlapped with the next row of insulation. Previously, in the lower part of the wall, it is necessary to fix the galvanized cornice with dowels: it will help the insulation plates to lie flat and protect the structure from rodents and insects.
After the heat insulator is laid, it is covered with a membrane to protect it from the wind, and it is attached with a stapler.
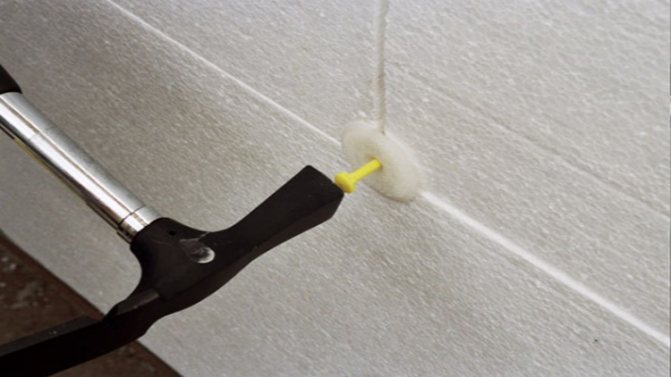
You can fix the mineral wool on the wall using a special adhesive solution. It is applied to the back of the mat, slab or roll, which is then applied from the bottom up, easily pressing it against the wall.
You can attach the heat insulator with dowel-nails "umbrellas". It is necessary to control that the material does not disperse when punching. Its surface is leveled with grinding brushes. A primer is applied to mats or slabs of mineral wool.
Creation of an air gap and finishing
The crate will help to keep the layer of heat insulator. It will also create a ventilation gap between the windproof membrane and the outer skin. Chipboard is installed on the crate. Then the cladding is mounted (for example, siding or lining).

Thus, the mineral wool slabs placed between the frame posts will be sewn up between the chipboard slabs from the outside and from the inside.
Let's check the obtained thermal insulation resistance:
Rti = (0.1 / 0.055) + (0.05 / 0.046) = 1.82 + 1.08 = 2.9 (m2 • ° C / W). Those. the obtained resistance of the insulating layer is slightly higher than our calculated one, if you look at the previous article, (2.5 (m2 • ° C / W). The total resistance of the enclosing structure (house walls) will be approximately equal to 1 (m2 • ° C / W) +2, 9 (m2 • ° С / W) = 3.9 (m2 • ° С / W), which meets the standard parameters for the Samara region, equal to 3.5 (m2 • ° С / W).
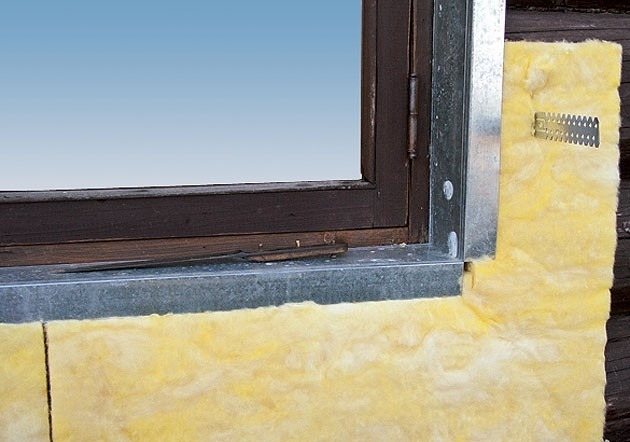
When insulating the walls of a wooden house, special attention should be paid to the selection and installation of insulation around the perimeter of window and door structures, and from the point of view of fire safety - to the device of fire diffusers. According to the rules, fire-prevention cuts along the perimeter of the window must be made of mineral wool. I did not fully comply with this requirement, but taking into account the fact that glass wool with a density of 30 kg / m3 and below is considered a non-combustible material, I will hope that this error is not so fatal. The photo below shows the finish of a TIM stone wool window (different in color, installed below the windows and between them).