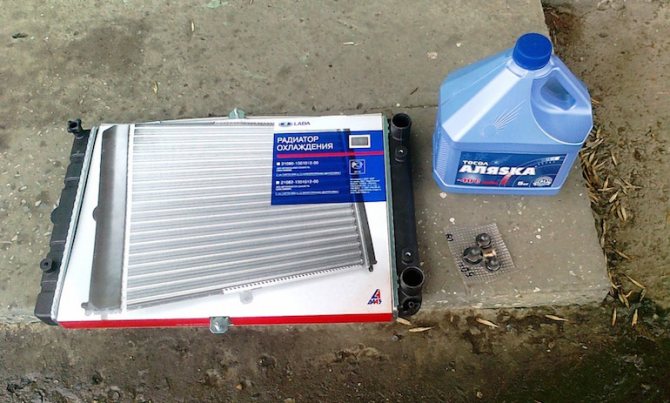
Radiator related malfunctions
The main problems with the radiator can be divided into two groups:
- Antifreeze leaks;
- The radiator is clogged with various debris and does not work one hundred percent.
It is quite simple to understand that there are problems with the cooling system, if the motor starts to overheat, and the temperature begins to rise above 95 degrees, then the system cannot cope with the load. It is possible that the pipe has broken, or the radiator may have leaked. Often, an aluminum radiator is damaged as a result of accidents, stones or inaccurate repairs, because its honeycombs are quite soft, and plastic elements can crack upon impact. Any coolant (coolant) leak must be repaired if you want to avoid costly repairs to an overheated engine.
Tips for repairing a plastic car radiator
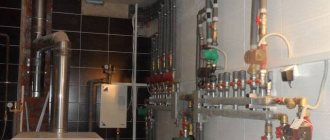
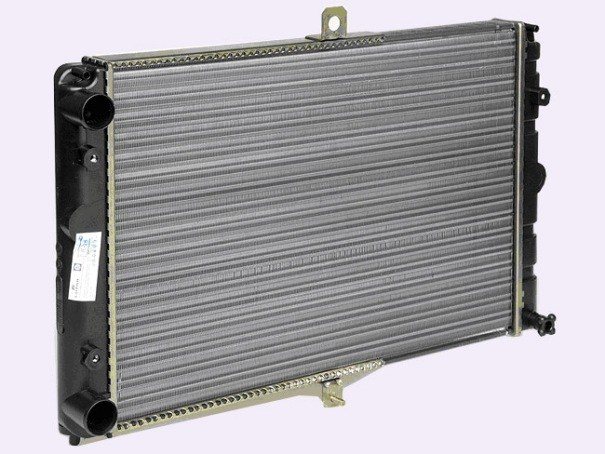
Car cooling systems are extremely important components that ensure the smooth functioning of the most loaded units and parts of the vehicle.
If in the early periods they were completely made of metal of various types, today it is increasingly necessary to deal with with plastic samples.
Although they differ somewhat more dynamic stabilitythan some metal radiators, significant problems can arise during their repair
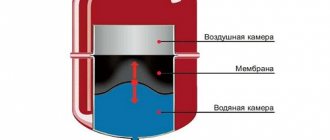
Inside the radiator circulates fluid, which removes heat from the car engine through it.
How to fix a car radiator leak using cold welding
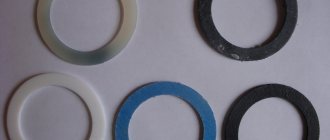
One of the reasons that you have a constant leak from a car radiator may be a damaged radiator cap. From old age, the radiator cap may not hold pressure, as a result of which the antifreeze in the system will constantly evaporate. This problem is often invisible to the eye, and although the entire system is in order, the antifreeze disappears somewhere. Replace the cover with a new one and check the level of antifreeze after a while. If the level is normal, then the problem is solved.
We suggest that you familiarize yourself with: What bailiffs cannot arrest and what they can describe
The most problematic option is when there is a leak in the radiator itself. Often in such cases, repairs do not help. If there is a large crack in the radiator, it is immediately noticeable by steam and coolant spray. A large hole can only be repaired in a garage or car service. Copper or brass can be sealed, aluminum can only be sealed with argon. You should know that such repairs are unreliable and even at the service station you will not be given a guarantee for more than a month.
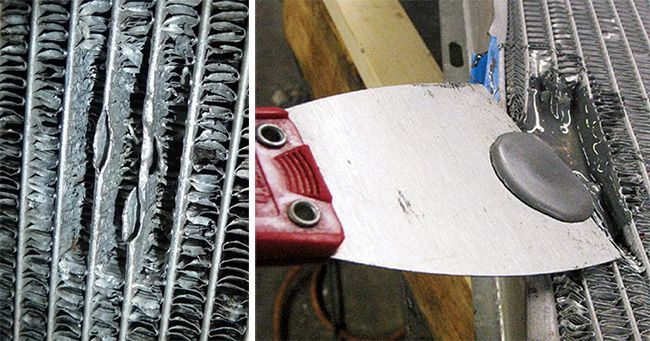
Cold welding is often used to close small cracks. It should be applied to the cleaned surface, from which all contamination must be removed. When the weld hardens, the crack will be repaired. Such repairs are not very reliable, since under the influence of high temperatures, cold welding loses its properties and is painted.
Some car owners, when their radiator is leaking, use "folk" methods to fix the problem. For example, dry mustard is poured, which swells with temperature and closes cracks with its particles. Such repairs can lead to high repair costs in the future. The channels, each thin tube and even the coolant drain valve will clog.

Car cooling radiator leak - elimination
You can hear many stories about how car owners ruined a car engine due to the use of sealant. Often these stories are not fictions.So what to do, apply a sealant or not? In fact, high-quality sealants will not be able to spoil the engine; it is just that many people buy cheap counterparts or fakes.


Features of radiator repair
The first solution that comes to mind to anyone who has discovered a plastic radiator under the hood is use of glue.
However, many car owners have already faced the fact that even universal samples are completely powerless when it is necessary to create durable patch on the radiator.
Even if such a patch can be applied, after some time the gluing will still form a crack and from it antifreeze begins to ooze.
The reason for this is that the design of the radiator is made from extremely slippery hydrophobic plastics... The material helps the liquid circulate inside, but almost completely eliminates traditional gluing methods.
Of course, components are susceptible to constant and extremely severe temperature fluctuations, as well as vibrations and significant pressure in the system itself.
Many experts speak exclusively of the need for complete component replacement, considering that it is also somewhat cheaper than metal samples.
Nevertheless, for various reasons, many may not have such an opportunity, therefore temporary effective measures elimination of leakage.
There are several possible options for restoring the tightness of this assembly. Considering that almost all types of adhesives are not suitable for this, experts recommend using the capabilities of the polymer material.
In particular, the first recommendation is name the ration. It should be noted right away that radiators are made of special heat-resistant plastics, however, they can also be excellently soldered using an ordinary soldering iron.
An alternative option is to use cold welding. This method of connection does not involve special heating, while the plastic mass itself includes special polymer resins, chemical additives and metal fillers that provide not only durable, but also heat-resistant seams.
Although the recovery processes themselves do not require special skills and are too expensive equipment, however, the result cannot be called particularly durable.
It should be said right away that cold welding may not be suitable for many car owners with a plastic radiator.
While this patch is better than any glue, it is still not strong enough to provide long lasting effect... On such a solution, for example, one can drive to the nearest car service, however, driving with such a patch for months will no longer work.
If there is very little damage, you can try seal a componentapplying specialized glue.
In particular, good results were shown by two-component adhesive 3M DP8005... It is based on acrylic, which connects well together difficult to bond plastics and even polyethylene.
With this glue, you can seal small cracks in the radiator. High resistance to aggressive solutions and high temperatures provides a successful, albeit temporary, solution to the problem.
Of course, this glue cannot be called cheap. Alternatively, you can use glue welding Horsh, also designed for joining a variety of plastic products and filling cracks. The ability to withstand high temperatures and pressures is the main advantage.
Not all car radiator sealants are created equal.
What is such a sealant? This is a compound that has the property of sealing small cracks and holes in the cooling system and, in particular, in the radiator.
There are several types of sealing substances:
- In the form of a powder, which is poured into the radiator when antifreeze leak occurs. The simplest and most popular among domestic motorists is mustard. Even tobacco from cigarettes and other equally exotic substances are used. The advantages of dry products are low cost and elimination of small defects up to 1 mm. However, there is a very significant drawback - not only the leaks are clogged, but also the radiator channels in the cooling and heating system of the passenger compartment.
- Liquid preparations based on polymers with the addition of small metal particles. The main purpose of such funds is to eliminate leaks in the engine block and partially in the radiators. Polymers catch and wrap around small rough edges and sharp edges. The advantage of such substances is that the sealant is constantly in the antifreeze and, when it is replaced, is removed from the cooling system. But the polymer preparation is able to close only a small hole (no more than one millimeter).
- Modern means of polymer type, containing special fibers. A striking example of such a substance is the LAVR STOP LEAK car radiator sealant. The fibers improve the adhesion of the agent particles to each other and to the edges of the cracks. The main advantage is the ability to close a hole up to 2 mm in a few minutes.
How to patch a hole in a radiator
A car radiator is a very important device for the stable operation of the engine. Sometimes the radiator breaks down, and then even through the smallest holes antifreeze begins to leak.
You will need
- Dry mustard powder, polymer sealant, special soldering iron, solder, "cold welding".
Instructions
1. Find the place where the antifreeze is leaking from the car's radiator. If the holes are small, it is easier for each to seal them up with the help of special additives, which are poured or poured naturally into the cooling system through the expander reservoir or through the radiator neck. 2. Dissolve a little dry mustard powder in antifreeze and pour the mixture into the car's cooling system. Start the engine. When the antifreeze heats up, the mustard will steam out and reduce or even seal small leaks. 3. Use modern polymer sealants. Pour in the polymerizing agent and warm up the motor. The heated sealant under the influence of air will turn into a strong film in the place where the antifreeze is flowing. This method is suitable for small hole sizes, no more than 2 mm2. A similar sealant has high cohesion (adhesion of particles of a substance), therefore, the radiator pipes will not suffer. 4. If holes in radiator huge and the sealant is powerless, carry out more large-scale repairs. Drain the coolant. On copper radiator solder cracks with the help of a special strong soldering iron and solder. 5. If the radiator is aluminum, apply "cold welding". It is a non-standard epoxy-based two-component adhesive sealant. In appearance and structure, it resembles plasticine. Consists of 2 parts, which must be mixed before use. 6. Try to degrease and dry the seal area. Seal the crack carefully and scrupulously, observing the special technology. Let the cold weld harden and grip before starting the car. 7. Expect similar repairs to be fickle. Be sure to keep an eye on the coolant tier in the expander reservoir. If the antifreeze continues to leak, add coolant before leaving the parking lot. 8. Replace the radiator that has lost its tightness with a new one as soon as it is comfortable. At the same time, change to new hoses and clamps for the cooling system of the machine.
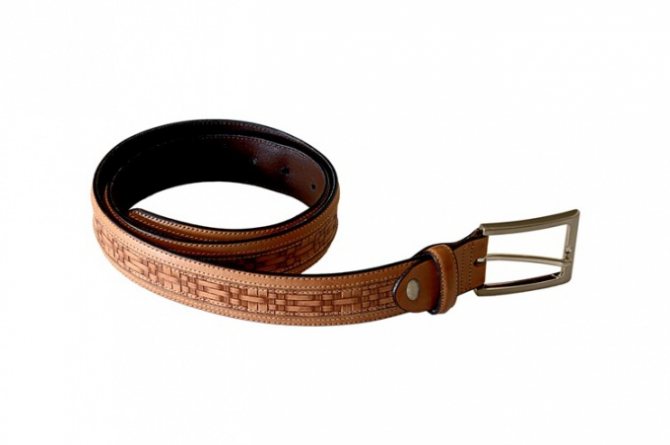
Every belt has countless holes so that every person can adjust its length to fit his own waist. But occasionally it is necessary to make additional holes in belt that will do when you have lost weight or have gained too much. This saves money on buying a new belt and also leaves you in the company of your favorite item.
You will need
- Handle, wooden board, hammer, nail, rivet, knife, shoe polish, toothpick.
Instructions
1. Place the belt around your waist and locate where you want to make the hole. Sweep this area with a pen, making a small dot parallel and equidistant from the other holes in the belt. 2. Lay the belt upside down on a wooden board. Attach a nail to the designated spot and hold it with two fingers perpendicular to the board, head up. 3. Smoothly hit the nail with a hammer, intensifying all further blow, until the leg of the nail completely penetrates the belt. Remove the nail from the hole. 4. If the belt is leather, the hole is ready. If the belt is made of a different material and all the holes on it are riveted, you will also have to decorate this new hole with a rivet. Use a sharp knife and hammer to smooth the edges of the rivet. 5. A leather belt (without a rivet) in the new puncture site should be treated with a colorless shoe polish. Use a toothpick or cotton swab to insert shoe polish into the hole. This will secure the edges of the hole. Helpful advice Use a nail of the same thickness as the other holes in the belt.
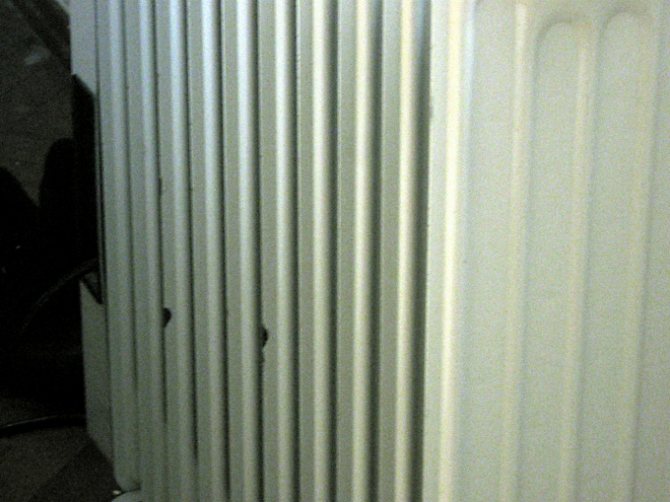
Aluminum is a metal that is difficult to solder. Virtually all of its alloys have the same quality. The reason for the difficulty is the instantaneous formation of an oxide film on the aluminum surface. Meanwhile, they make of him radiators both for cars and for home heating. And these devices have the quality of periodically failing. Let's say leak. And what to do in such cases? It is permissible, of course, to replace. But the required amount may not always be in your pocket. In this case, it is allowed to try to solder the radiator.
You will need
- - Radiator.
- - Crucible.
- - Soldering iron.
- - Rosin.
- - Steel filings.
- - Solder.
- - Salt.
- - Sodium sulfate.
- - Potassium chloride.
- - Lithium chloride.
- - Cryolite.
- - A mortar with a pestle.
Instructions
1. Before everyone, prepare the soldering point. Clean it of foreign contaminants, paint, lubricants and the like. Sand it with sandpaper. The aluminum oxide cannot be removed, so it is not worth trying. The part must be dry at the soldering point. Water makes soldering unthinkable and even dangerous. There are several methods for brazing aluminum. 2. In a separate crucible, melt the rosin, into which, while stirring, add clean fine steel sawdust in a ratio of 2 parts rosin to 1 part sawdust. Let the mixture cool and use it as a flux when brazing in the future. 3. The soldering process looks like this. Apply a rosiferous iron flux to a previously prepared surface and rub the soldering area with it with the support of a heated soldering iron. It is necessary to clearly monitor so that the rosin protects the aluminum surface from air access. At the moment when the rosin begins to spread over the surface, it is necessary to introduce into the soldering zone an ordinary tin-lead solder, with which the sealed object is tinned, again in the presence of iron filings. Steel filings play the role of an abrasive that destroys the oxide film. Further soldering is carried out by the usual method. 4. If it is necessary to obtain a high-strength seam, special bismuth and flux-based solders are used. It is permissible to apply a further recipe. For 95 parts by weight of tin, take 5 parts by weight of bismuth. Melt it all in a ceramic crucible in a muffle furnace or on a gas burner. This will be the solder. 5. Make flux (used instead of flux). Finely grind 6.5% pure sodium chloride, 4% sodium sulfate, 23% lithium chloride, 56% potassium chloride and 10% cryolite. Mix the powders.It is necessary to protect the mixture in a vessel with a tightly closing stopper or lid, because it absorbs moisture powerfully. 6. First apply flux to the soldering area. Later, it spreads over the heated surface, soldering with bismuth-tin solder is carried out. During soldering, care must be taken to ensure that the amount of flux is sufficient to cover each soldering area. Note! The soldering iron must be strong and strictly perfectly heated. Independently of the methods and recipes used for soldering, at the end of soldering, the formed seam must be cleaned of contaminants and oxidation products formed in the process.
Ear piercing is the most common procedure in the field of aesthetic surgery. Now there is no hitch to pierce the ears, but it so happens that it is necessary to get rid of the holes in the lobe. How to do it?

You will need
- - Kontraktubex ointment;
- - a visit to a plastic surgeon.
Instructions
1. First of all, you need to remove the earrings. If you walk without earrings for a long time, then there is a chance that holes will overgrow themselves. True, this will take more than one month. If the ear was pierced for a short time, then the probability of rapid overgrowing of the holes is as much as 100%. If the decoration was removed closer after the canal is tightened, then it is not a fact that complete overgrowth will occur. Plus, hole scars will remain. The earlobes differ from all other common piercing sites in that they have the functional specifics of being crappy to heal. 2. In order for the hole to heal faster and also to dissolve the scars, it is desirable to buy a special Kontraktubex ointment. It is allowed to purchase any other drug prepared for this purpose in the pharmacy. In most cases, medications are effective. However, they also act in full force, while the punctures in ears still fresh. Otherwise, you will have to spend much more time on overgrowing. 3. In addition, it is allowed to go to an appointment with a trusted plastic surgeon. Hole tea in ears it is allowed not only to overgrow, but also to sew up, which is much more effective. This operation is performed under local anesthesia, so you won't feel anything. In addition, each procedure is relatively short-lived. The result pleases everyone, without exception. As a result of this operation, not only does it become invisible holes but also no scars and scars remain. After a while, the earlobes easily return to their original appearance. Note! It is necessary to pay special attention to the fact that after the holes are sewn up in the hospital, it will be allowed to pierce your ears again, not until a year later after the operation.
Drywall is widely used in the preparation of walls for decoration. It provides a smooth surface inside rooms, creates sound insulation and is fire retardant. However, during repairs, you can easily damage the drywall with a hammer blow. It is unrealistic to putty the resulting holes, because the strength of the slab is lost at the site of damage. Many people change the damaged drywall to the newest one. But there are times when the manipulation is associated with serious interference with the finished interior.

Instructions
1. Try to patch hole in drywall. You can make these repairs yourself without the help of an expert. 2. To patch up hole small, cut a piece out of drywall twice as long as the hole and slightly narrower. Pierce the patch at about the center of the patch. Pass a piece of rope through it and tie a nail at the end. 3. Apply plaster mortar to the edges of the patch, you can use putty. Hold the patch for the rope, slide first with one, then with the other end into the hole. 4. Pull the rope so that the patch fits snugly against the back of the drywall. Now neatly cover the recess with plaster or a previously prepared putty.Cut the lace. 5. At the last stage of a small cosmetic repair of the damaged surface of drywall, apply a layer of plaster, moisten it with water with a brush and smooth with a trowel. 6. If more volumetric damage has formed on the surface of the drywall, then cut the drywall with a knife along a horizontal line to the fastening stubbornness. 7. Run the incisions further down to the middle of the stubborn. Then make two longitudinal cuts. Now remove the damaged drywall section from the wall. 8. Separate two wooden blocks with a saw, insert them between the posts. Screw or nail these bars so that they become supports for the edges of the supporting drywall and for the upcoming patch. 9. Cut a piece of drywall to the size of the part that you removed and nail it in place of the hole formed. Putty the joints of the patch, then cover with paint tape. The final step is to rub the repaired area with mortar in order to hide the patch. 10. When the restored surface with a hole in the drywall is painted or covered with wallpaper, you yourself will not be able to find the unfortunate place of damage.
Down jackets are made of strong, wear-resistant fabric. An exceptionally serious danger for her is mechanical damage. But if you apply imagination, then it is allowed to close up any hole in down jacket making it inconspicuous.

Instructions
1. Observe the damage and determine its nature. The hole may have smooth or uneven edges. The way to correct it largely depends on this. 2. If the cut is even, take a small piece in the color of the fabric of the down jacket and grease it with BF-6 rubber glue. It is also allowed to use "Supermoment", "Moment Crystal" or "Aquasure". After that, carefully push the shred inside the hole, align the edges and press down coolly. After a while, the adhesive will harden and the damage will be repaired. 3. It is also allowed to process the smooth edges of the hole with a decorative seam, say, in the form of a zigzag. To do this, it is better to take threads in the color of a pumpkin, or differing by several tones. A contrast stitching will also look great if the down jacket has small details and elements of a similar color. 4. It is somewhat more difficult to close a hole in a down jacket that has uneven edges. A cool method is appliqué, a company label, or a tag. They should be neatly sewn over the damage. 5. In specialized stores, it is allowed to buy thermal stickers and, with their support, to close a hole in a down jacket. To do this, place the damaged area of fabric on a flat surface and place the decal on it. After that, cool it with a hot iron through paper or thin fabric. 6. If the damage is hefty, the edges are uneven, and fluff appears on the surface, a thorough repair should be made. First of all, you should get rid of excess fluff. Take scotch tape and glue the edges from the inside of the hole with it. After that, collect the fuzz with the sticky side of another piece of tape. Now cut out two huge pieces of fabric that is the same as the one the down jacket is made of. First, spread one with rubber glue, place on the inside of the damage and press down on the edges of the hole. Wait until it is completely dry and stick another flap on the outside. In order for the patch to be beautiful, it is allowed to cut it out in the form of any figurine.
Due to the huge heat capacity radiator soldering it even with the use of a strong soldering iron does not always work. For the correct adhesion of the tin, the soldering point must be carefully cleaned, treated with a flux and additionally heated with a construction hair dryer.
You will need
- - a soldering iron with a power of more than 250 W;
- - building hair dryer;
- - tin;
- - flux.
Instructions
1. Locate the leak correctly by visual inspection. If it is not feasible to do this visually, check the radiator for leaks.Fill it with water, close all pipes except one with plugs. Apply pressurized air through the open connection. Water will begin to flow through the slots in the cooling system. 2. To remove small leaks, coolant from radiator it is allowed not to merge. Warm up the engine and seal the expansion tank filler with an appropriately sized rubber plug. As the engine cools down, the volume of the coolant will decrease and a vacuum will appear in the radiator, which will prevent the fluid from flowing out of radiator . 3. If the leak is huge, remove the radiator and dry it. To do this, drain the water from the cooling system, dismantle the upper mount radiator , disconnect the fan electrical connector and remove its electrical wiring from the mounting brackets. Disconnect the hoses from radiator . 4. Dry and degrease the soldered area. Scrupulously clean the gap to the origin of the metal, treat it with flux, put a tin wire. Warm up the soldering area with a construction hairdryer and seal the gap with a soldering iron. If the tin does not "stick" to the metal surface, clean the soldered area a second time and additionally treat it with flux. Reinstall the radiator, check the tightness of the connections of the hoses and branch pipes. Installation Steps radiator will be the reverse of the withdrawal. Related Videos Note! Mustard and all kinds of dry additives to repair leaks can also be used only as a temporary measure. They will help to eliminate the leak only for a while, and the results from their use can be more dangerous - contamination of the radiator pipes. To avoid the consequences of using these products, flush the system thoroughly after using them. Helpful advice To eliminate a radiator leak on the road, it is allowed to use cold welding. Usually, this measure is enough for 1-2 months. Consequently, at the first probability, the radiator must be soldered.
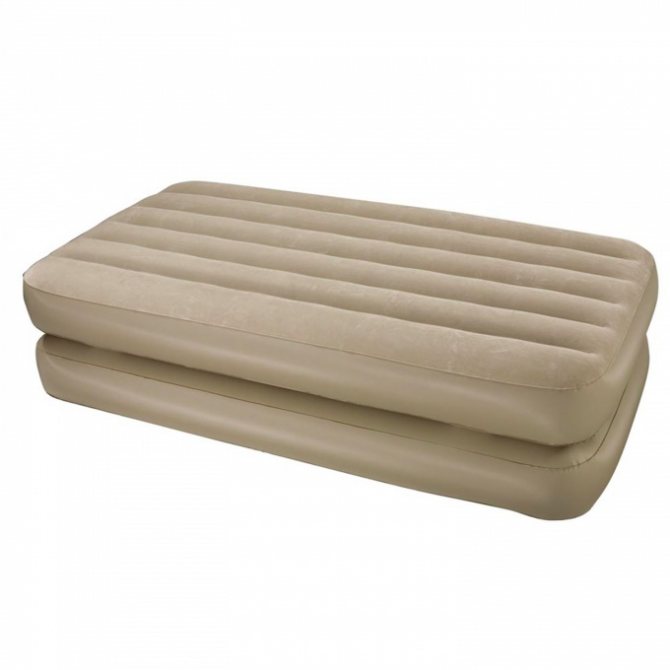
Nowadays, benign inflatable beds are considered a worthy alternative to ordinary ones. However, unlike the traditional bed of sleep, inflatable beds are more vulnerable: a small hole and the bed will deflate.
You will need
- - detergent;
- - water;
- - kit with patches;
- - scissors;
- - alcohol;
- - rubberized material;
- - glue.
Instructions
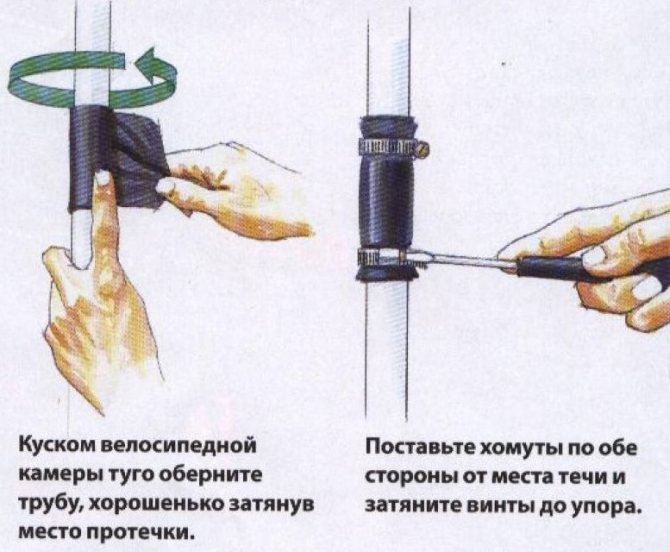
1. Look around the inflatable bed and listen to it: if the hole is huge, then, firstly, it is invisible perfectly, and, secondly, the air will descend loudly, therefore it will be allowed to quickly determine the place where the mattress is punched. 2. If an inflatable bed was punched on vacation, then immerse it in the nearest body of water (sea, river, lake or pool): a thin stream of air will show those places that are leaky on the inflatable bed that need to be patched up. Pull the inflatable mattress out of the water and mark the place of the breakdown so as not to lose sight of it. 3. Do not even try to immerse the lowering inflatable bed in the water at home: the water will splash over every bathroom, and you will not find the hole. Whisk the liquid soap or detergent into a fine lather and spread the lather over the areas of damage. Under the influence of the air pressure coming out of the inflatable bed through the holes, bubbles in the foam will increase. These are the places where the inflatable mattress was damaged. Dry the mattress. 4. Remove the patches from the kit supplied with the inflatable bed and, if necessary, cut the patch to the desired shape and size. Seal all the holes you find. Allow the glue to dry. 5. Recheck (immersed in water or smeared with fine foam) and make sure there are no larger holes. If you suddenly find a new place of damage, and there are no patches any closer, use any rubberized material (say, it can be a bicycle camera) and special glue for gluing rubber to a different surface.Degrease the surface with alcohol, apply glue to it and stick a patch. Note! If, after the attempts made to find the place of damage on the inflatable bed, it was still not possible, do not rush to throw out the mattress. Take it to an expert's workshop, one that provides air bed repair services. Helpful advice In order to hear the noise emitted by a punctured inflatable mattress, it is allowed to use a miracle device (earpiece, amplifier and microphone). Put on the headphones connected to the amplifier, the one that is combined with the microphone. Slowly slide the microphone along the descending inflatable bed: the sound from the descending air will be heard very well, which means that it will be easier to identify the holes.
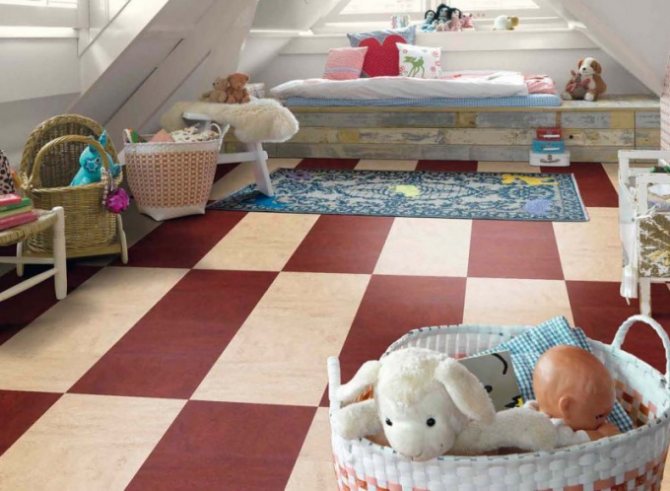
Even the sturdiest and most modern flooring is destroyed at some point. Linoleum is no exception - under the influence of various factors, scuffs, cracks and breaks can form on its surface. The origin of holes is not uncommon - as usual, they are left by furniture legs or sharp female heels. Such damage is absolutely permissible to repair yourself.
You will need
- - a piece of linoleum
- - glue;
- - putty;
- - metal ruler;
- - flooring cutter;
- - rubber roller;
- - plywood sheet;
- - a vacuum cleaner;
- - primer;
- - putty;
- - rosin;
- - turpentine;
- - dye;
- - mastic.
Instructions
1. Find the right patch material. Try to find linoleum that matches your flooring as much as possible in texture and color. Absolutely, if after the installation you still have scraps, then the "patch" will be virtually inconspicuous. 2. Place the selected material on the damaged area. Align the drawing, if necessary. Draw the borders of the patch using a pencil. Borders must pass at a distance of 2-3 centimeters from the damaged area. 3. Get a metal ruler and a flooring cutter. If you do not have a special cutter, then it is allowed to use a sharp boot knife. Place a ruler against one of the previously drawn borders and cut through both layers of linoleum - newest and decrepit. By moving the tool, cut out the entire patch. 4. Remove the cut piece of damaged canvas from the flooring. Scrupulously clean the subfloor from old glue, dirt, mastic residues. Vacuum. Prime and allow to dry. 5. Apply glue to the floor and to the wrong side of the patch and leave for 6-8 minutes. Attach the piece to the area to be repaired, aligning the edges correctly. Apply a rubber roller to the surface. Cover with a sheet of plywood and place under pressure. The cargo must be left for 2-3 days. 6. Minor damage to the floor covering - minor cuts, scratches, abrasions - can be repaired with a putty. If you have no chance of buying a ready-made putty, then it is allowed to make it independently. To do this, you need to take thickened turpentine, rosin and dry dye of a suitable color. Mix rosin and turpentine in a ratio of 1: 4, add dye. Apply the resulting homogeneous mass to the damaged area of the linoleum. Wait until it dries and scrupulously clean. Sand and polish with linoleum mastic. Related Videos
The problem of damaging the car interior is quite common. Scratched, cut and burned upholstery or seat upholstery spoils the overall look of the cabin. It is allowed to repair it with the help of special compositions.
You will need
- - kit for repairing the interior of a car salon;
- - thin cloth;
- - scalpel.
Instructions
1. To restore the seat, you will need a special car interior repair kit. Find the right kit depending on the type of material covering seat ... This can be a repair kit for a leather, velor or fabric seat. 2. If the damage is a result of a burn-through, pulling the material around the hole, neatly smooth out or cut off these shrunken areas with a scalpel. Despite the fact that the hole will become larger in size, in this state it is more amenable to correction. 3. On the inside of the hole, glue the special reinforced mesh included in the restoration kit. After attaching, iron it with a Teflon iron at a temperature not exceeding 125 degrees, otherwise the mesh may melt. Between it and the iron, carefully place a piece of thin fabric. For proper gluing of the mesh, ironing should be done for 10 - 15 minutes. 4. After installing the reinforced mesh gasket, apply the repair compound from the kit to the area inside the hole. As usual, it is a powder that melts during heat treatment and fills the hole. 5. After sprinkling a layer of powder on the damaged area, cover it with a special Teflon coating and iron it with an iron for 10 to 50 seconds. Let the melted mixture cool. Attach a cooling bag to speed up this process. 6. While the composition is cooling, prepare a mixture that allows you to recreate a texture that matches the color of the damaged area. Take a special two-component compound from the repair kit, and squeeze in equal numbers onto a spatula. Mix and apply to the nearby seat surface. In five minutes, this coating will harden, and the smallest drawing will remain on its reverse side - an impression. 7. "Print" the finished copy of the texture on the treated area. To do this, apply the 2nd layer of powder to the damaged area, on top of it - an impression and iron it all with an iron, putting a Teflon pad. 8. With the help of the color fan, select a color that is especially suitable for the surface to be repaired. On the contrary, the color has a special code, the one that needs to be found in the catalog with an exact description of the method for preparing the shade. 9. Prepare the paint according to the instructions, taking the necessary components from the kit. Apply paint to the repaired area with a special gun and let dry for 10 - 15 minutes. If the surface of the seat is fleecy, it will be necessary to match the villi contained in the set in the jars to match it. Helpful advice If getting a repair kit turns out to be too expensive for the car owner, repairing the seat using the same materials will help to implement it in special auto repair shops.
When repairing a plumbing unit or electrical wiring, a small hole is cut out, which then needs to be repaired. In addition, a hole in drywall may occur due to water leakage or fire.

You will need
- - knife;
- - a hacksaw for drywall;
- - putty;
- - cardboard;
- - plywood;
- - screws;
- - reinforcing tape.
Instructions
1. Before you patch up hole in drywall , eliminate the cause due to which the damaged areas appeared on it. If it gets wet, then wait until it dries completely. 2. Use a drywall knife or hacksaw to remove any loose or hanging parts of the board. If necessary, unscrew the screws next to the damaged area. If the hole size is no more than 5-10 cm, apply a layer of putty in several layers. 3. A plasterboard patch is required for a larger hole. Measure the extreme dimensions of the hole with a tape measure. Cut out the damaged part, making the hole triangular or rectangular. 4. On a piece of obscene drywall, make a patch of the desired shape, the perimeter of which is 5 cm larger. Use a knife to cut the back of the patch card. Remove it and each cast. Leave only cardboard on the front side of the plate. 5. On the damaged drywall make a cut with a knife around the triangle or rectangle. Remove only cardboard from the front. 6. Using a spatula, apply a thin layer of gypsum mixture to the edges of the damaged drywall and patch. Place the patch over the hole and press down lightly. It should be on the same tier as the damaged area. After drying, apply another layer of plaster mix. 7. In order to close up a large hole in the drywall, cut a rectangular stencil out of cardboard. Its size should be slightly larger than the damaged area. With the stencil attached to the hole, trace its silhouette with a pencil. 8. Use a saw or knife to cut a hole in drywall along the line of the silhouette of the stencil. 9. Make strips of plywood that are 3cm to 7cm wide, 10cm longer than the opening. 10. Place the strips on the hole and attach them to the back of the drywall with screws. 11. Patch obscene drywall to fit your stencil. Attach it with screws to the plywood strips. The patch should be on the same tier as the surface to be repaired. 12. Apply a thin layer of putty around the hole. Lay the reinforcing tape along the patch joint, pressing it into the putty. 13. Apply a thin layer of putty. After drying, wipe with a damp sponge or sand the surface with sandpaper.
When buying a used car, pay special attention to comprehending the underbody, doors and sills. Tea if there are significant areas of rust, then in the future you will have to tinker. If you bought an old car, then the first step is to eliminate all holes .

You will need
- you will need a welding unit - a semiautomatic device for 150A, a carbon dioxide cylinder, a welder's mask and a defensive suit, clamps, a grinder, clamps, copper wire, sealant, putty, paint, sandpaper, hair dryer, fiberglass, white spirit, metal brush.
Instructions
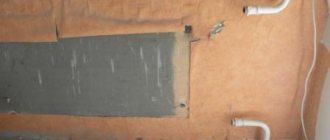
1. When sealing unloaded body elements, holes in the bottom of the doors and the edging of the windshield, first scrupulously clean all damaged areas with a metal brush. If putty was previously used there, then neatly remove it with a knife. Sand everything scrupulously. Then cut the fiberglass into slices. Degrease the surface with white spirit, dilute the resin. Saturate the fiberglass and apply in two layers. Blow dry and leave to dry completely for 24 hours. Later, scrupulously clean with a fine sandpaper. 2. Then fry the fiberglass over the fire. Better to use a gas stove. This will remove every paraffin wax. Cut out the fiberglass fabric. Apply it in two layers. Apply a smaller slice first, and a slightly larger slice on top. Do the same on the other side. 3. Scrupulously fill the repair sites, then prime. Use a joint compound. Later, apply a can of primer and paint on top. When performing these works in the cold season, warm up the spray cans with a hairdryer. 4. If there are small holes in the bottom, then you need to completely free it and scrupulously see it. It is possible that a much larger area will have to be repaired. Take a grinder and cut out all the rot and rust. After that, weld a piece of new metal onto this place with a semiautomatic welding unit. 5. Minor holes in the wing should be covered immediately. To do this, carefully pick them out, sand them and treat them with a rust converter. 6. A slight leak at the bottom of the windshield can be repaired without changing the seal. To do this, coat the joint between the rubber band and the body with silicone sealant. In the place of the leak, slightly pry the sealant and squeeze out the glue there. Remove any excess immediately with a cloth. Note! Unfortunately, due to the low level of adhesion of its particles to each other, mustard clogs the radiator tubes, and then they fail. Consequently, it is recommended to use it for rapid repairs on the way.
How can you glue a car radiator
The use of "cold welding" or special adhesives is also very effective in extending the "life" of your car radiator. Algorithm of work:
- Using a narrow screwdriver, expand the crack.
- We carefully clean it with needle files or sandpaper and degrease it.
- We mix the components of "cold welding" ("Poxypol", "Moment", "Arbo" or the like).
- We fill the gap with the prepared solution and leave the knot for a day to dry completely.
- We check the tightness of the radiator and install it in place.
Damage to radiators (made of a wide variety of materials) can be quickly and effectively repaired using a special Hosch-Kleber repair compound. Its delivery set includes two containers:
- one with a liquid adhesive;
- the other with special welding granulate.
How to use this tool to repair a car radiator is described in the video below:
Methods for eliminating the identified malfunction of the cooling radiator
There are several ways to fix a radiator leak:
- The use of folk remedies (only if you are at a considerable distance from the nearest spare parts store).
- The use of special sealing agents to temporarily eliminate the leakage of the cooling system.
- Repair of a damaged unit using soldering or special adhesives.
- Replacing a damaged radiator with a new one.
Important! The first two methods are only a temporary measure that allows you to continue operating the vehicle without the risk of engine overheating.
Radiator Sealant - Potential Problems
If you purchased a low-quality or fake sealant for repairing a radiator or did not fulfill the manufacturer's requirements, then instead of a leak, you can get other troubles as a gift. Namely:
- Thin radiator tubes can become clogged, the cooling of the engine is disrupted, which will lead to overloads or its failure.
- The radiator of the stove will also become clogged, and the heating of the interior of your car will become insufficient or stop working altogether.
- The pump may also break due to the abundance of foreign matter on the blades.
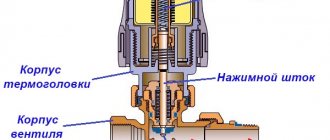
- The coolant thermostat will stop working and the engine will malfunction.