September 28, 2020 Equipment and faults admin
Oil heaters have long been used as an alternative or main source of heat in the cold season. After the expiration of time, a new radiator may show some signs of an impending malfunction, if measures are taken in time, you can extend the life of the device. You can find out more about which oil to fill in the heater on the website znatoktepla.ru.
Design and principle of operation
The design of the oil cooler is quite simple. It consists of a body filled with oil and one or more heating elements. The heater is controlled by the existing regulator. It allows you not only to turn the device on or off, but also to adjust the intensity of work. Modern models of oil heaters can be additionally equipped with:
- fan;
- timer;
- remote control.
Attention: The oil in the heater housing makes it possible to achieve high-quality heating of the room, has a positive effect on the safety of the device and makes it possible to save money. In terms of heat conductivity, oil is significantly superior to air.
Read more about the inverter heater here.
The principle of operation of an oil heater is as follows: heating elements immersed in oil heat up as a result of which the temperature of the filler rises, which transfers heat to the room through the body. Due to the fact that heating elements are cooled in oil rather quickly, oil heaters have high efficiency. Many modern models of oil heaters are equipped with built-in fans. With their help, a faster rate of heating the room is provided.
Oil radiators are reliable enough, but they can also break. Breakdowns vary, but one of the most common is oil leaks. In the event of such a malfunction, it is necessary not only to eliminate the leak, but also to add oil to the heater.
According to user reviews and its composition, transformer oil is best suited for these purposes. Moreover, it is quite affordable and it will not be difficult to find it.

Installation of heating elements
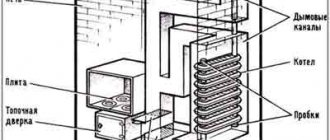
The electrical part of a homemade heater is quite simple in design. A heater, a connecting wire with a plug - that's all you need to install it. To begin with, the grinder cuts out a metal plate to which the heating element will be attached. A hole is drilled or electrically cut out in it according to the seat and heater fasteners. When this part of the work is completed, the plate is welded to the end of the lower pipe left for this purpose. After processing the welds, the heating element is installed in its place.
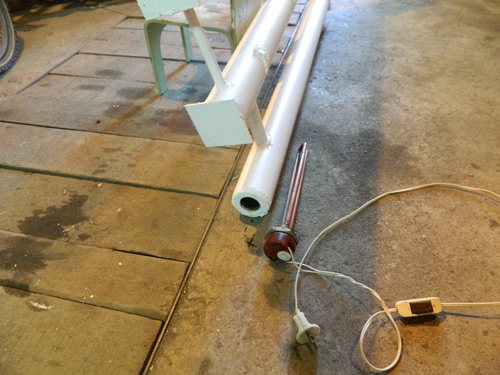
The gasket between the heater and the heater body is made of thermo-oil-resistant material (special rubber). The electrical connection wire will work just fine from an old electric iron. On this, the assembly of the waste oil heater with your own hands can be considered complete. It remains to fill in the coolant and turn on the device to the network.
Oil is poured into the heater in the amount of 85% of the internal volume of the heater.
Transformer oil
Transformer oil is made from petroleum by distillation. It has a low viscosity and good cleaning properties. The oil boils at a temperature of 300 degrees. It is intended for pouring into circuit breakers, transformers and reactor devices. Due to its properties, it can also be poured into an oil heater.
The composition of transformer oil depends on the original composition of the raw materials from which it is made. It may have some differences depending on the field from which the oil was produced.
On average, transformer oil, which can be poured into a heater, has a service life of no more than 20 years. But it must be unused before.
Attention: The filled oil must have the necessary certificates from the manufacturer. They must confirm that the technical oil is free of any additives, gases and moisture.
This fluid, due to its characteristics, is able to operate even at low temperatures. The minimum mark can be 45 degrees. Due to its low viscosity, it is able to efficiently dissipate heat.
Aspects of choosing a heating device
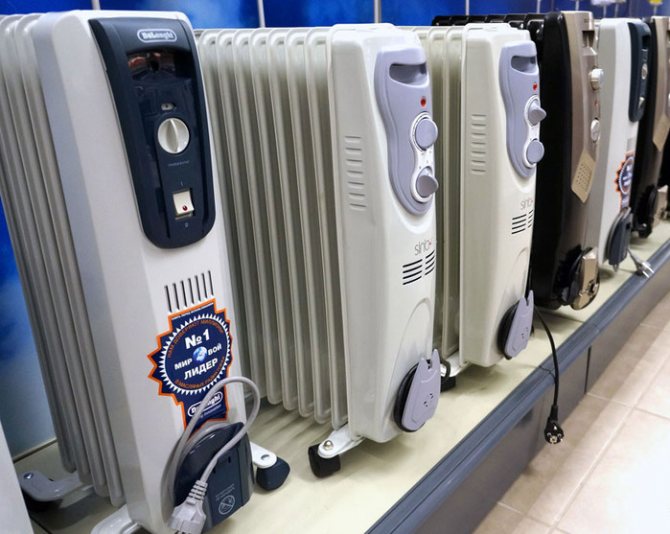
How to choose the right oil heaters for summer cottages and homes? In this case, pay attention to the power of the device, its dimensions, the presence of additional characteristics (climate control system, fan, humidifier, clothes dryer).
The heater heats the room thanks to air convection.
Power or performance. According to building codes, heating a room with an area of 10 square meters requires 1 kW of thermal energy. At the same time, the house or apartment is insulated, and outside the temperature is as low as possible. Therefore, for a room of 15 square meters, a radiator with a capacity of 1.5 kW is needed. However, it must be remembered that the equipment cannot work for a long time at the maximum possible power, since the electrical part may fail. Experts recommend choosing a heater "with a margin" in terms of performance, that is, for a room with an area of 15 square meters - 17 square meters, it is better to buy a device with a capacity of 2 kW.
How to fill oil in an oil heater
After the leak in the oil cooler has been eliminated, add the transformer oil. But here it should be borne in mind that it should not be poured in its usual form. The oil should be evaporated beforehand. The temperature should be +90 degrees. The oil should not be heated more strongly, since then the process of its oxidation will begin.
The amount of oil to be poured should also be taken into account. It should be approximately 85% of the body volume. The remaining 15% should be left for air. Compliance with this rule is mandatory. Indeed, when heated, the oil will expand and if it fills the entire volume, then the body will simply burst.
Attention should be paid to the quality of the filled oil. It must be heat resistant and clean. The service life of the heating element depends on the last criterion. After all, if there are any impurities or dirt in the oil, then scale will form and settle, which means that the heating element will quickly become unusable and will need to be replaced.
Removing a defective heating element
When dismantling the heating element, the heater must be located on the rear edge. It turns out that the heating element itself must be on top. This is necessary so that during the replacement process oil, which is a heat carrier, does not leak out of the radiator.
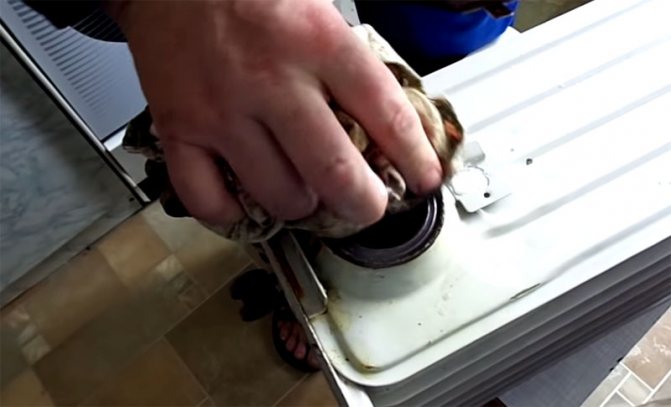
In the absence of a key of a suitable size, it is quite possible to use a gas one. With its help, the old heating element is unscrewed, after which it can be pulled out.
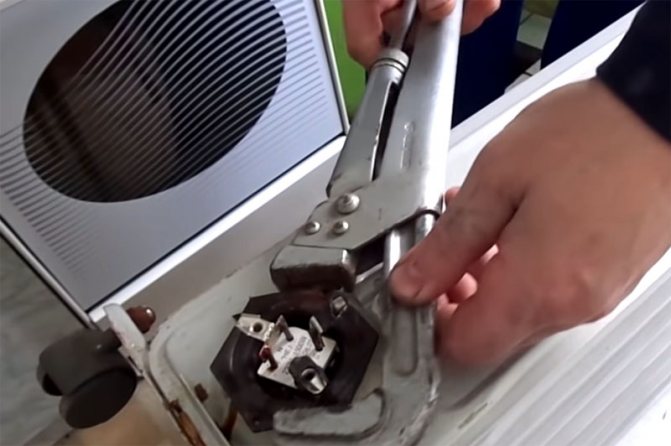
With a gas wrench, you can freely unscrew the faulty heating element from the seat
The problem in this example was the breakdown of the heating element onto the case, which can even lead to the oil igniting and the explosion of the radiator (if the protective automatics do not work). And what a heating element looks like with a similar problem can be seen with the naked eye.
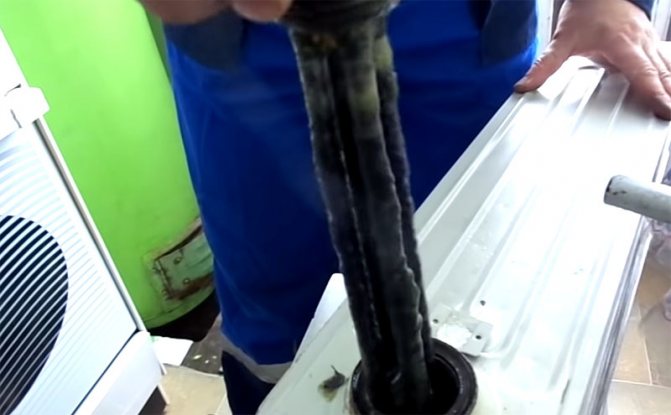
The appearance of the heating element, punched into the body - all the tubes were swollen and deformed
Operating rules
After the leak in the oil cooler housing has been eliminated, and the oil is filled, special attention should be paid to the rules for its operation.
Attention: In order for the oil heater to serve as long as possible, you should adhere to some rules when using it. Caring for it is quite simple - dust should be removed from its body from time to time. To carry out this procedure, you should not use various abrasive compounds. It is best to brush off the dust with a regular, dry, soft cloth.
When using heaters, you should adhere to the following rules:
- heaters should not be used in rooms with high humidity, for example, in a bathroom;
- the device must always be in an upright position;
- do not use an extension cord when connecting, as it may overheat during operation;
- do not store the oil heater in a shed or on a balcony, otherwise it can quickly fail;
- the heater from various low-melting products should be located at a distance of at least 50 cm.
Rechecking and dismantling the heating element
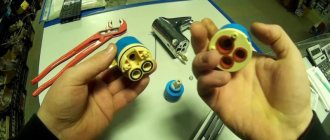
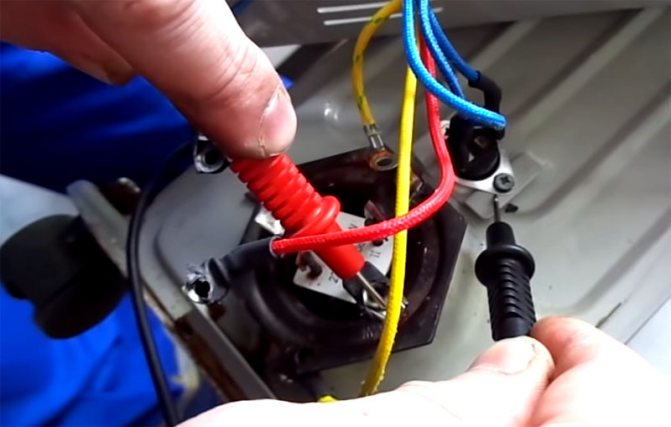
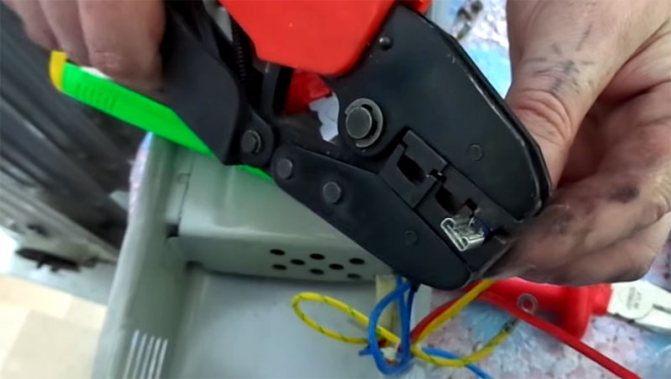
All the automatics on the lid, as well as the wiring that goes with it, are in perfect condition. So, it's time to start dialing the heating element again and dismantling it. To do this, you first need to cut off the heat shrink tubing that insulates the contacts of the heating element, and then unscrew the screws. When the contacts are free, it will become easier to work with the heating element.
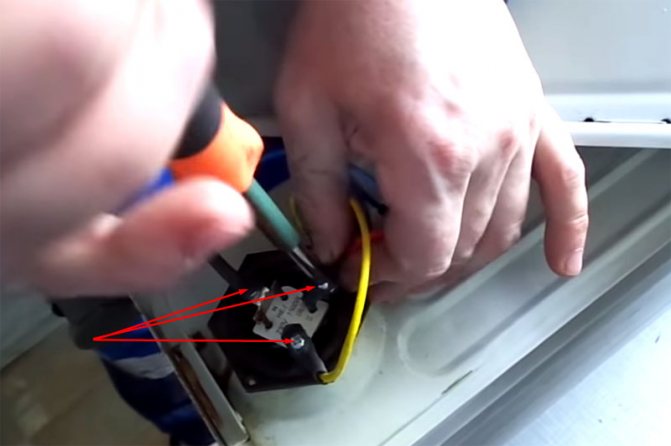
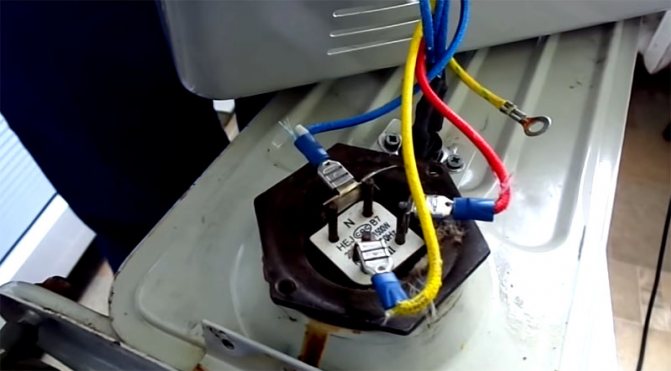
The screws of the heating element contacts must be unscrewed in order to disconnect the wires. During subsequent assembly, it will be quite difficult to get confused with the location of the wires - all the contacts are marked. The two combined contacts marked with the letter "N" are zero. The rest, marked with Roman numerals "I" and "II" - power supply to the first and second circuits.
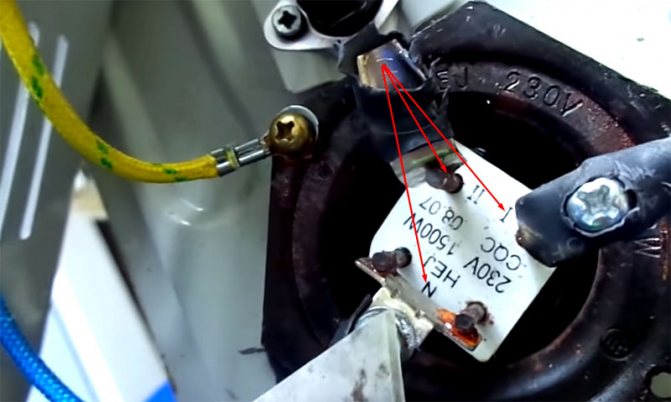
All contacts on the heater are marked, it will be difficult to make mistakes during assembly
Ringtone heating element: what can happen to it
There are 2 variants of events here - this is a burnout of a heating element or its breakdown to the case. In the first case, there will be no circuit between the phase and neutral contact, and in the second, the multimeter will show a short circuit between the phase and the case. The second option is much more dangerous, especially if the protective automatics in the water shield leaves much to be desired.
Another problem may be the failure of the emergency release, but this is extremely rare. The reason for this is the rare actuation of the plate, because for this, the entire automation of the oil heater must fail. Typically, the trip limit for the emergency circuit breaker is set at 140 ° C.
Dialing with a multimeter will allow you to accurately determine the cause of the failure of the heater
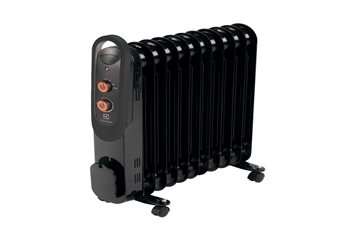
The device of the simplest oil heater
It is good to cover the oil heater with clothes to dry. The only type of appliance where the owner will avoid fatal consequences. The only thing is that on the side of the accordion container there is an extension equipped with electronic filling; avoid covering the compartment. The oil heater device includes the following elements:
Emergency shutdown sensor (thermal fuse, relay)
- A container filled with oil. Appearance - a poured accordion, heating up to a decent temperature, wait a moment to touch it with your hand. When it comes to drying things, put heat-tolerant ones fearlessly. The container is sealed, but there is 15% air inside. Try to put the oil heater upside down, roll it on one side, return the load to the wheels. Heard thuds scare mice: air bubbles burst inside. Water is not used by the heater, it will quickly evaporate, the corrosion of the body will become significant, the manufacturing technology would require the complete exclusion of air from the working fluid (water + oxygen = the most powerful oxidant of living nature).The coefficient of thermal expansion of the most common liquid on the planet is ten times that of steel. It's not good if the tank bursts.
- The lower part of the end of the accordion contains a heating element, to which the electronics compartment clings. The oil heater has no pump and works by natural oil recirculation. The current starts from the heating element upwards, then at the opposite end of the battery the liquid goes down. While working, it emits the vibration of the spiral, which is audible, under the influence of alternating voltage. The effect is unavoidable, due to the influence of the Earth's magnetic field. The boiling point is above 100 ºС (150-200), avoid touching the container, until the phase state changes, the liquid is not brought due to the prohibition of the use of water: the container will rupture. TEN double (two spirals), will allow more flexible regulation of heating.
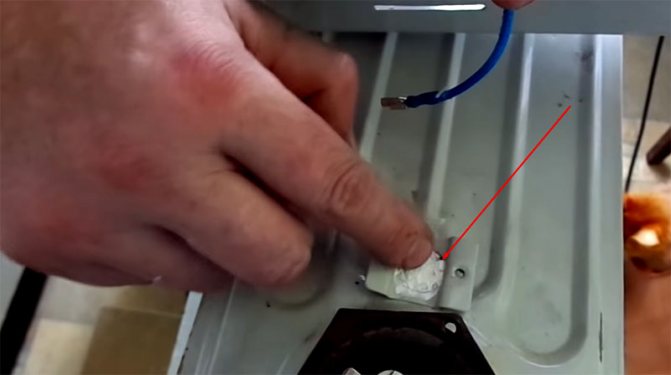
- There is a thermal fuse not far from the heating element. The device will not allow a fire to happen, if suddenly oil leaks out, the temperature relay breaks. The oil heater would work hard when the copper heating element began to melt. Oil will leak out - high temperature through the housing will trigger the stuck-on thermal fuse. The structure distinguishes between bimetallic (reusable) or wire (disposable). The photo shows the presence of a clearly blackening tablet above the heating element: a thermal fuse (see the first photo of the review), or a thermal relay (determined by the design).
Steel profile connecting the electronics compartment and the heater accordion
- The relay is located at the top. The main difference from the iron is visible: there is no contact with the body. It can be seen that the thermal relay simply tramples the air. An oil heater resembles an electric kettle in a marked feature, in which the bimetallic plate is often exposed to steam penetrating through a special opening in the body. A thermal relay is an adjustment mechanism, a thermal fuse is designed to localize the case of failure of standard equipment.
- The pictures show: there are two switches, each has a phase, the ground of the heating element, one wire of the thermal relay. This redundancy allows the indicator lamps to glow. One phase is not enough to provide the Joule-Lenz effect. The manufacturer does not know in advance which side the user will plug in the plug, whether the blue (red) wire will be neutralized, and is exposed to 230 volts.
The electrical part differs little from an iron, an electric kettle, a water heater. You can turn on both spirals of the heating element at the same time, separately. In the latter case, the oil heater will take longer to reach the mode. There is a chance that in a cold room, the structure will work without interruption at all.
Earth's magnetic field researcher listens to the whirring of the oil heater coil
Close the air passage holes in the electronic circuit - nothing will burn, the oil heater will turn off ahead of time, restart will not take place soon, a drying woolen sock will prevent the flow of a fresh jet. The bottom of the casing of the electronic unit is cut with supply slots. The air leaves the floor, it follows, bypassing the wires, reaching the upper exit. Along the way, the bimetallic plate estimates the moment when heating stops.

Preventing malfunctions
Despite the fact that changing the oil in most cases is quite simple, it is still better not to bring the situation to such an extent. If you follow the important rules of operation, then the oil heater will serve faithfully without any excesses.
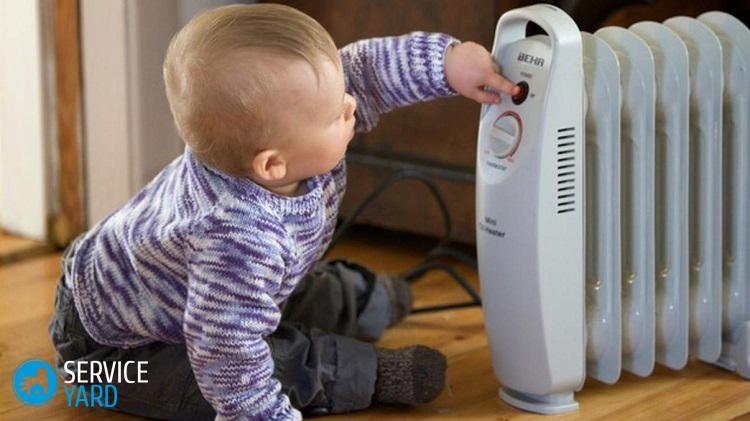
The main recommendation is the choice of the installation site. Or rather, it is highly undesirable to place such a heating device in a children's room. There are two reasons for this:
- during operation, the radiator housing becomes very hot. This is the main disadvantage of this type of heating equipment. Even if you accidentally touch the surface of the case, you can get severely burned.And everyone knows that children are quite active and do not always look in front of them. In general, for safety reasons, it is best not to combine an oil radiator with a nursery. However, if you want to use this particular type of device, then you can purchase a model equipped with a protective casing. It will protect children from burns, since it completely covers the body of the product;
- the body is made of a rather thin material. This leads to the fact that it is not particularly resistant to mechanical damage. Children's curiosity and love of active play can make the need for oil change procedures more than a regular occurrence. In addition, if the housing is damaged, as mentioned above, the oil quickly flows out. If at this moment it is warmed up as much as possible - you yourself understand what it is fraught with when in contact with children. Better not to risk it.
Another recommendation is to purchase a device that includes overheating and rollover sensors. They have already been mentioned above. Such regulators, which automatically turn off the device in the event of force majeure, can repeatedly save the equipment from serious damage.
In general, an oil cooler is an excellent heating device. If you do not take into account the repair procedure, which, if used correctly, will not be needed, then this device does not cause any trouble at all.
It has an excellent appearance, and the equipment is presented in stores in both floor and wall versions, which allows you to choose the optimal model for your interior. The efficiency of the device is very high, and all the necessary actions of the owners are to connect the equipment to the network.
In addition, some models have advanced functionality. For example, an on and off timer will make the operation process as comfortable as possible. In this case, energy savings will serve as a pleasant bonus, since the heater will not work in vain.
In general, this is quite a worthy purchase, and for the sake of its use it is quite possible and necessary to tinker with the repair. An oil heater will effortlessly bring warmth and comfort to your home. We are sure that after today's article you will not have any questions about the selection of oil and the availability of the possibility of replacing it. Good luck!
In accordance with current legislation, the Administration disclaims any representations and warranties, the provision of which may otherwise be implied, and disclaims liability in relation to the Site, the Content and its use. More details: https://seberemont.ru/info/otkaz.html
Was this article helpful?
Tell your friends
A household oil-filled electric heater is a unit known to the consumer for a long time, the device of which allows you to independently perform many operations for its repair and maintenance.
Damage to the unit body is a fairly frequent phenomenon, so we will consider measures to eliminate this malfunction and its consequences, including the question of which oil in an oil heater is safe to operate.
Disassemble the oil heater
The photographs of the oil heater show: the electronic unit is sealed in one piece with the accordion. This is not true. The inscription “Do not cover” hides a pair of screws, the fastening bracket is held by a spring located in the bottom part. It is clearly visible with the naked eye, explanations are unnecessary:
- the spring is unfastened;
- the bolts are unscrewed.
Inside the casing of the oil heater, most of the electrical connections are made with detachable terminals. If necessary, remove the switches, the bimetallic relay by unscrewing the screws from the inside, disconnecting the wires. Please note: the heating element is tightly sealed. Shows the desire of manufacturers not to allow anyone inside.

The cunning technician knows how to get to know each other
Major breakdowns of oil heaters
The heating element breaks more often, the tank leaks. The oil heater becomes completely unusable. The relay will last for years. Today, Soviet irons are widespread, they are still workable. It is impossible to repair the mechanism. It is necessary to clean oxidized contacts with alcohol. Repair of electronic filling is limited to the replacement of elements mainly. Thermal fuses are too lazy to repair: it is difficult to calculate the response temperature. Masters avoid taking responsibility. Keys, relays should be cleaned from time to time.
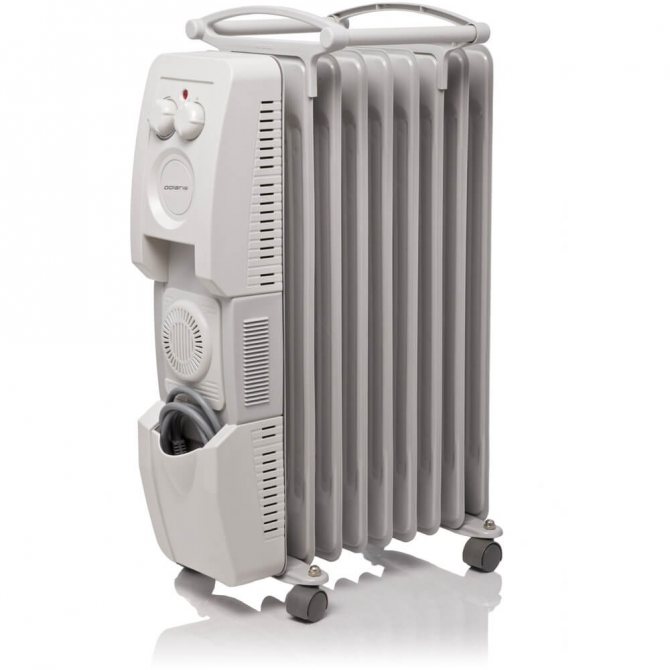
General arrangement of oil heaters
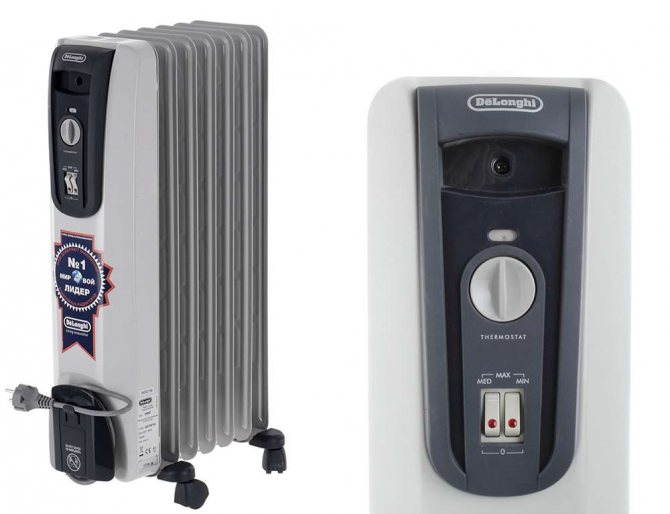
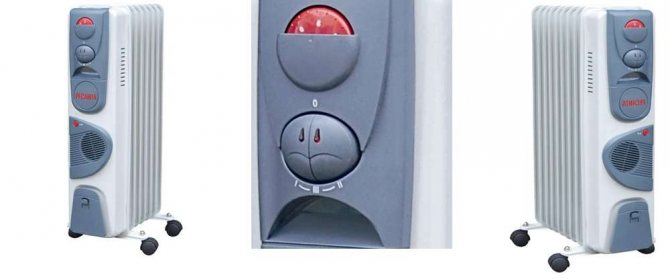
The design of oil-filled heaters is a sealed metal heat exchanger-radiator filled with 80% of its volume with oil. A tubular electric heater (or several heating elements) is mounted in the lower part of the radiator, and on the side outside there is a block with control devices (switch, power mode switch, thermostat flywheel) and devices that ensure operational safety (electrical circuit breakers in case of overheating, overturning or filler leakage).
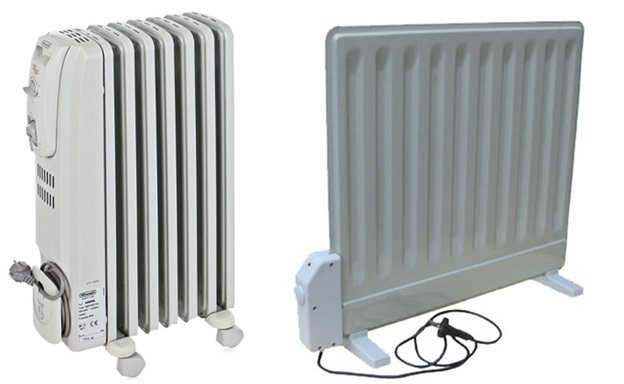
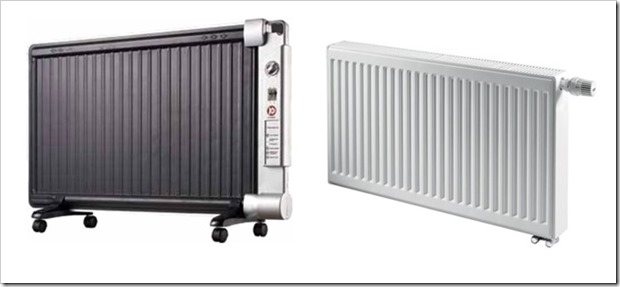
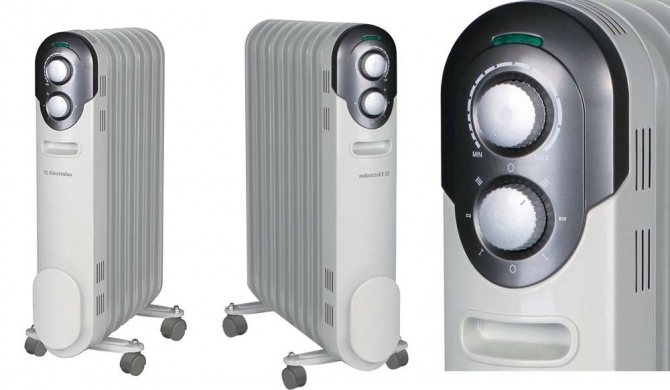
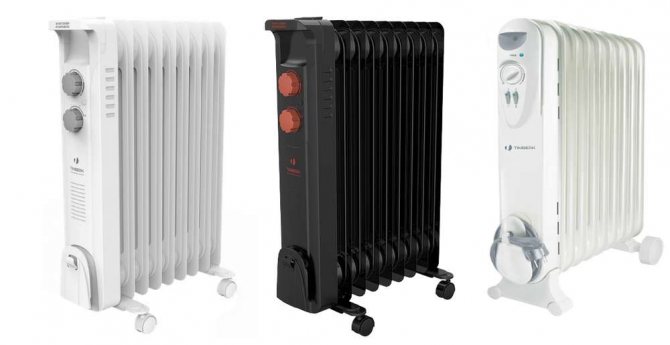
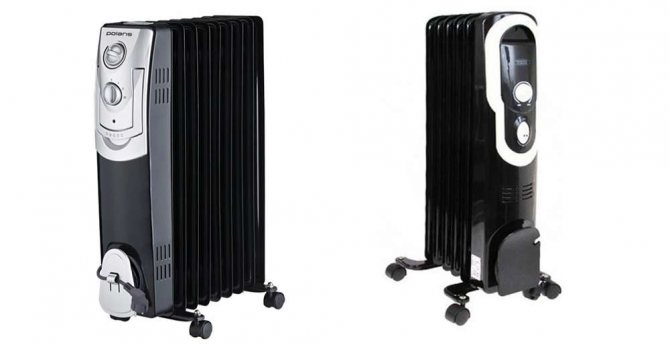
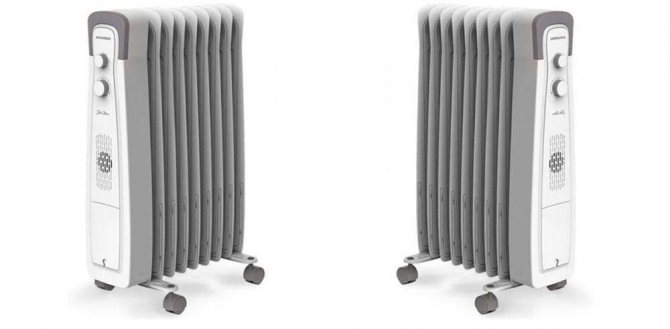
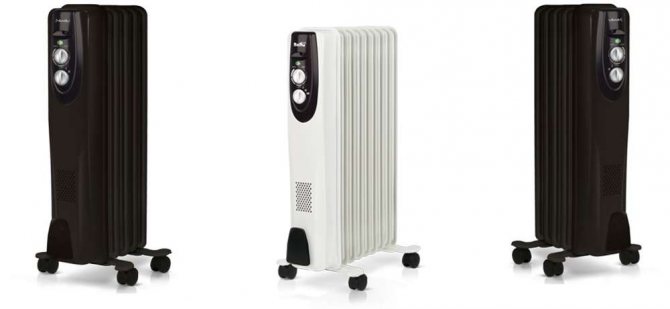
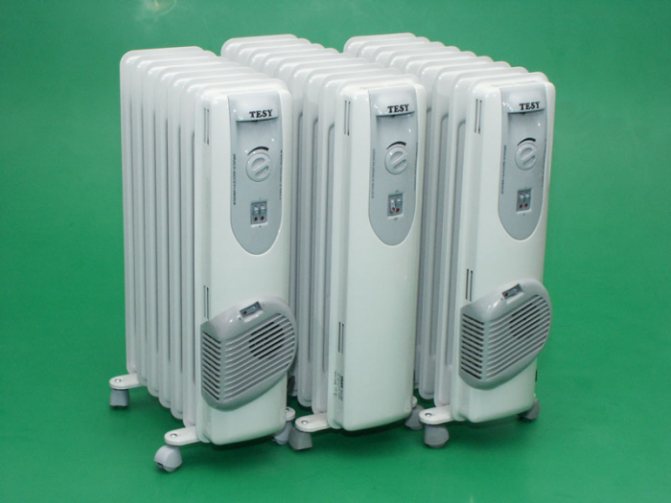
Oil-filled electric heaters of industrial production: on the left - ribbed, on the right - flat.
The equipment of oil heaters, depending on the type and performance class of the unit, is different, but an oil-filled radiator with heating elements is present in all devices.
The tubular heater, after being connected to the network, increases the temperature of the oil in the lower part of the radiator, thereby initiating the formation of convective flows in this liquid medium. Thanks to convection, the device heats up evenly over the entire surface area and gives off heat to the air, which as a result also starts convection movement.
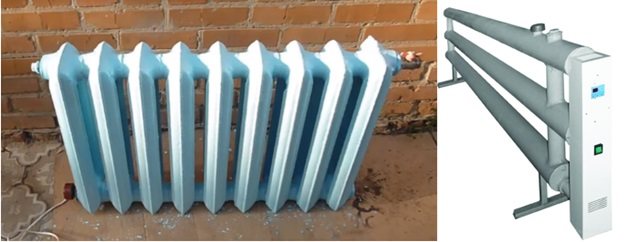
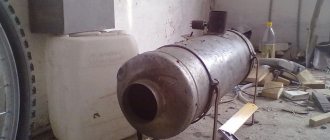
Homemade oil heaters
The heating of the contents of the radiator is accompanied by the expansion of the liquid and, accordingly, an increase in the pressure in the reservoir. Part of this effect is extinguished by the air "cushion", which occupies 20% of the radiator's volume, but its remainder still presses on the walls of the container from the inside. The radiator of the new oil heater is designed for such a load, but due to a number of factors, sooner or later it may lose its tightness. Consider how to eliminate this malfunction in relation to various types of oil-filled heaters.
Finned heater
Radiators of such heaters are similar in configuration to cast-iron central heating heat exchangers. Separate sections of such heaters are made from workpieces cut with high precision by laser from sheet steel with a thickness of 0.5 mm, molded by pressing and then assembled by laser welding again.
The small thickness of the radiator walls makes the heater vulnerable to corrosion, therefore, a protective powder painting is performed on the outside of the casing of such oil heaters. Mechanical damage to the protective layer, which is common in everyday life, entails, first, a point surface, and then through corrosion of the tank with a loss of tightness.
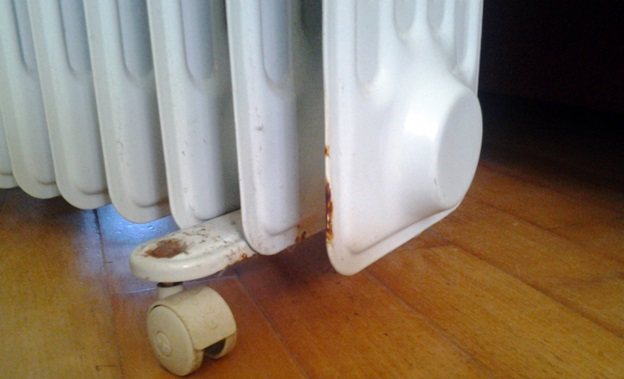
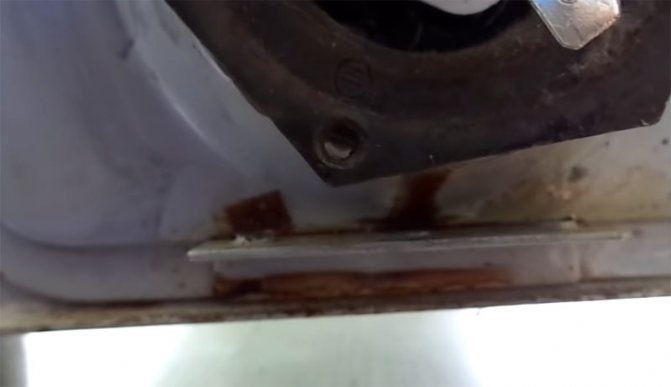
Progressive corrosion of the rib of the oil-filled heater section
When depressurizing a ribbed oil cooler, three problems have to be solved:
- elimination of damage to the case;
- filling the reservoir with oil;
- restoration of the tightness of the container.
The possibility of repairing a radiator is primarily determined by the design of its heating element.
Important! If the heating element is rolled into the housing, the heater cannot be repaired due to the absence of a technological hole for filling the tank with oil after its tightness is restored.
If the tubular heater is removable, then dismantling it allows you to drain the remaining oil after the leak, repair the damage, then refill the radiator, and reinstall the heating element.
The principle of operation of oil-filled electrical appliances
Oil-based electrical heaters have a similar appearance to traditional heating elements. The device consists of a sealed reservoir with oil filler, heating element, as well as a power regulator, special stands.
The principle of operation of the unit is to heat the oil, after which the composition expands in volume and fills all the space in the tank. The electric regulator and the heating element alternate turning on and off the device when the case temperature reaches its peak values.