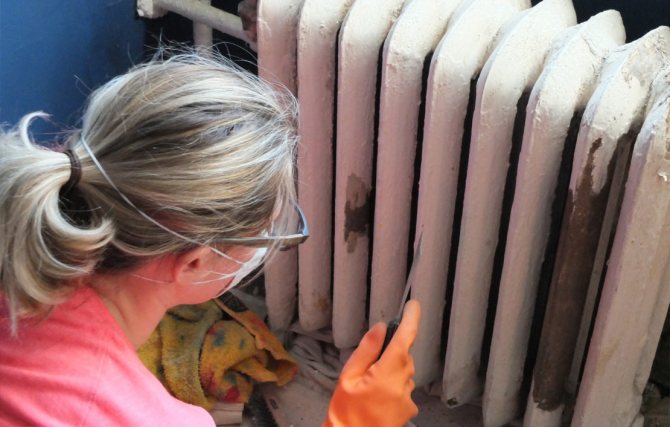
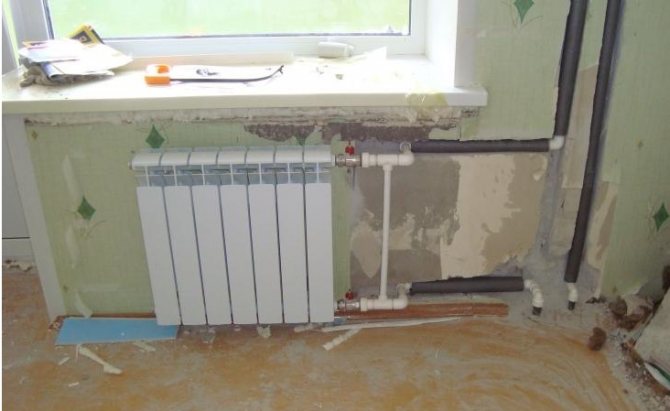
The battery can rightfully be considered one of the dirtiest areas in the house. Regardless of the location and type of heating radiator, getting to the inside of the battery or looking behind it is quite problematic. That is why dust accumulates there, which later turns into a breeding ground for dust mites. Many homeowners avoid battery cleaning for many reasons - inconvenience, lack of special tools, etc. But there are several effective ways to make it easier to wash and clean the heating radiator.
How to remove a heating radiator for wall decoration
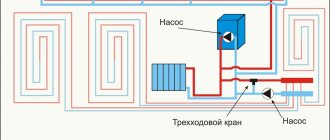
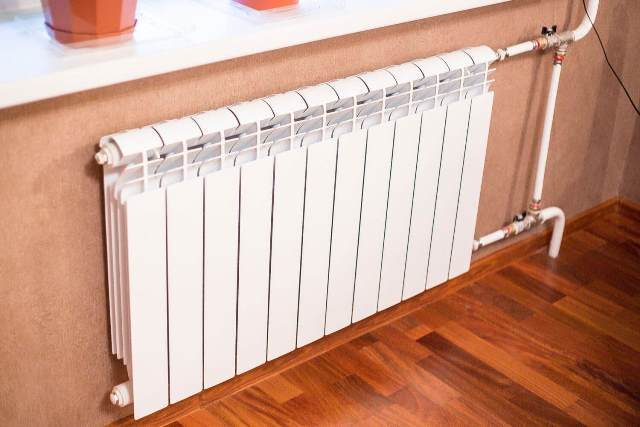
All radiators, both aluminum, cast iron, and other materials, have the same general connection principle. Regardless of the number of sections, the battery has a tap that regulates the supply of hot water, a return shut-off valve, and a Mayevsky tap - an air vent designed to release an air lock from the radiator.
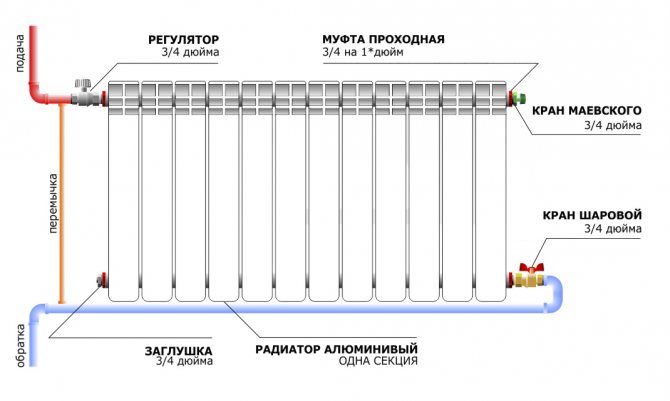
Battery connection diagram. With a small number of sections, the plug and the return pipe are interchanged.
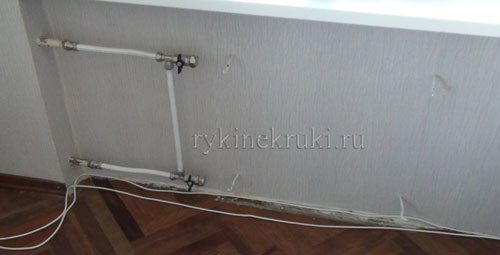
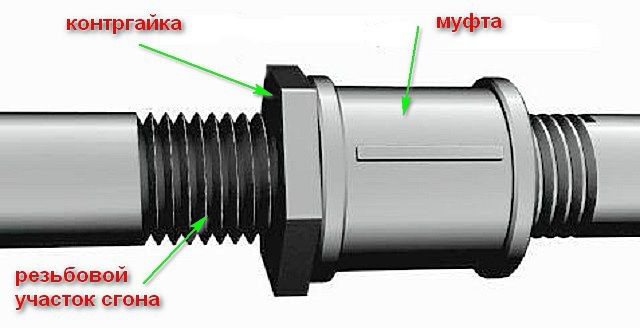
On the supply and return of hot water in the radiators, couplings with union nuts are installed, to which a water adjustment valve is attached at the top, and a shut-off valve at the bottom. After both taps, couplings with an external or internal thread are installed. And after the released couplings, either American couplings with clamping nuts, or couplings for crimping are installed. One way or another, the supply and return heating pipes are connected to the latter.
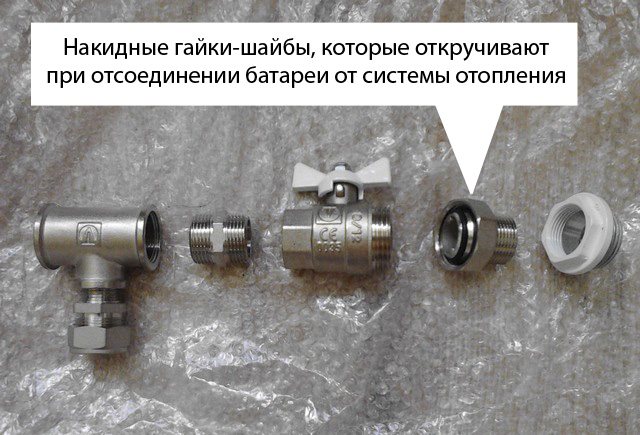
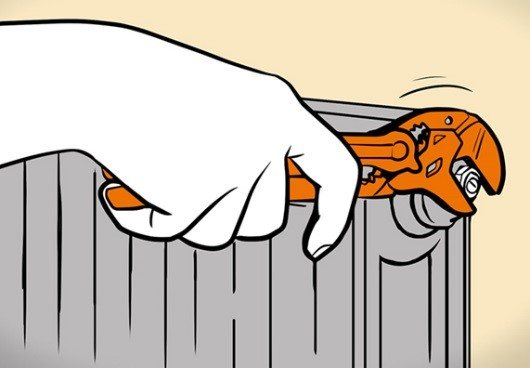
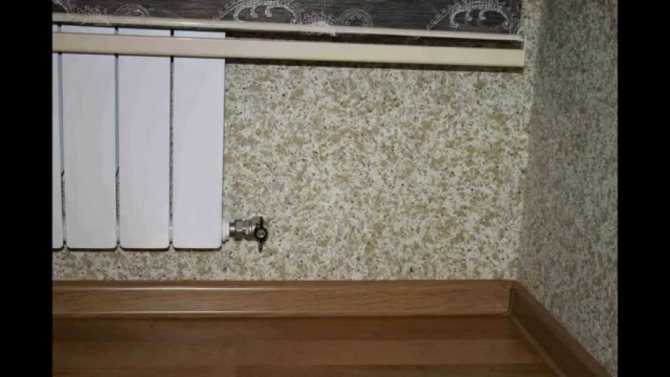
Nut that must be unscrewed to remove the battery.
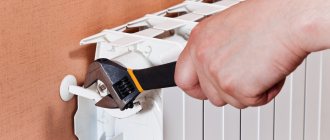
In order to remove the aluminum radiator, it is first necessary to close the water supply control valve and close the return valve. After that, you need to open Mayevsky's tap. Its external design can be different. Modern air vents have a comfortable grip. Old-style air vents are opened with a screwdriver, which completely unscrews the bolt.
At the next stage, a basin or a low bucket is installed under the battery to be removed and, using either 2 wrenches or 2 adjustable wrenches, the union nuts connecting the radiator couplings with the taps are unscrewed. Considering that the air vent was previously opened, then you need to wait until all the water drains from the radiator and remove the battery itself from the brackets.
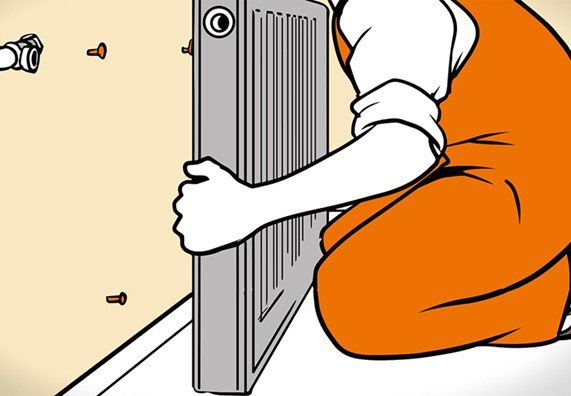
Dismantling (removing) the battery
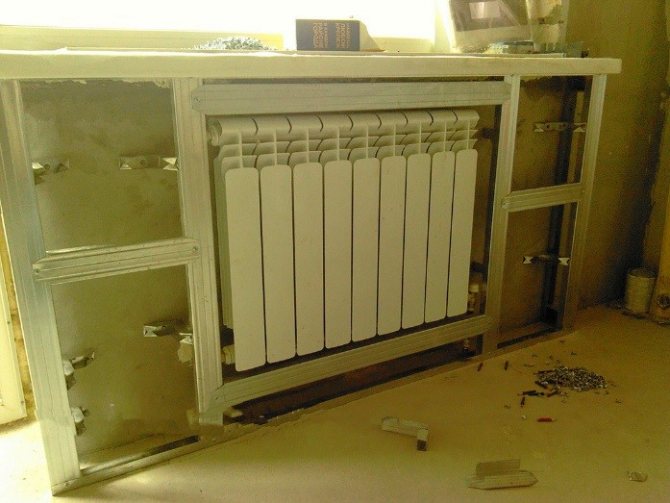
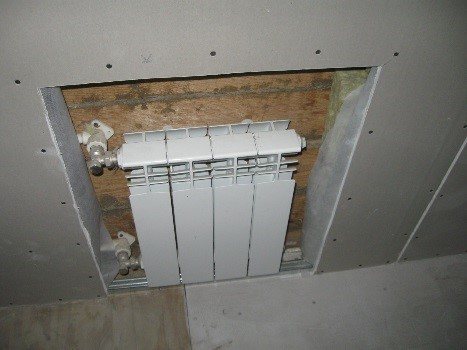
It is most convenient to carry out repair work on the surface of a niche with the radiators removed, then unhindered access will be provided for any operations. But, not all types of batteries are dismantled equally easily, and an attempt to unwind the old ones may be unsuccessful or lead to a violation of the integrity of the heating elements. In this case, the need to purchase new radiators is added to the cost of repair work. Therefore, it is advisable to remove them only when the batteries need to be cleaned or they are completely replaced with new ones.
The complexity of dismantling work also depends on the type of fittings used, the time of work (during the heating season or off-season), the heating scheme and the type of radiators themselves.
Removing modern battery designs
It is more correct to perform operations that will be associated with depressurization of the heating system in the summer, when hot water under pressure is no longer supplied and it does not need to be reliably shut off. In addition, this will not entail cooling pipes in an entire apartment or across the entire riser of a multi-storey building.
But the situations are different and sometimes it is necessary to remove the batteries earlier.The easiest way to do this is in modern houses where group or individual heating systems and new radiators are used. The general sequence of actions in this case is as follows:
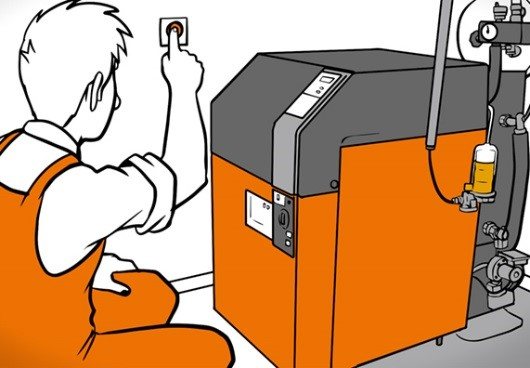
- Boiler shutdown. Switch off the heating device and disconnect the system from the mains, paying attention to the recommendations of the heater manufacturer regarding its correct shutdown;
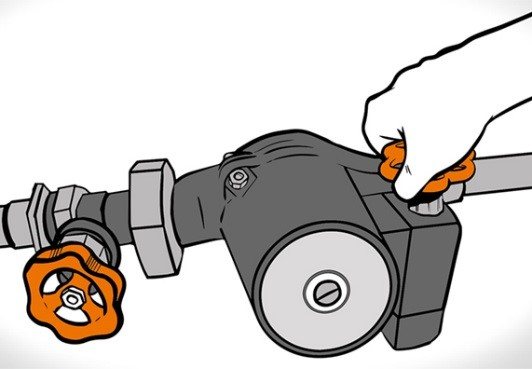
2. Closing the water supply. Shut off the water supply that feeds the entire system. It can be a circulation pump if individual heating is used or ball valves on direct or return flow risers;
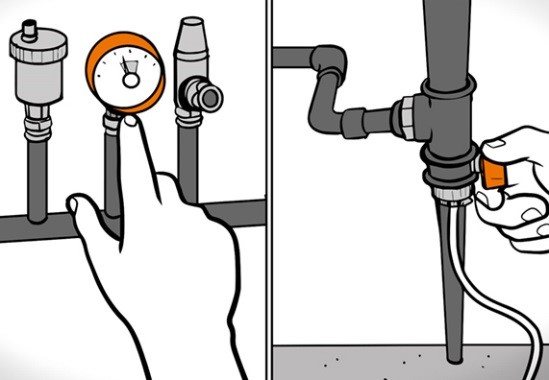
3. Decrease in pressure. Then, the water pressure in the closed circuit should be relieved. This will reduce the amount of liquid in the connected radiators. The drain valve is most often located on the drain near the boiler, in the lower part of it. All that is needed is to connect a suitable hose to the tap and drain the water down the drain;
4. Battery cut-off... The thermostat valve in front of the heating element is closed to the minus position - this ensures complete isolation of the battery from the entire system. Some radiators have a lockable drain valve. On these models, the water can be wiped off in situ using a hex wrench. If there is no outflow blockage, you will have to drain the entire system to avoid damage that water can cause;

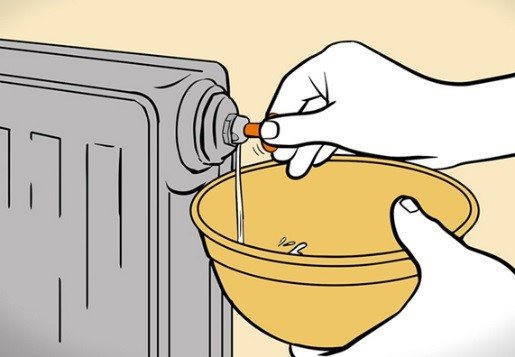
5. Air outlet. Using a special wrench or screwdriver, the bleed throttle is loosened to reduce the residual pressure. For safety, you need to hold a bowl, bucket, or other container under the vent valve to catch the emerging water. If, for a long time, heating liquid flows from the air hole, then it is necessary to check the shut-off valves again. Then, repeat the air removal procedure again;
6. Draining... The plugs on the radiator are unscrewed with an open-end wrench or an adjustable wrench and a bowl for dirty water is supplied;
7. Analysis of threaded fasteners. American women (large nuts) at the entrance to the radiator are unscrewed. For this, a large adjustable pipe or cylinder wrench is used;

8. Removing the battery. Then, using a screwdriver, unscrew the bolts holding the aluminum radiator in the niche on the wall. If, however, a bimetallic battery is used, then it just needs to be removed from the hooks and carefully lowered.
Thanks to competent preparation, dismantling can be done very quickly. When removing an old radiator, it is best to use the help of a second person, since old threaded connections are very difficult to disassemble, and the scale accumulated in the heating sections gives the battery additional weight.
Removal of obsolete heating elements
Old pipe connections are the most difficult to disassemble. The method of fitting threaded joints on the paint and their long service life lead to the fact that such structures cannot be disconnected. In addition, the communal connection of risers involves the systems that are located in neighboring apartments in this process.
1. Definition of risers. First of all, it is necessary to find out whether the type of water supply and drainage system used is upper or lower, find the direct and return heating pipes and close the valves (shut-off valves).
2. Then, you can open the discharge plugs, which are located in the basement or basement, this will allow you to remove almost all the water from the system, and the liquid will not flood the apartment and neighbors.
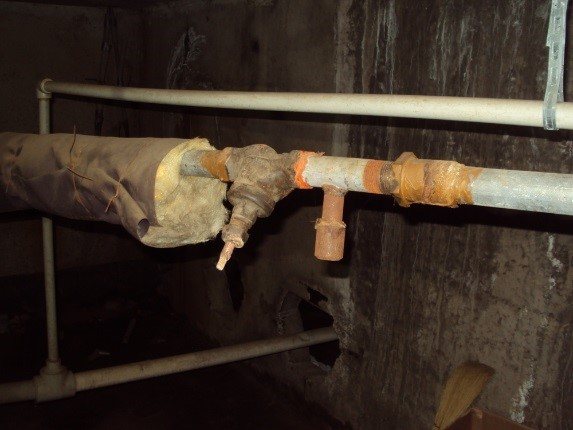
Basement vent plug.
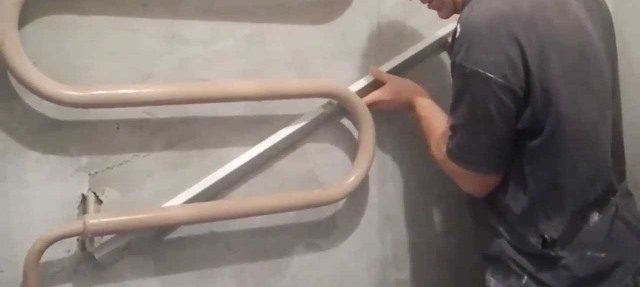
3. It's time to start removing the batteries themselves. Most likely, you won't be able to disassemble the old sleeves and couplings, but you can try. To do this, you need to heat them with some kind of device, for example, an industrial hair dryer.It is necessary to try to unscrew the couplings in the direction of the squeegee with a large thread margin.
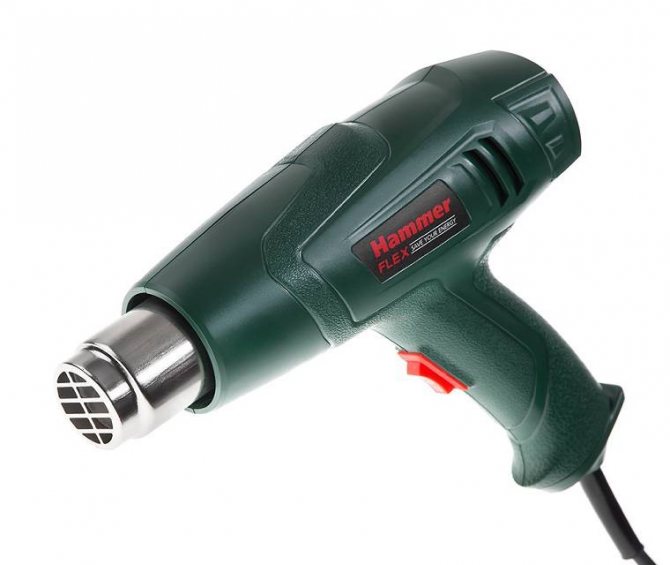
A building hair dryer is a heat gun.
4. If it was possible to disassemble the connection, then you need to make sure of the integrity of the pipes, the degree of their slagging with scale and check the condition of the threads. Even when everything turned out to be in order, you need to buy a new coupling, since it is the most emergency and vulnerable point of this connection;
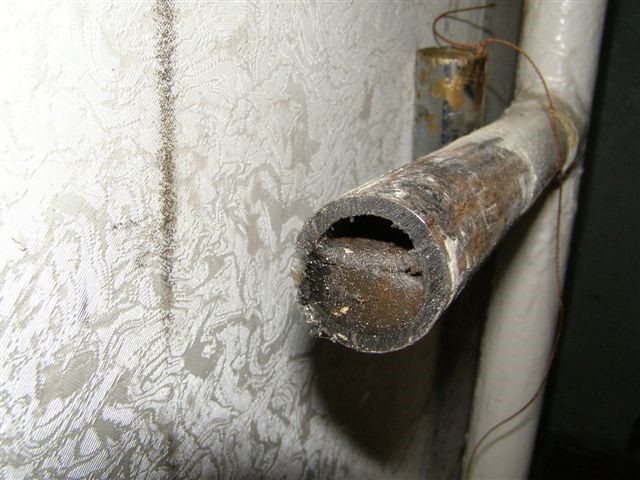
If the battery does not detach, it is cut off.
5. In case of unsuccessful attempts - the thread does not want to understand at all, or it was possible to do it with excessive physical efforts, but with damage to the pipes, you will have to resort to the cutting procedure. This can be done using an angle saw (grinder), a hacksaw for metal and using gas welding. It is better to immediately resort to the services of a welder, since you will have to restore the junction, measure and build pipes. There is an alternative: replace the risers with plastic ones, and install American women at the entrance to the radiators;

6. For easy removal of heavy cast iron heating elements, it is better to use the help of another person. There is still dirty water in the battery section, so you need to carefully lift one side of the radiator and drain the liquid into a low dish, and then place it on the prepared wooden supports.
Here is one of the illustrative examples of dismantling old cast iron batteries:
How to disconnect a cast iron radiator from metal pipes
As a rule, in old cast-iron batteries, the pipe connection is as follows. At the inlet and outlet of the water in the radiator, there are cast-iron couplings of adapters - sleeves. The outer thread of the foot allows it to be screwed into the hole of the last section. The thread cut in the inner hole of the foot is designed to connect a 1/2 in. Metal pipe. After the buttress, a metal pressure washer is located on the thread of the metal pipe.
In houses of an old building on cast-iron radiators, as a rule, there are no taps for regulating the water supply and a shut-off valve. All shut-off valves are usually located in one place at the outlet and at the inlet of water to a gas boiler, or in the basement, if we are talking about an old apartment building connected to a central heating system.
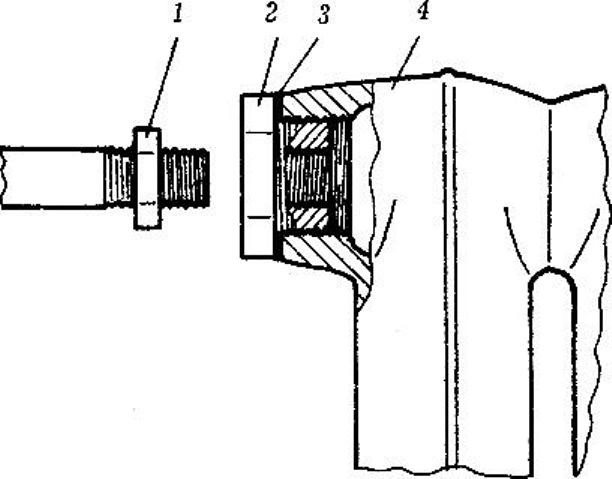
Connection diagram of a cast iron heating radiator.
In the figure, the numbers indicate:
1 - hold-down washer (lock nut);
2 - transition sleeve (foot);
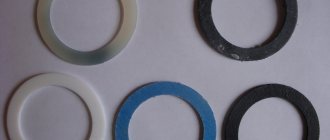
3 - gasket under the footboard;
4 - base of the cast iron section.
After making sure that the water supply to the radiator is shut off using 2 adjustable wrenches, initially the pressure washer is released on the pipe, about 4-5 cm.After that, substituting a container for collecting water under the battery, unscrew the case from the radiator section, which will move along the thread on the pipe towards the released washer. In this case, it is advisable to calculate and remember the number of revolutions, since the installation of the radiator will be backward sequential.
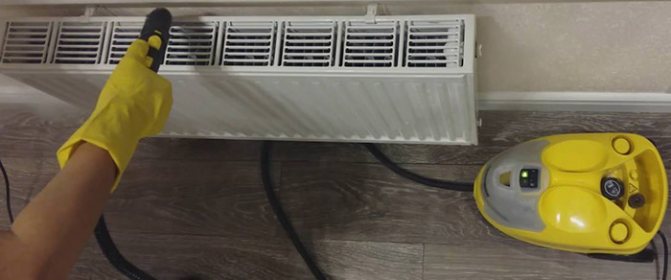
We use a steam generator
A more modern alternative to a hair dryer and a rag will be a steam generator. This equipment is ideal for cleaning old type radiators with many small cells. The universal device copes with any type of dirt, while helping to disinfect the radiators from the inside.
Before using the steam generator, place cloths that absorb water and moisture under the battery. If walls and floors need more reliable protection, then it is worth covering them with polyethylene or construction film. It remains only to use the steam generator not quite for its intended purpose, but according to the standard scheme!
How to quickly wash windows without streaks and effective folk remedies
Wall decoration behind the battery without dismantling it
For various reasons, it is not always possible to remove heating batteries. For example, if the repair is carried out in winter and at the entrance and exit of the radiator, and there are no shut-off valves. In this case, there are two options. If the battery is installed close to the wall, that is, the gap is minimal, only 10-20 mm, then it is better to wait until the end of the heating season and still temporarily dismantle the battery. If the gap between the radiator is 4-5 cm, then the wall surface can be finished without removing the battery.
Plastering and filling behind the battery
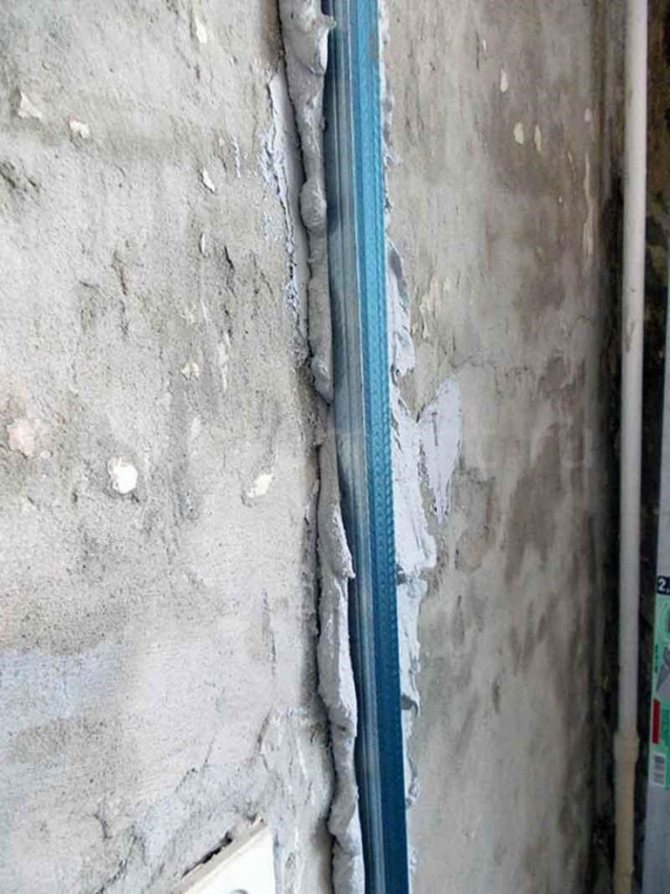
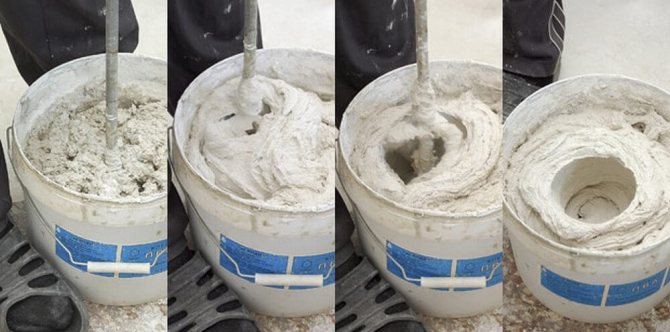
Plastering the walls behind the battery without removing it will not work fully. That is, you can perform plastering with a cement-sand mortar, but without grouting. It will be necessary to finally level the walls behind the radiator with putty. To apply plaster or putty, an aluminum strip is used with a length of 150 cm or more and a width of only 3-5 cm. The thickness of the strip should be about 4-5 mm so that the strip does not bend during operation.
When plastering or puttying, the mortar is initially made of a thick consistency so that it does not drip from the aluminum strip. A solution is applied to the edge of the entire length of the strip, or putty and the strip is passed between the battery and the wall at an angle of 45 degrees. The work is similar to the principle of plastering with a rule, but here the main inconvenience is associated with the battery located on the wall.
Painting, priming the walls behind the battery
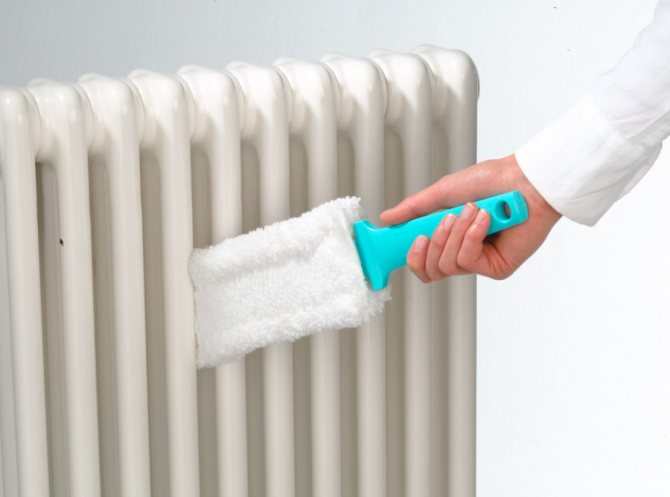
Given the small gap between the battery and the wall, priming and painting are more convenient to perform with a roller with a small diameter - a mini-roller. Mini-rollers rarely appear on the market, so they often have to be made independently from available tools, using only its holder from a standard roller. You can also use homemade brushes or ottomans to apply paint to the wall surface. They use an aluminum wire with a diameter of 0.8-10 mm as a handle, which can be bent at the desired angle during painting. In addition, there are radiator brushes on sale. The radiator brush is a curved brush with a long handle.
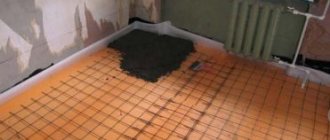
Preparation of the surface of the niche for the batteries for finishing
Regardless of how the niche for the battery is finished and insulated, its surface must be carefully prepared. Preparatory work will strengthen the wall, repair damage, remove the unpleasant odor of old coatings and create conditions for further finishing.
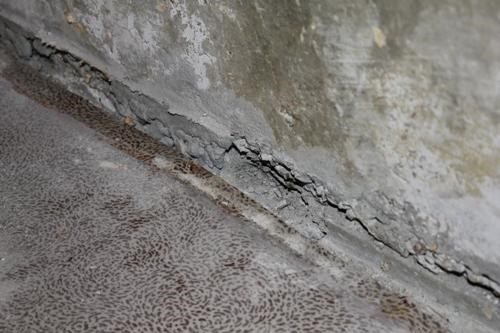
The wall in the niche is the thinnest in the whole room, as it is recessed by the thickness of the battery, therefore, any cracks in it can be of a through-going nature. In addition, changing the window frames with new ones, installing a window sill, contribute to the violation of the integrity of the surface, and it needs to be repaired.
Carrying out preparatory actions in a niche is as follows:
It is necessary to first estimate the amount of work: if the surfaces are strong and well preserved, then they should be slightly updated. If you have not looked here for years or want to carry out radical repairs, then you will need a full range of preparatory operations.
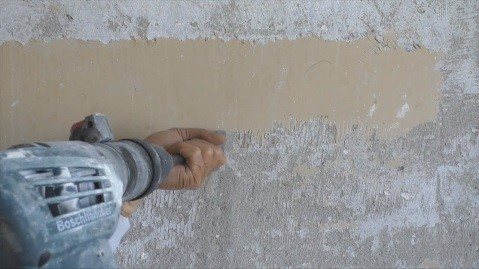
If it is required to punch grooves (grooves) for outgoing pipes, then it is necessary to mark the walls according to the dimensions of the radiator and make grooves with a puncher. Only after that you can start preparing the niche.
The layers of old coatings are removed: wallpaper, paint, peeling plaster. It is convenient to do this with a sturdy iron spatula or a hammer with a chisel. For chipping off particularly large and strong irregularities, you can use a hammer drill.
The cement apron under the heating elements is a relic of the Soviet era that must be mercilessly removed during a radical renovation. Its place will be taken by a more decent flooring and baseboard.
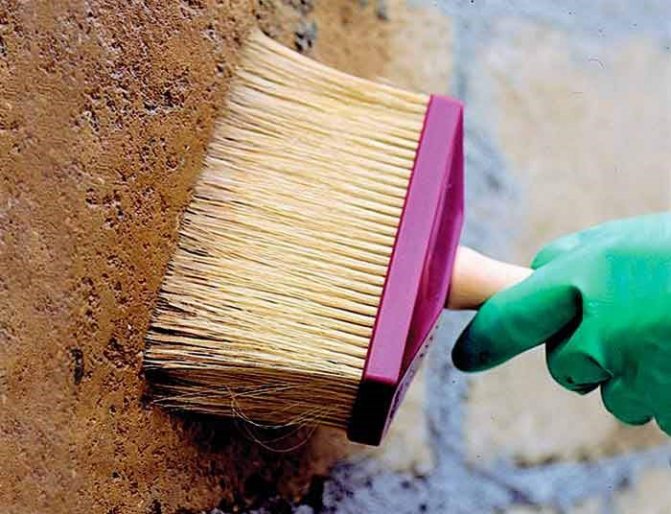
The wall is completely dedusted and treated twice with a deep penetration primer - concrete contact. Such treatment will strengthen the thickness of the surface and provide adhesion to future plaster.
If the surface is intact and even, then plastering is not done, but is limited to simple puttying. In the presence of hidden or obvious defects, it is imperative to apply plaster.
Since the place behind the battery will not be particularly conspicuous, you do not need to put the beacons under the plaster. If there is large damage, then you will have to use a reinforcing metal mesh and pre-seal the flaws.
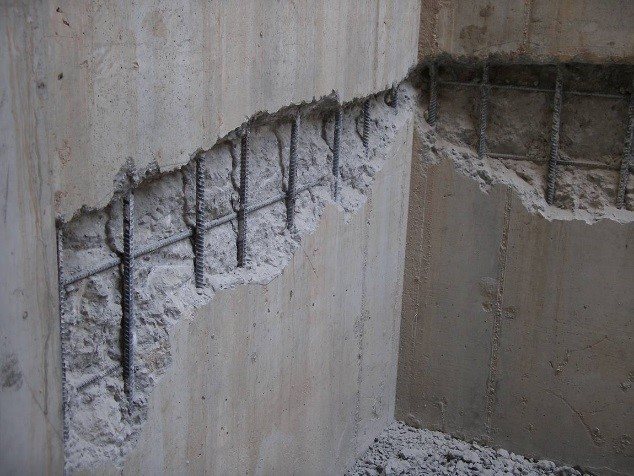
Possible wall flaws in the niche.
In wide niches with a large area, it is advisable to install lighthouses under plaster. This will significantly reduce the consumption of dry mix and achieve the effect of a perfectly flat surface;
Plaster alignment plane is set by beacons.
In order for the coating to be durable and moisture resistant, it is better to use not gypsum, but a cement-lime mixture, which dries longer and worsens to level, but is a strong and reliable base. For the best effect, cement grade 500, sifted fine sand and lime dough are used. The ratio of the components is 1: 6: 1;
For plastering a medium-sized niche, seven liters of mortar are enough. It is more convenient to apply it with a small trowel on a wet wall. At the same time, the movements should be fast, splashing. It is easier to level the mixture with a large, wide, rule-of-thumb spatula.
After drying for 2-7 days (depending on the season), the plastered surface is covered with a thin layer of putty. This procedure will reduce the graininess of the surface and hide minor defects, as well as paint the cement wall in a pure white color. Especially carefully putty the outer and inner corners of the niche and the lower edge for the installation of the skirting board.
The dried, plastered wall is sanded to perfection. If this process is combined with major repairs throughout the house, then it is convenient to use a sander with a P200 attachment. When the niche is finished with a long delay and less dust needs to be done, then the alignment is more convenient to carry out with a sharp spatula.
A well-prepared surface is the key to the successful implementation of any finishing work and their long-term service afterwards.
The following video provides an example of preparing niches:
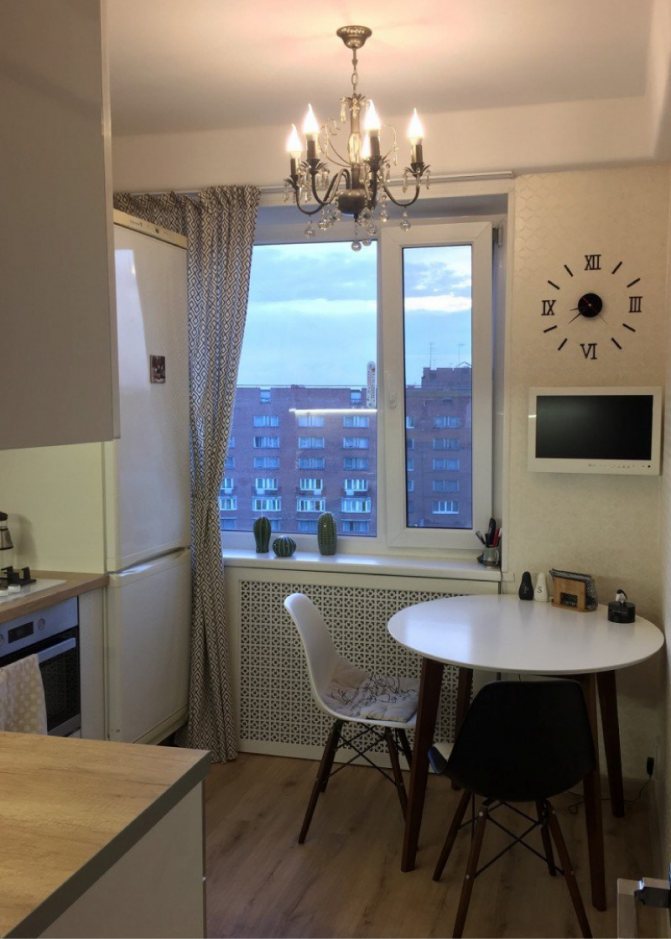
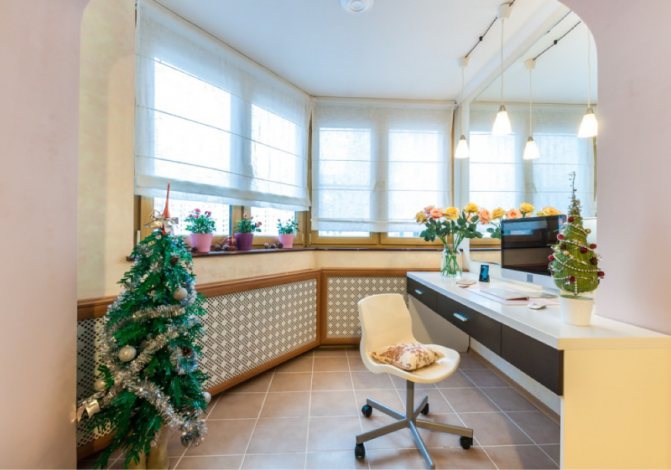
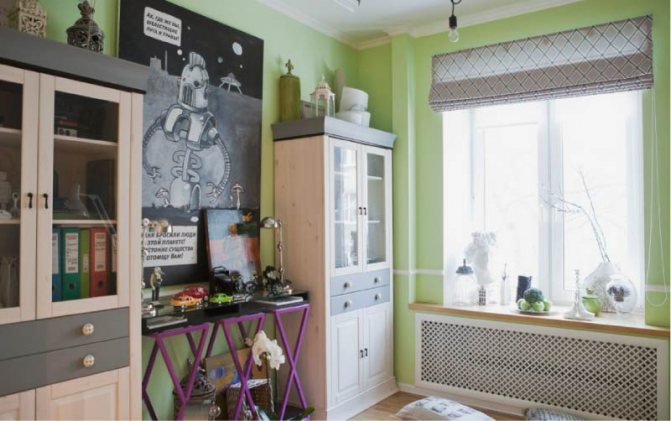
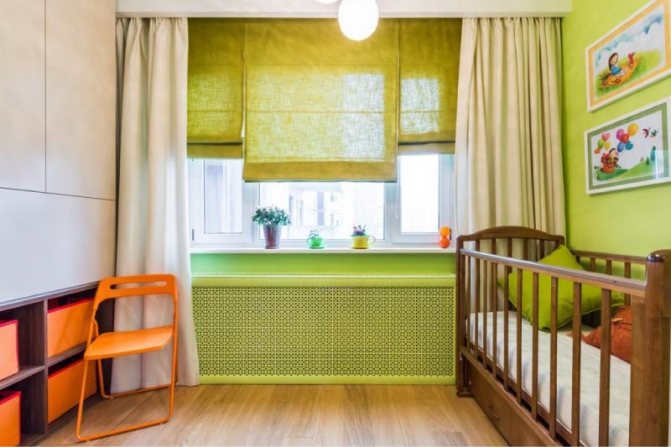
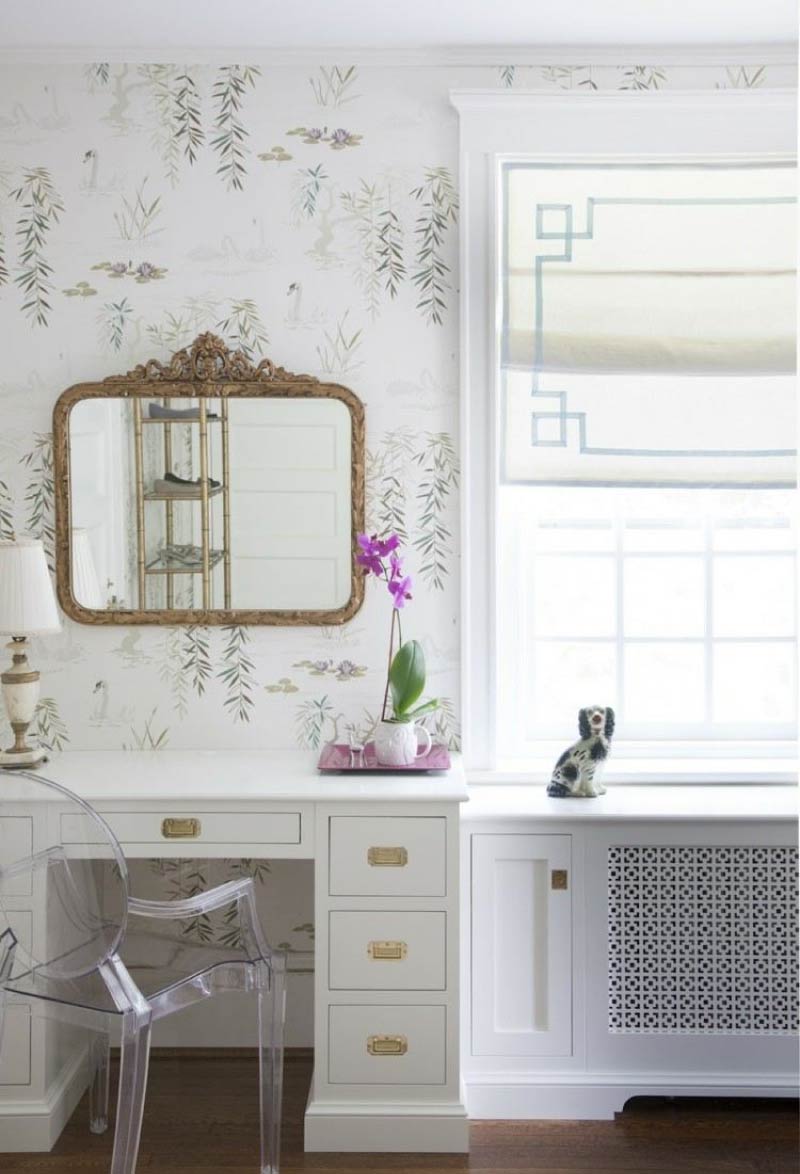
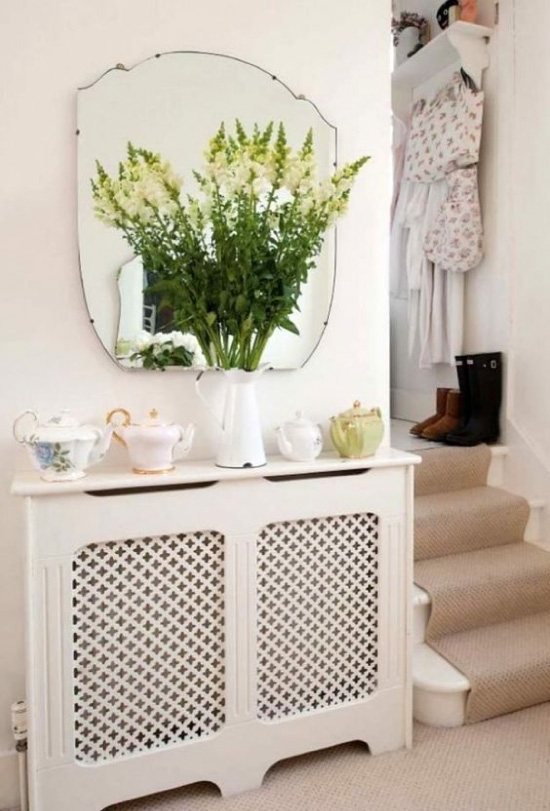
Screens for radiators
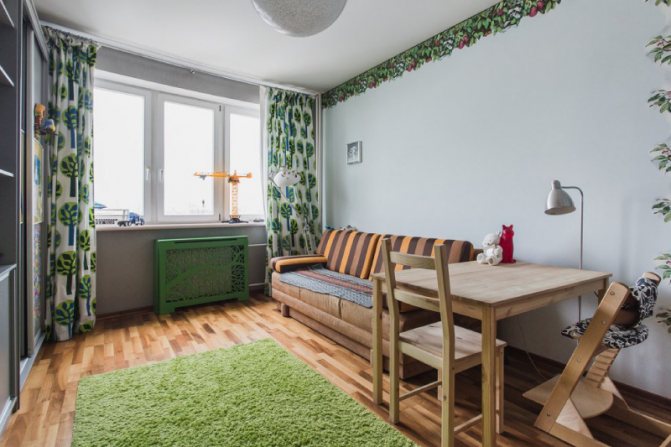
Another solution when decorating a wall behind a radiator and decorating radiators is to use screens for radiators. They are perforated panels of various materials and come in a variety of patterns and colors. Such panels cover the wall along with the batteries. Thus, part of the wall behind the battery itself is hidden from view. The disadvantage of this solution is some reduction in heat from the battery.

Screen for radiators.
If in the wall behind the batteries there is a recess for the battery - a niche, then the finishing technologies in this case are slightly different. You can find out more about them in a separate article: finishing a niche under a heating battery.

When an unsightly heating battery spoils the interior, the problem can be solved in several ways: replace it with a designer or trench model, or simply close it with a screen / box. The latter method has several advantages:
- A screen or box not only hides a bulky structure, but often decorates a room.
- The screen / box can be used to construct an additional console, a shelf for decor, a bench, a rack, a desktop.
- A sealed battery is safer for children - the risk of burns and accidental shock is eliminated. However, one can argue with this argument, because it is in the children's room that heat loss is least needed.
- If the house is too hot and dry, then closing the battery will help create a comfortable microclimate for households, their pets and plants.
- The screen prevents dust from settling on the inside of the radiator and thus simplifies cleaning.
- The heat transfer of a closed battery decreases on average by 10-15% or more (depending on the degree of closure);
- Screens and boxes often complicate the maintenance of radiators, and sometimes completely block access to them.
- Often, improperly sealed batteries lead to fogging of windows, and then to the appearance of harmful mold on slopes and walls.
- A screen or a box at least a little, but "eats up" the space around the radiator. After all, any elements should be installed at a distance of 5-10 cm from the battery.
- Battery shielding requires additional expense and hassle.
Further in the article, we will tell you how to close the radiators without compromising the heat in the house and show, using 70 photos as an example, how to do this beautifully.
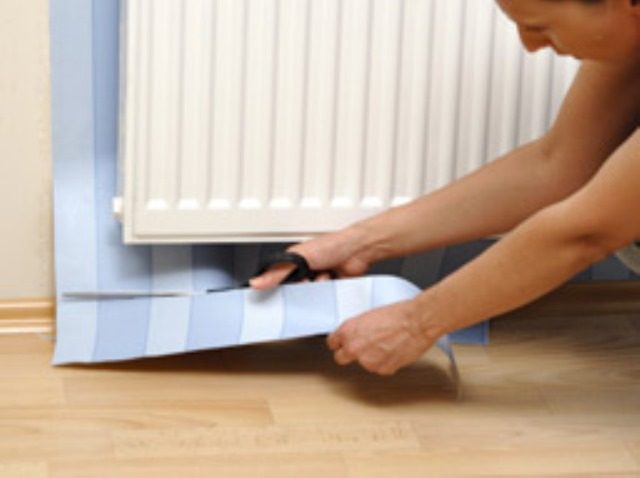
Installation of films for radiators is a simple sequence of actions
From a technological point of view, the foil behind the heating coil is installed without any difficulty. You will perform all the work efficiently and quickly, if you listen to some advice.
First, don't buy matte metallized material. Use only polished foil.
Second, don't buy double-sided films. One air gap is enough to ensure high-quality heat reflection.
Third, leave a gap of about 1.5–2 cm on both sides of the insulator layer. It is necessary to obtain the optimal thermal resistance of the reflector (1.15 m2 * ° C / W).
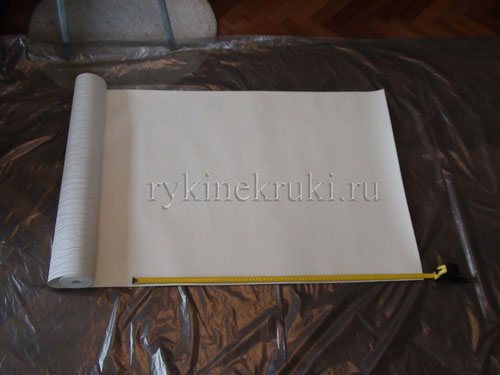
Prepare liquid nails or standard adhesive used for wallpaper installation, as well as directly reflective foil, and proceed to install it. The procedure is as follows. First, carefully measure the dimensions of the wall sections where you plan to install the screen, or niches.
The parameters of the film must correspond to the projection of the radiator onto the wall. Add about 10% more to the result. In this case, the heat-reflecting potential of the foil will be slightly high. Some masters say that extra centimeters are not needed.
The effect of them will be insignificant, but the edges of the screen sticking out from behind the radiator will greatly spoil the aesthetics of the room. See for yourself, choose the option that suits you personally.
Then make sure that there is a gap of at least 1.5 cm between the heater and the film that you will be installing. When there is not enough free space, you will have to adjust the radiator suspension to accommodate the missing centimeters.
Next, remove the radiator. Mark the places where its mounting brackets are located. Dismantle them. Examining a brick or concrete wall surface.
In the presence of cracks, cracks, other defects, plaster them (or putty). Align the wall, glue the screen (coat the reverse side with wallpaper or polymer composition).
Instead of glue, as noted, it is allowed to use liquid nails. In some cases, it is allowed to use stapling staples or small nails to attach the foil (if they fit into the wall material without any problems and are firmly held in it). Carefully return the suspensions to their place and install the battery.
In addition, we will give some useful recommendations for home craftsmen who are installing heat-reflecting products for the first time. If during the installation of the screen you damaged its outer covering, the cut site can be masked with LAMS or LAS films.
They are made of foil and do not reduce the efficiency of heat reflection. Don't try to find screens that are too thick. Practice shows that five centimeters is quite enough for high-quality heat conservation in the house.
Installation recommendations
- Installing a heat-reflecting shield behind the battery is technologically simple, but it will be done faster and better if you take into account the following practical recommendations:
- the maximum effect when using penofol and similar materials is achieved when there is an air gap of 15-20 mm on both sides of the insulating layer.In this case, the thermal resistance of the insulating structure is reached up to 1.1-1.2 (m ∙ ° C) / W. Installation is carried out on wooden slats, and penofol should be double-sided foil (type B);
- in most cases, to equip a reflector for batteries, one air gap is sufficient - between the radiator and the insulating material. Double-sided foiling is optional in this case;
- when choosing a reflector, it should be borne in mind that the foil must be polished (not matte).
How to close radiators - 11 ways from a plasterboard box to a fabric screen
Decorative screen / HDF box
This option is one of the most popular because of the average price and beautiful appearance.
What is the difference between a box and a screen? The screen is designed for a battery located in a niche or under a windowsill (pictured above), therefore, only covers the front of it. The box completely covers the radiator on the wall from all sides.
The screen, like the panel of the box, is made of perforated sheet HDF (high density fiberboard, 3 mm thick), but the profiles of the box are made of MDF. Both materials are strong enough, durable and non-toxic when heated.
- Due to the original perforation, HDF screens / boxes look beautiful and fit into any interiors, especially classic ones.
- Heat resistance (the structure does not dry out like natural wood, and does not turn yellow like plastic).
- Easy to assemble and install without the help of specialists.
- Ready-made HDF screens / boxes can be white or imitate wood (wenge, beech, oak), and custom-made ones can be painted in any color, laminated, veneered with natural wood. True, the complexity of the design always affects the price of the screen.
- MDF and HDF do not tolerate prolonged contact with water. If the battery leaks or the pipe breaks, the elements of the box / screen may swell. Therefore, any emergencies must be dealt with immediately.
- Perforated panels, despite their thinness, are quite durable due to the high density of fiberboard. However, they must be protected from impacts and sharp objects.
- Perforation cuts in factory screens are not stained and therefore visible.
Price: from 1,500 rubles for a finished model and from 2,300 rubles for an individual order.
Selection tips:
- The radiator recess must be sized to match the inside of the screen.
- Screens and boxes for the battery can be either ready-made (assembled as a constructor) or made to individual sizes and designs (you can choose a perforation pattern).
Here is a small selection of photos of sealed batteries.
Drywall box
How to cover the battery with drywall? Using this material, you can sheathe the radiator with a box or create a niche for it in a false wall.
- Environmental friendliness;
- Can be used in damp rooms;
- Material is available;
- With a false wall, you can close pipes, expand the window sill;
- You can close the battery with a drywall box with your own hands without special skills in a few hours of work;
- You can think over the configuration of the box and false walls yourself, if you wish, equip it with shelves and niches, additionally close the pipes leading to the battery. Next, you can see a photo of a closed battery in a plasterboard false wall with an enlarged bench-sill and a built-in niche for books.
How to insulate a wall inside an apartment?
As a rule, insulation of internal walls in an apartment perform first of all, since this is the most affordable and can be done independently, but even such measures will help reduce heat leakage through the walls and especially all the advantages of insulation will be appreciated during the winter cold.
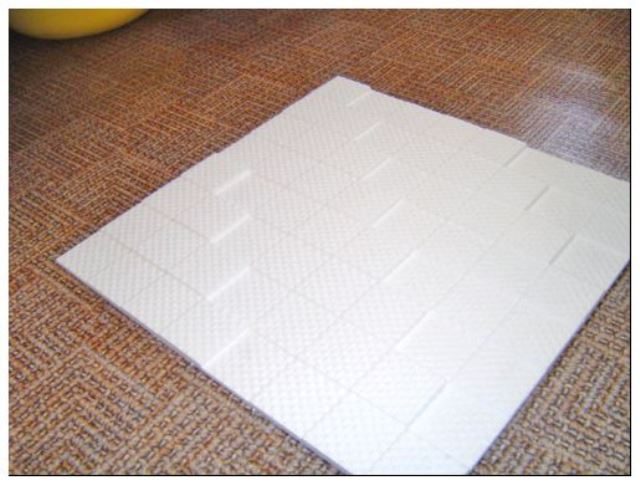
Most often in the apartment they use these types of heaters:
- Styrofoam;
- Mineral wool;
- Foamed polyethylene foam.
The most optimal combined option, when the base is covered with polyethylene, followed by the main layer of mineral wool - this is for living quarters, and foam can be used on loggias, balconies and rooms with a non-permanent location.
Before insulation, the wall surface is cleaned of poorly adhered coatings, also need to be primed.
The heat insulator layer will covered with decorative cover, therefore, it is necessary to make a crate around the perimeter of the walls, from a wooden bar, since wood is a good heat insulator, which cannot be said about a metal profile.
If it is decided to make insulation with polyethylene, then it mounted first on the wall, and pressed on top with a wooden bar.
In the piers between the ribs mineral wool is laid, sheets of drywall are fixed with glue, after which the whole structure is "sewn up" with drywall or other decorative material.
How to close batteries correctly - technical rules and tips
Before closing the radiator, it is necessary to take into account several technical nuances:
- Keep in mind that heat transfer from a closed radiator is reduced in any case, whichever camouflage method you choose. The main thing is that the change is not significant. Ideally, the temperature drop in the room should be about 1-1.5 degrees.
- Before closing the battery, put it in order: blow it out, rinse it (this is done at the end of the heating season) and paint it.
- Keep in mind that the tighter the grill weave, the better it masks the radiator, but the worse it conducts heat. Therefore, when choosing a screen for a battery, try to look for a middle ground or rely on heat saving.
- To minimize heat loss, the screen can be placed on its legs, and a groove can be cut in the center.
- When closing the battery, it is very important not to block the convective air currents, otherwise the room will blow and the windows will start to fog up, which will eventually lead to the appearance of mold on the walls. Ideally, the sill visor should protrude no more than 30 mm above the batteries, the top and bottom of the battery should be as open as possible.
- There must be a distance of at least 35-50 mm between the battery and the screen. There should be a gap of about 60-70 mm from the radiator to the floor and to the window sill.
- To solve emergencies, it is necessary to provide free access to the radiator. For example, the lattice of the box can be removable, folding (see photo), opening on hinges or sliding out on profiles.
Why is it better to trim a niche behind the battery
By itself, the wall behind the central heating elements is not quite an accessible place for finishing work, and when it is recessed in a niche, the situation is doubly exacerbated. It becomes more difficult to get to such a surface, there are additional angles and transitions that are not always ideal.
For various reasons, niches do not deign to finish at all:
- removing radiators is a complex and time-consuming process;
- when working in uncomfortable, cramped conditions, the aesthetic quality of coatings in niches is worse than on other surfaces;
- usually, the batteries are located under the windowsills, and this place can be easily covered with long curtains, decorative shields or screens;
- work in niches requires additional operations or the purchase of such building materials that are not used in general repairs and entail additional financial costs.
Leaving the problem unresolved, you can face it at the most inopportune moment, when the furniture and floor coverings will lie in their places, and you will need to dissolve the dirt and finish the corner that spoils the whole view. After all, you may need to change the layout, abandon the curtains altogether or replace them with shorter ones, and remove bulky shields.
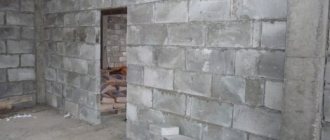
Niche for a battery without finishing.
In addition, by obscuring the radiators, the owners of the apartments greatly reduce the heating efficiency. It is required to do the exact opposite - open the air flow free access for convection, and trim the battery niches with isofol, reducing heat leakage to the street.
Also, the plastered surface, on which the final protective coating is not renewed, begins to deteriorate intensively. This entails additional financial costs for its restoration in the future.
Difficult option
At the same time, the solution with the removal of the heater will be the simplest in terms of finishing work, and the most difficult in terms of preparation. The preparation will consist mainly of removing the battery completely. Not every home craftsman will be able to cope with this, and in winter, in the absence of a tap that shut off the water, this simply becomes impossible. If removing the radiator is not a problem for you, then the repair itself is not difficult - the technology for performing all the work will not differ from the rest of the room.
Therefore, there are only two ways to prepare everything here: remove the heating device yourself or call a foreman, who will first remove it, and then, after a while, install it back. You will need to call it two times - for removal and installation, and this will require additional costs. In this regard, finishing the wall with a battery with its removal is one of the most costly and difficult ways to repair the surface. It is much easier to make repairs without removing anything.
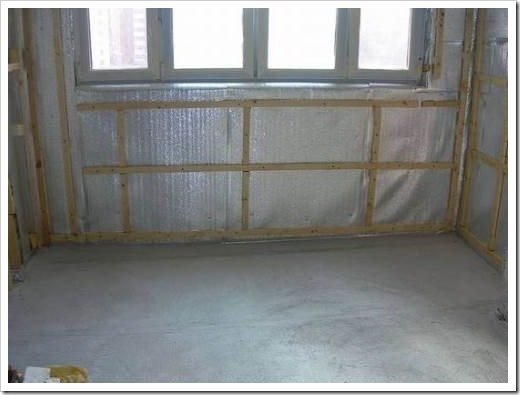
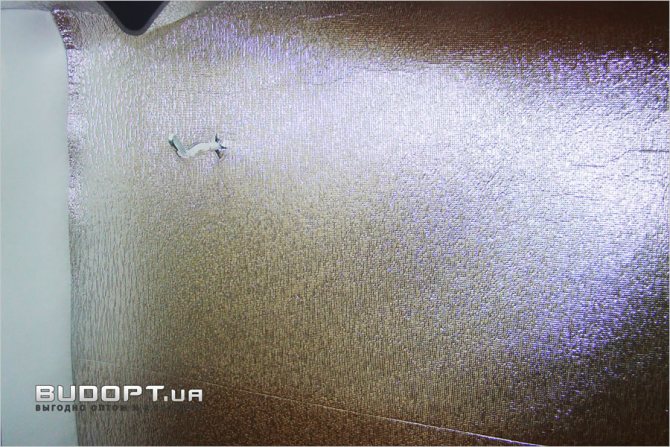
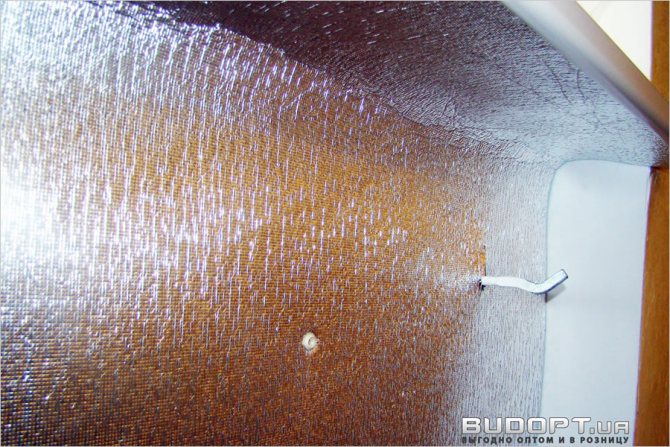
Installation of foil insulation behind the radiator in stages
- Remove the radiator and prepare the wall.
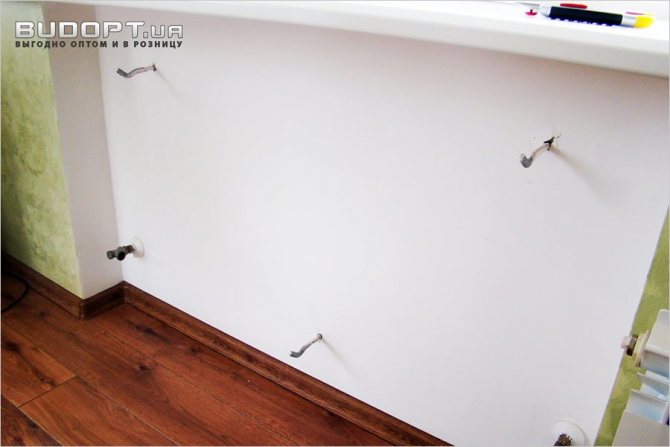
- Take foil insulation with a size slightly larger than the parameters of the niche.
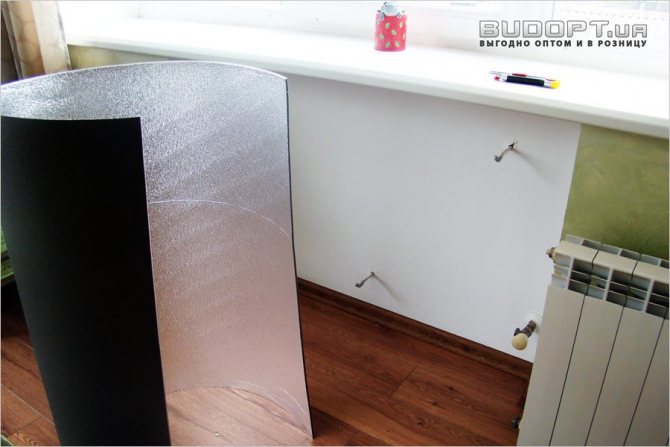
- Attach it to the wall so that there are small isolon spurs in height and width. It is very good when the foil insulation completely covers the lower part of the window sill.
- Mark the locations of the holes for the radiator mountings. Be specific - use a tape measure and a building level for this. Make the holes with a cassette knife - cut a cross with it.
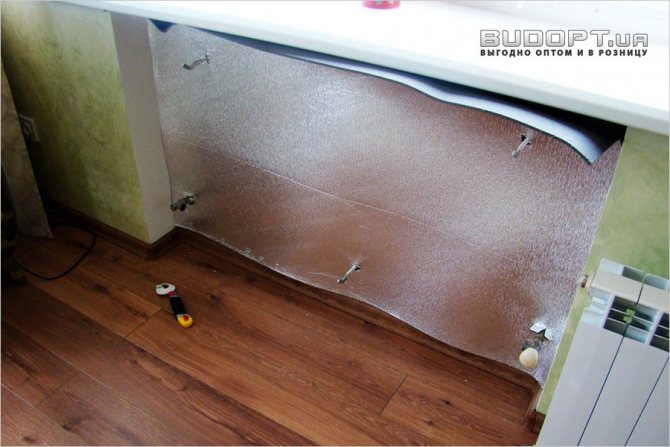
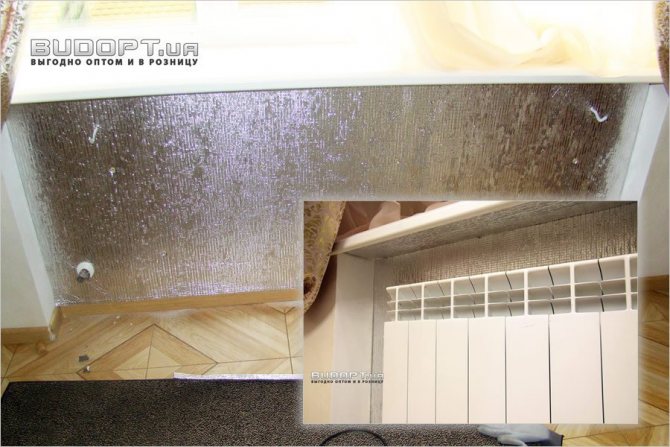
- Slip the insulation over the radiator mounts and press the material firmly against the wall. Walk along the isolon to level it, pay special attention to the corner zones. The insulation should be as close to the wall as possible.
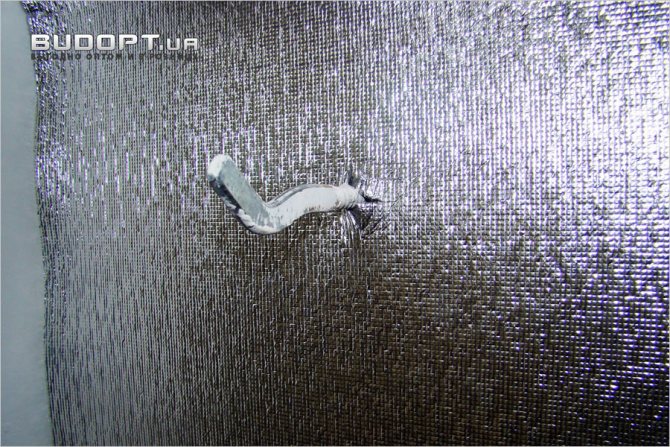
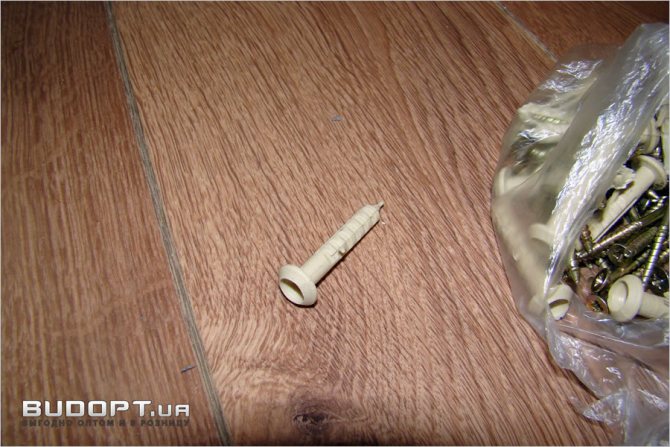
Now we turn to fixing the foil isolon. To do this, use dowels and screws. For additional fixation, several fasteners are enough, which are staggered at a certain distance from each other:
- Use a drill to drill a hole for the dowel. Take a small diameter part.
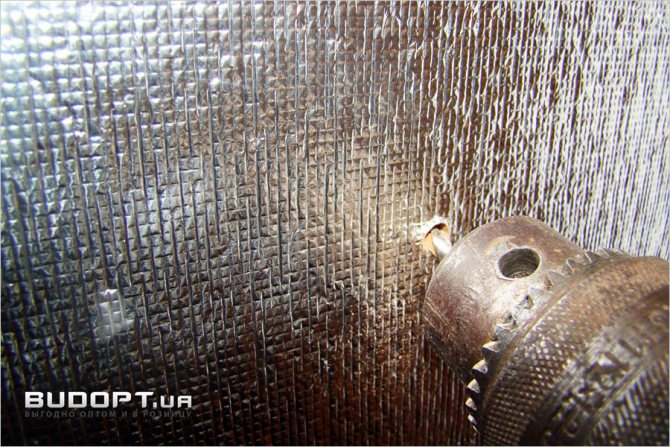
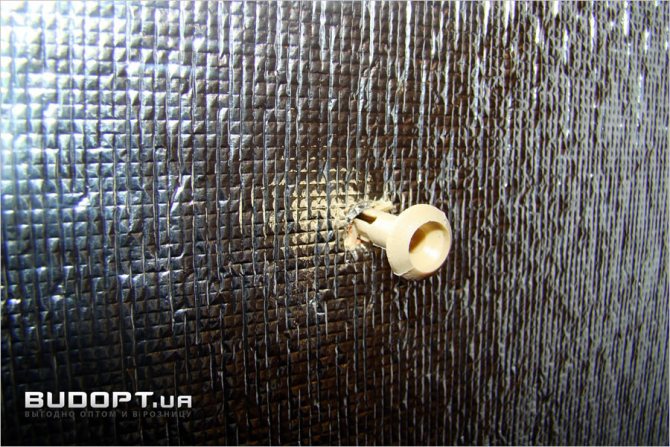
- Insert the wall plug into the hole and then use the screw. The dowel must enter the wall completely.
- Trim the material again, go well along all the bends of the isolon. If the insulation extends beyond the right or left corner, trim it with a cassette knife.
To make the insulation fit snugly against the bottom of the window sill, you can trim the material a little from the side where there is no foil. A small depression of 1-2 mm will make it easy to bend the material and cover the corner tightly.
Hang up the radiator and enjoy the warmth!
This algorithm is easy to perform even without special skills. If you don't want to work with dowels and screws, use glue or double-sided tape.
Remember, by installing the screen, you will increase the temperature in the living space and save a good amount on heating both with radiators and with electrical appliances or gas. The cost of isolon and auxiliary materials will pay off very quickly, and the structure will last for years.
To purchase products and receive advice in this area, call: +38, +38 (093) 246-22-24
A simpler approach
The complexity of the work in this case depends on what kind of material you need to decorate the surface.If this is paint, then everything will be very simple - you just need to purchase a special brush with a curved handle or make yourself a semblance of a thin roller, fixing a foam rubber coat on the wire. It is more difficult with other materials, and there are several finishing options:
The most difficult thing is with the tile - it does not bend, it is difficult to push it into the narrow space behind the radiator, and aligning the tiles relative to each other is even more difficult. In addition, you will have to cut grooves in some tiles, into which the brackets on which the heater hangs will enter. That is why wall decoration behind the battery with tiles is usually performed with the removal of the heating device.
It is not so difficult to cope with wallpaper, and the most important point will be the tight pressing of the panel to the surface. The cut blade is smeared with glue, pushed behind the radiator and leveled there using a long brush with a curved handle or other suitable device. The bubbles cannot be completely removed, but in this place they are practically invisible and this moment will not be the most critical. The main thing is to glue a piece of wallpaper well so that it does not come off later.
The panels are also easy to attach. They can be fixed with glue or lathing. In the first case, the work is simple and there is no need to consider it separately. The second case is not that simple. You will have to arm yourself with a screwdriver with a very long sting in order to be able to screw the panels through the heater sections. In addition, the decoration of the walls behind the radiators with panels on the crate is possible without removing them only with the vertical arrangement of the panels. Otherwise, it is almost impossible to mount the crate. The most difficult case is with plaster and it is worth talking about separately.
In addition to all the above methods of decorating the surface behind the radiator, there is another universal option that is not suitable in all cases - finishing the walls behind the radiator with ceiling tiles. It is simply glued to the desired surface, easily pushing it into a narrow space. However, this method is not always suitable, since the decorated surface will be different from the rest of the space.
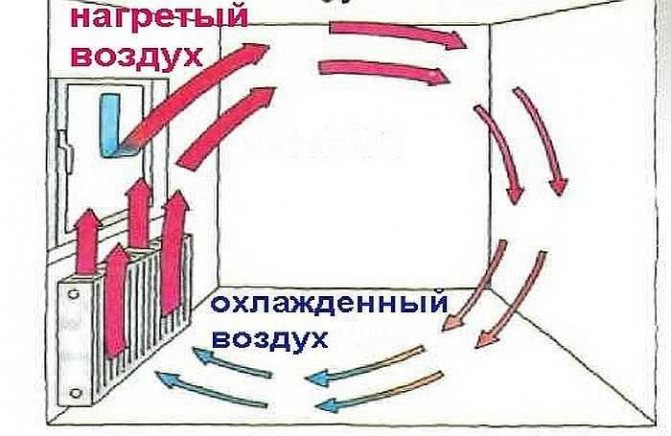
Where does the heat go
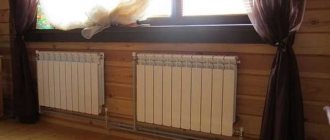
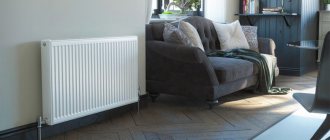
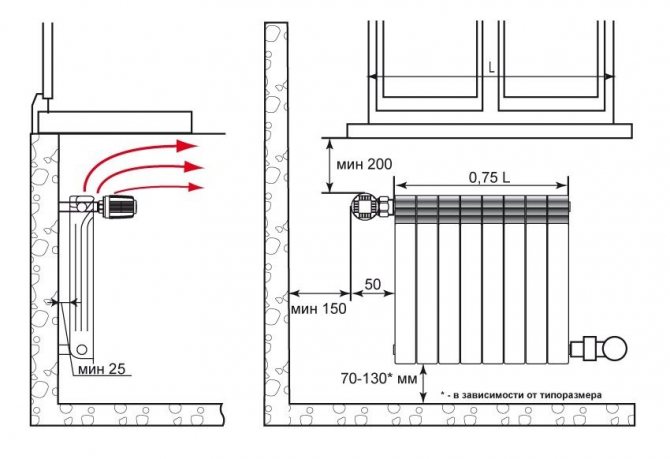
Heating devices in buildings are installed under windows.
The goal is to warm up the air inside and create a heat curtain that prevents the penetration of cold from the street.
Heat spreads from a heated object to a cold one.
The wall temperature is lower than that of the radiator.
In the cold season, the surface behind it heats up to 35-40 ° C.
Instead of heating the air inside a warehouse or office, some of the energy is spent on heating the outer walls.
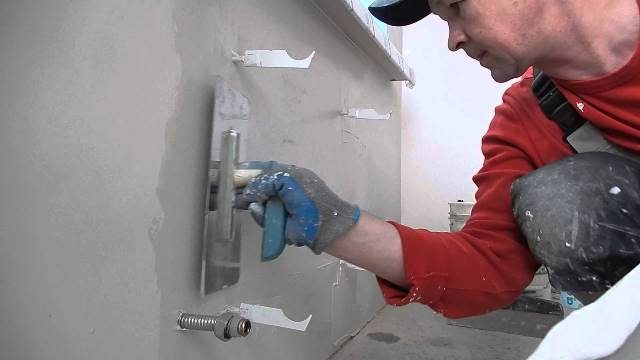
Plaster
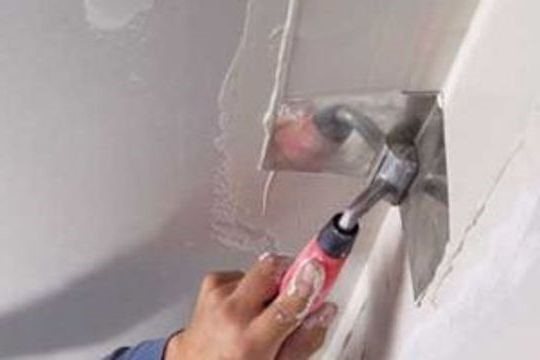
It is very difficult to apply the solution to the plane. For work, you will need a thin metal strip, 3 - 5 centimeters wide and 10 - 15 centimeters longer than the radiator. The plaster or putty is diluted a little thicker than usual so that it does not run off the narrow strip of metal. The solution is applied to the edge of the strip along its entire length, and the strip itself with the applied mixture is passed in the space behind the battery, at an angle of forty-five degrees. The process is very similar to working with the rule - you need to perform plastering according to the same principle.
When the solution is applied to the entire area behind the heating device, the mixture must be allowed time to dry, and then, using the same metal strip, grind the surface by attaching sandpaper to it.
«>
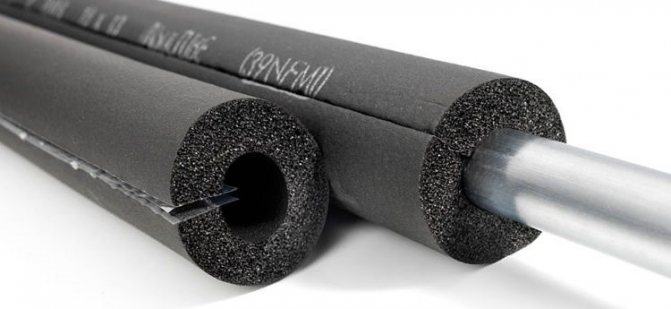
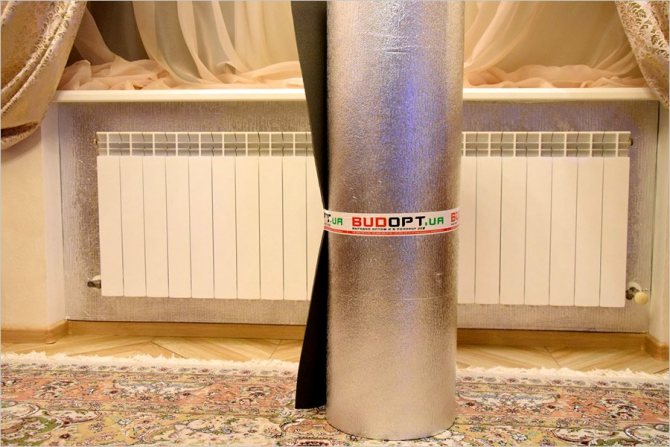
Foil insulation: types and specifications
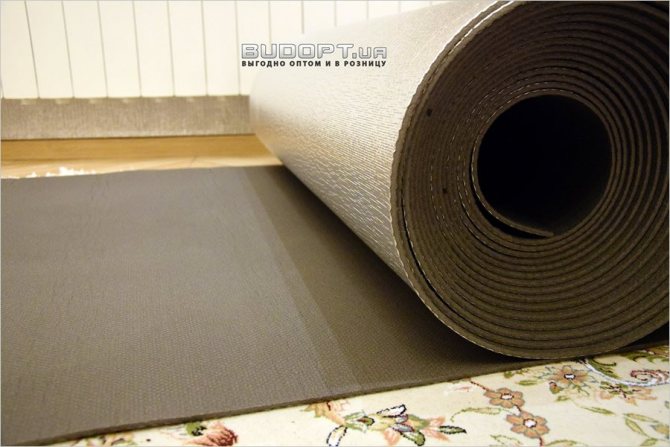
We recommend that you pay attention specifically to the isolon. There is also penofol, foil-plastic and other reflective insulation. But they have significant drawbacks when used for mounting behind a radiator. Therefore, we will focus on isolone as a progressive material. It can be of two types - NPE (uncrosslinked gas-filled) and PPE (sewn with closed cells). Both have decent parameters, but the PES is still better. Technical characteristics of these heaters (in brackets NPE):
- thickness: 1-50 mm (1-16 mm);
- density: 30-200 kg / m3 (19-35 kg / m3);
- thermal conductivity: 0.031-0.041 W / m K (0.036 W / m K);
- absorption of sounds: up to 68% (3-13%);
- temperature range: -60 ... + 100 ° С (-80 ... + 80 ° С);
- water absorption: up to 1% (up to 0.2%);
- steam absorption: up to 0.001 mg / (m · h · Pa) (the same value);
- shelf life: approximately 90 years (the same);
- heat reflectance: reflects 95-97%, emits 3-5% (similar for IPE).
For home conditions, both materials are used.
Design nuances
The radiator installation site is one of the most difficult to access for finishing, whether it is a hinged battery or hidden in a niche. The difficulty lies in the fact that bulky heaters take up the entire space of the niche, and the pipes for supplying hot water, the lintel and the return interfere with free access to the wall. It is most reasonable not to postpone the issue of finishing the space behind the batteries for later, but to do it simultaneously with the main walls at each stage of the repair. Ideally, if you bought an apartment in a new building and ordered a turnkey repair or build your own house, then the designer will think through everything to the smallest detail and the heater will organically fit into his idea.
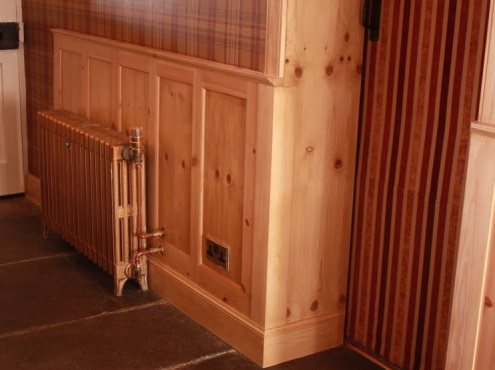
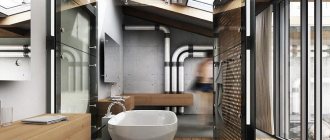
Exterior finish with wood paneling behind the radiator
But most of us still live in Soviet buildings, which are more than a dozen years old, and during the times of Khrushchev and Brezhnev, no attention was paid to the surface behind the battery, the main thing was to quickly provide people with living space. So it turned out that the wall behind the radiator was somehow pasted over with wallpaper or painted over. It is clear that over time, the wallpaper peeled off from the constant exposure to warm temperature, and the paint peeled off. Basically, the batteries are placed under the windowsill and covered with tulles and curtains, but what if you want to make a modern design and use blinds, and square meters do not allow you to install a decorative screen on the radiator? We'll have to do wall decoration in this place.
When repairs are carried out with the replacement of the radiator, it is necessary to replace the supply pipes and plaster the wall behind the battery
A separate repair behind the battery will add the following hassle:
- in a completely made and clean room, you will have to start a mini-repair for a rather long time;
- dust and waste of building materials pollute the air and things in the room;
- a separate mini-repair will have a bad effect on finances: the purchase of building materials that are not all used, the call of the master to remove the battery - you have to pay for this.
If you have inherited sloppy walls behind the heater, you will have to make repairs. There are many options to close up the surface where the battery is located and to give the wall a finished look.
How to glue wallpaper behind a battery
Now we prime the wall for the last time (again 2 hours together with drying) and you can start pasting the wallpaper:
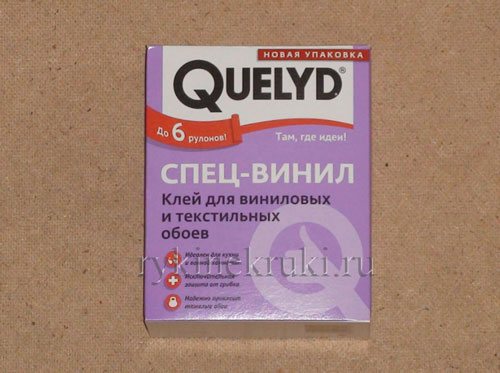
We select the glue that is suitable for this type of wallpaper. For example, in the picture, you see paper-backed vinyl wallpaper. This glue is suitable for them:
We prepare the glue according to the instructions and glue the wallpaper. We take 0.5 days for pasting, taking into account the preparation of glue, marking the rolls and pasting. There is an important comment on gluing panels. You need to glue one sheet on one side of the niche under the battery, and start gluing the second sheet on the other side of the niche. This is done so that the seam is exactly in the center of the battery, and not somewhere where it will be clearly visible, since our battery does not cover the entire niche:
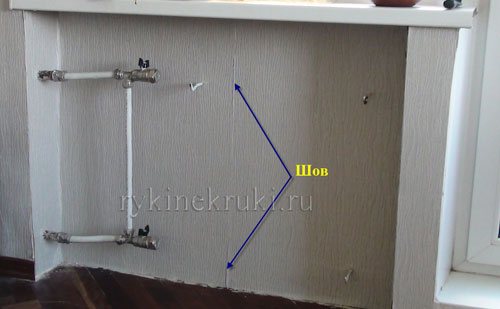
If the niche is long, then we begin to glue the canvas on one side, the next to it end-to-end, but on the other side of the niche we also glue one canvas: